Just joined? Please introduce yourself.
Page 1 of 3 123 LastLast
Results 1 to 10 of 24

Thread: Roof rust repairs

  1. #1
    Registered Member MP&C's Avatar
    Join Date
    Dec 2013

    Member #:2017
    Location
    Southern MD
    Posts
    1,293

    Roof rust repairs

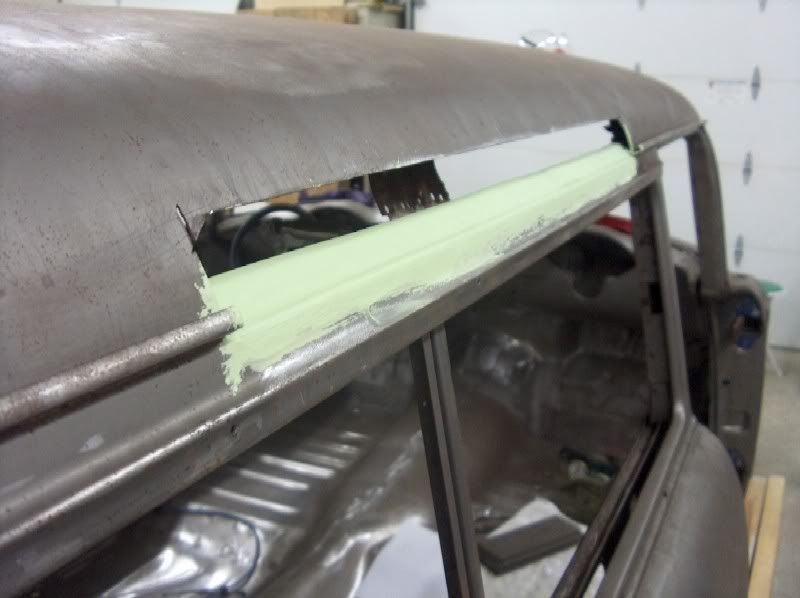
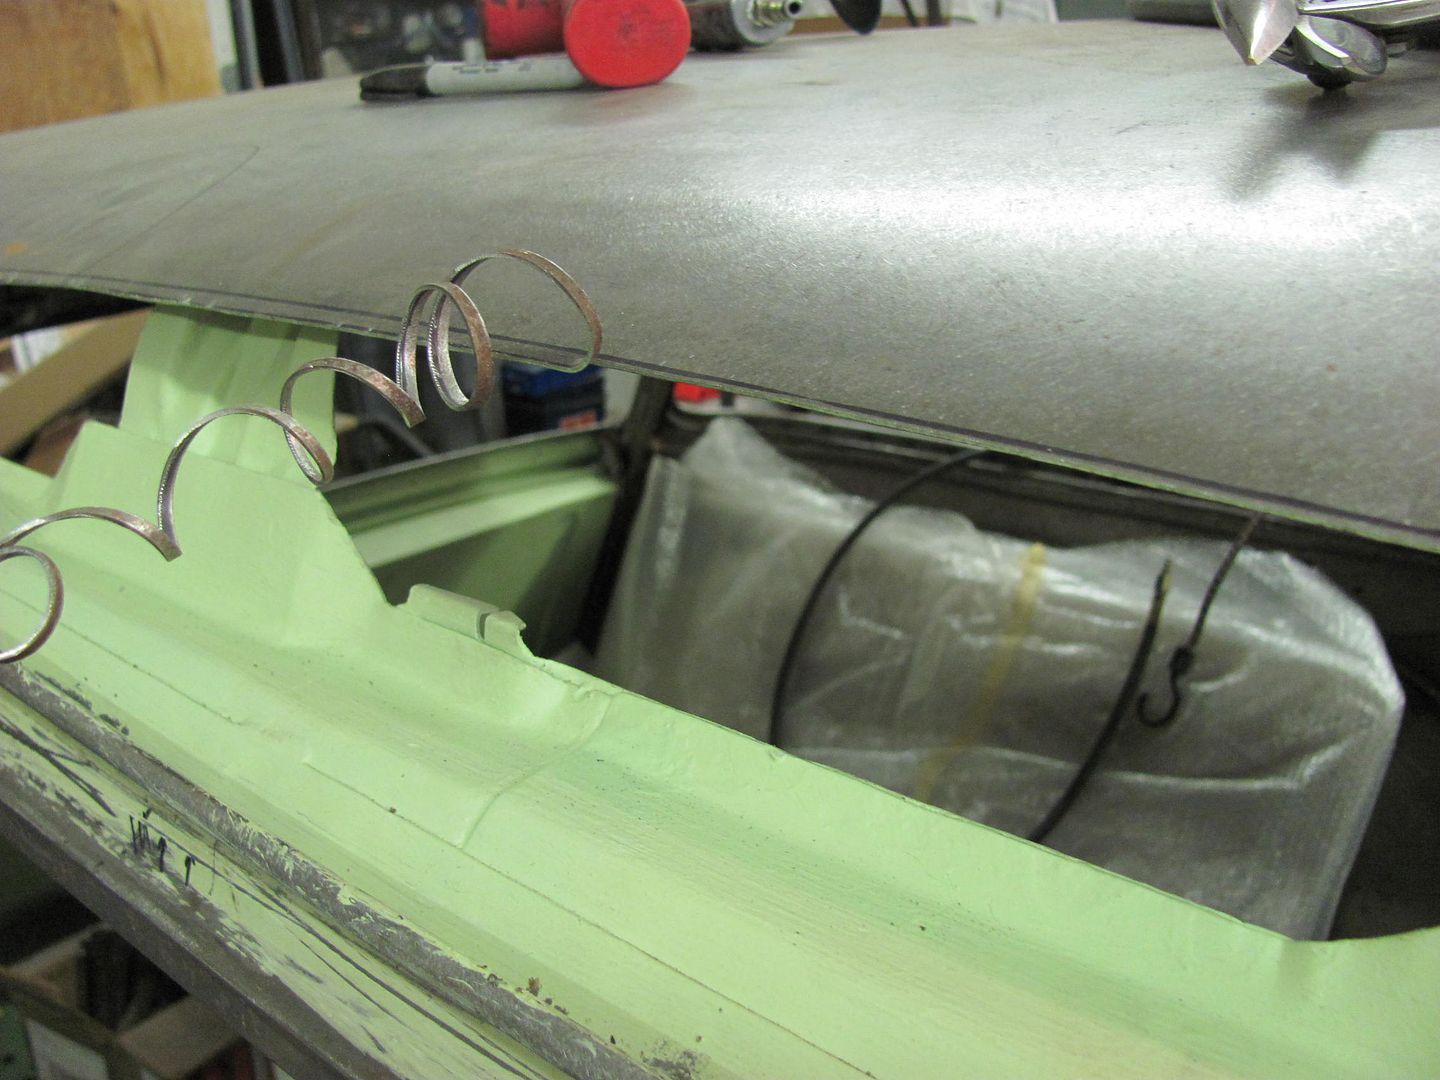
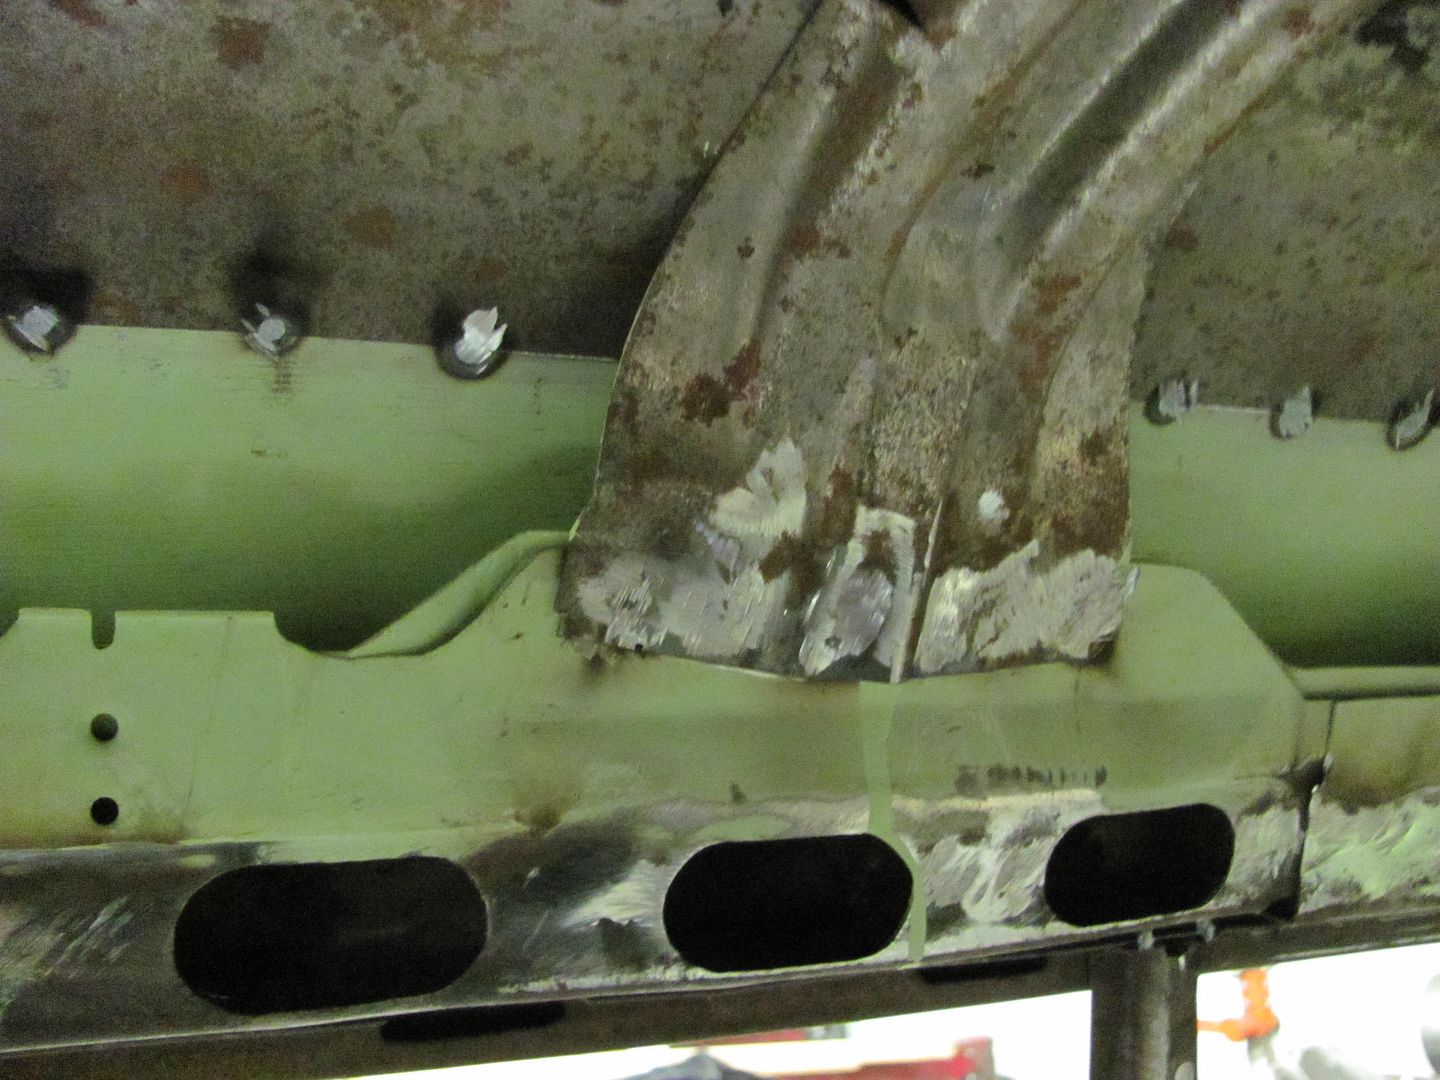
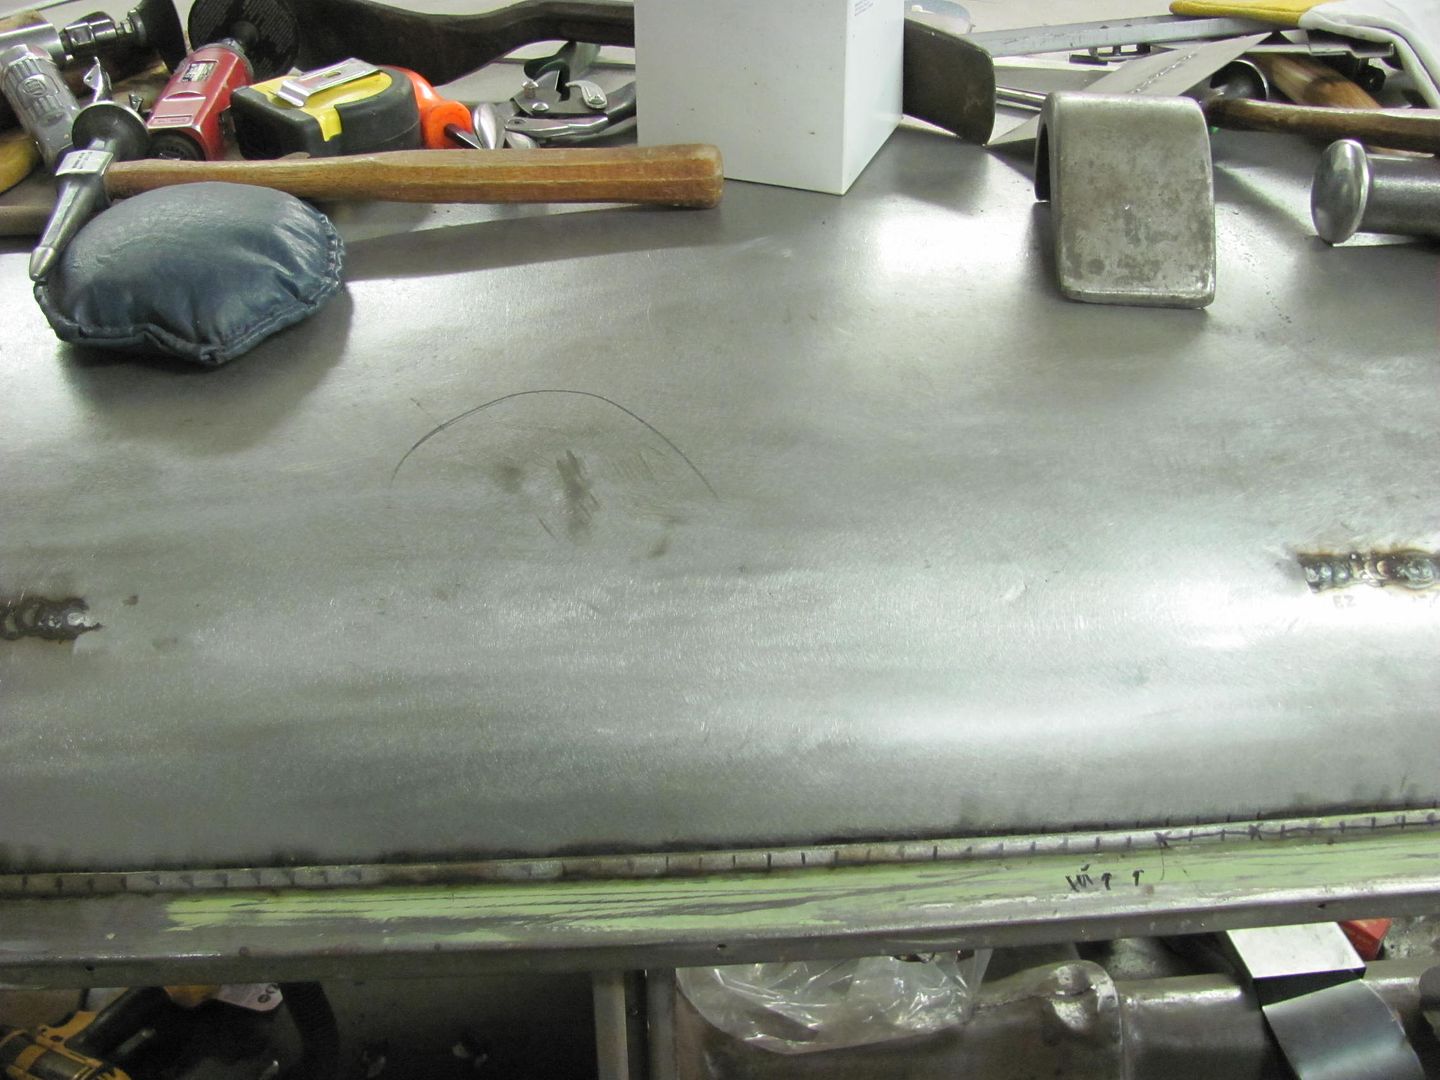
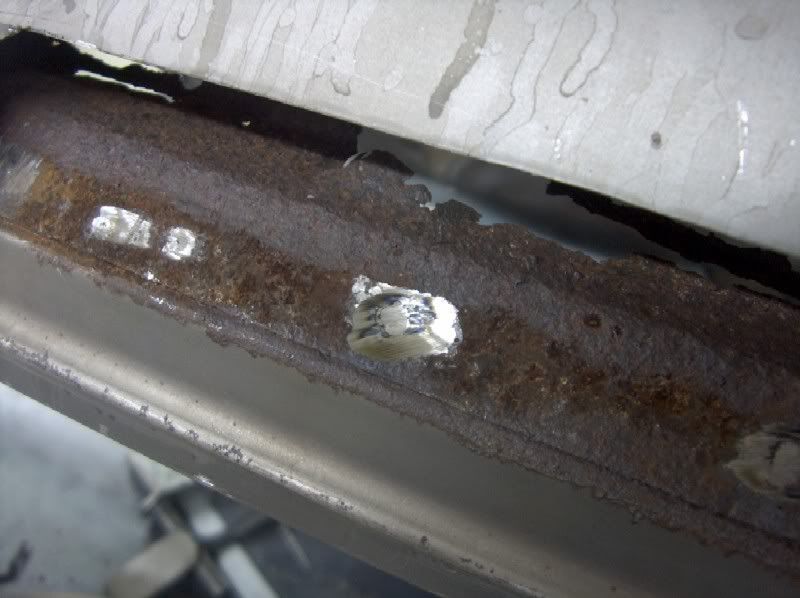
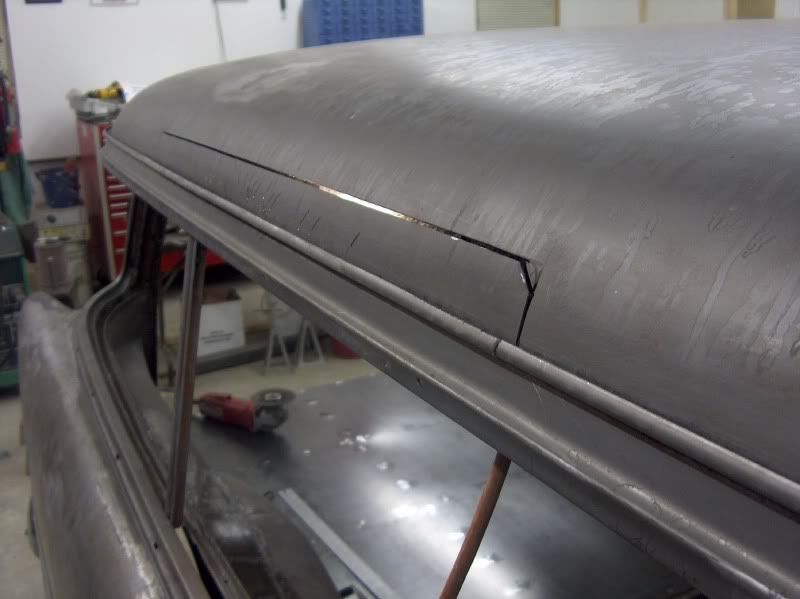
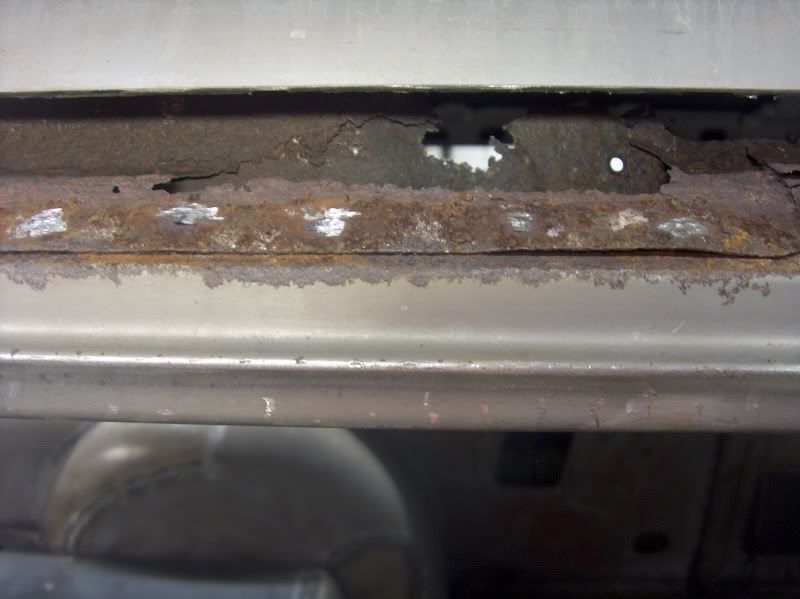
    If you've seen a hole in the roof that is noticeably up from the drip rail, chances are it has rusted from the inside-out, as you'll soon see. Any attempts to repair without opening up the roof for some exploratory surgery will be short lived. So simply tapping the holes inward and filling with bondo is a good waste of a paint job, and will come back to haunt you in a year or two.


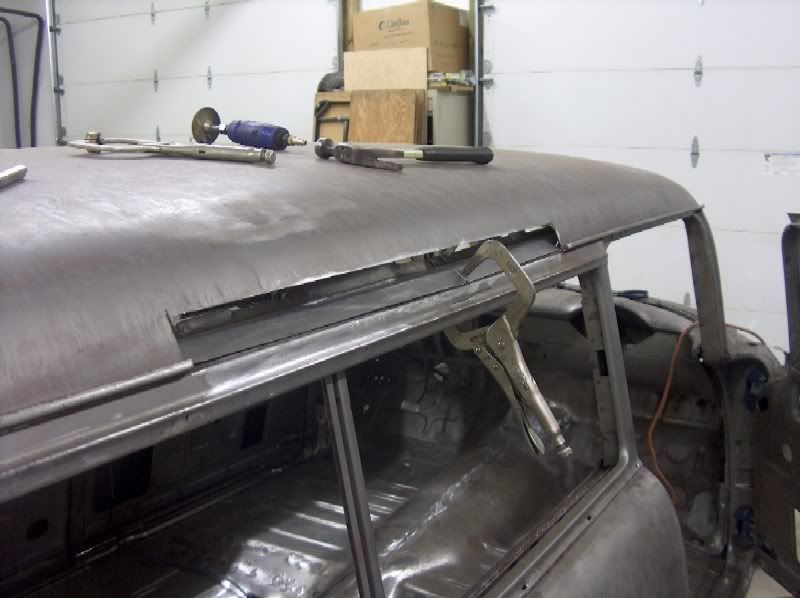
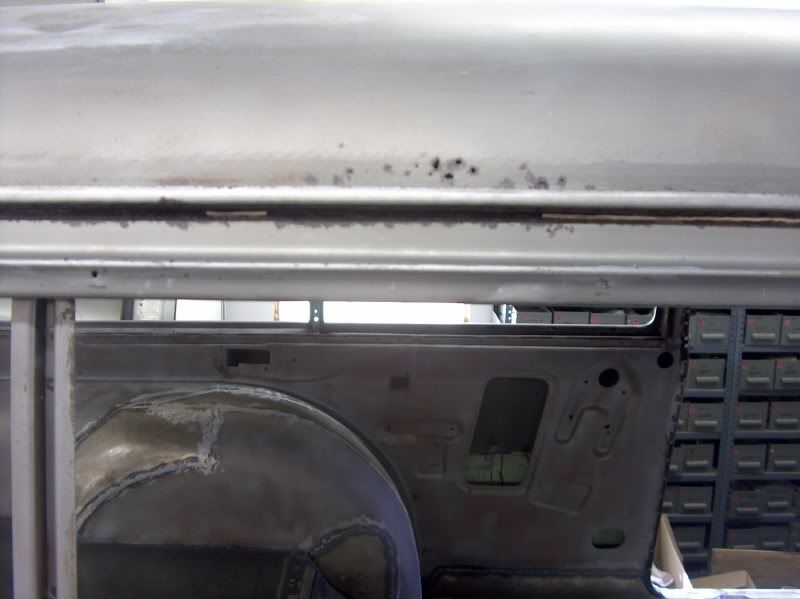
    While waiting to do some painting, might as well cut up something. But not until after a quick check on the inside as well to see the extent of the problem.


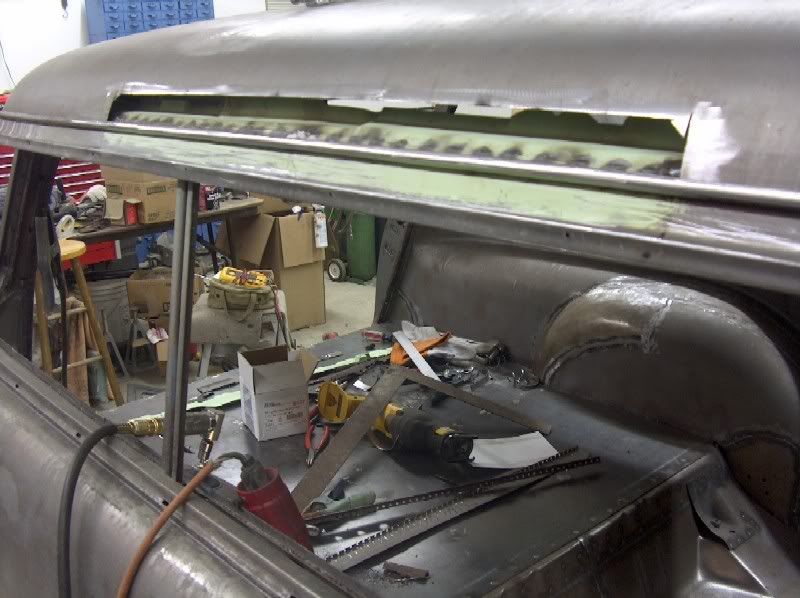
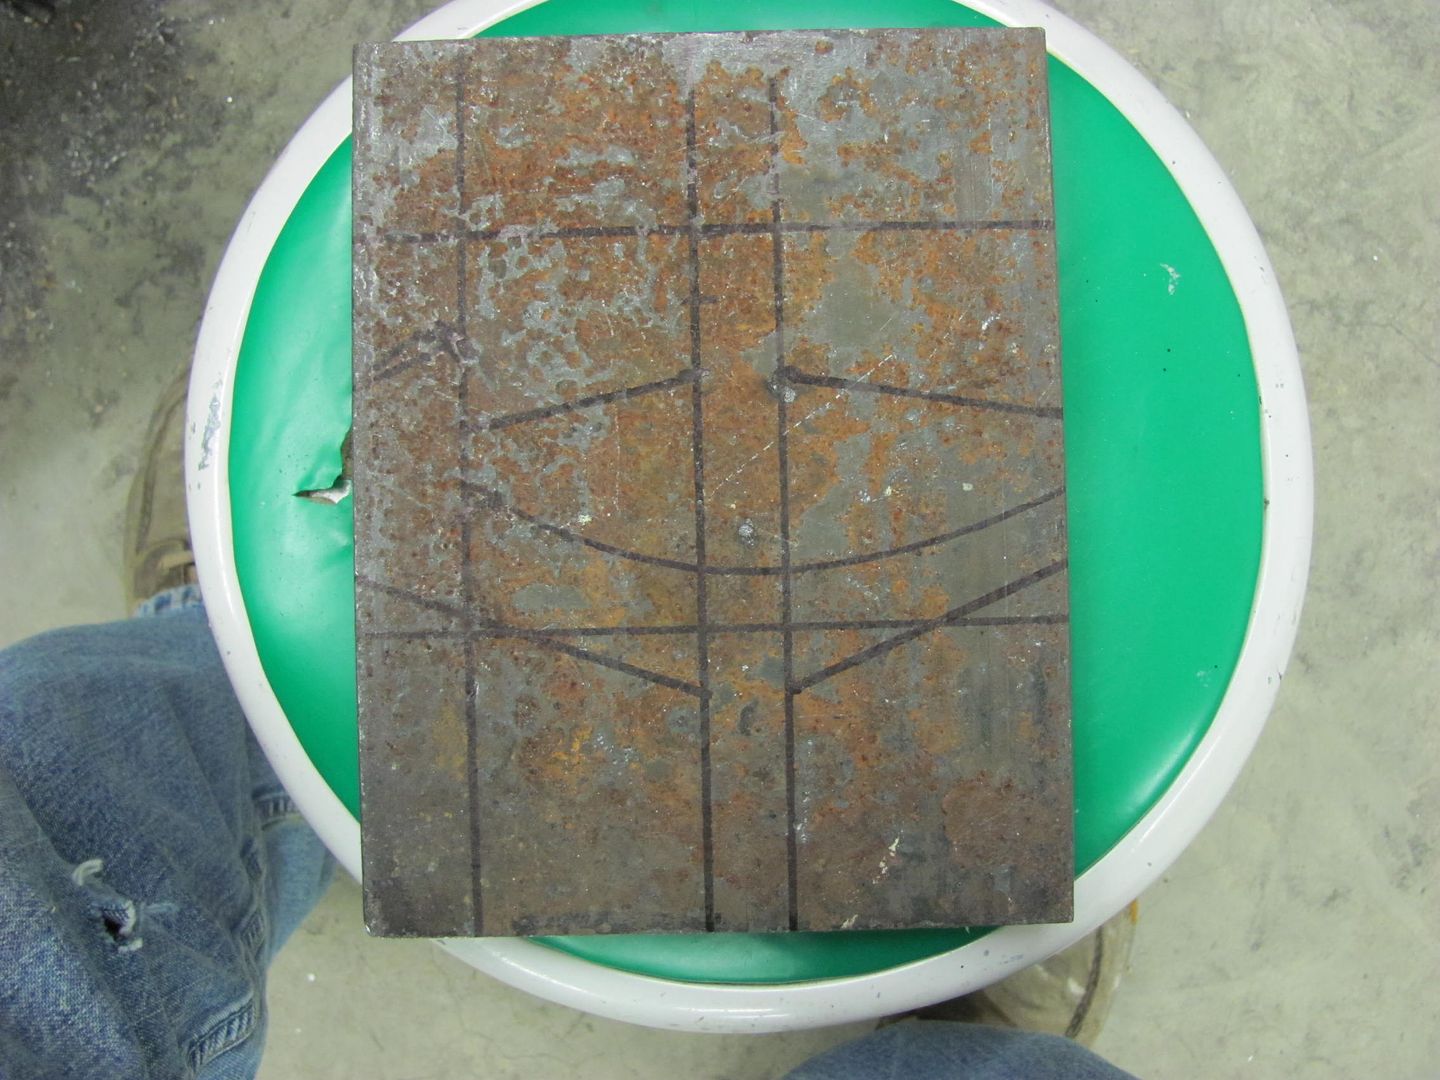
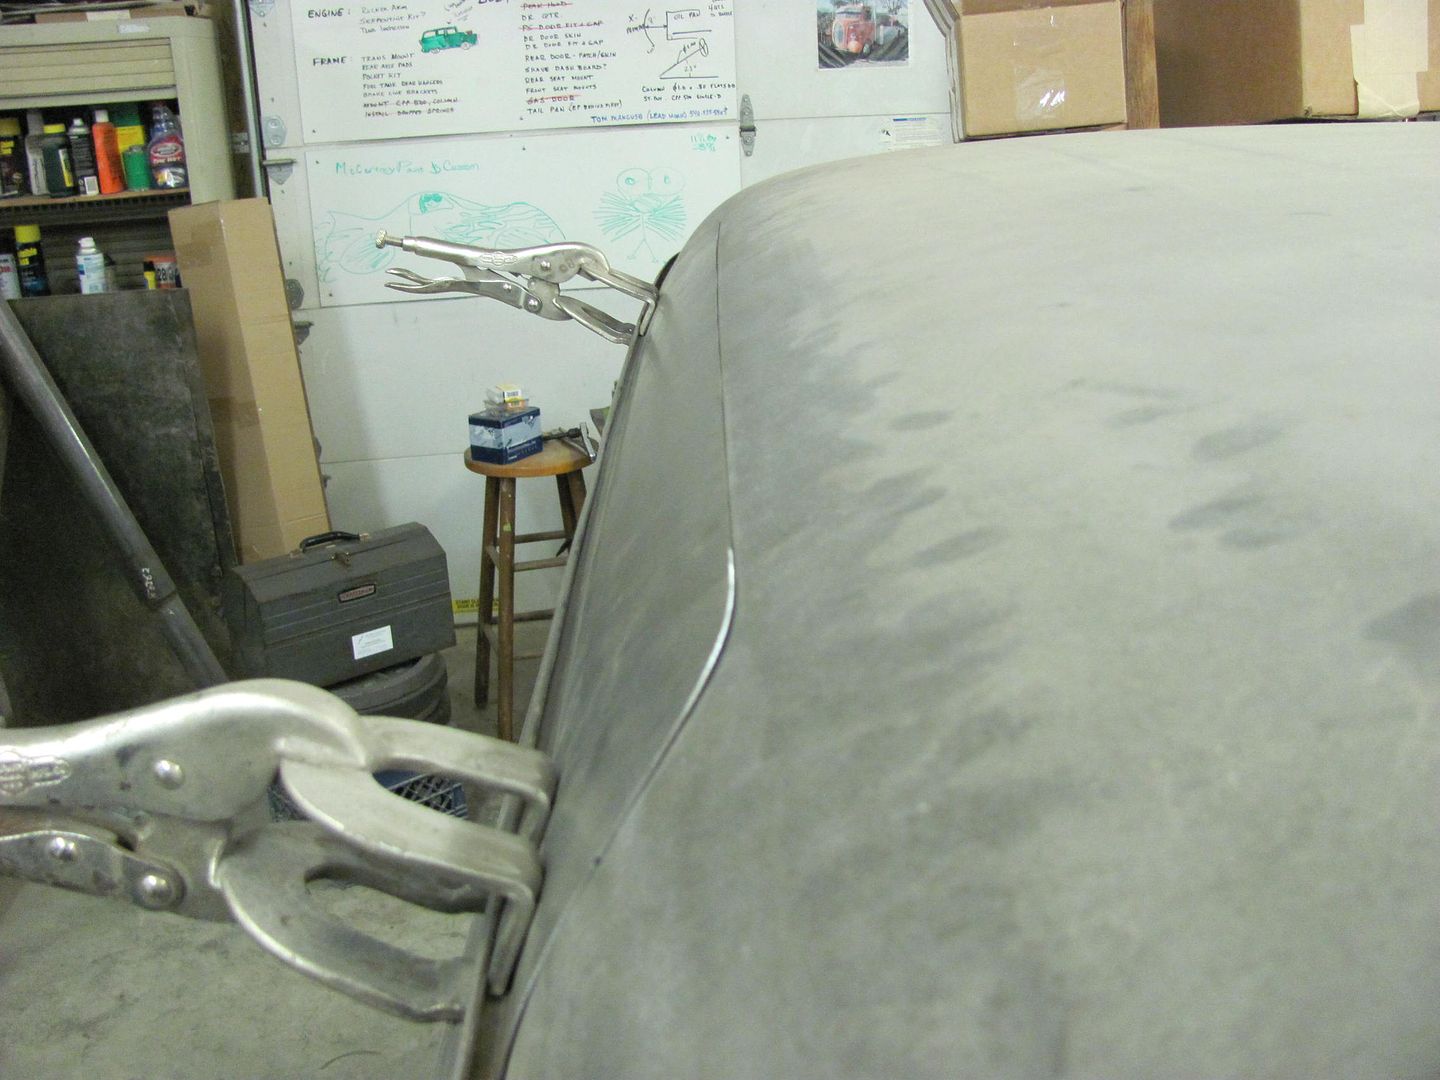
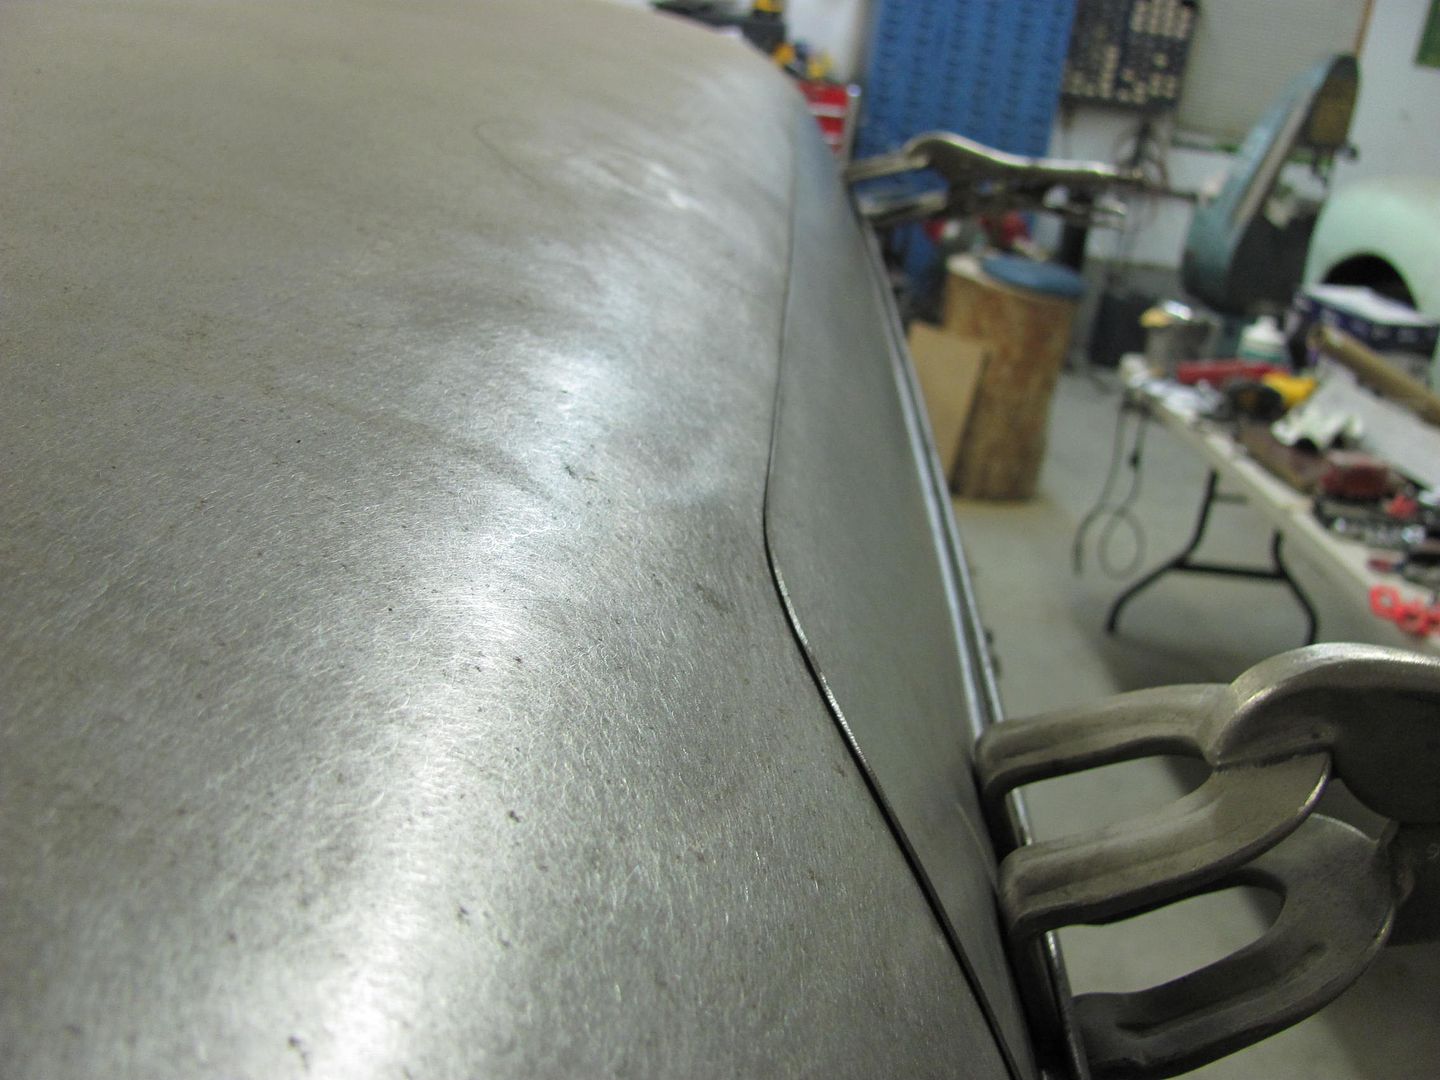
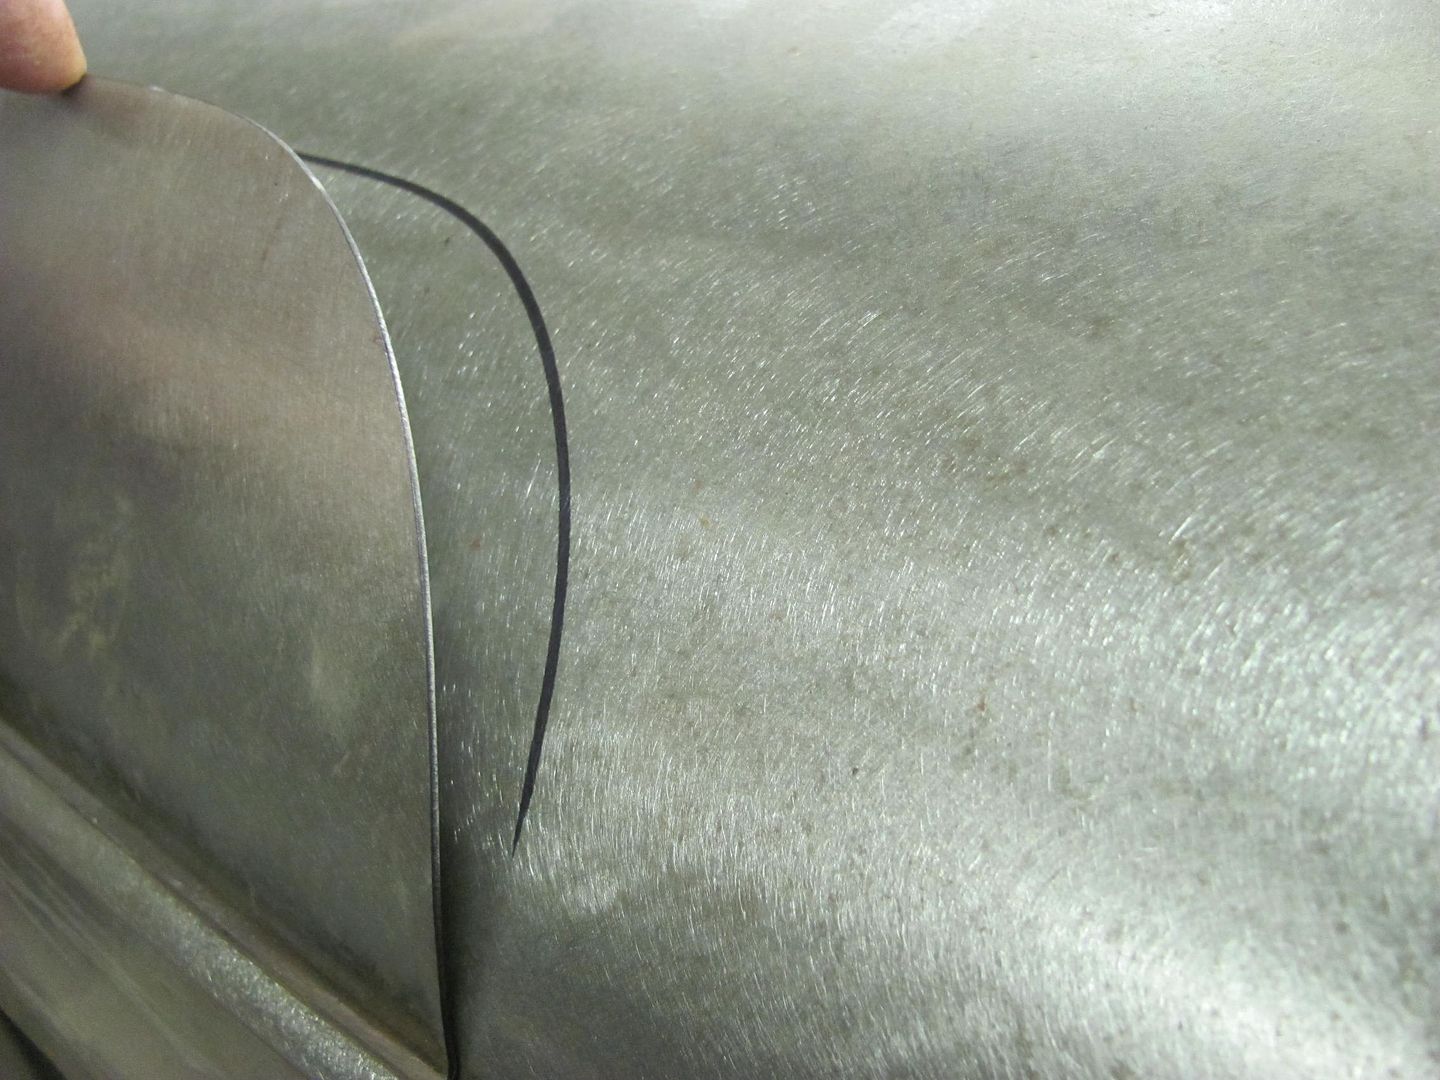
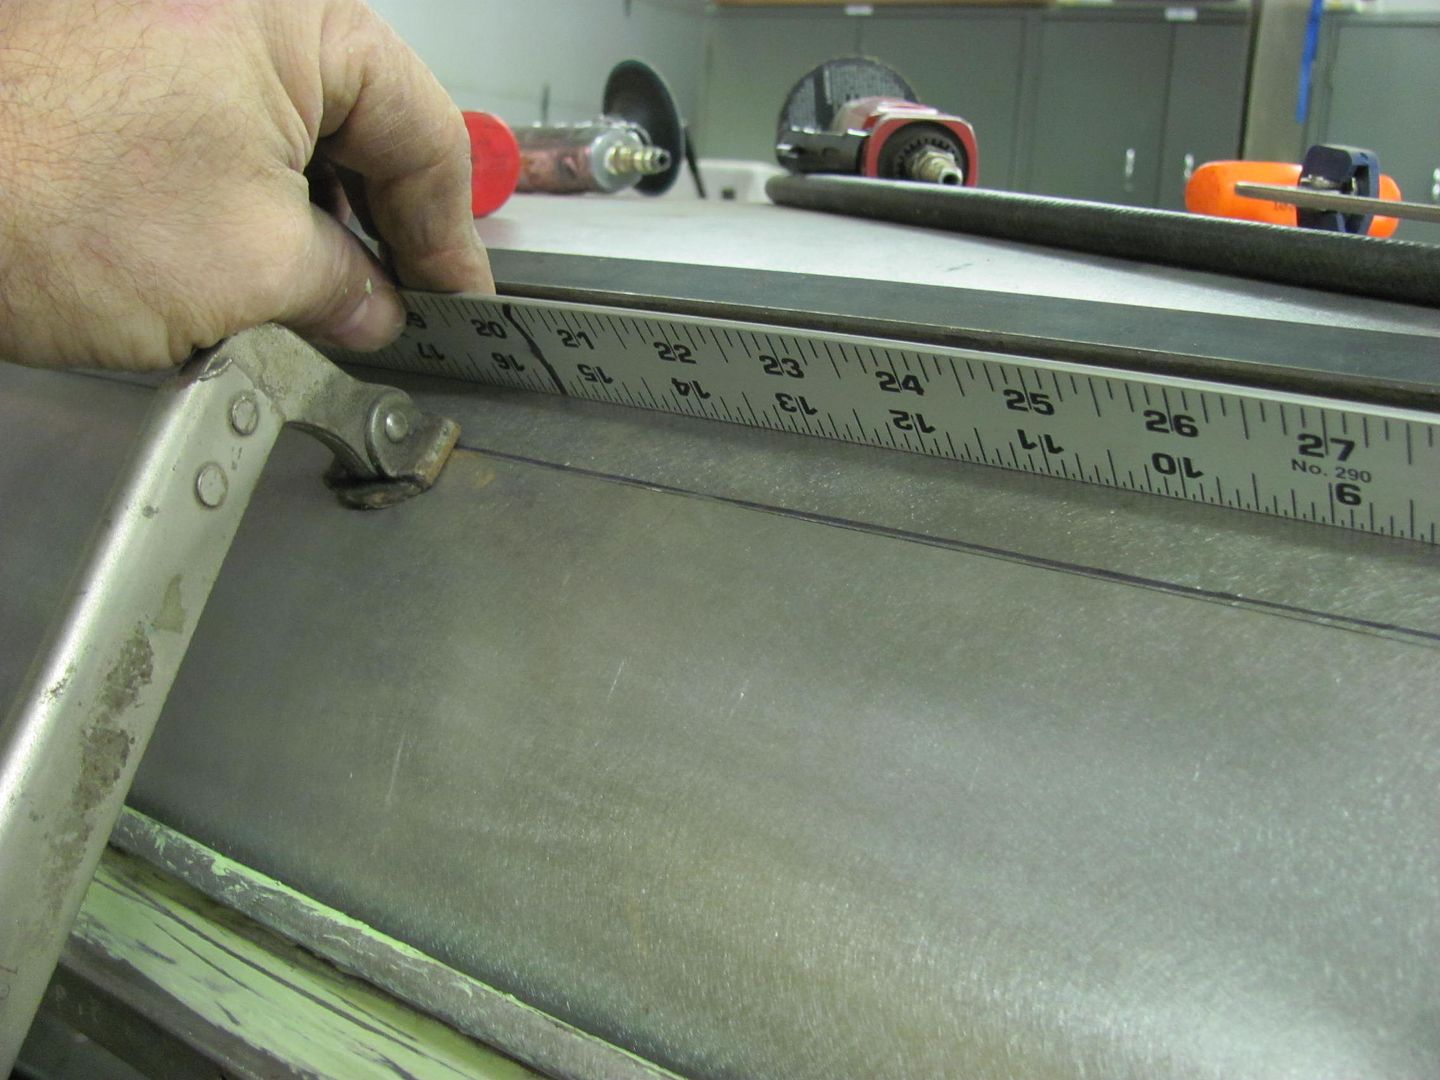
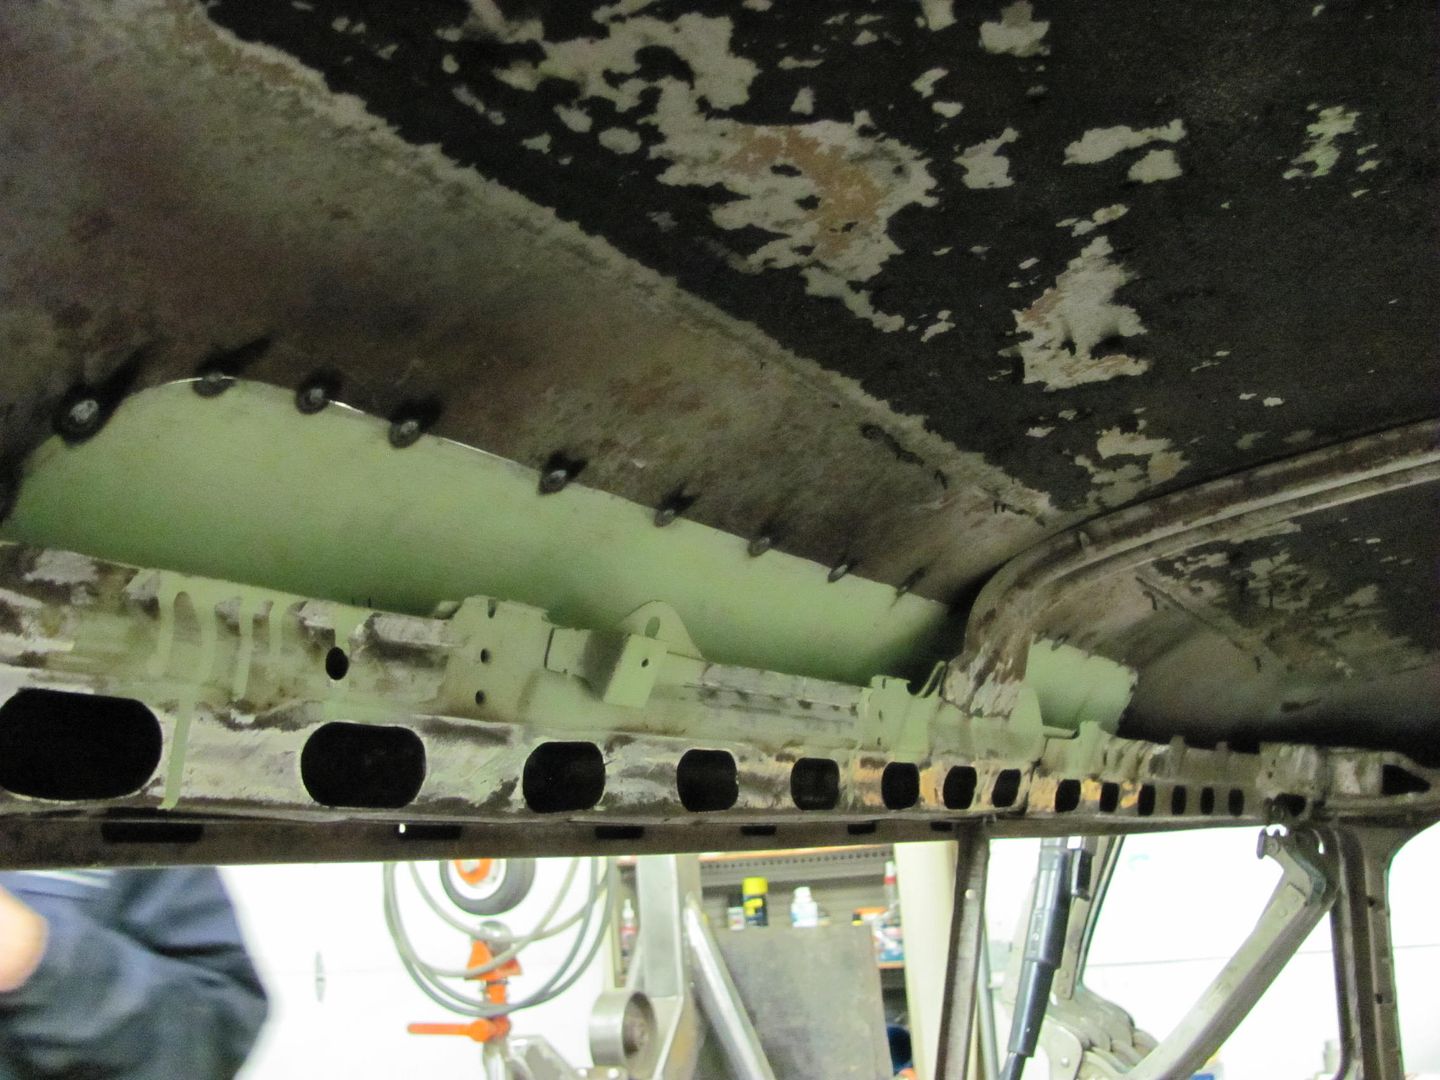
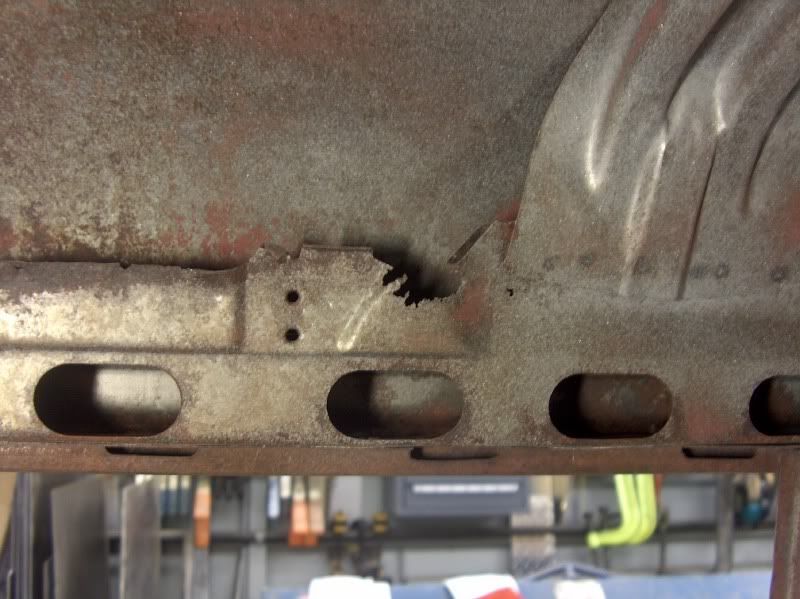
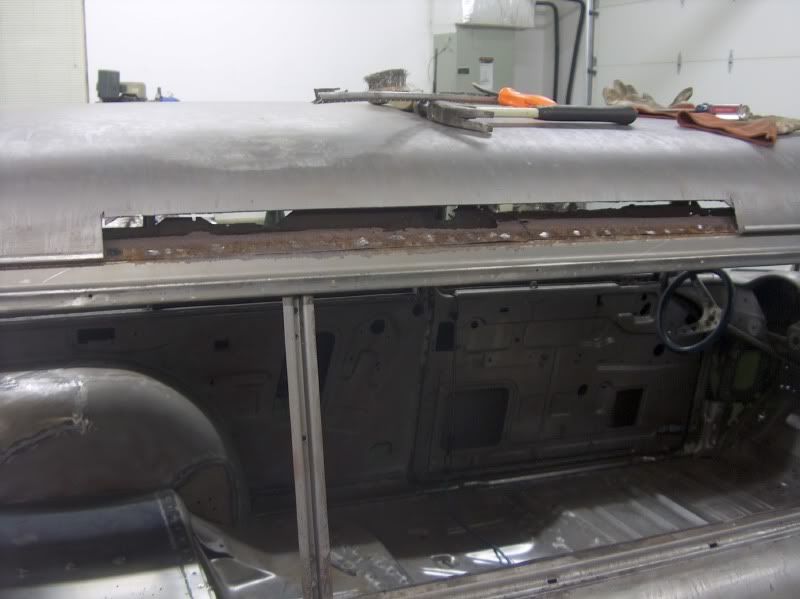
    Looks pretty ugly, and will require taking out more than I originally thought. Time to mark out the cut line.


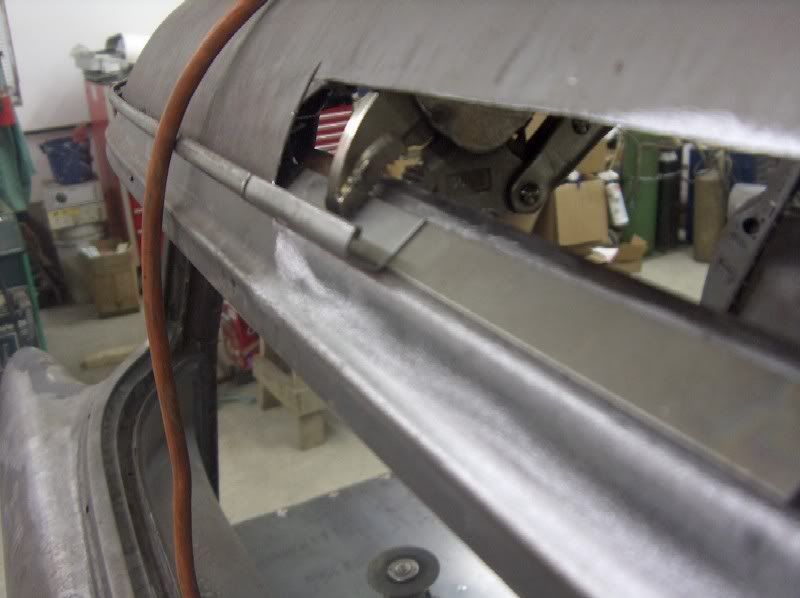
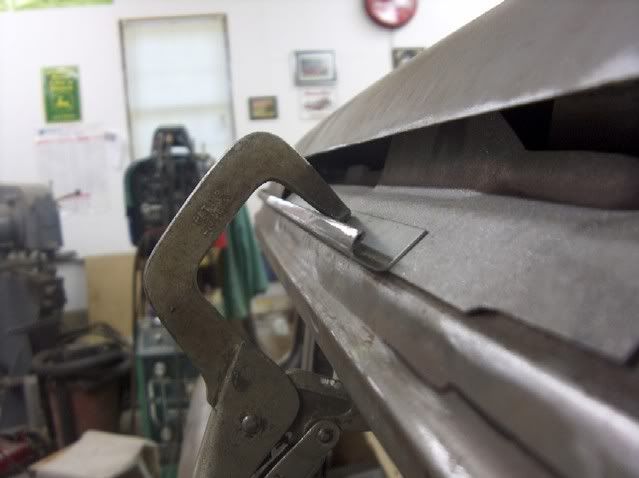
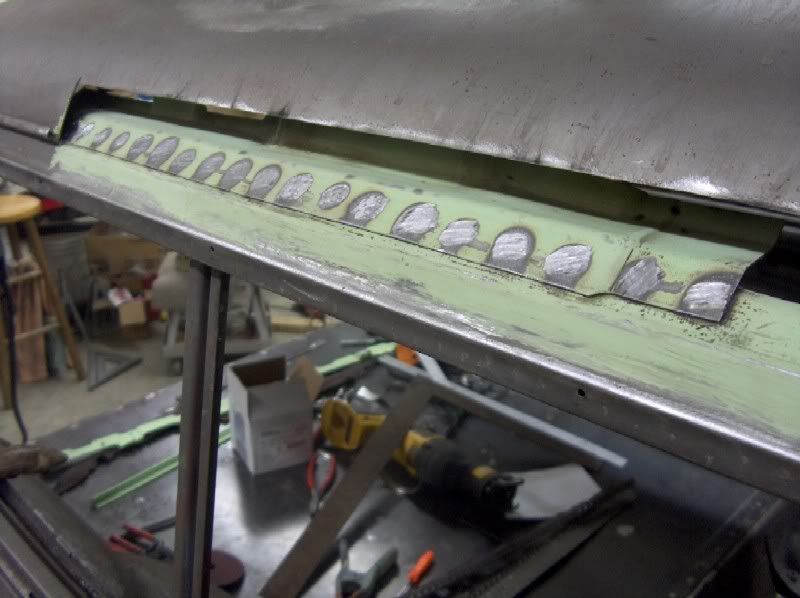
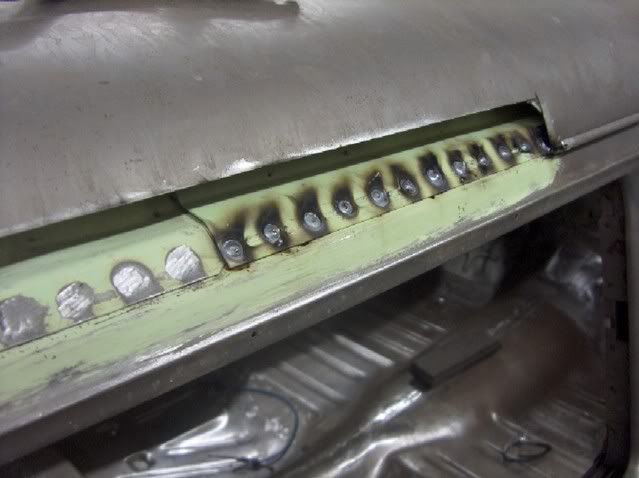
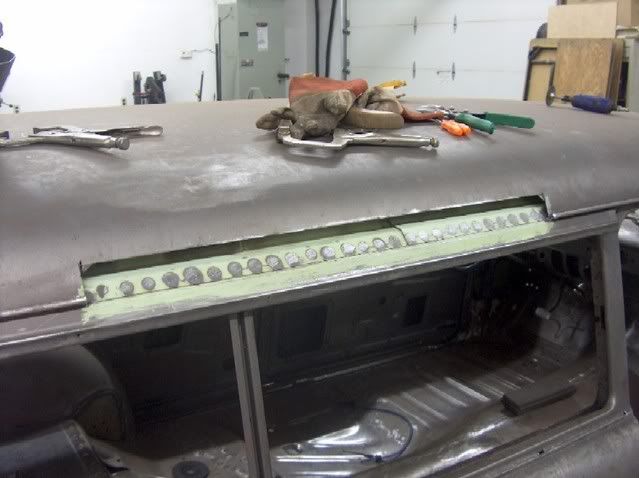
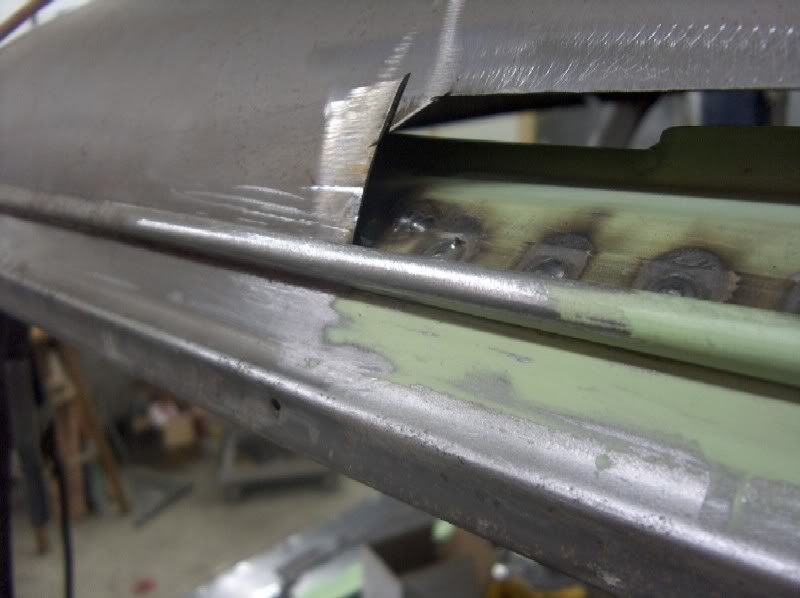
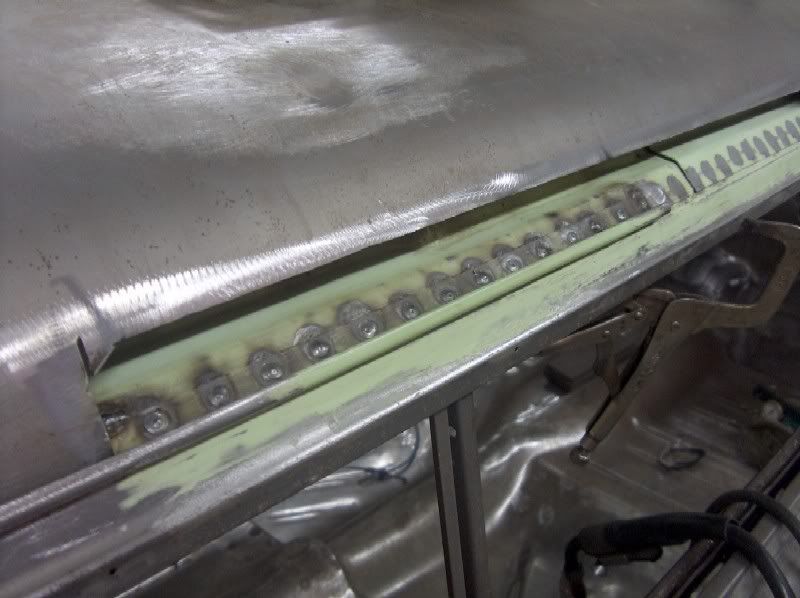
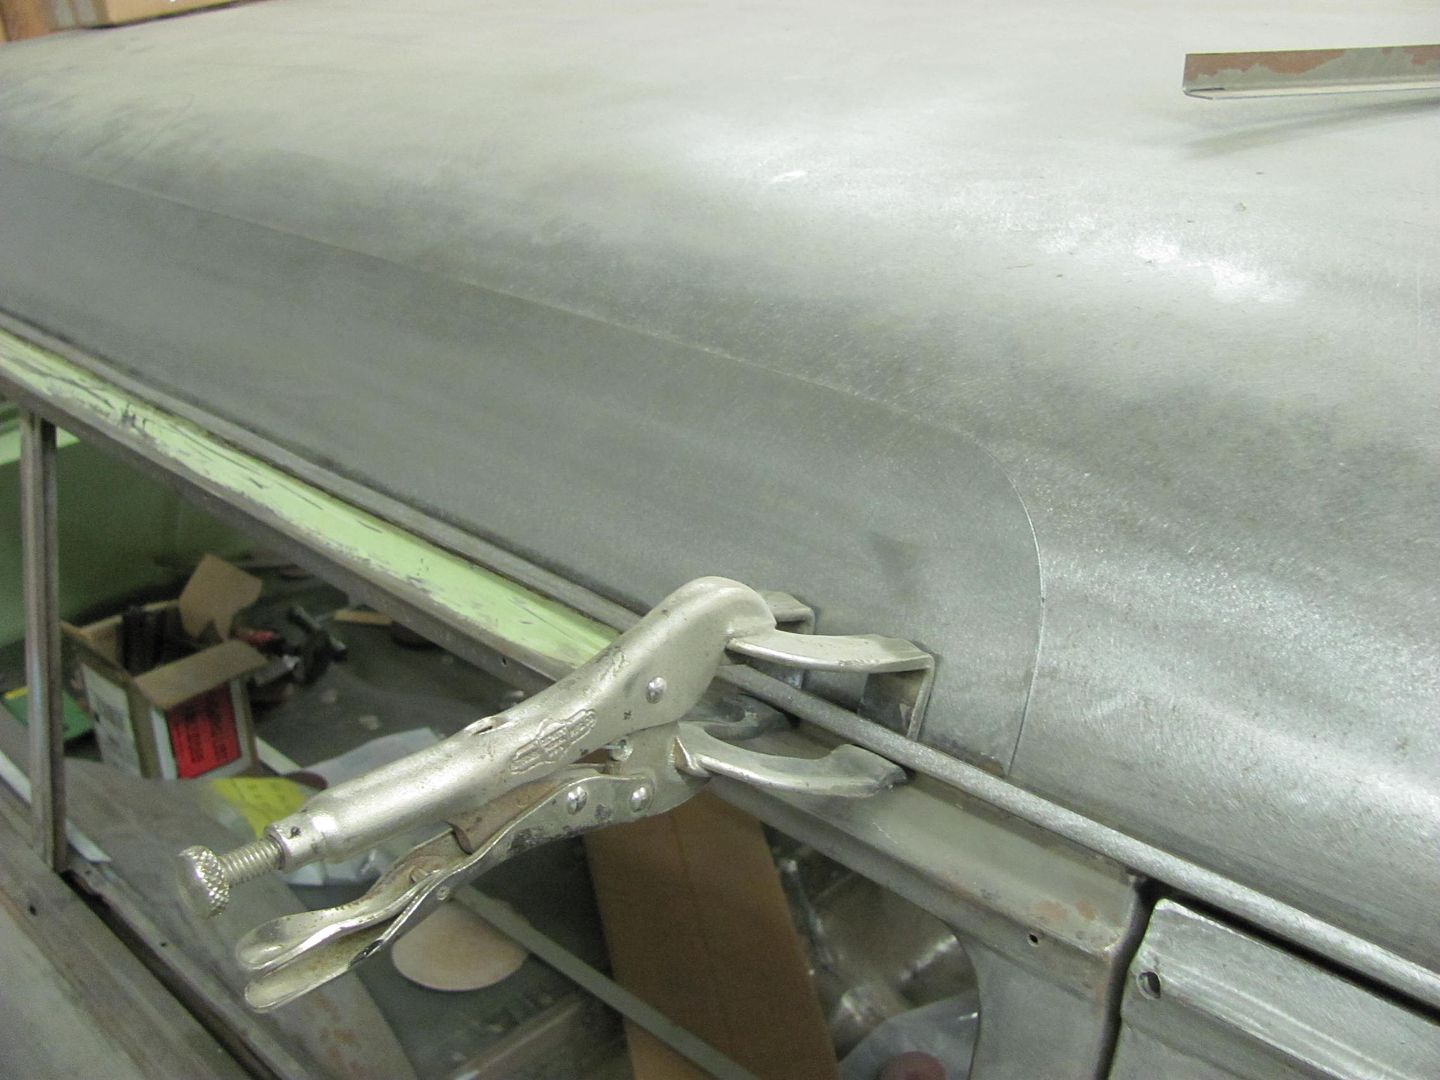
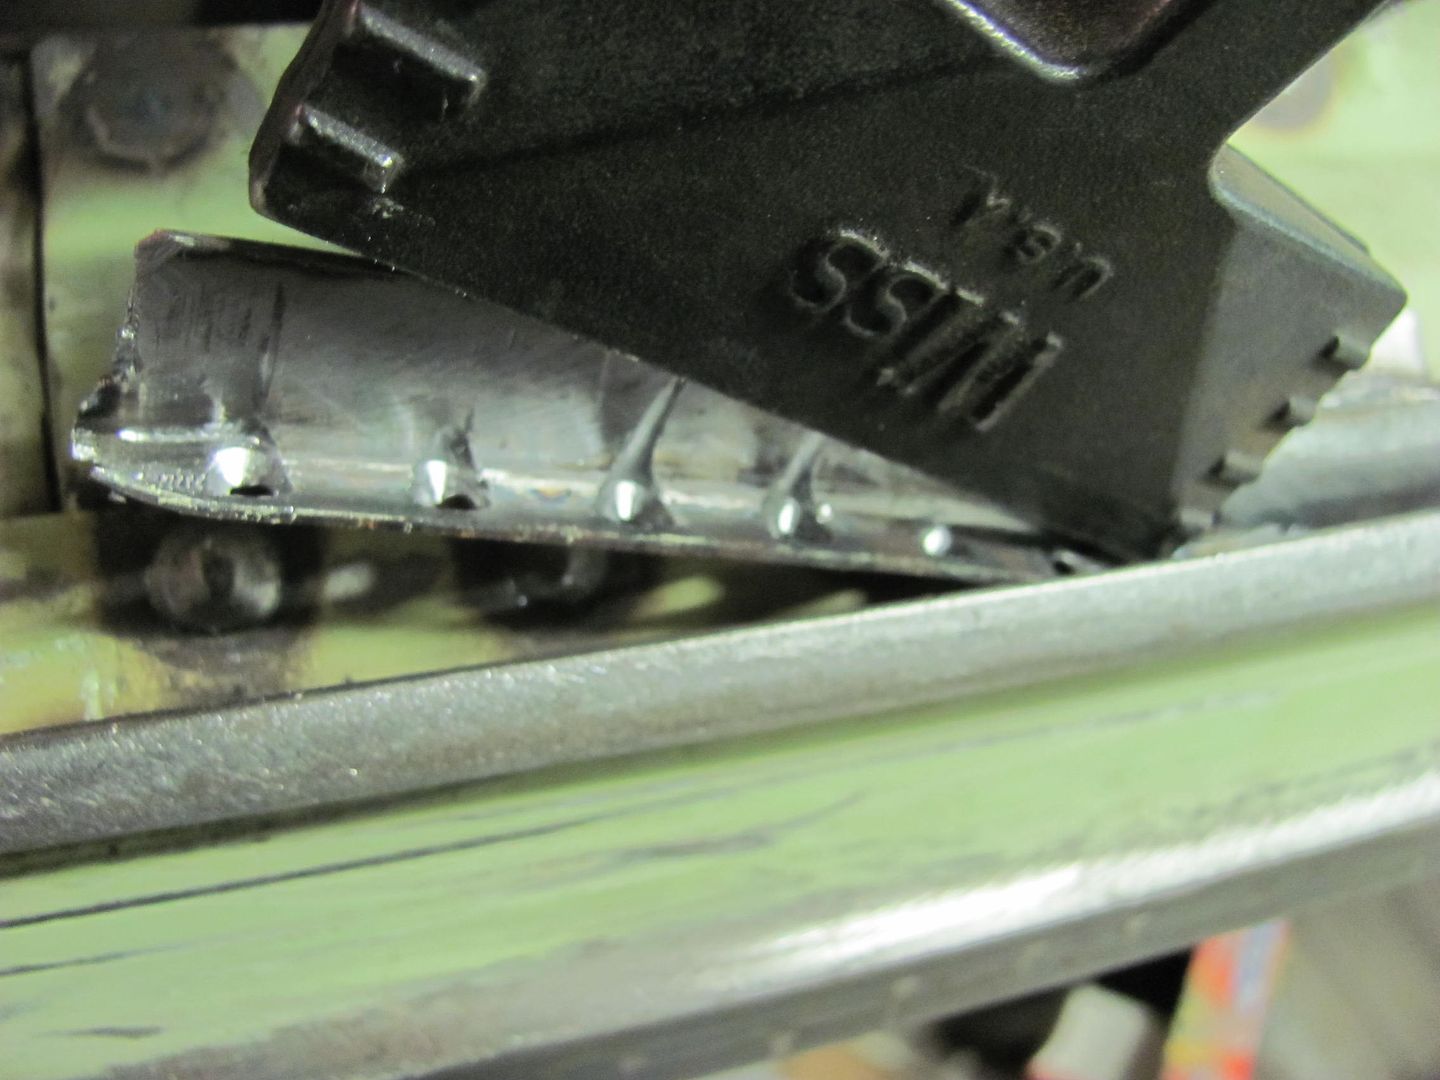
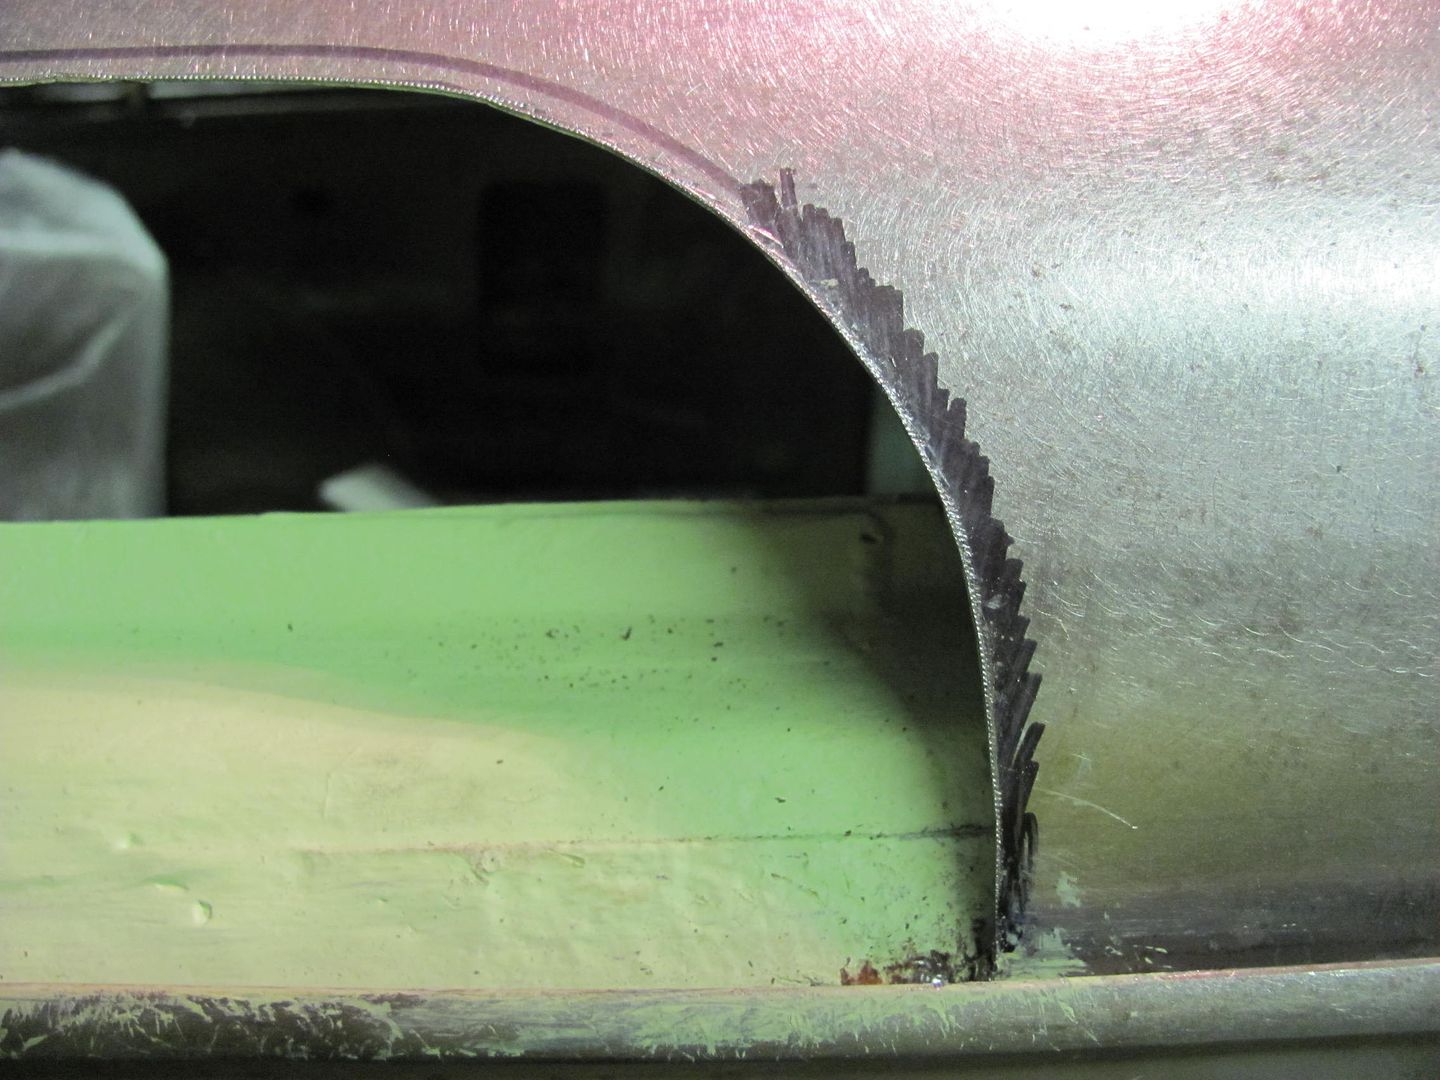
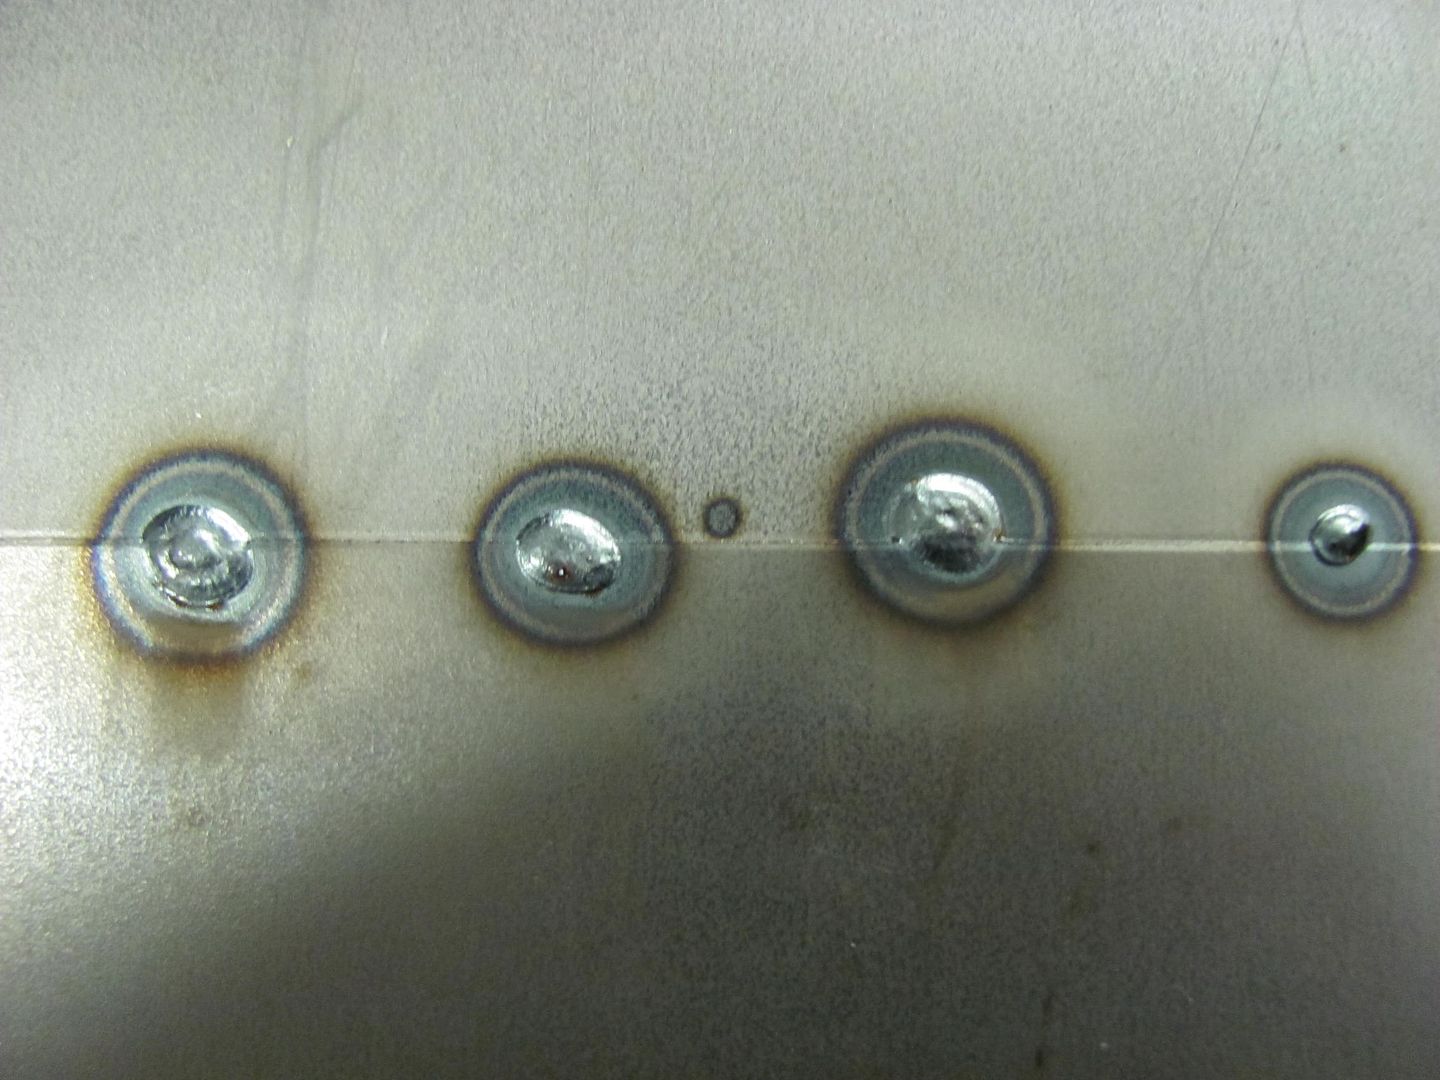
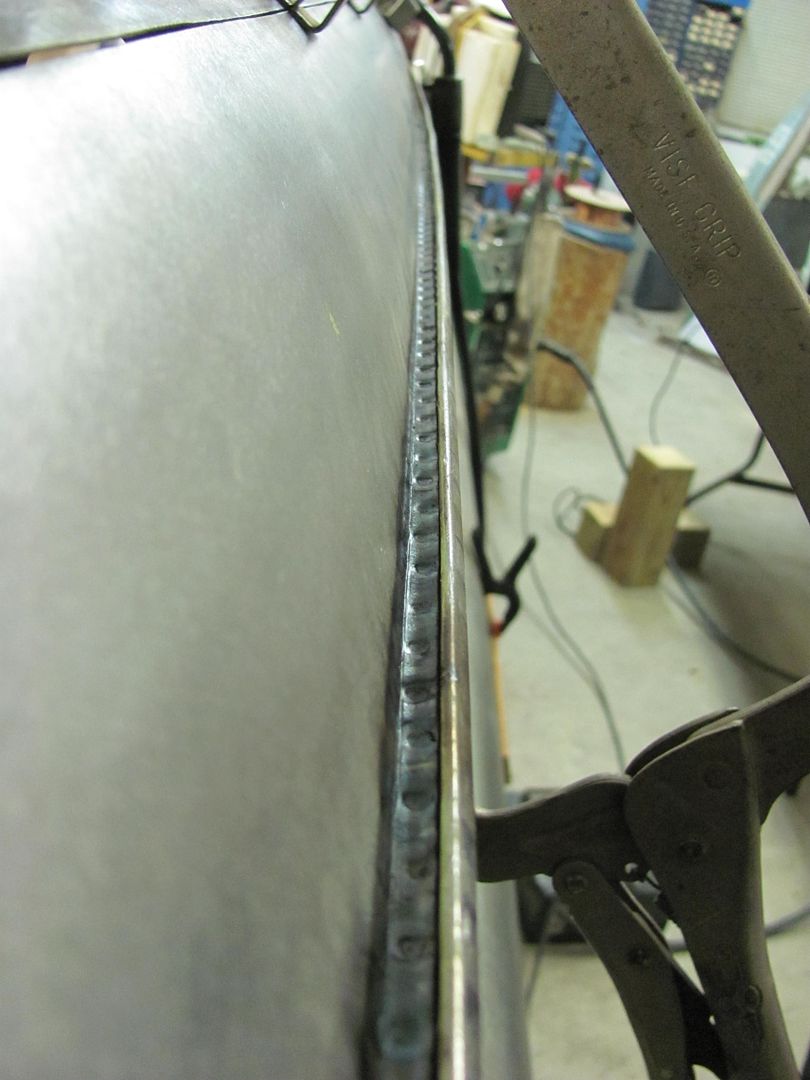
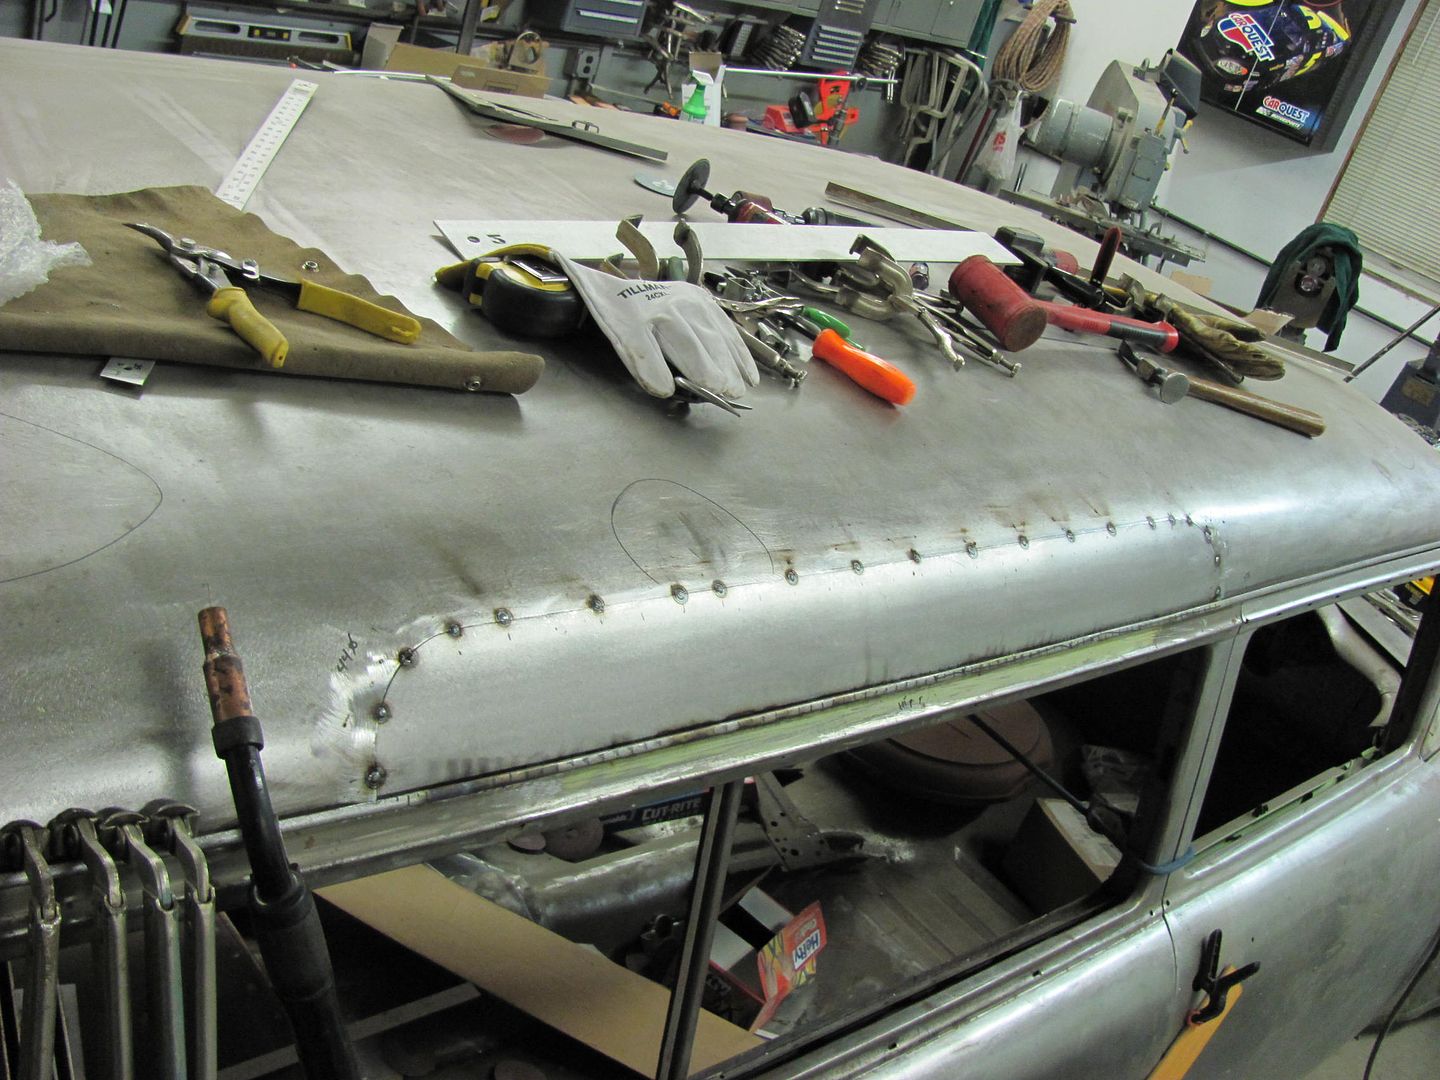
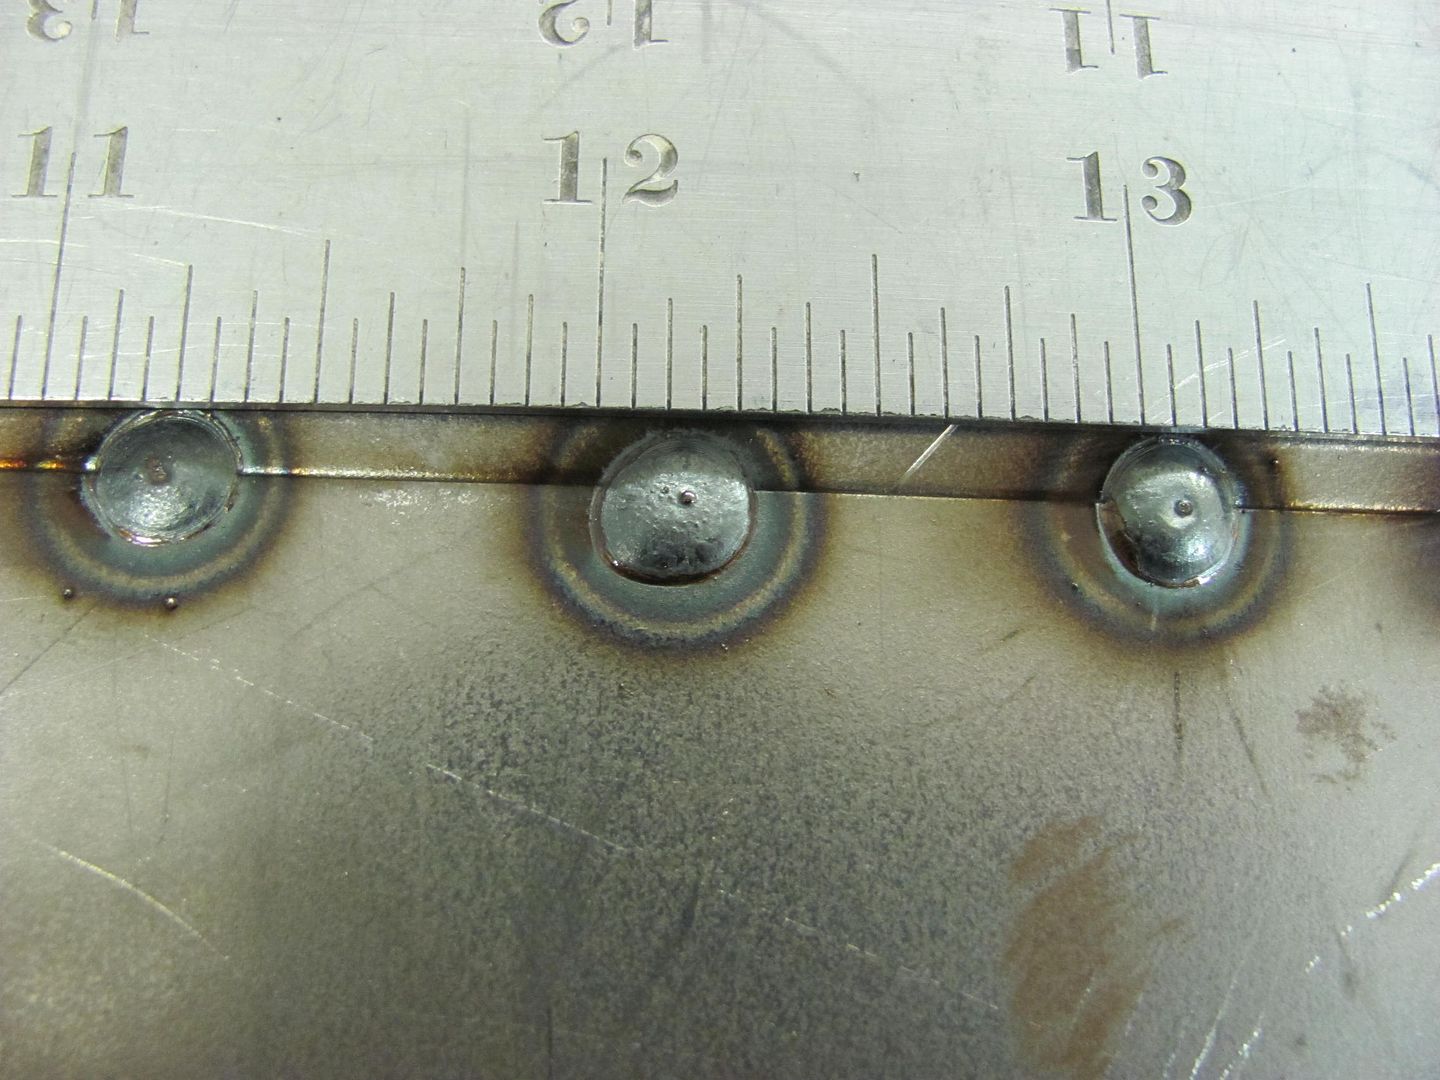
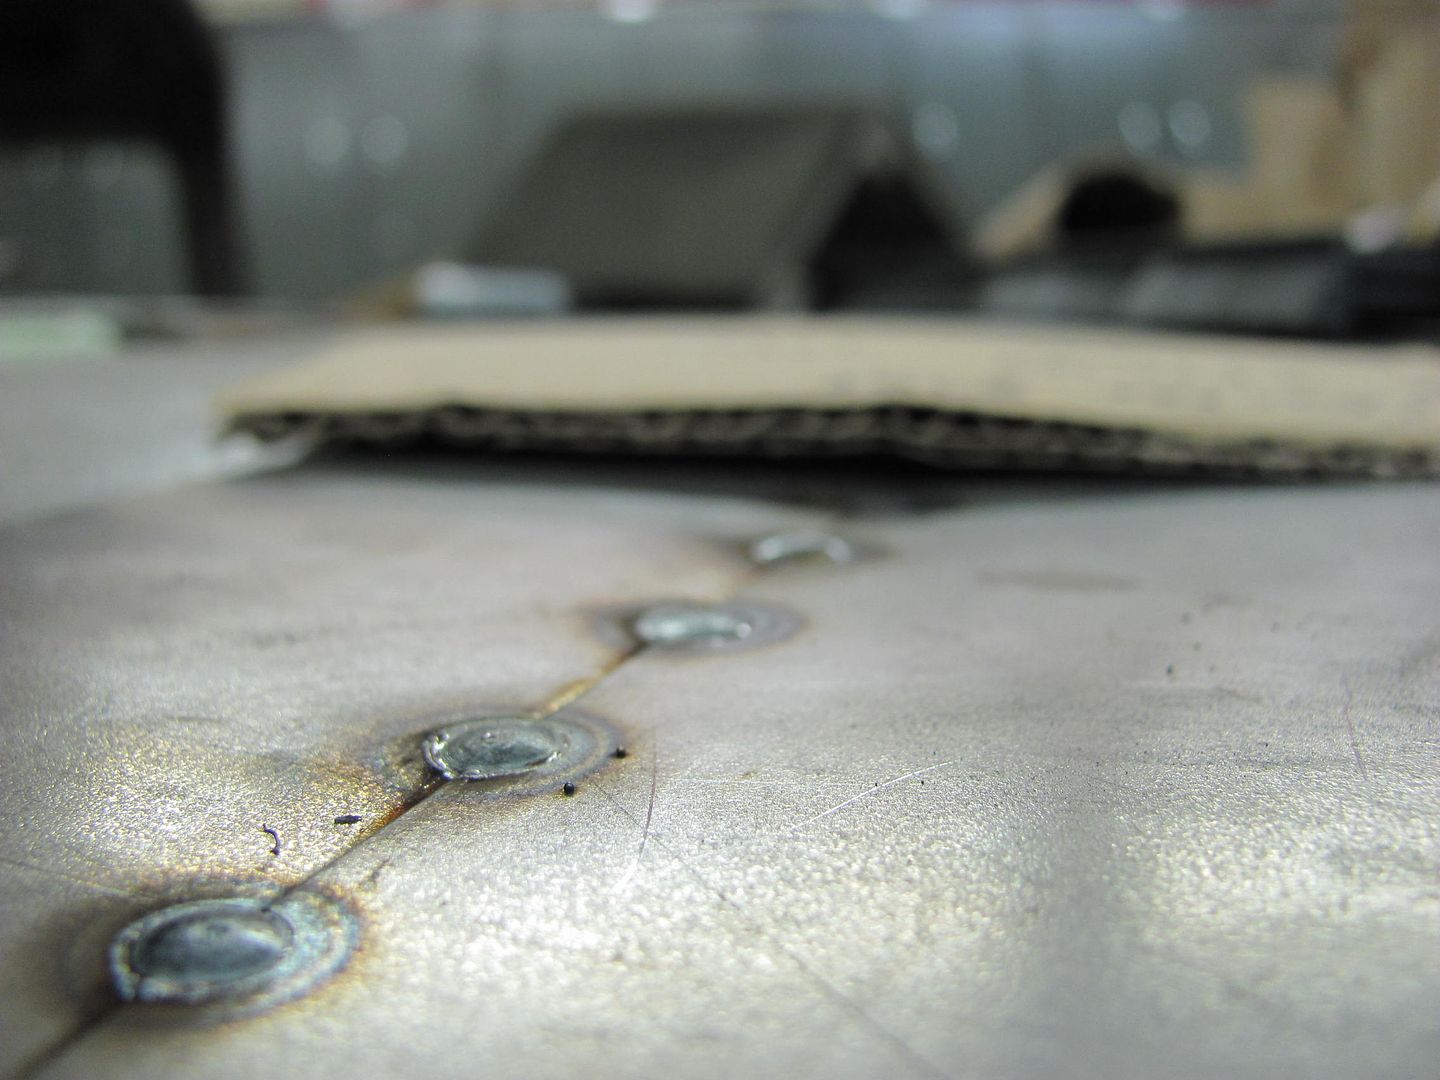
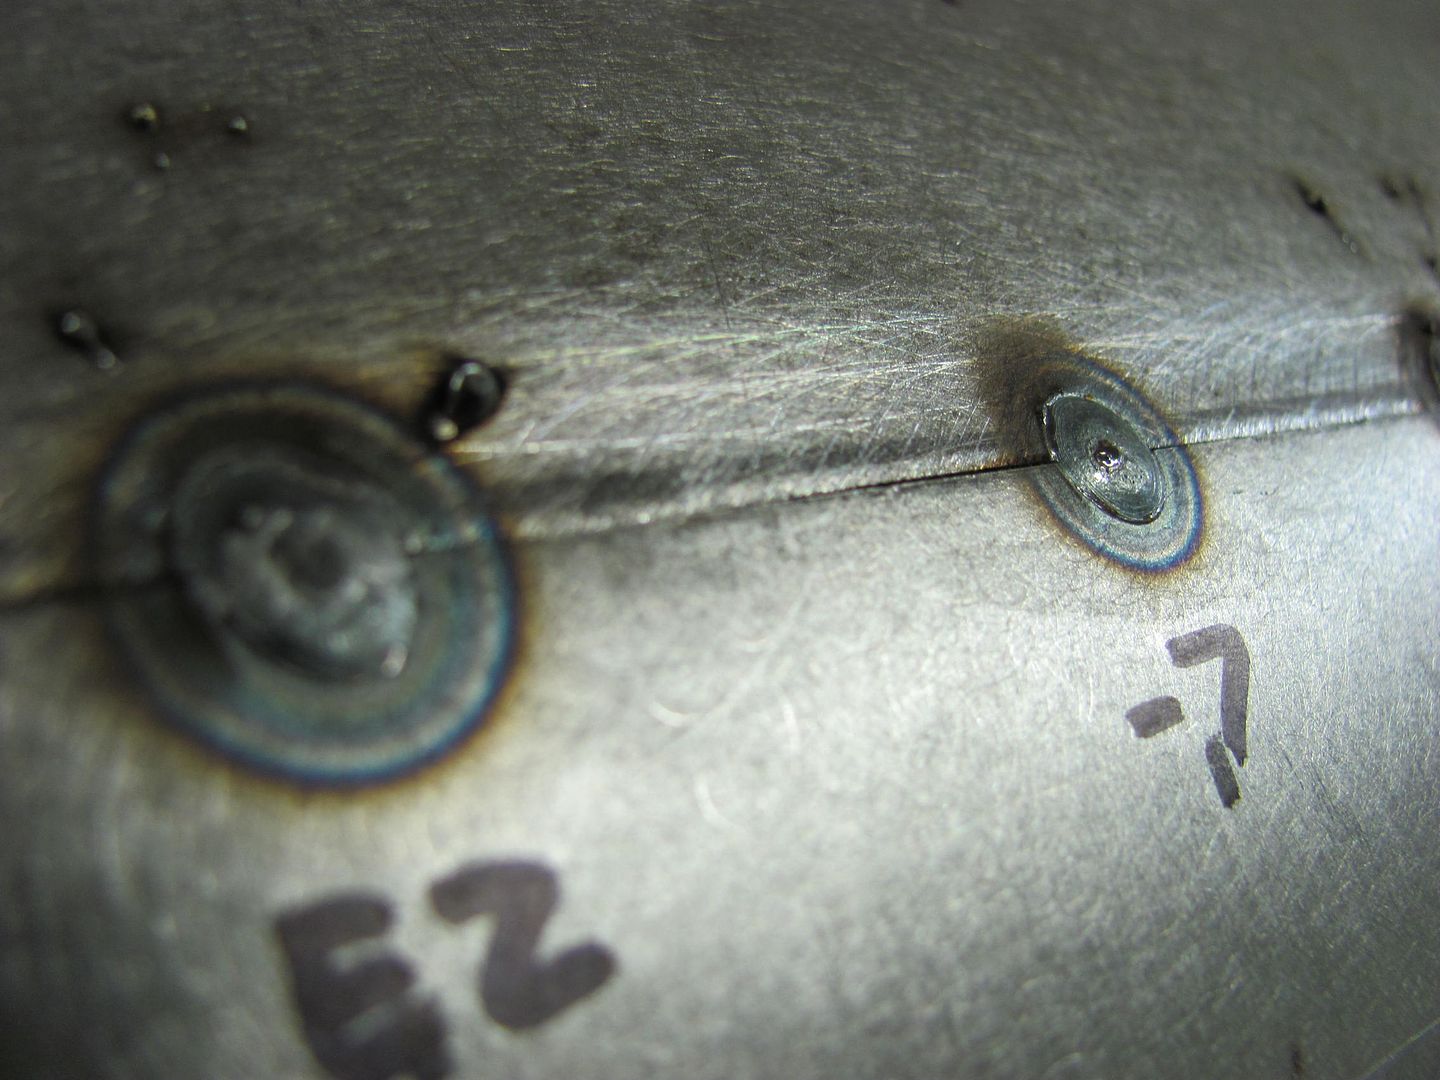
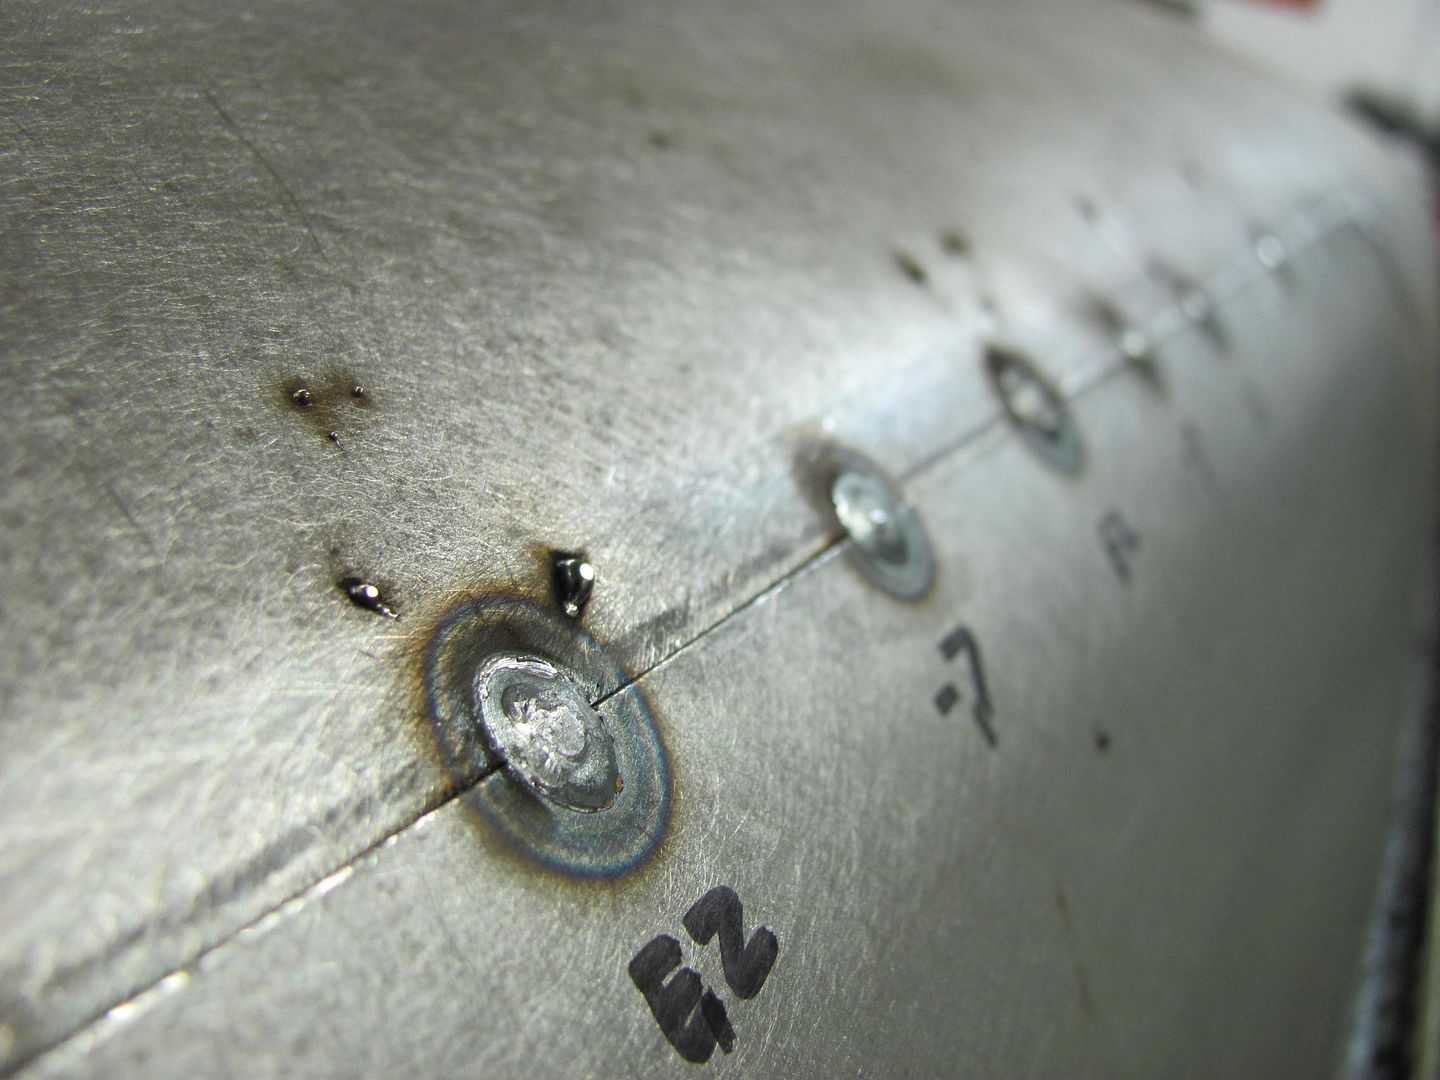
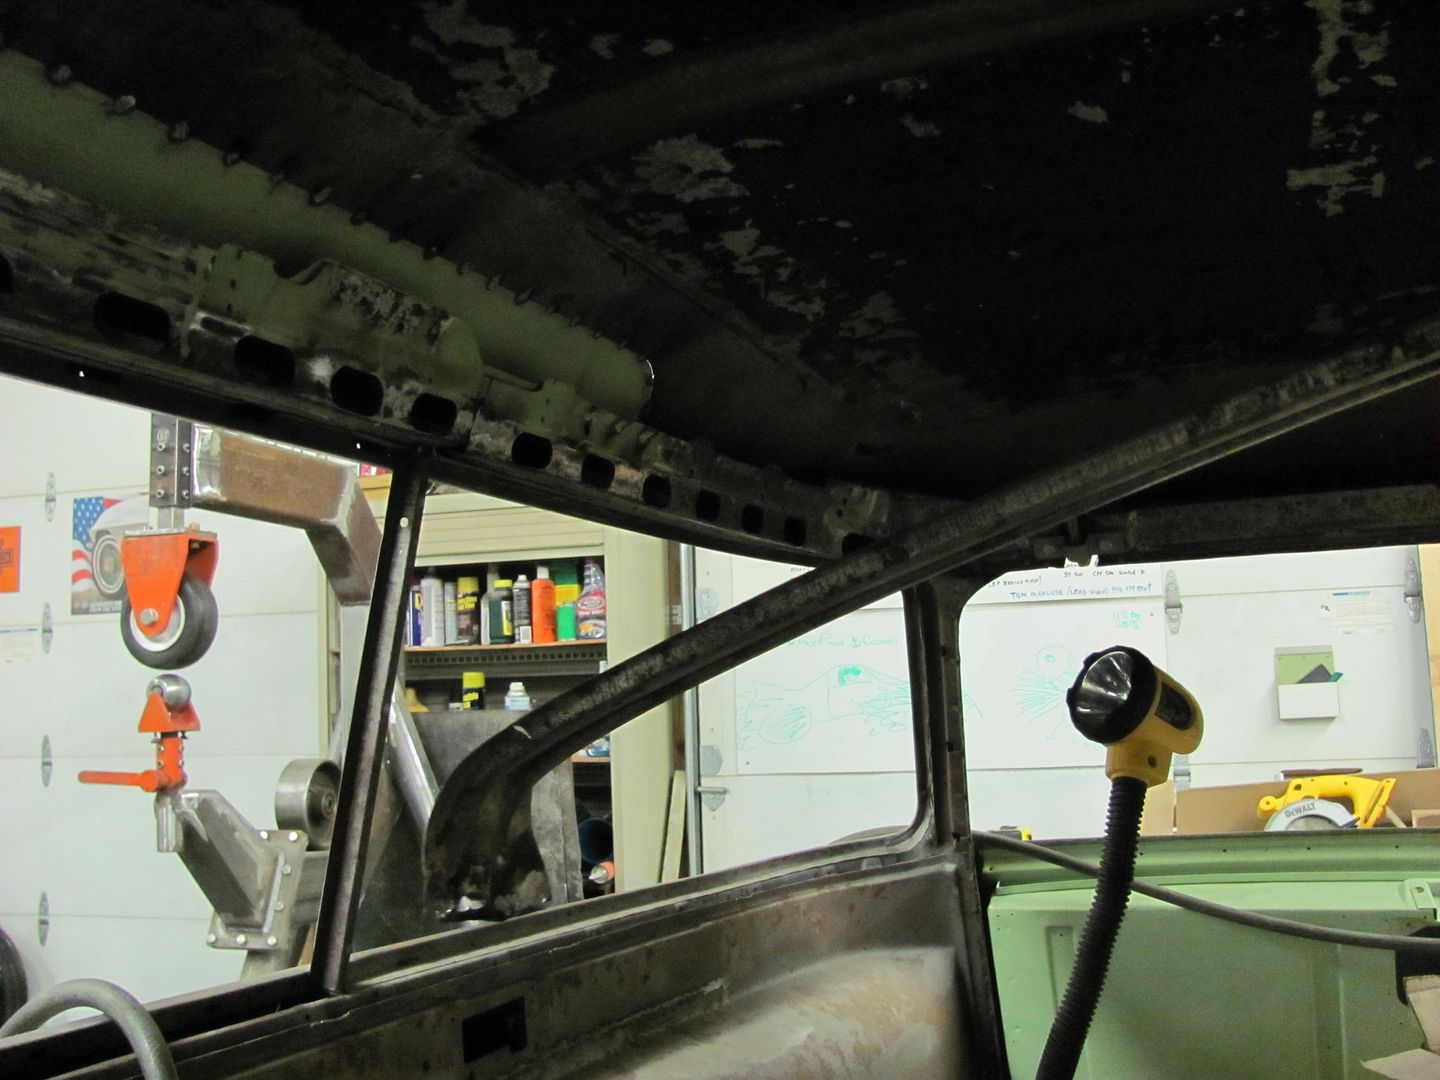
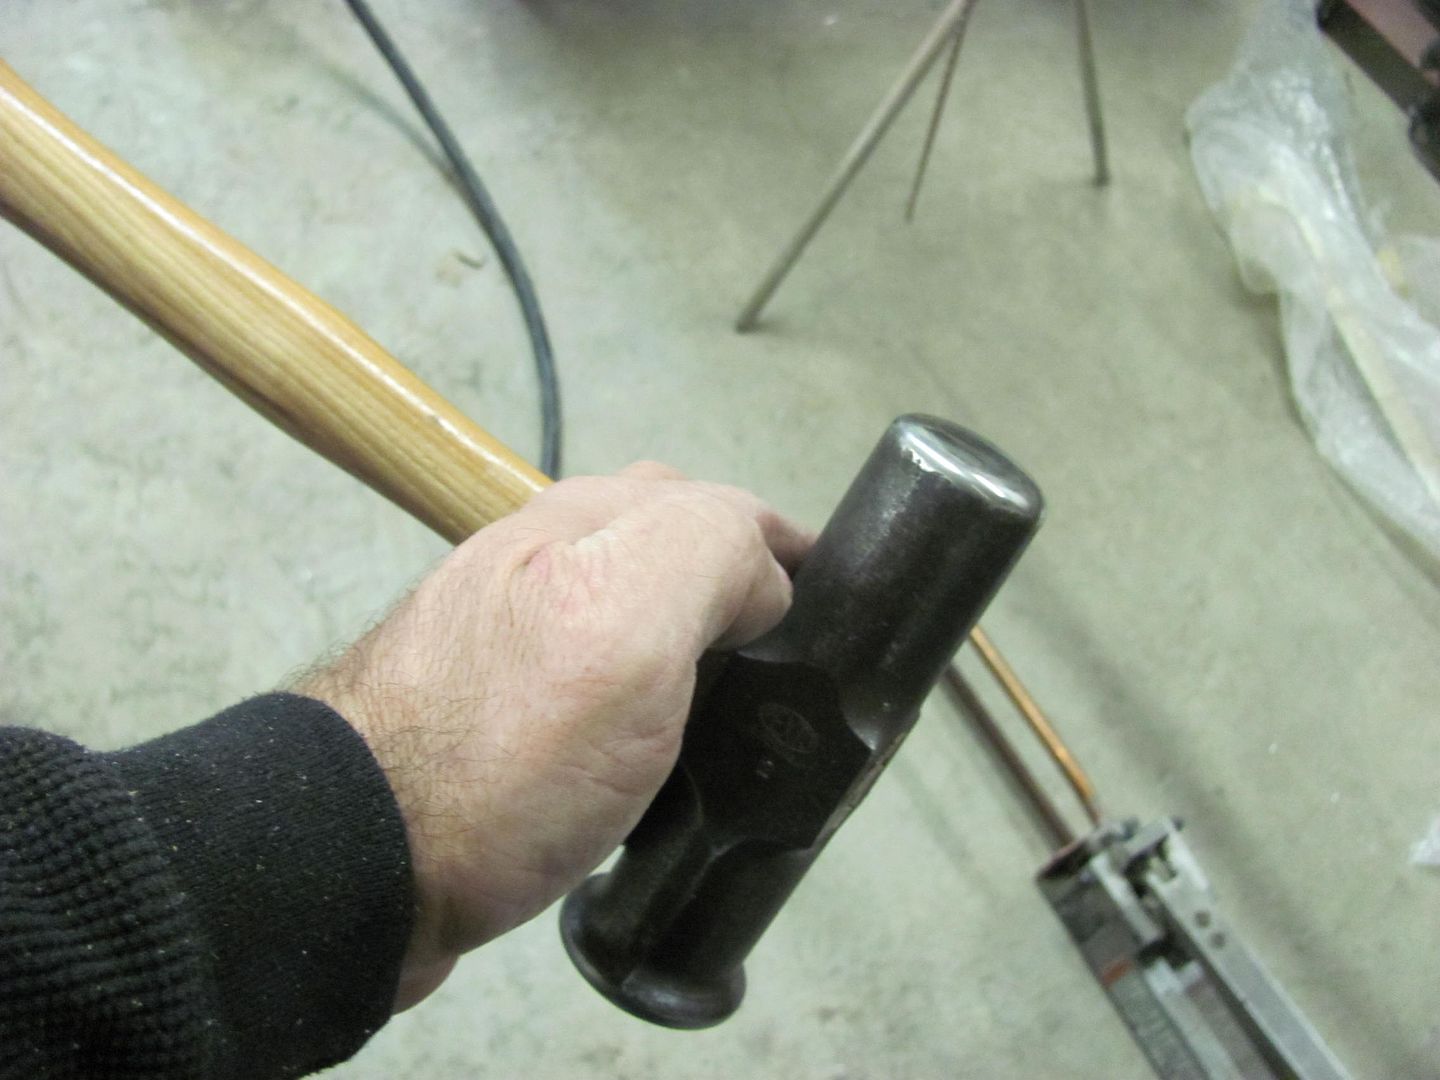
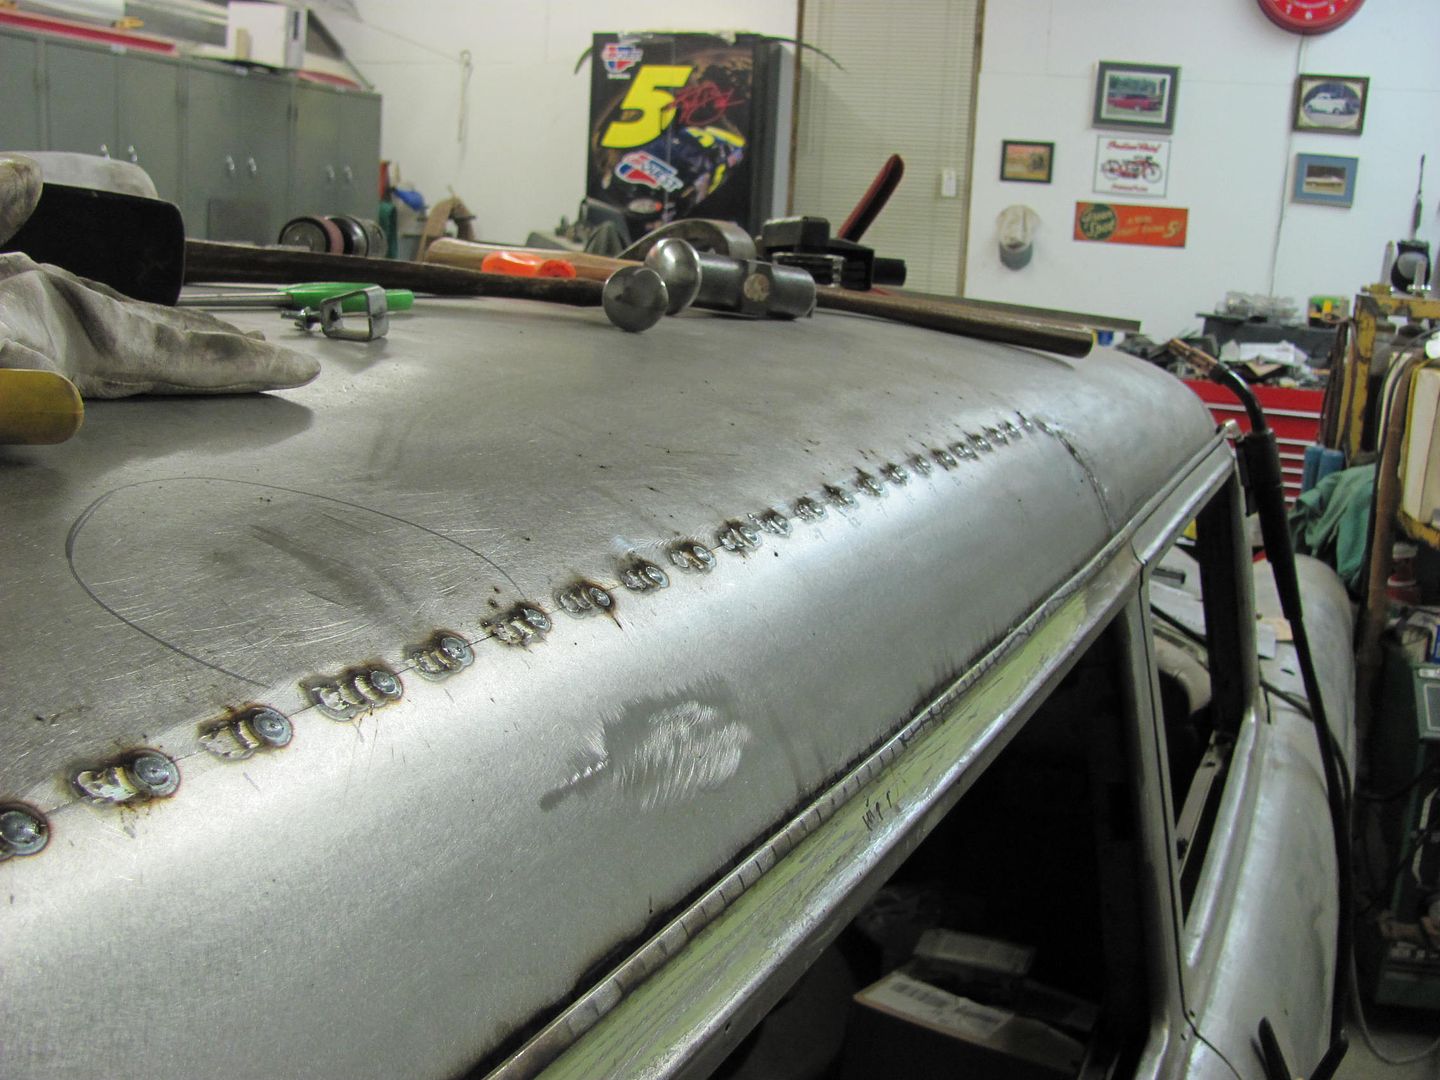
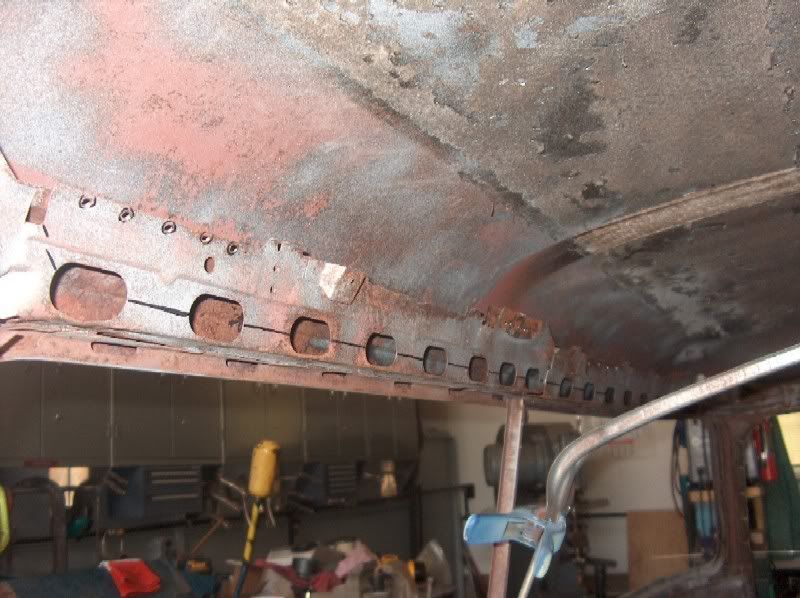
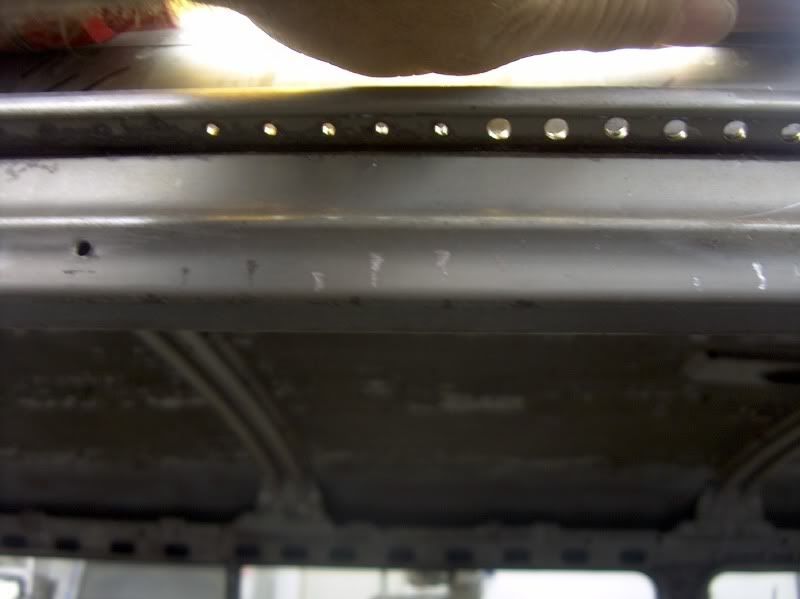
    If you've never seen what holds the roof on, there are about a gazillion spot welds that hold it down to the gutter. Maybe not that many, but when you are drilling them out, well it seems so.


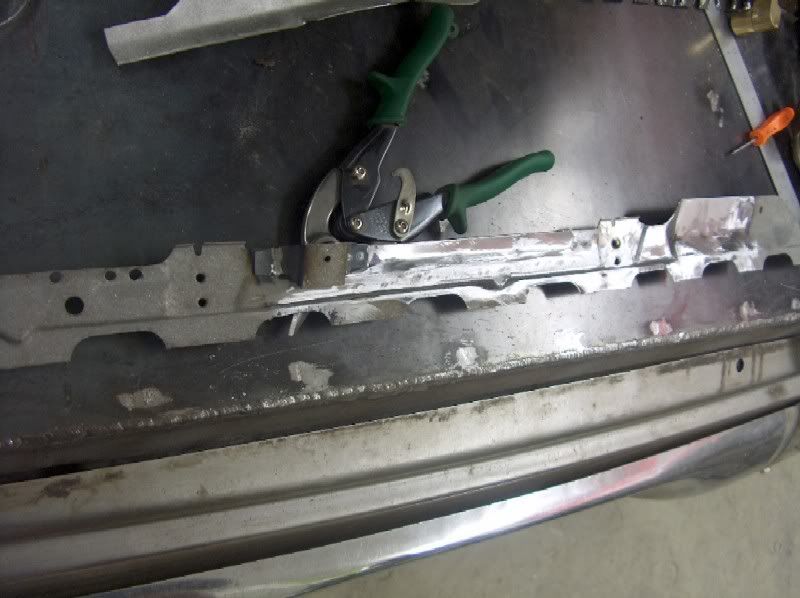
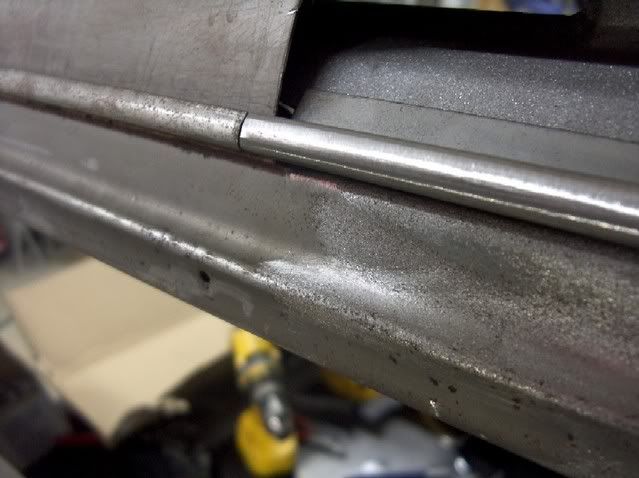
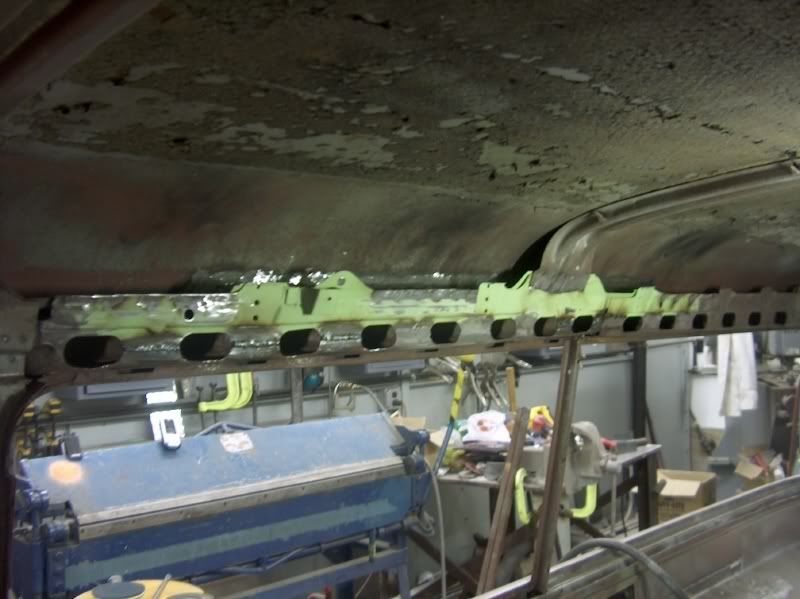
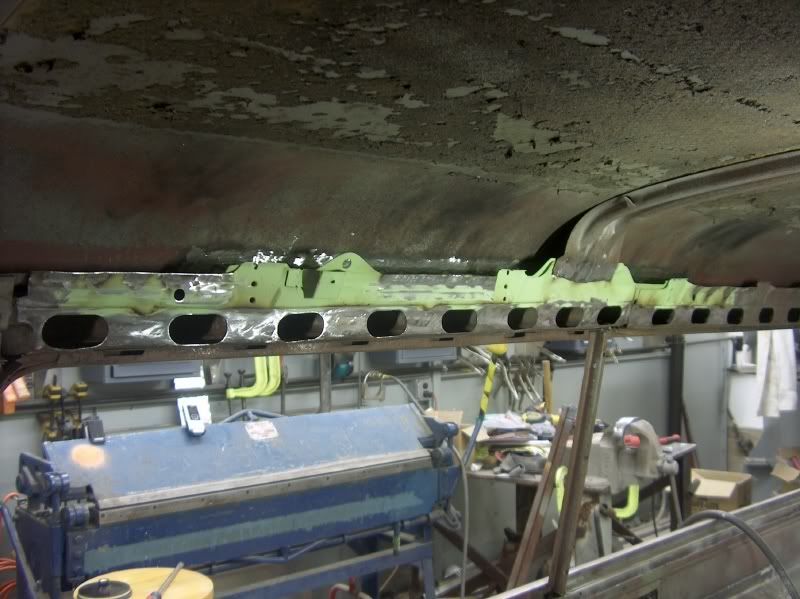
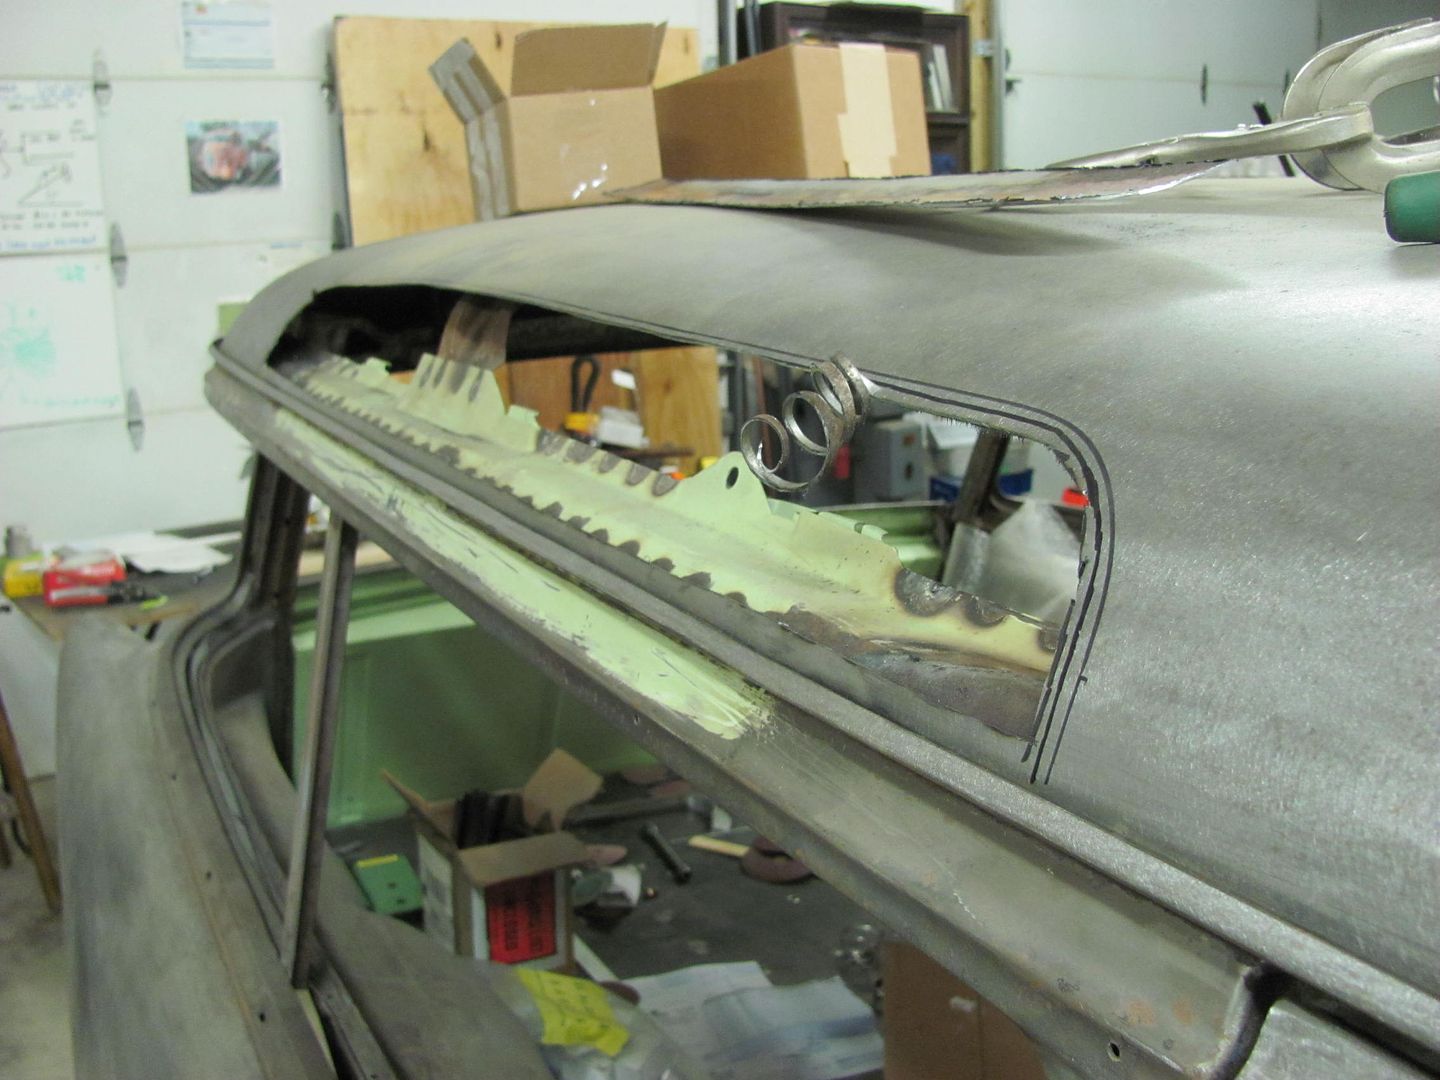
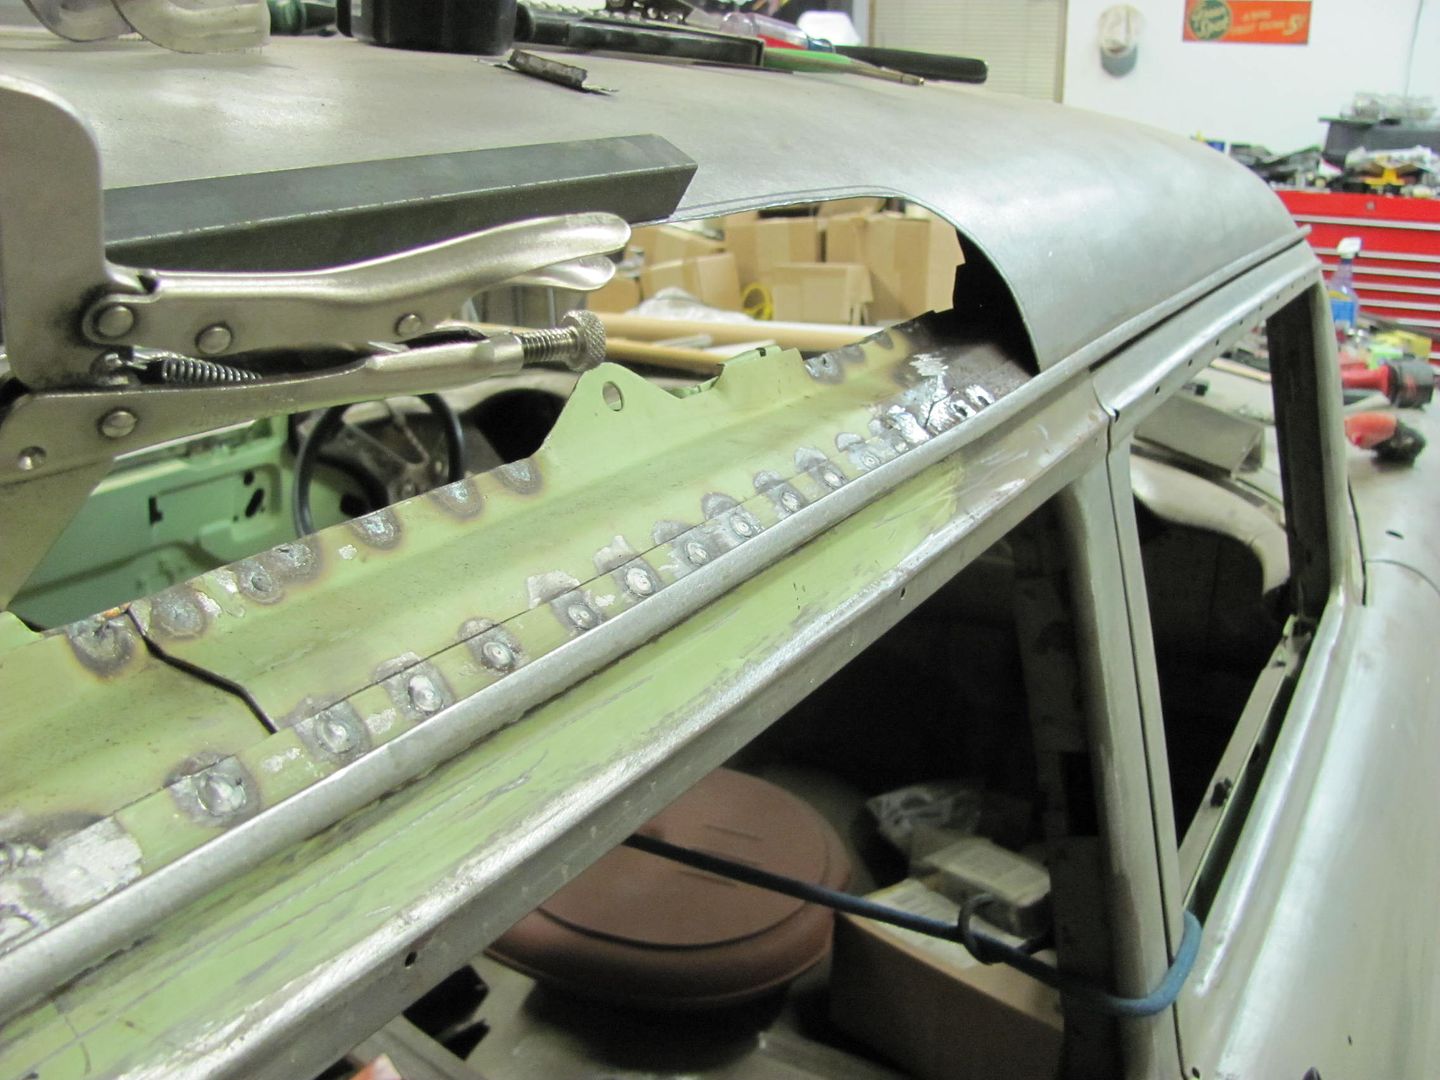
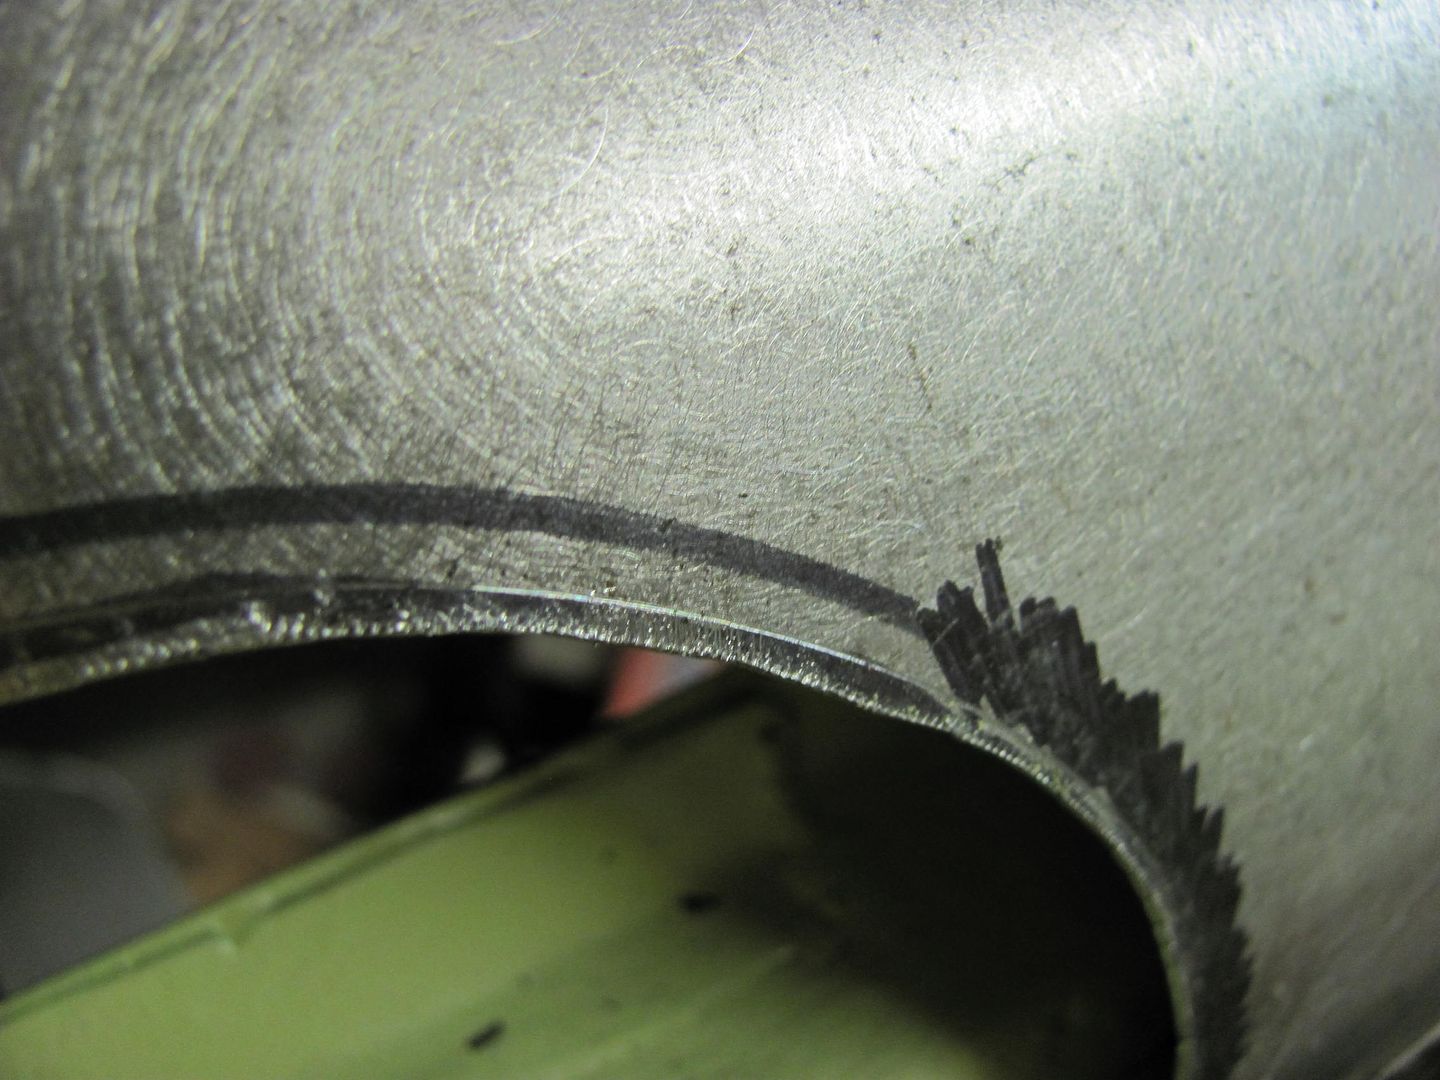
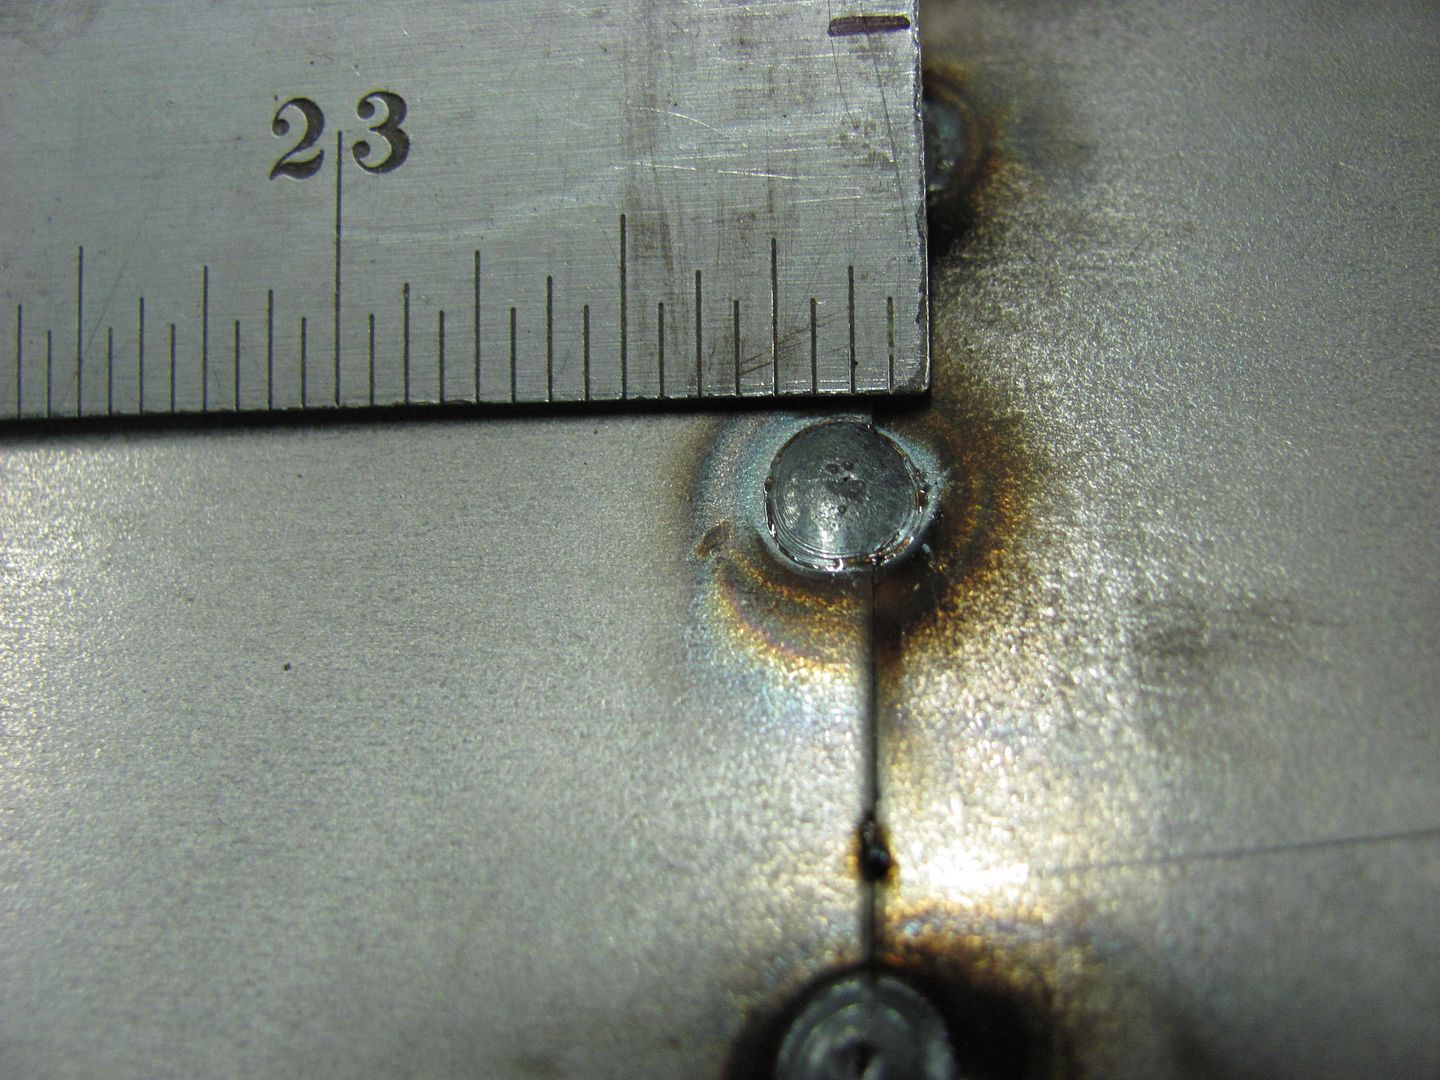
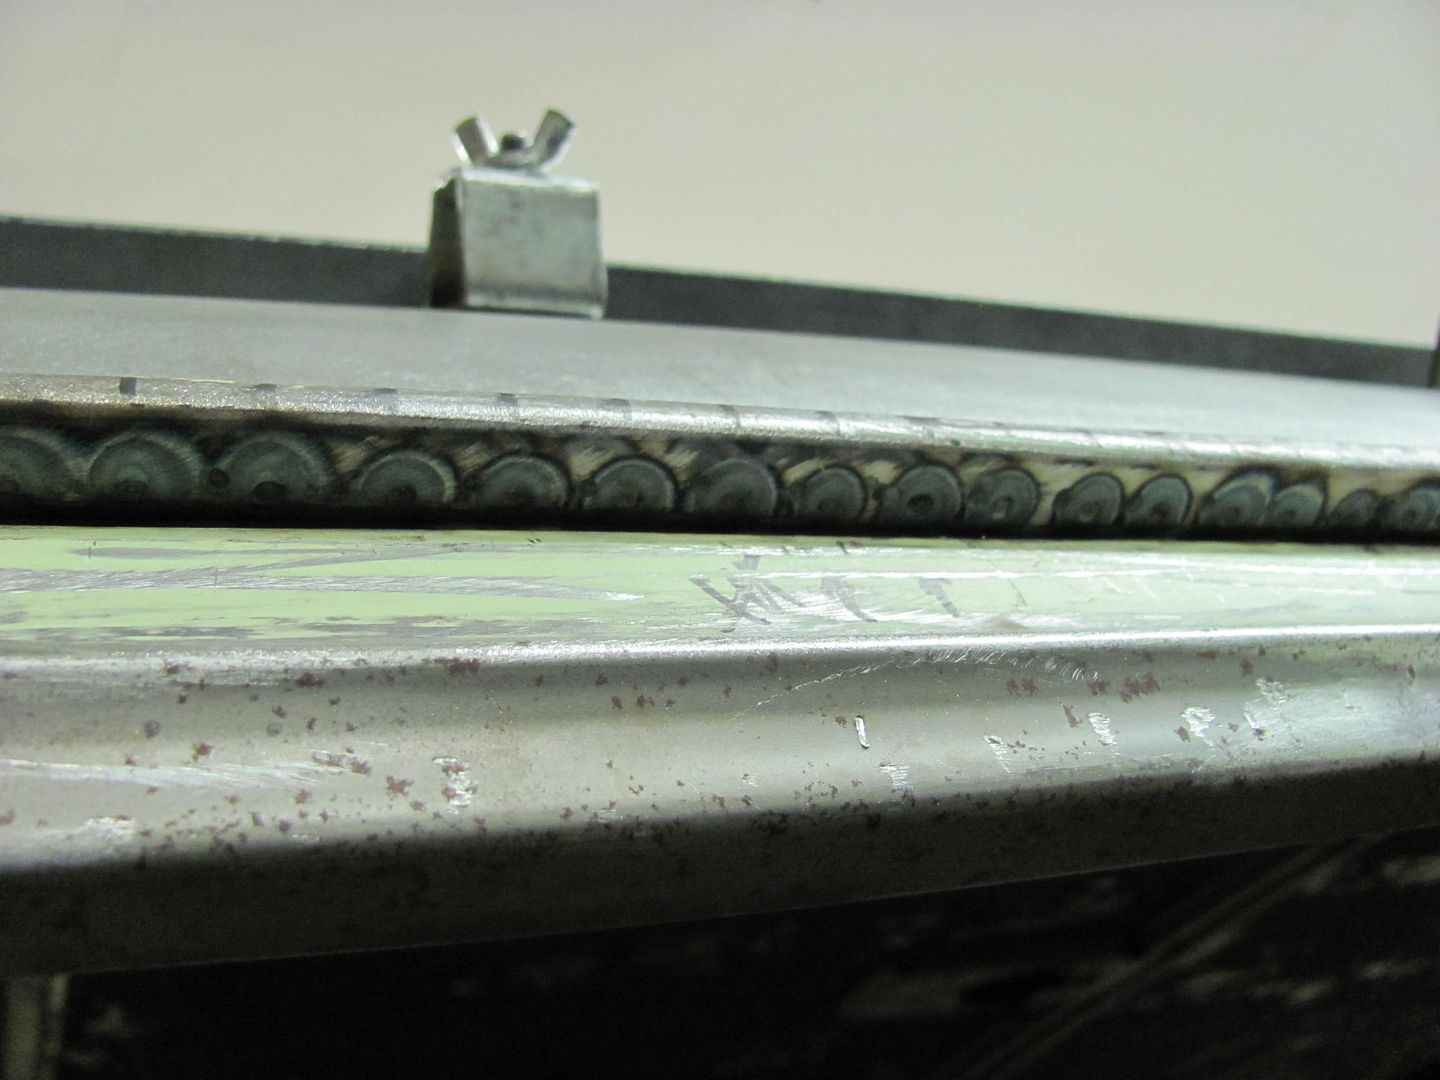
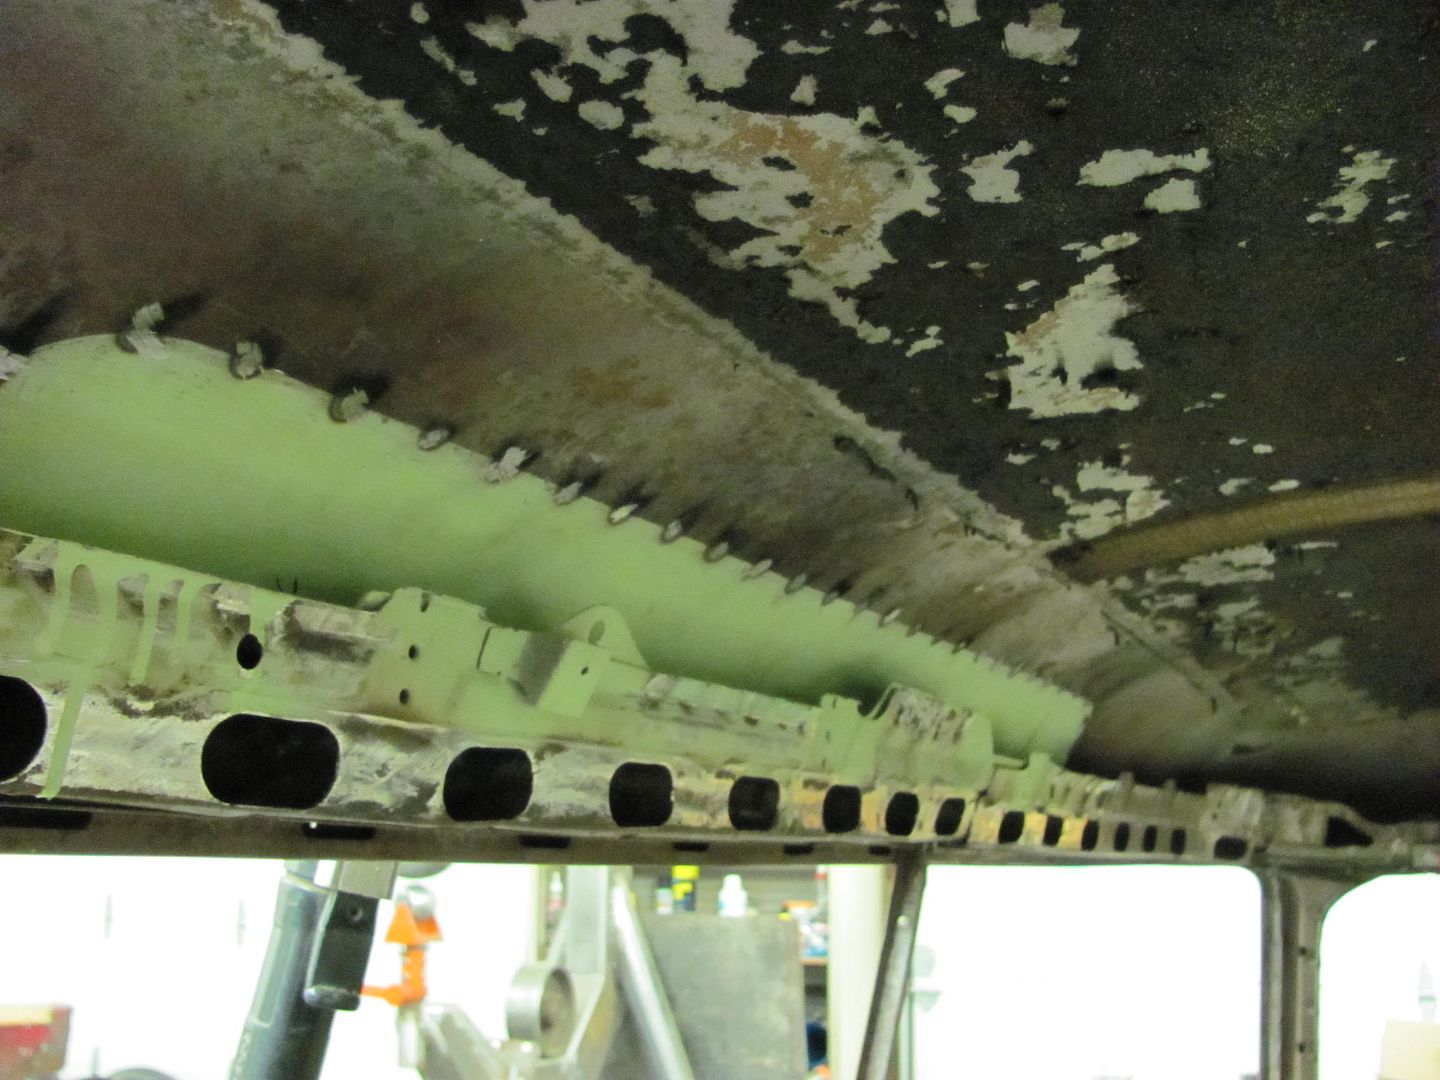
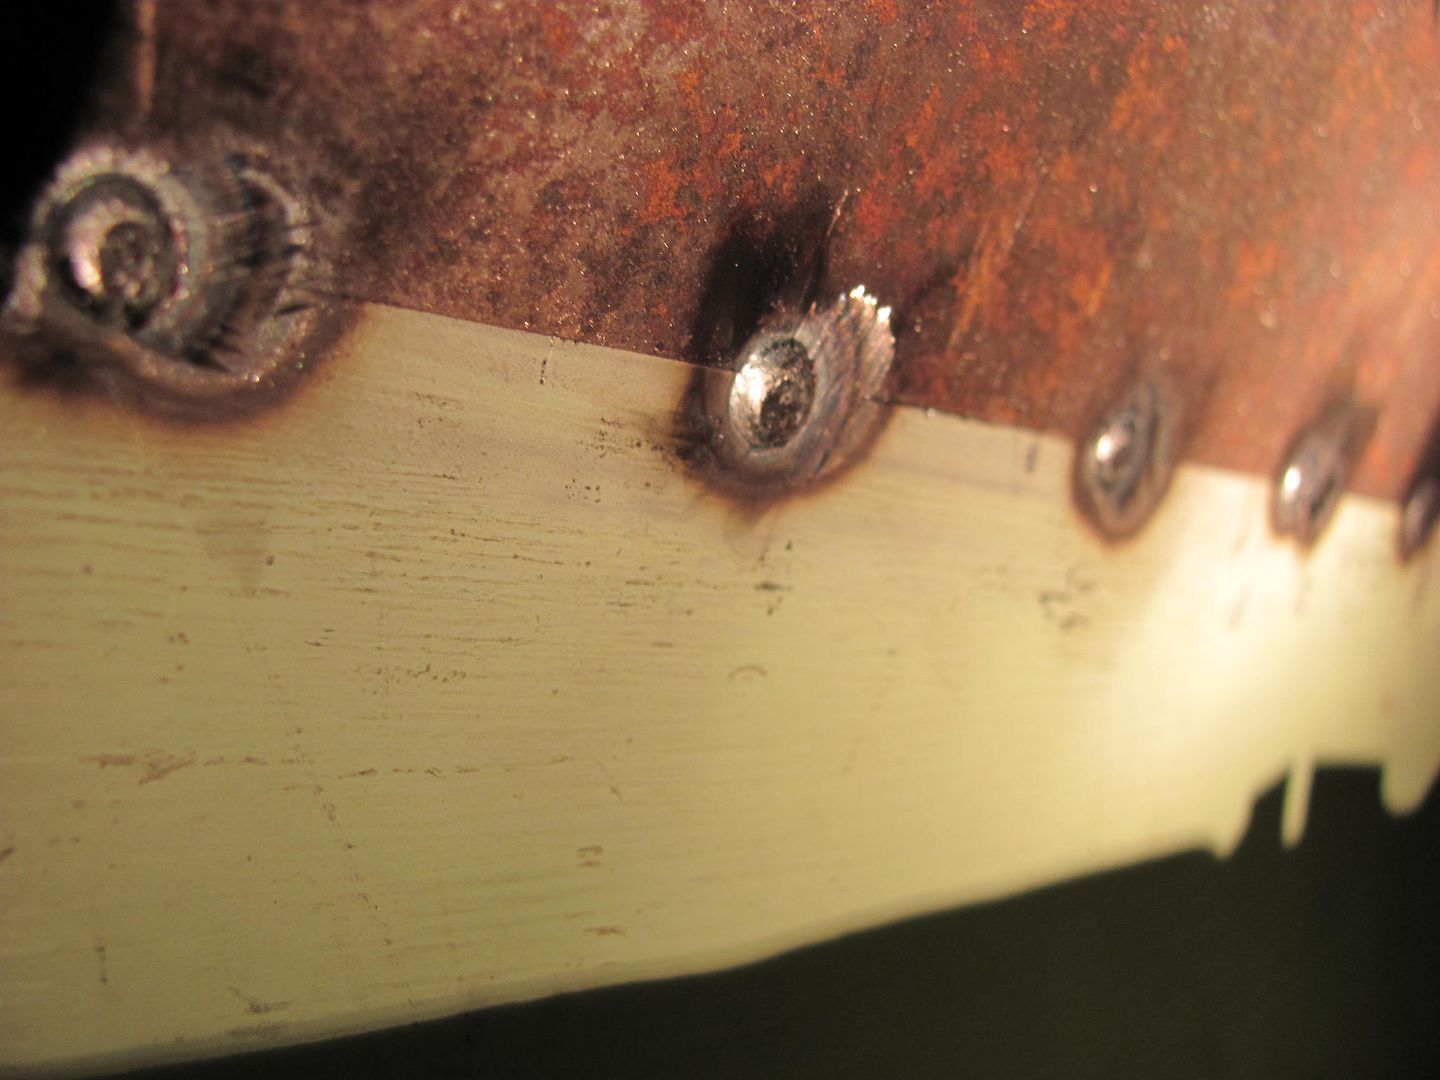
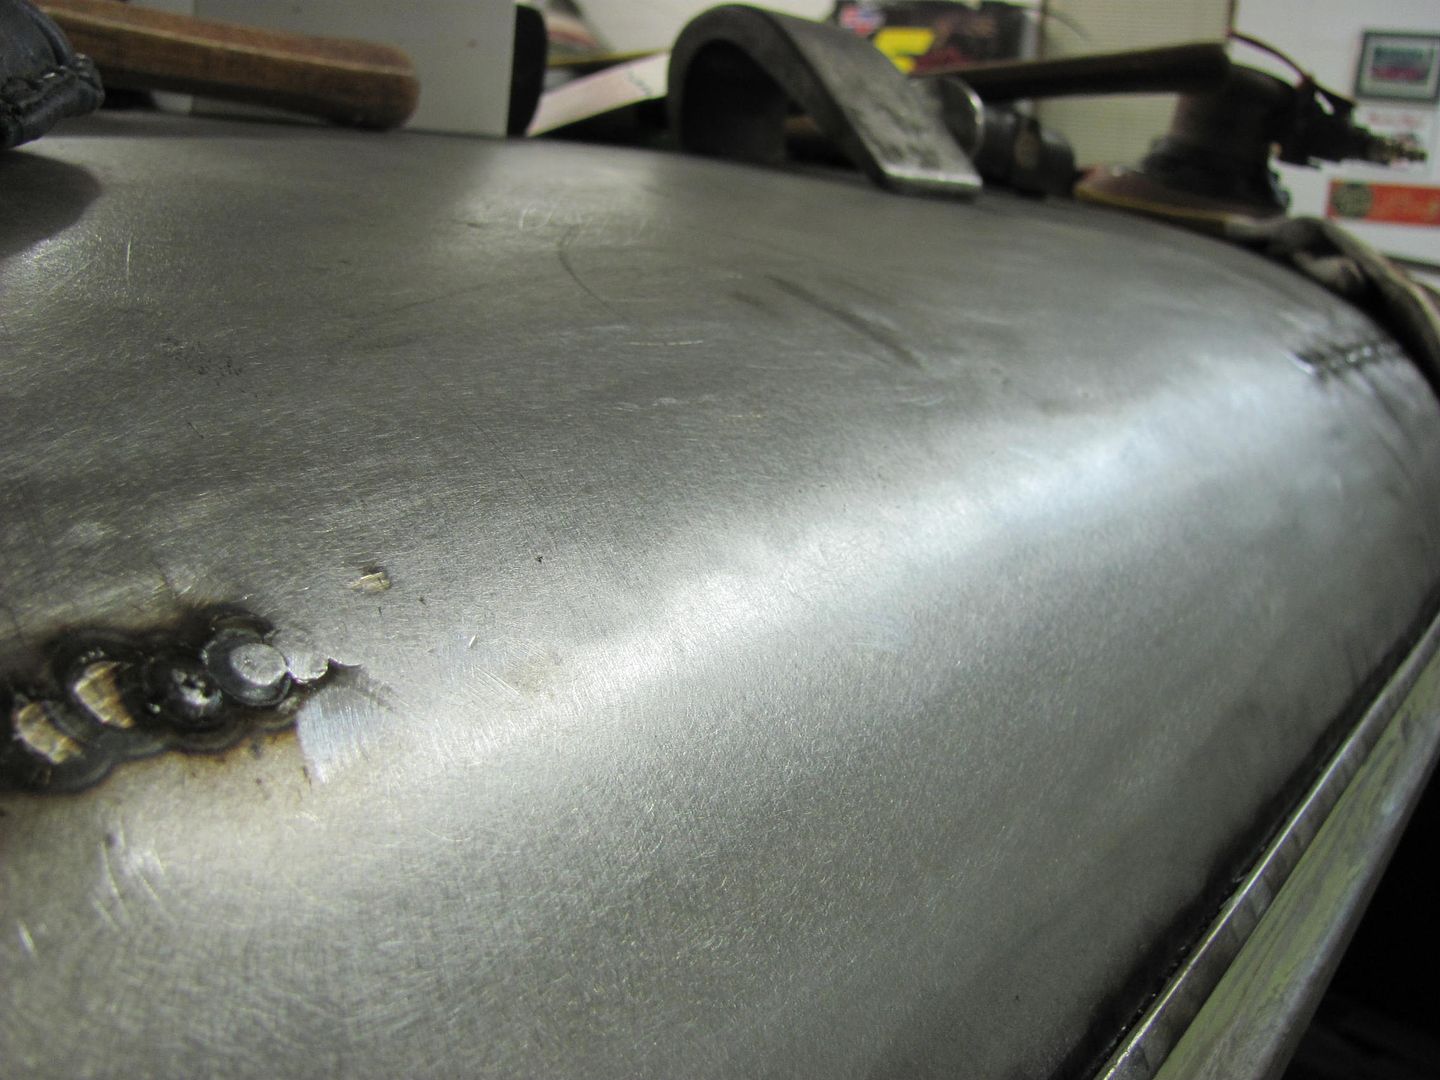
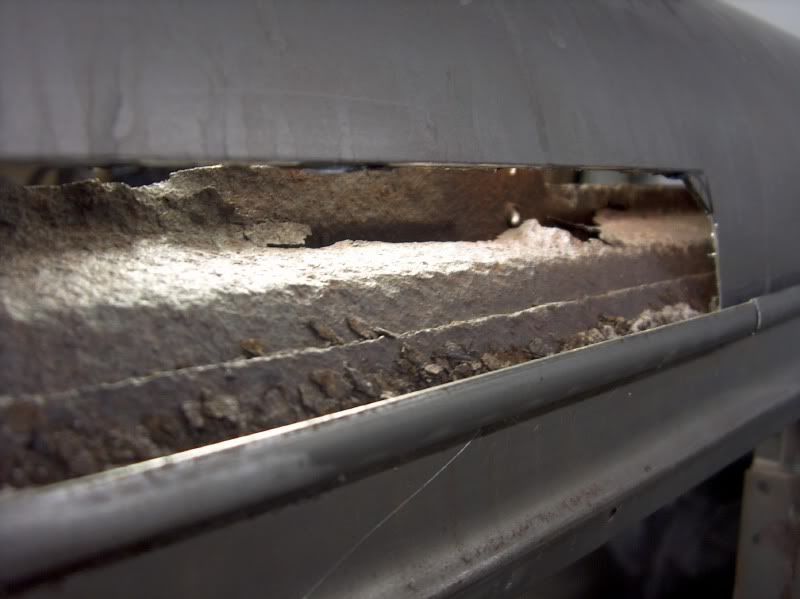
    Once all the spot welds are drilled out, it is easily removed. This is going from bad to worse. The rain gutter doesn't look too healthy inside.


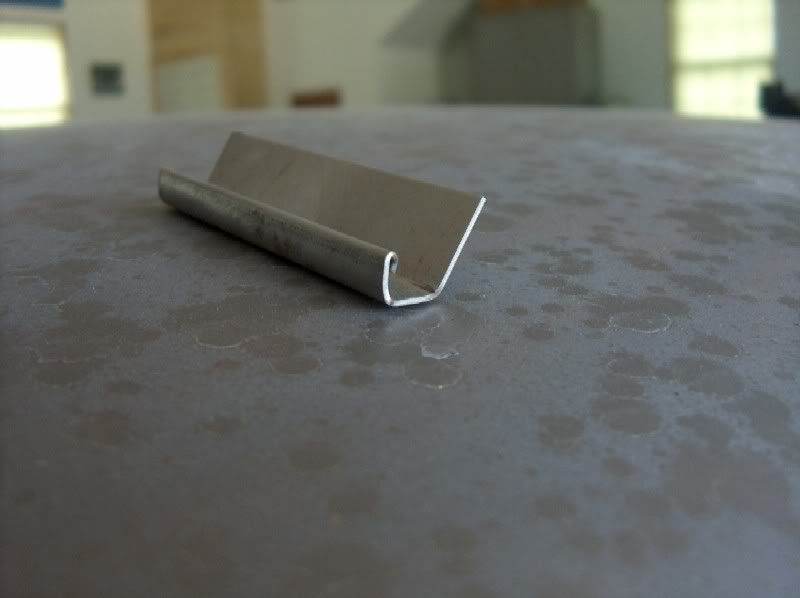
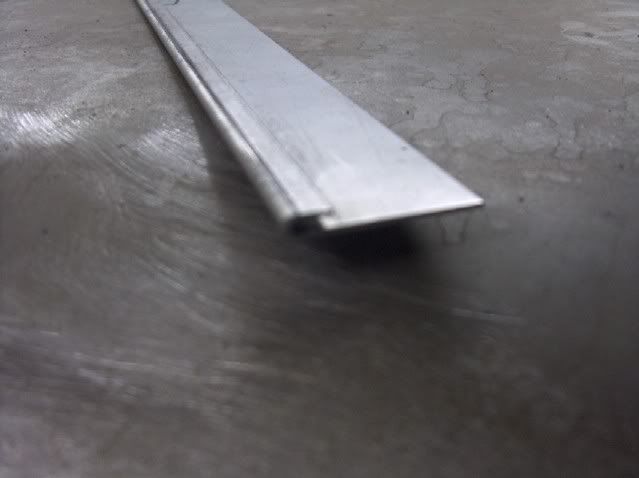
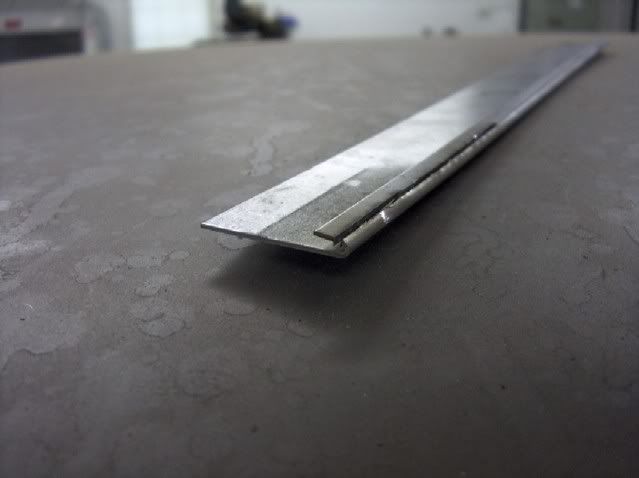
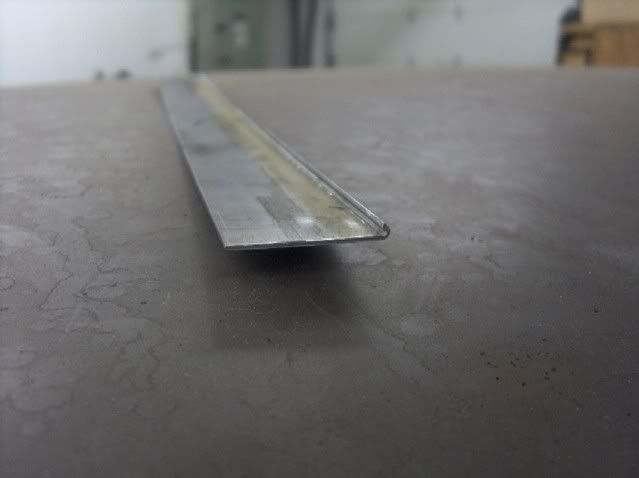
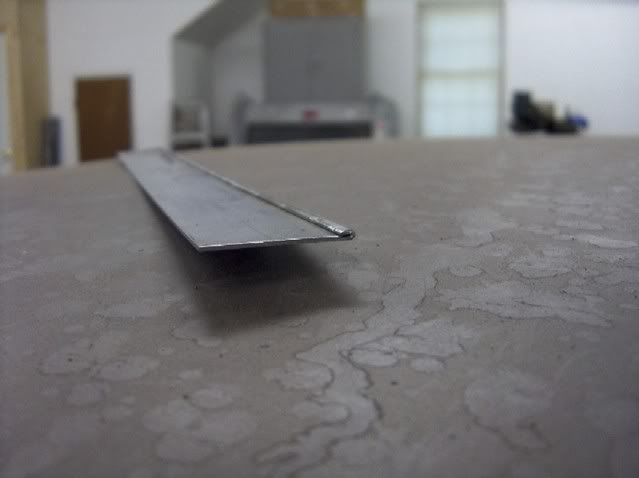
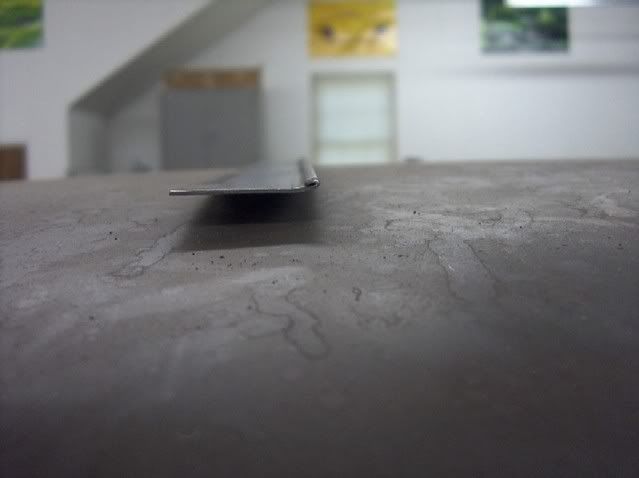
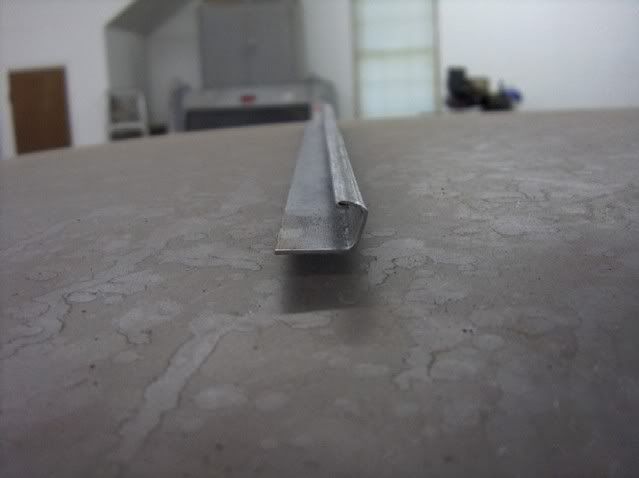
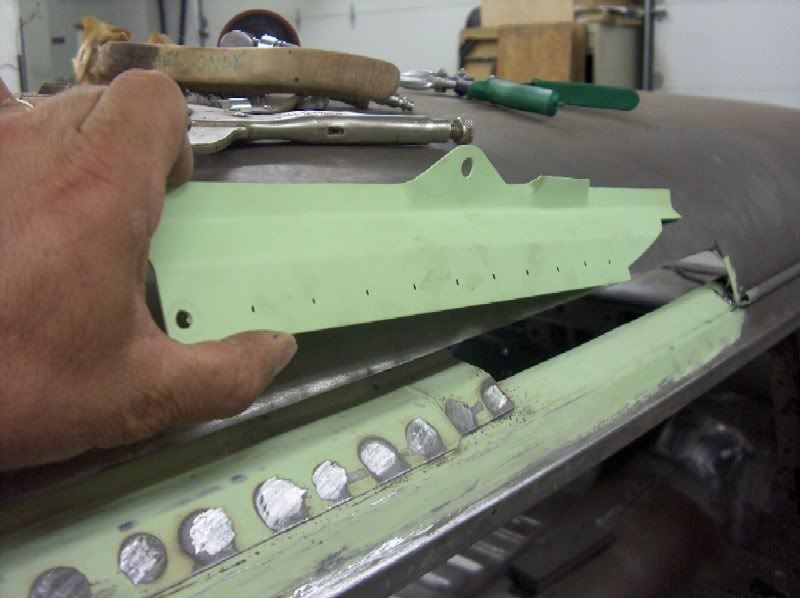
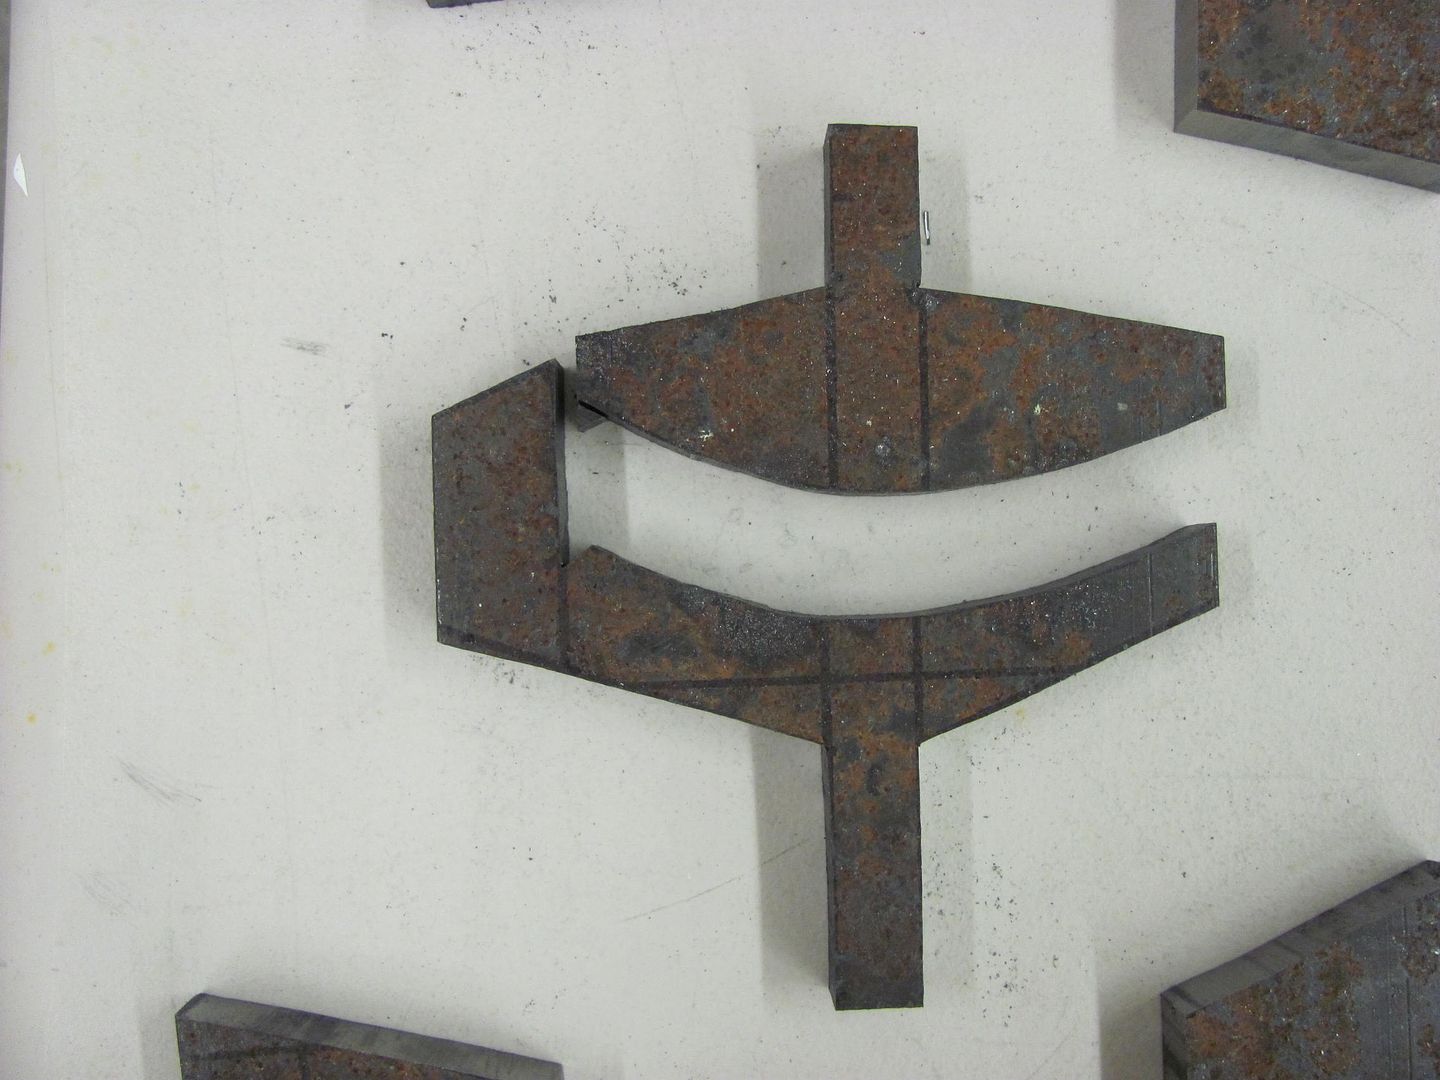
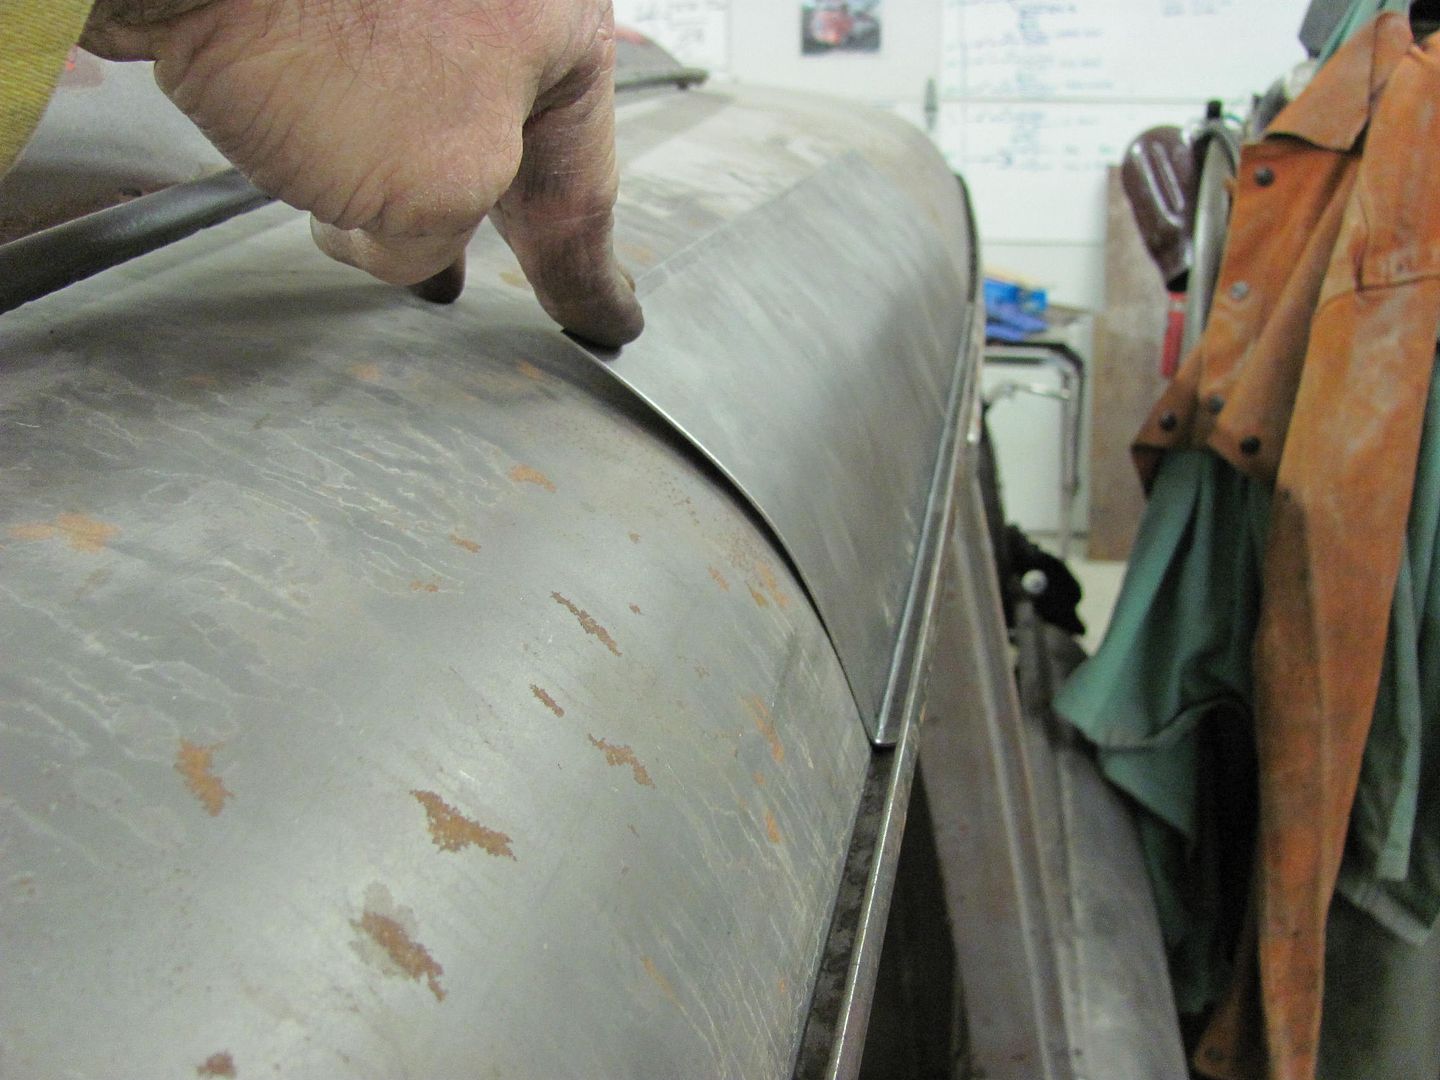
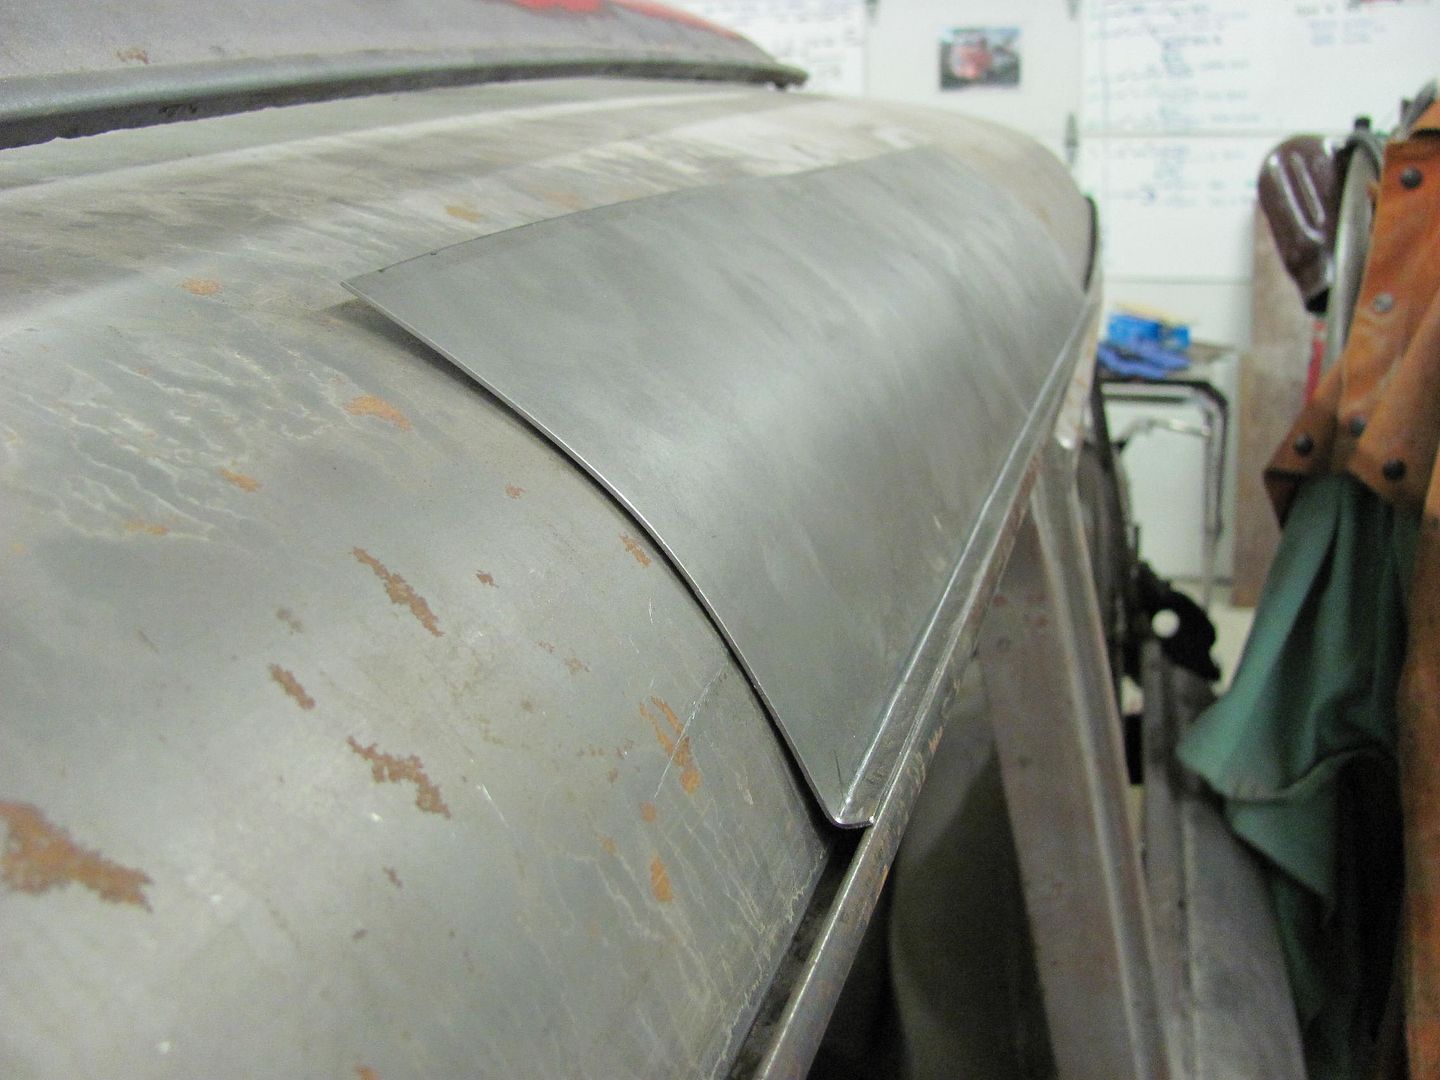
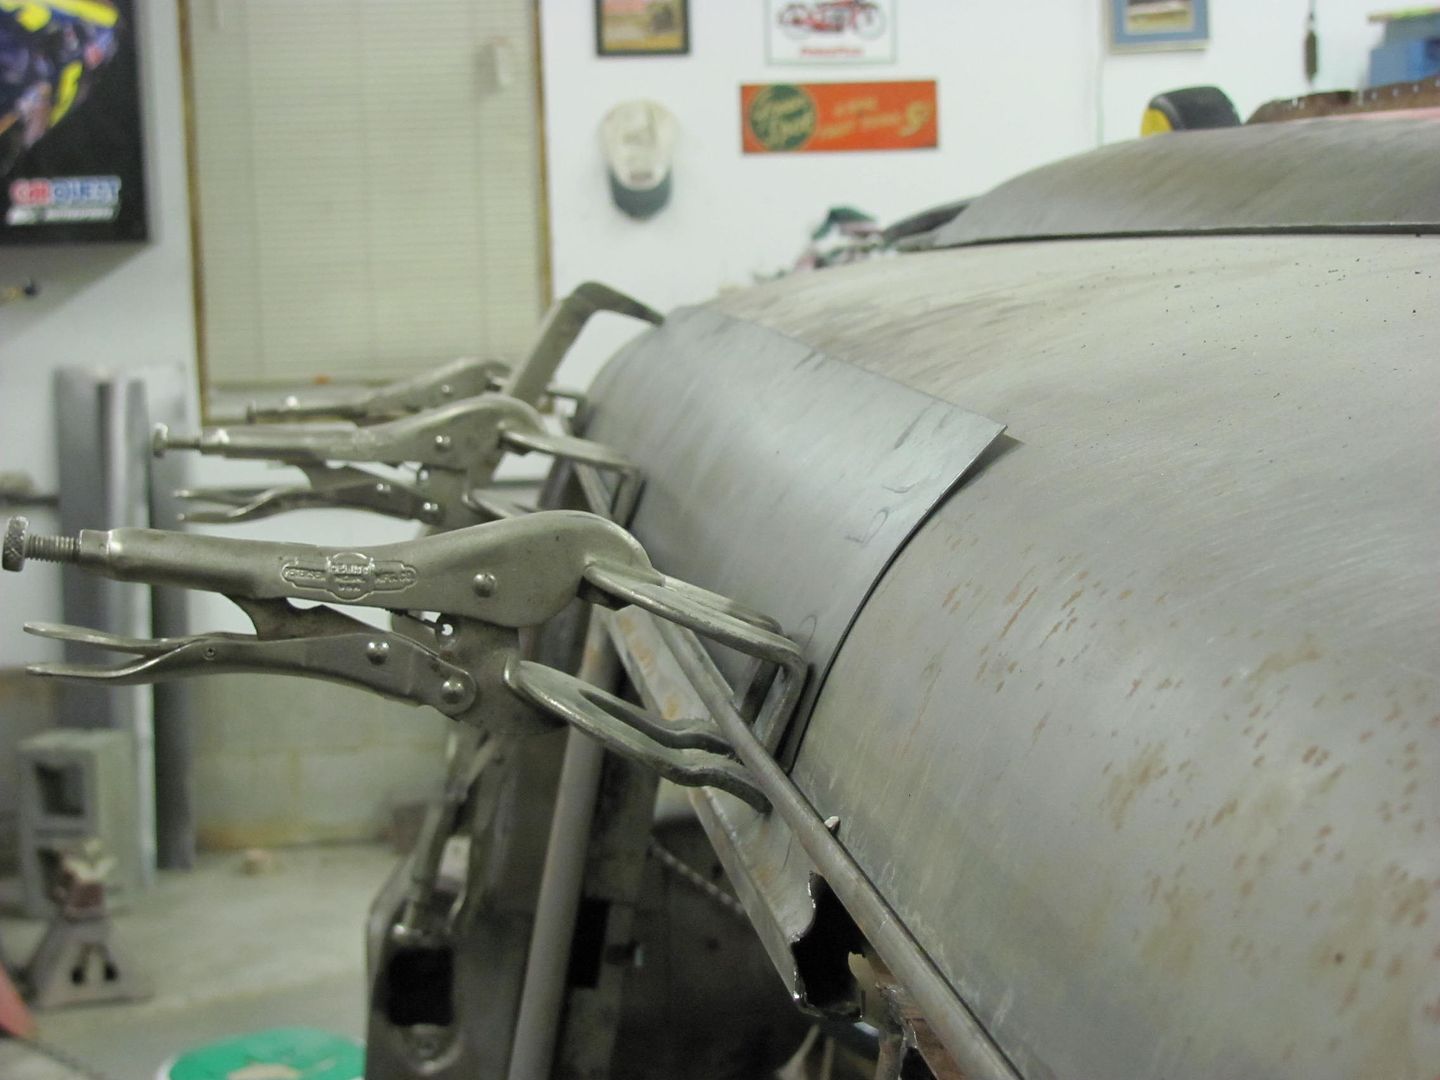
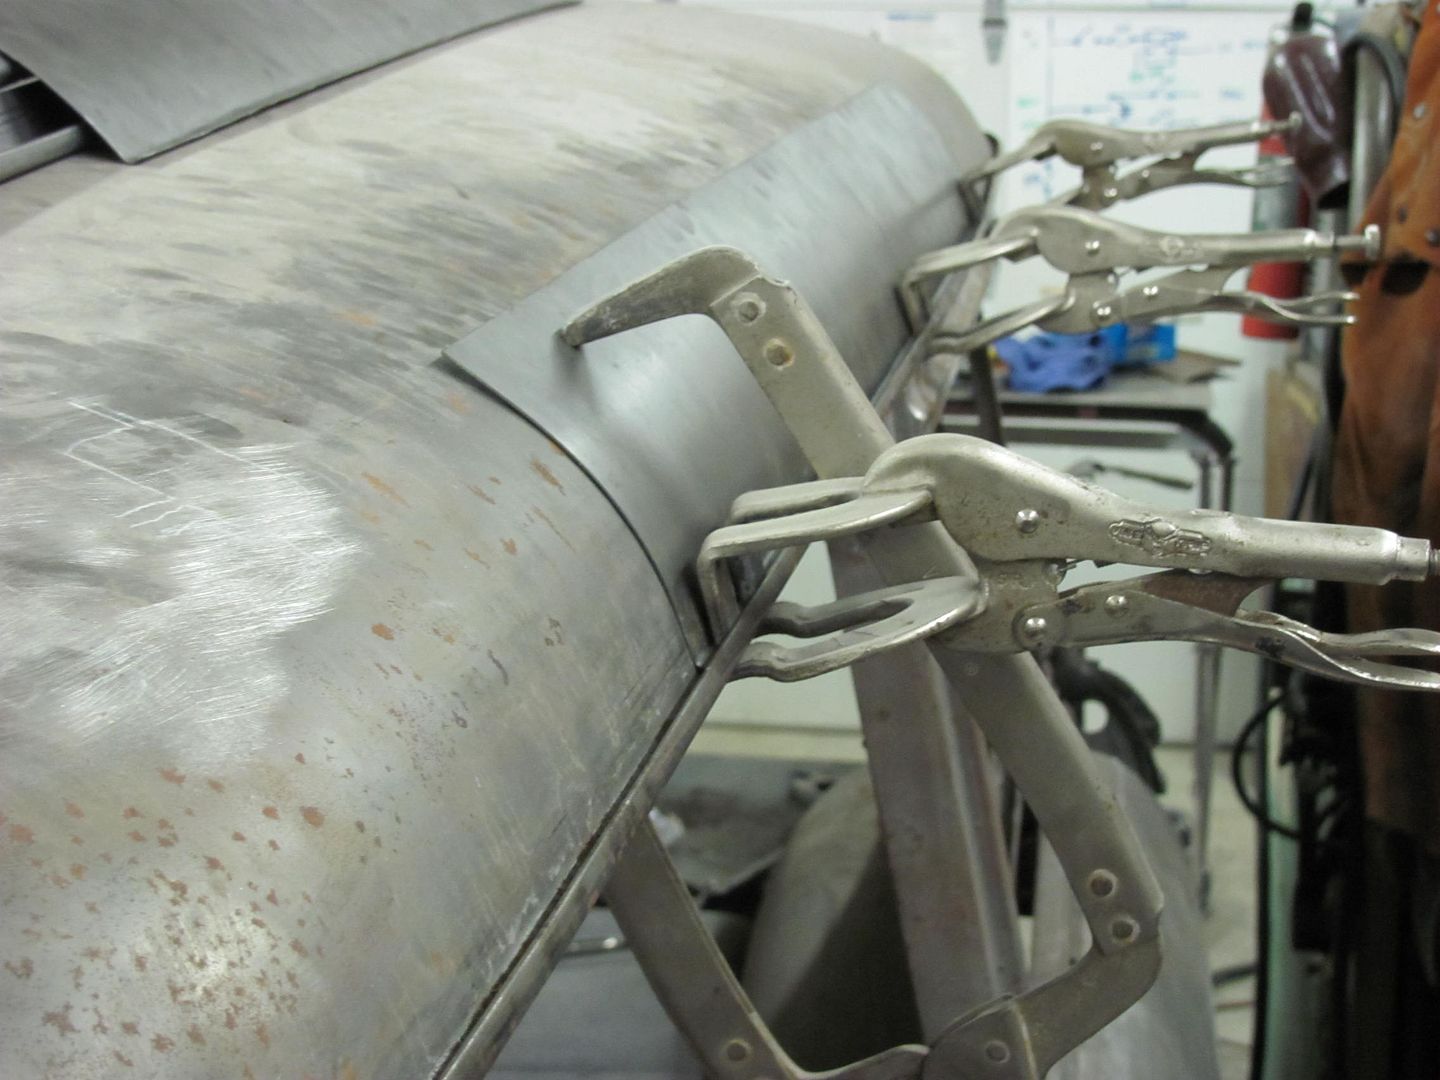
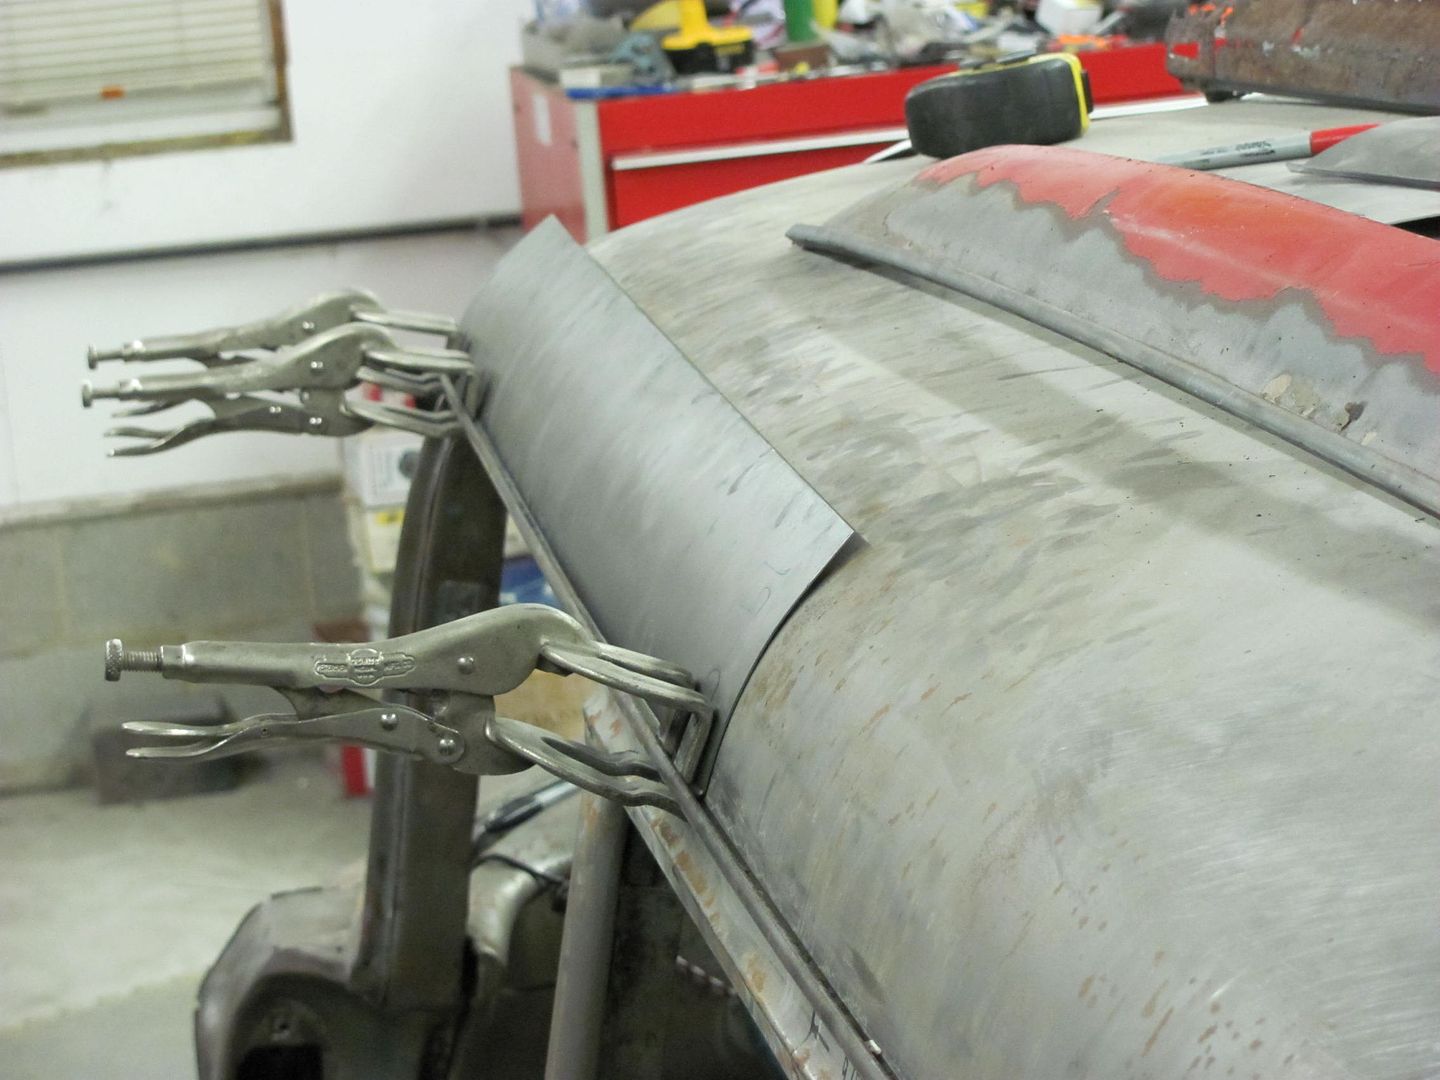
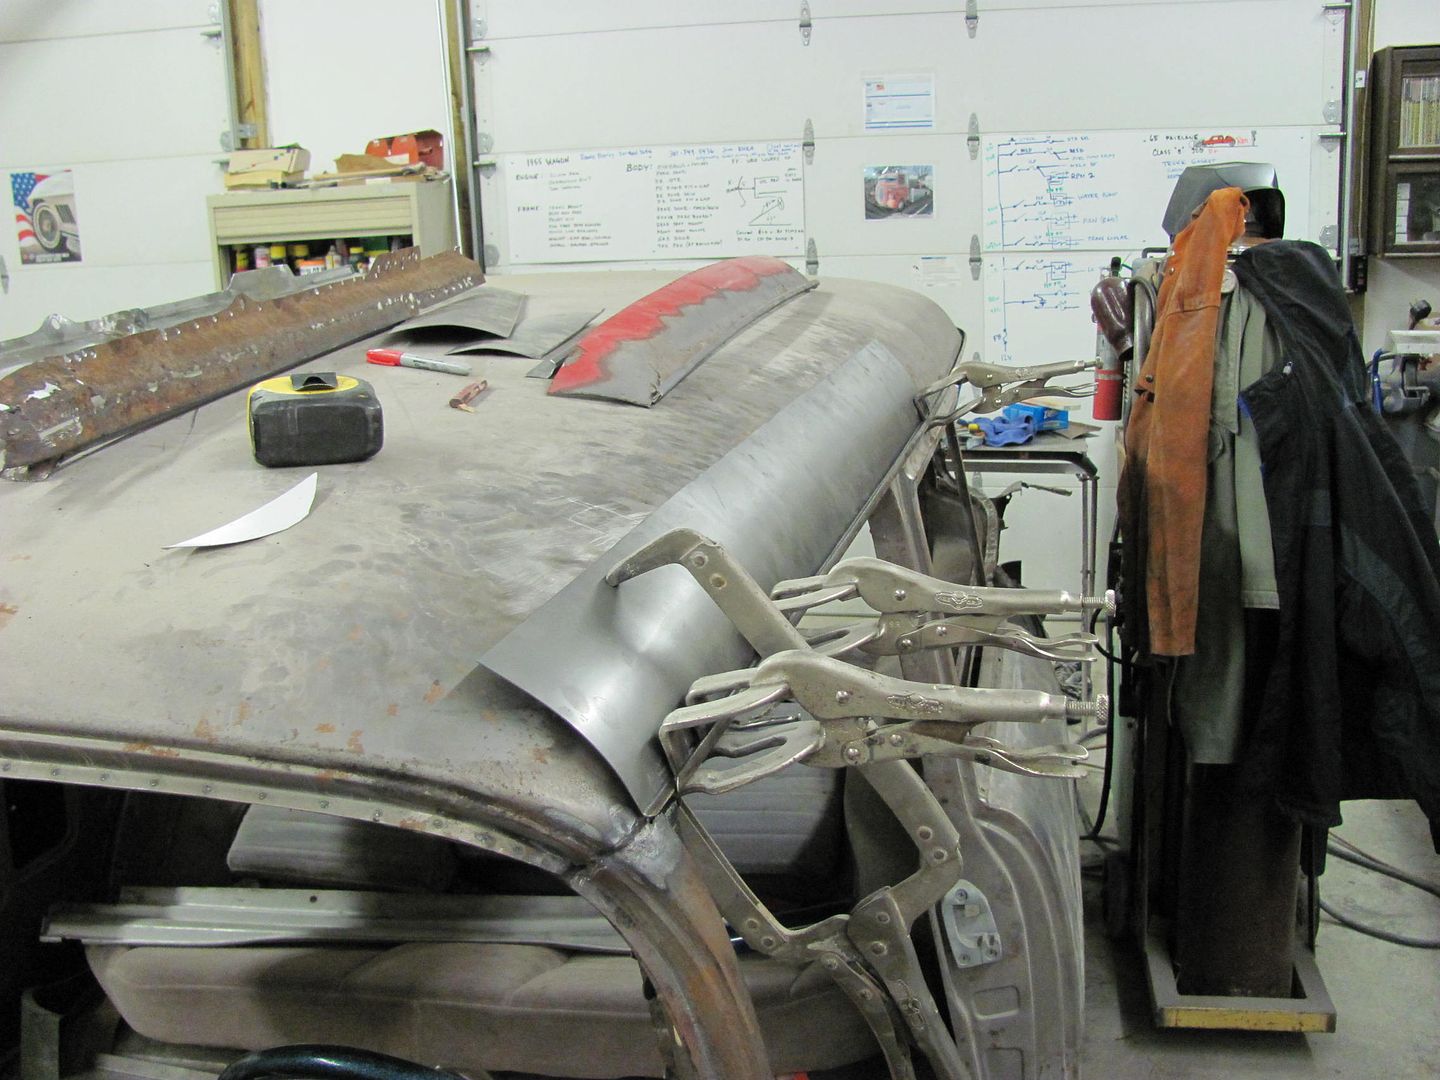
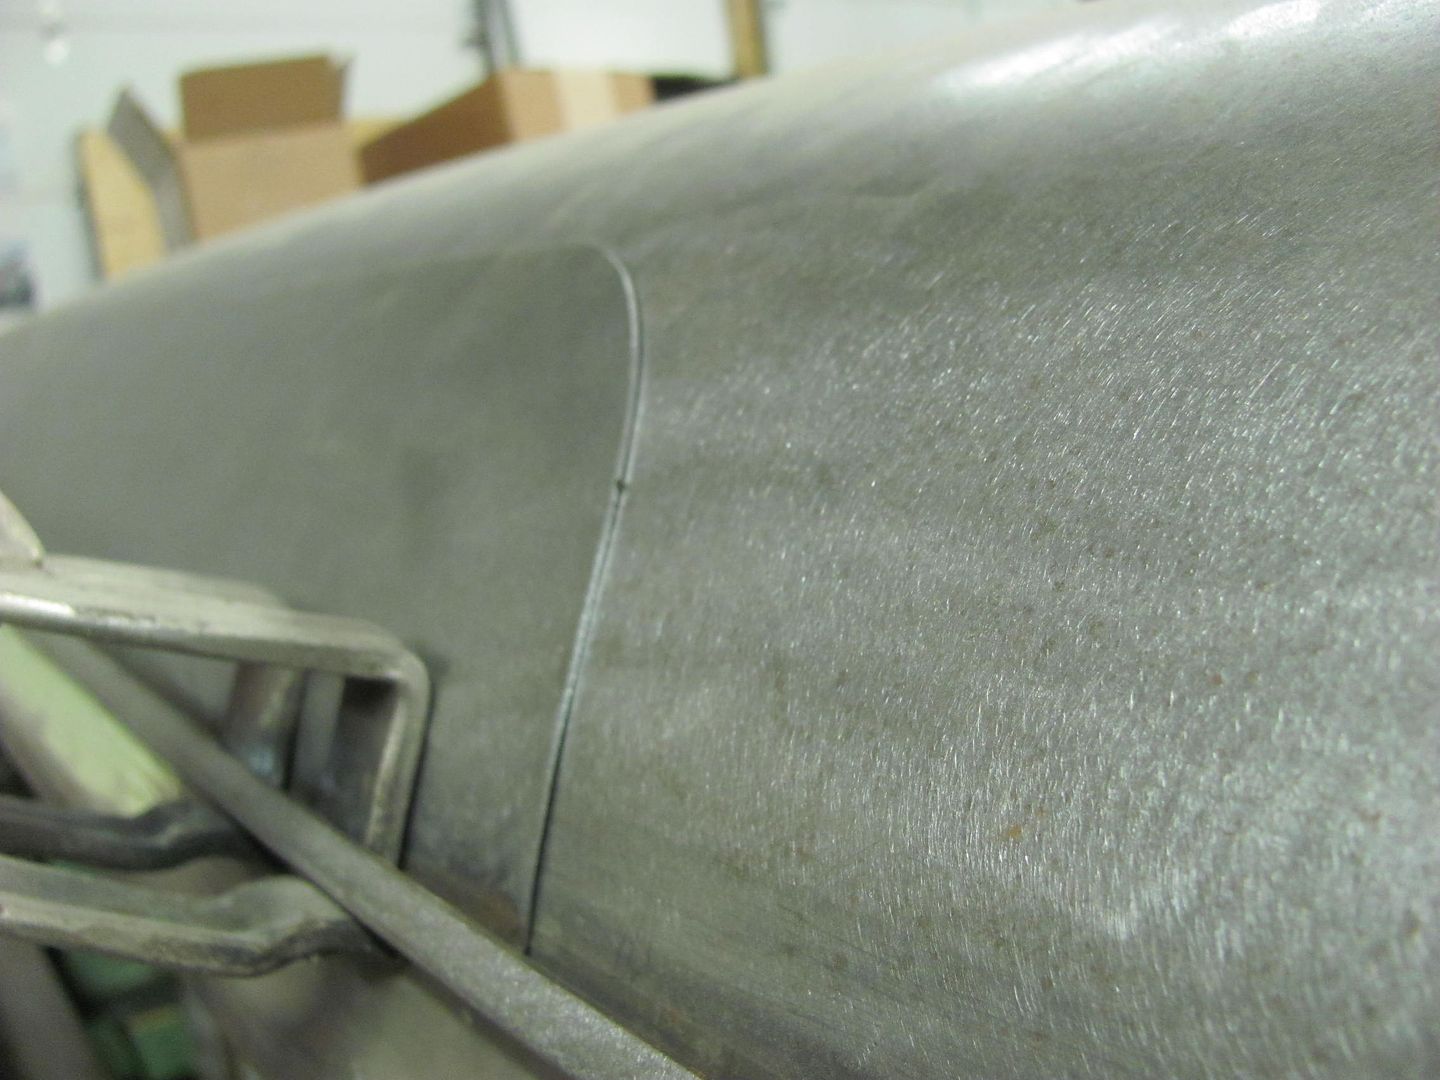
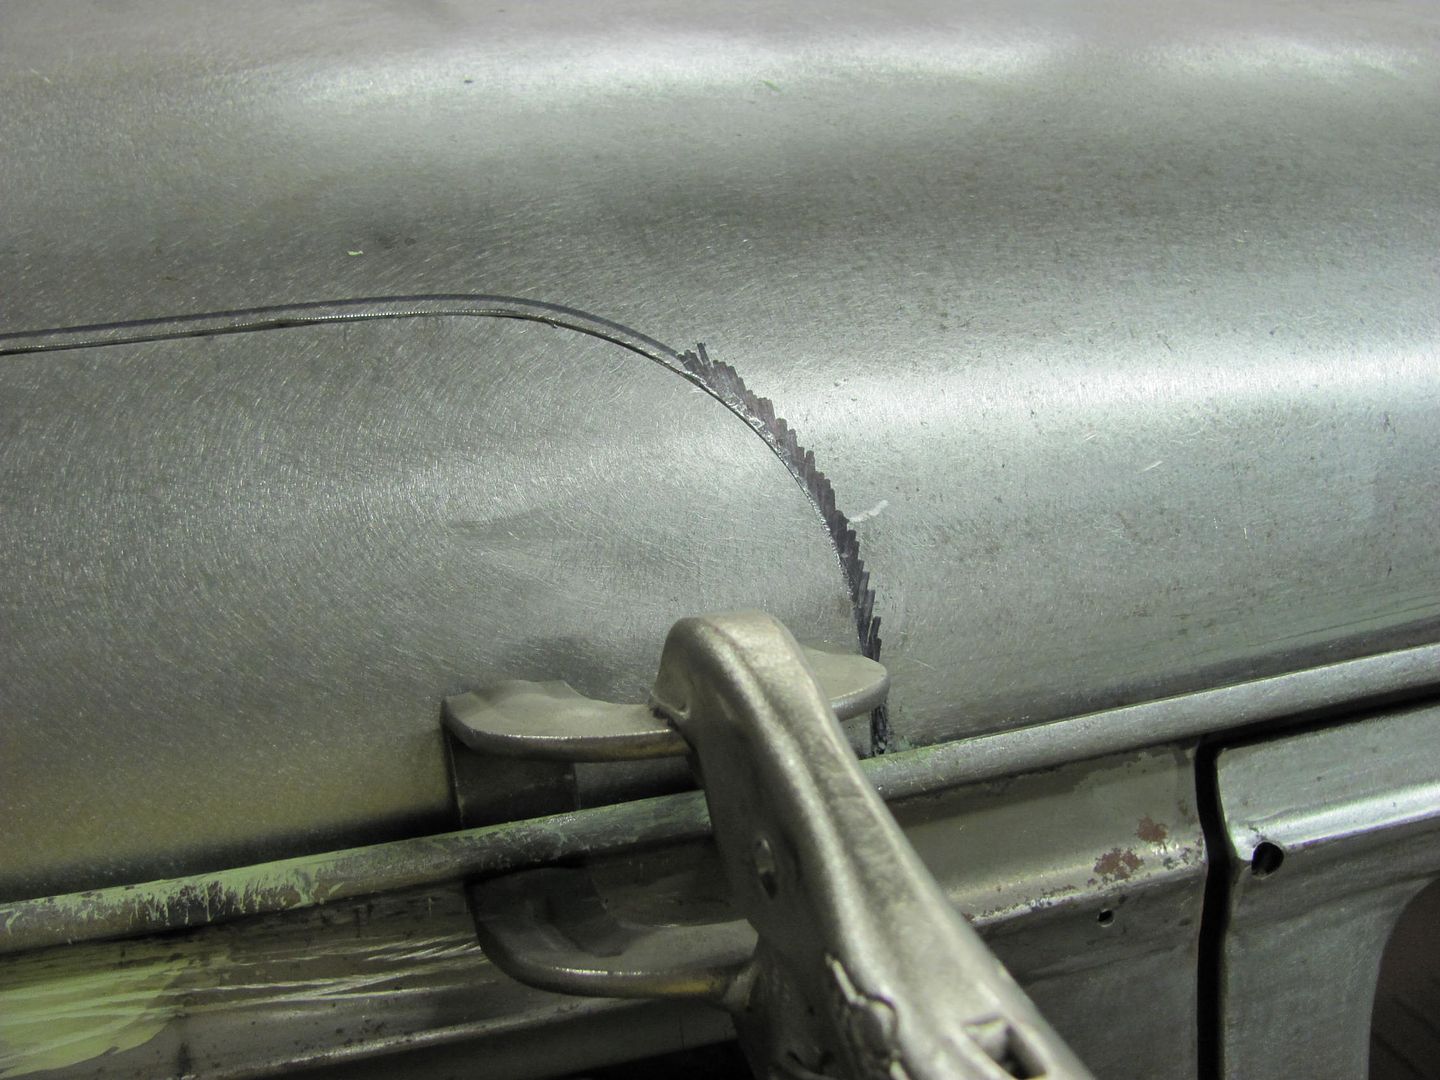
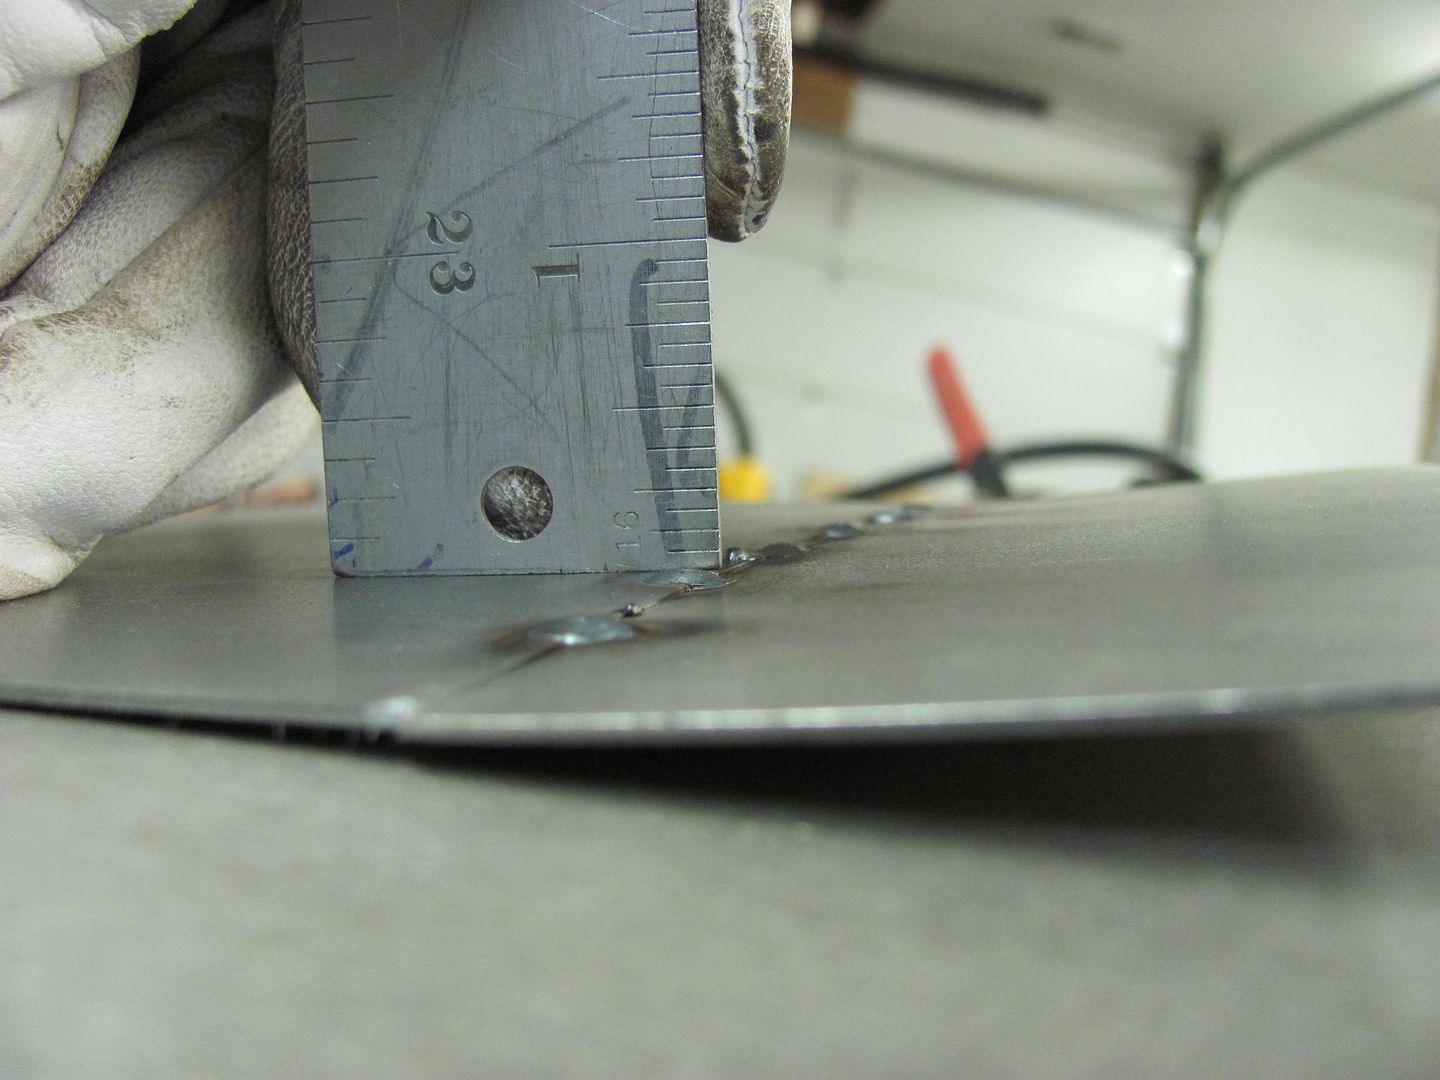
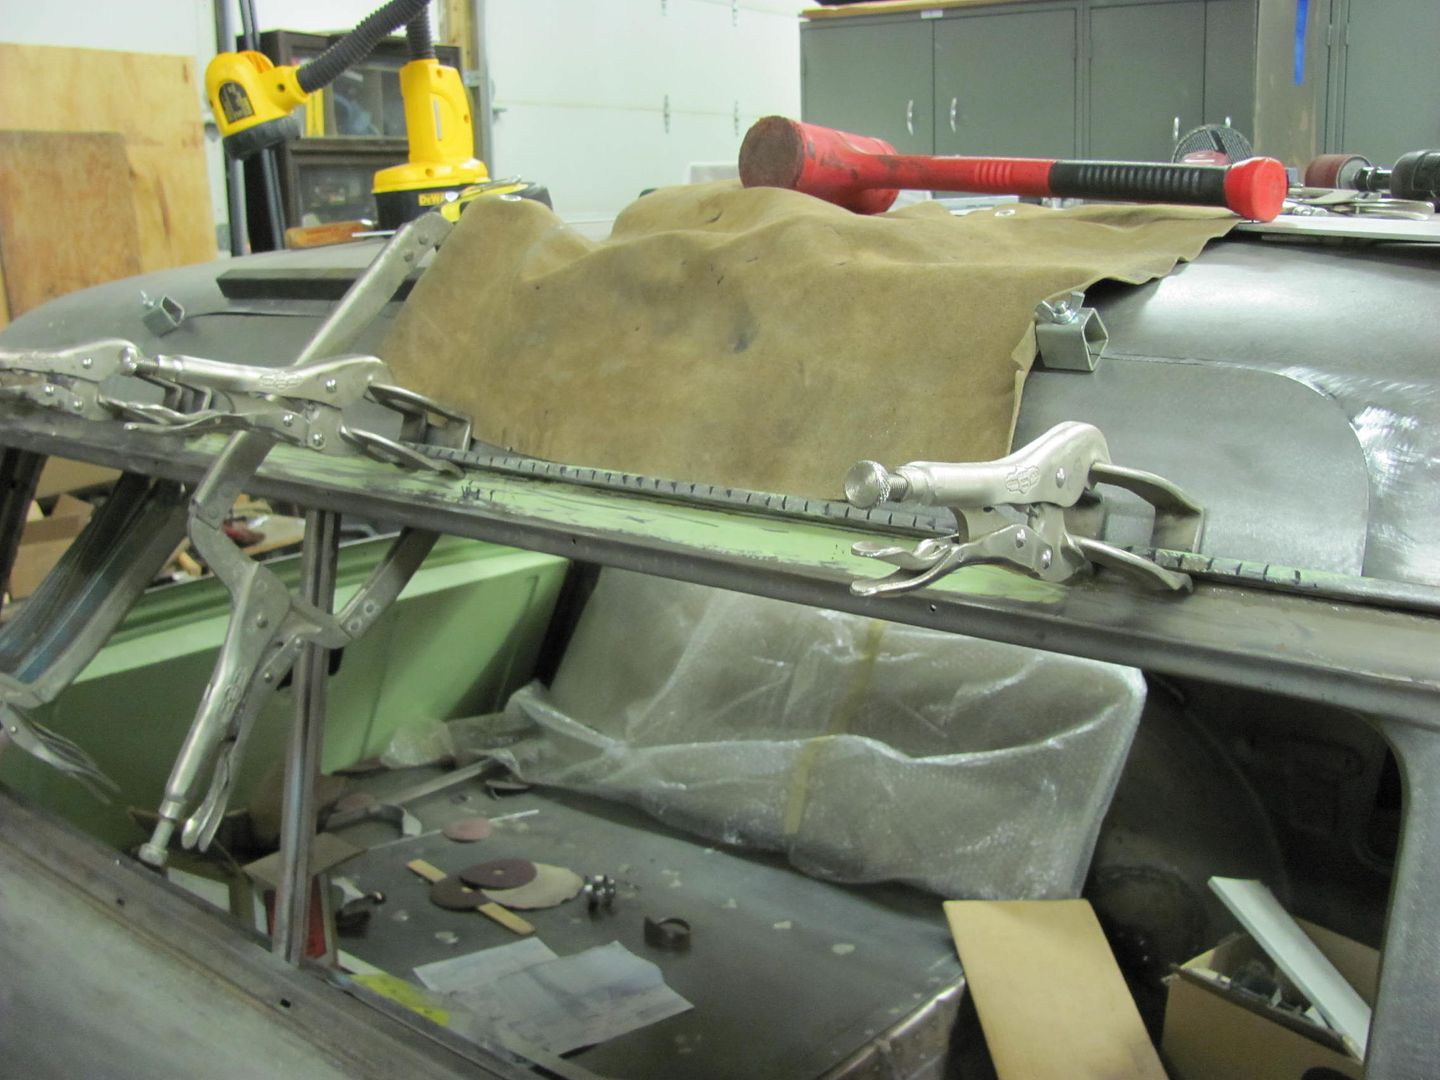
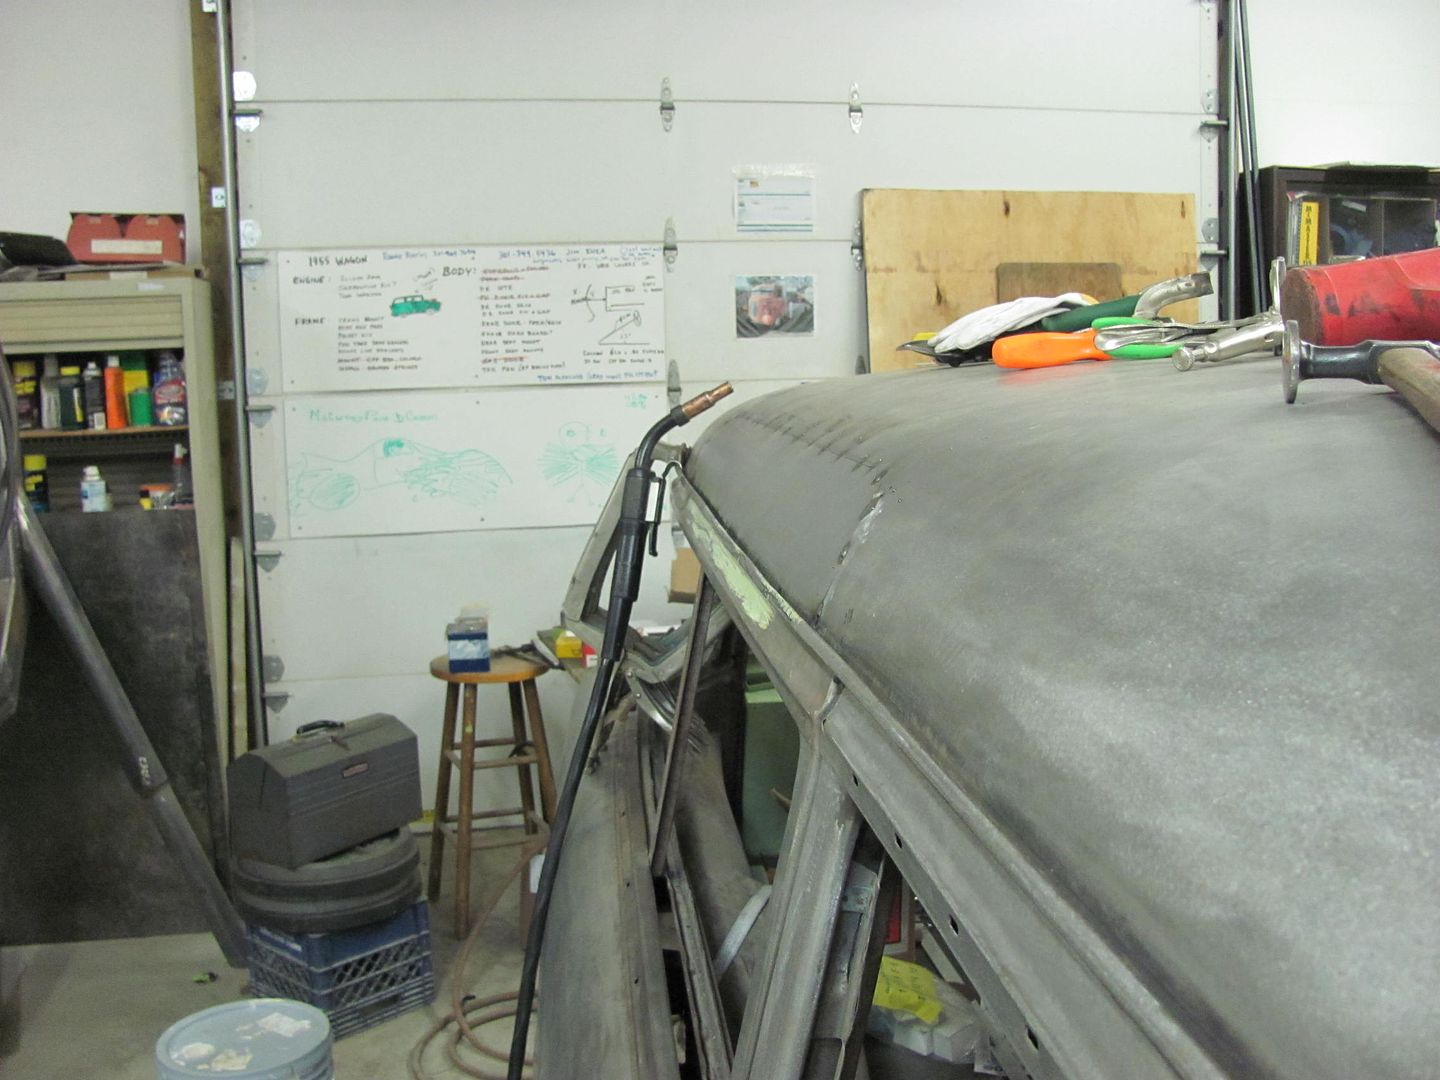
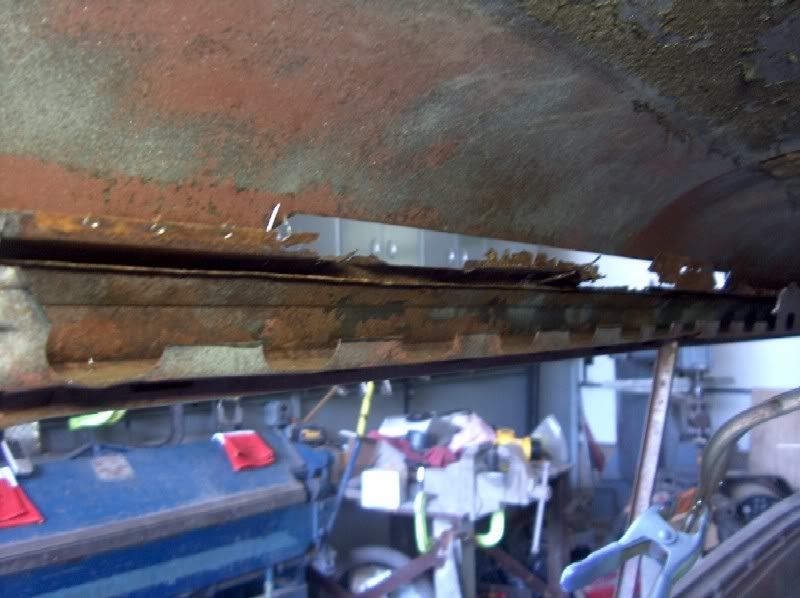
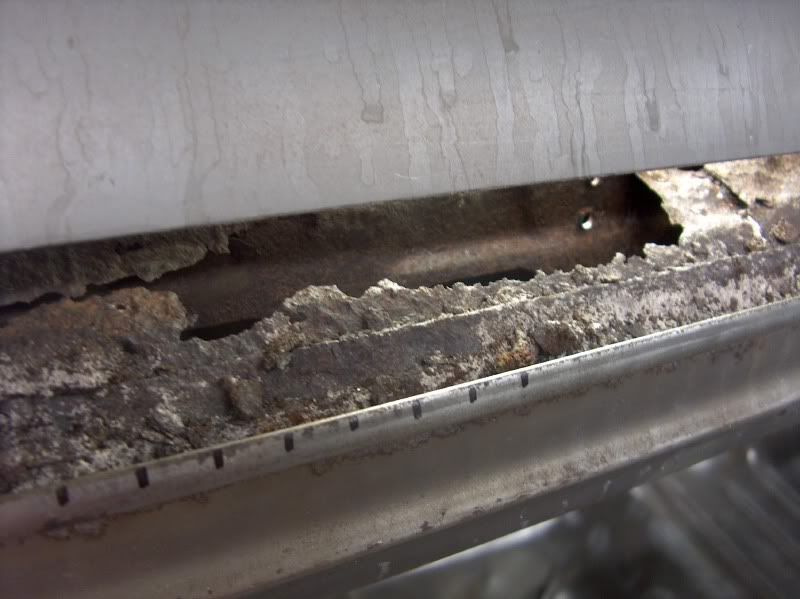
    In true domino fashion, time to lose the gutter, and the profile shot will show how they are assembled together.


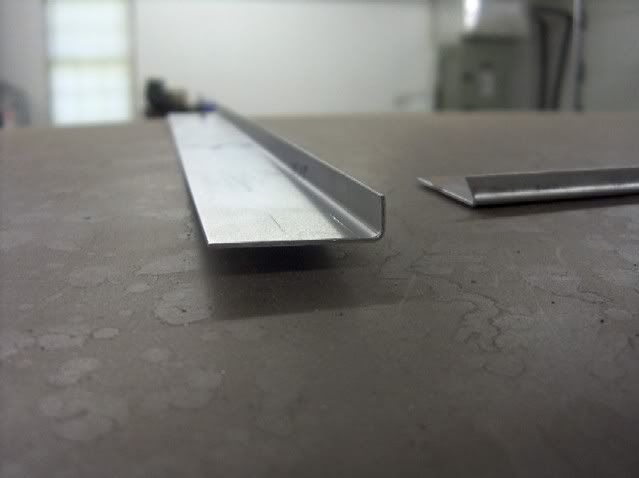
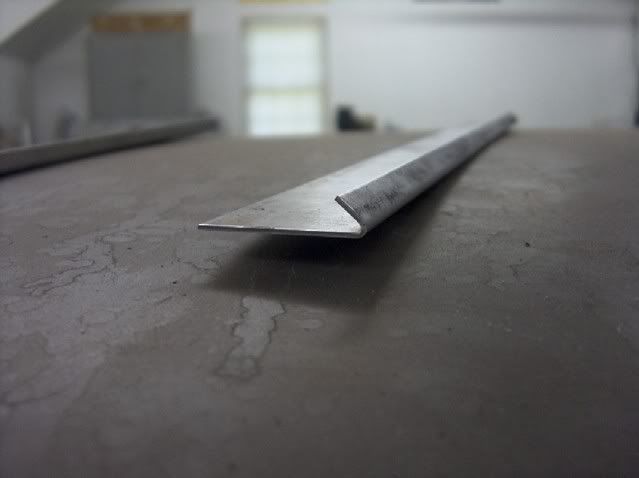
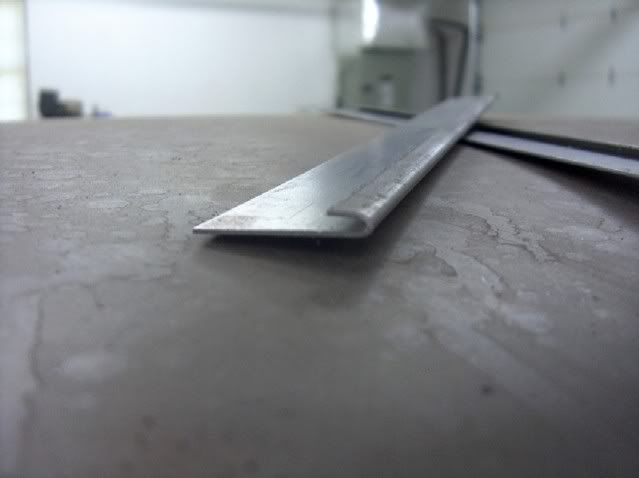
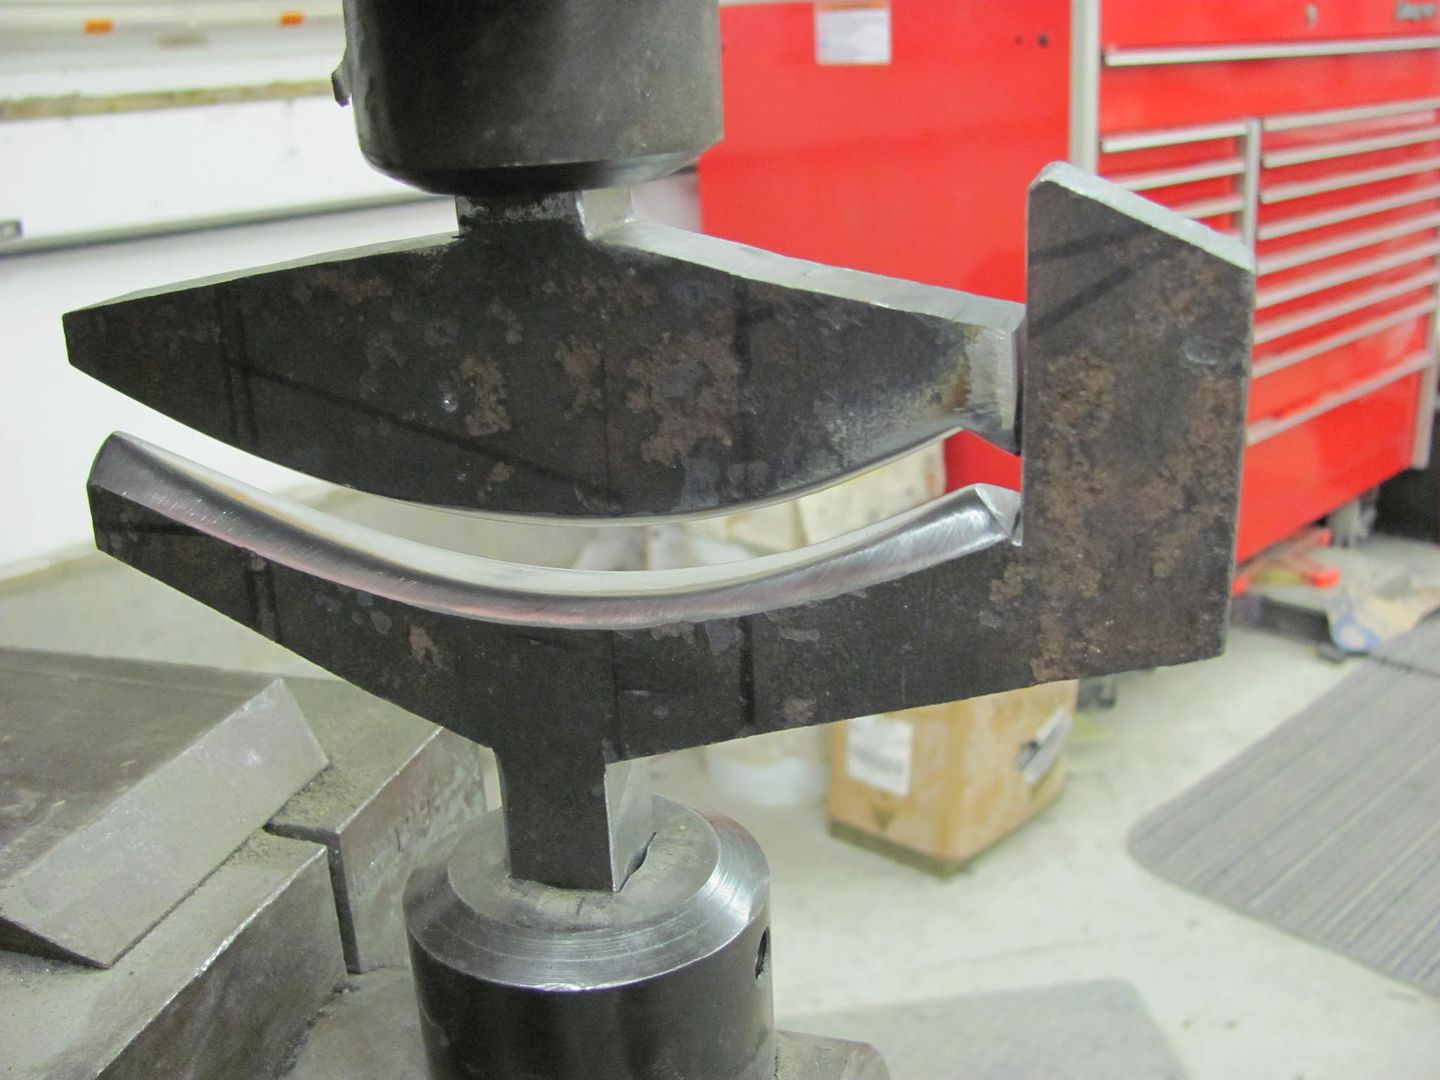
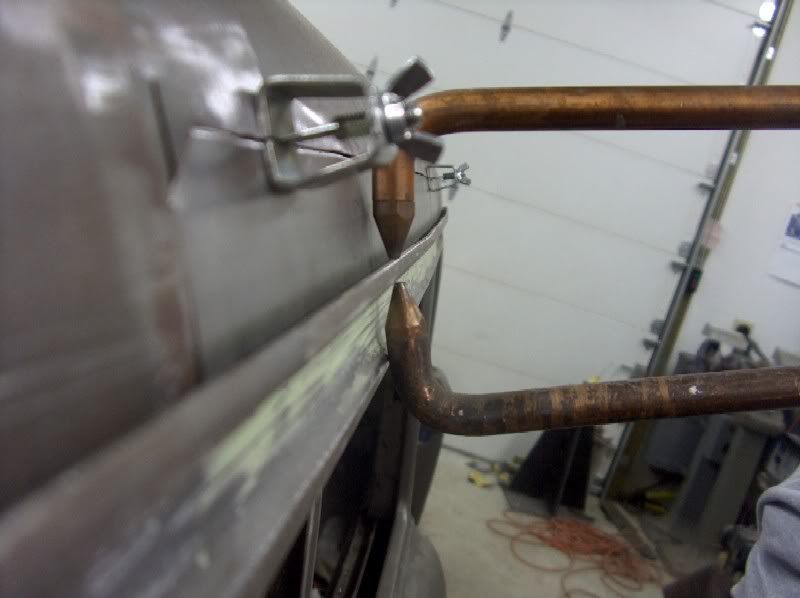
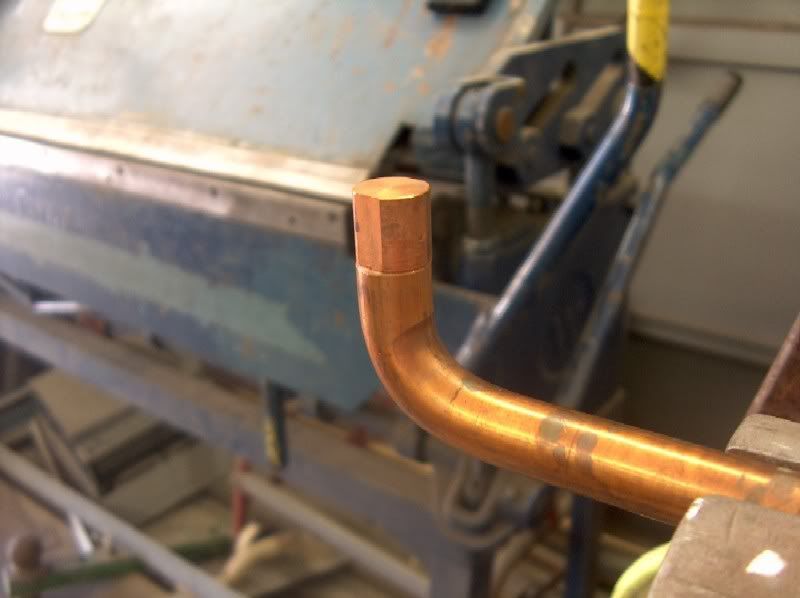
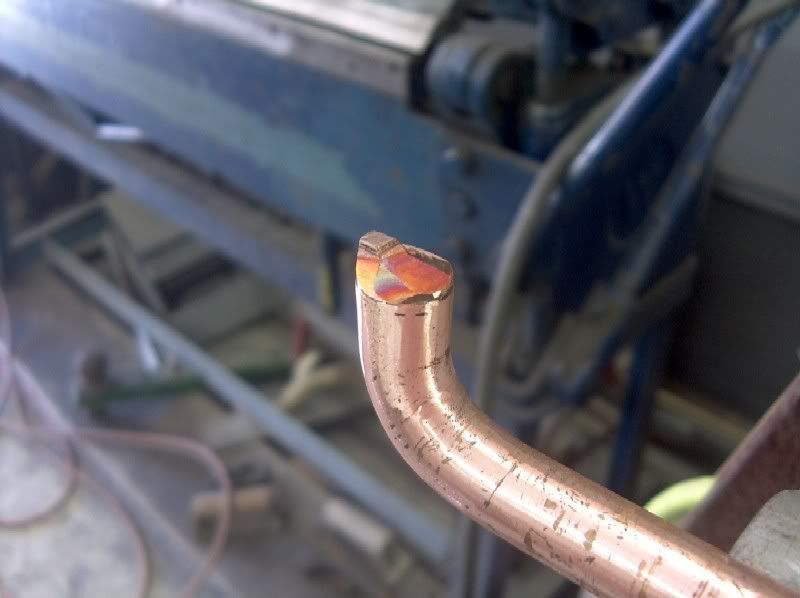
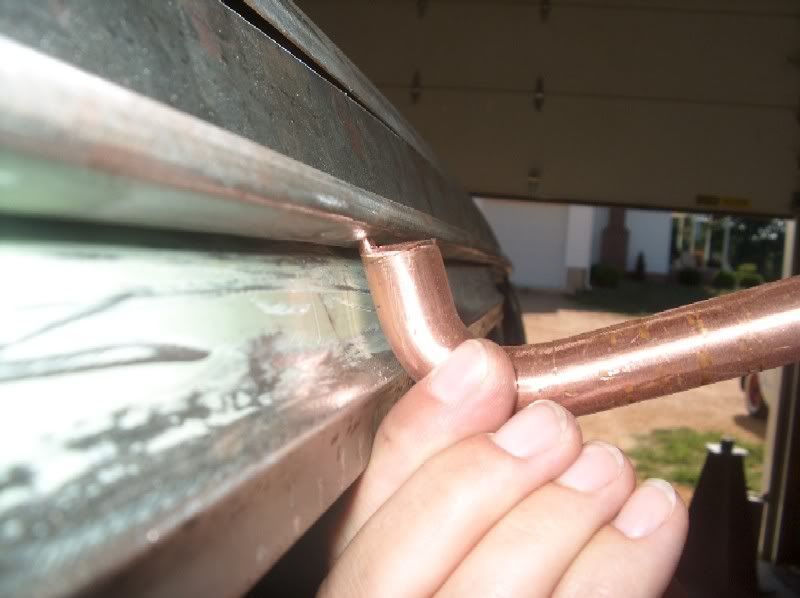
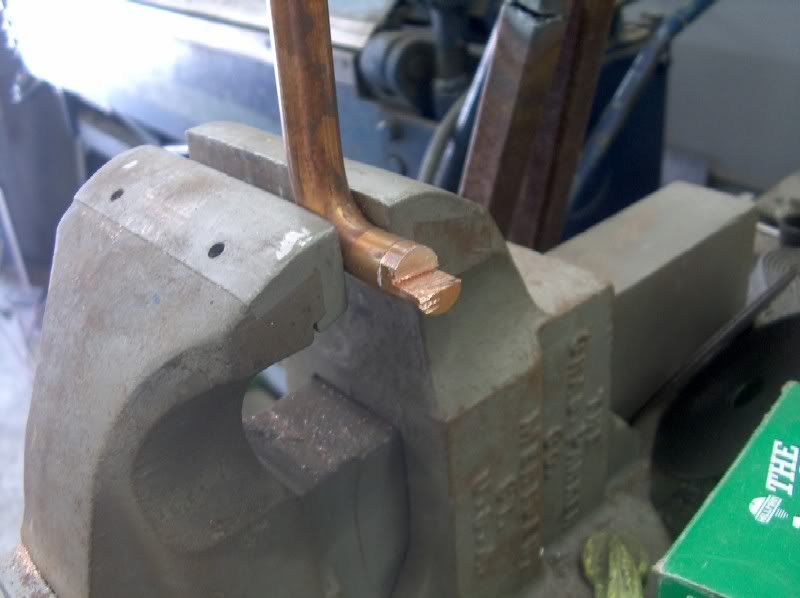
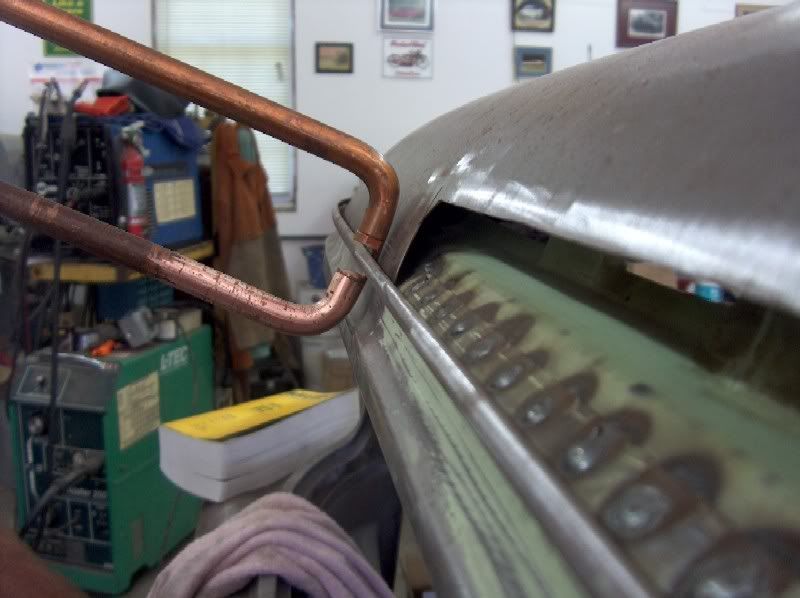
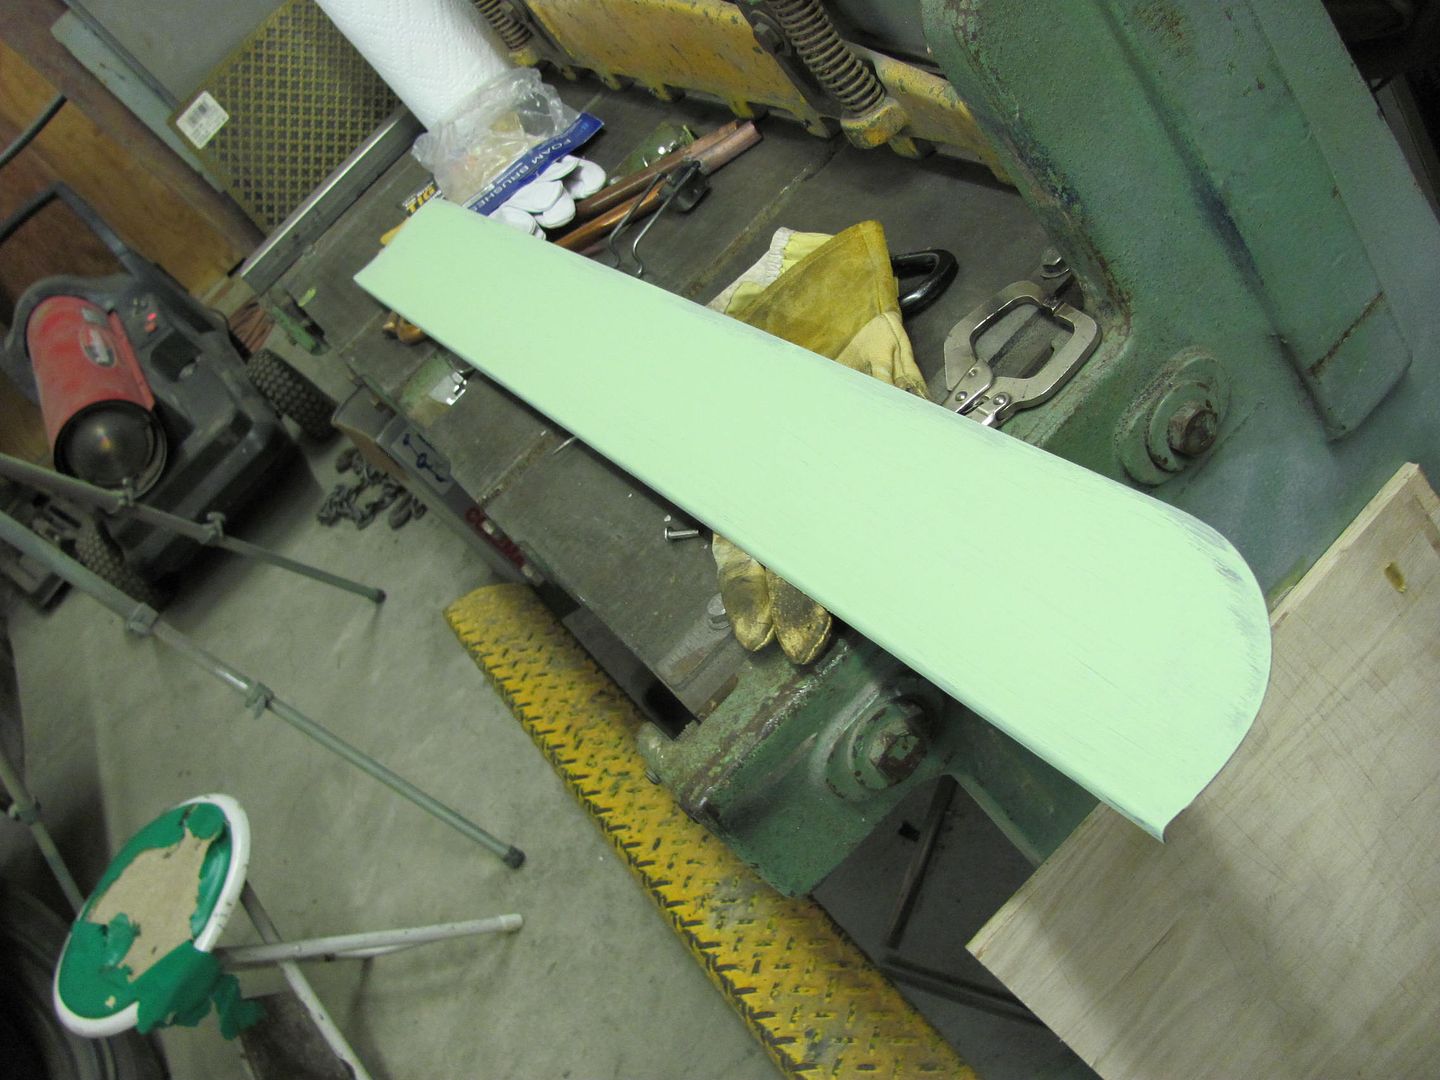
    Maybe this would make the start of a good Vista Cruiser? After some much needed sheet metal replacement takes place on the inside, we'll try our hand at making a rain gutter.

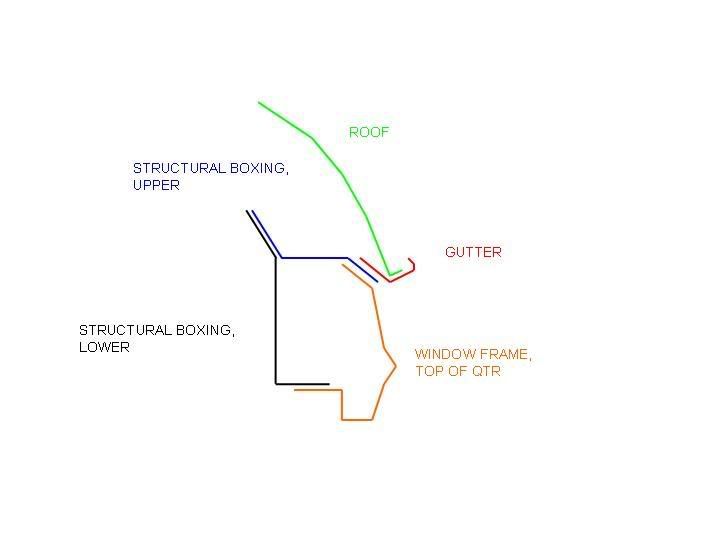
    Let's pause here and clarify the major components we're working with:


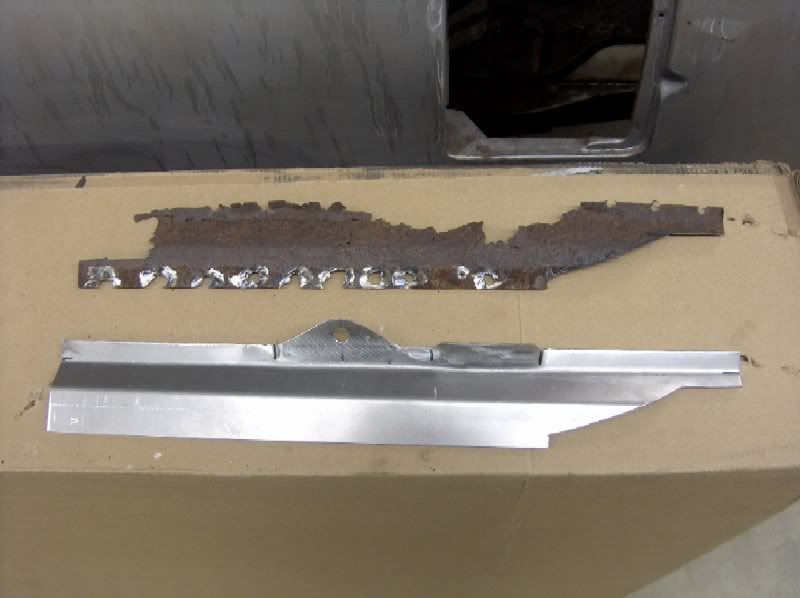
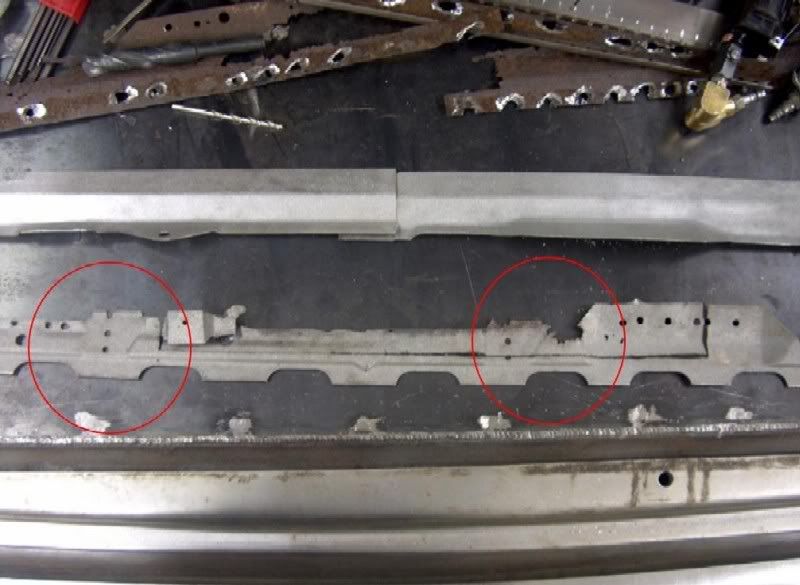
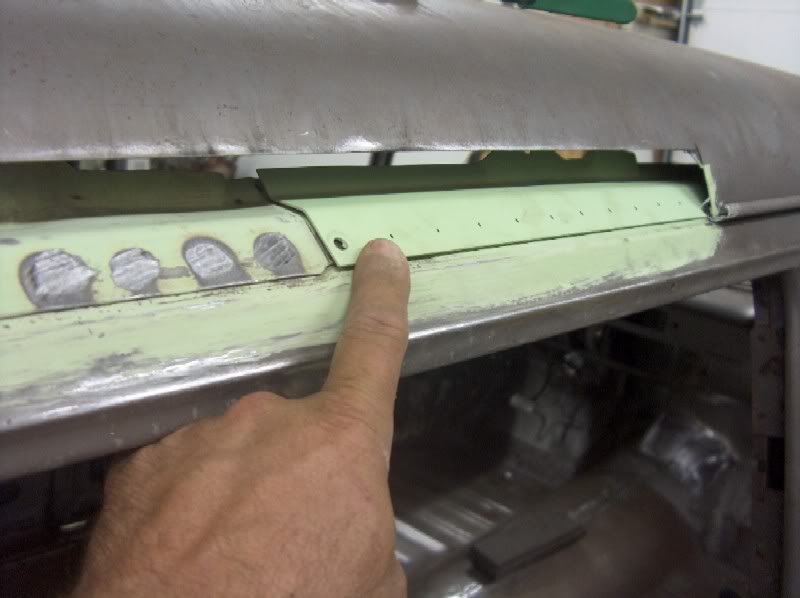
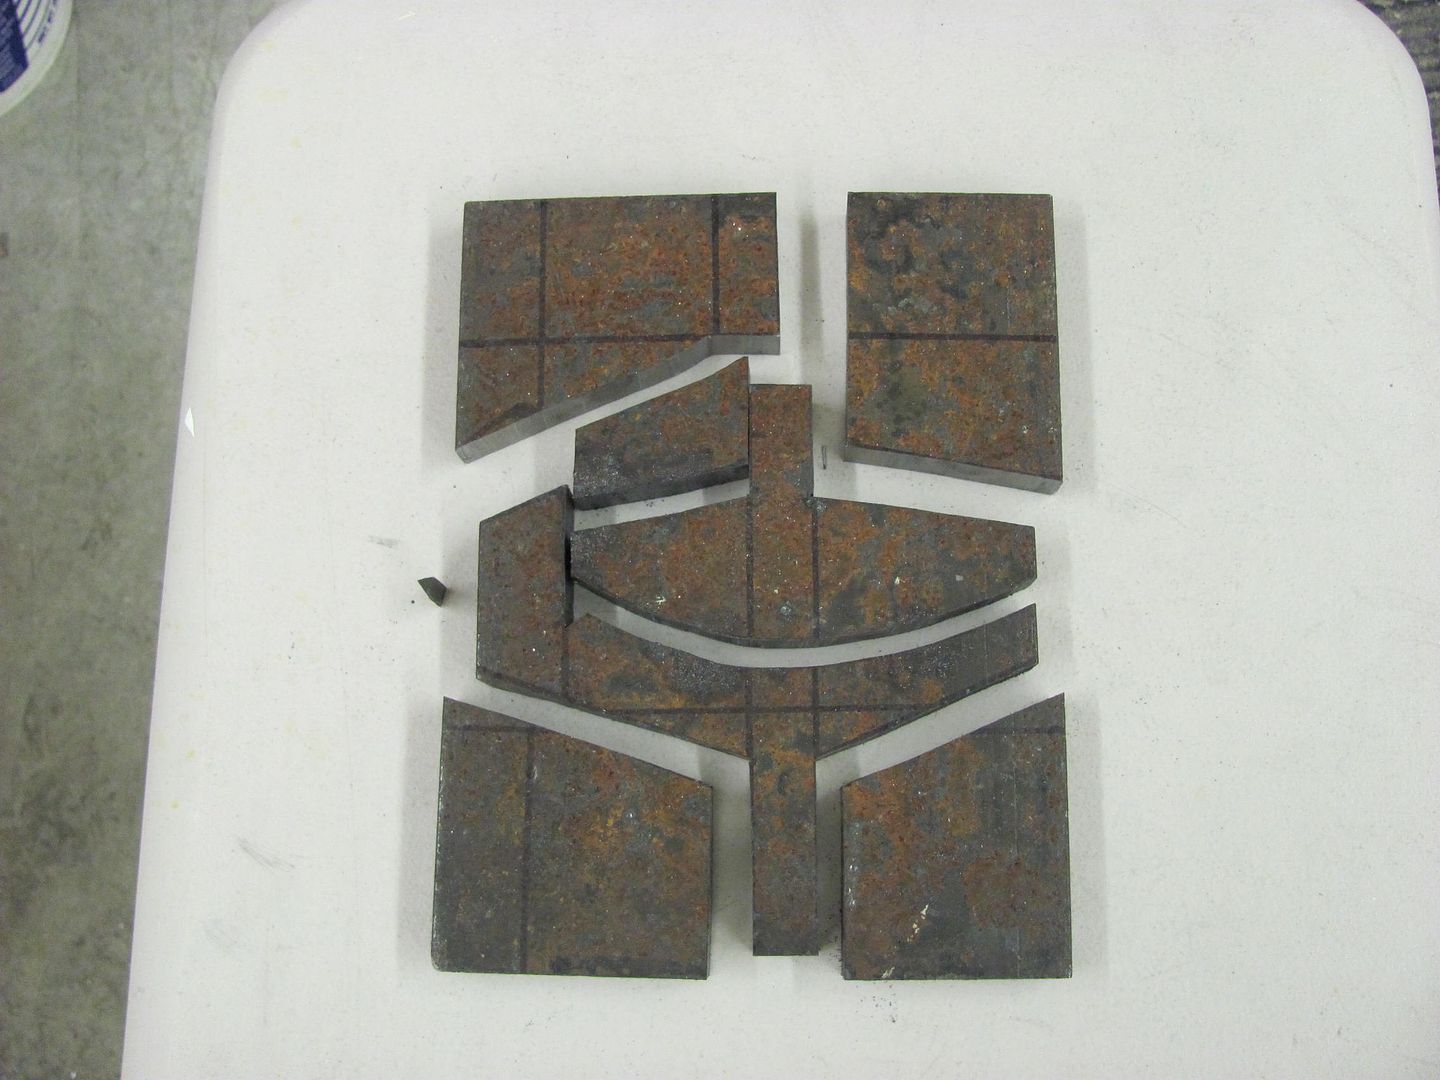
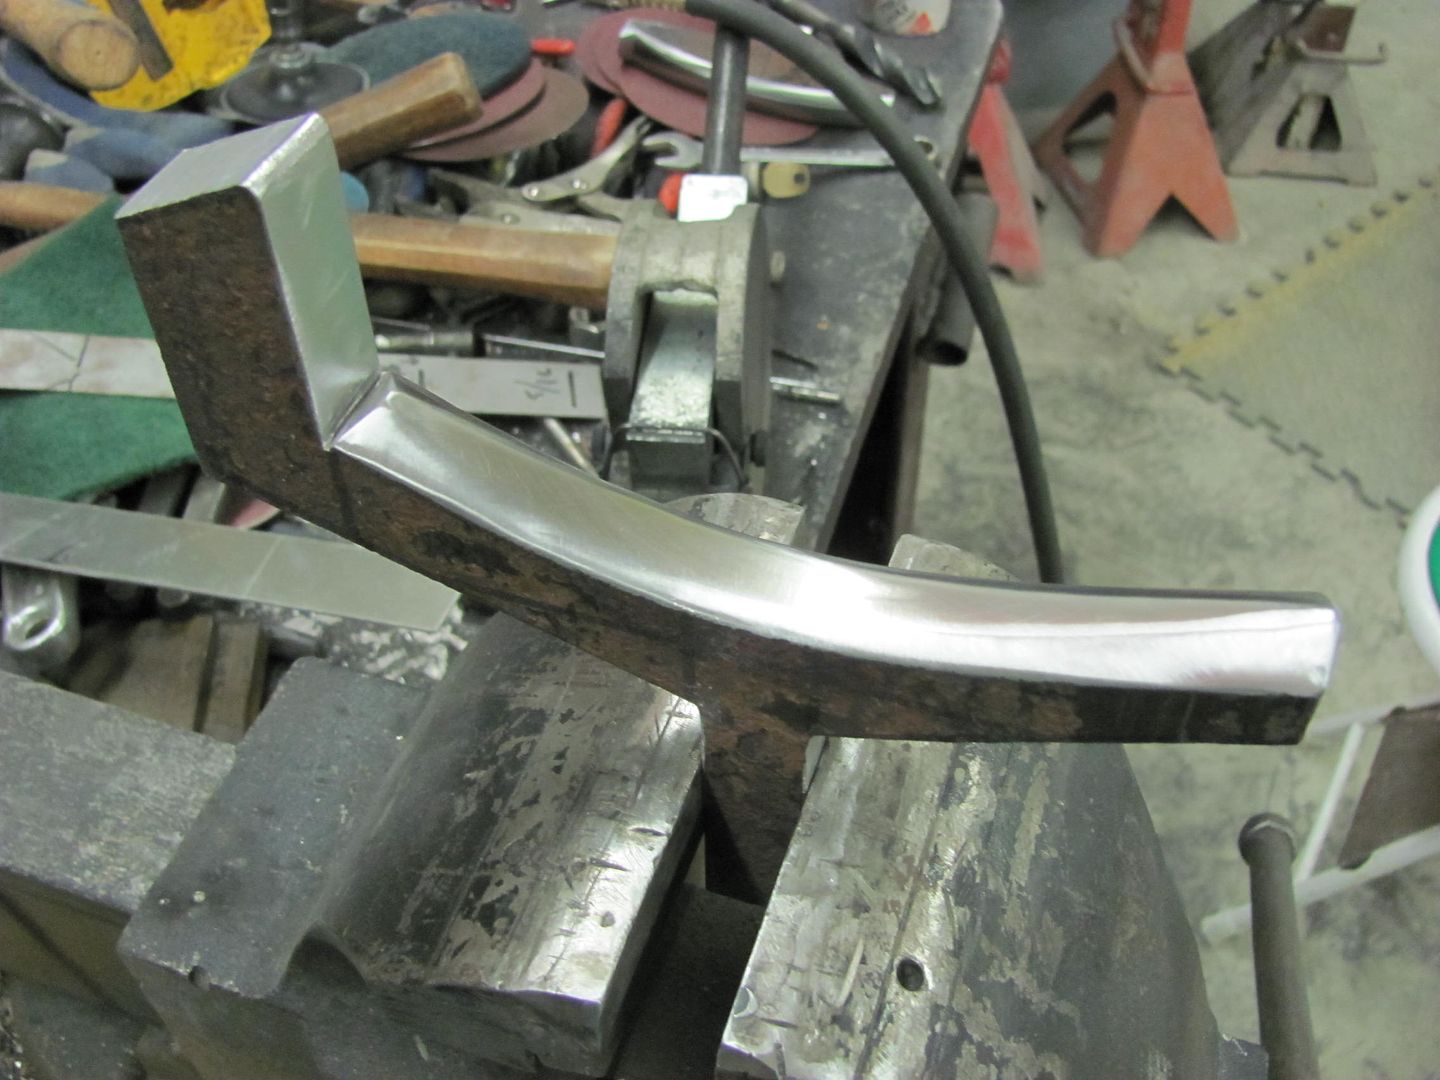
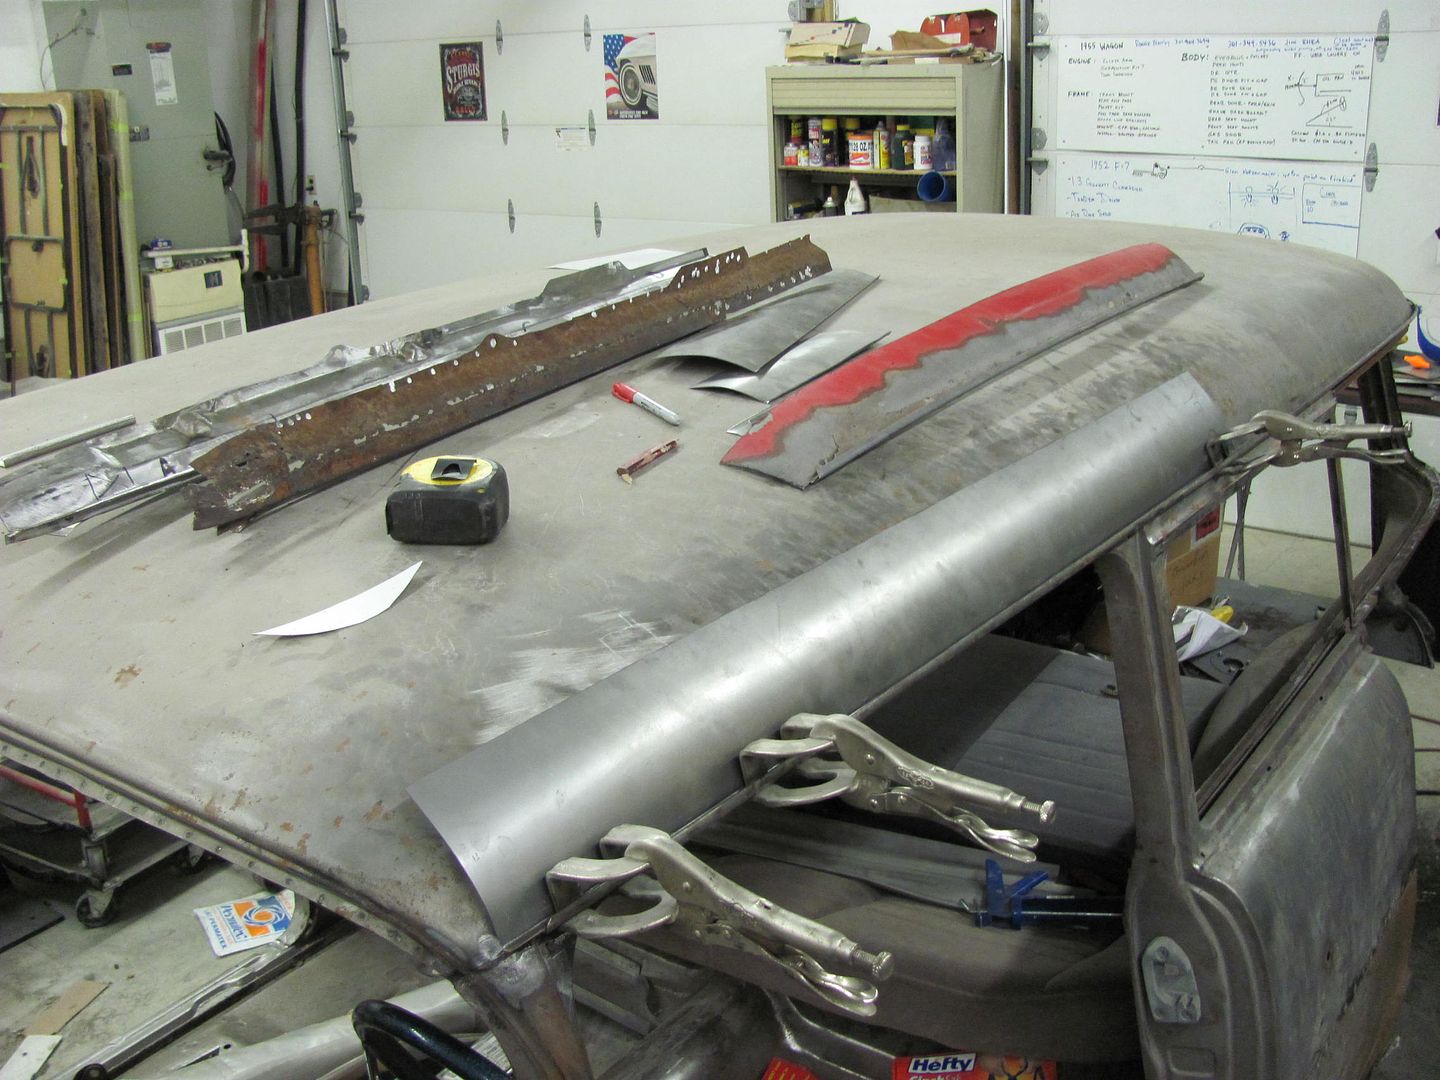
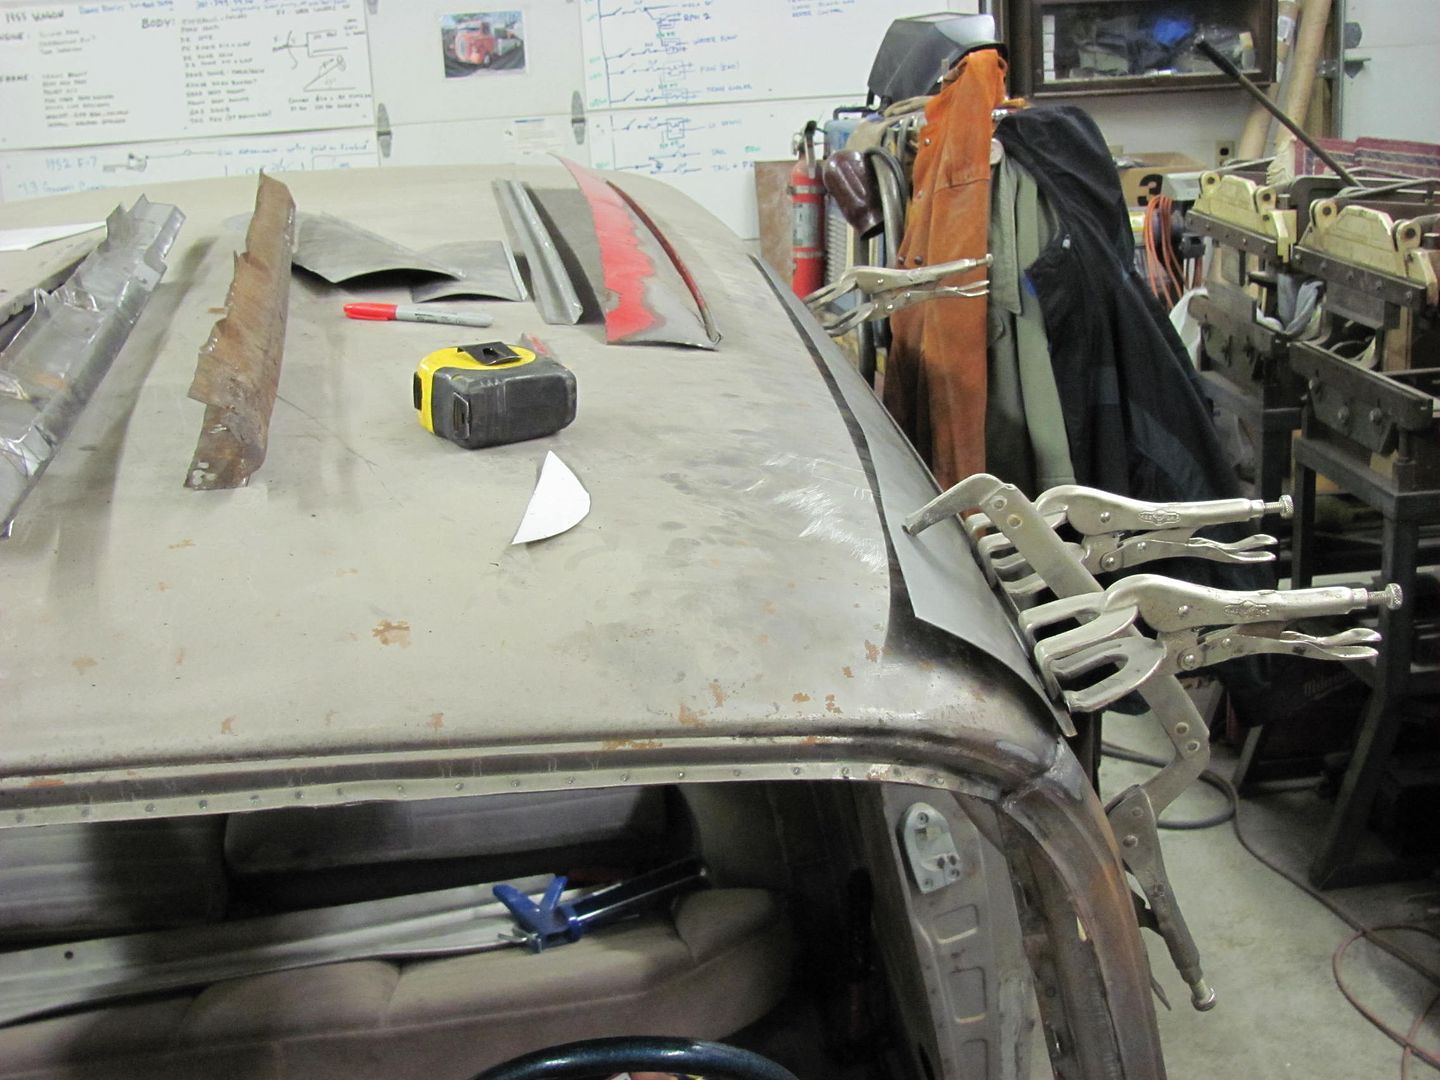
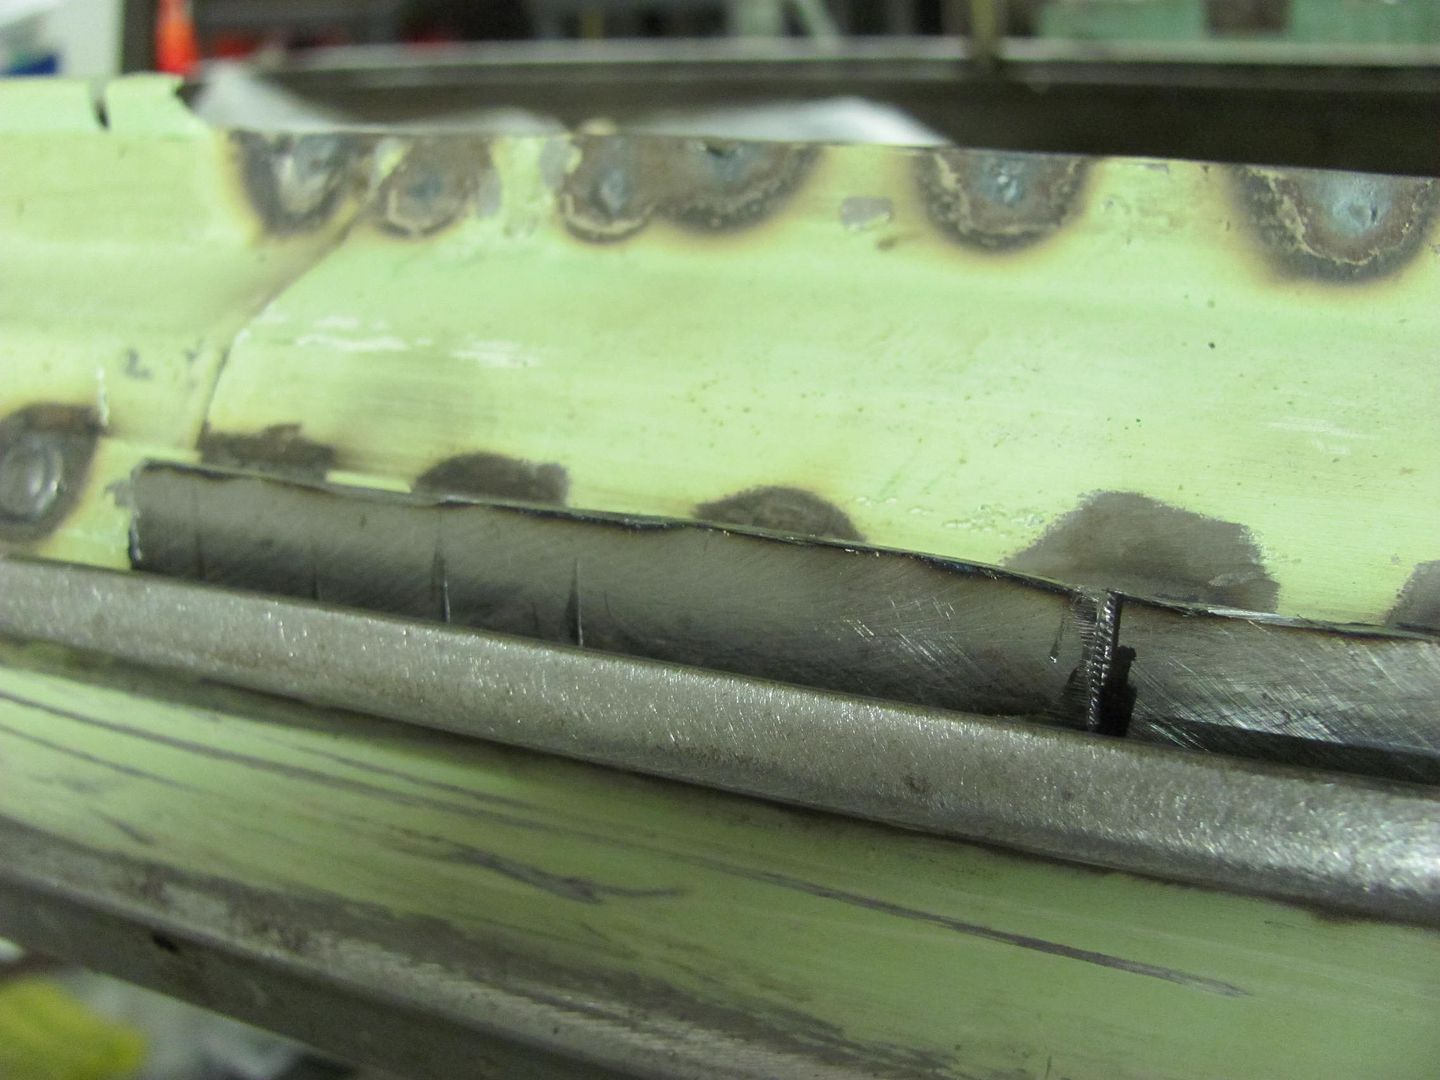
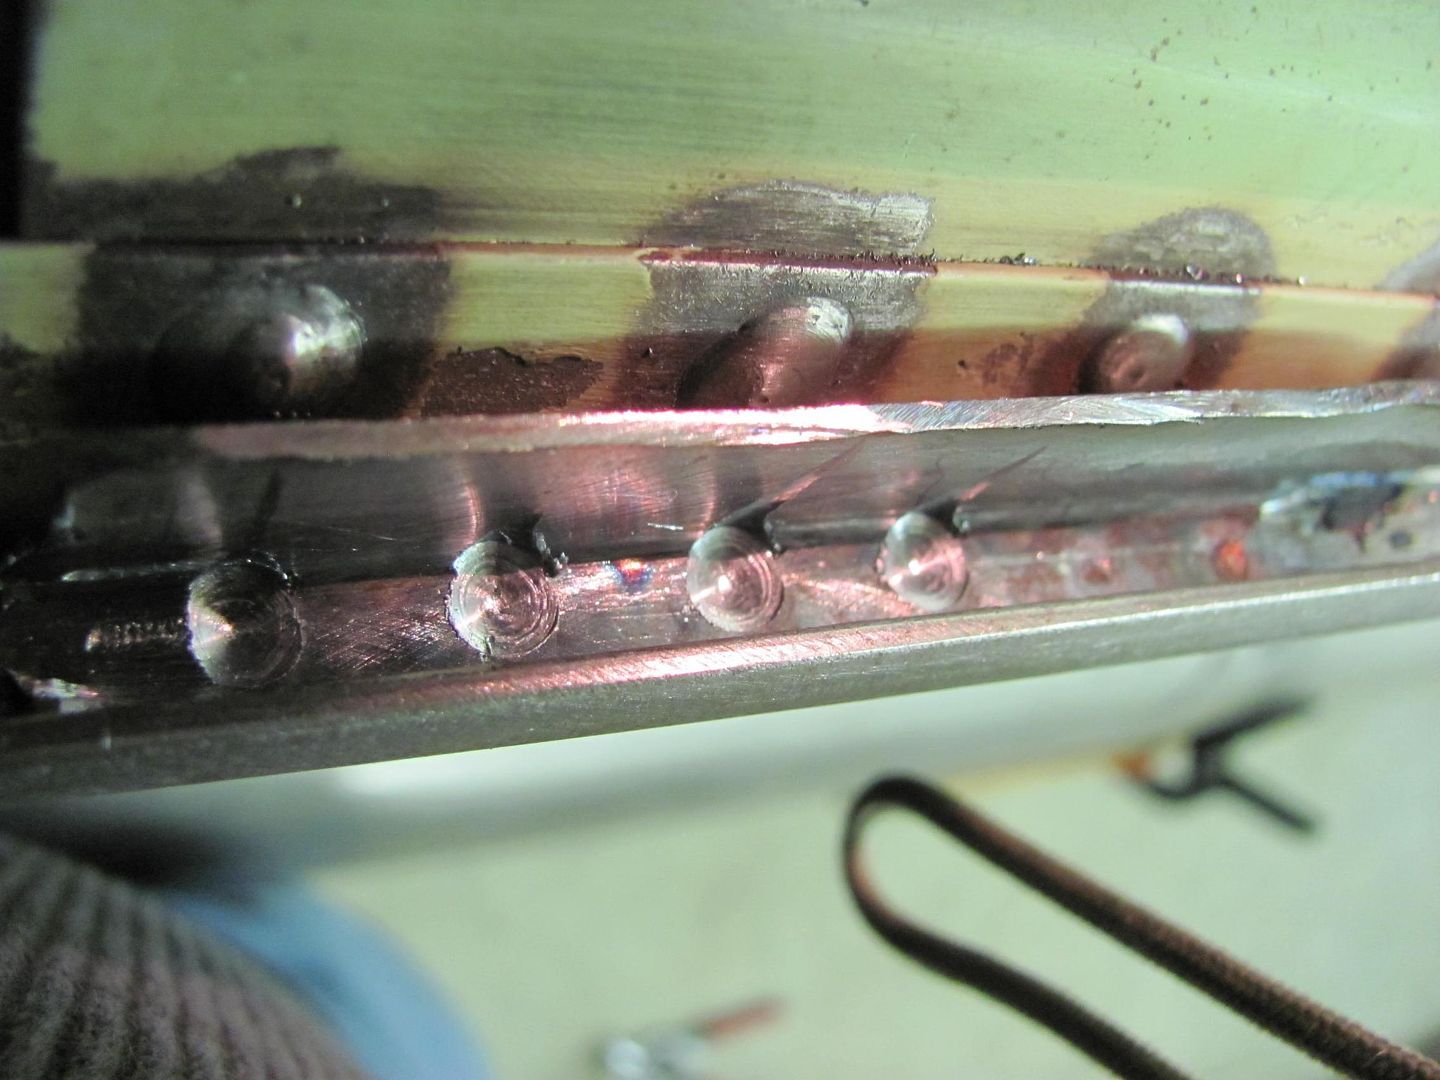
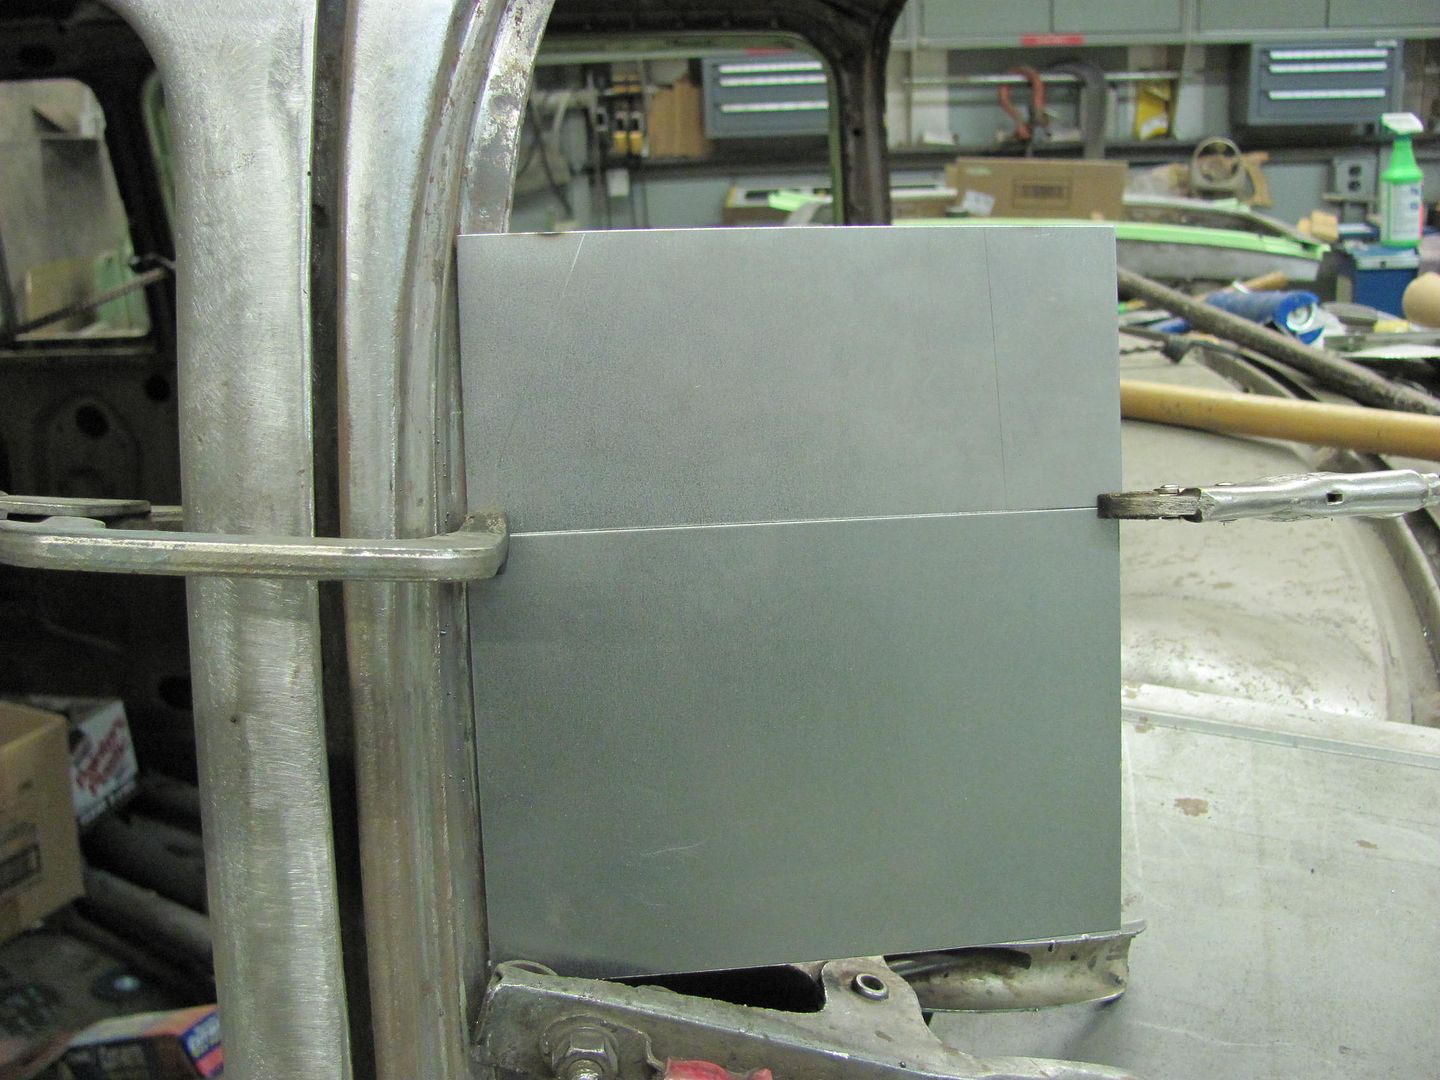
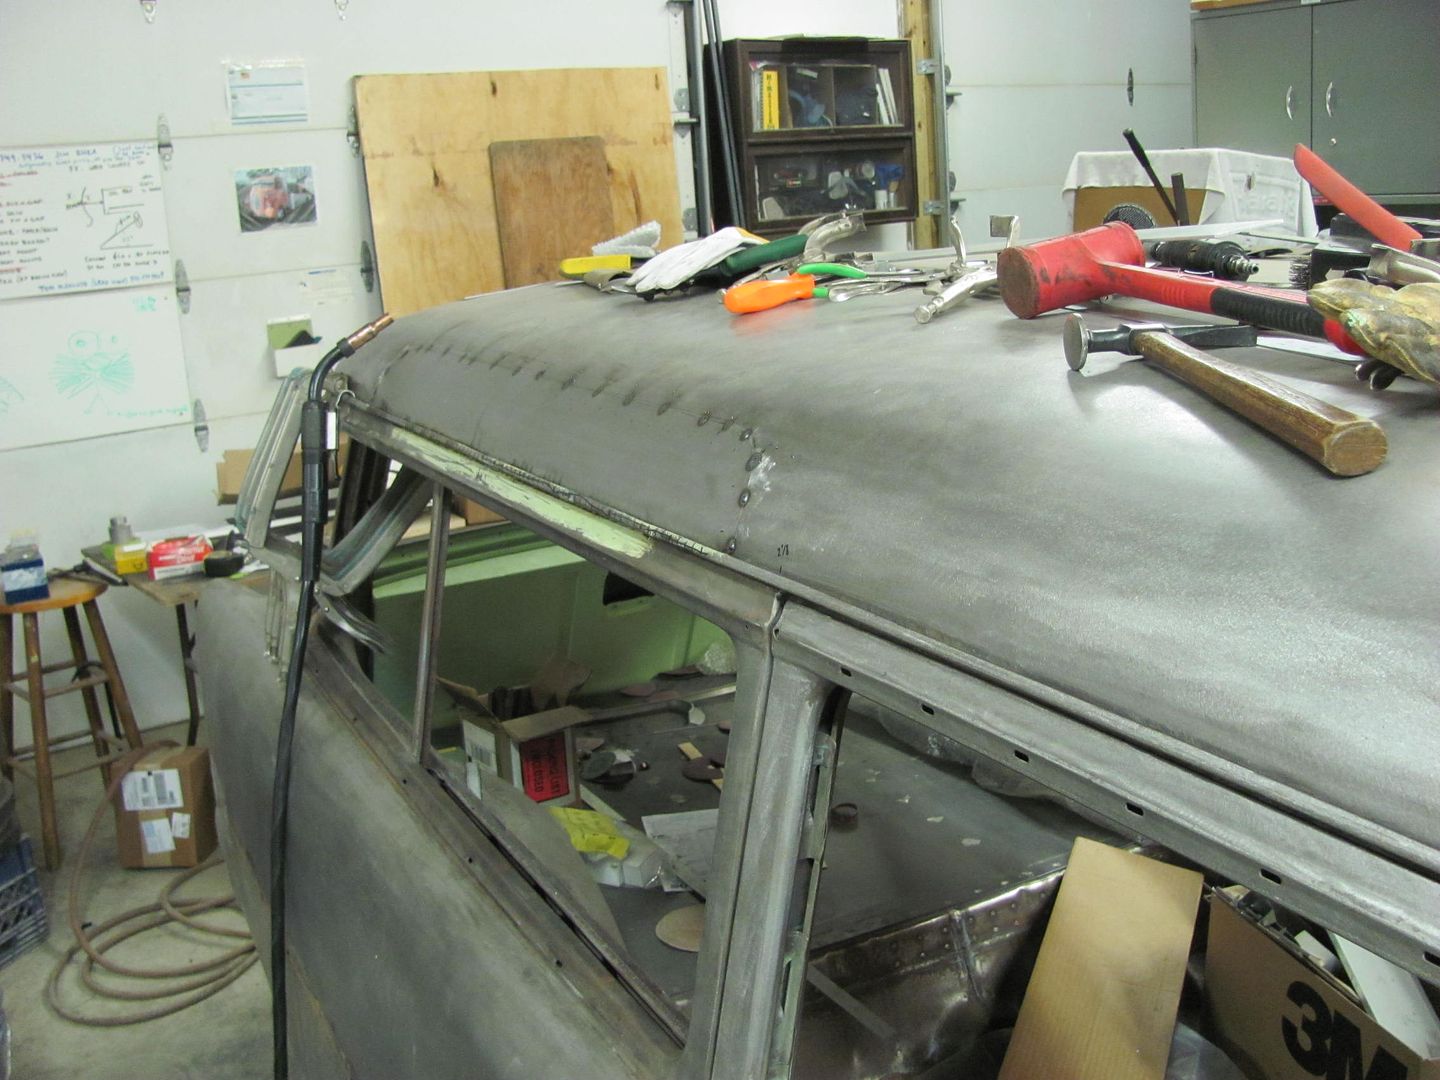
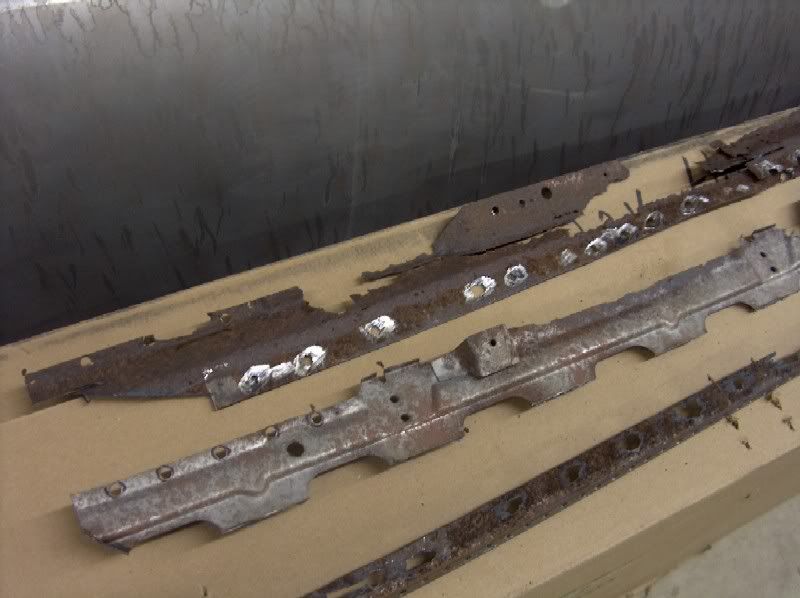
    The rusty pieces came out as good as could be expected, and were limited help in forming new pieces. Some of the measurements had to be transposed from the opposite side of the roof, which was virtually flawless. After further inspection of the affected area, I'm thinking it was a condensation problem, and the moisture followed down the roof crossmember just like a gutter. The car must have been parked with a downhill slope to that side.
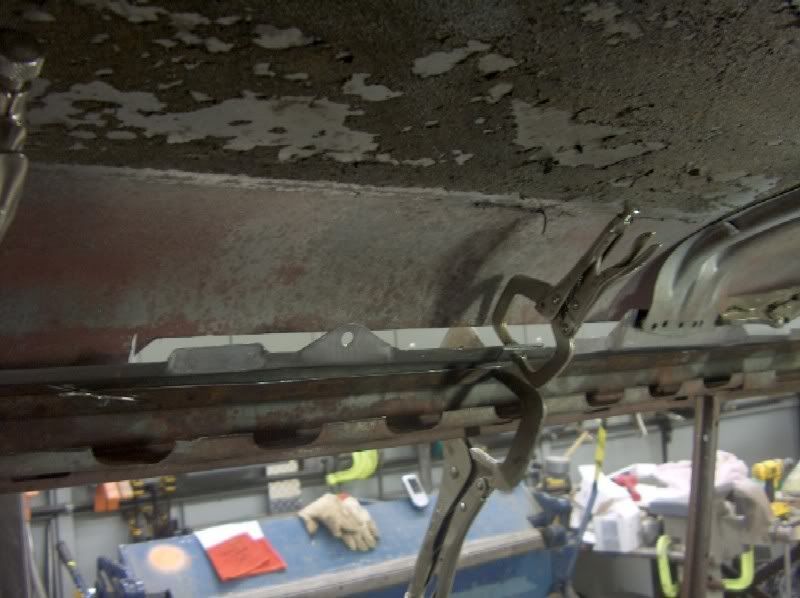
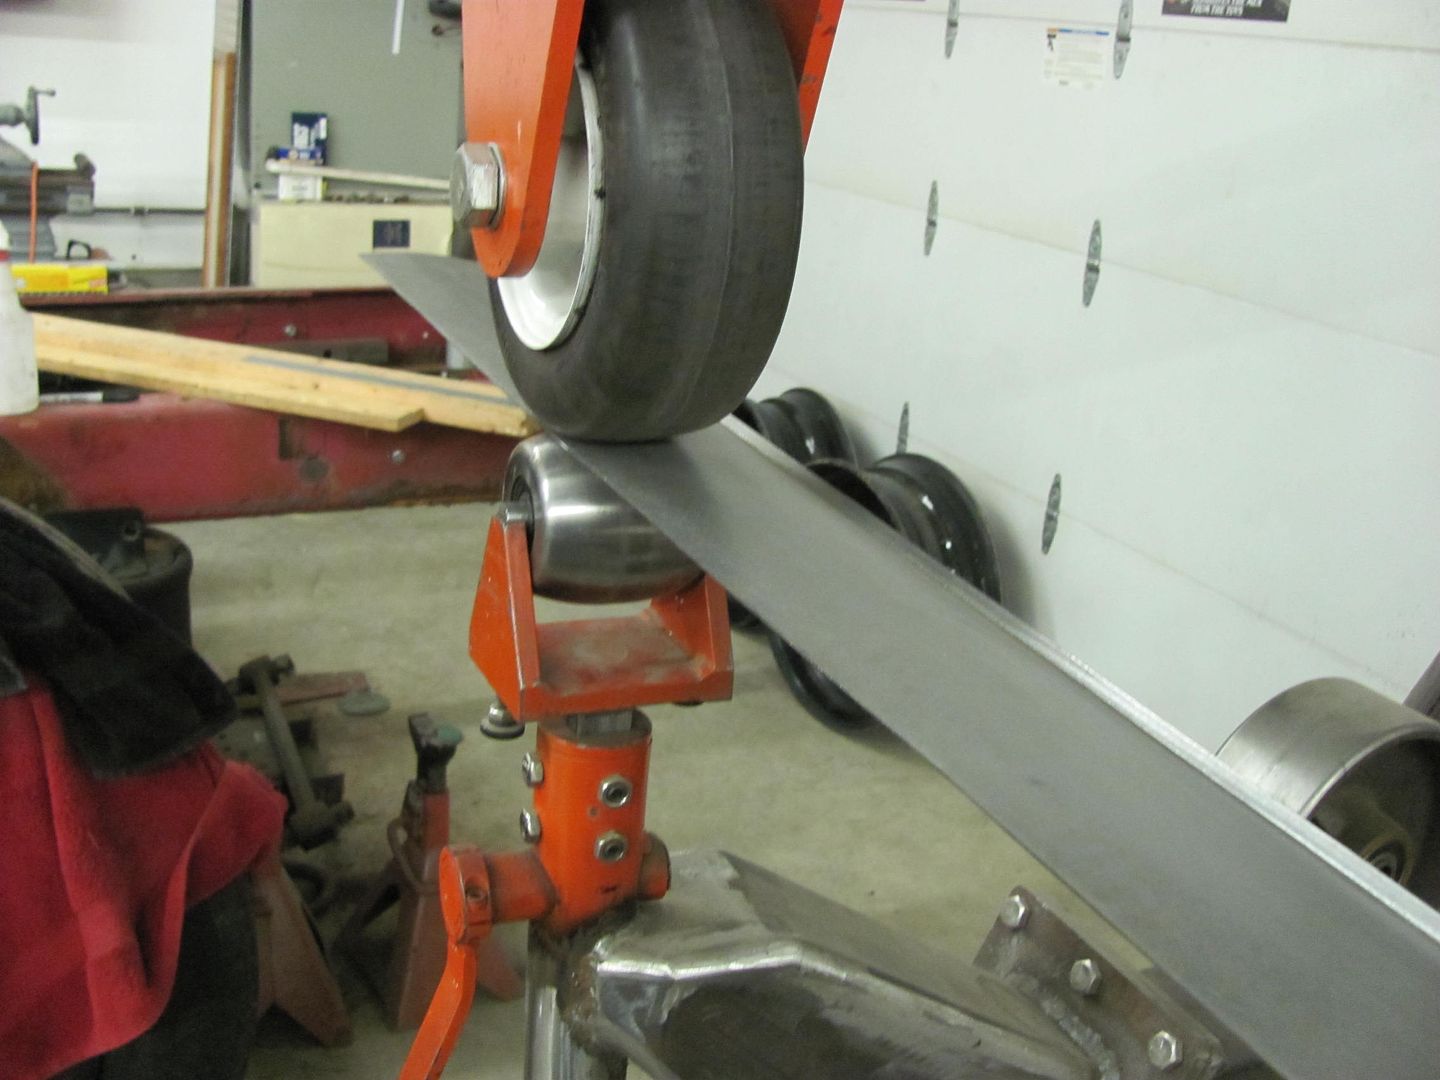
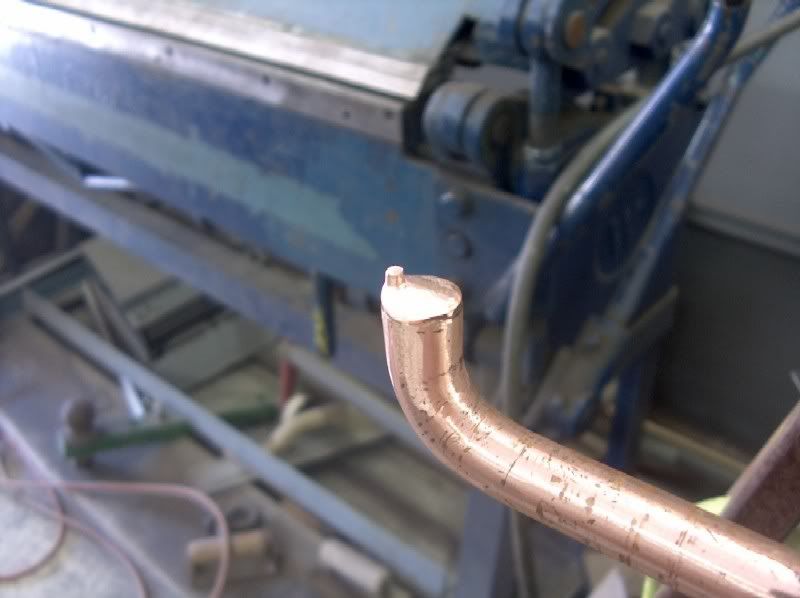
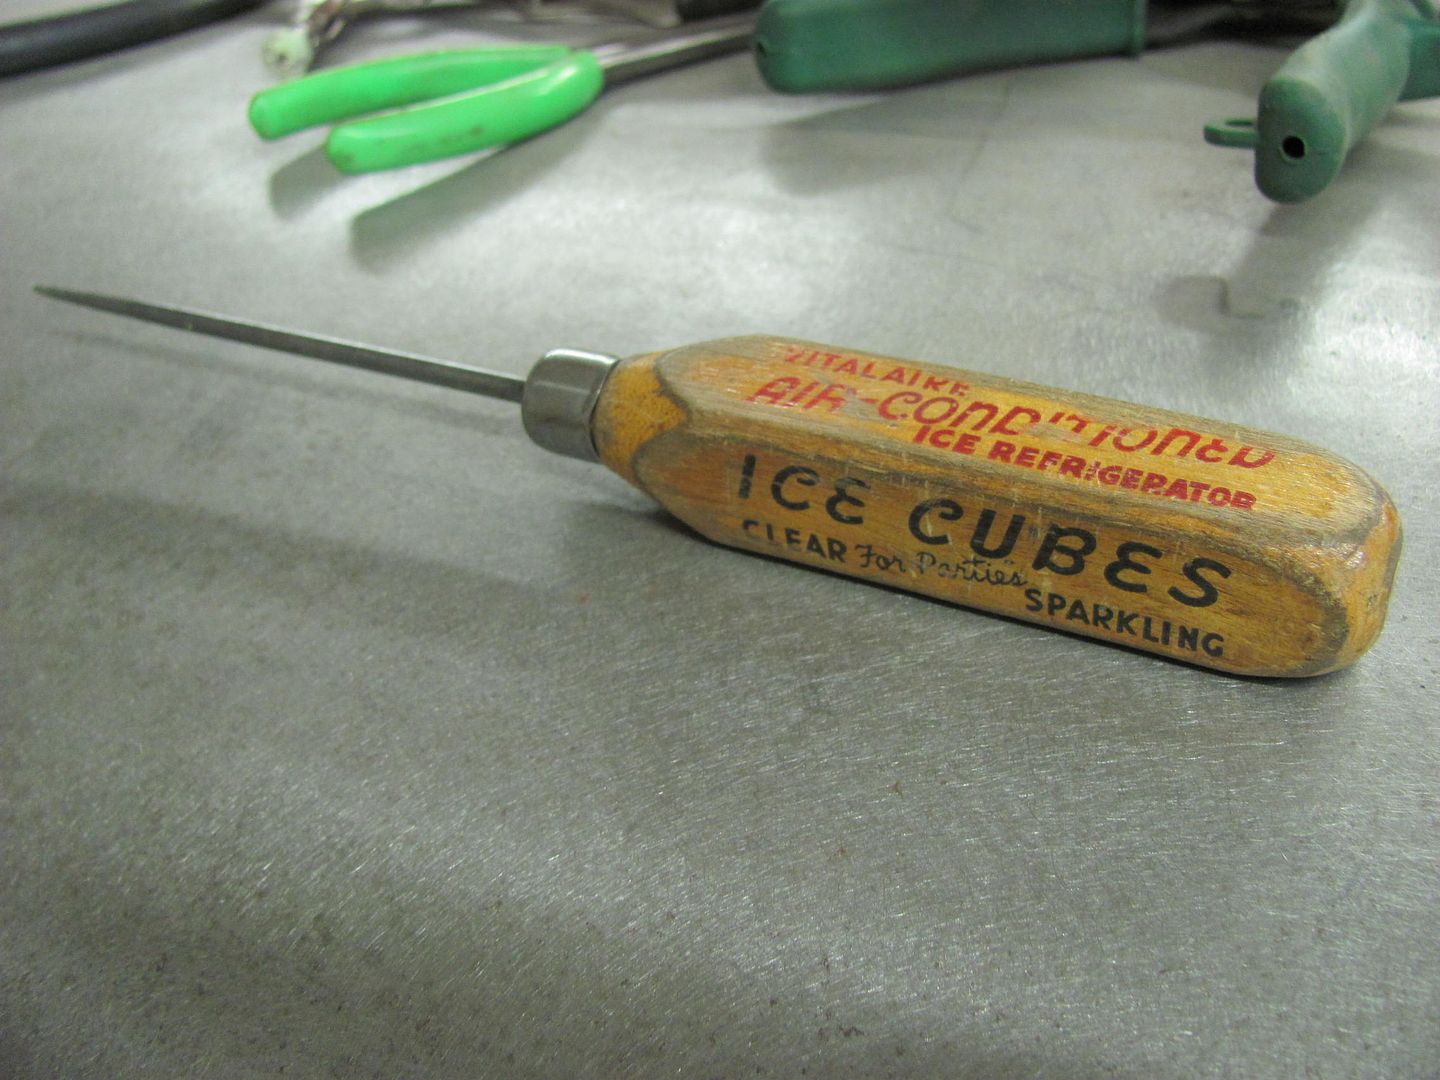
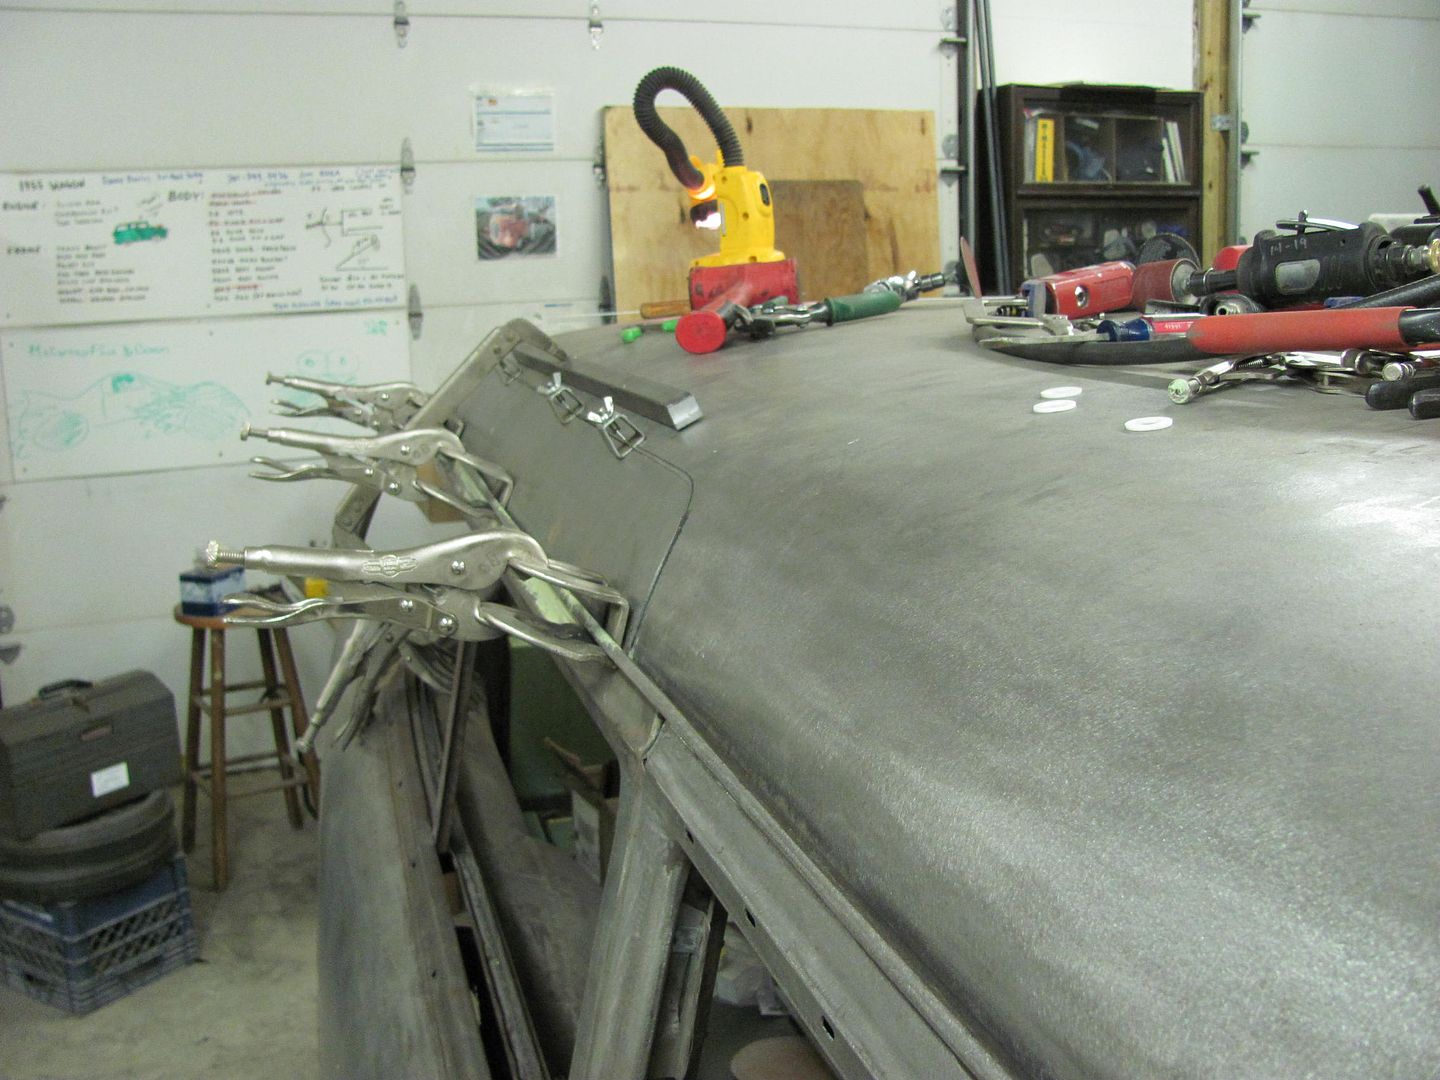
    Gaining access:


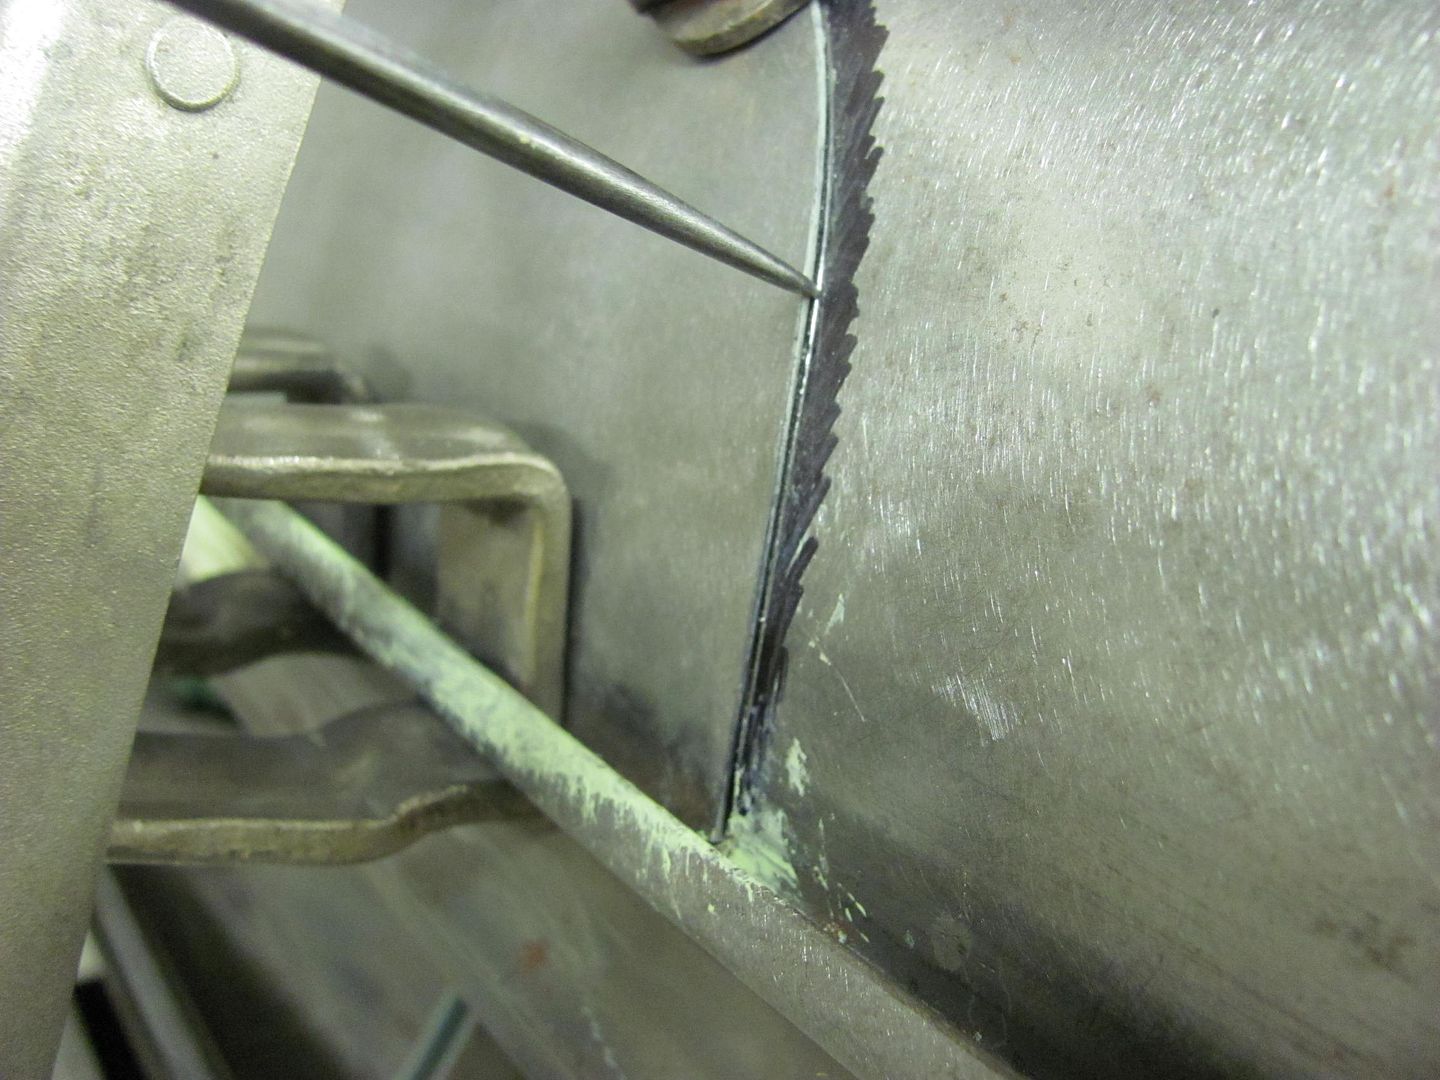
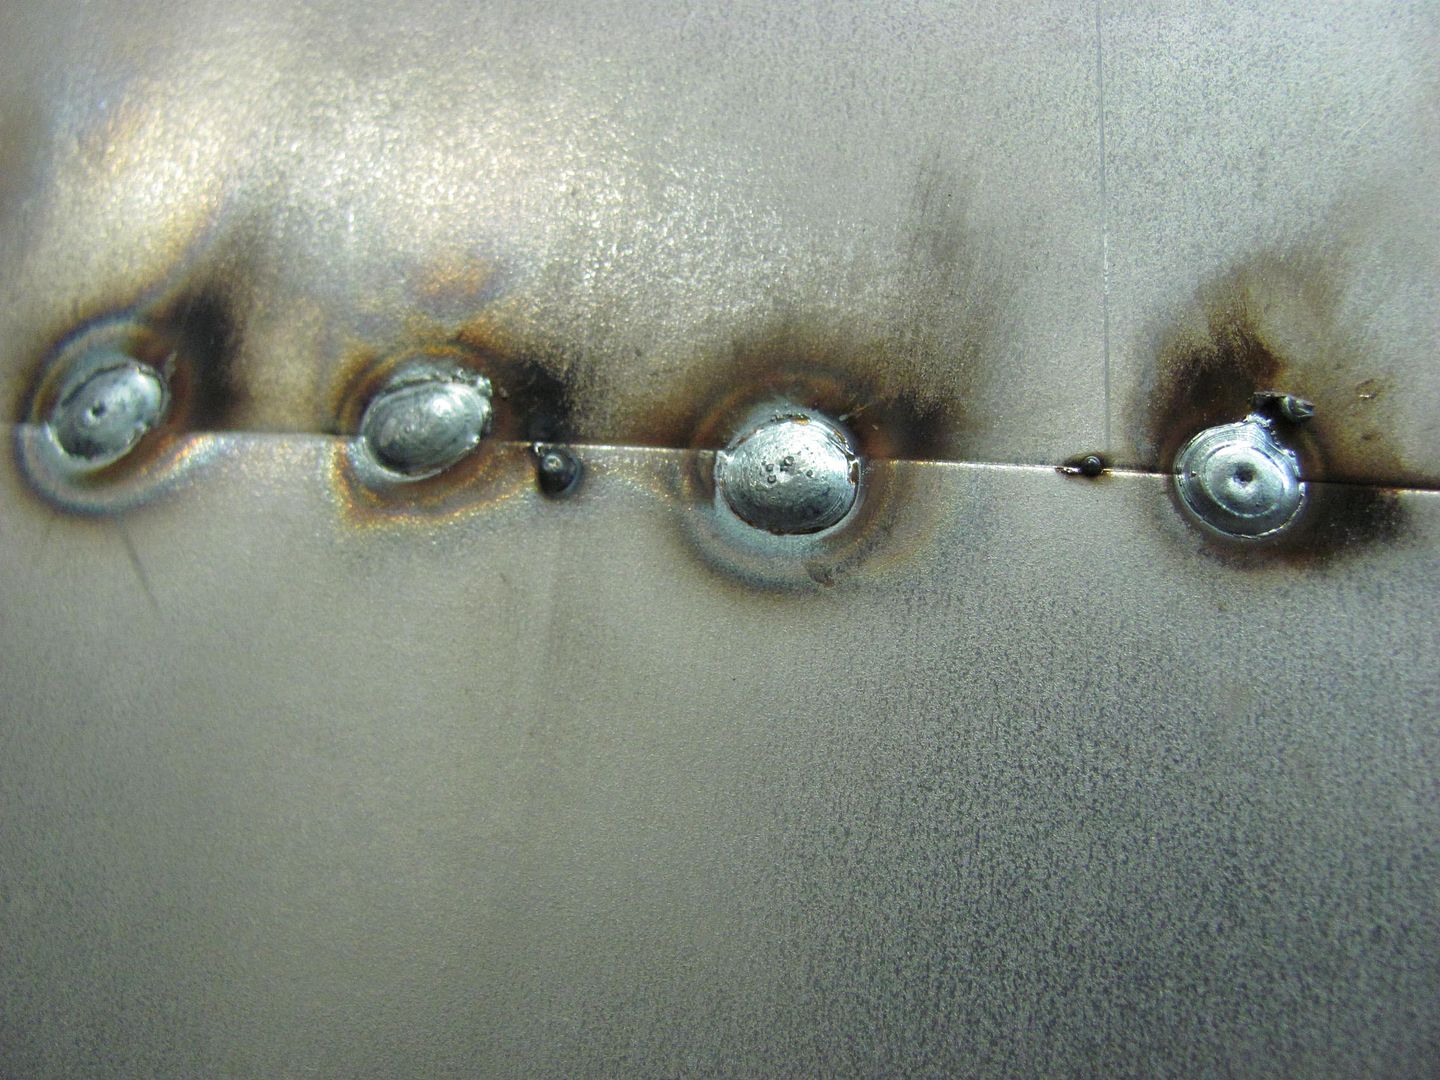
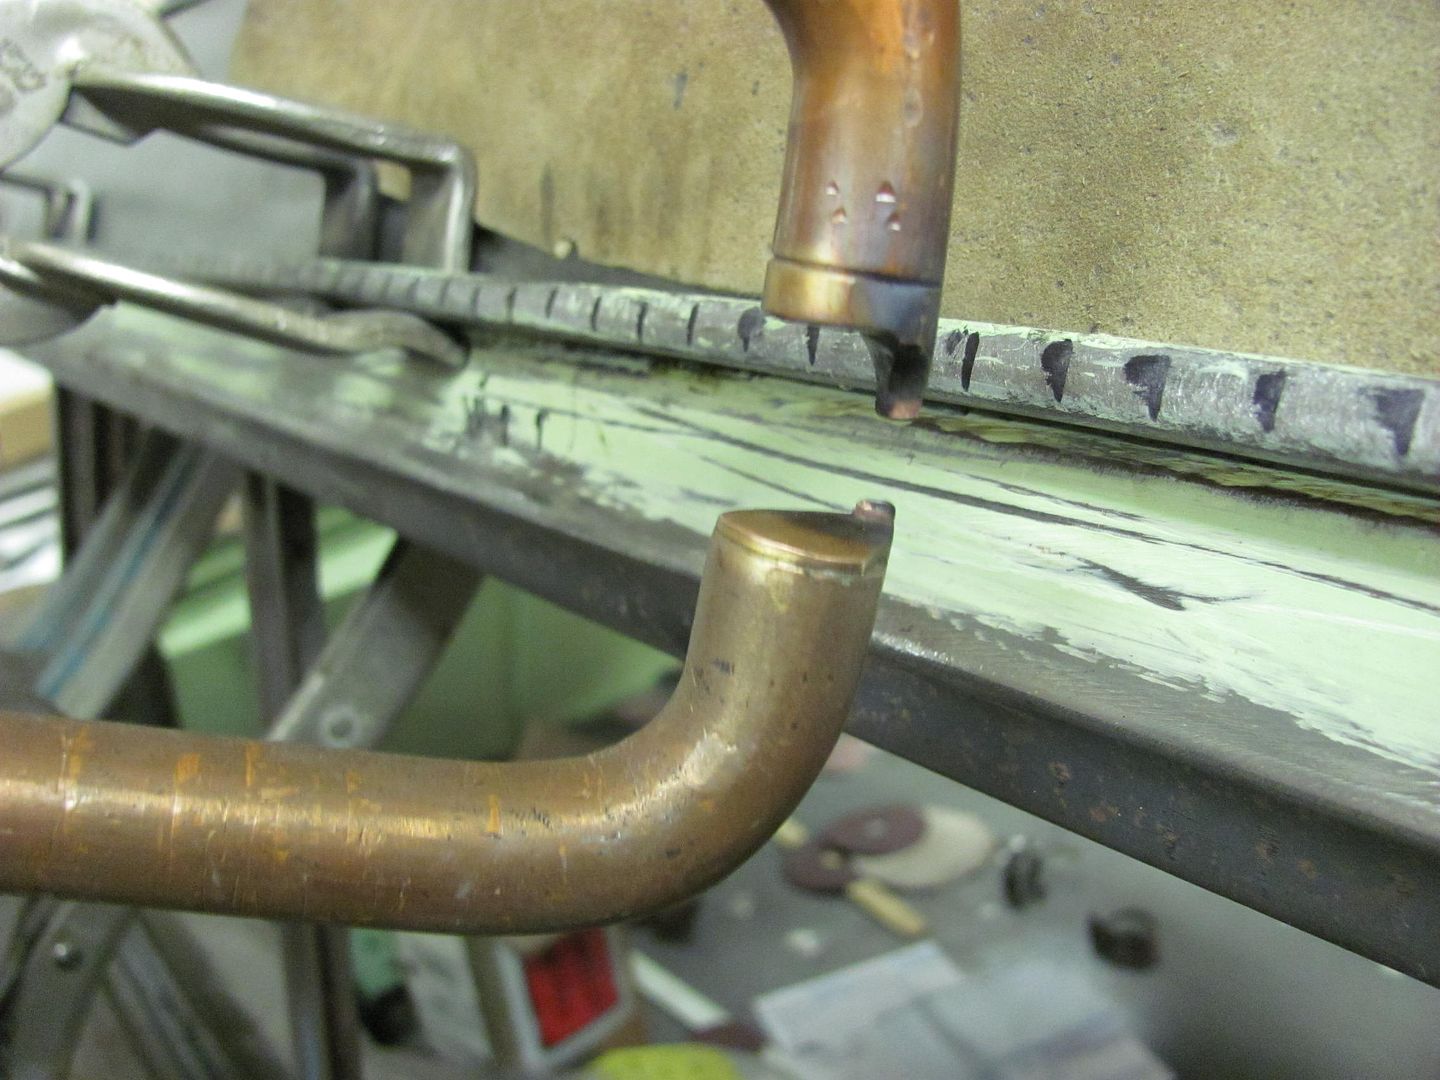
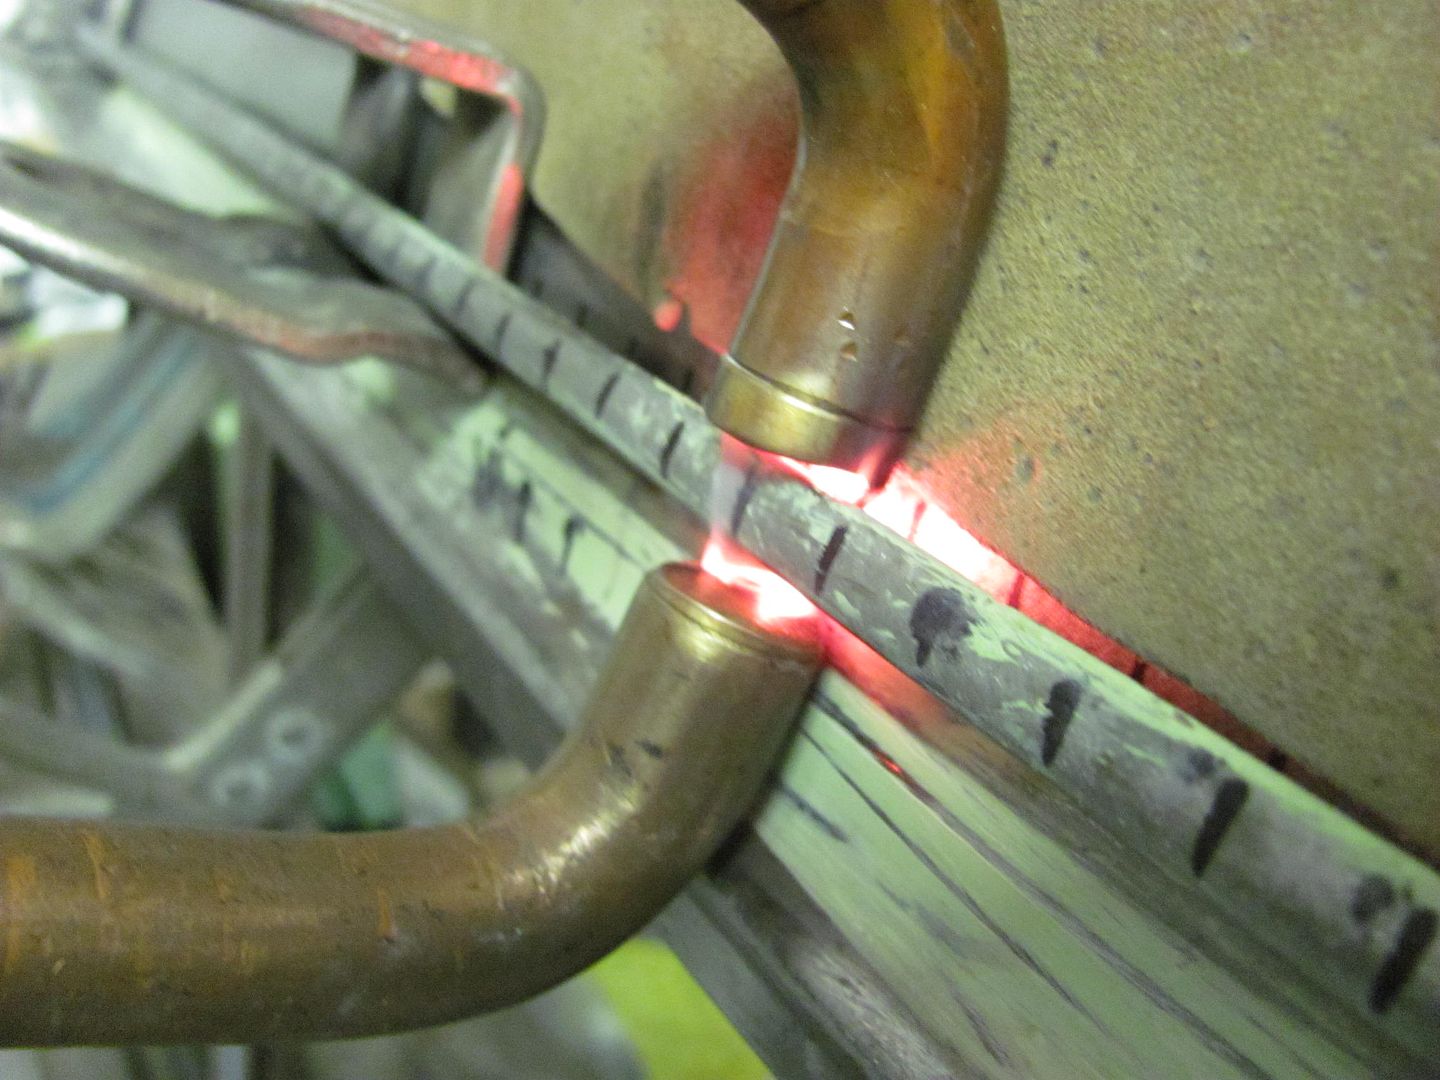
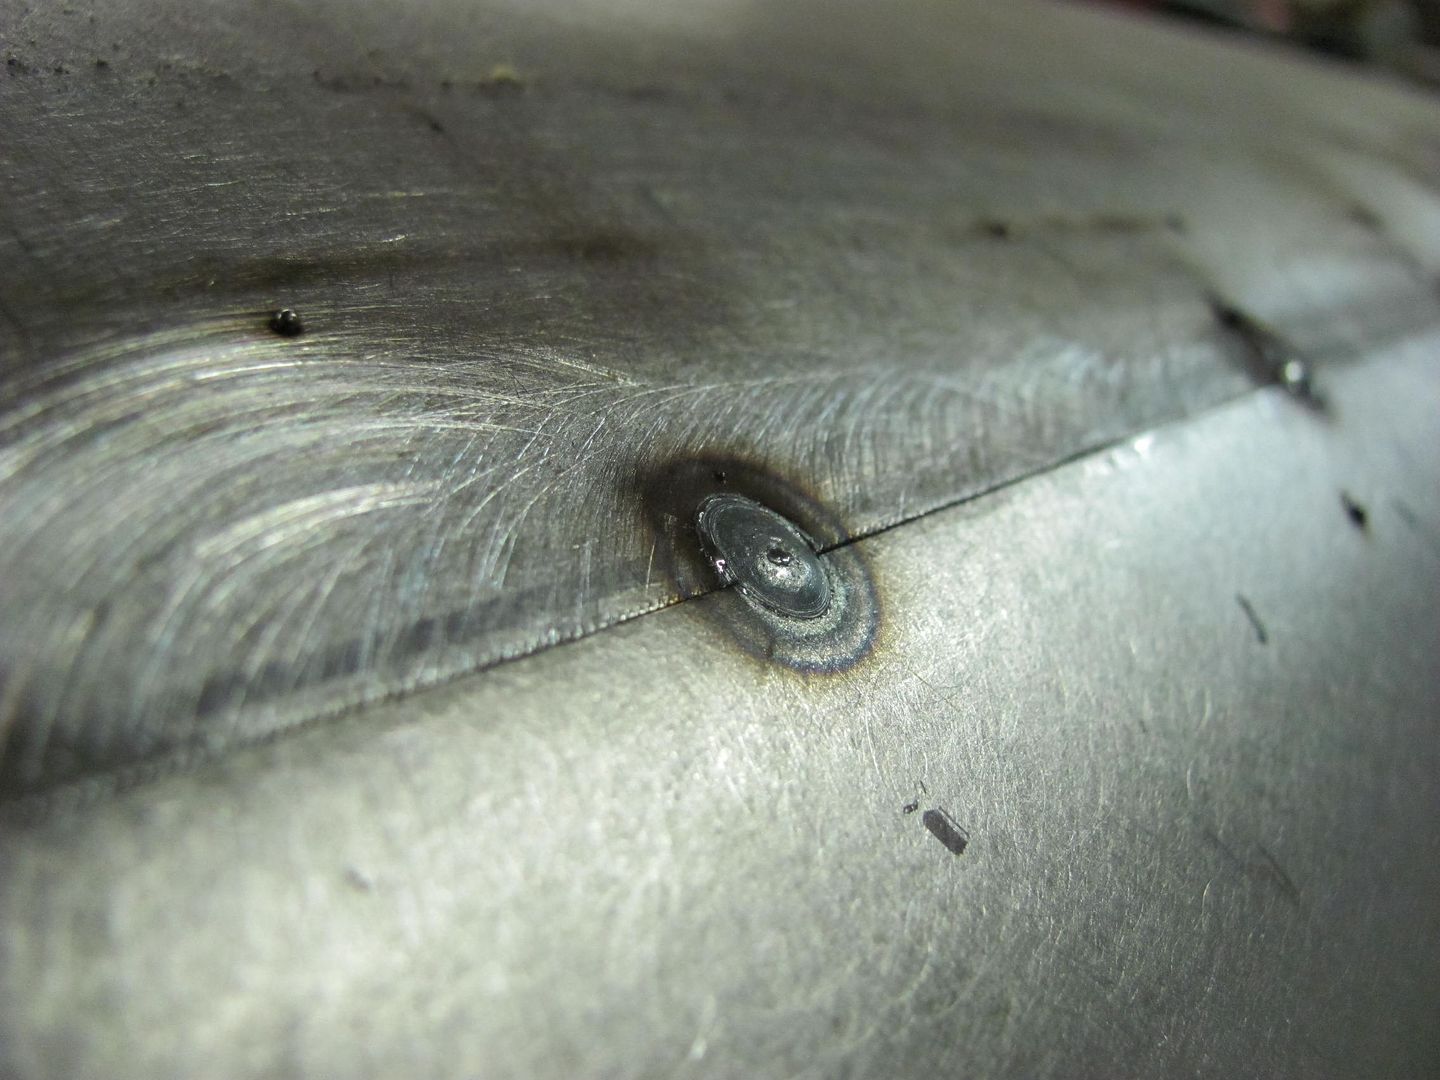
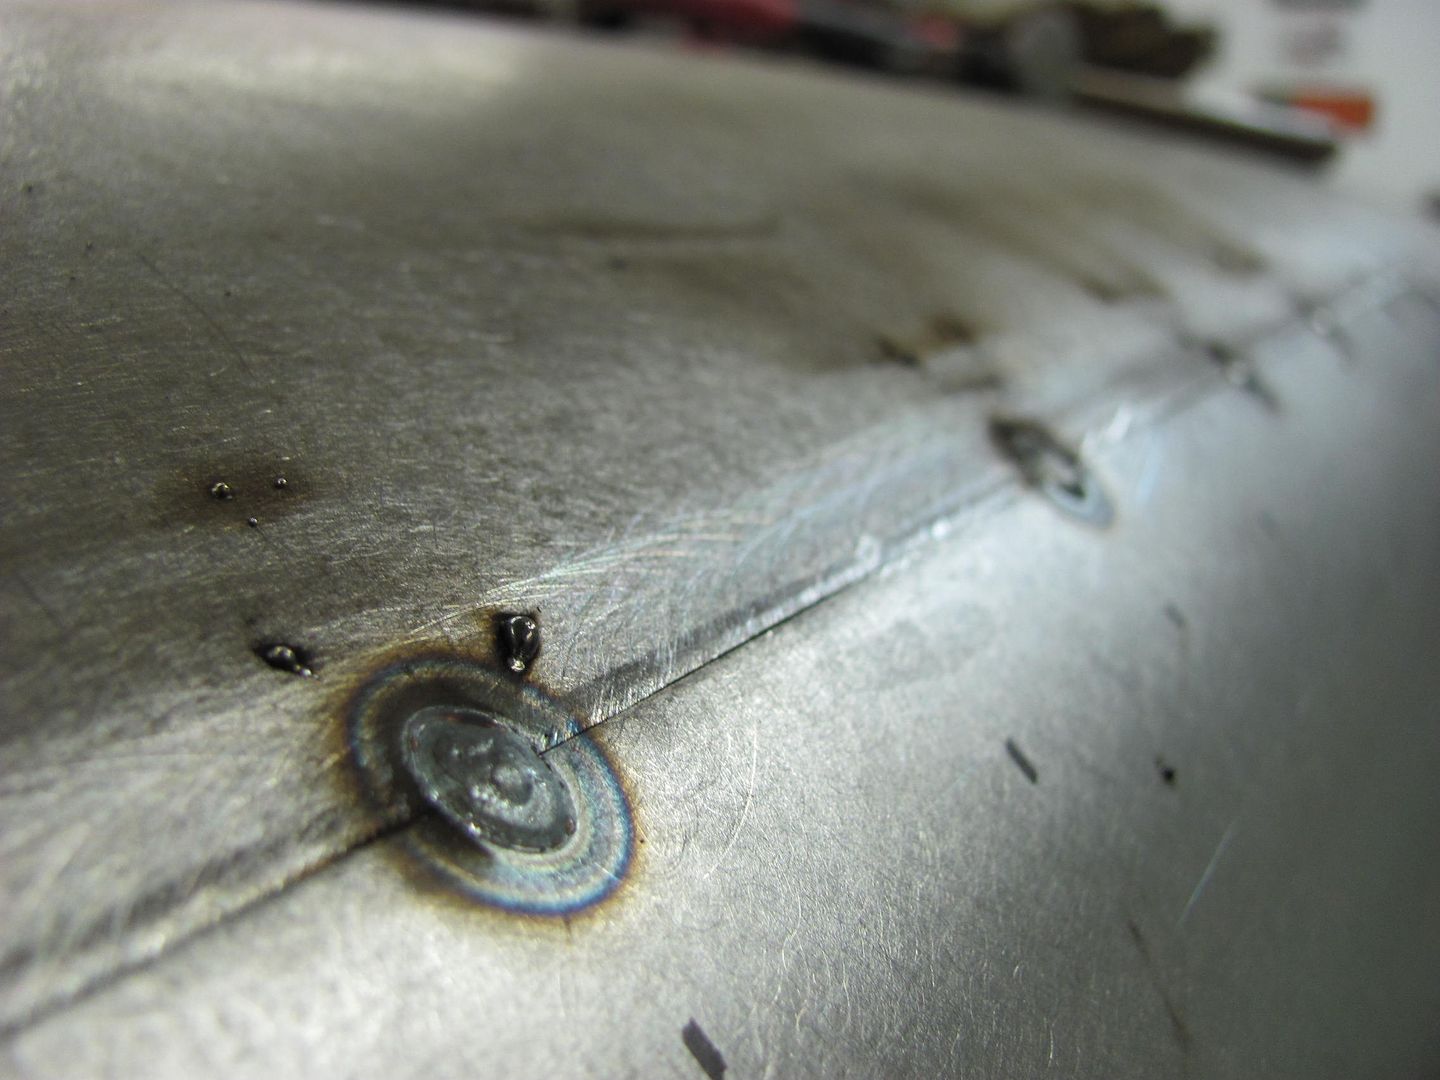
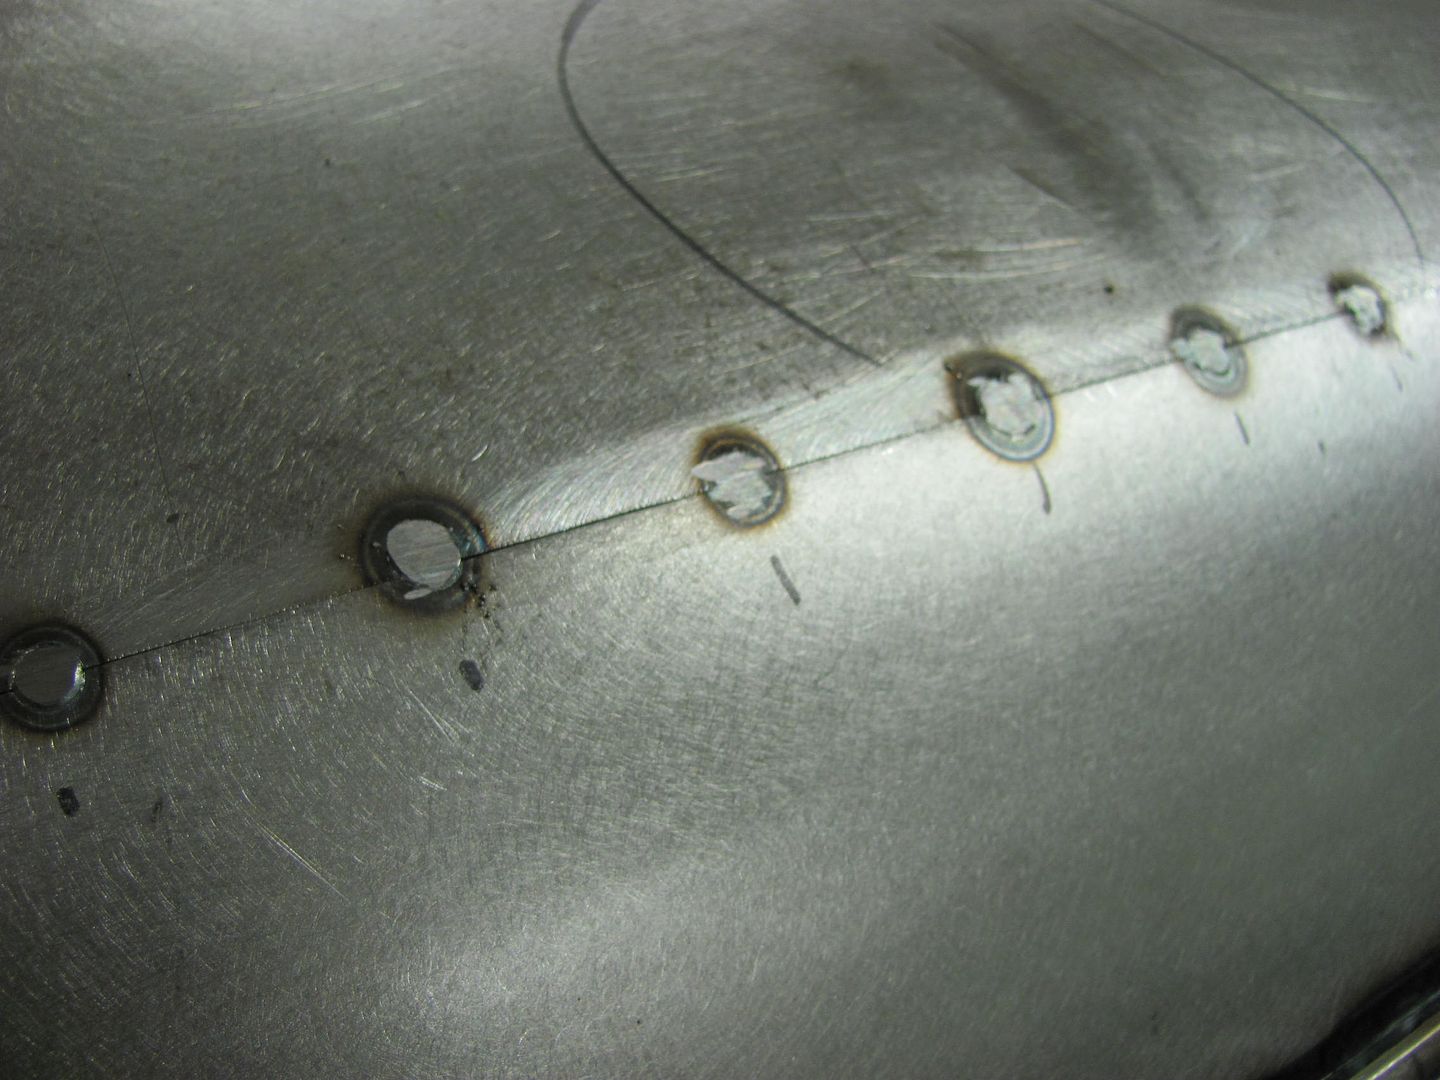
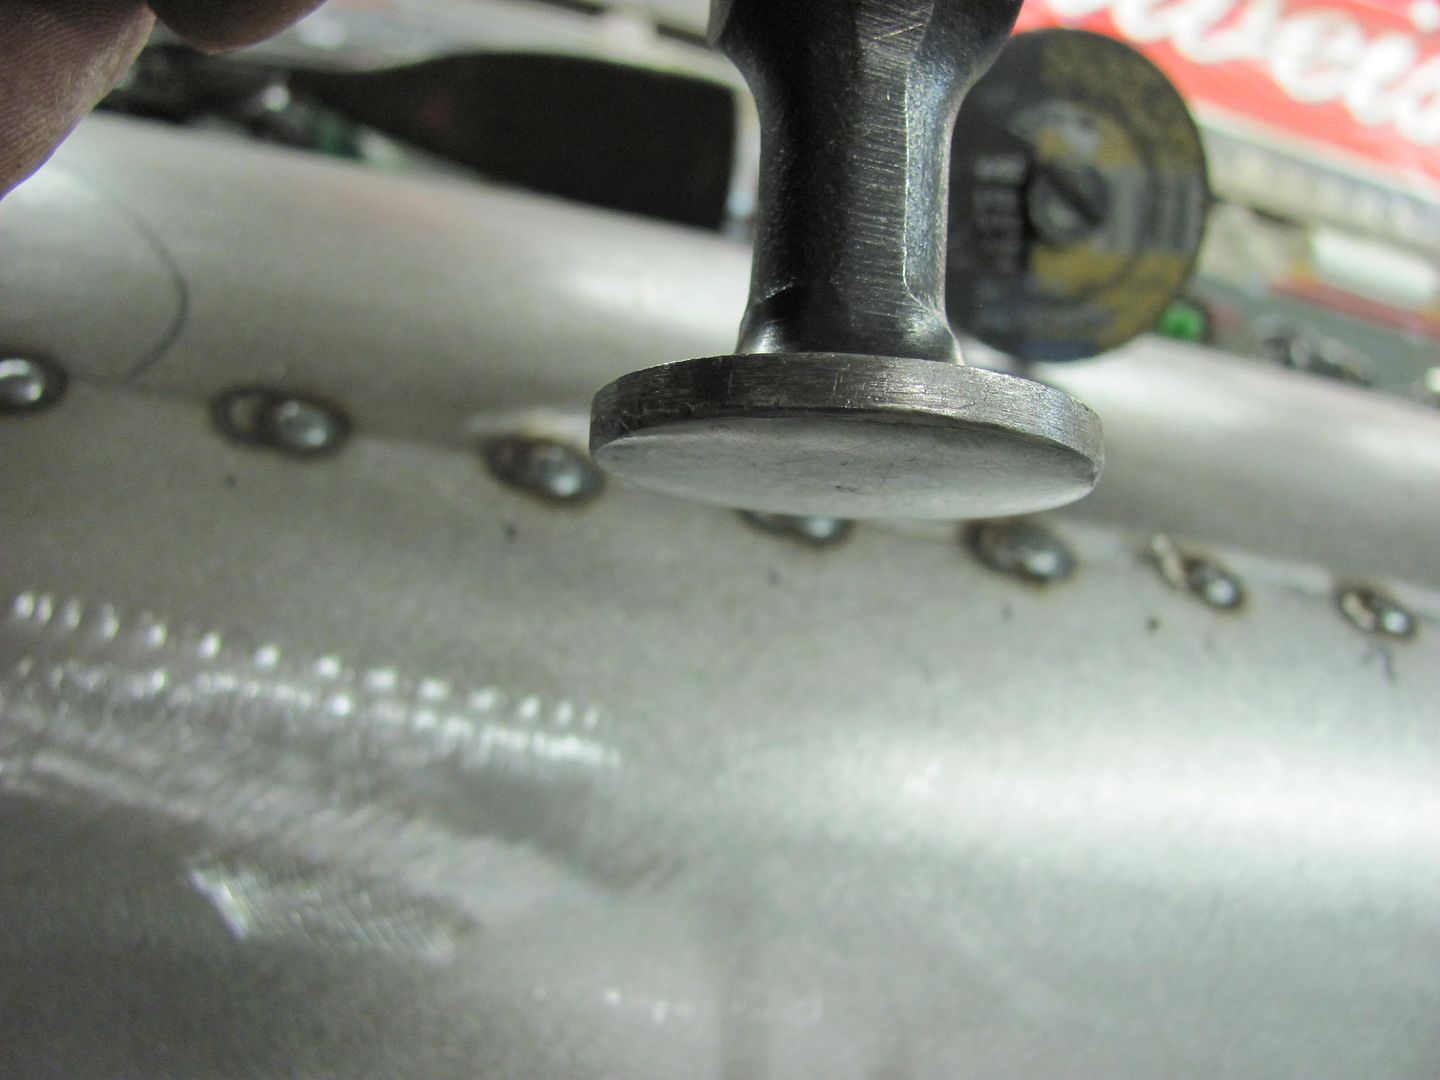
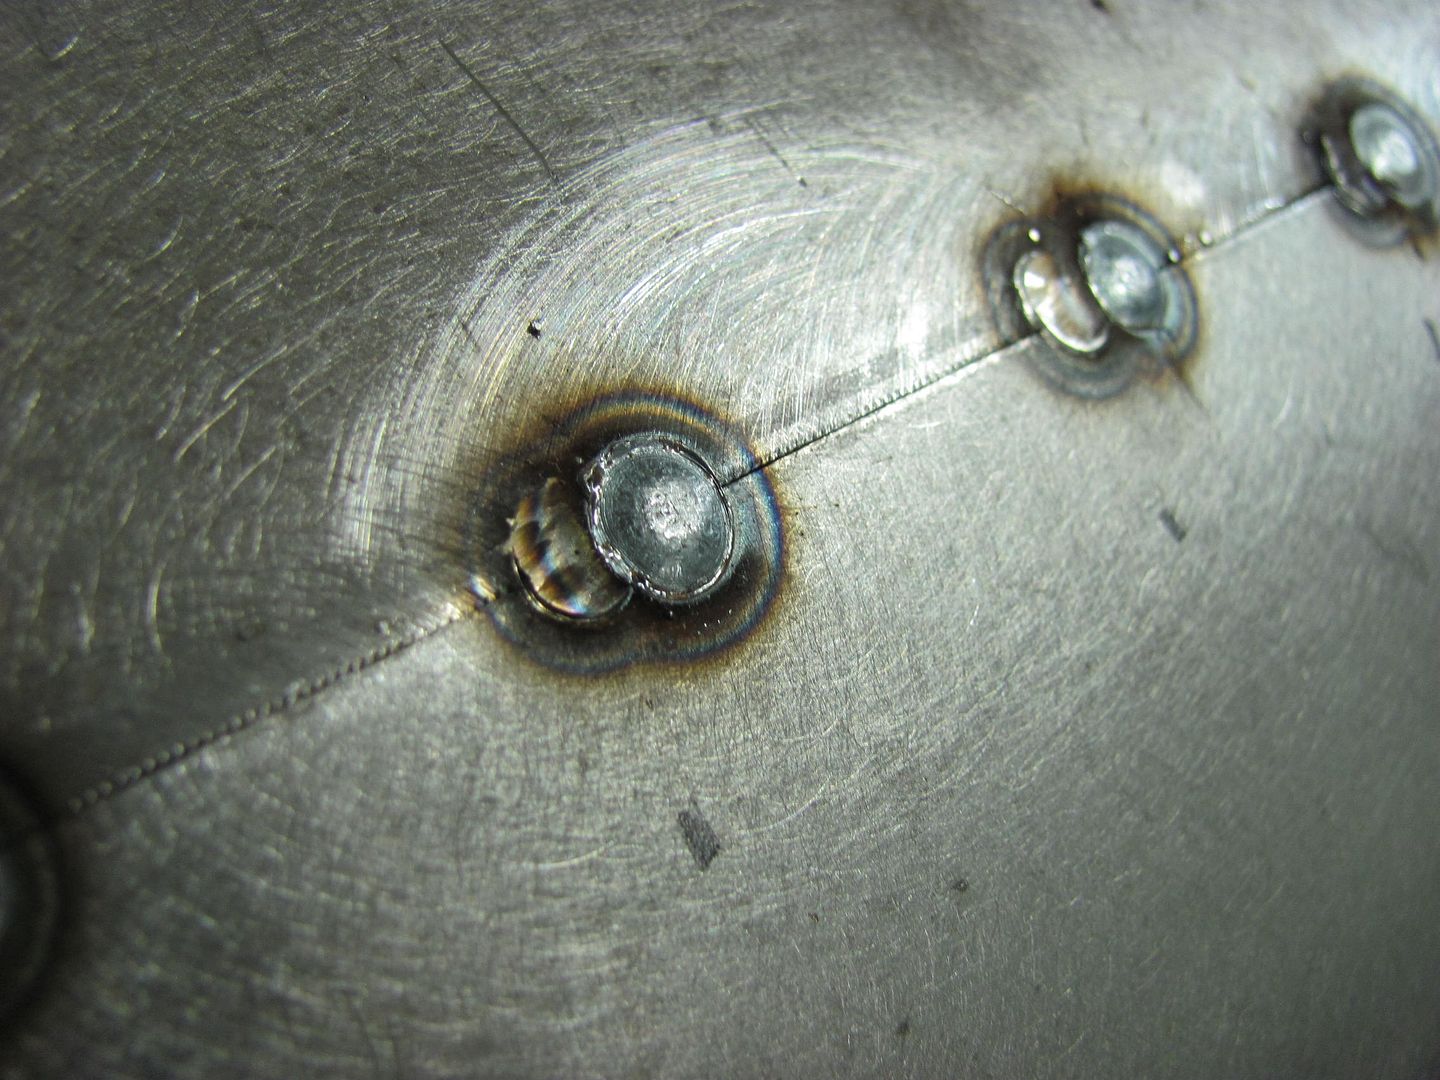
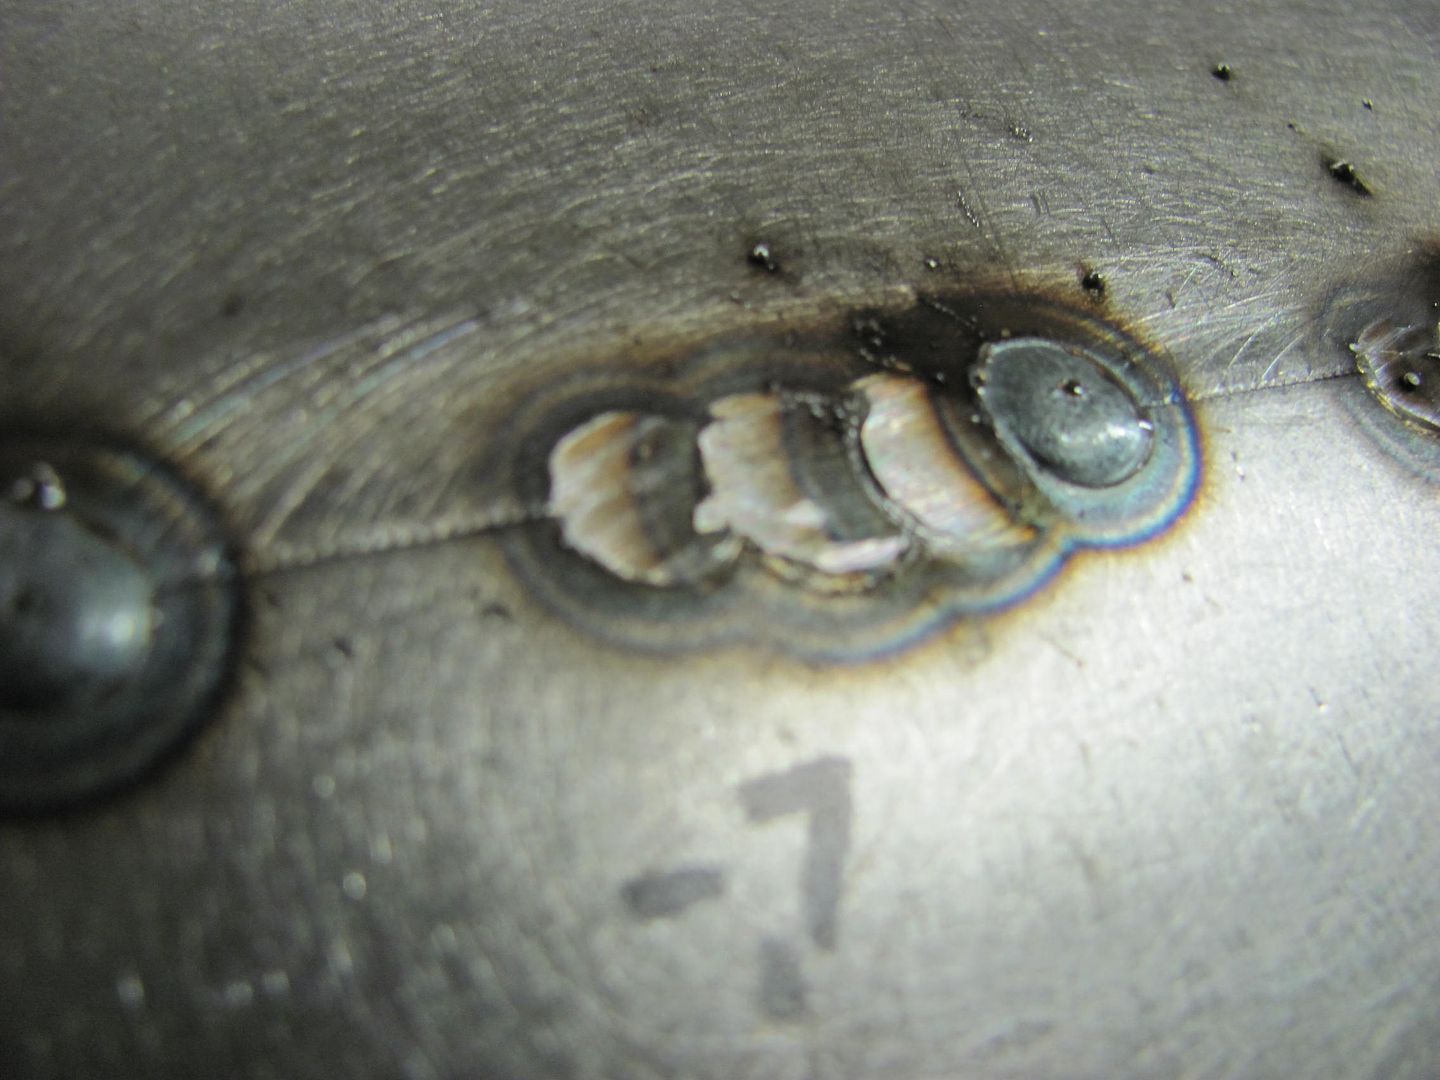
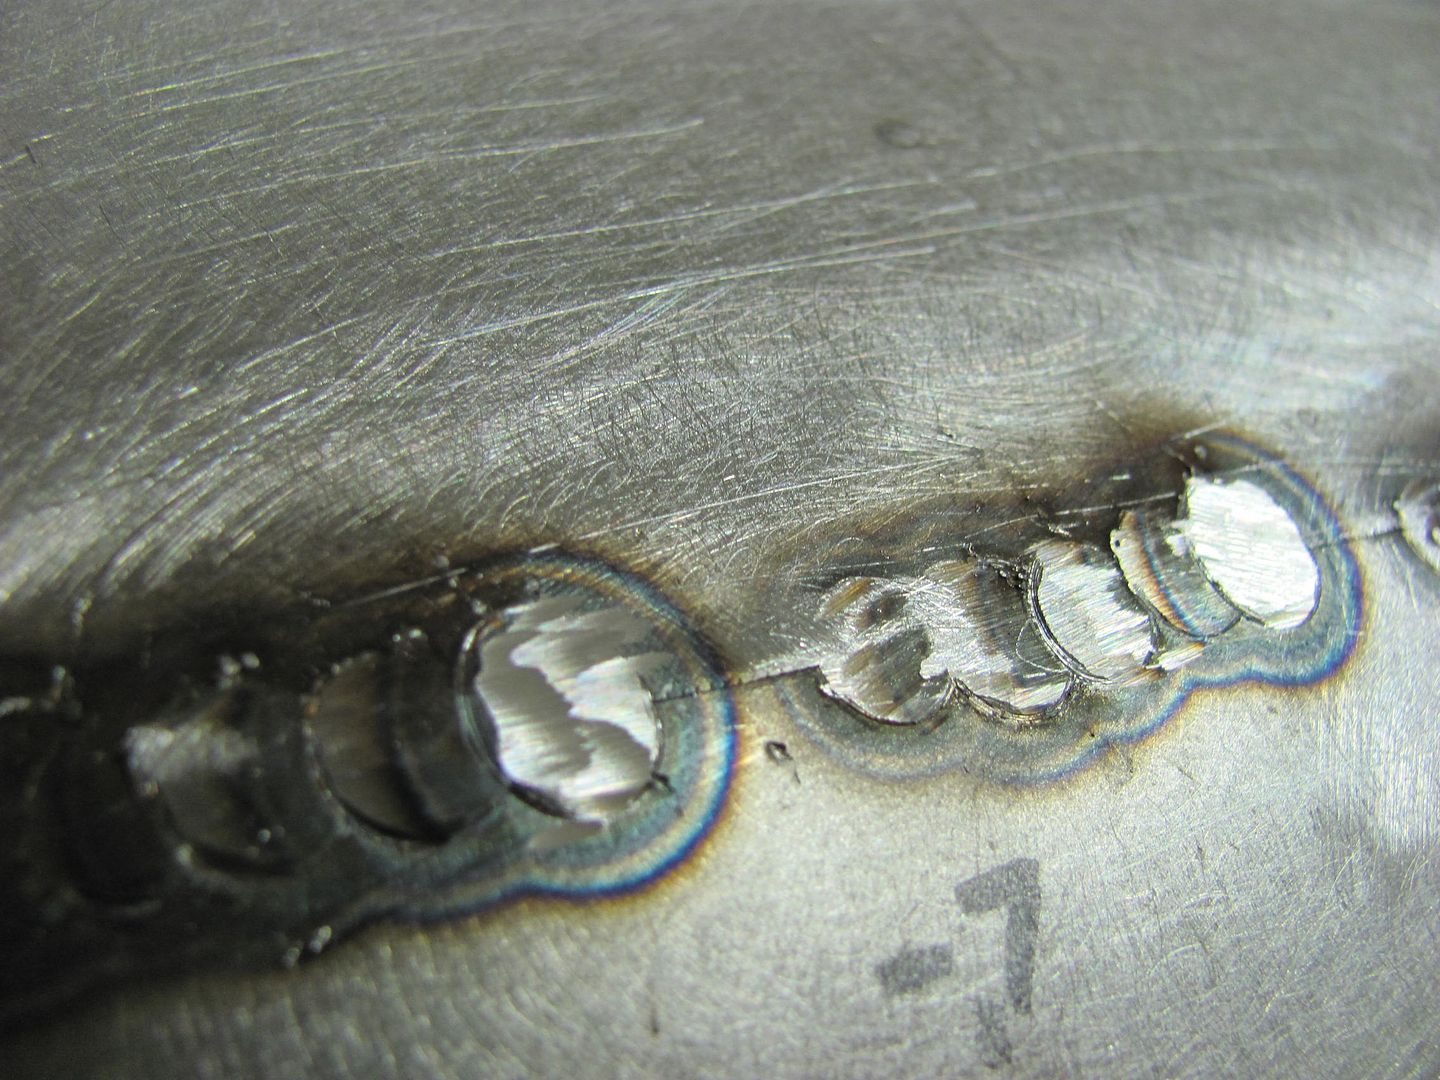
    Here's a good indicator for using the 3" cut off wheels as a grinder for removing spot welds. The top layer starts to turn blue when the metal gets thin and hot. Once you are through to the second layer, you will see the bright metal surrounded by the blue ring. Time to stop and pry them apart.


    This video will show the spot weld removal process in a little better detail..


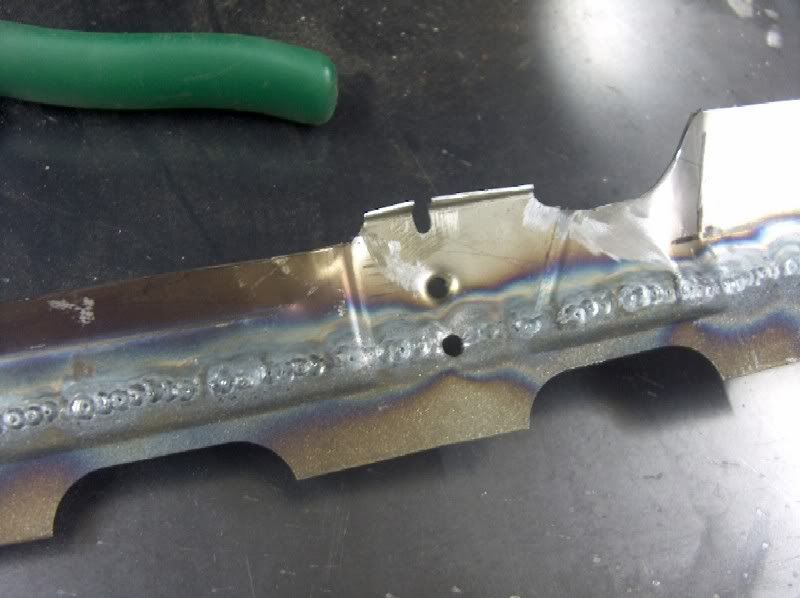
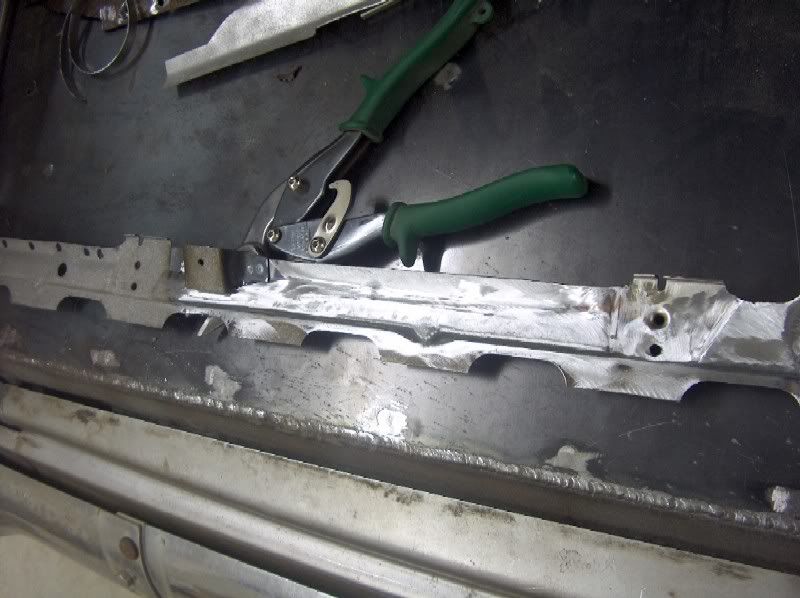
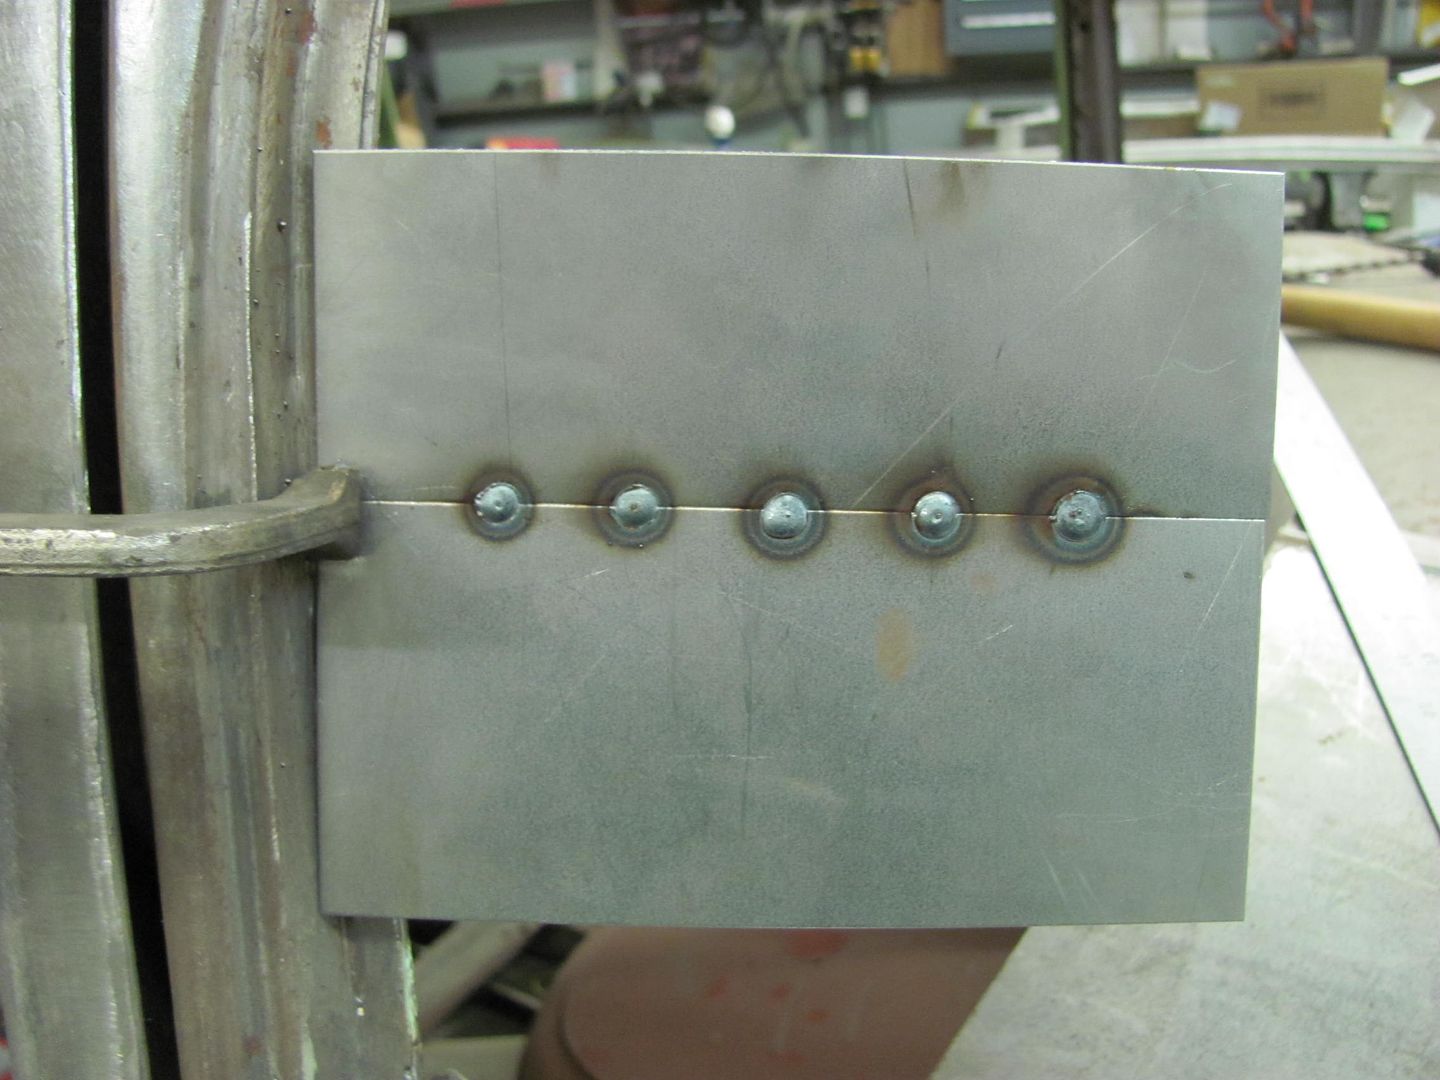
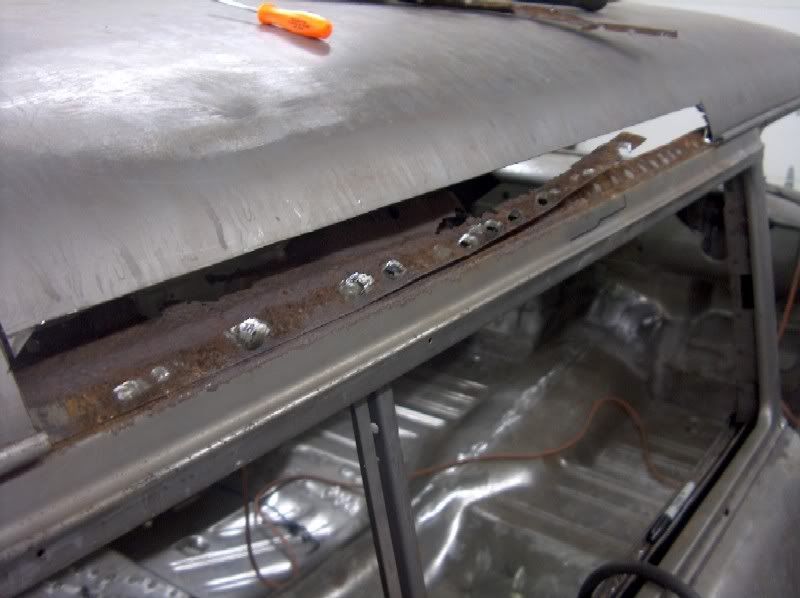
    Our removed parts, so far....

    Last edited by MP&C; 02-18-2014 at 07:43 AM.
    Robert


    MP&C Shop Projects-Metalshaping Tutorials


    Instagram @ mccartney_paint_and_custom


    .

  2. #2
    Registered Member MP&C's Avatar
    Join Date
    Dec 2013

    Member #:2017
    Location
    Southern MD
    Posts
    1,293
    A trial run at rain gutters


    Fabricating the new pieces


    There was one more section that needed repair, specifically the section holding the headliner bows. Looking at the next pic, the left red circled area is what it should look like, and the right red circled area shows where some of the rust spread, weakening the headliner bow support. Time to cut this out, bend up a replacement, and weld together.


    Dress the exposed welds a bit, and the rest will be cleaned up in the sand blast cabinet in preparation for epoxy primer. Then this stuff can start going back together.


    Well most of the roof patches are just about done, ready for paint, but we'll need the rain gutter as well, so let's get that done so it can be painted at the same time. The section needed was about 31" long, and you tend to get crisper bends on shorter sections (especially with worn out machinery), so I made two pieces 16" long. Here's the bend process:


    These were all done in the apron brake, with the last one accomplished using the clamping section of the brake to flatten out the bend. Next, a mark is made to cut the "tail" to size, and this cut will be done using a 3" x 1/32 cutoff wheel. To prevent from cutting through into the back side, slide a piece of scrap under the "tail".


    Once the tail is cut this short, we'll need to resort to the press brake with some flattening dies to compress the fold flat, mimicking the factory original. This could also be done using a good flat body hammer.


    Then it's back to the apron brake, and with the newly made fold facing out, make a slight bend to form the curved surface you see on the outside of the gutter.


    Then the rest of the bends, and a trail fit.


    Although the gutter was fairly straight and needs to have a slight radius to match the roof, the heat from the plug welds should be sufficient to shrink the back edge and draw the gutter in tight to the car where it belongs. Now where's the smiley with the fingers crossed when you need it?

    Well the epoxy primer has dried so let's get started on the drip rail install. Some epoxy primer was also painted on the top edge of the quarter the other day, in an attempt to prolong the lifespan this second time around. Plug holes were drilled, and the first piece was welded in place.


    All the plug welds were ground flush as the drip rail will position on top of this for welding. The next piece was overlapped and welded in place.


    And now for the drip rail


    Inside roof structure welded back in the wagon, and the welds dressed.


    Last edited by MP&C; 02-18-2014 at 10:42 AM.
    Robert


    MP&C Shop Projects-Metalshaping Tutorials


    Instagram @ mccartney_paint_and_custom


    .

  3. #3
    Registered Member MP&C's Avatar
    Join Date
    Dec 2013

    Member #:2017
    Location
    Southern MD
    Posts
    1,293
    For the roof filler panel, I needed to make some dies for my Lennox, a reciprocating machine used to form sheet metal. But first let's take a profile template.. ( I should point out that this is by all means something that someone could do with a simple hand brake, it would just take a bit of determination and finesse.)


    As the machine has 3/4" square tool holders, this 3/4" steel flat bar looks like it will work......


    A sample piece of 19 ga is run through and test fit on the car.....


    The wavy metal at the top indicates the dies are a bit tight in that area, and are planishing, or stretching the metal.


    So we'll tweak the dies to see if we can get it a little closer....


    The repair panel came out much better this time.....


    This is a good rough start, and we'll fine tune it to better fit over the area with the hole.
    Last edited by MP&C; 02-18-2014 at 08:45 AM.
    Robert


    MP&C Shop Projects-Metalshaping Tutorials


    Instagram @ mccartney_paint_and_custom


    .

  4. #4
    Registered Member MP&C's Avatar
    Join Date
    Dec 2013

    Member #:2017
    Location
    Southern MD
    Posts
    1,293
    Test fitting the repair panel over the area with the hole.............


    Looking at the front, the panel needed just a bit more crown....


    And the rear needed just a bit less....


    So with the Go Kart slick mounted up and ready to go, a 6" then 3.75" radius lower anvil added the crown needed for the front and a 24" radius flattened out the rear for a much better fit. The sharp corners are also trimmed to a nice sweeping radius to prevent the shrinking effects from compounding, as they would in a sharp corner.


    These panels are about 4" high and put the weld up above the roof boxing structure, so planishing will be easily accessible to give us a better job.
    Robert


    MP&C Shop Projects-Metalshaping Tutorials


    Instagram @ mccartney_paint_and_custom


    .

  5. #5
    Registered Member MP&C's Avatar
    Join Date
    Dec 2013

    Member #:2017
    Location
    Southern MD
    Posts
    1,293
    The standard cone tips with my spot welder do not have the clearance needed to duplicate the factory spot welds inside the drip rail......


    Looks like we'll have to make our own, so lets start out with some flat tips, and start on the bottom. This one has to be trimmed down pretty short to fit in there because of the outward crease just below the drip edge:


    Then to shape up the top one, it will need the extra length to reach past the drip edge:


    Then a test fit, this just may work!


    Robert


    MP&C Shop Projects-Metalshaping Tutorials


    Instagram @ mccartney_paint_and_custom


    .

  6. #6
    Registered Member MP&C's Avatar
    Join Date
    Dec 2013

    Member #:2017
    Location
    Southern MD
    Posts
    1,293
    Marking out the roof for the new replacement patch.....


    Then another line was dropped down about 1/4" to be used for the "rough cut". A cutoff wheel was used and then trimmed with the snips.


    For the outer sections, a section was marked off just wider than my sheet metal pliers. Then the spot welds, which were visible from the top, were drilled. A cutoff wheel was used to grind through the end(s) of the section being removed. Then the sheet metal pliers used to rock the panel back and forth to break the spot welds loose.


    Got some epoxy on the back side of the new roof patch...


    Last edited by MP&C; 02-18-2014 at 08:48 AM.
    Robert


    MP&C Shop Projects-Metalshaping Tutorials


    Instagram @ mccartney_paint_and_custom


    .

  7. #7
    Registered Member MP&C's Avatar
    Join Date
    Dec 2013

    Member #:2017
    Location
    Southern MD
    Posts
    1,293
    The lower corners of the opening were trimmed to size so that the roof patch could be clamped down into the drip rail. This will help to get more accurate markings on the roof skin for trimming the rest of the opening.


    C-Clamp vise grips added to secure the overlapped panels for marking, then a straightedge used to read the crown of the roof to insure there were no dips or puckers along the top of the joint....


    My favorite scribe, a local auction purchase...


    Scribing the roof panel


    Not much to spare! Trimmed the opening with some offset snips...


    Corners touched up with a 1-1/2" drum sander


    Clamped in place to hold the shape. Note the butt weld clamps will be removed at welding for a tight fit-up.


    Robert


    MP&C Shop Projects-Metalshaping Tutorials


    Instagram @ mccartney_paint_and_custom


    .

  8. #8
    Registered Member MP&C's Avatar
    Join Date
    Dec 2013

    Member #:2017
    Location
    Southern MD
    Posts
    1,293
    In an attempt to limit the heat on the roof panel, I wanted to try some .023 welding wire. I had ordered .023 ER70S-7, but what actually showed up was EZ Grind. I guess I was destined to try this stuff out...


    After about 45 minutes of changing wire, rollers, and trying different settings on the machine, we found dialing it in for 3/16 thick steel and using 1/2 second weld "application" showed about the best results.. Seems odd as the metal was 19 ga, or about .038 thick..


    front:


    rear:


    Comparative size of the weld proud.


    Using the special made tongs, we did the spot welds first to insure the panel was pulled down into the drip rail tightly..


    Then the panels were aligned and tacked, starting at the rear and working toward the front...


    Full penetration welds....


    The patch should be well high enough for planishing.....


    Robert


    MP&C Shop Projects-Metalshaping Tutorials


    Instagram @ mccartney_paint_and_custom


    .

  9. #9
    Registered Member MP&C's Avatar
    Join Date
    Dec 2013

    Member #:2017
    Location
    Southern MD
    Posts
    1,293
    Well after a week in FL, time to get back in the shop.. I wasn't totally pleased with the .023 EZ grind, but in all fairness I think some of the issue is my welder. It never has been too keen on .023 wire, so looks like my BIL is going to get a new roll of the EZ grind wire for his Hobart.
    Put the .035 ER70S-7 back in, dialed in the settings for 3/16 thick steel, and ran some test welds...


    Front side....


    Rear side....


    Comparing the EZ grind to the -7, shows less splatter with the -7...


    The roof cross member made part of the weld seam inaccessible, so it was removed on one end for planishing access...


    Welds ground down to just above panel surface...


    Our planishing implements this evening.... Low crown hammer and used the Pexto blocking hammer as a dolly...


    This shows the weld dots planished....


    Full penetration welds.....


    Weld, planish, grind, repeat.


    We're about halfway done, hope to finish it up tomorrow...


    Got the bulk of the welding done. planished, and started to dress the welds.


    This will still need some final metal bumping when finished, but this looks much better than those rust bugs staring at you!


    Sorry I didn't have as many in-process pictures, got in a rush.... until next time..
    Last edited by MP&C; 02-18-2014 at 08:50 AM.
    Robert


    MP&C Shop Projects-Metalshaping Tutorials


    Instagram @ mccartney_paint_and_custom


    .

  10. #10
    Registered Member JT56's Avatar
    Join Date
    Mar 2013

    Member #:1608
    Location
    DFW Texas
    Posts
    1,209
    Again Robert wonderful work. Thanks for sharing!

Page 1 of 3 123 LastLast

Posting Permissions

  • You may not post new threads
  • You may not post replies
  • You may not post attachments
  • You may not edit your posts
  •