Just joined? Please introduce yourself.
Page 1 of 3 123 LastLast
Results 1 to 10 of 21

Thread: Inner Fender repairs

  1. #1
    Registered Member MP&C's Avatar
    Join Date
    Dec 2013

    Member #:2017
    Location
    Southern MD
    Posts
    1,293

    Inner Fender repairs

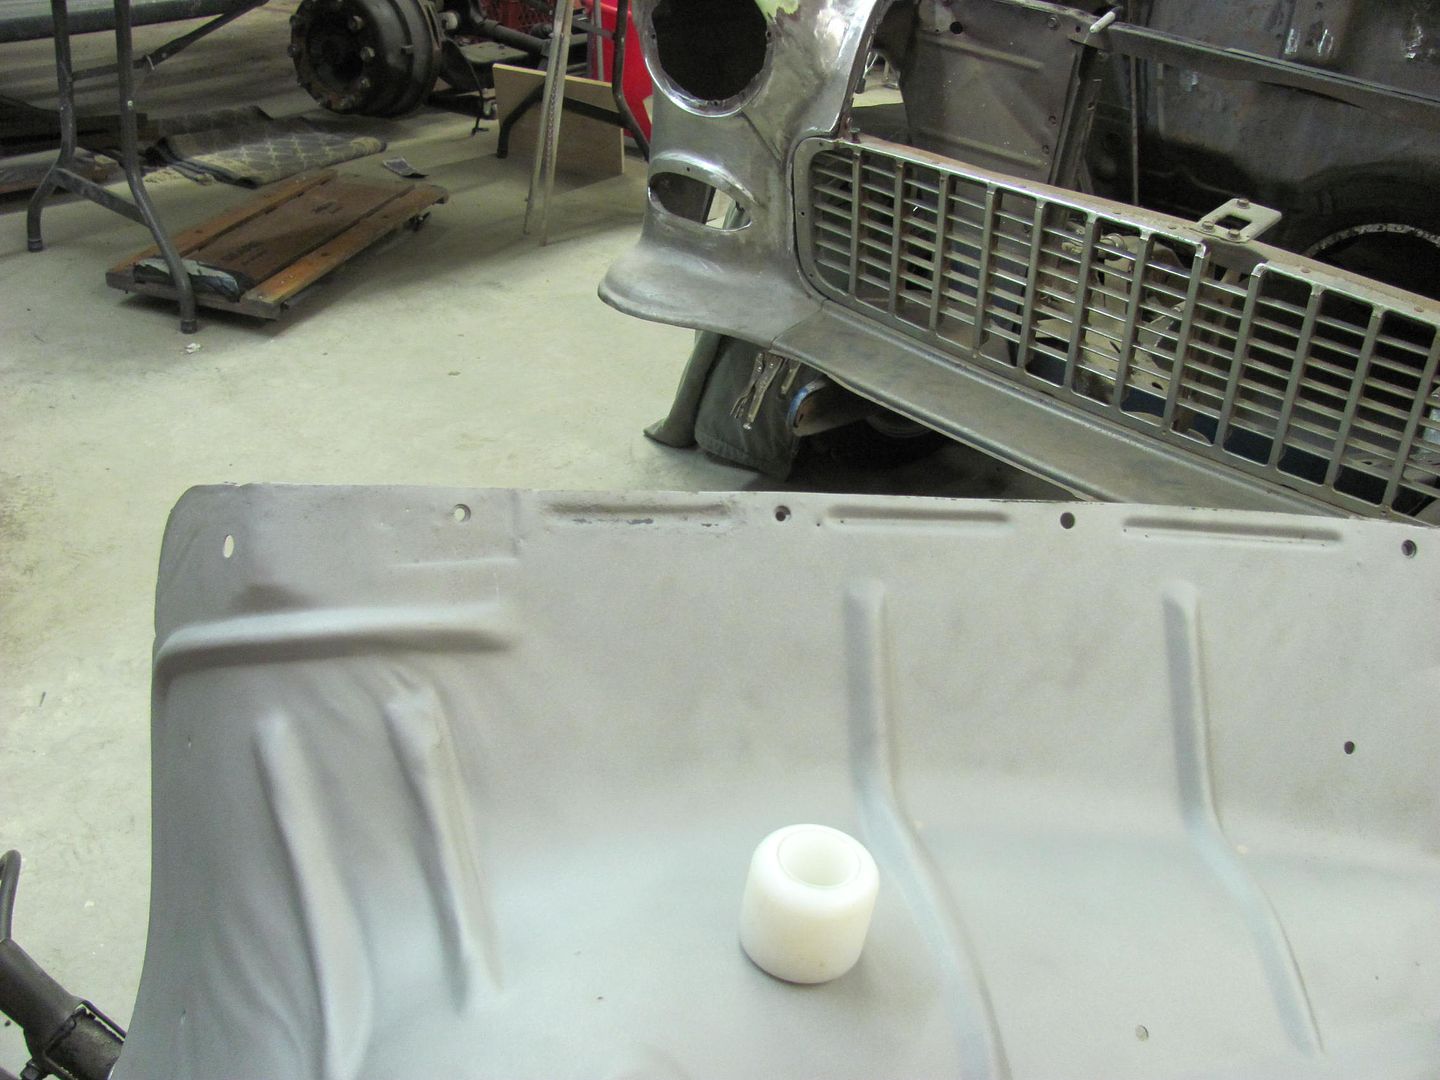
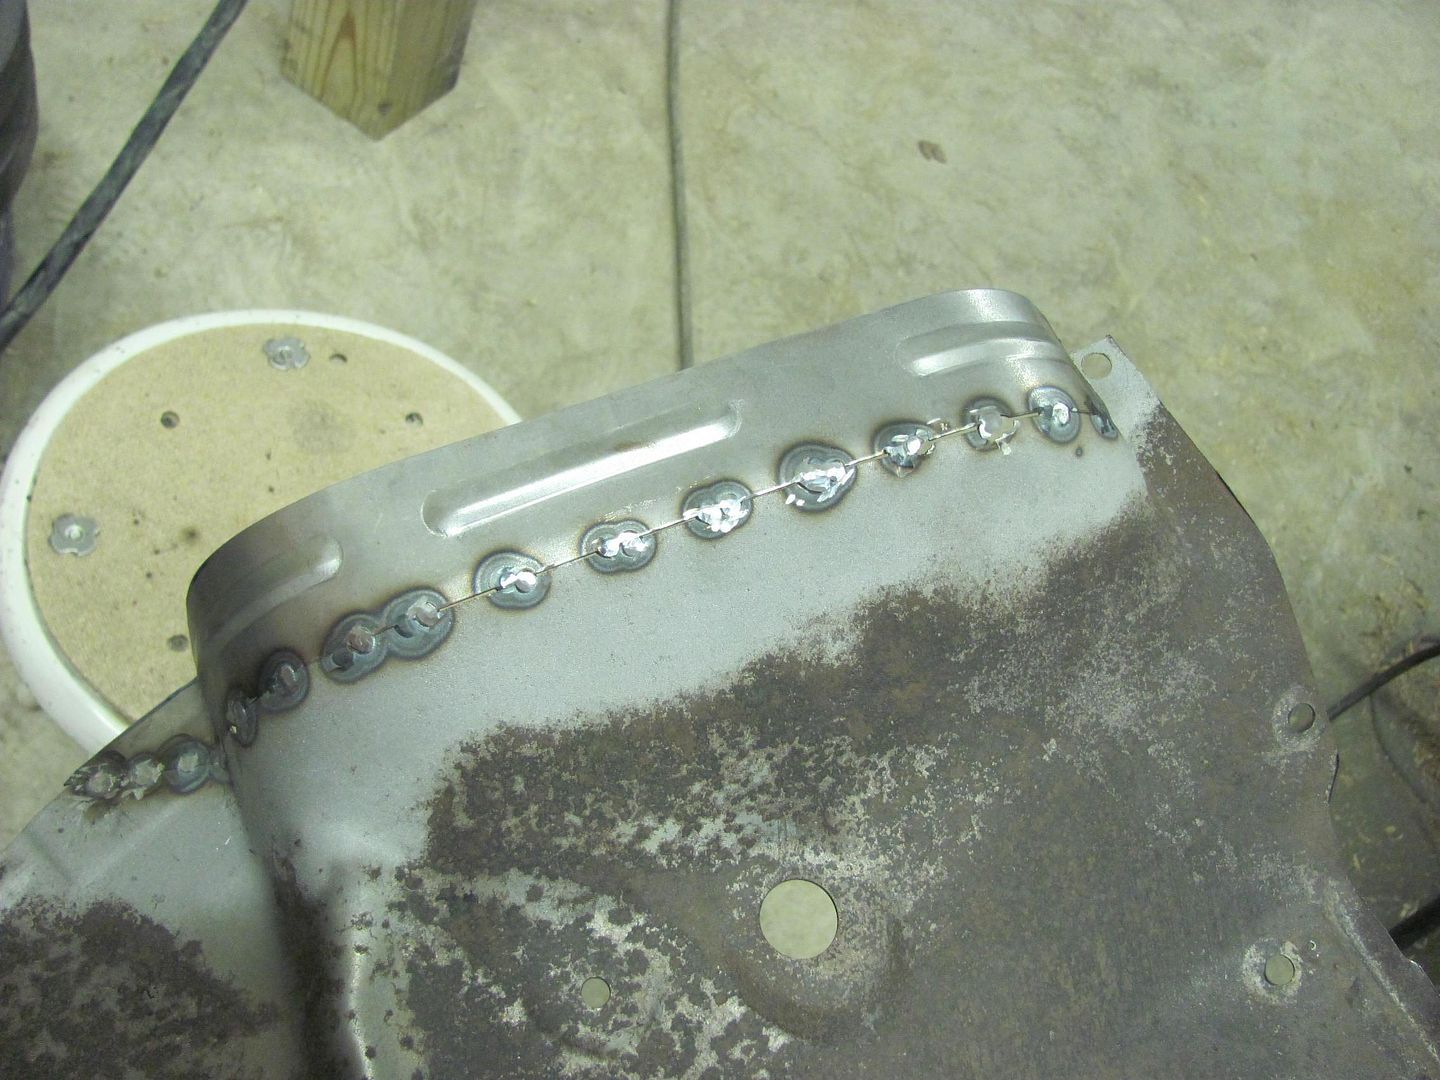
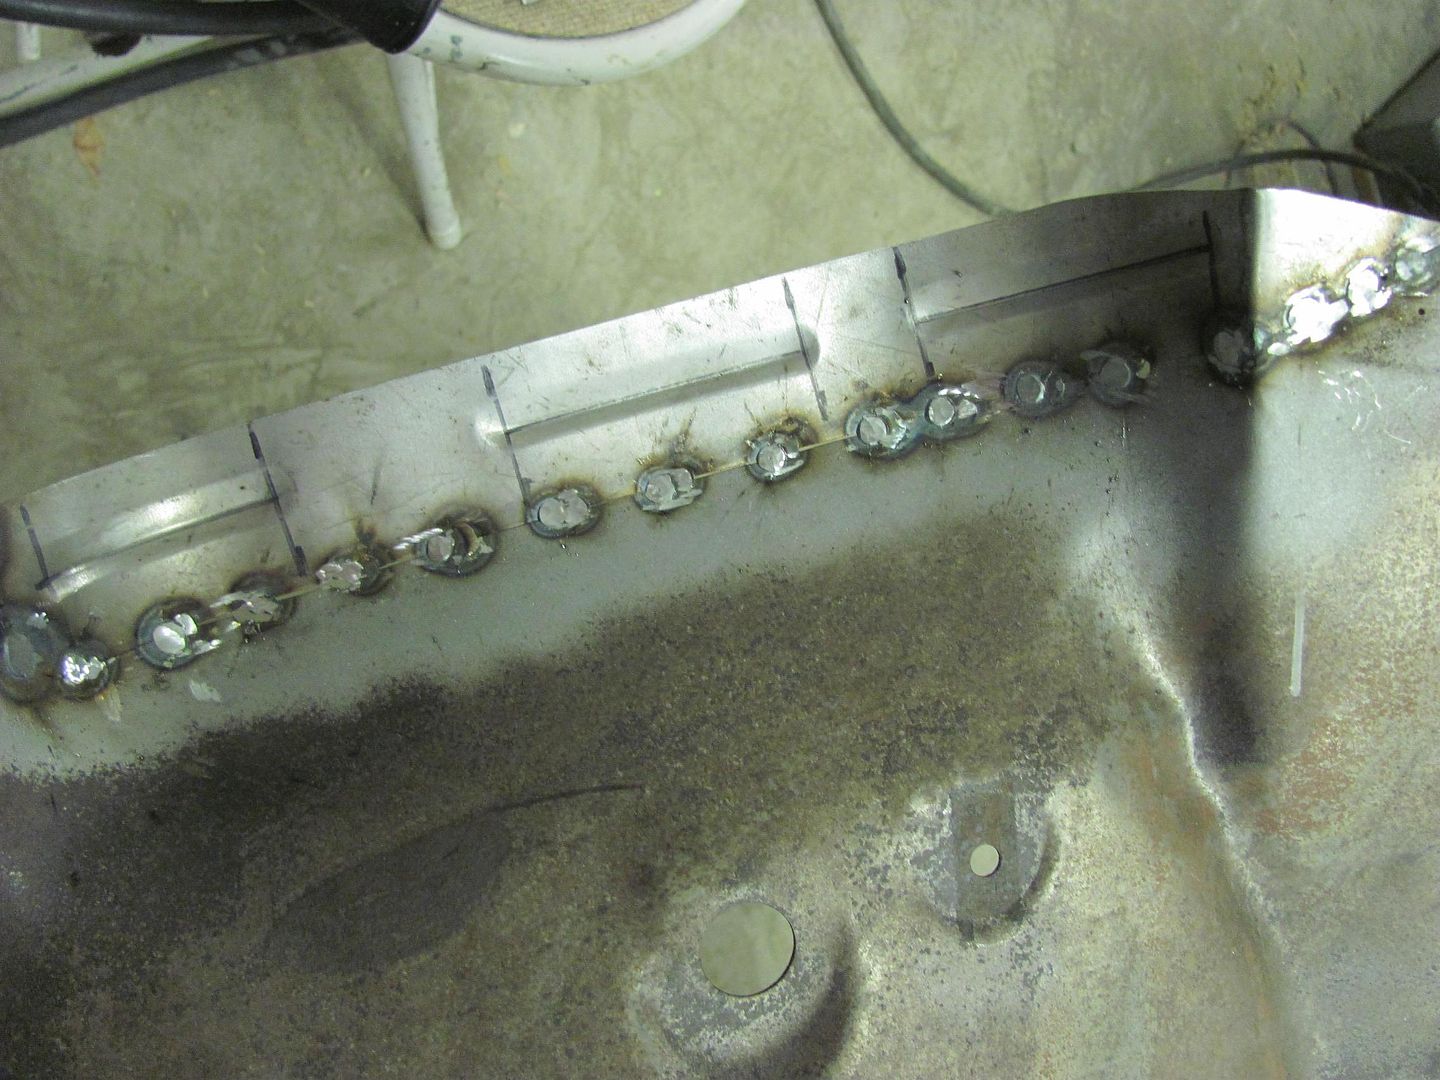
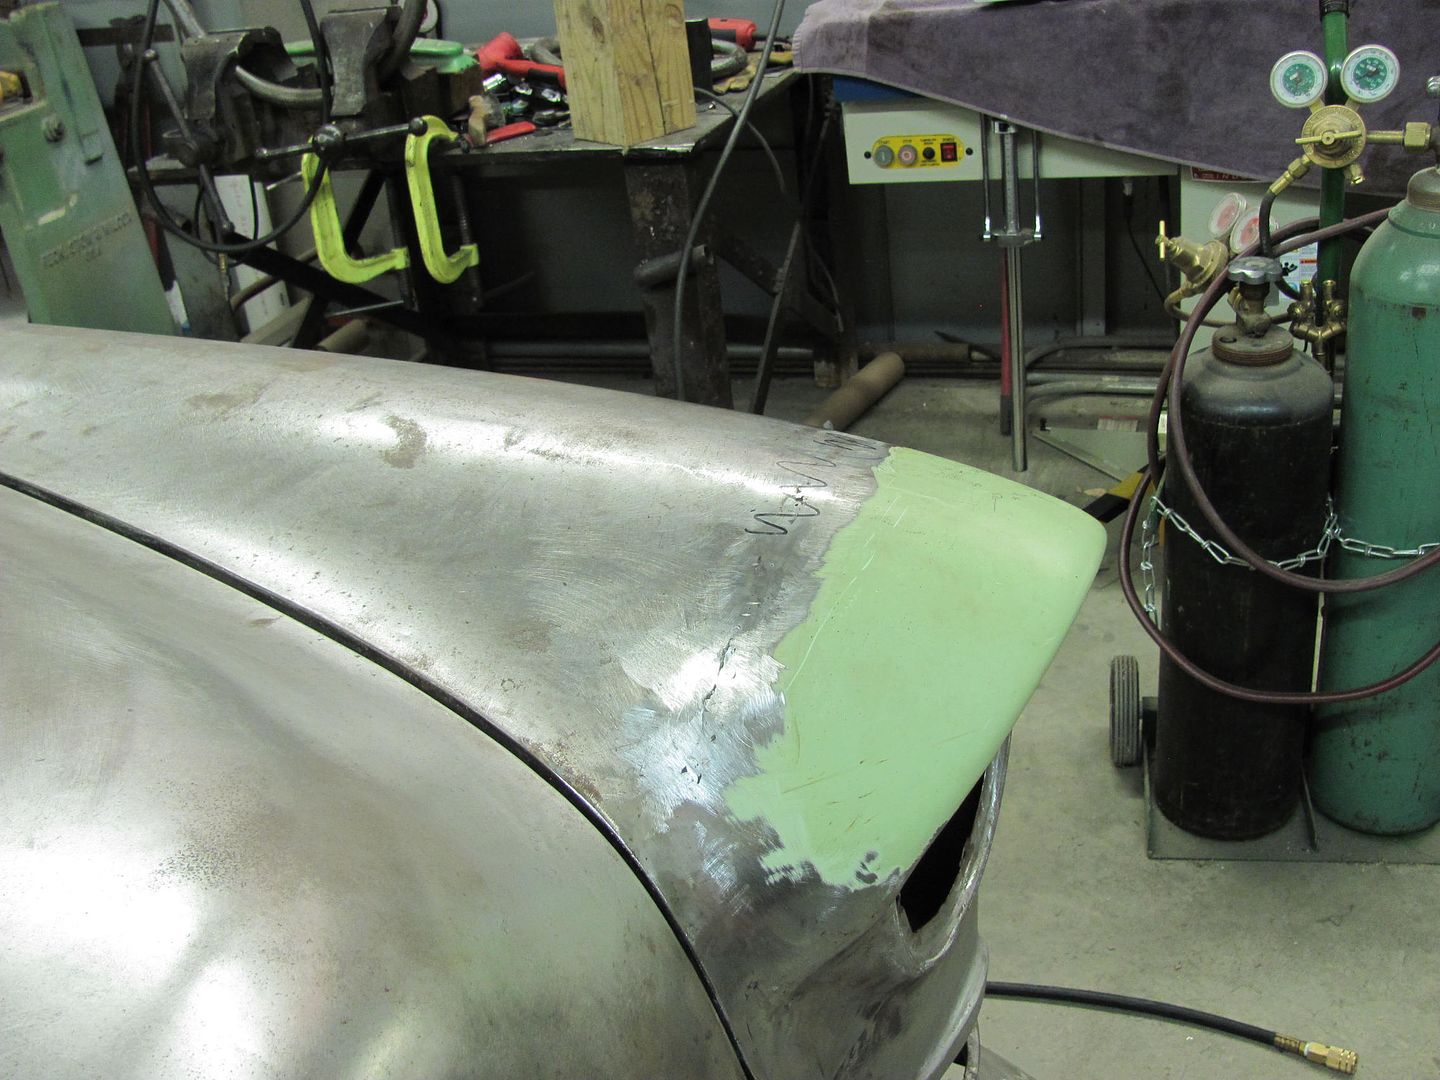
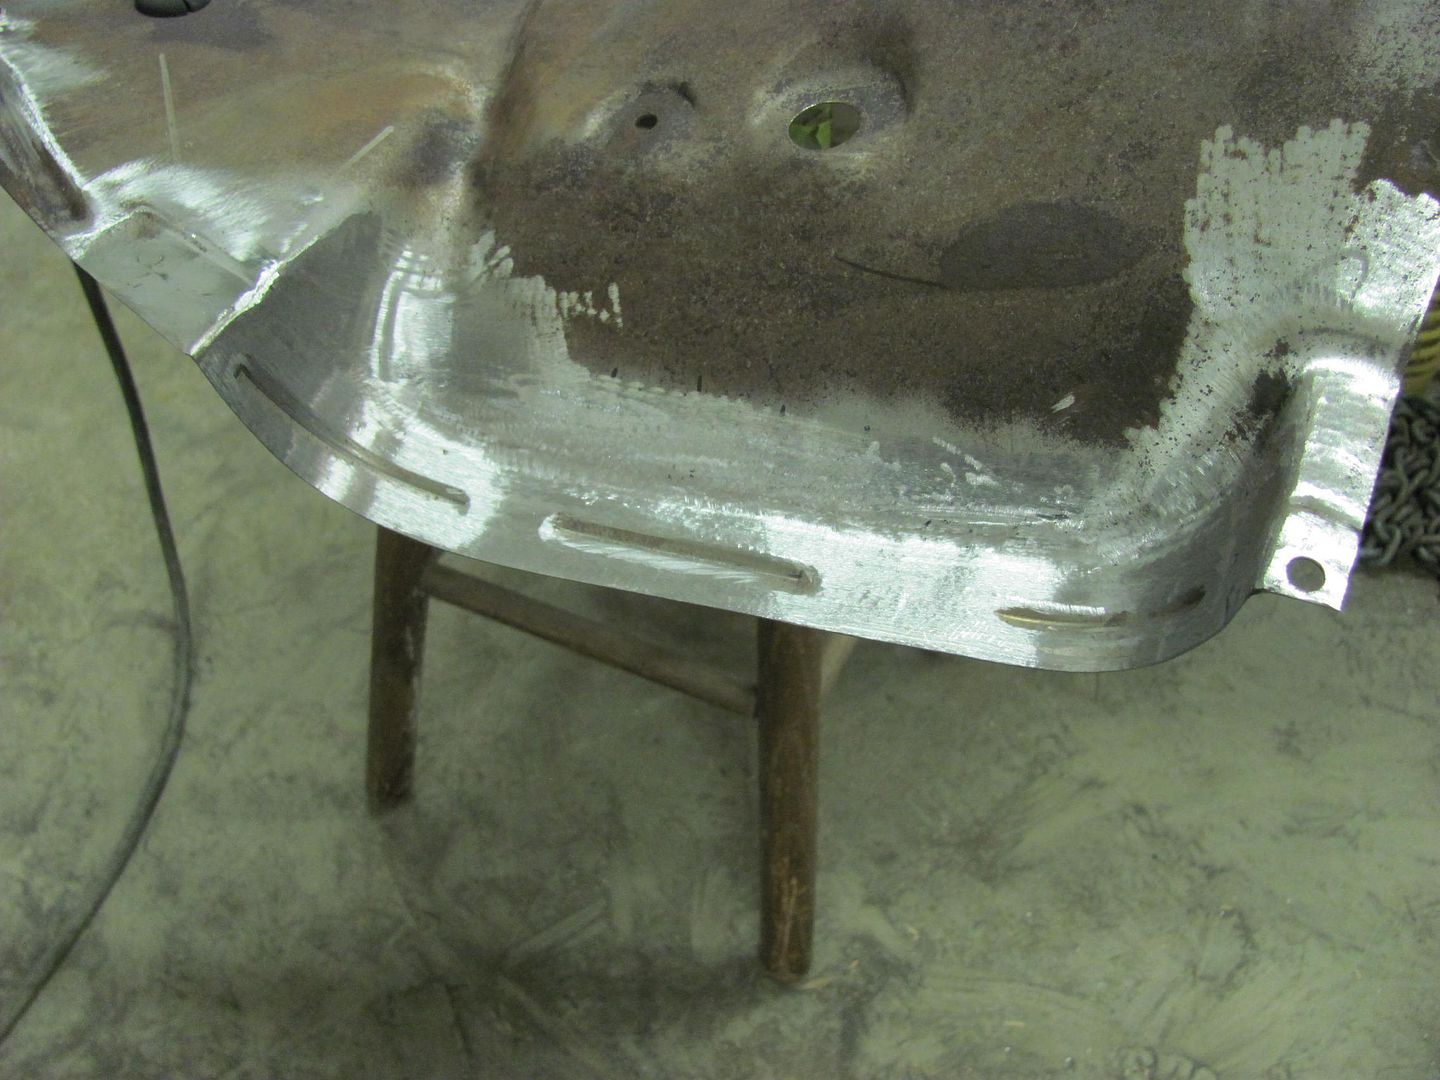
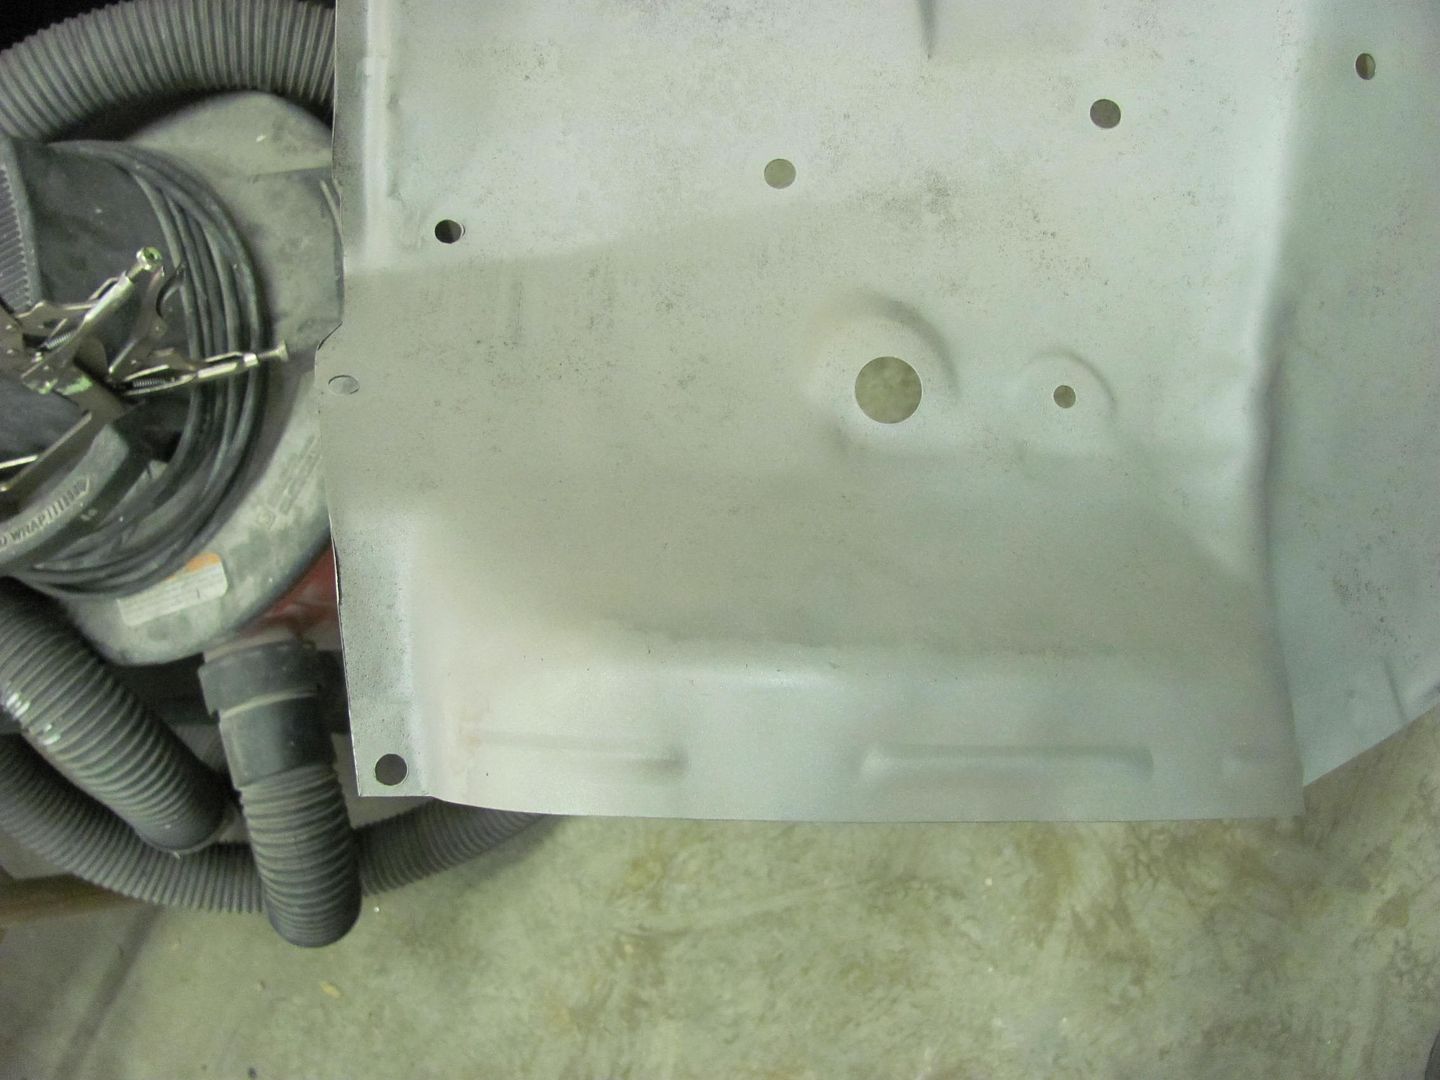
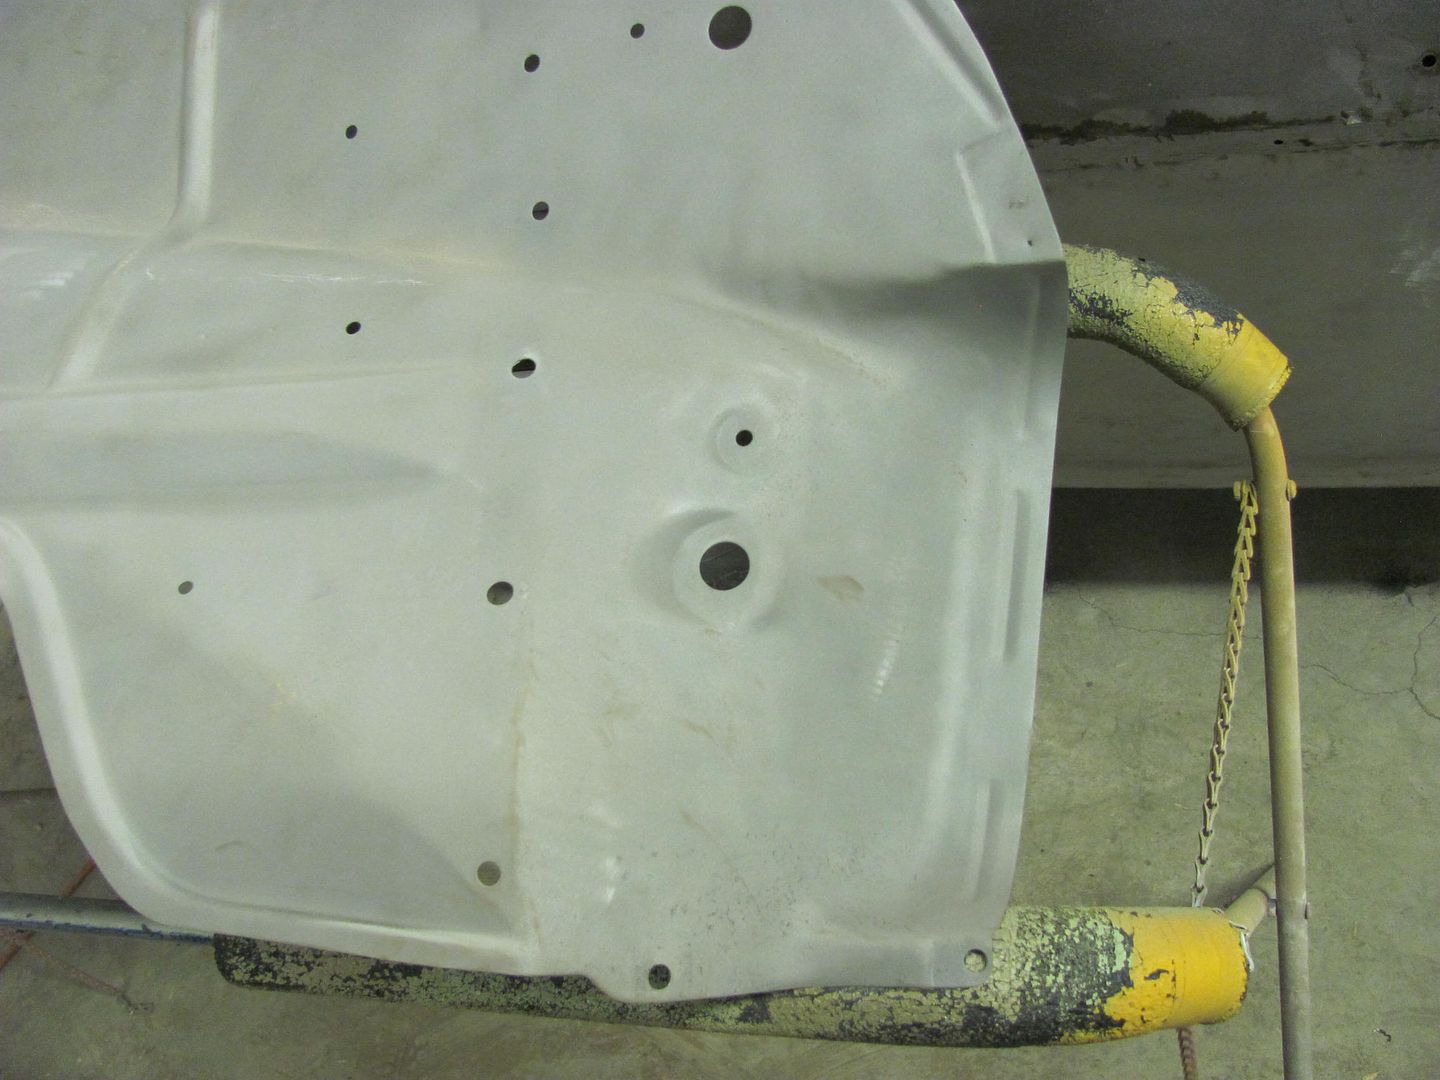
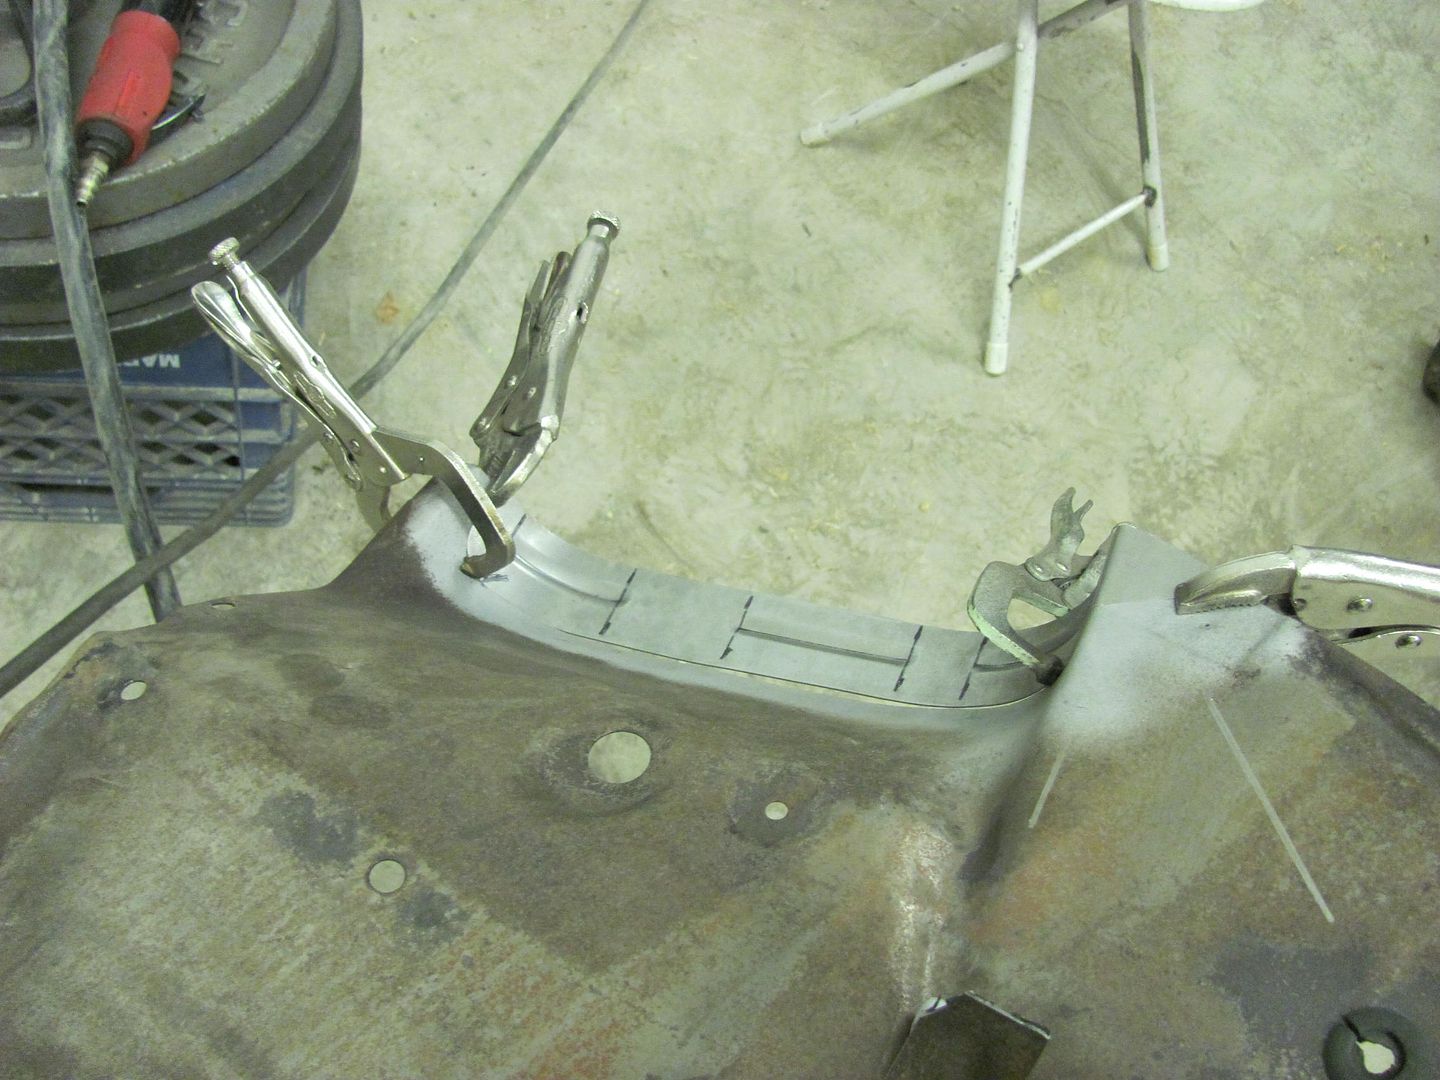
    Last night we turned our attention to inner fenders. We've got some items
    slated to go out for powder coating, and these will get added to the pile.


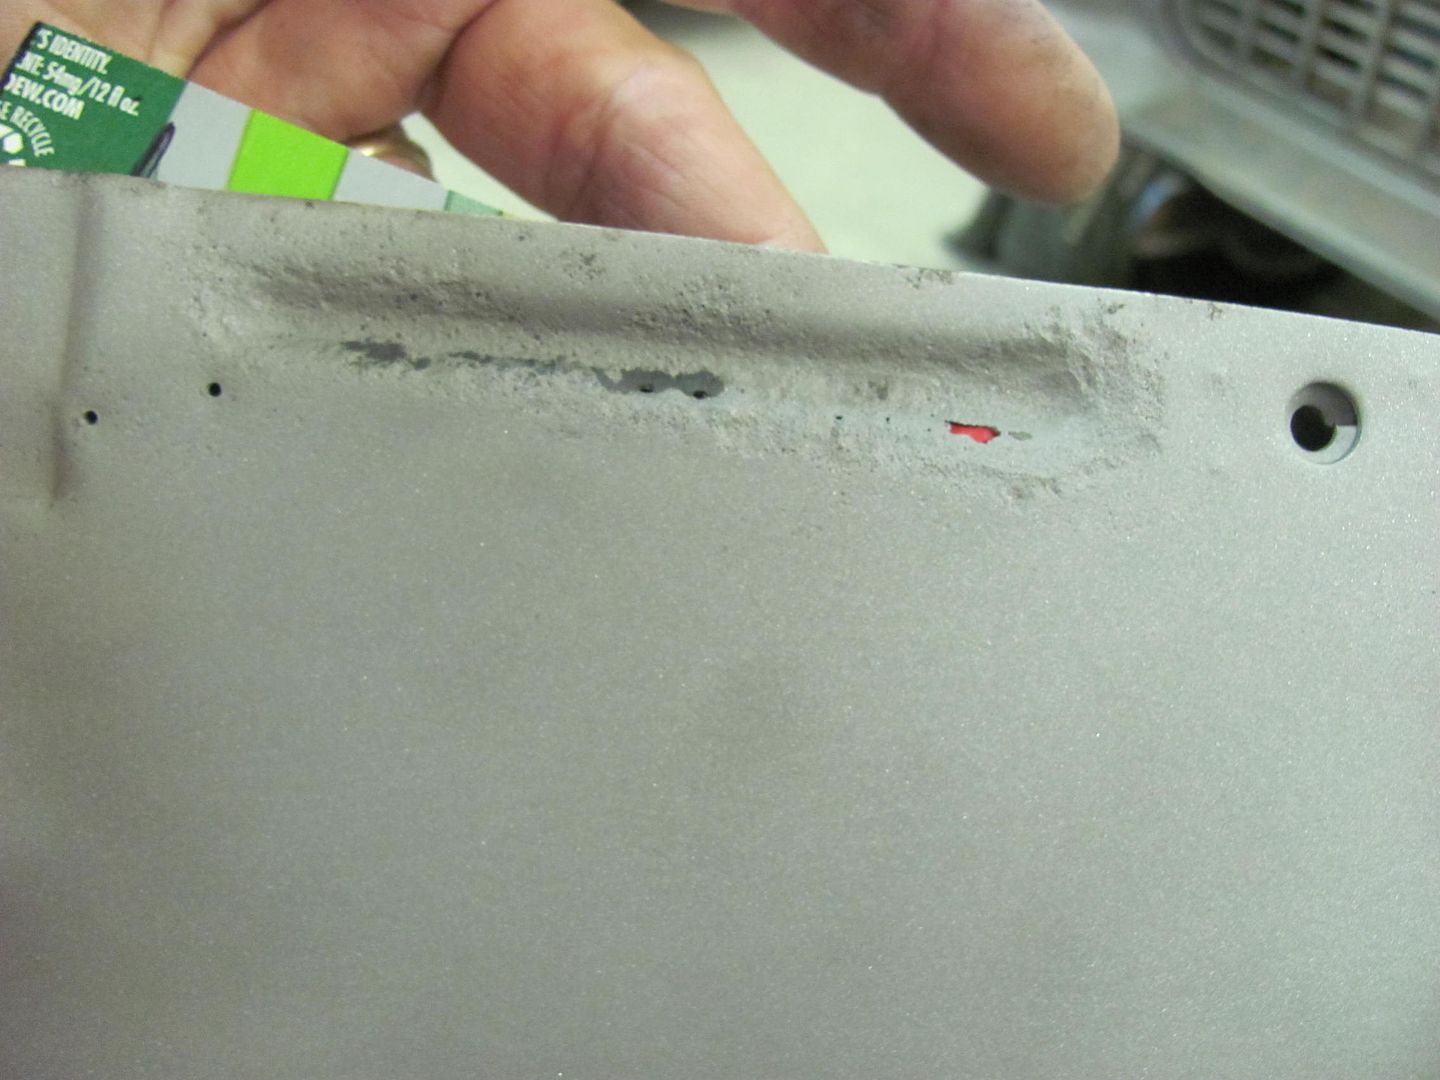
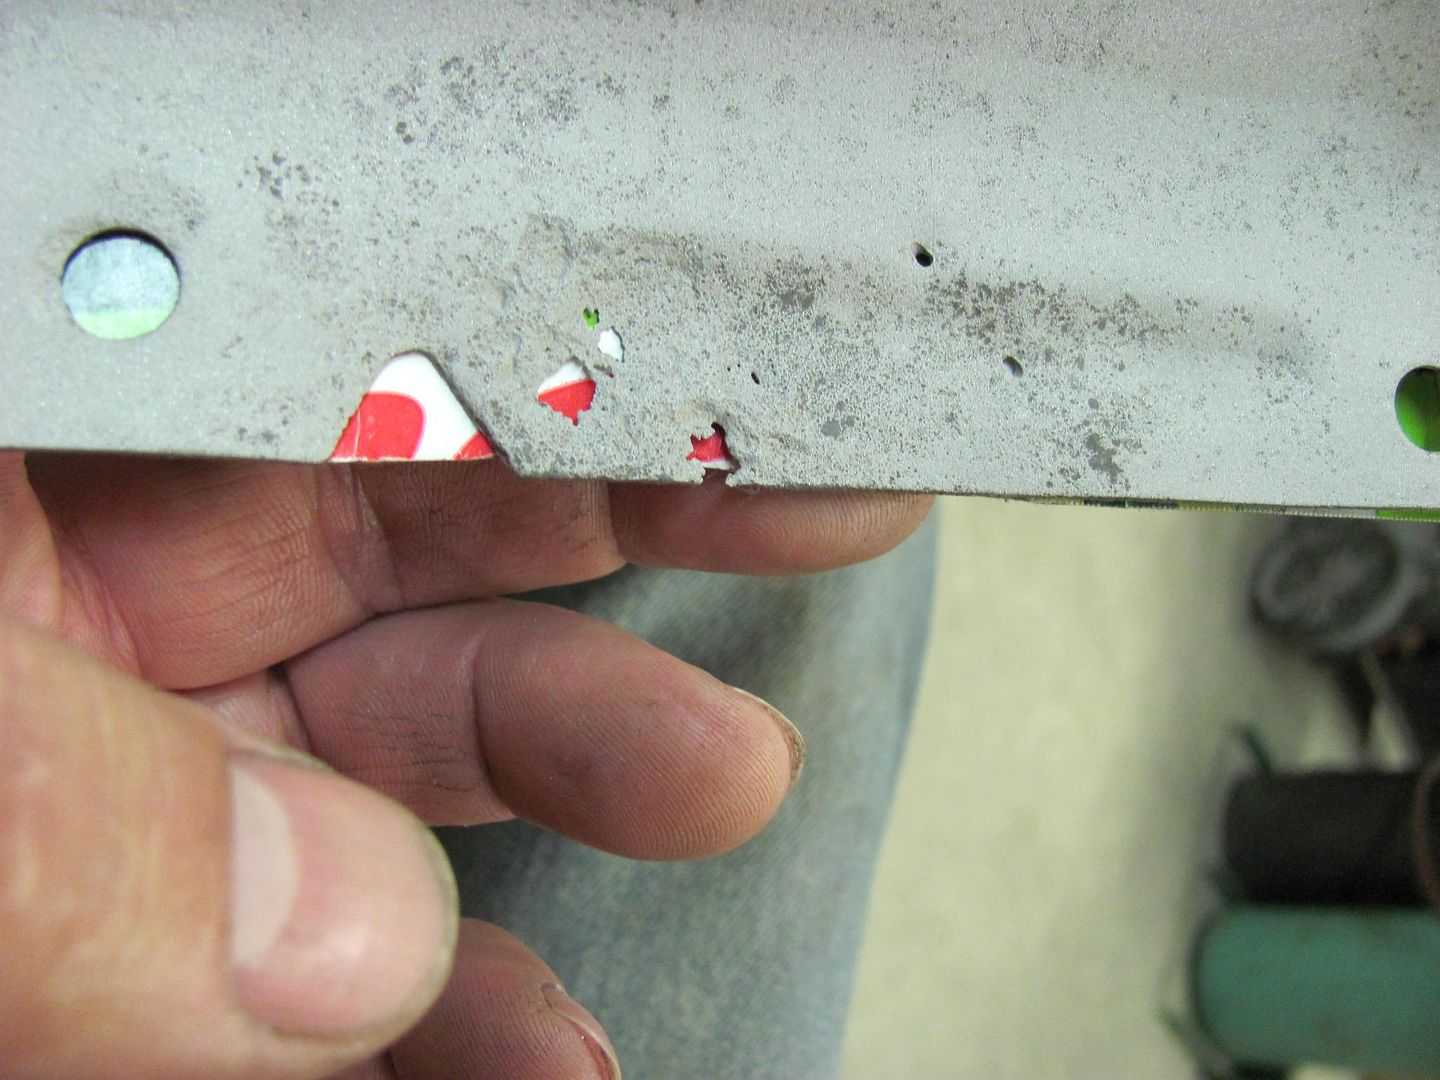
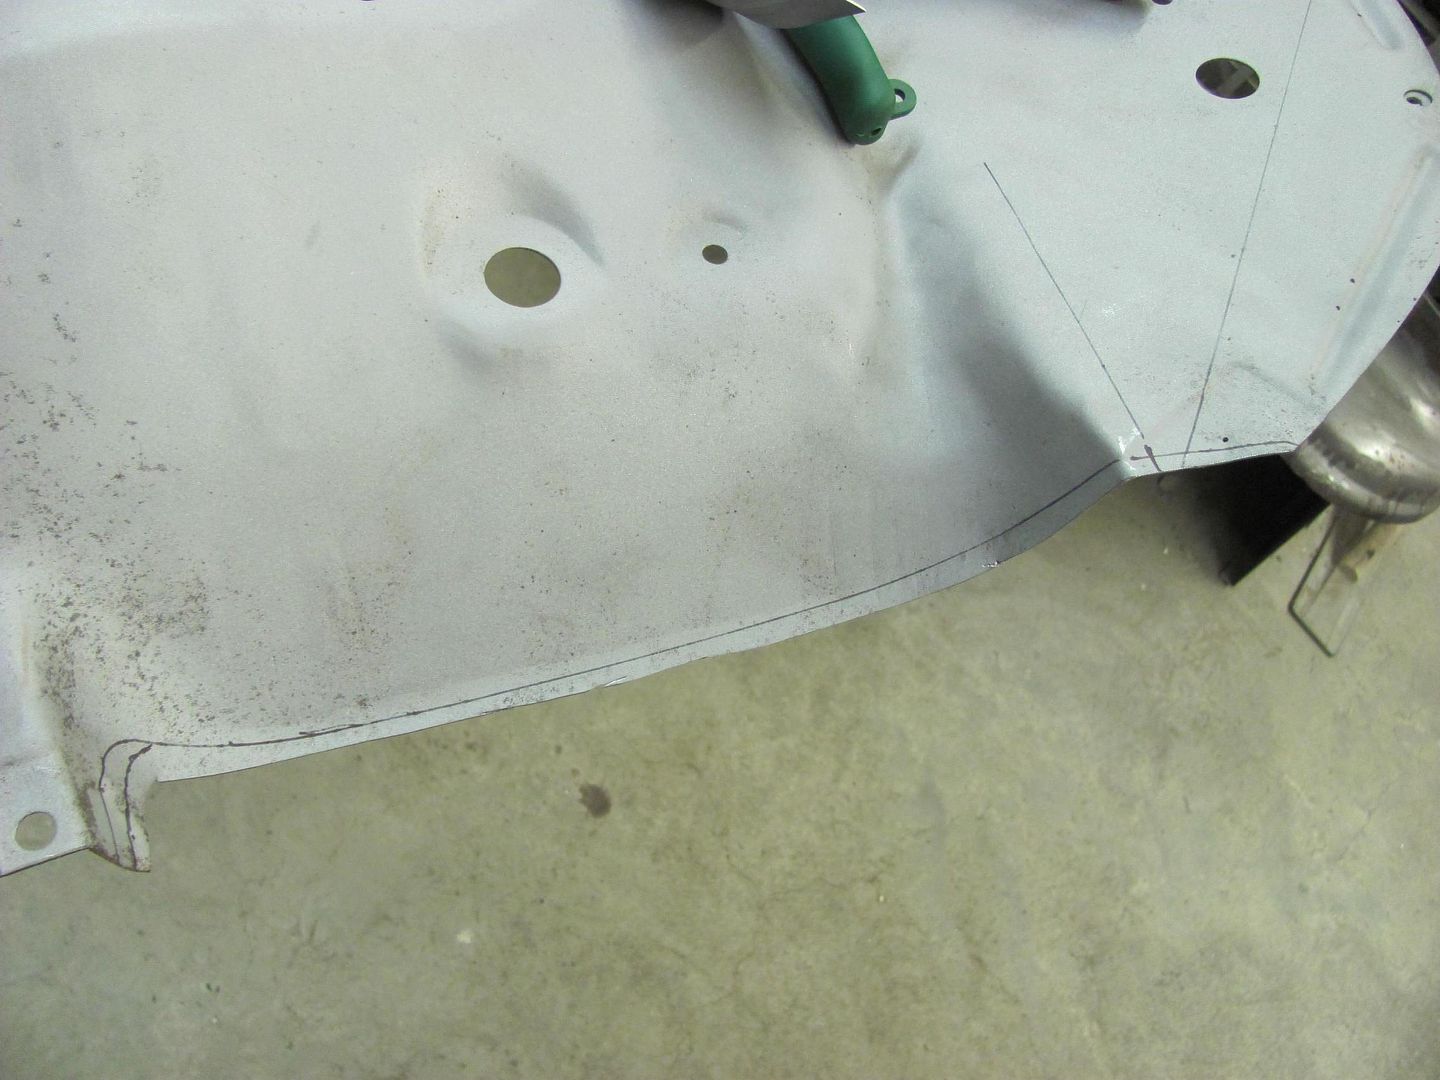
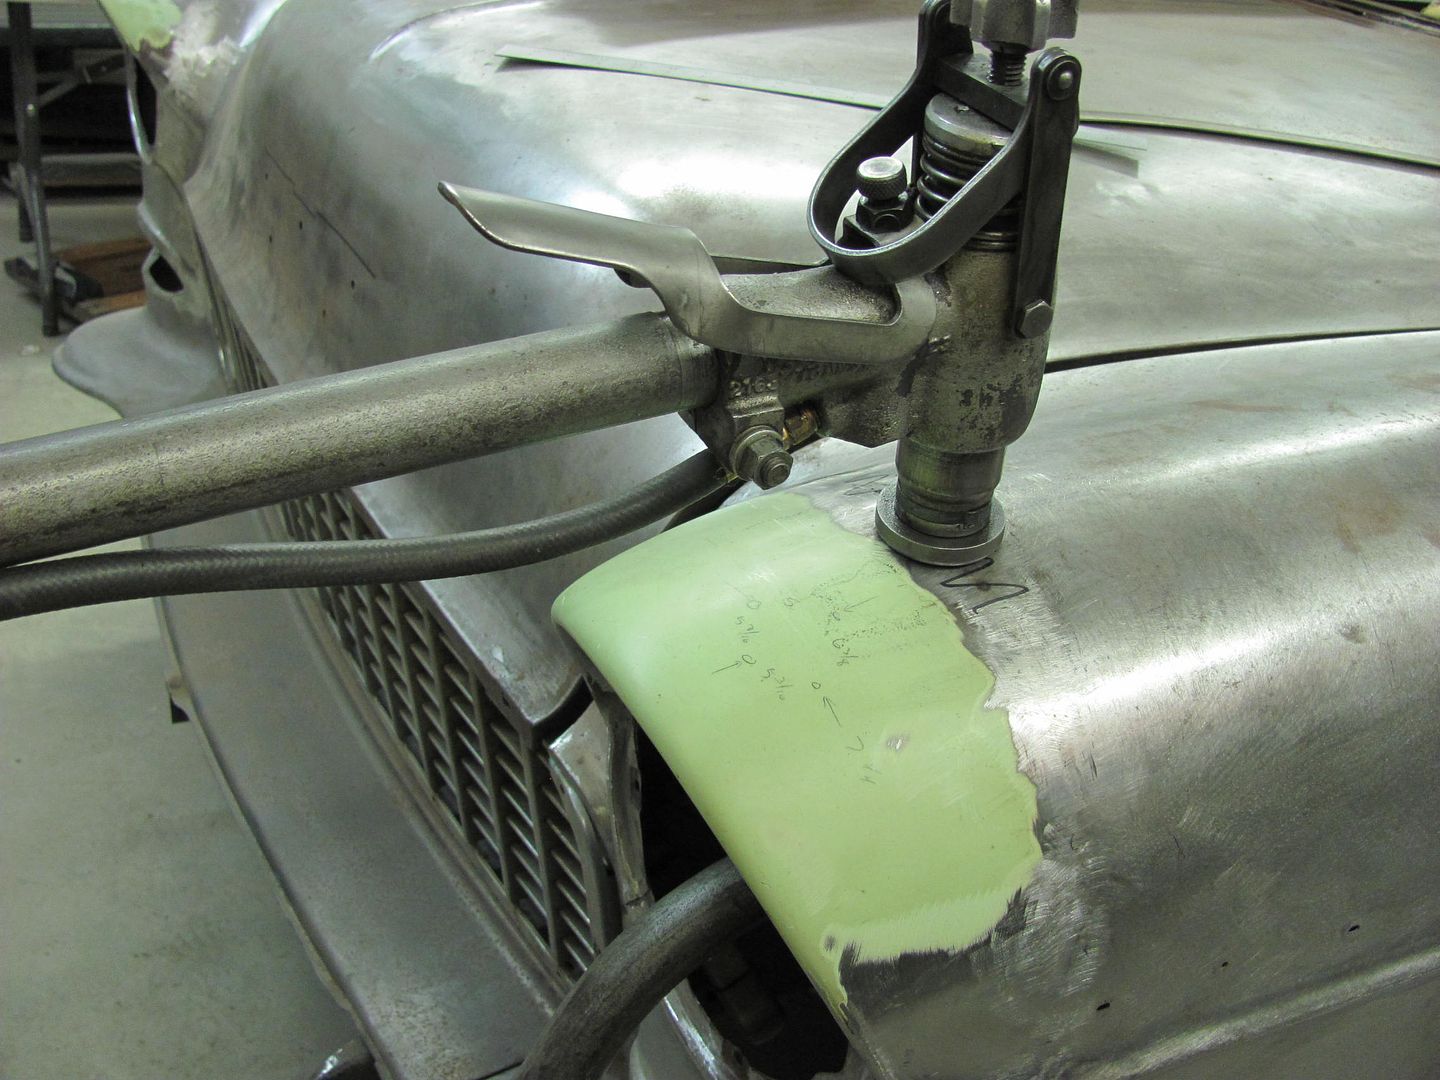
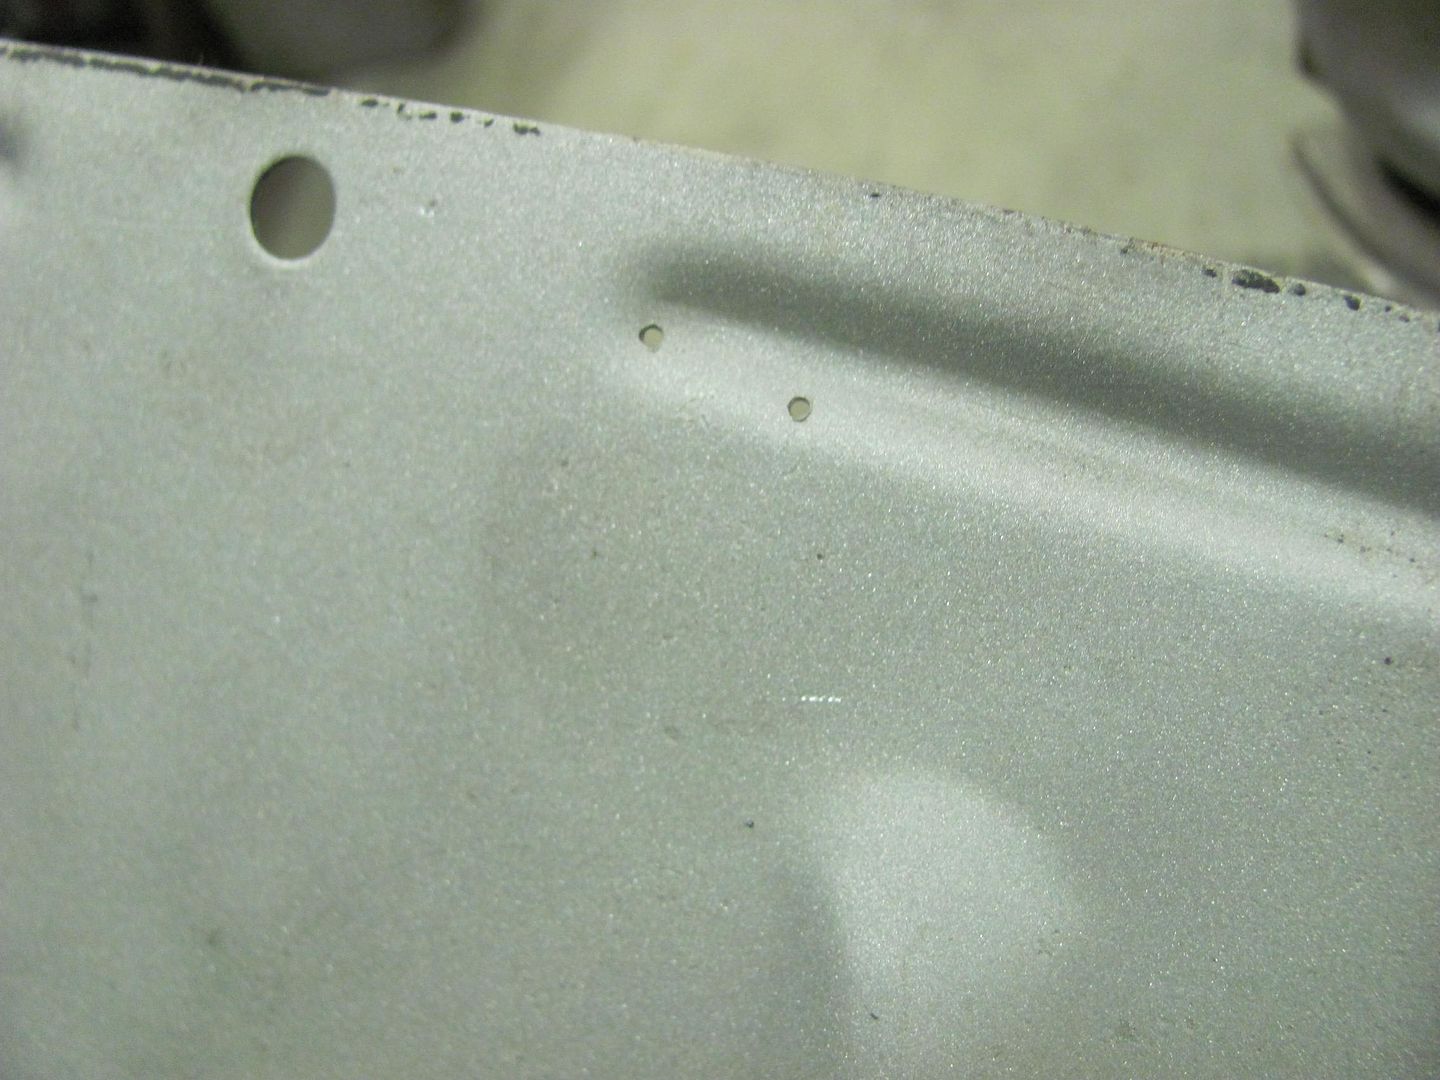
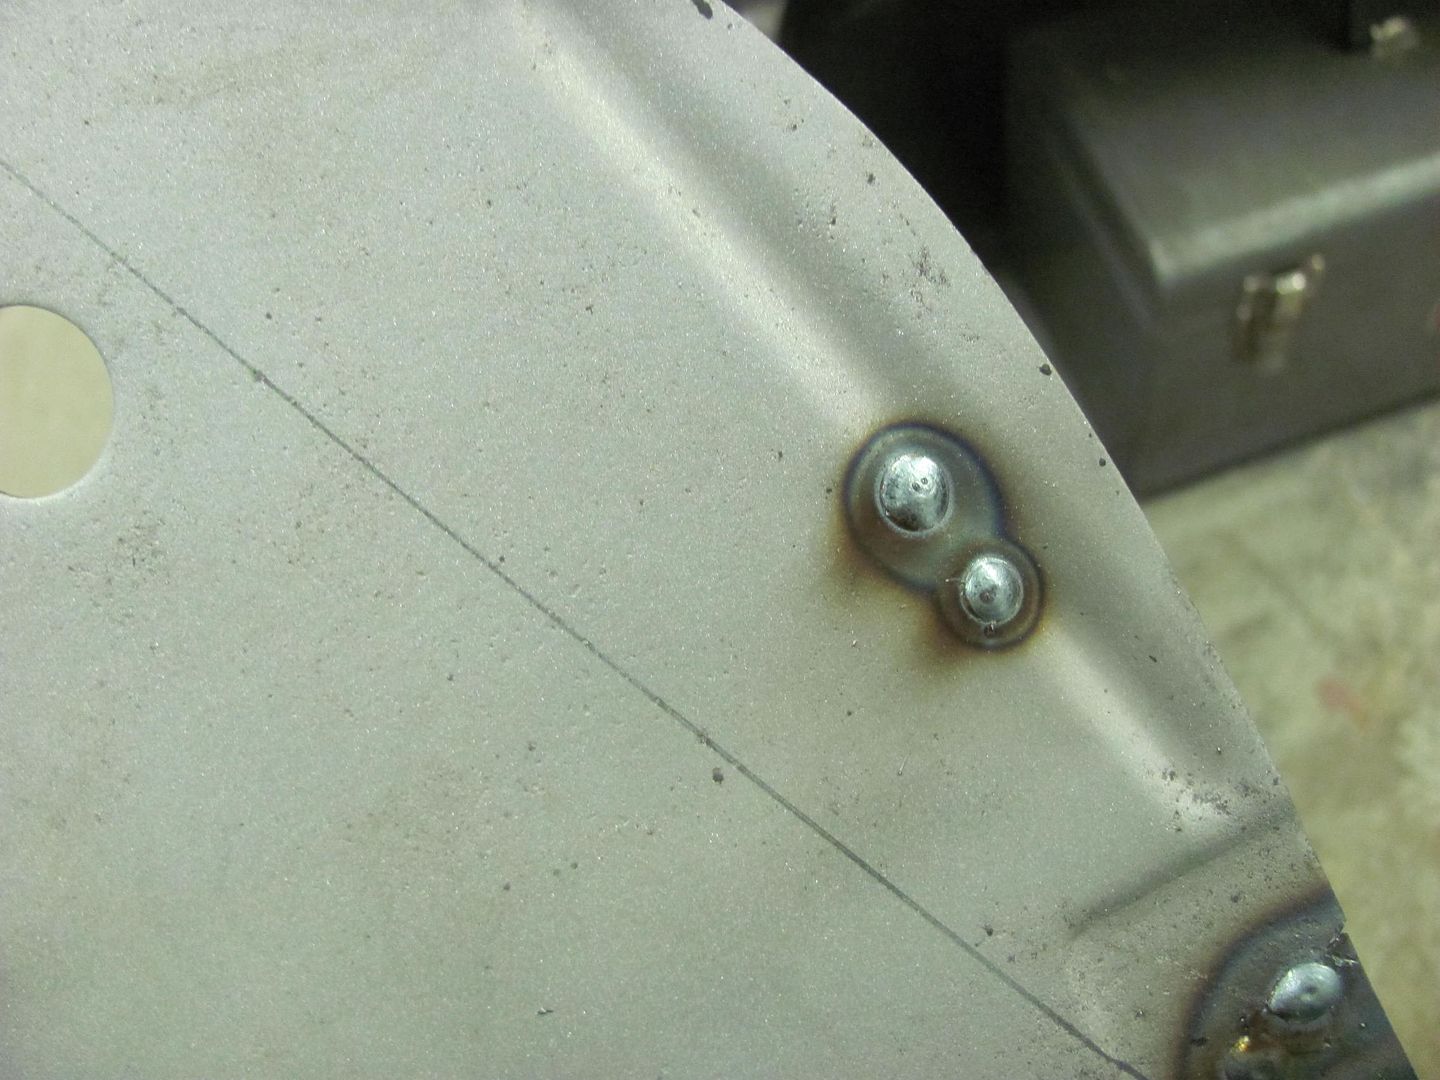
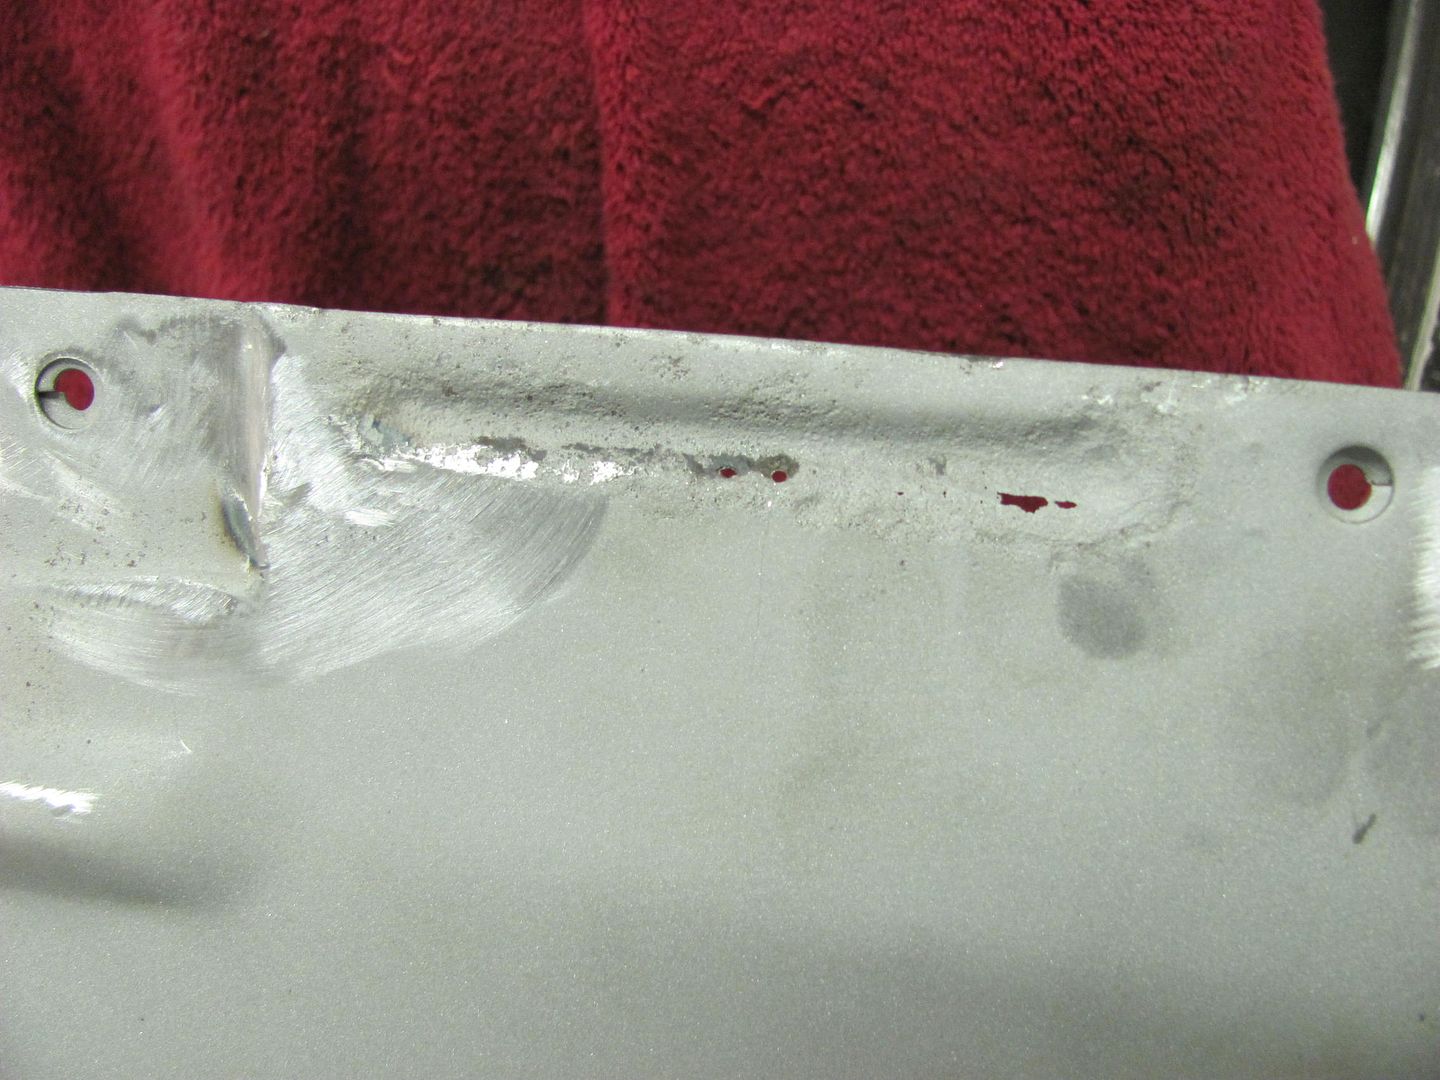
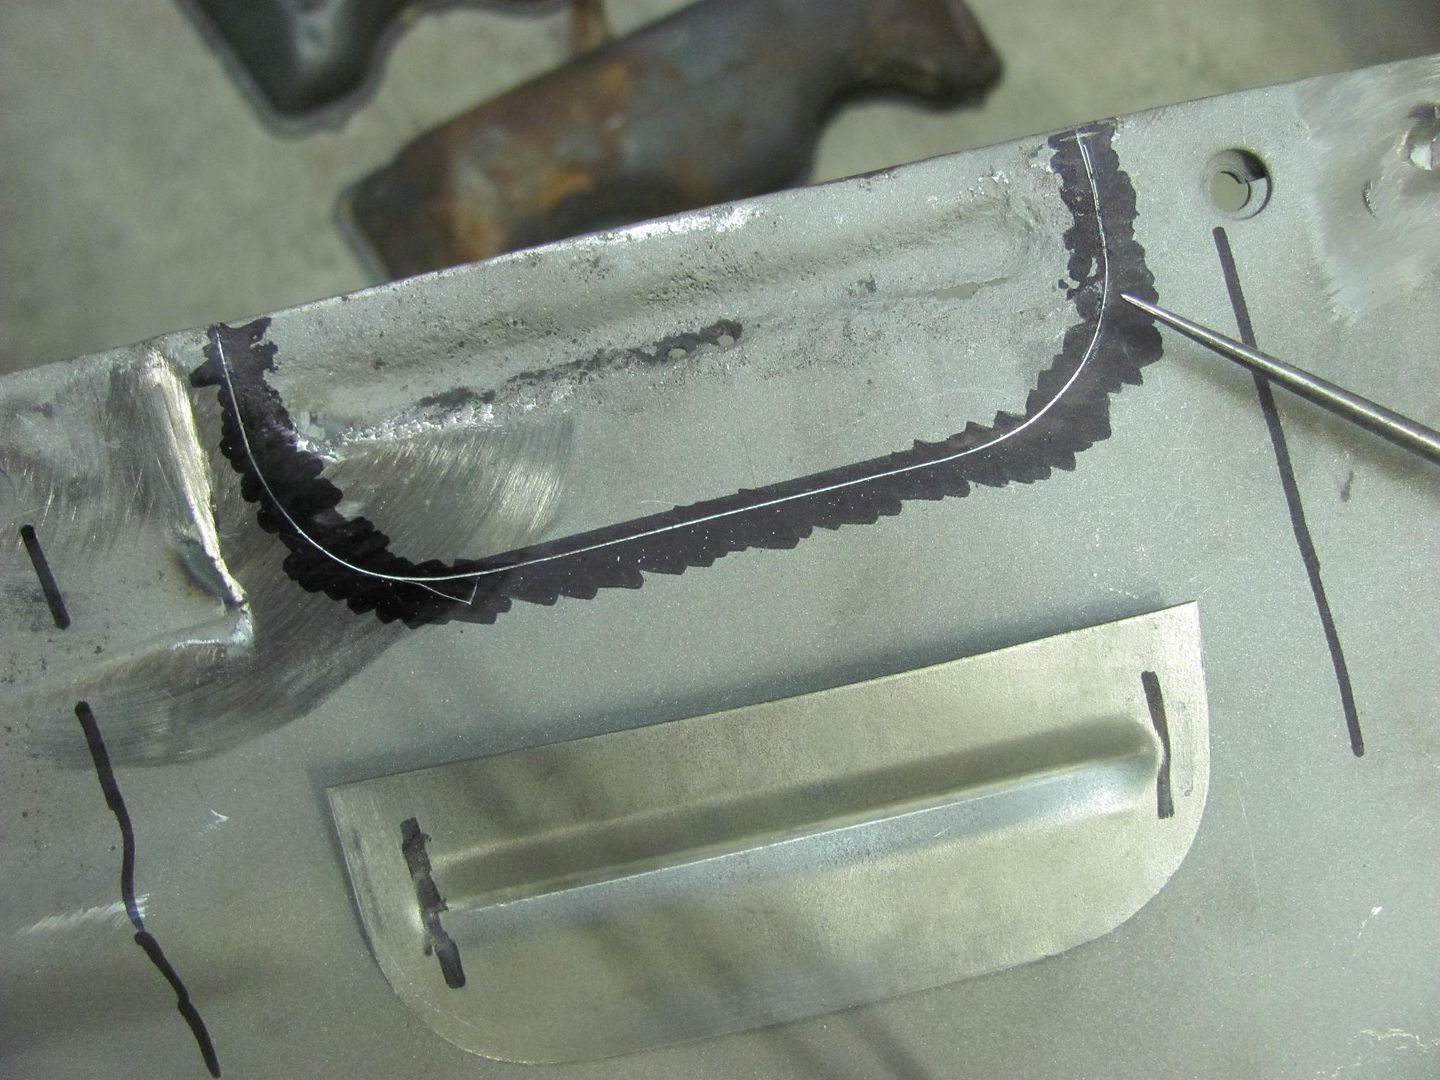
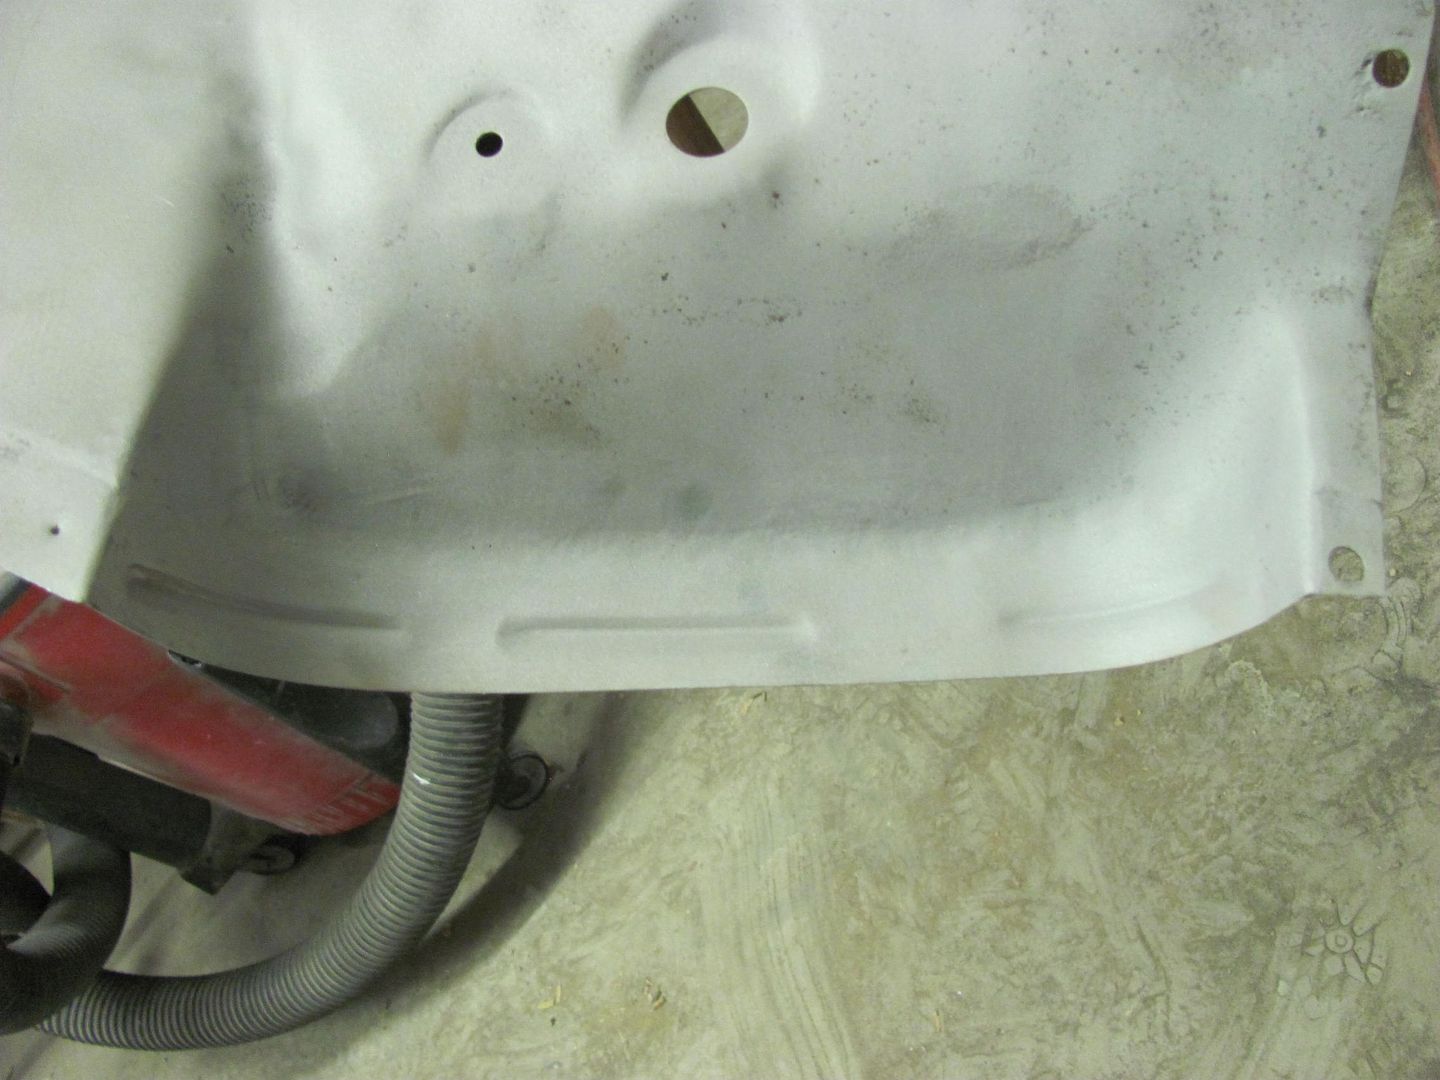
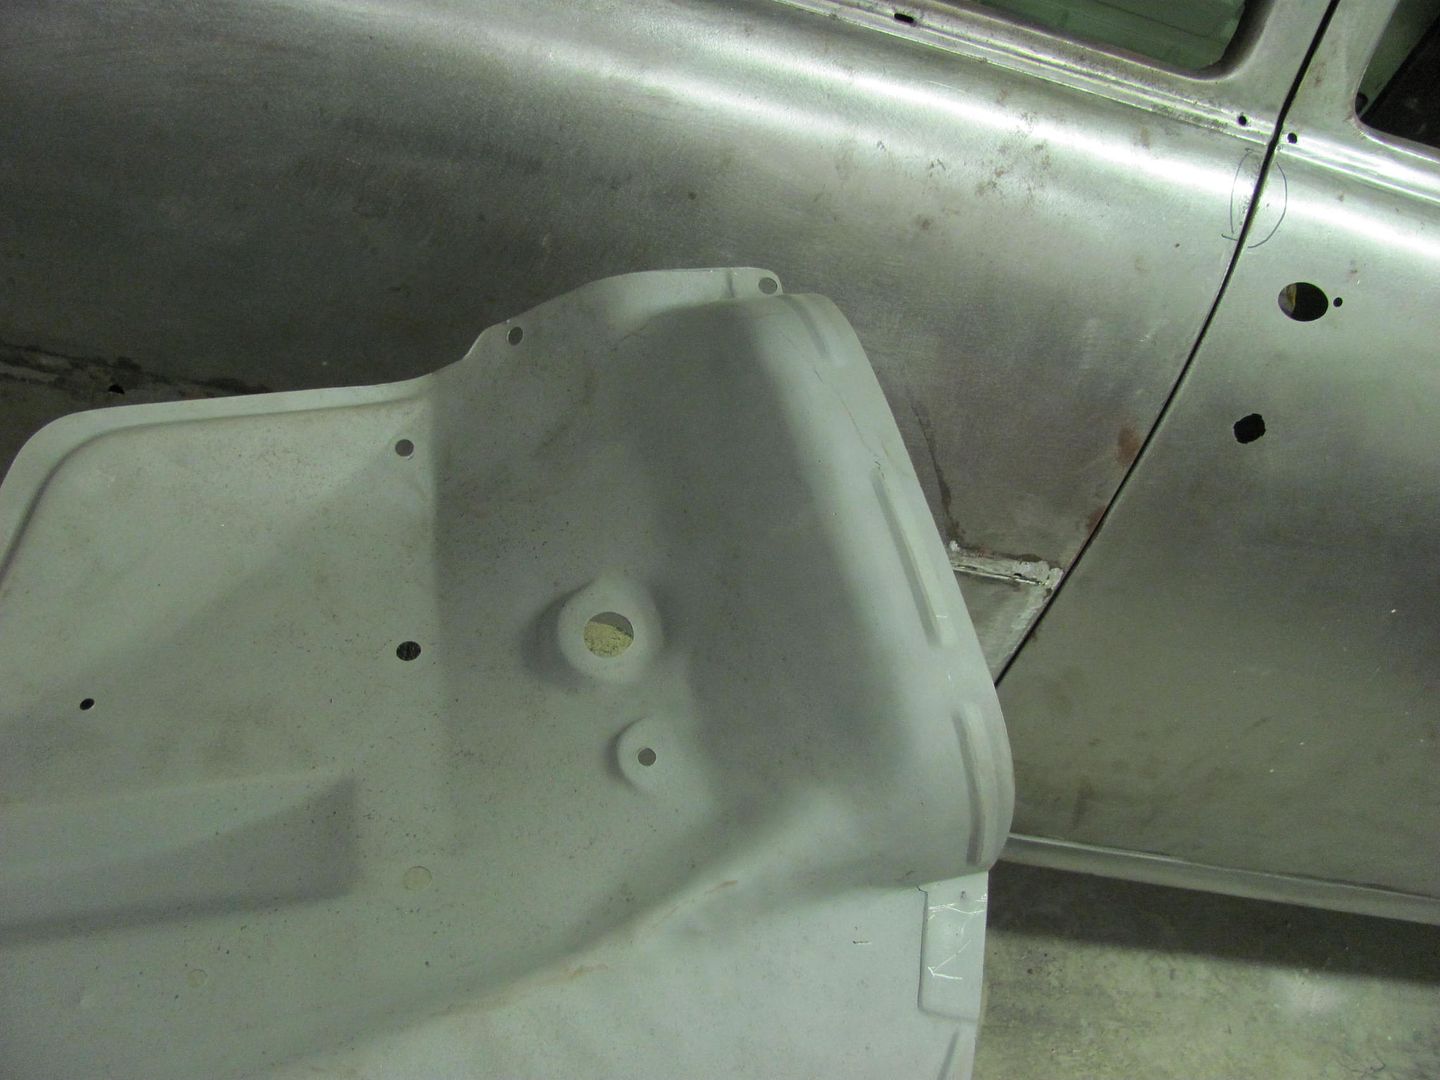
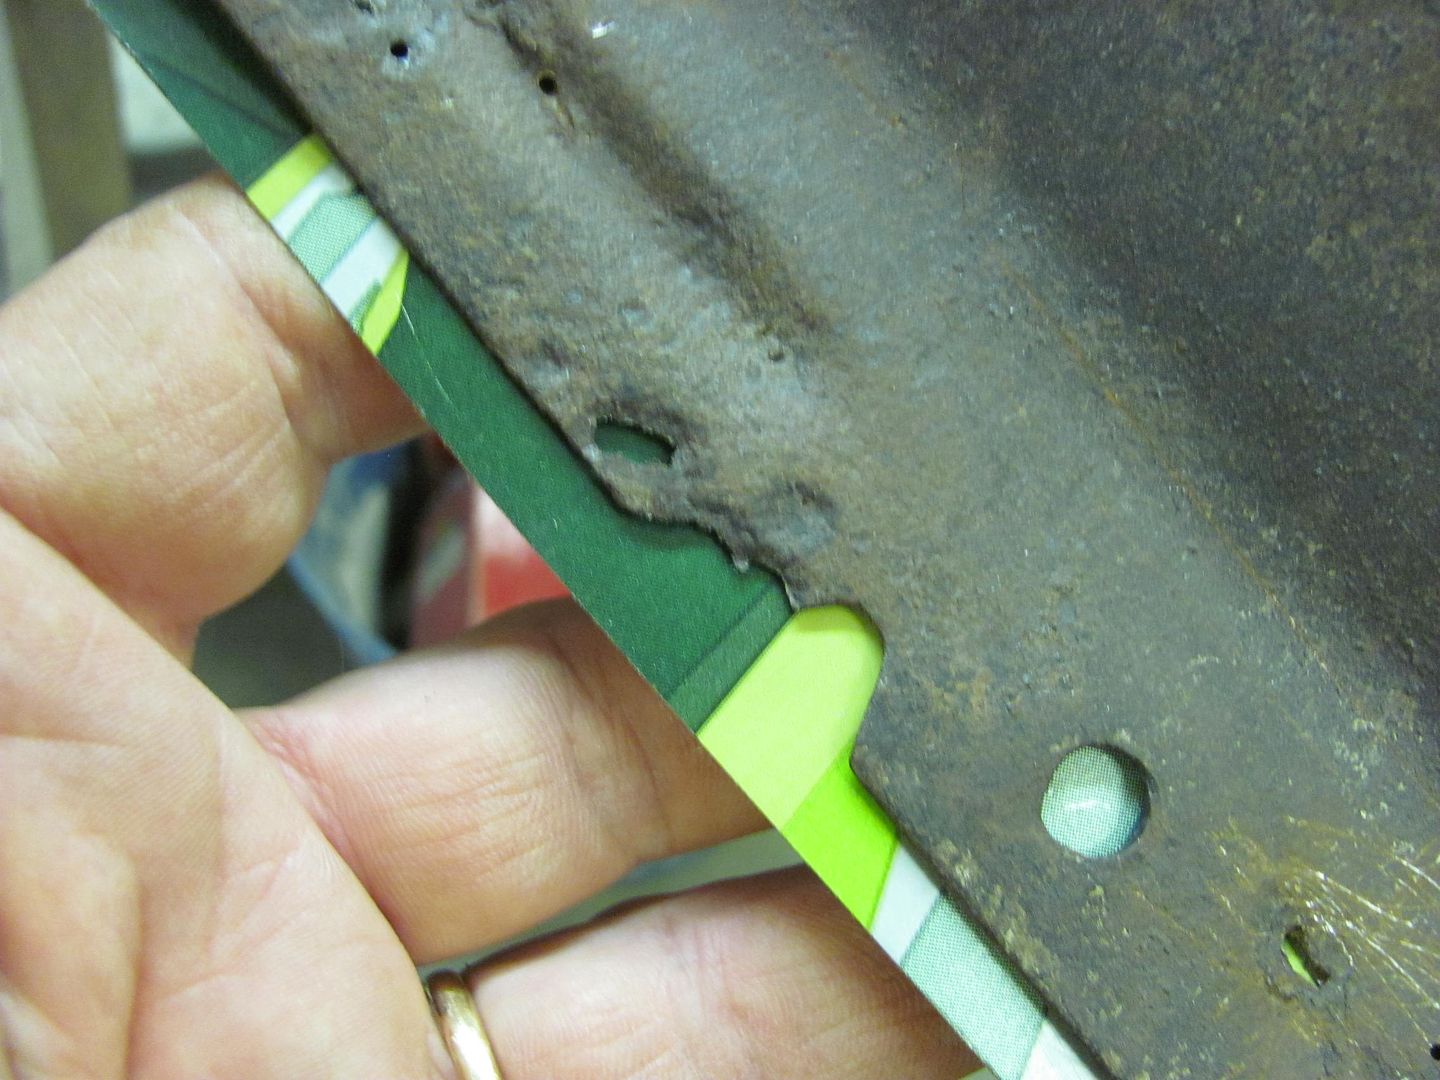
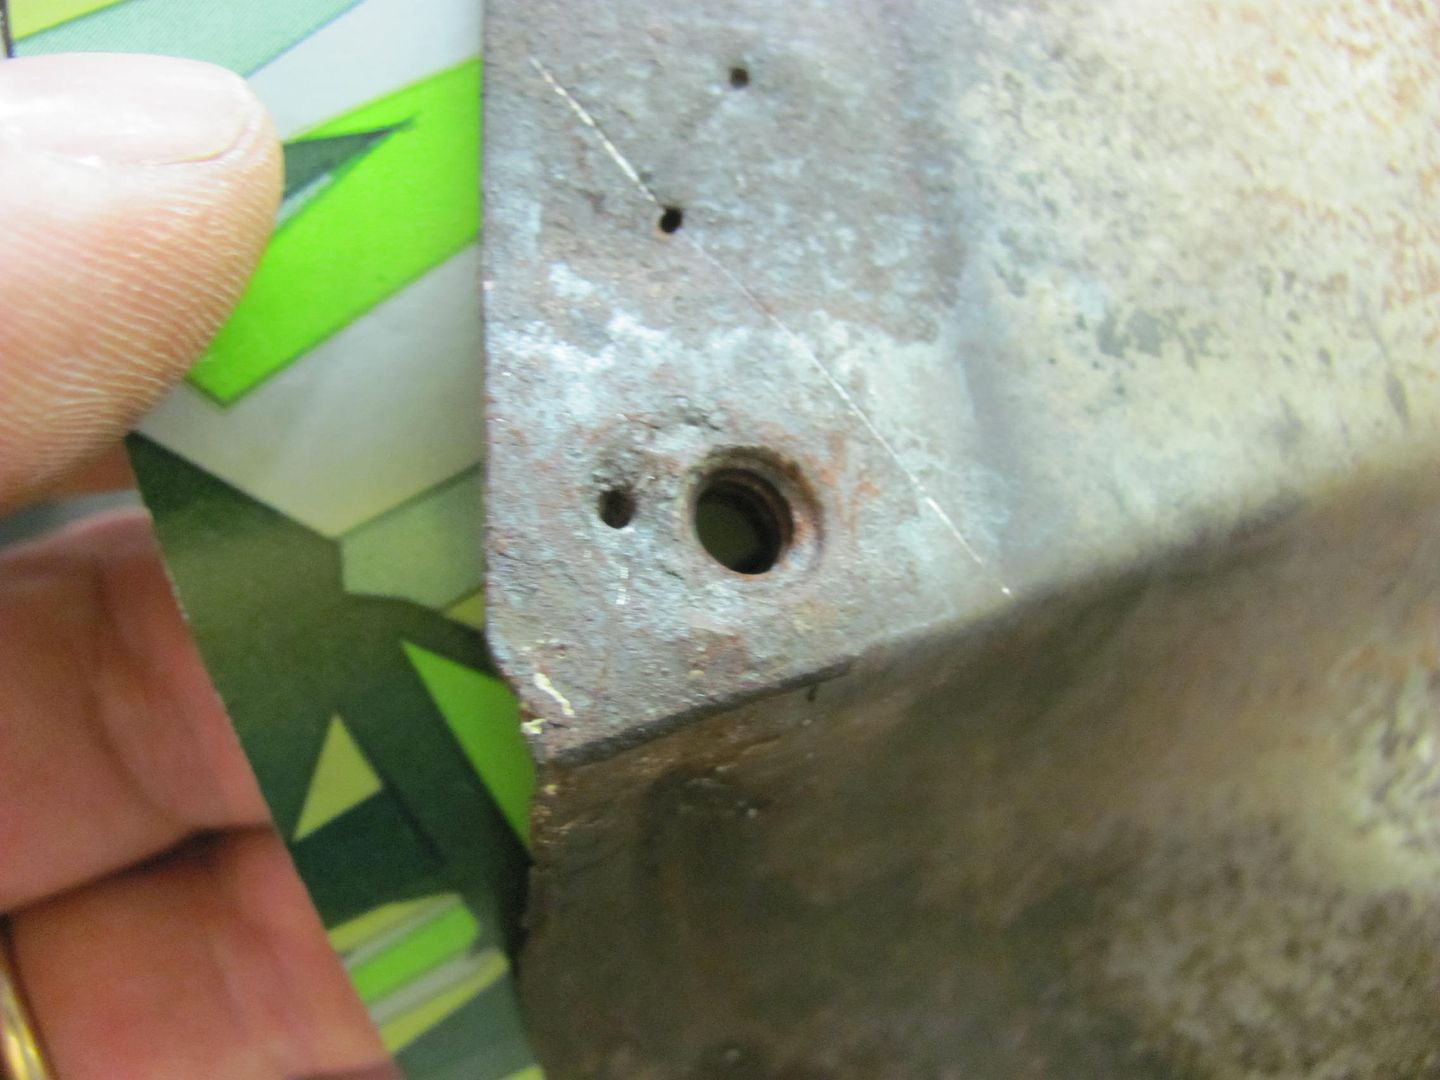
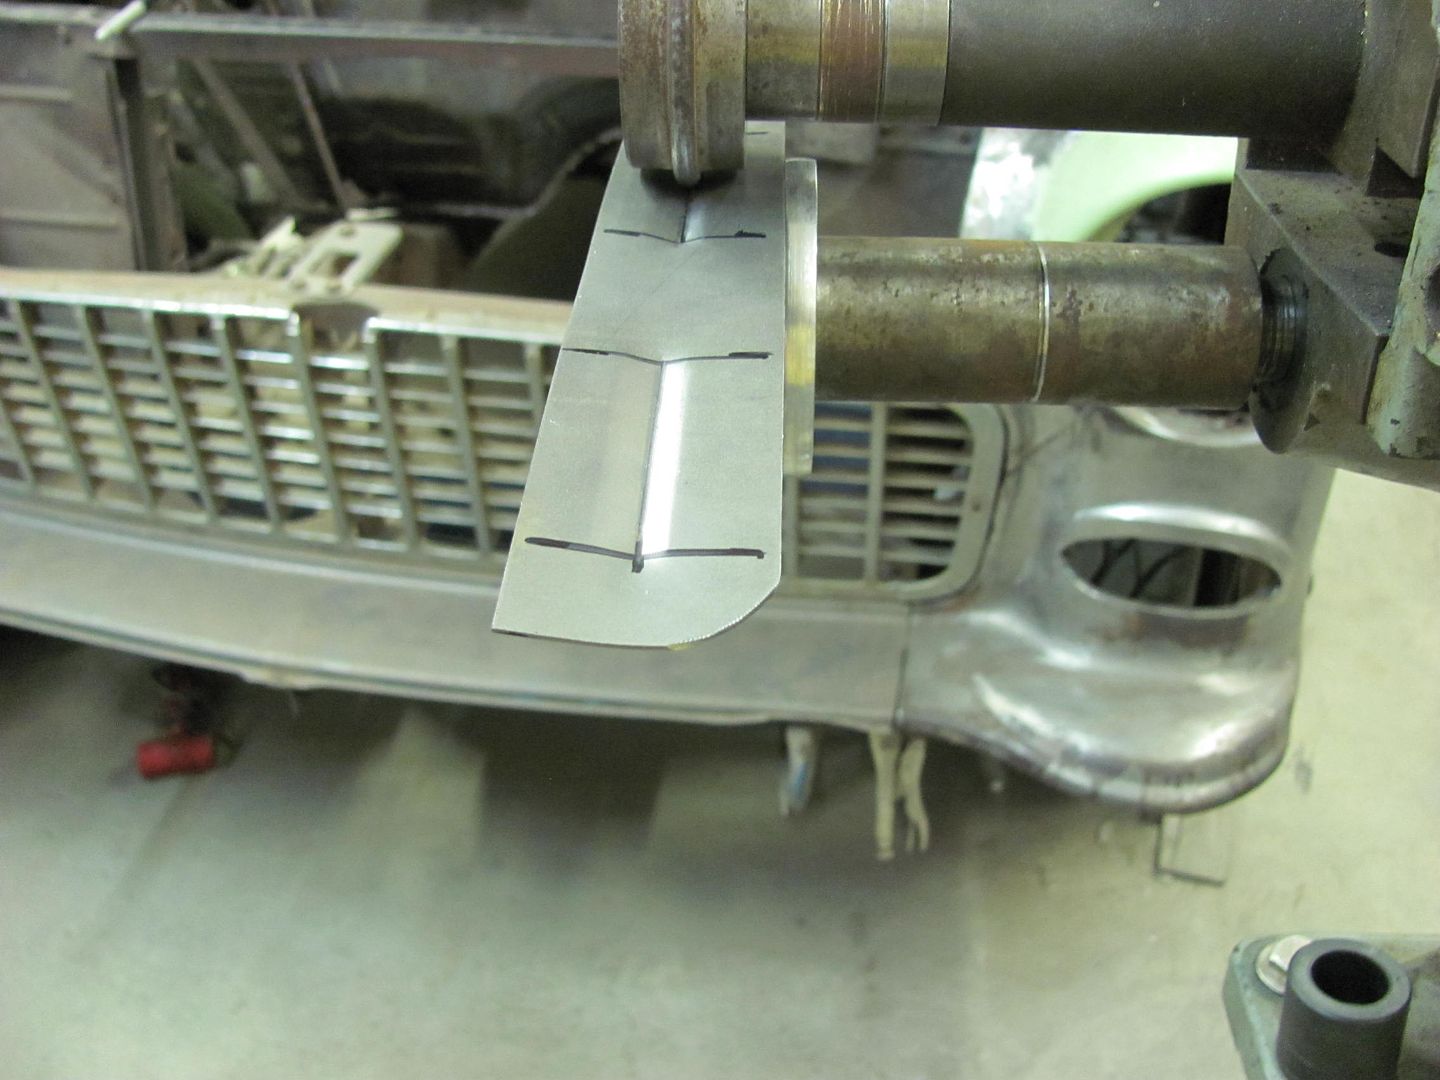
    The front edge that bolts outside the grille is showing remnants of water
    retention...


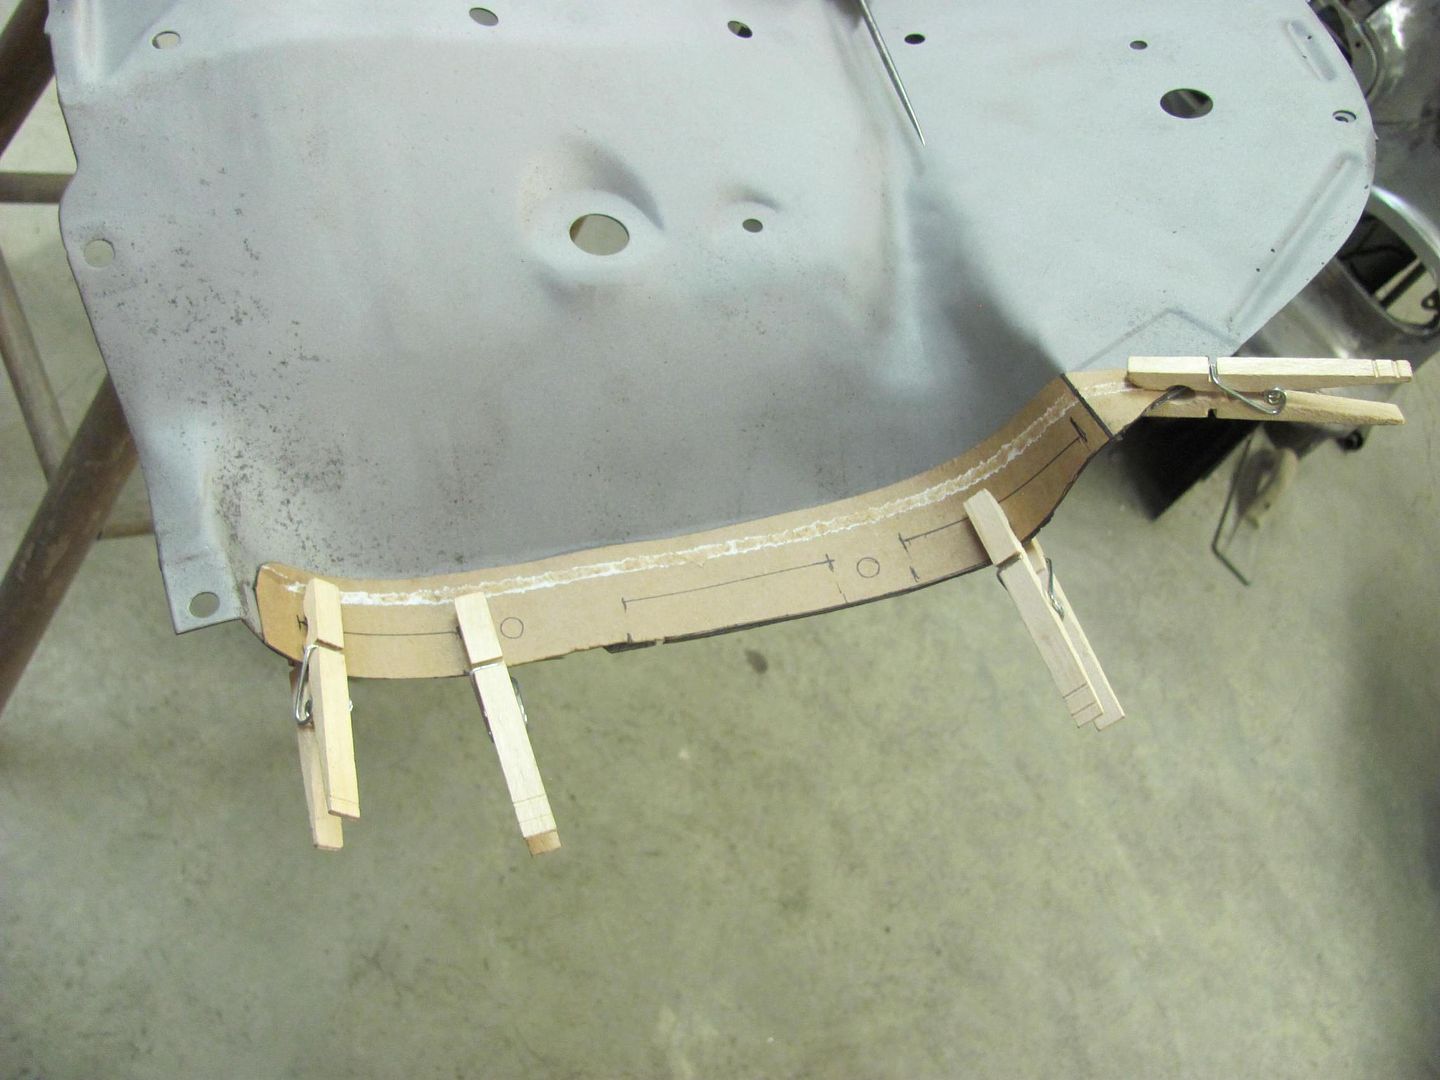
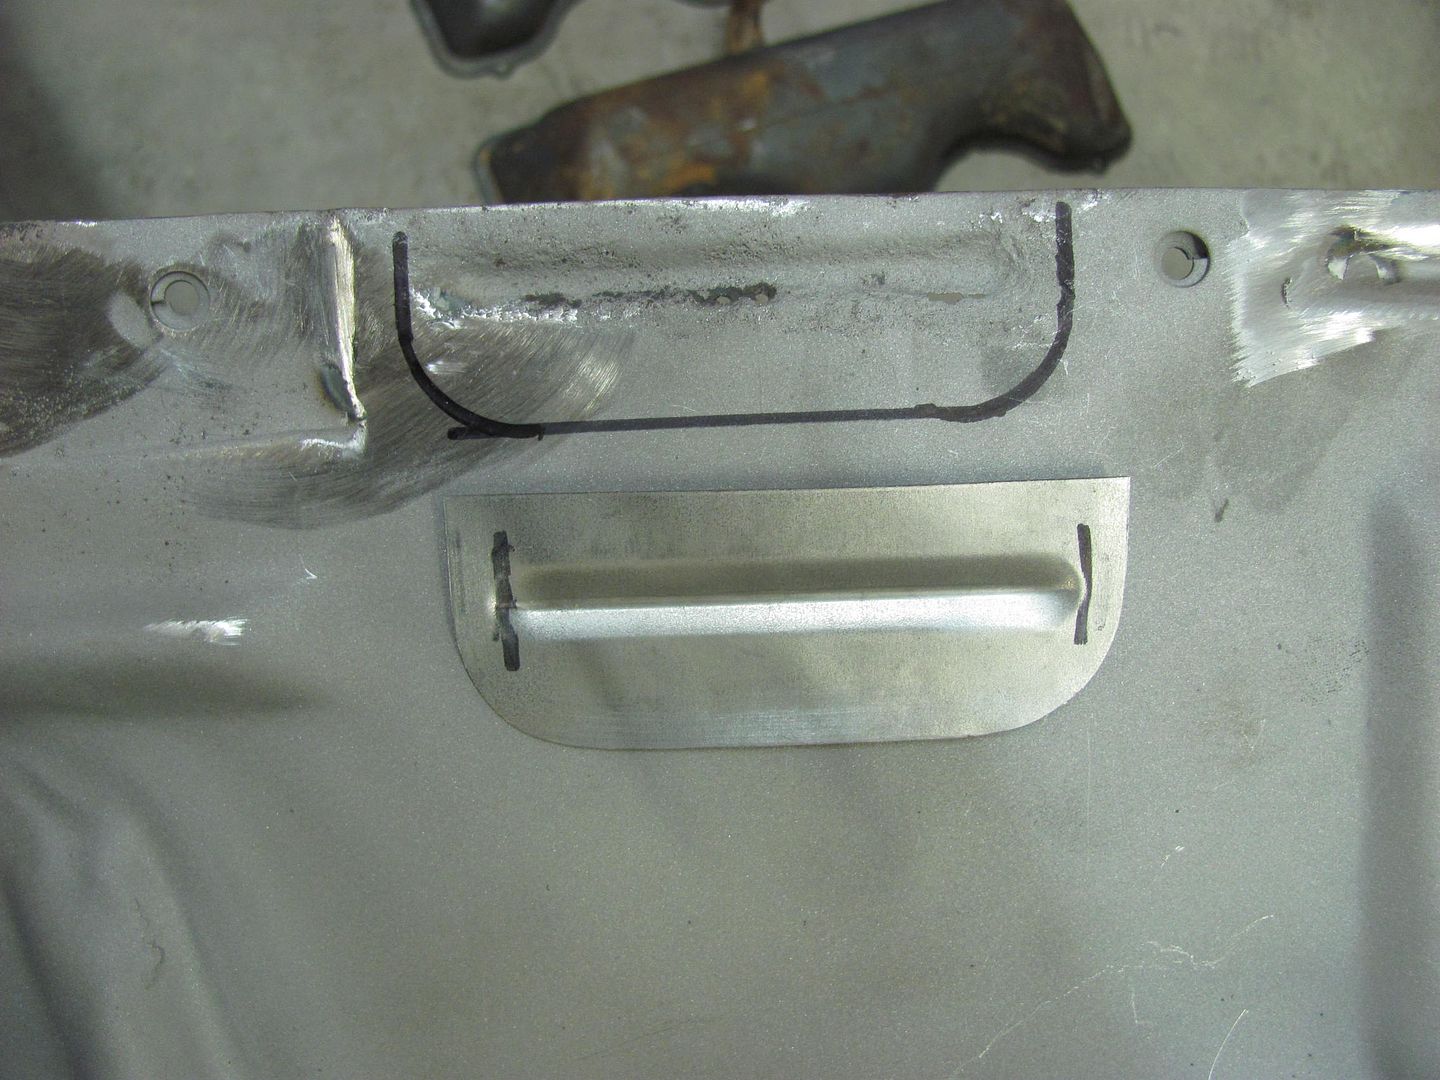
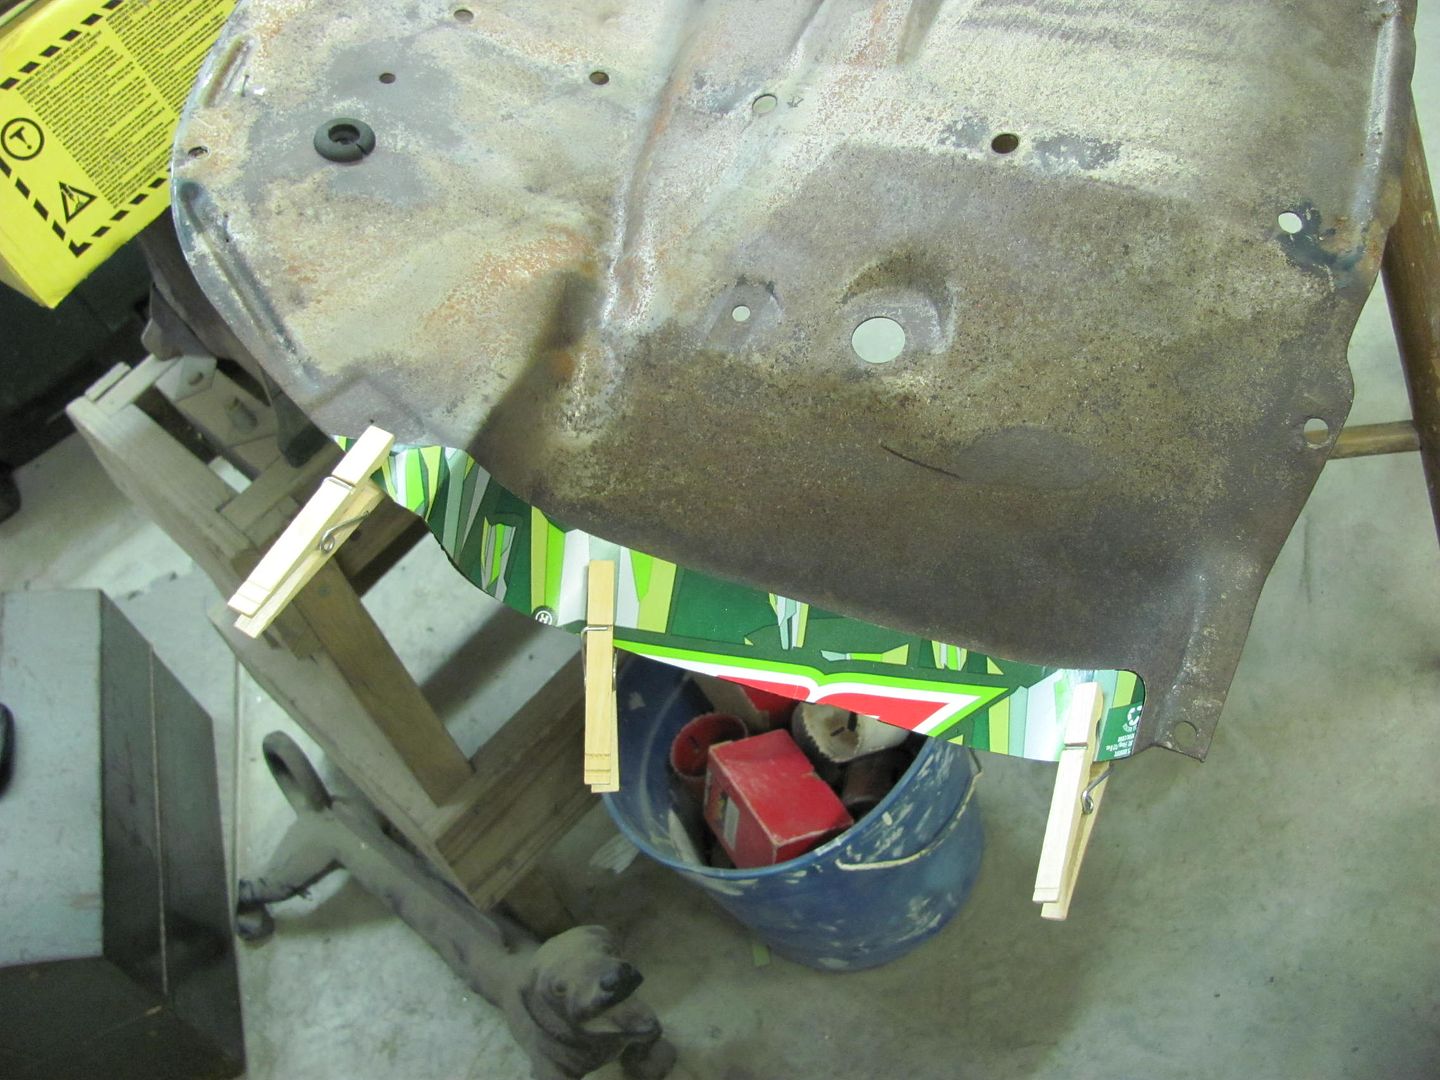
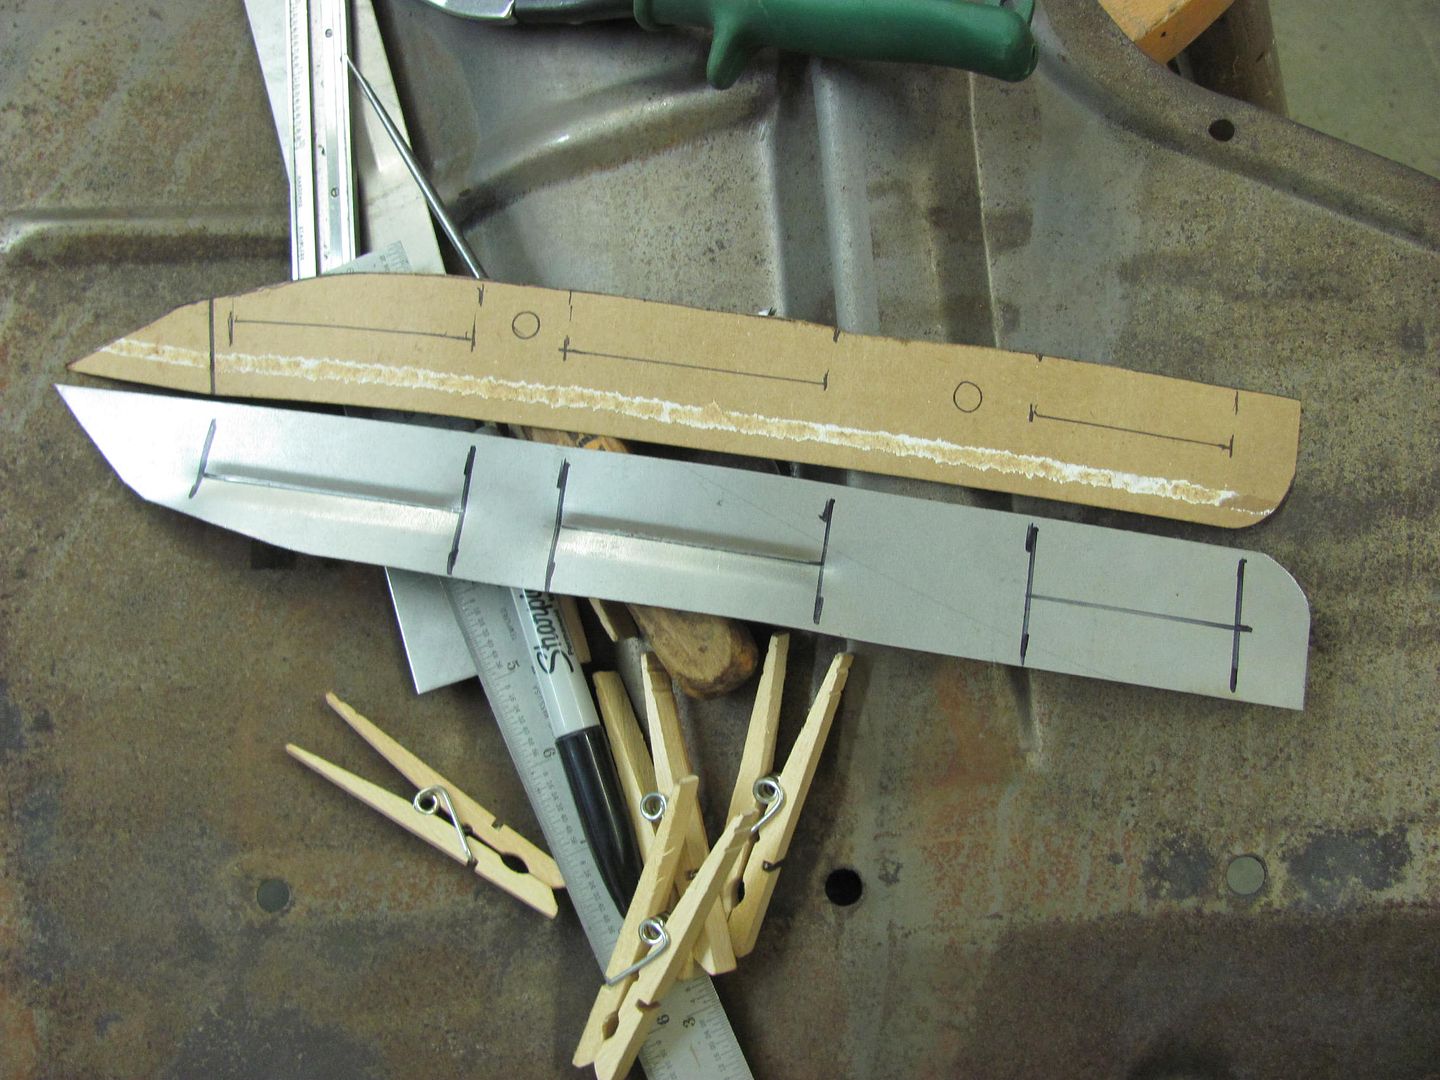
    Mountain Dew template


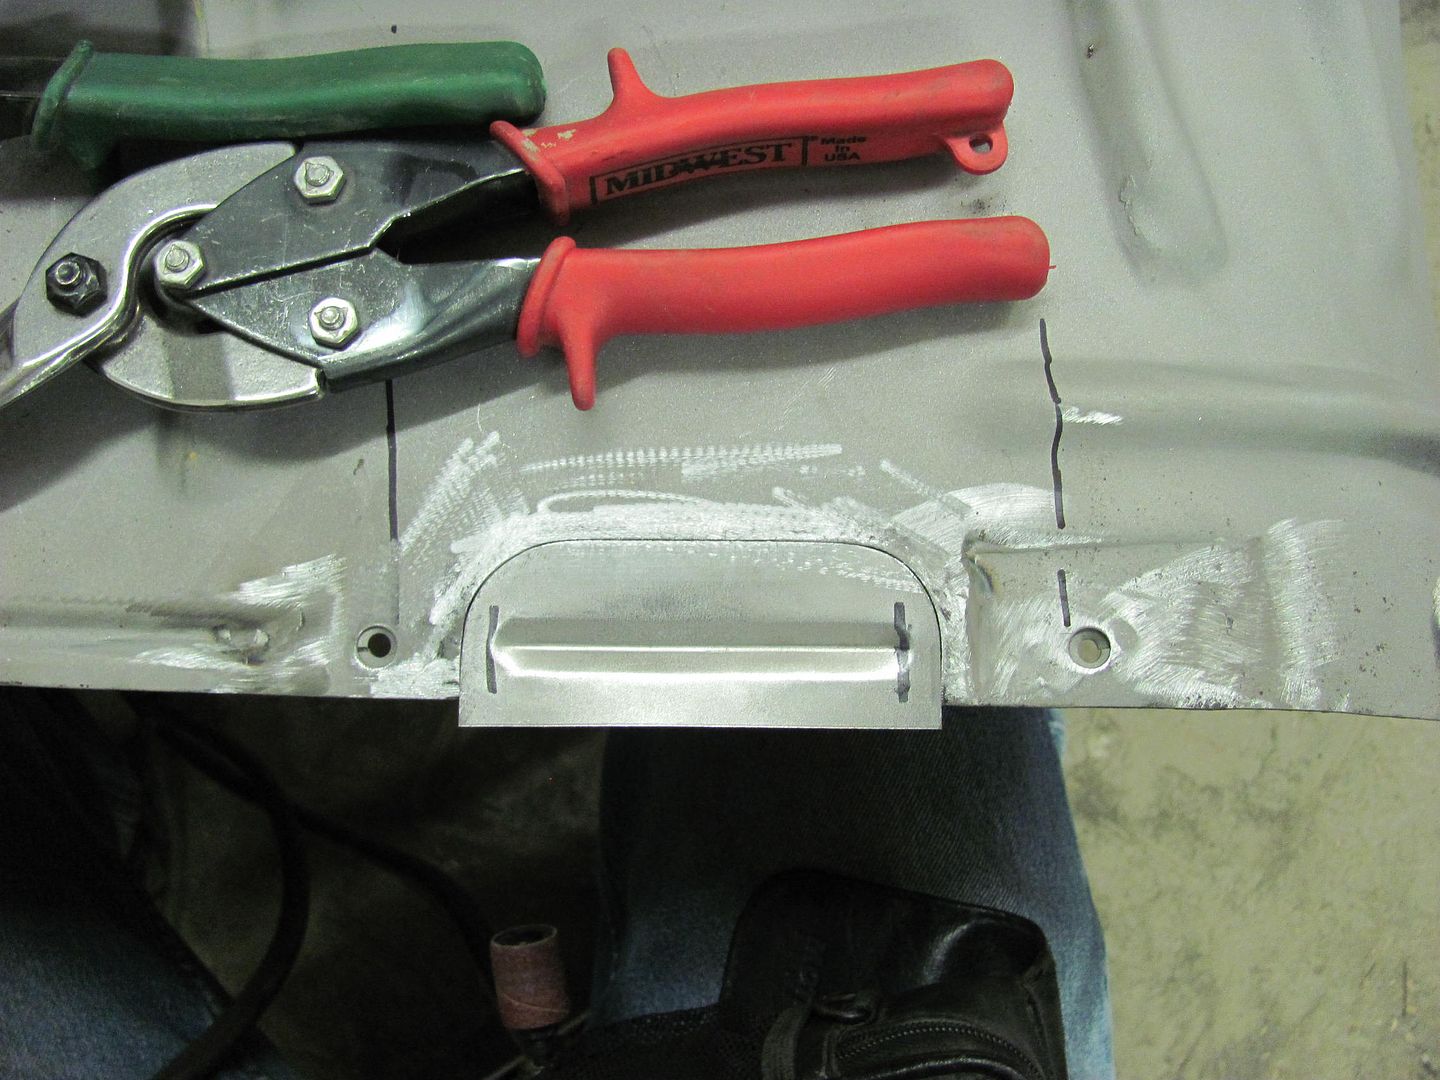
    Bead's male die is offset to one side to match the originals.....


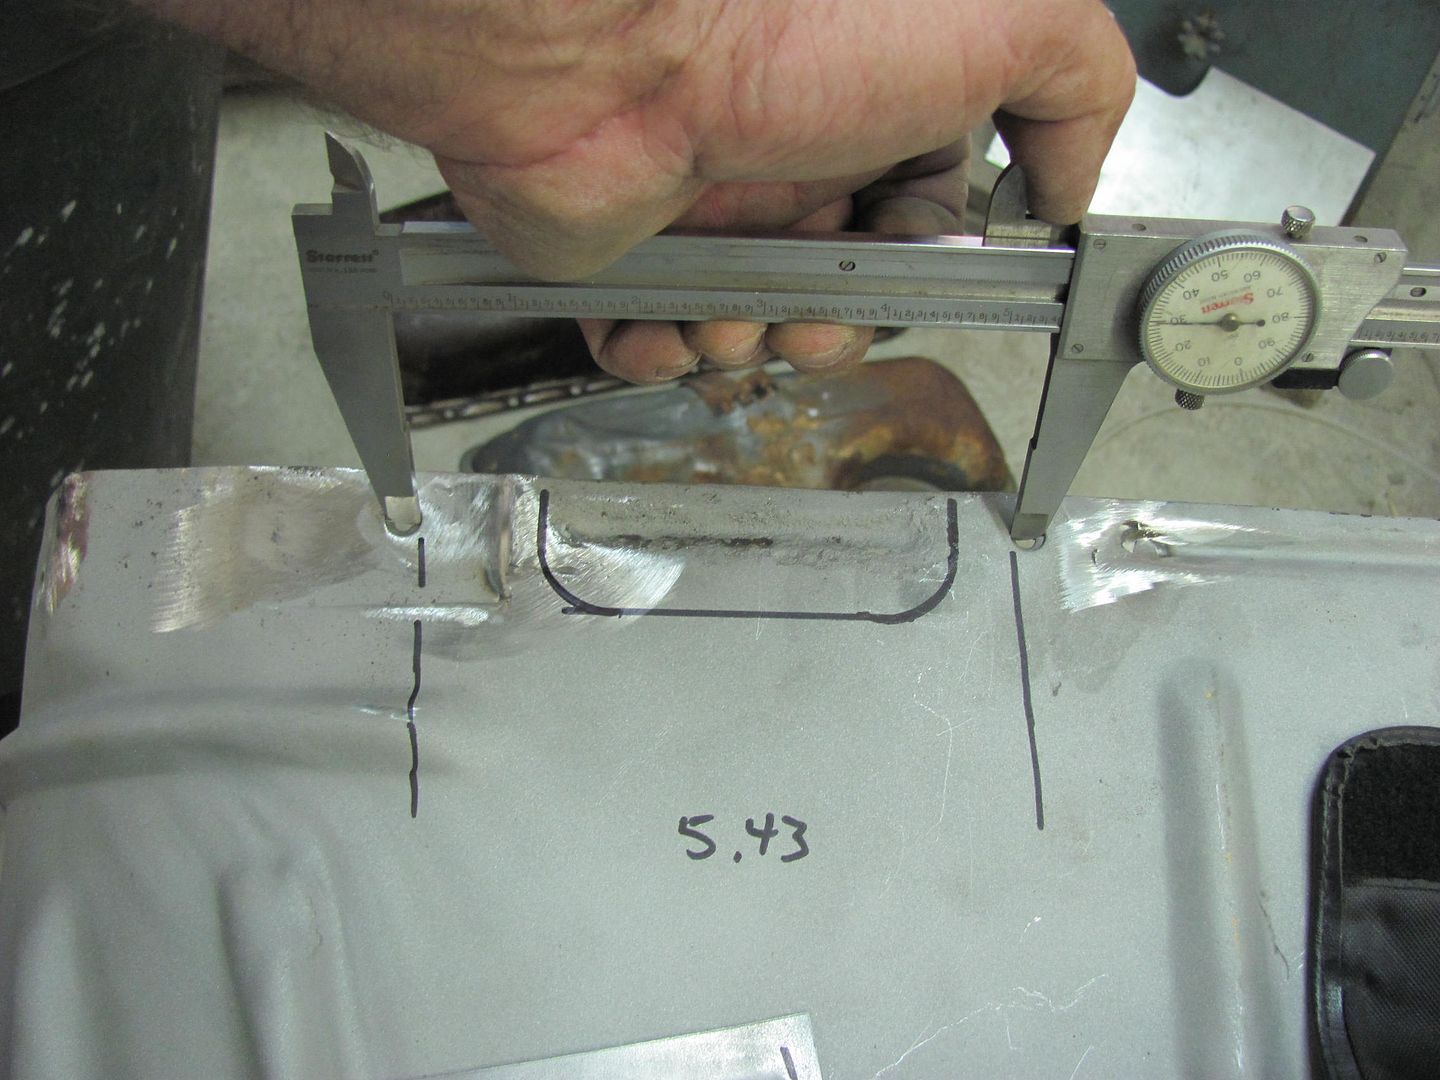
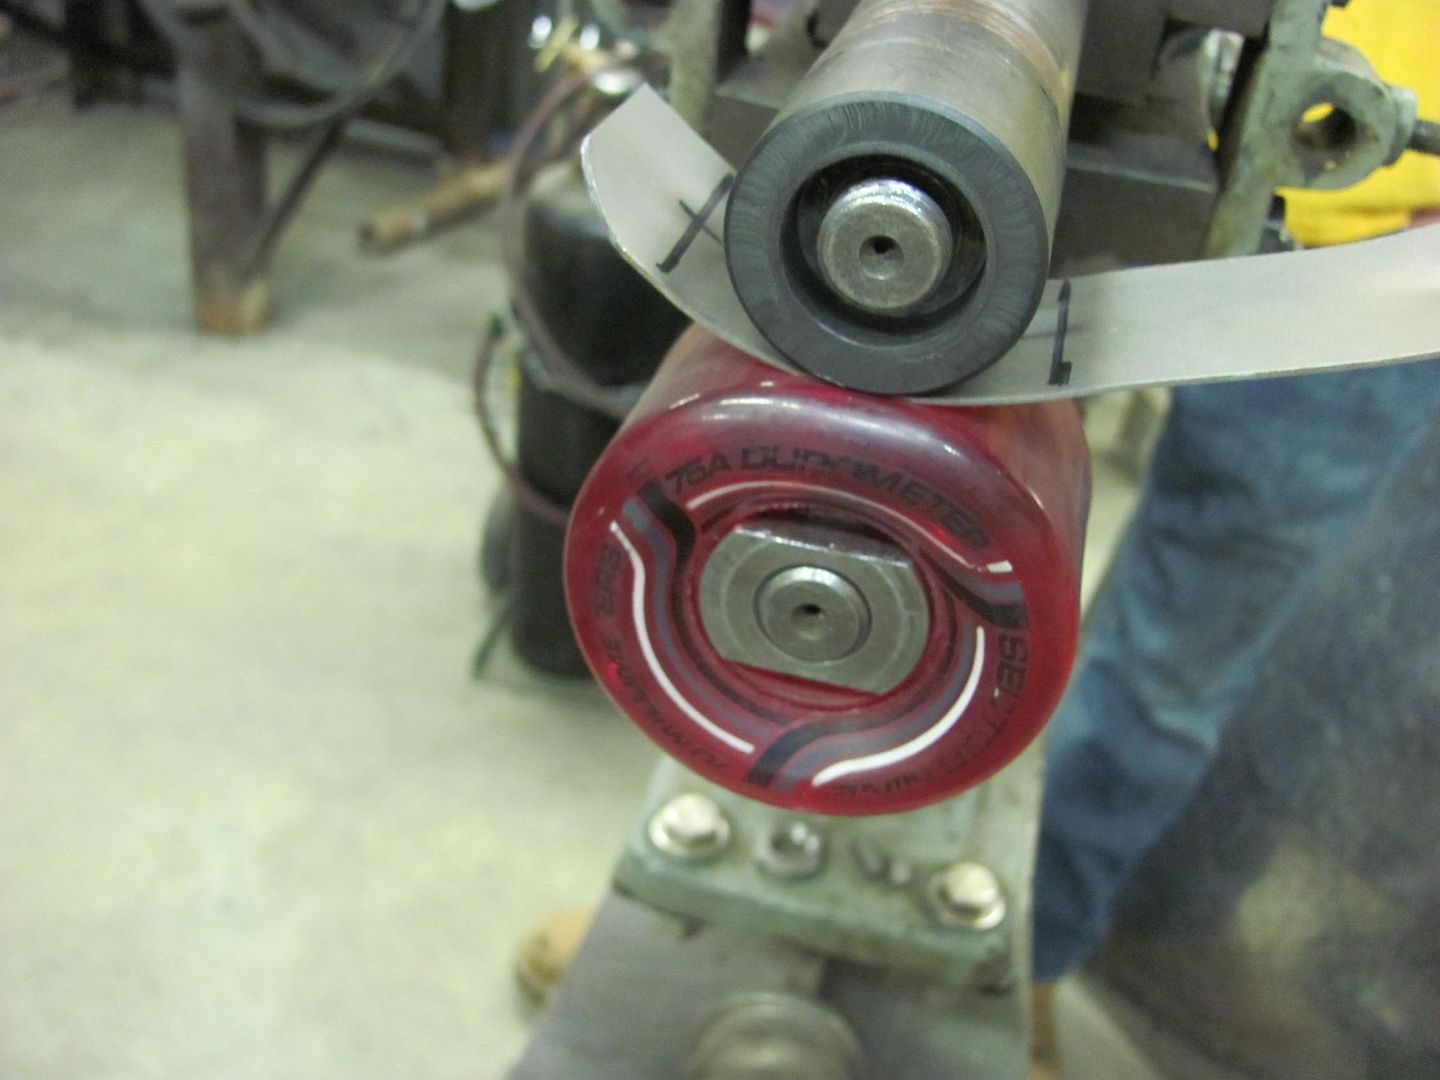
    Bead roller was set up with a backstop die...


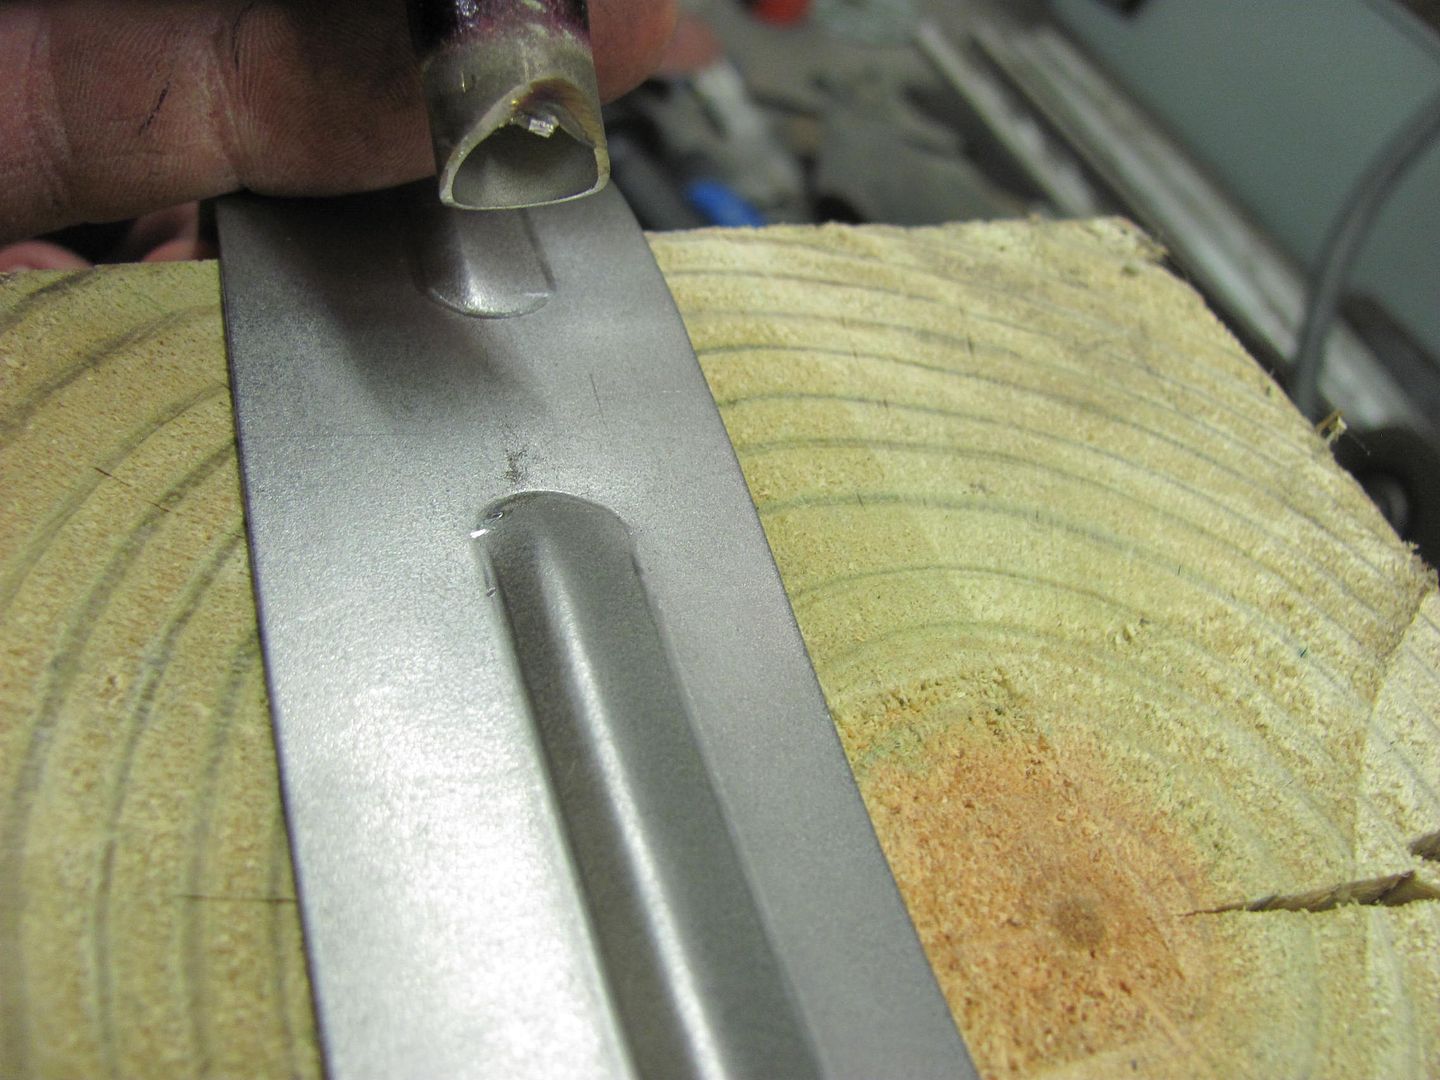
    Skateboard wheel and "rolling" wheel used to add radiused ends....


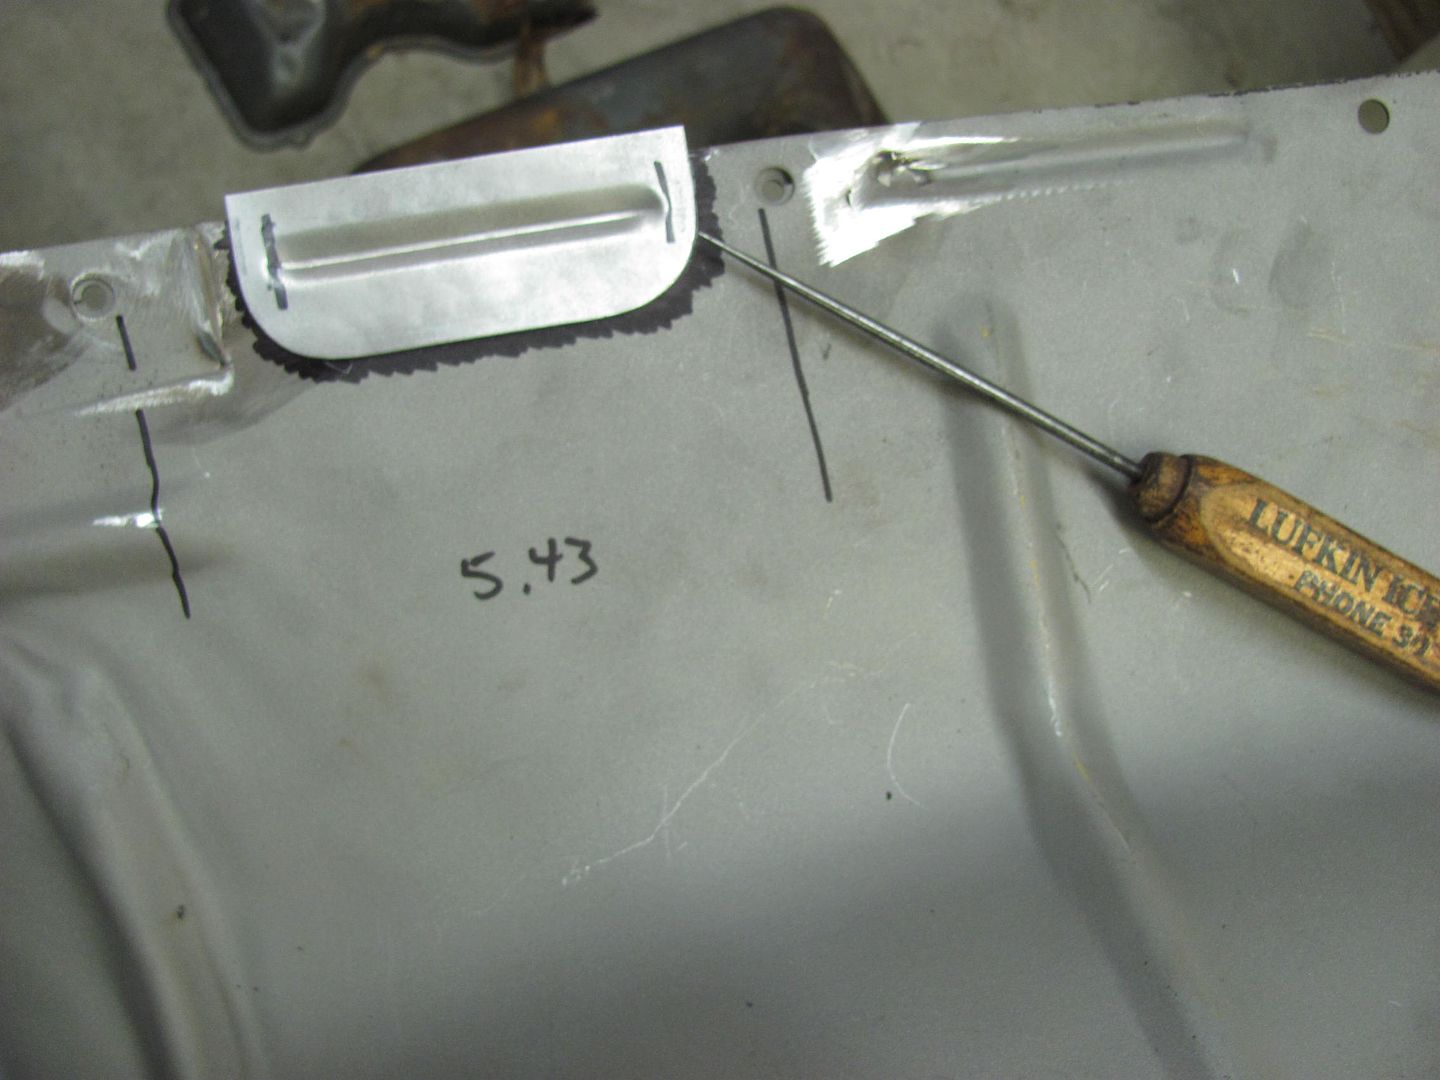
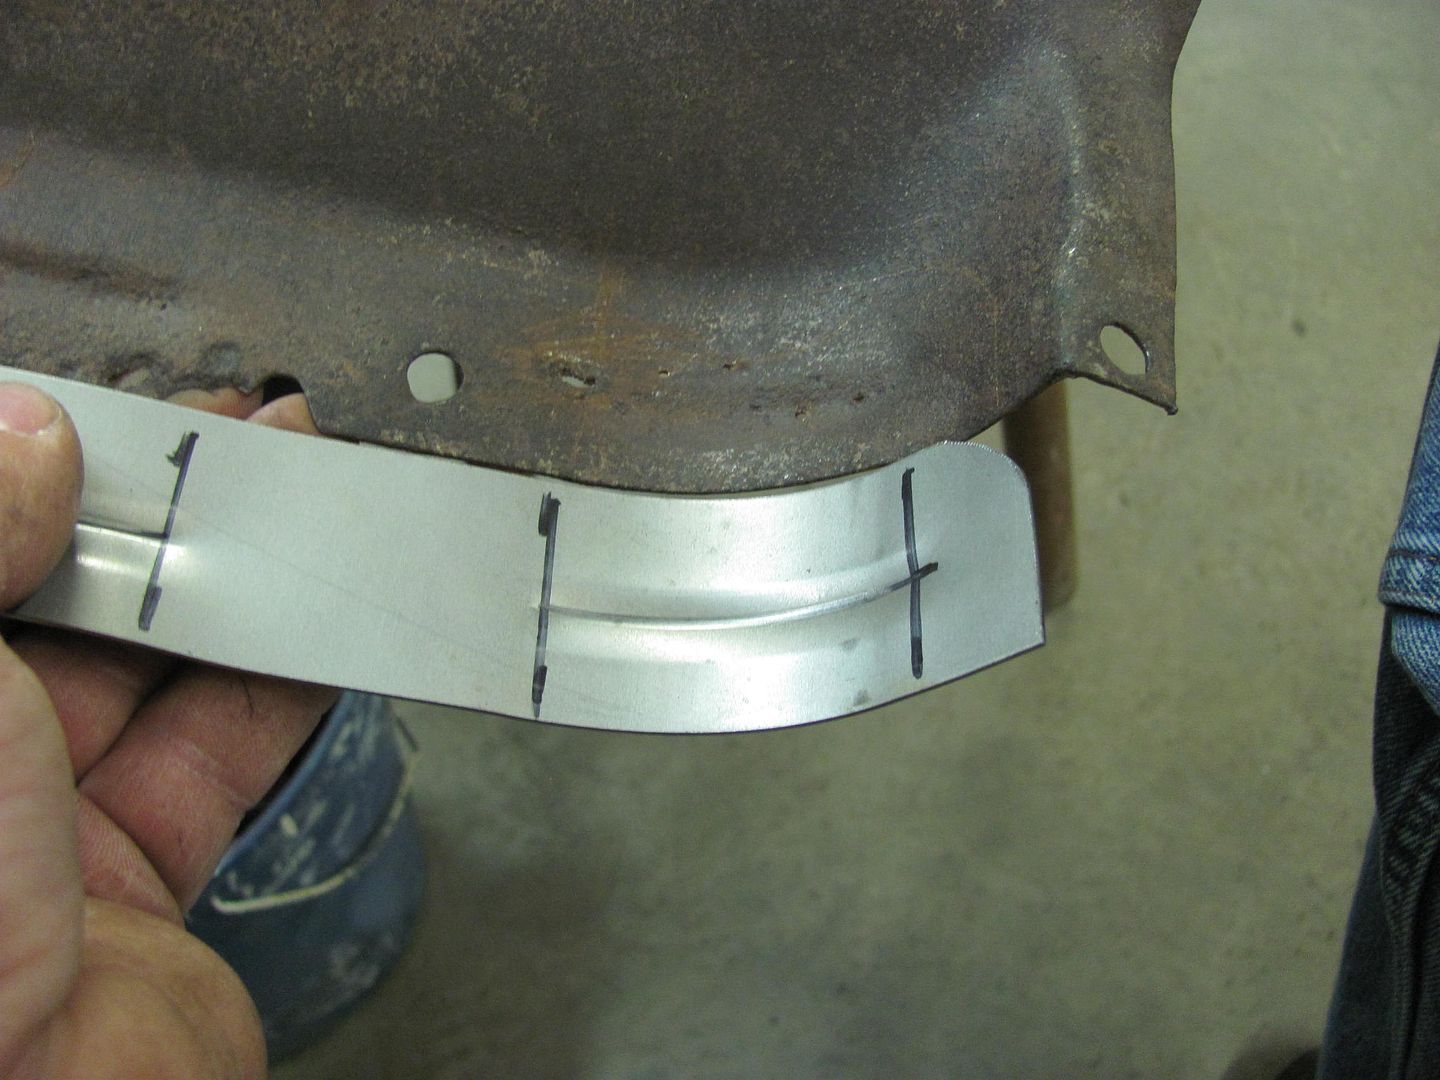
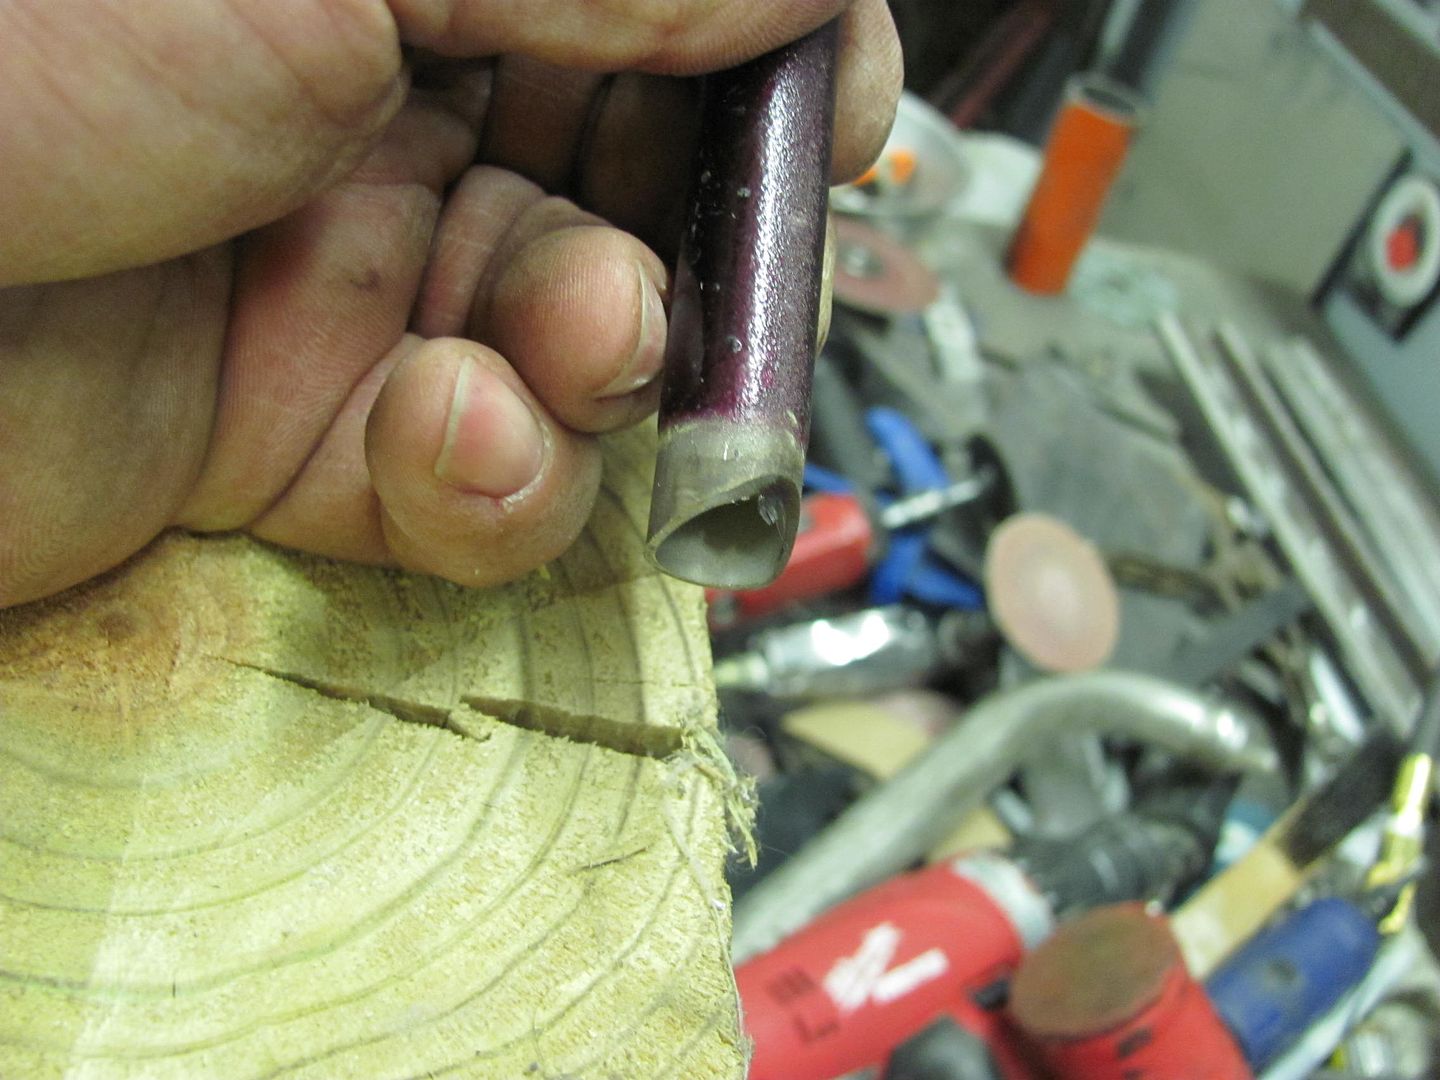
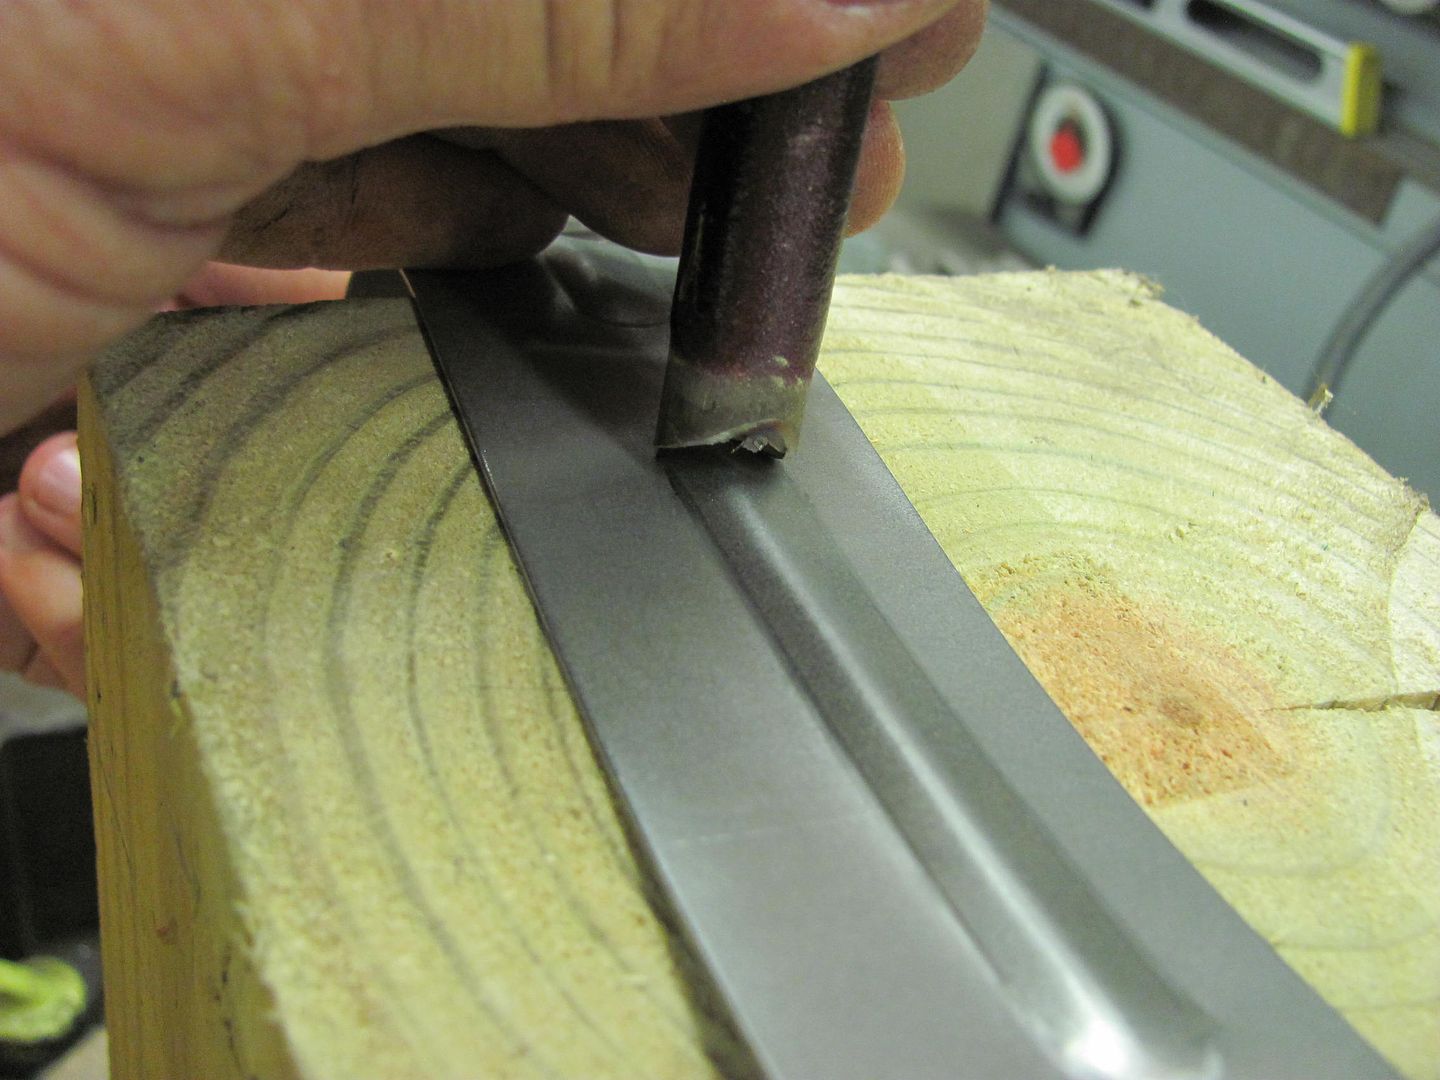
    Grabbed a suitable scrap from the pile and used the sander to make a bead
    ender tool thingie, used on the treated 6x6 anvil...


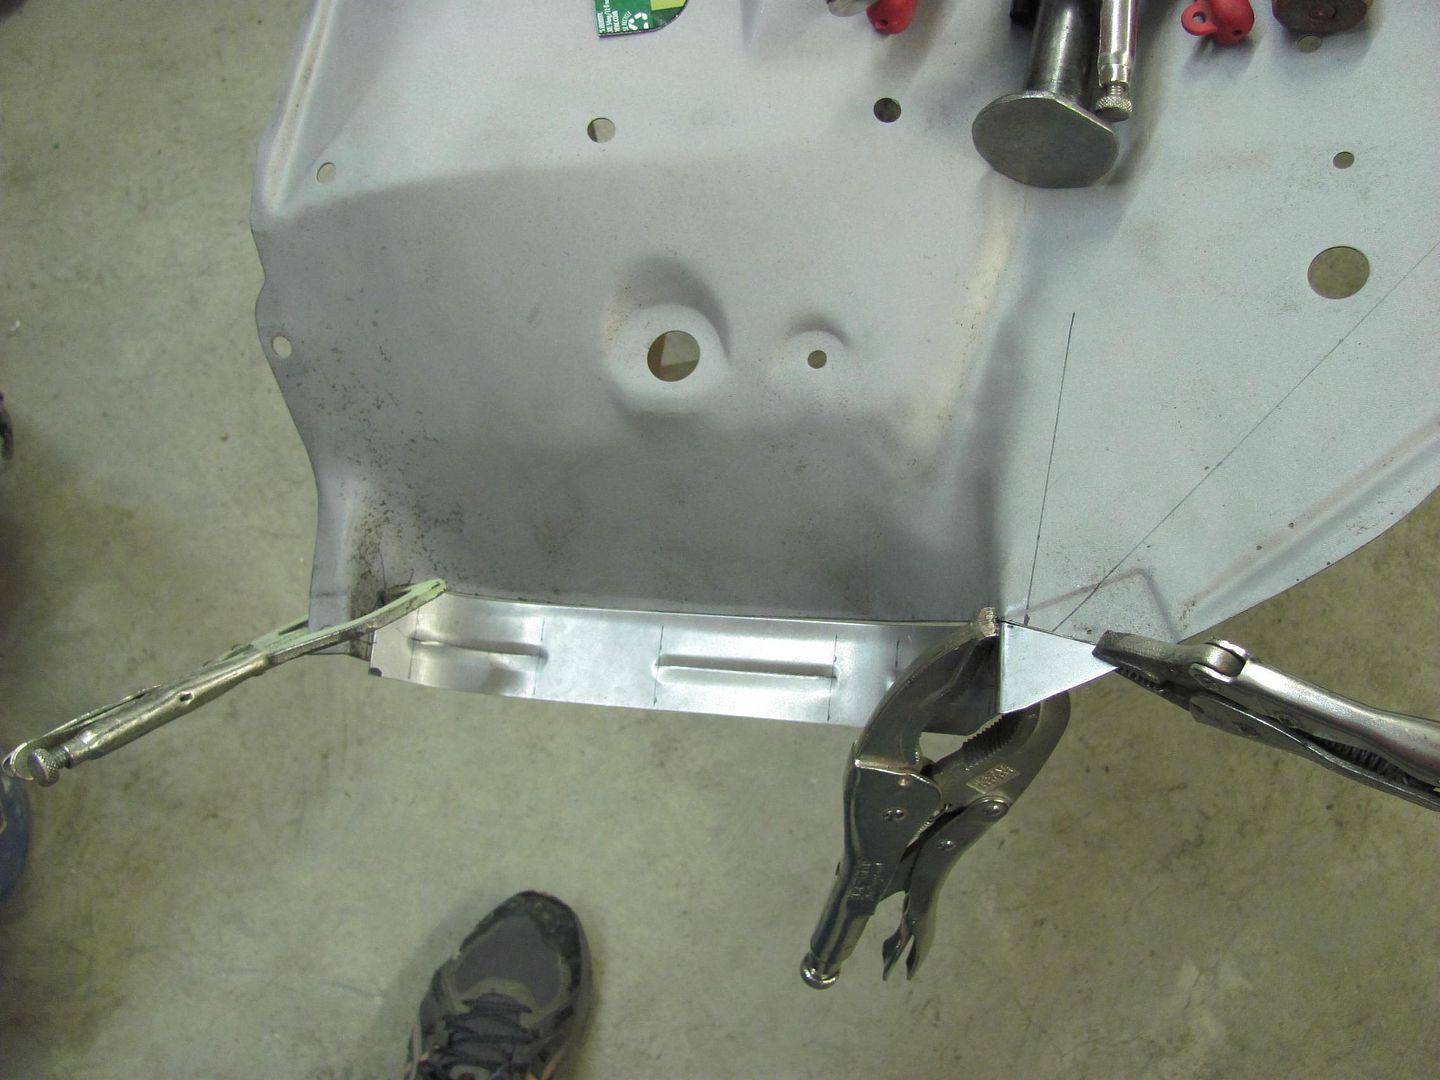
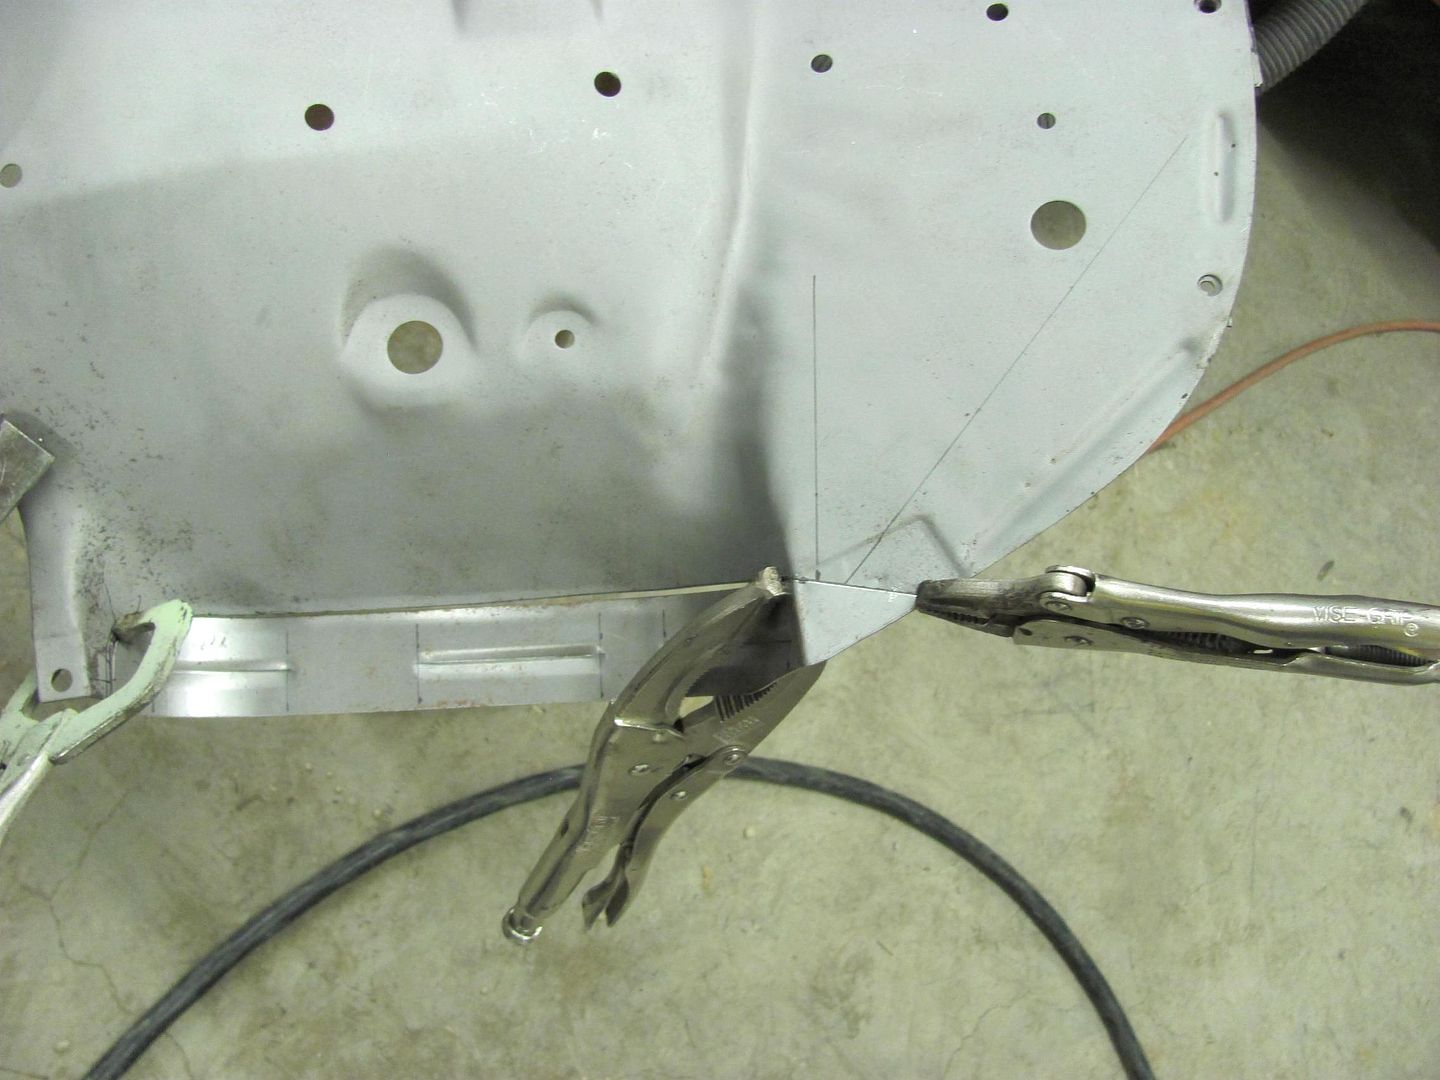
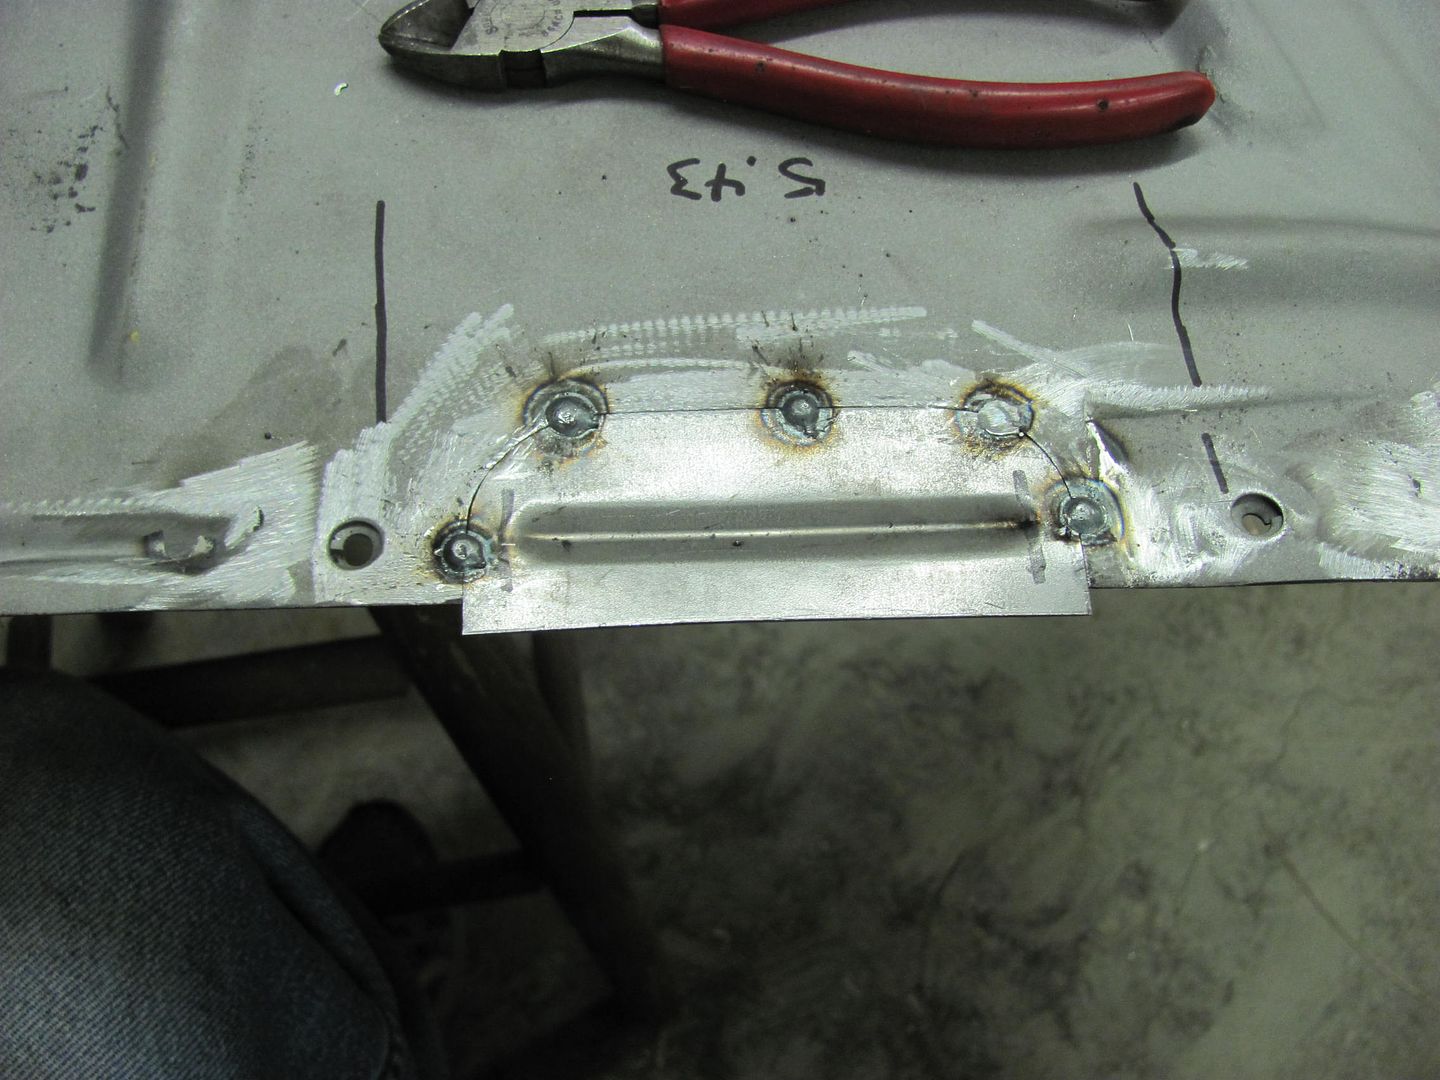
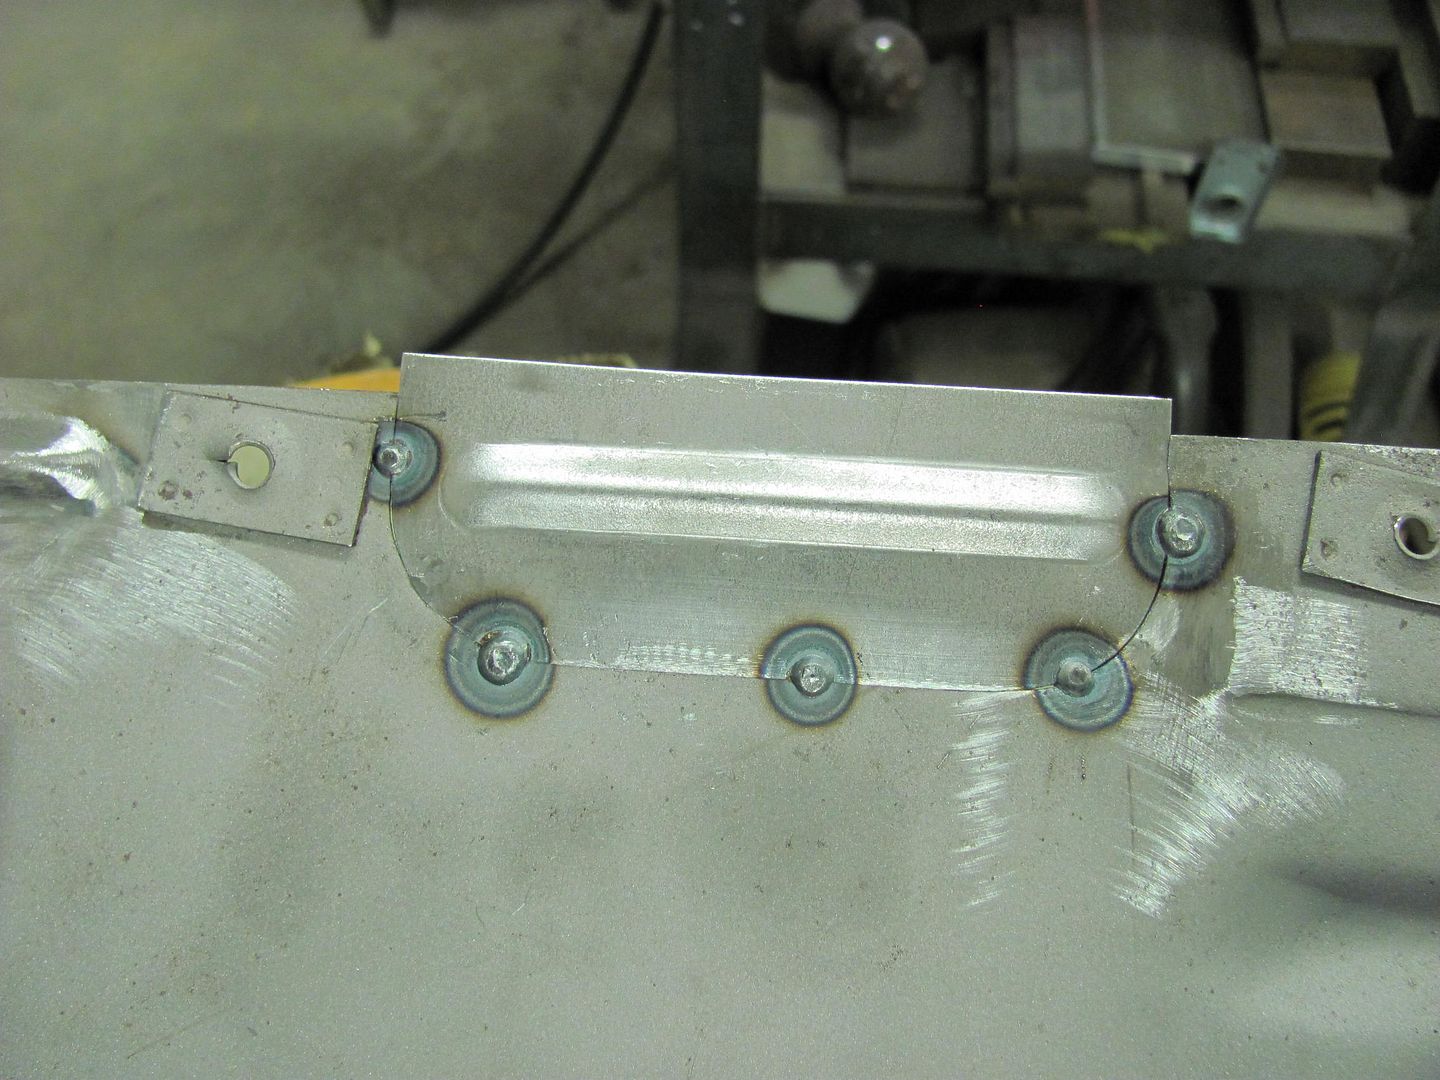
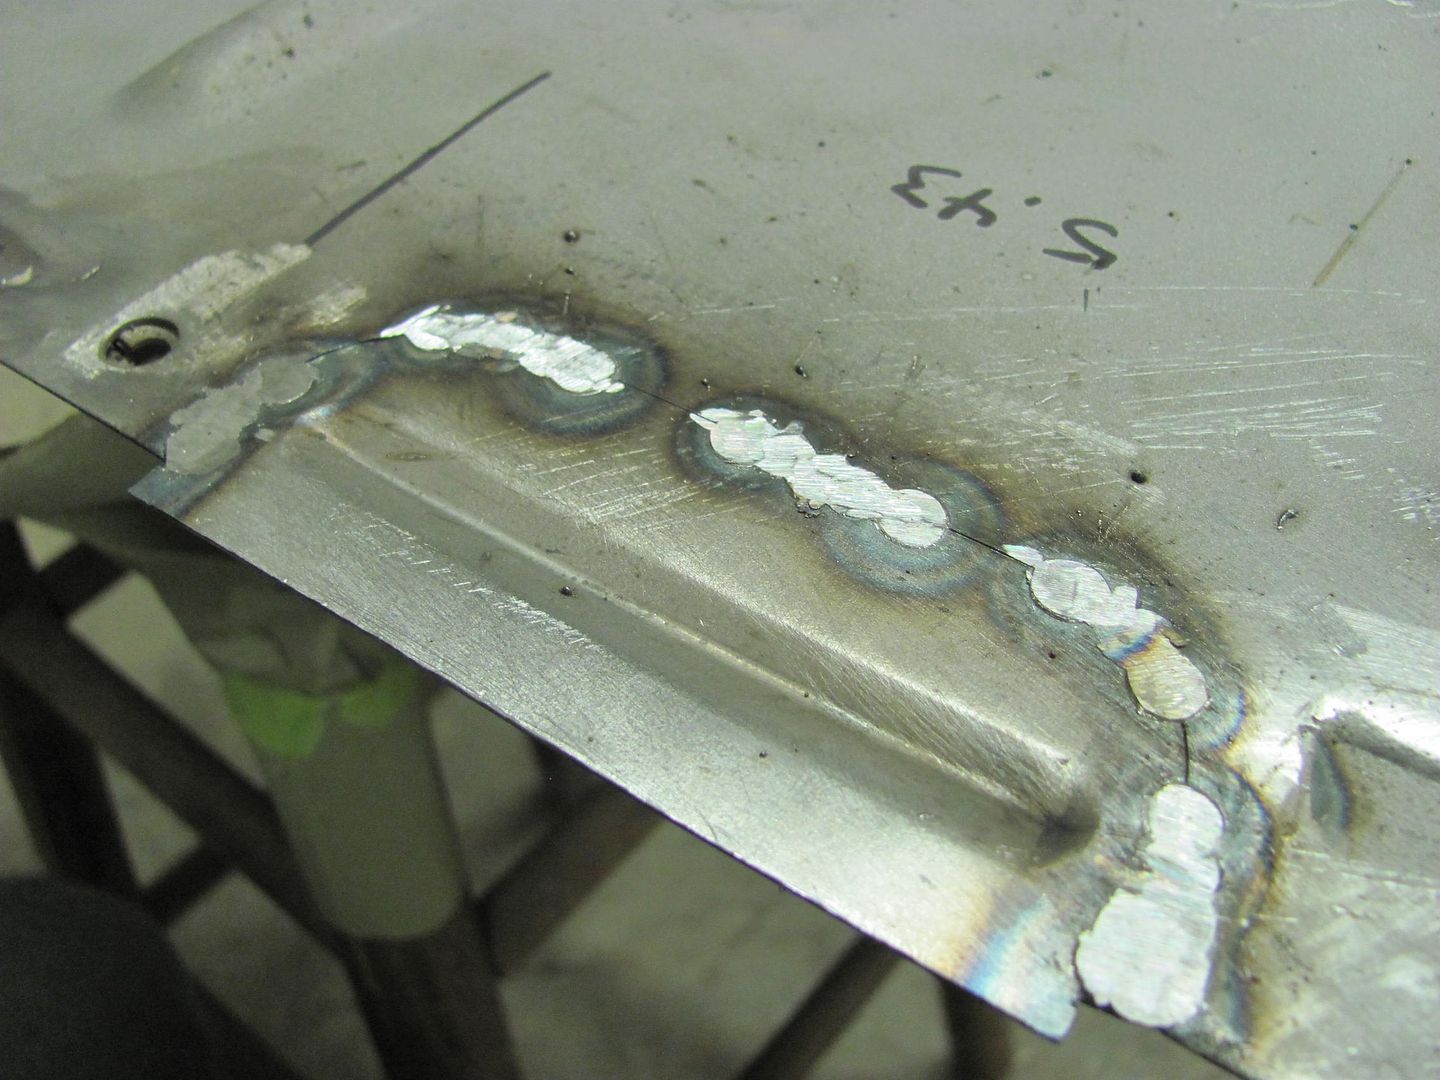
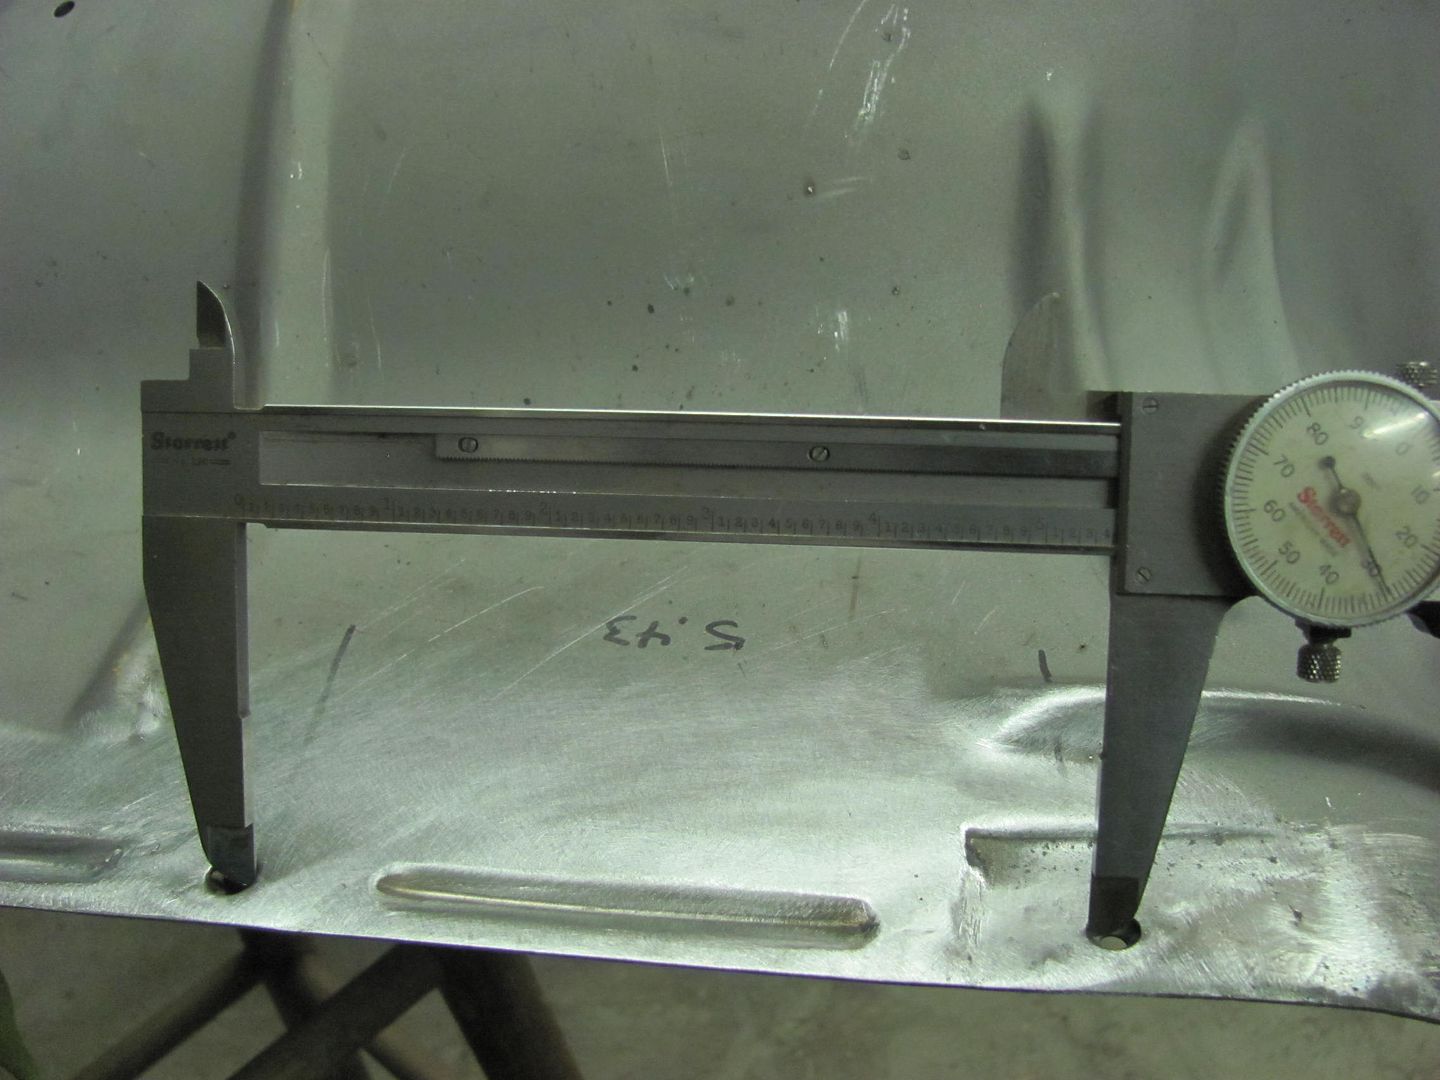
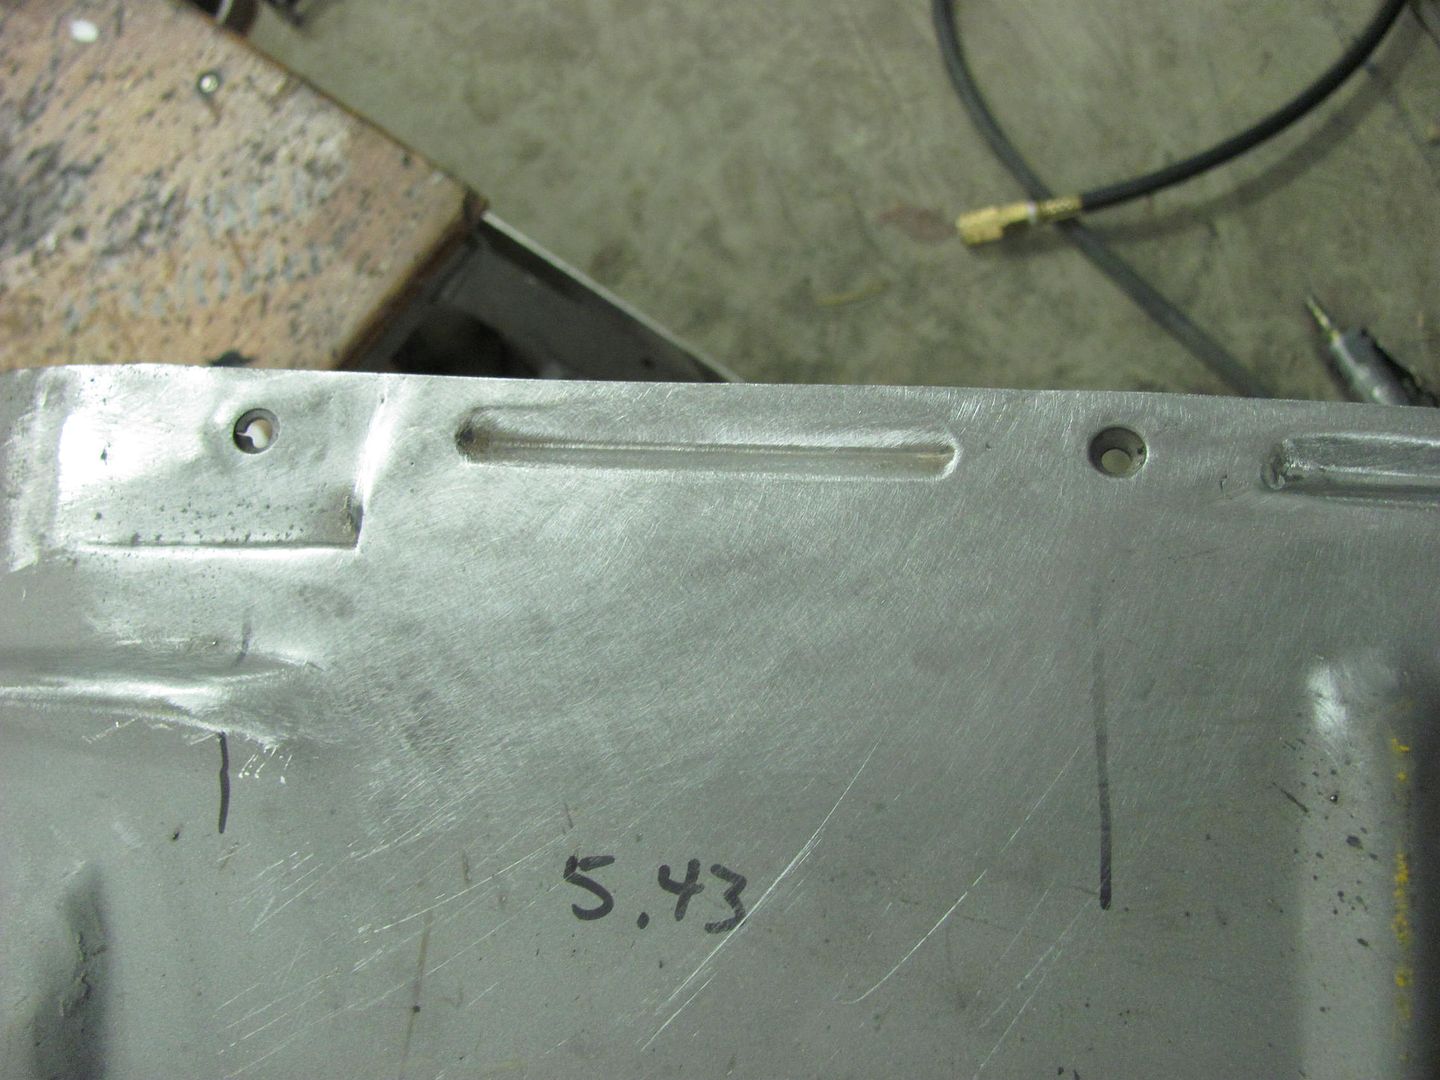
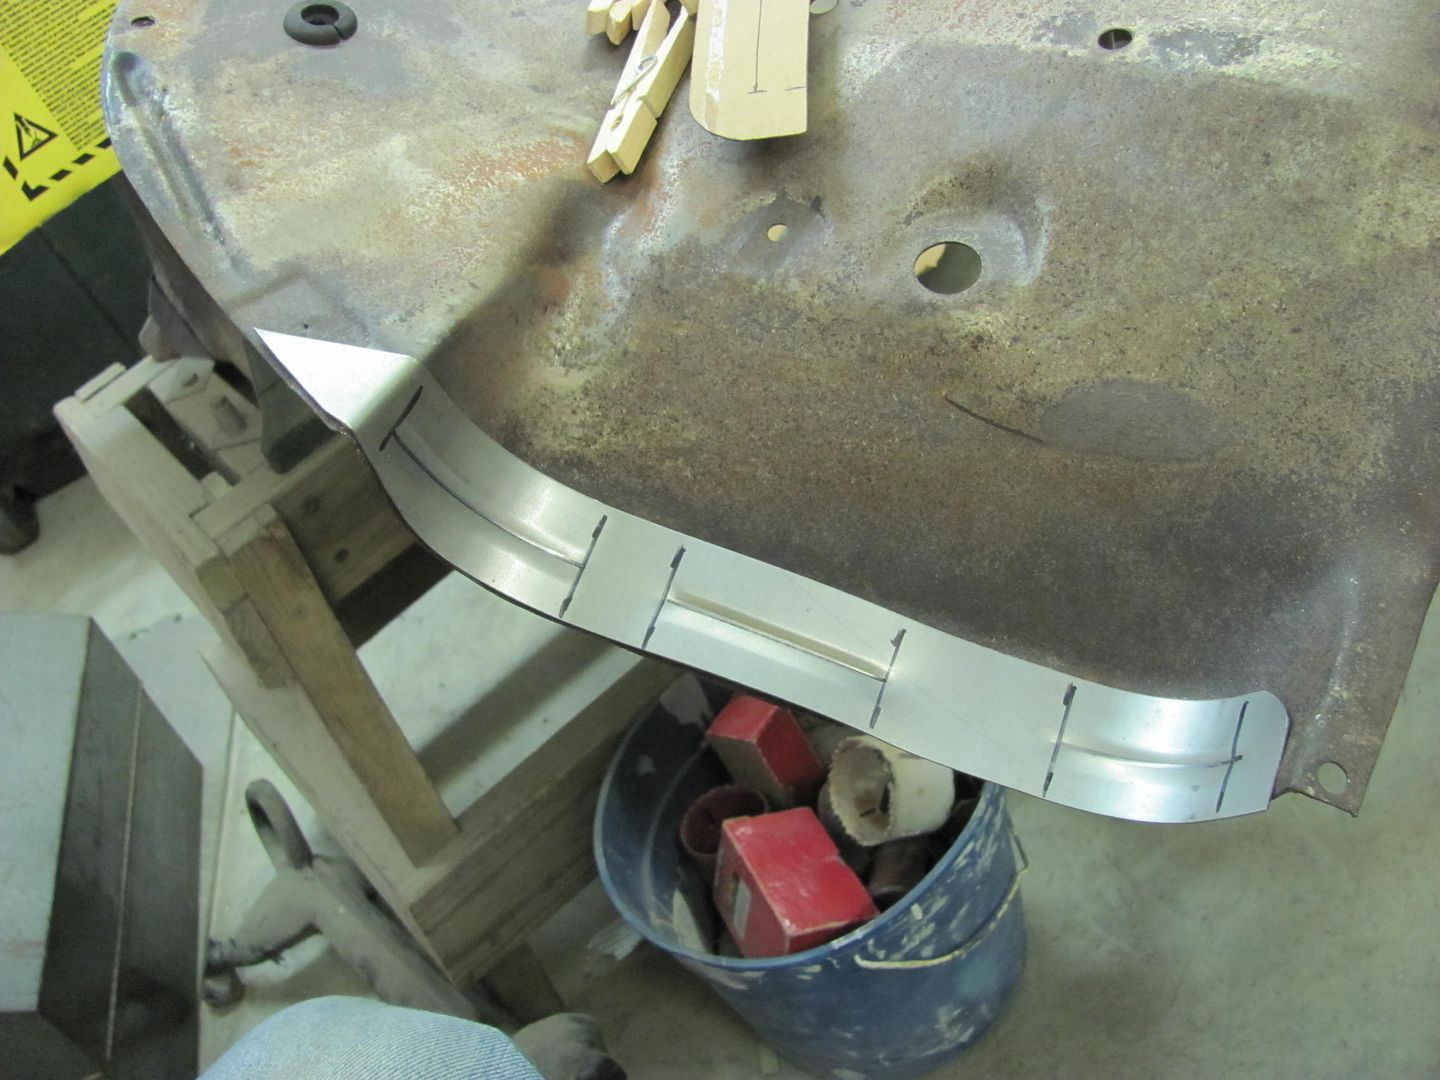
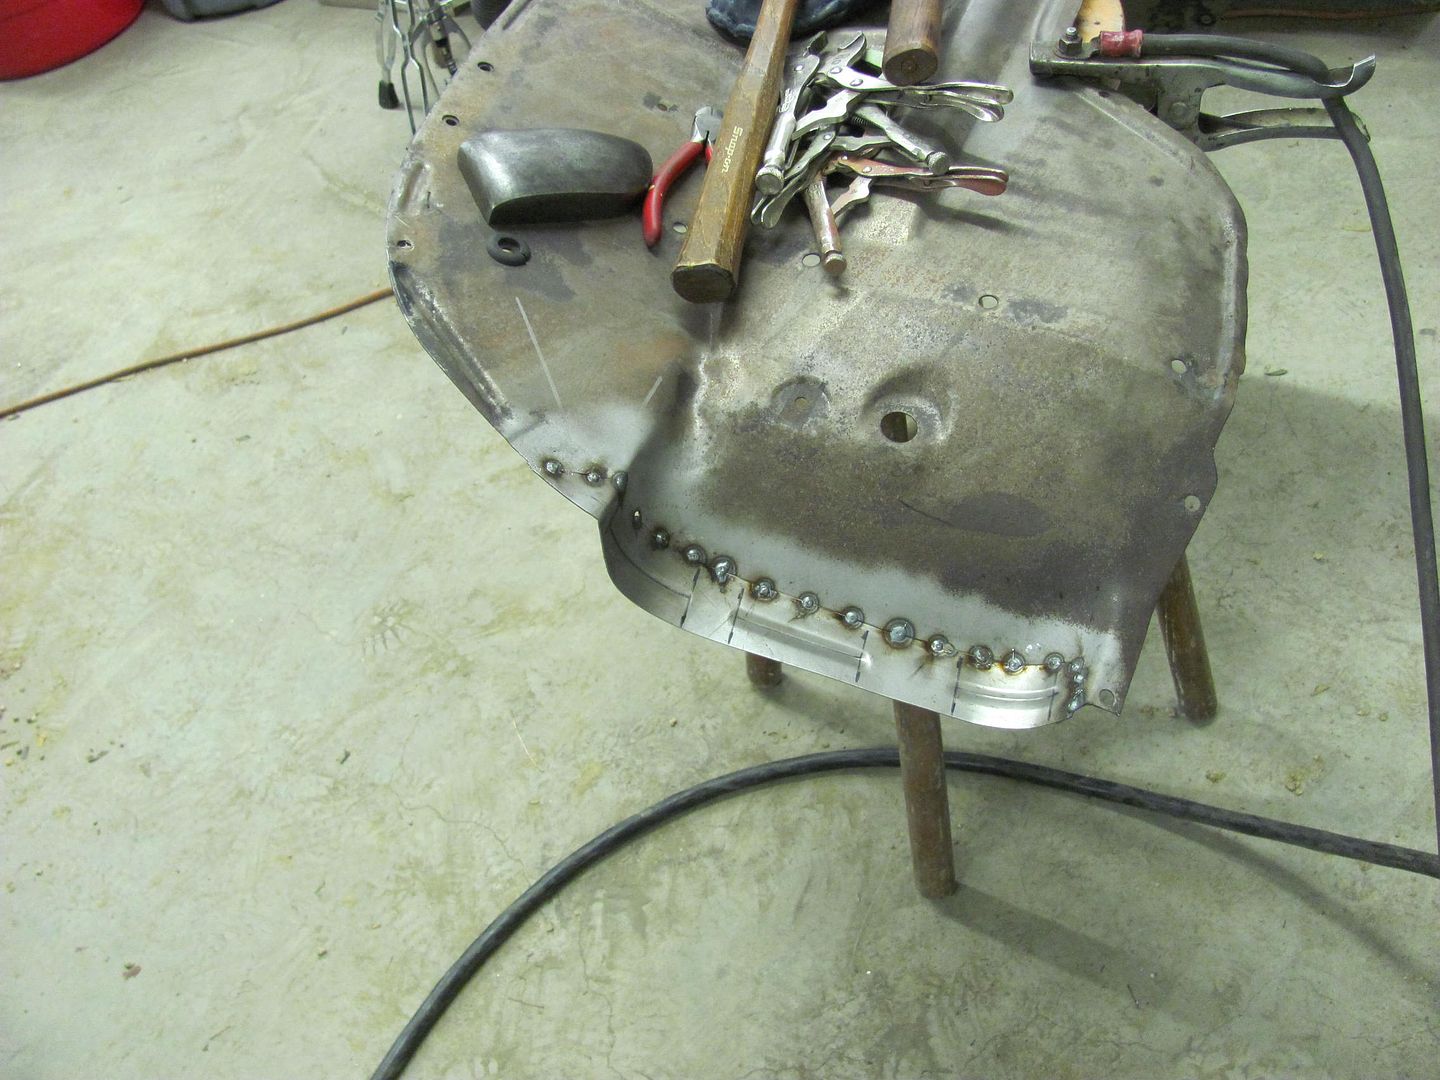
    Clamped and tacked....
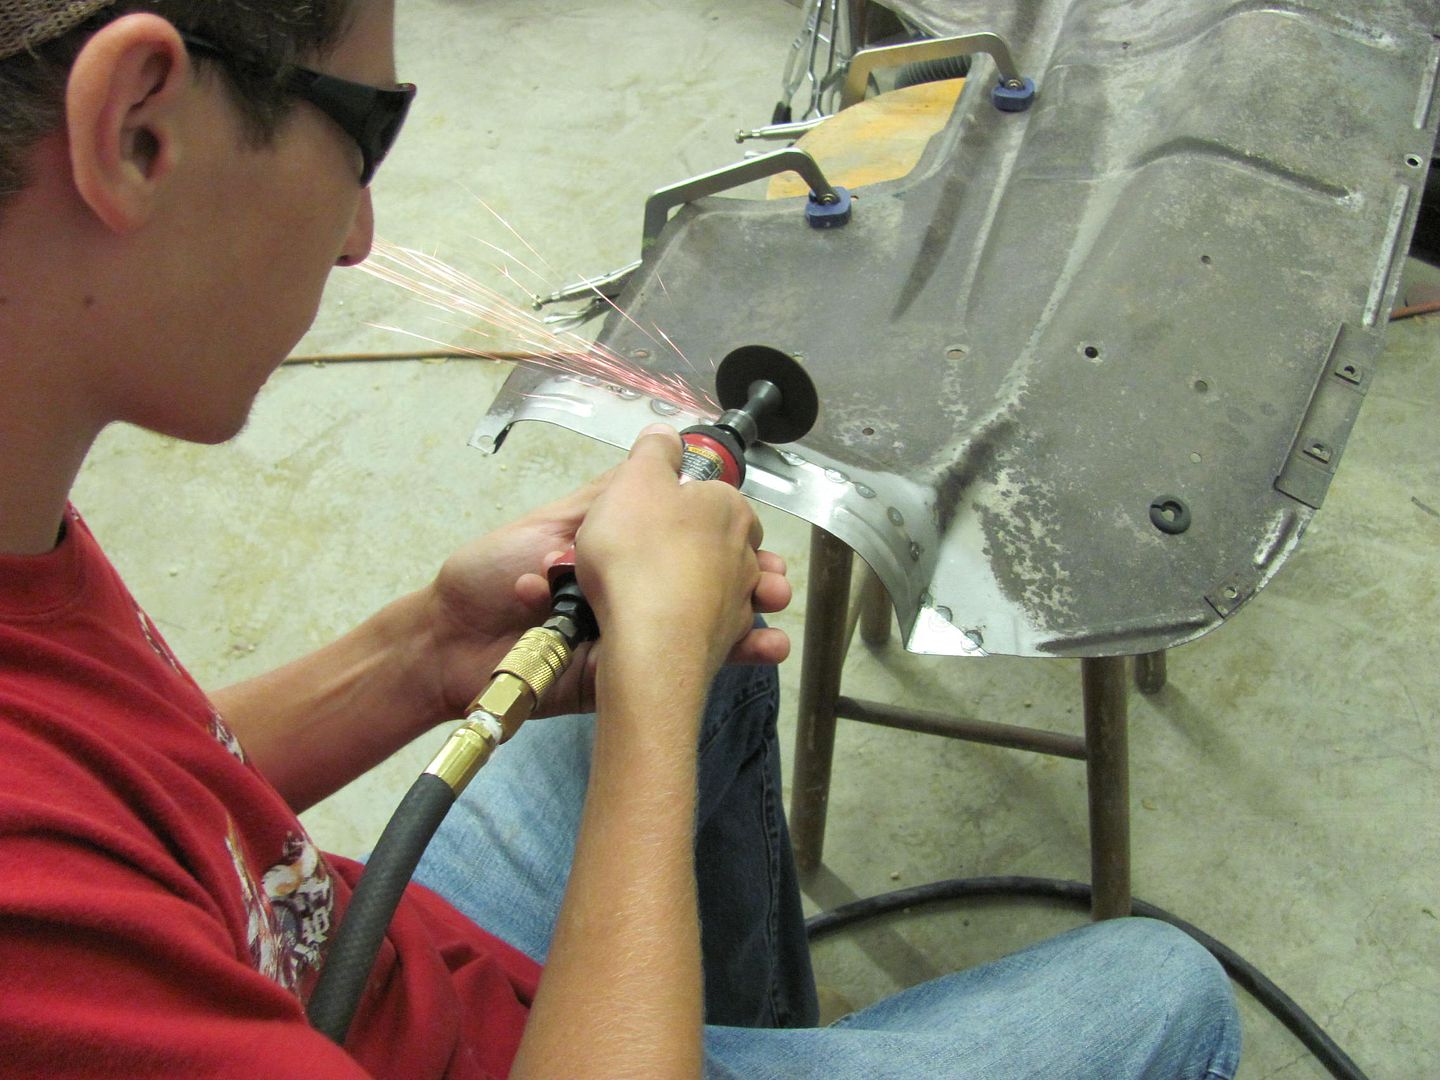


    More tonight......
    Robert


    MP&C Shop Projects-Metalshaping Tutorials


    Instagram @ mccartney_paint_and_custom


    .

  2. #2
    Registered Member carls 56 (RIP 11/24/2021)'s Avatar
    Join Date
    Jan 2011

    Member #:33
    Location
    Culpeper, Va.
    Posts
    1,857
    thanks for sharing Robert.
    ARMY NAM VET, very proud!

    56 210 4dr

    drive and enjoy them while you work on them, life is to short.

  3. #3
    Registered Member chevynut's Avatar
    Join Date
    Nov 2011

    Member #:115
    Location
    Fort Collins, CO
    Posts
    10,854
    It's just amazing how you fix stuff like that and make it look so easy. I'm going to have to get me one of those skateboard wheels some day. They look like they're pretty handy and I never thought about using it to bend a radius like that. Cool stuff.
    56 Nomad, Ramjet 502, Viper 6-speed T56, C4 Corvette front and rear suspension


    Other vehicles:

    56 Chevy 2-door BelAir sedan
    56 Chevy 210 4-door sedan
    57 Chevy 210 4-door sedan
    1962 327/340HP Corvette
    1961 Willys CJ3B Jeep
    2001 Porsche Boxster S
    2003 Chevy Silverado 2500 HD Duramax
    2019 GMC Sierra Denali Duramax

  4. #4
    Registered Member MP&C's Avatar
    Join Date
    Dec 2013

    Member #:2017
    Location
    Southern MD
    Posts
    1,293
    You have to "mash" the upper wheel into the skate board wheel a good bit to get the radius forming to take place, but the SB wheel still has enough give that it doesn't flatten the bead detail..
    Robert


    MP&C Shop Projects-Metalshaping Tutorials


    Instagram @ mccartney_paint_and_custom


    .

  5. #5
    Registered Member MP&C's Avatar
    Join Date
    Dec 2013

    Member #:2017
    Location
    Southern MD
    Posts
    1,293
    Well the Wheeling Machine finally has paint!

    Napa Econo-etch primer....


    H/K Pavo Purple and Flo Klear. I tried playing with the camera settings to get it to capture the true color, but it just wasn't happening. It may look blue in the pic, but it's about as close to Chrysler's Plum Crazy as you can get without putting a HEMI under the hood..


    Here's the actual color...


    While I was finishing up the paint on the English Wheel, Kyle stripped the driver's inner fender. This one has the same issues in the front as well as a spot up top where the flange of the fender had some rust issues we previously repaired..


    Looks like our same template will work here as well..


    And while I was trimming more rust away, Kyle was working on the passenger side learning the fine art of dressing welds...


    Robert


    MP&C Shop Projects-Metalshaping Tutorials


    Instagram @ mccartney_paint_and_custom


    .

  6. #6
    Registered Member chevynut's Avatar
    Join Date
    Nov 2011

    Member #:115
    Location
    Fort Collins, CO
    Posts
    10,854
    I have never felt like I was in tortal control when I use a straight die grinder. The only time I use mine is when I don't want to change tools, or I need to get into a tight spot where the 90 degree grinder won't work. I find that I have a lot more control with the 90 degree die grinder. I have 5 of them, 4 are 90 degree (Ingersol Rand) and one is straight (Harbor Freight). If you have one you might let Kyle try it with the cutoff wheel and see which he feels more comfortable with....just a suggestion
    56 Nomad, Ramjet 502, Viper 6-speed T56, C4 Corvette front and rear suspension


    Other vehicles:

    56 Chevy 2-door BelAir sedan
    56 Chevy 210 4-door sedan
    57 Chevy 210 4-door sedan
    1962 327/340HP Corvette
    1961 Willys CJ3B Jeep
    2001 Porsche Boxster S
    2003 Chevy Silverado 2500 HD Duramax
    2019 GMC Sierra Denali Duramax

  7. #7
    Administrator 567chevys's Avatar
    Join Date
    Oct 2010

    Member #:3
    Location
    Woodland Washington
    Posts
    2,416
    Robert your ideas and work are world class and very Amazing.


    Thanks for posting the stuff on the site.

    Sid

    1955 2 DR Post
    1937 Chevy Coupe
    2023 Ford Super Duty F350 TREMOR
    2019 Corvette Z06
    1955 Chevy Nomad
    1935 Ford 2dr Slant back I have 4

  8. #8
    Registered Member MP&C's Avatar
    Join Date
    Dec 2013

    Member #:2017
    Location
    Southern MD
    Posts
    1,293
    While Kyle was working on dressing some welds this evening, I took some time to planish the weld on the driver's fender eyebrow. Here's the previous.....


    It had a noticeable dip throughout the weld seam. Here's the tool used.....


    The eyebrow on the passenger side was planished all by hand, and probably has a couple hours in planishing. The Watervliet planishing hammer made short work of the driver's side, it took all of five minutes time to have it in a comparable state as the passenger side...


    Continuing on with more inner fender work, starting on the driver's side....


    Back side, full penetration welds.....


    Staple holes for seal filled...


    Should get both these finished up Saturday morning and mocked up with the battery tray..
    Robert


    MP&C Shop Projects-Metalshaping Tutorials


    Instagram @ mccartney_paint_and_custom


    .

  9. #9
    Registered Member MP&C's Avatar
    Join Date
    Dec 2013

    Member #:2017
    Location
    Southern MD
    Posts
    1,293
    Here's the passenger side with the welds dressed and mocked up to the grille....


    While Kyle media blasted the passenger side, I did some finish work on the driver's side. We still had this up at the top to fix...


    A replacement was made and marked out on the inner fender..


    Took a reference measurement to insure any shrinking effects were properly planished out...


    Ice pick works well in marking the cutout pattern...


    Trimmed and fitted


    Tacked in place...


    Rear side


    After planishing and dressing the welds, re-checking the reference measurement....


    Passenger side complete....


    Driver's side complete.....


    Next task will be to assemble the battery tray and send off the goodies for powder coating.
    Robert


    MP&C Shop Projects-Metalshaping Tutorials


    Instagram @ mccartney_paint_and_custom


    .

  10. #10
    Administrator 567chevys's Avatar
    Join Date
    Oct 2010

    Member #:3
    Location
    Woodland Washington
    Posts
    2,416
    Great work Robert ,

    Thanks For sharing it


    Sid

    1955 2 DR Post
    1937 Chevy Coupe
    2023 Ford Super Duty F350 TREMOR
    2019 Corvette Z06
    1955 Chevy Nomad
    1935 Ford 2dr Slant back I have 4

Page 1 of 3 123 LastLast

Posting Permissions

  • You may not post new threads
  • You may not post replies
  • You may not post attachments
  • You may not edit your posts
  •