Just joined? Please introduce yourself.
Page 44 of 102 FirstFirst ... 3442434445465494 ... LastLast
Results 431 to 440 of 1019

Thread: wagon progress

  1. #431
    Registered Member MP&C's Avatar
    Join Date
    Dec 2013

    Member #:2017
    Location
    Southern MD
    Posts
    1,293
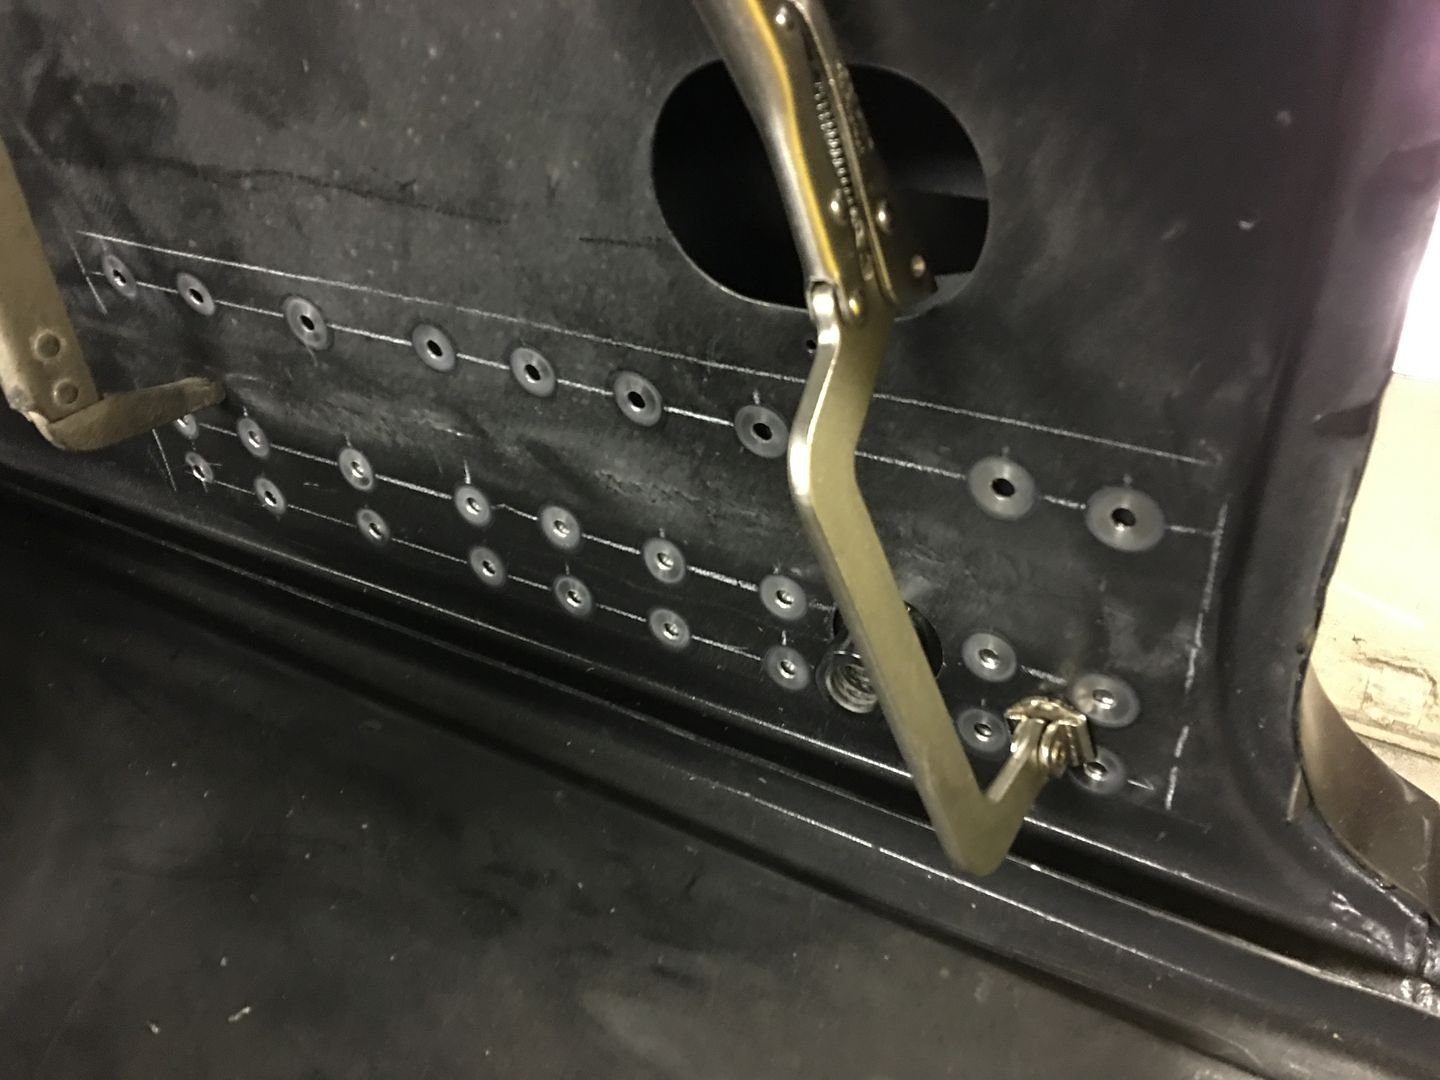
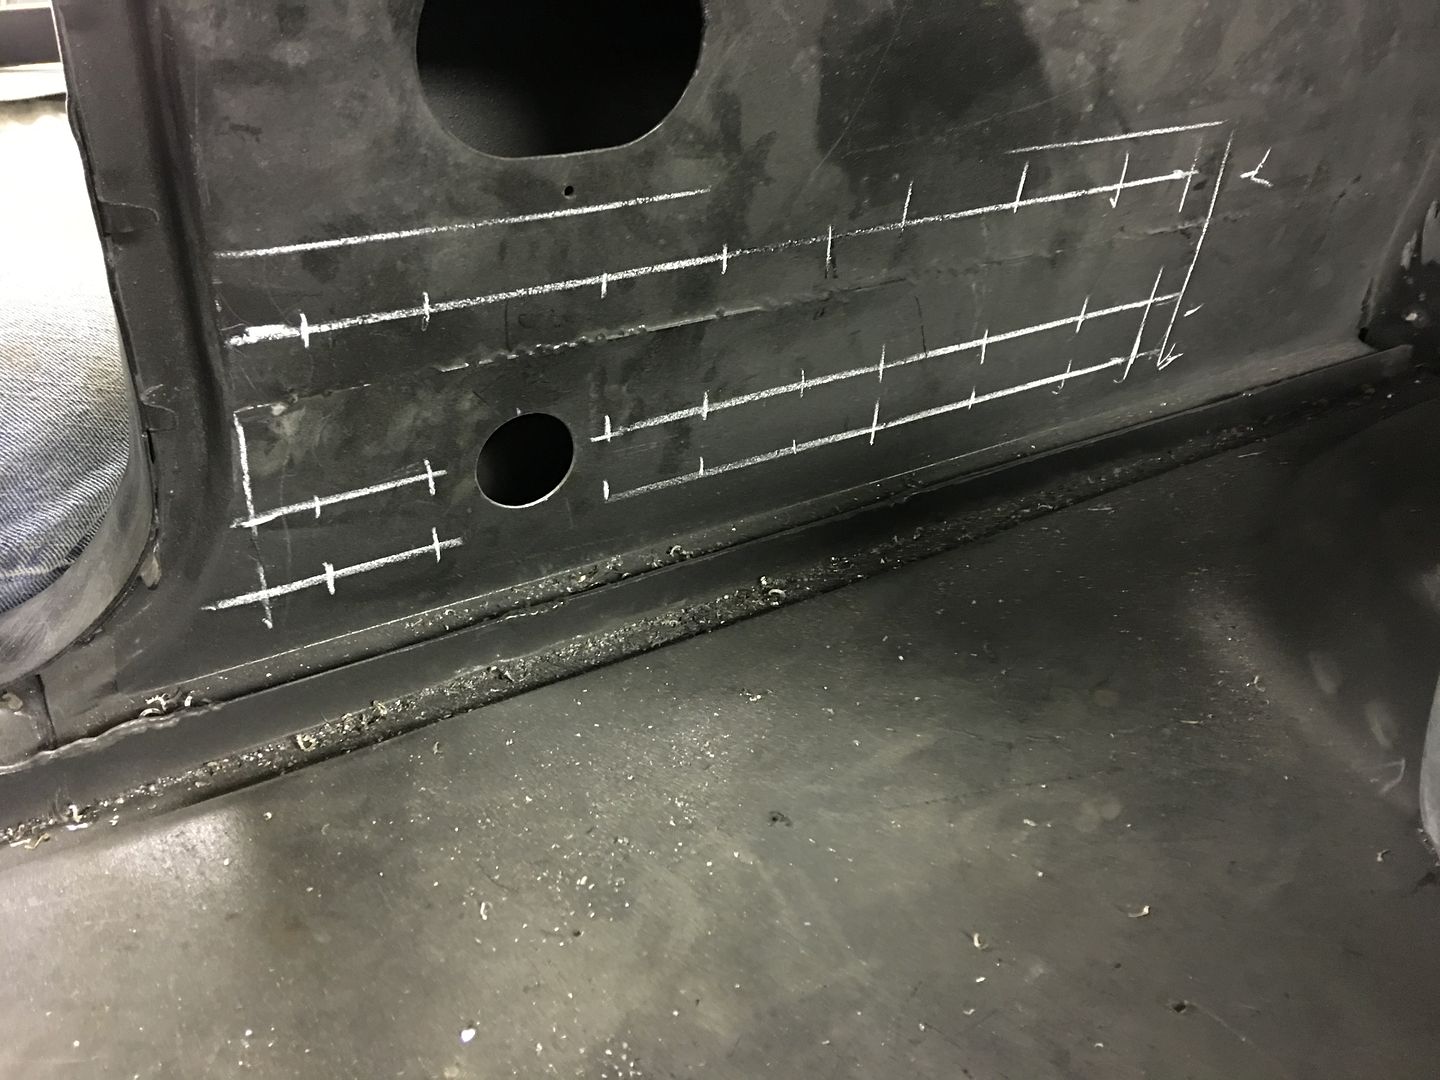
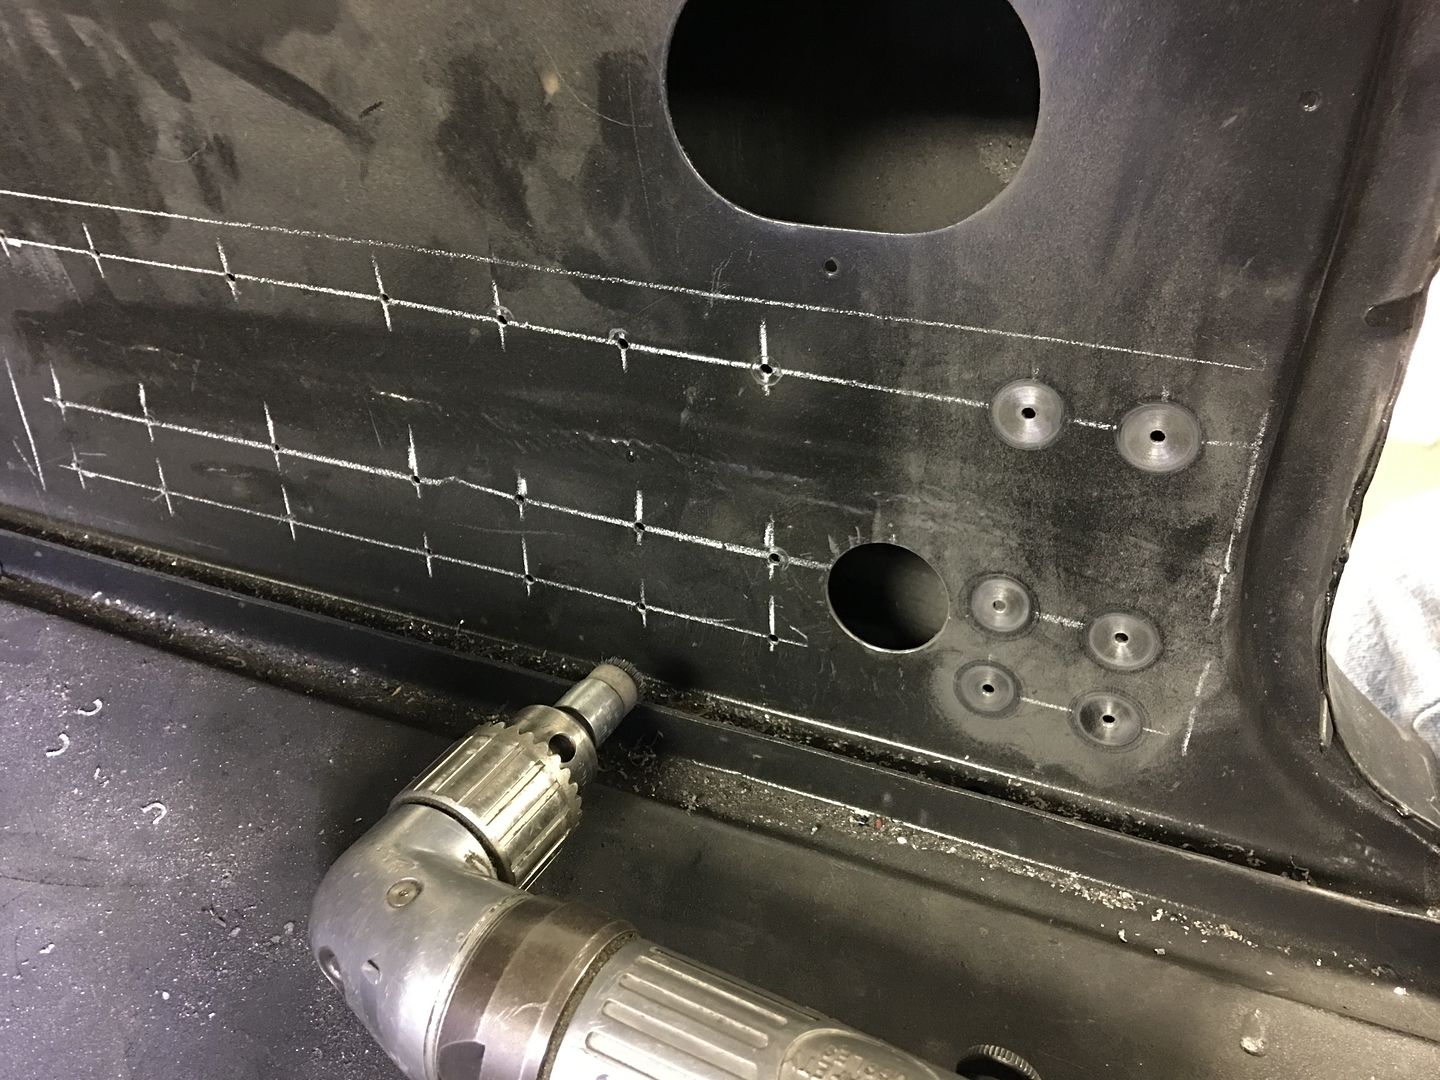
    To catch up on the wagon, the seat belt retractor anchor bracket will be located inside the quarter panel, here we are laying out for the plug weld holes that hold it in place...


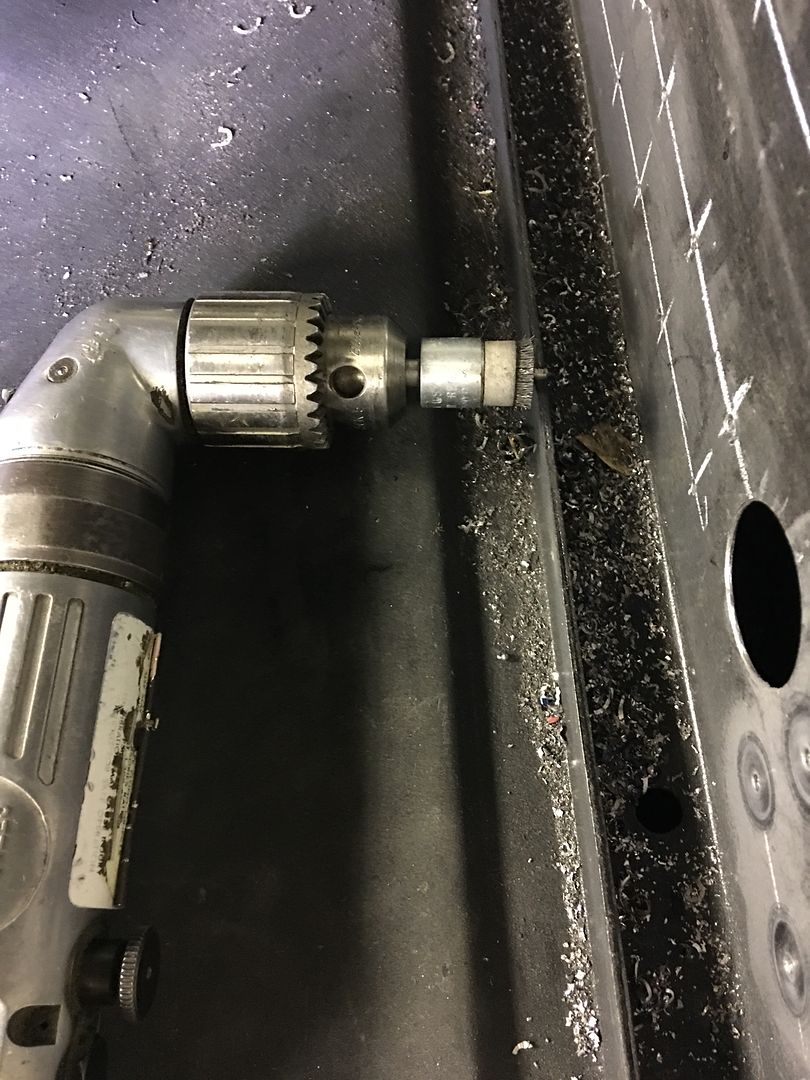
    Holes piloted, then use the burnishing brush to remove the paint from the weld area...


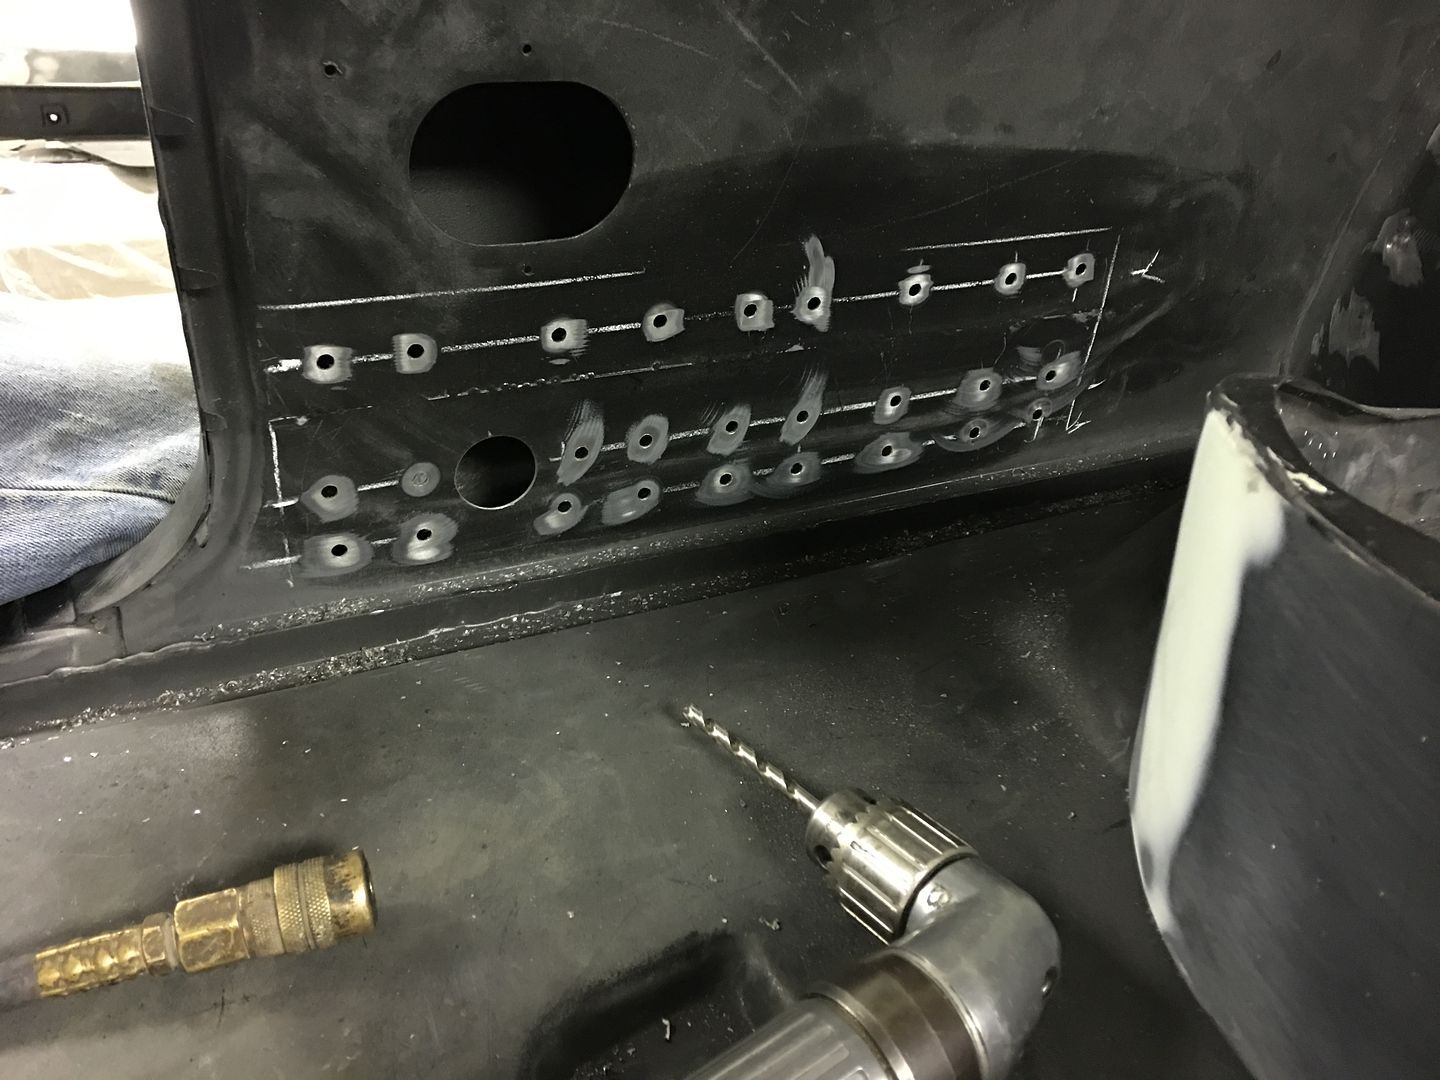
    Then the holes are enlarged for plug weld size, I use a letter A and plenty of heat.


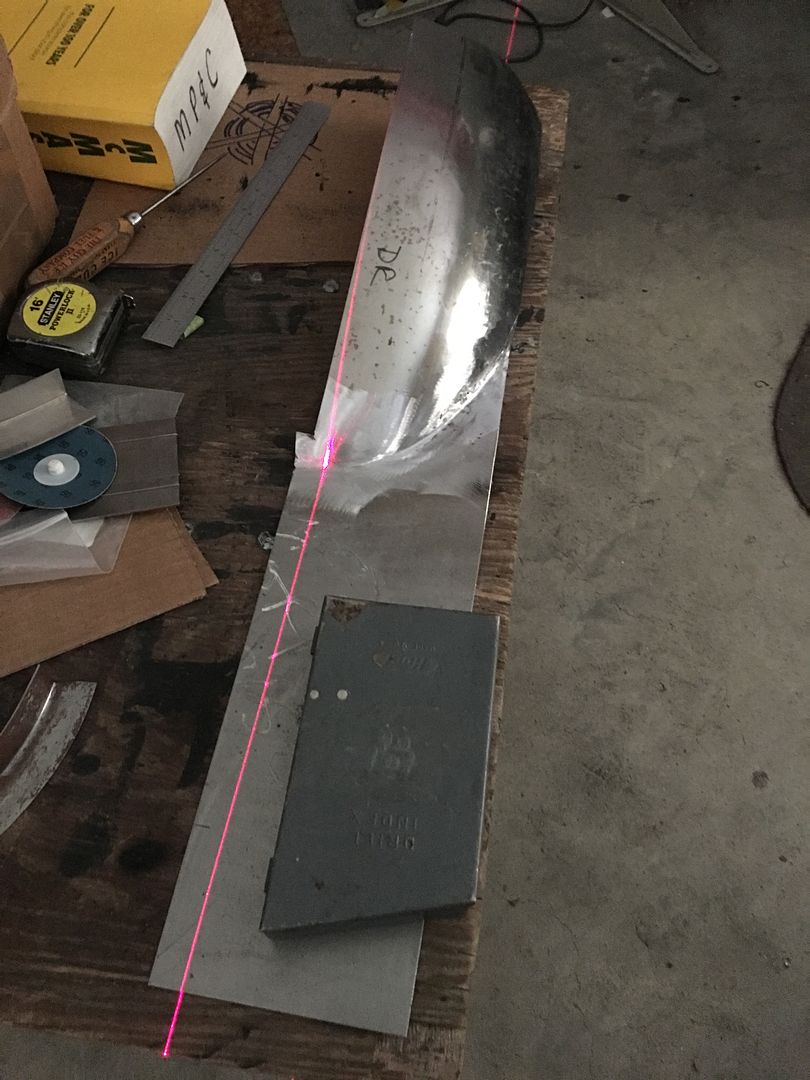
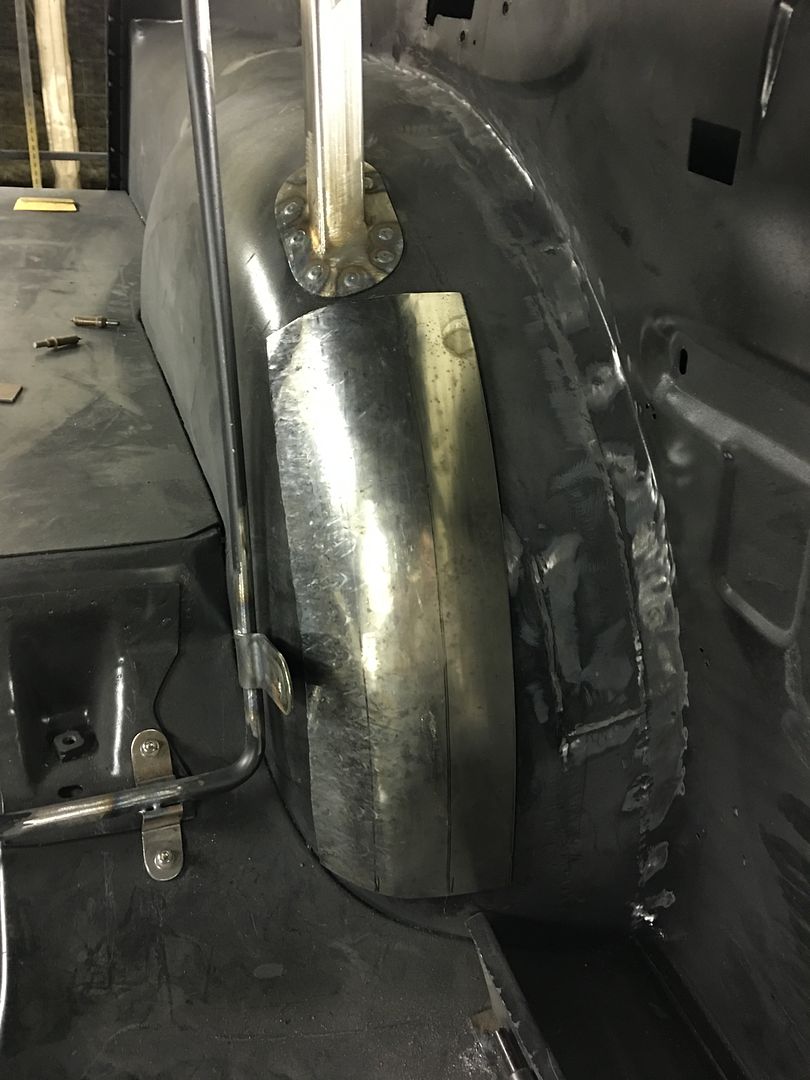
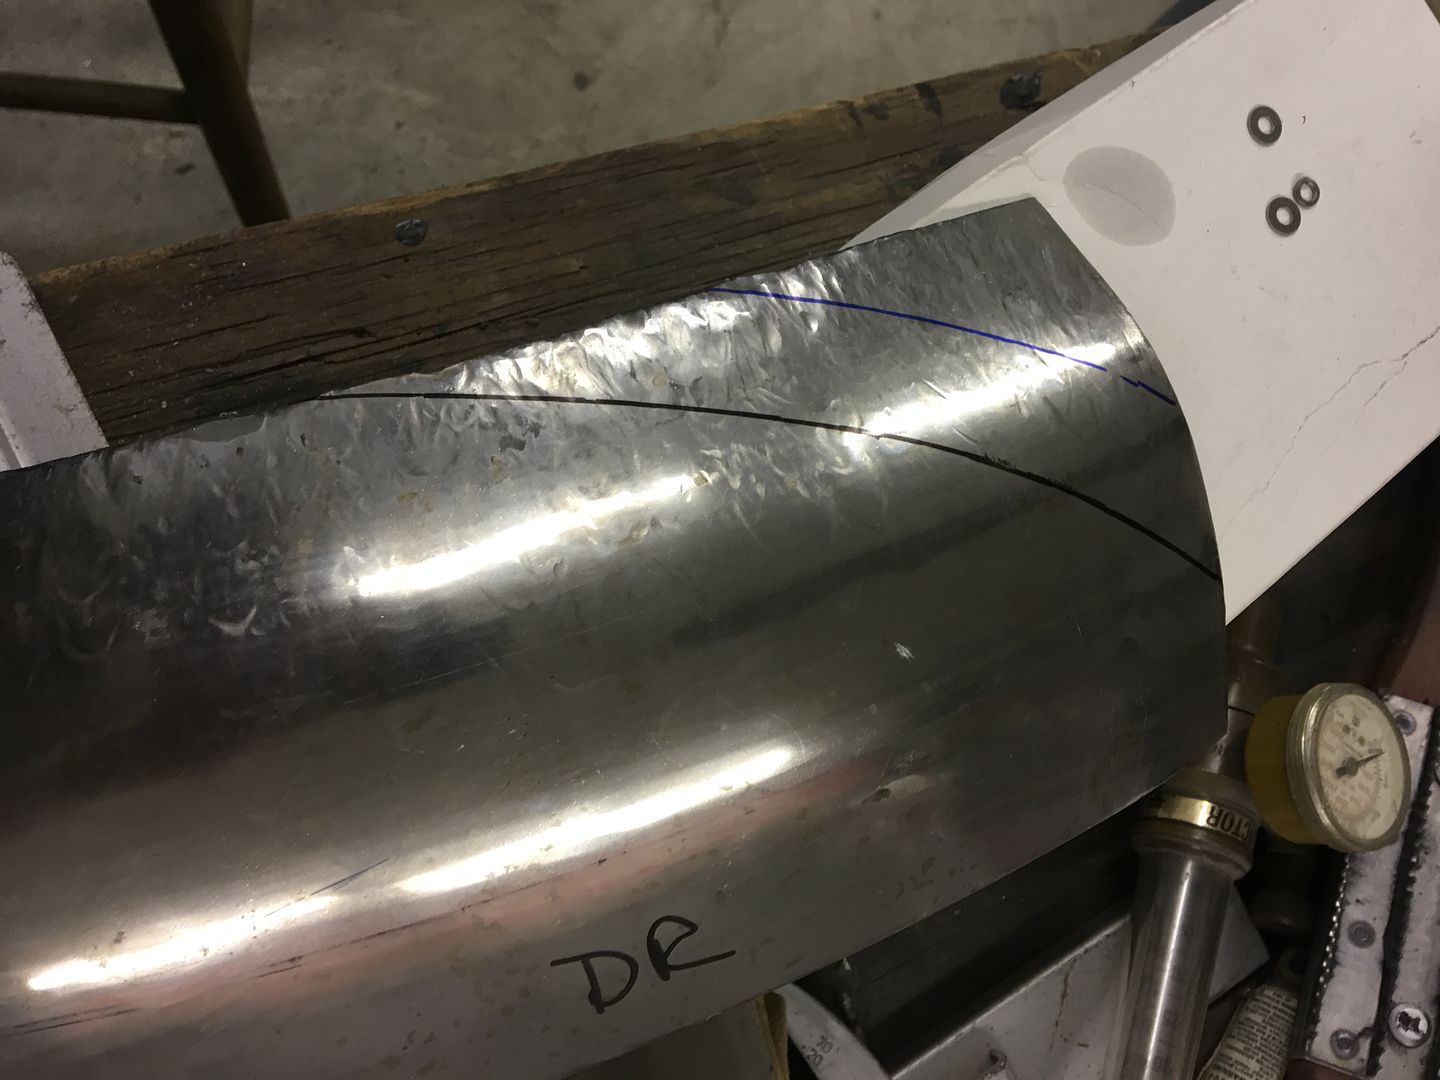
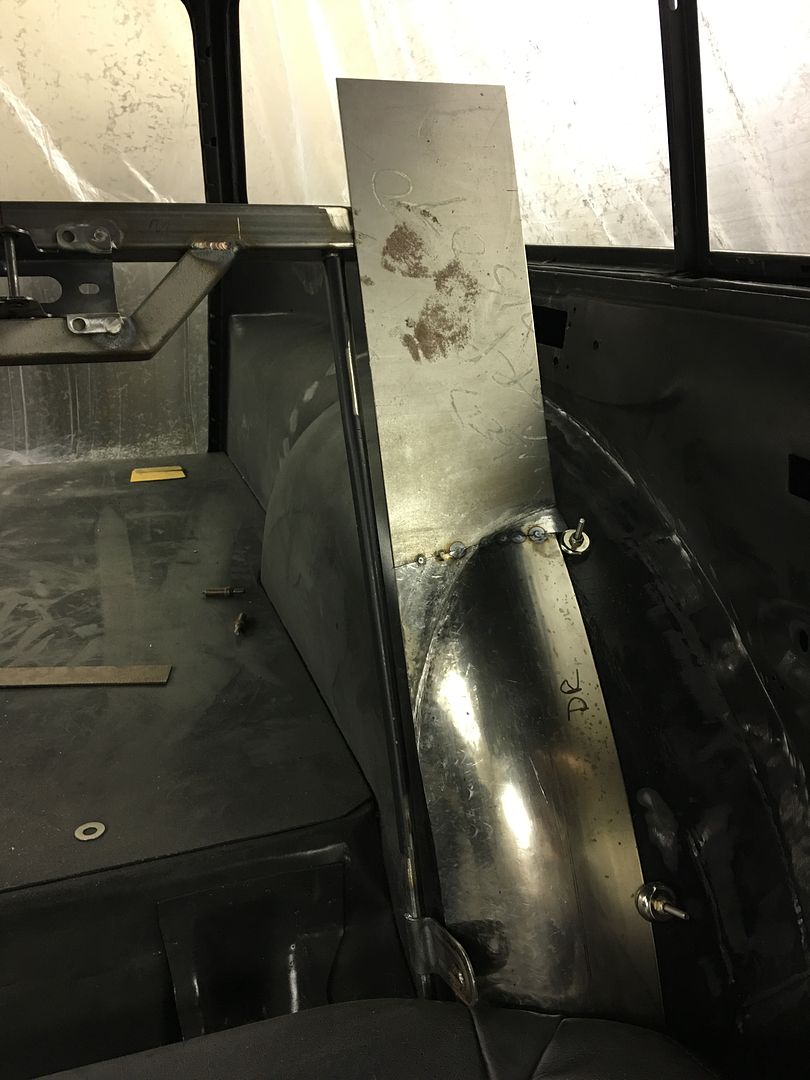
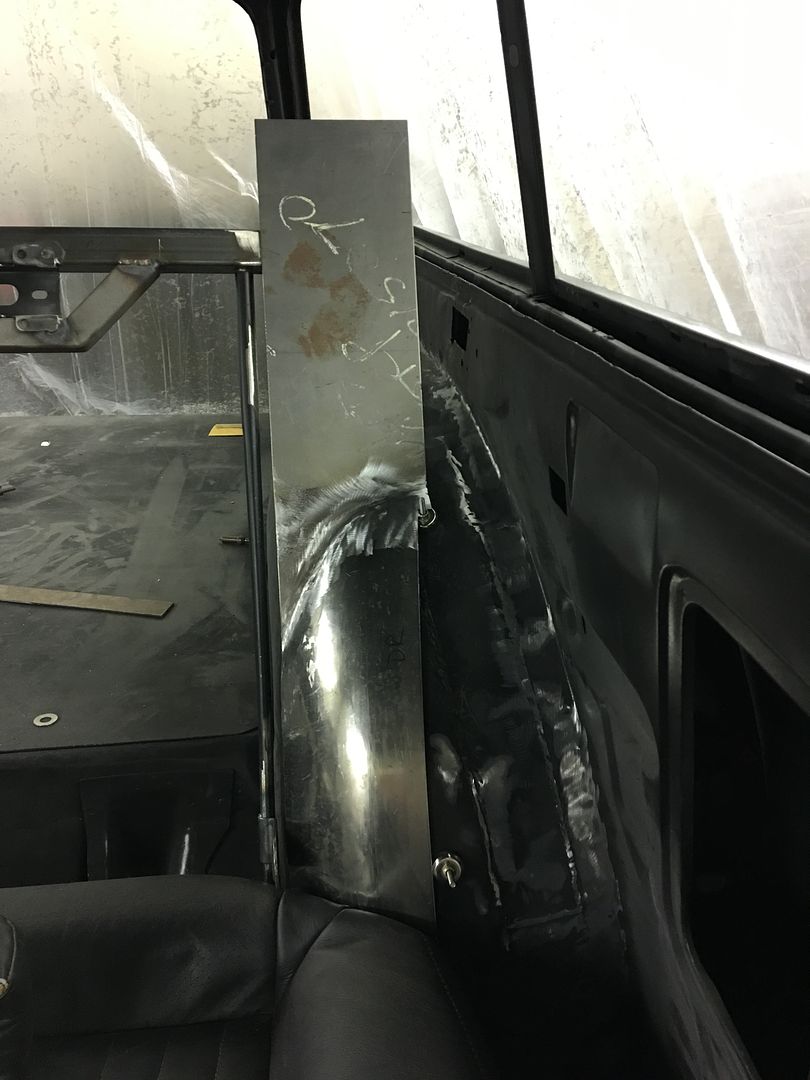
    Back to our rear seat back modification, some 14 gauge steel is shrunk in the Baileigh MH19 to fit the driver's wheel well..


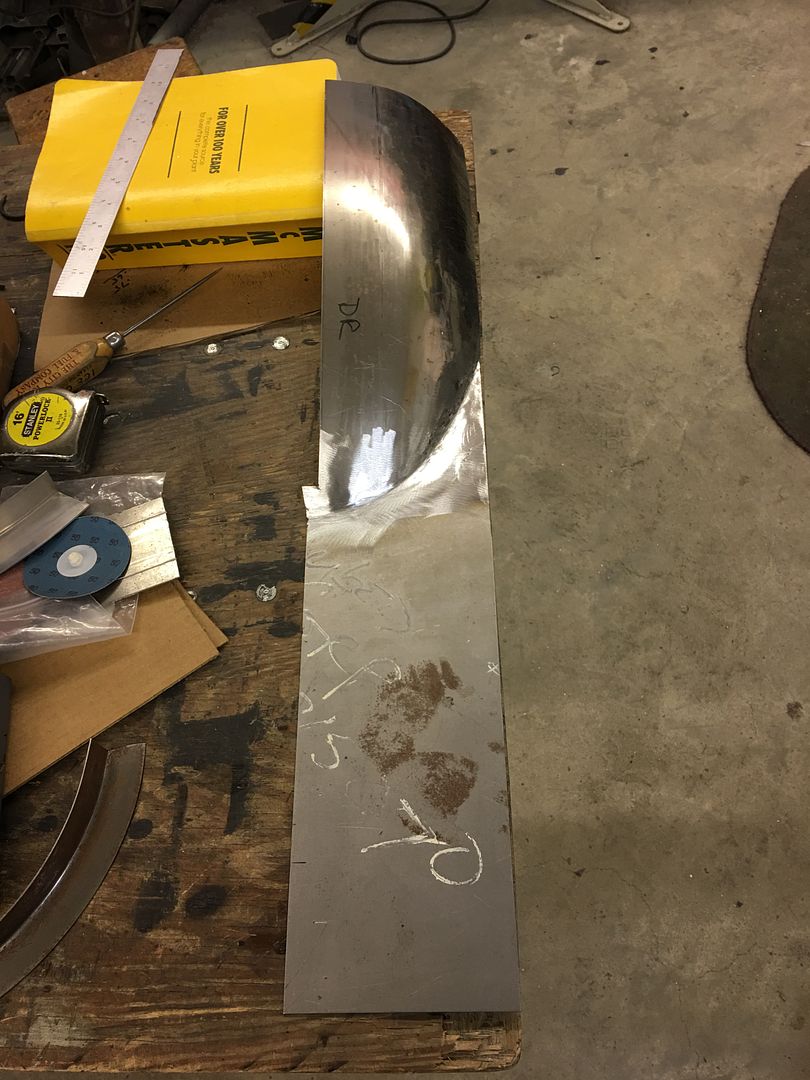
    After some cleanup on the Tommasini cast wheeling machine...


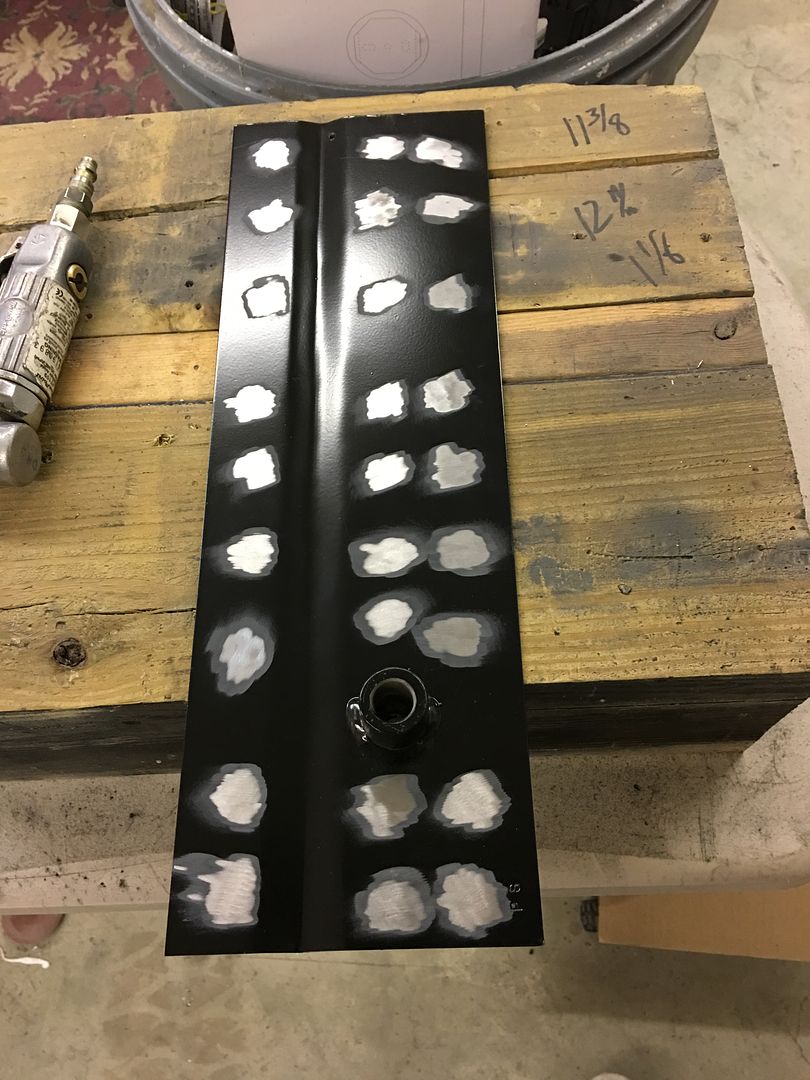
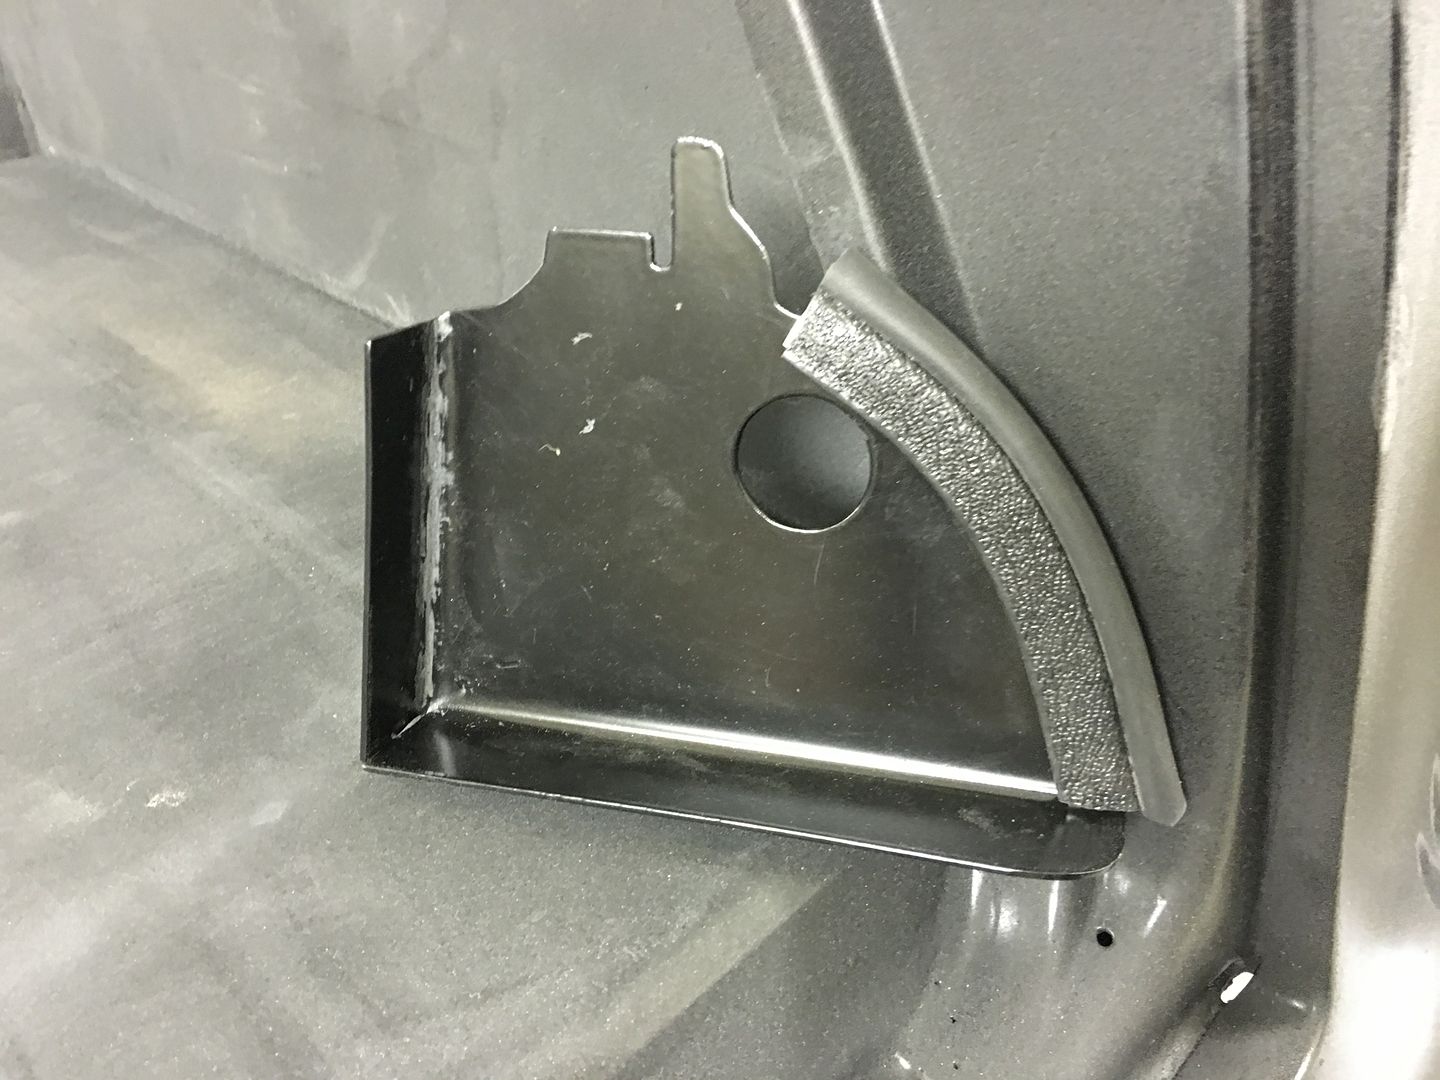
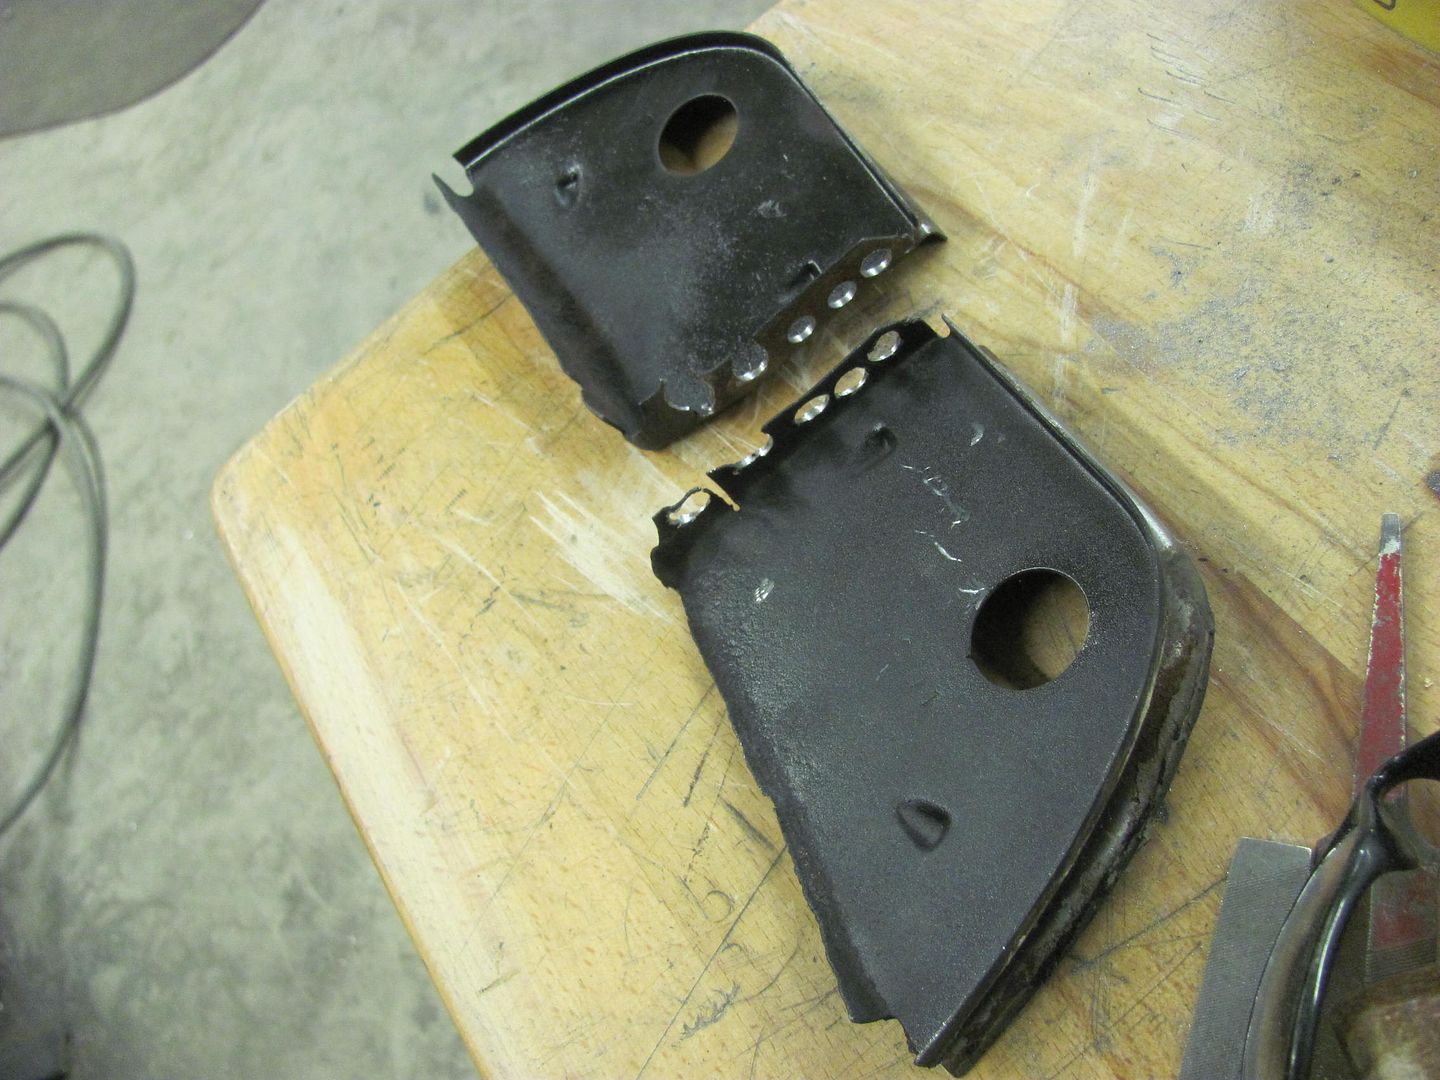
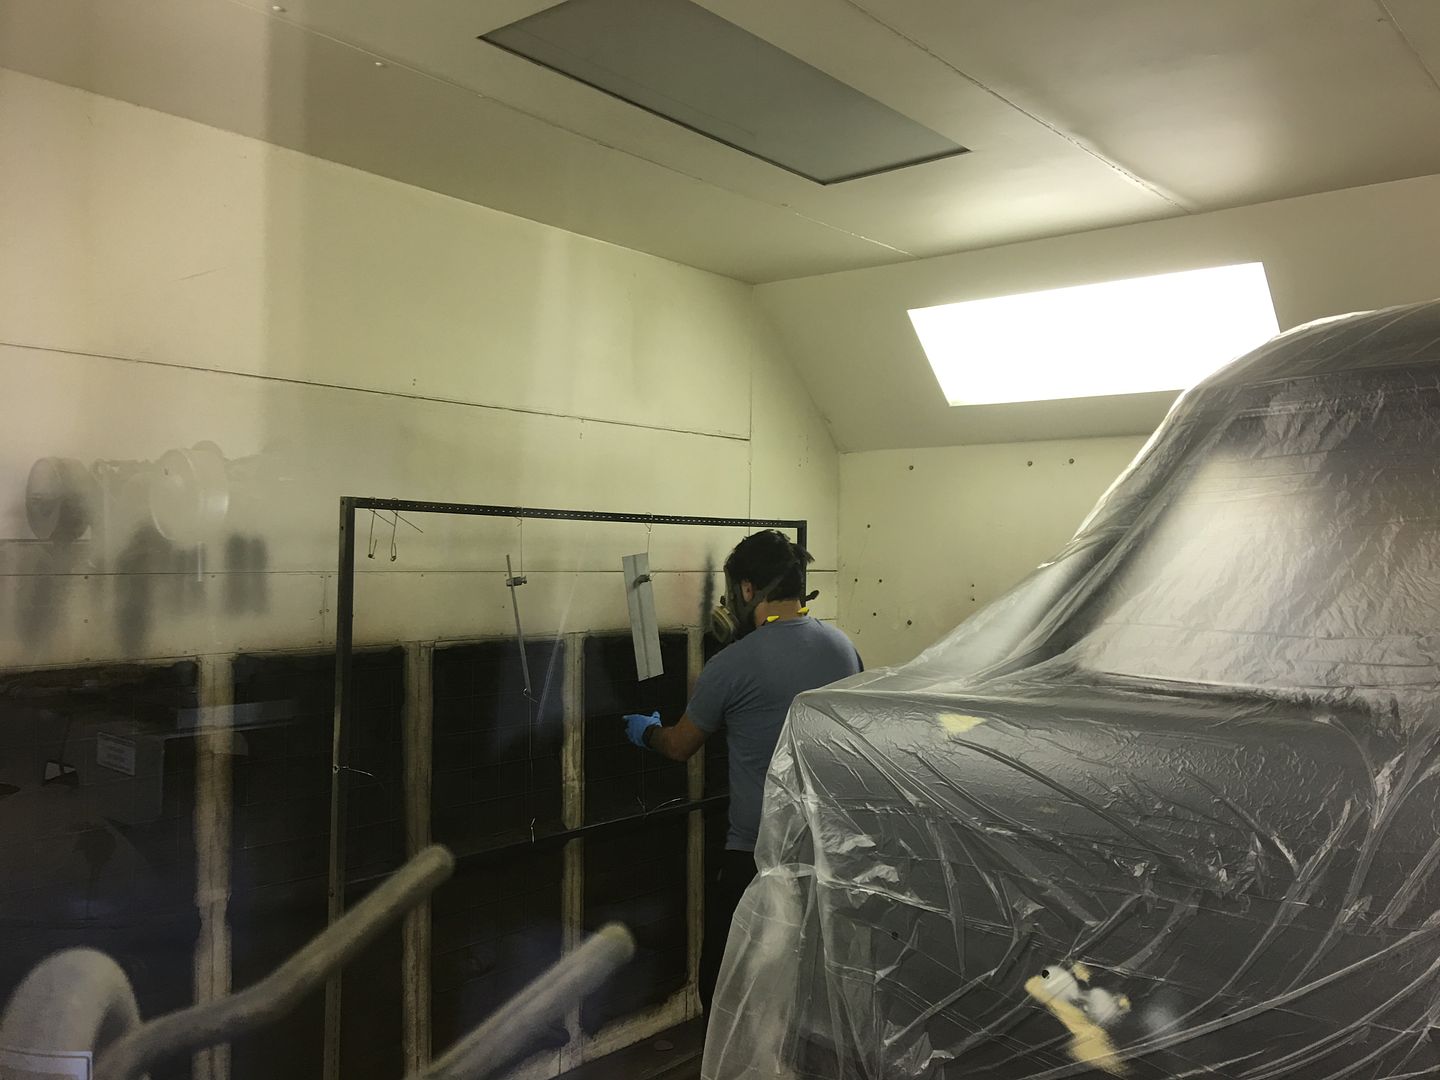
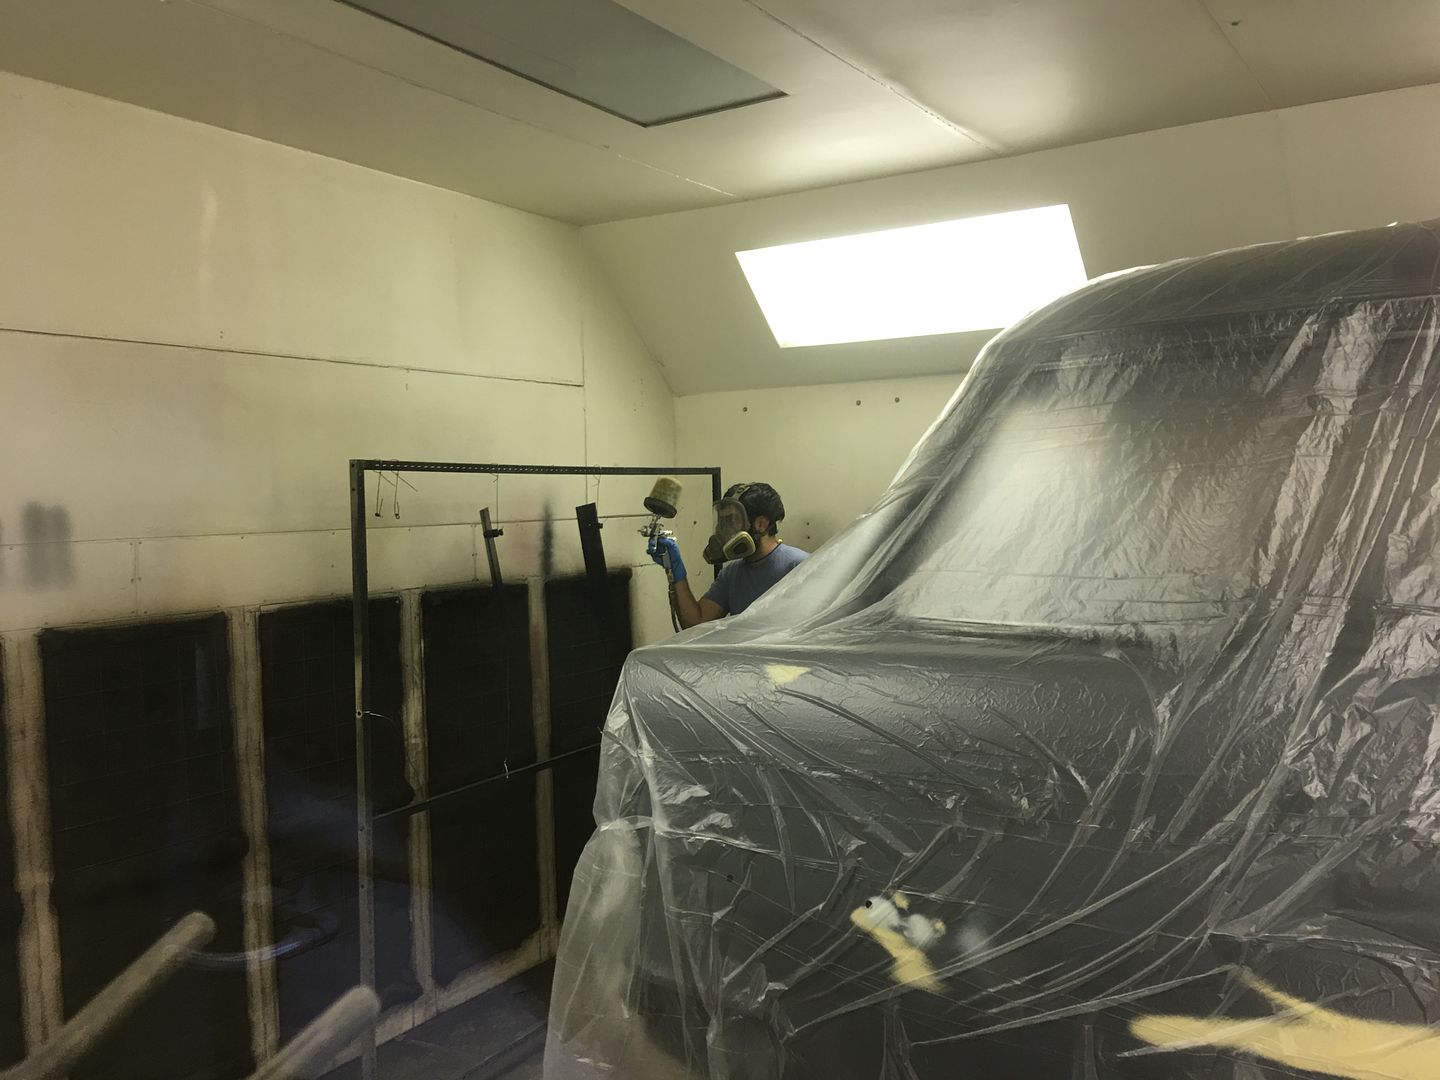
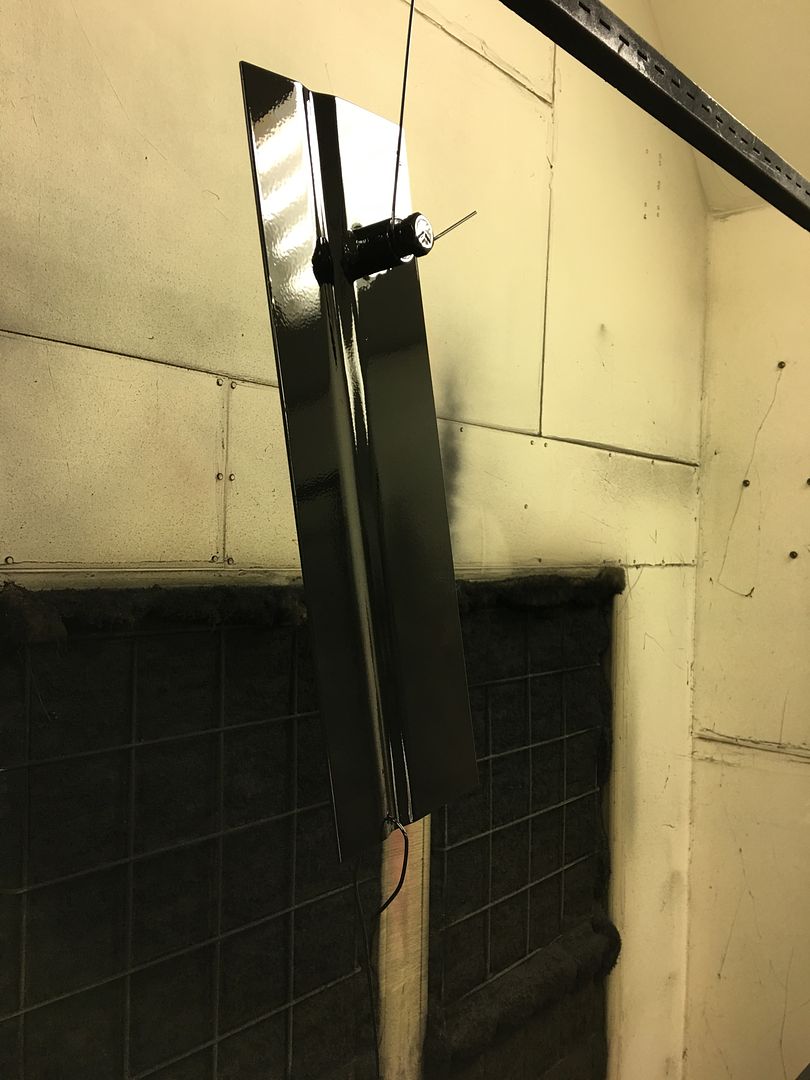
    Meanwhile, Mike has media blasted the anchor brackets and is here spraying them with SPI epoxy primer...


    The 14 gauge is then held to the wheel wells and marked a line parallel to the seat frame. We'll use this line to start the transition to flat, using a linear stretch die in the MH19.


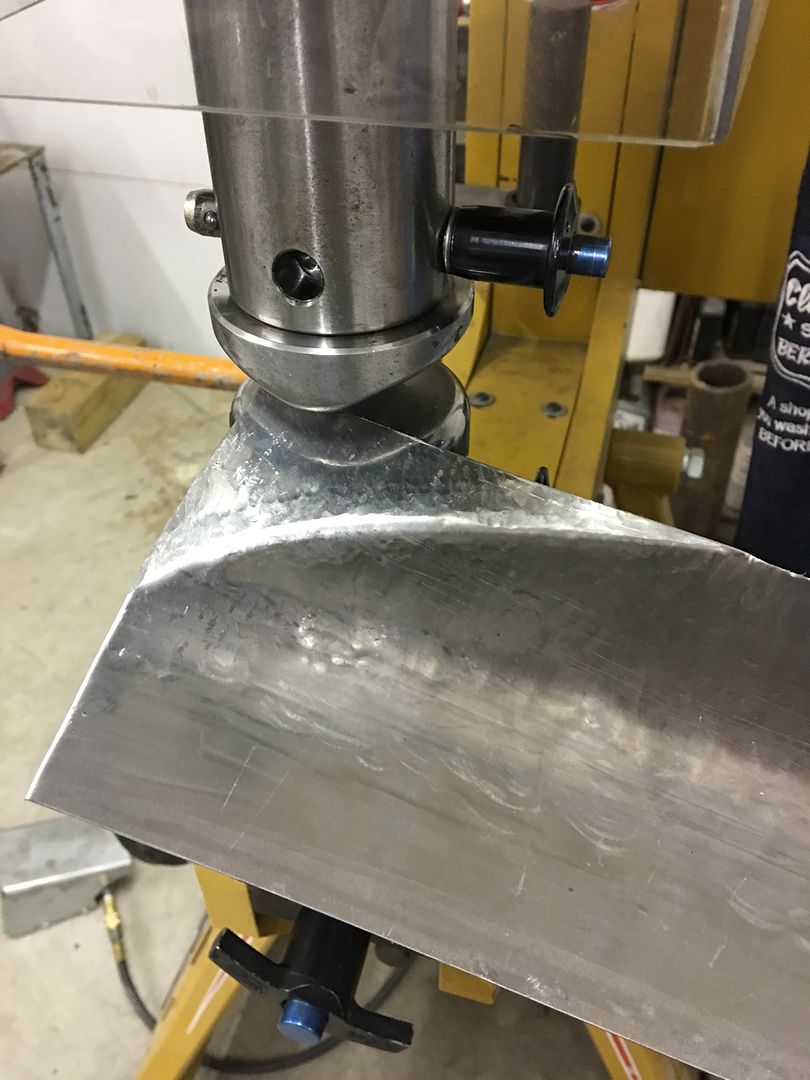
    Linear stretch die also used to add this detail to blend into the bottom part...


    Tacked together and fitted....
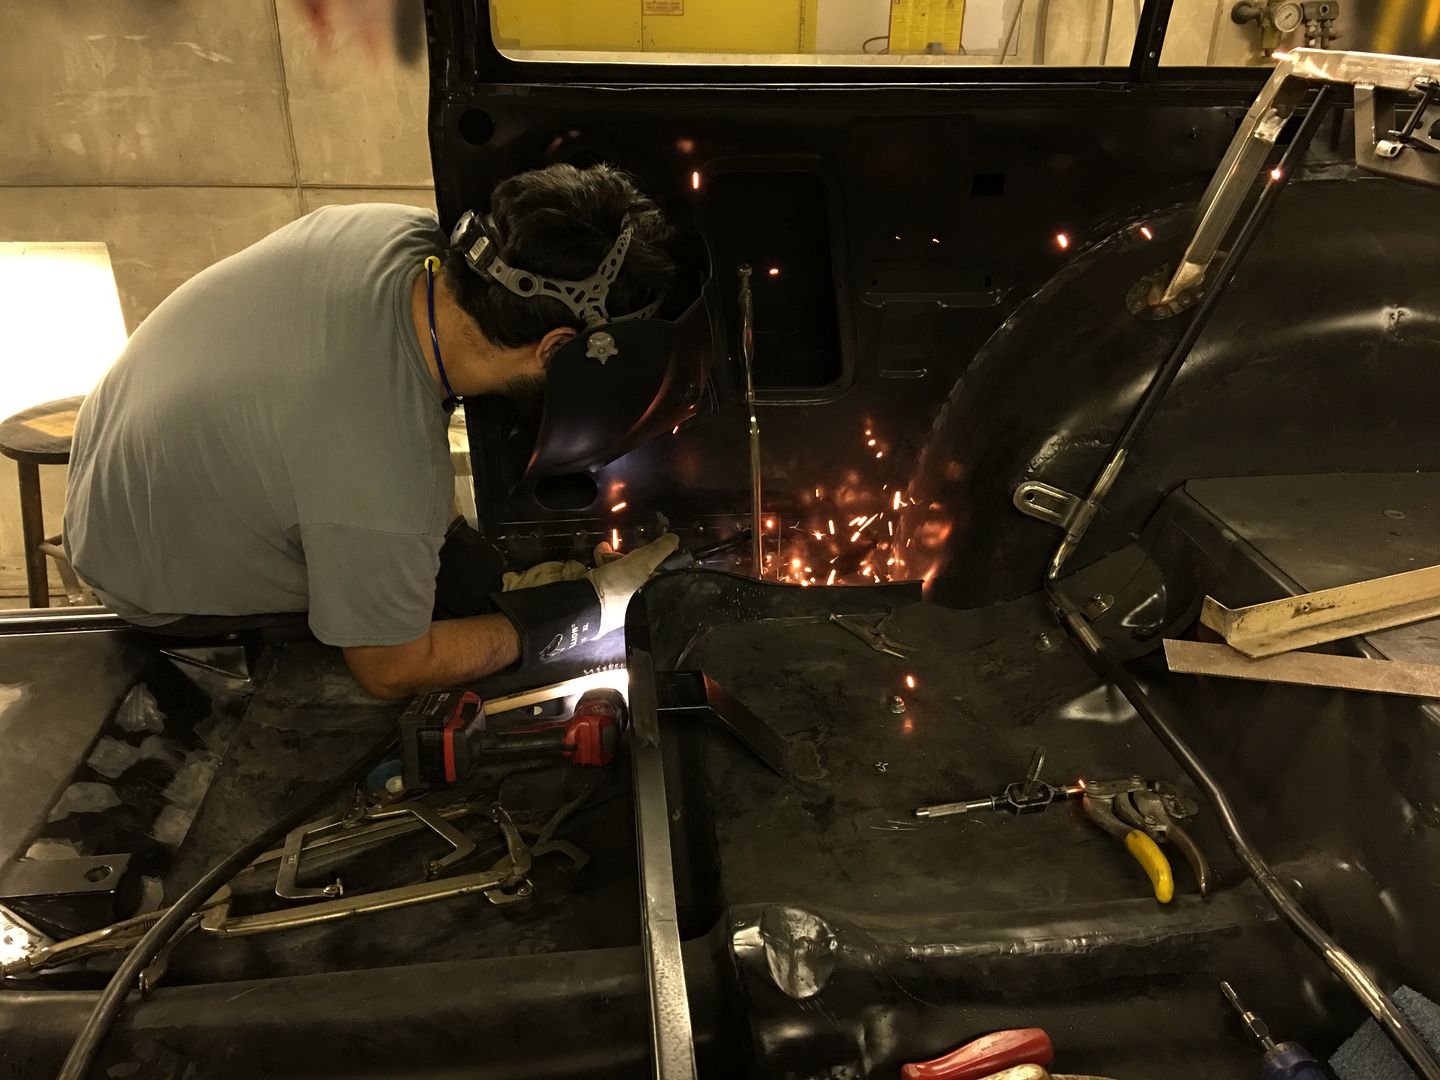
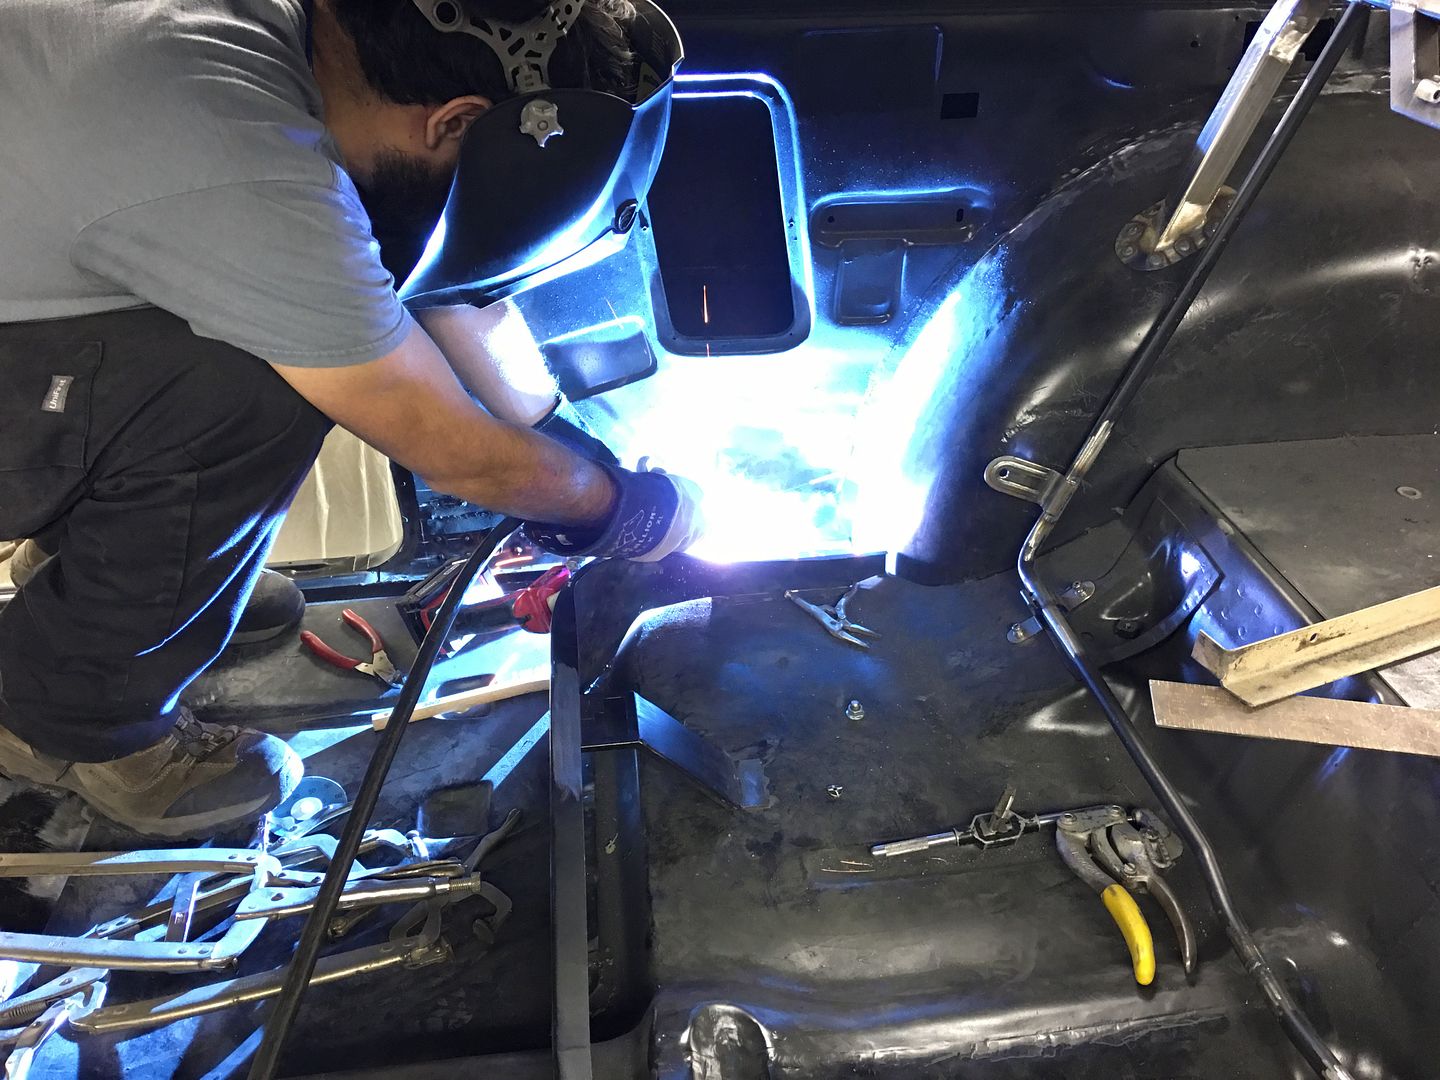
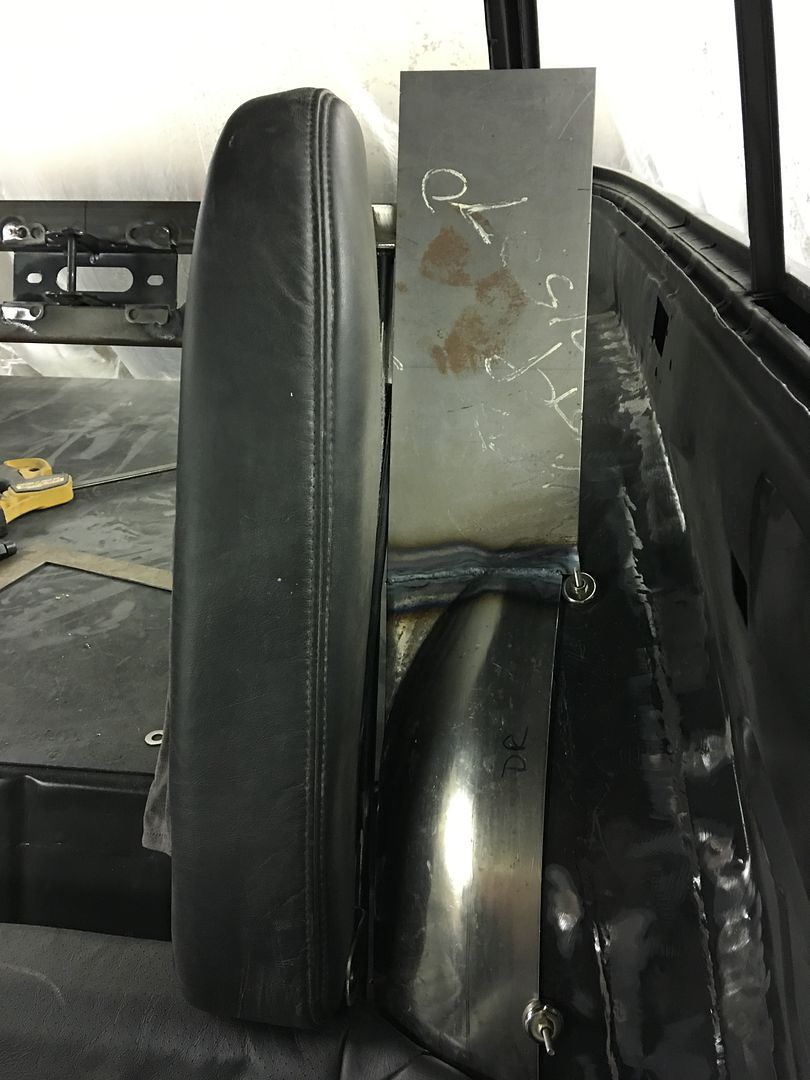


    Tig welded....


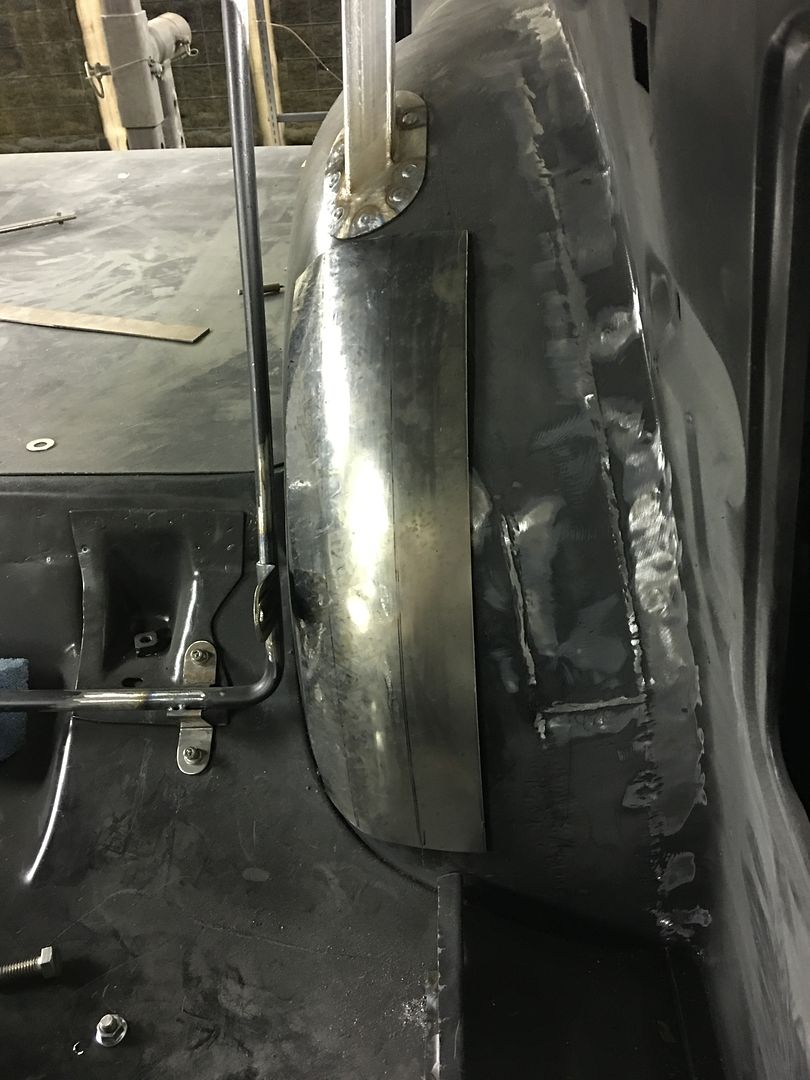
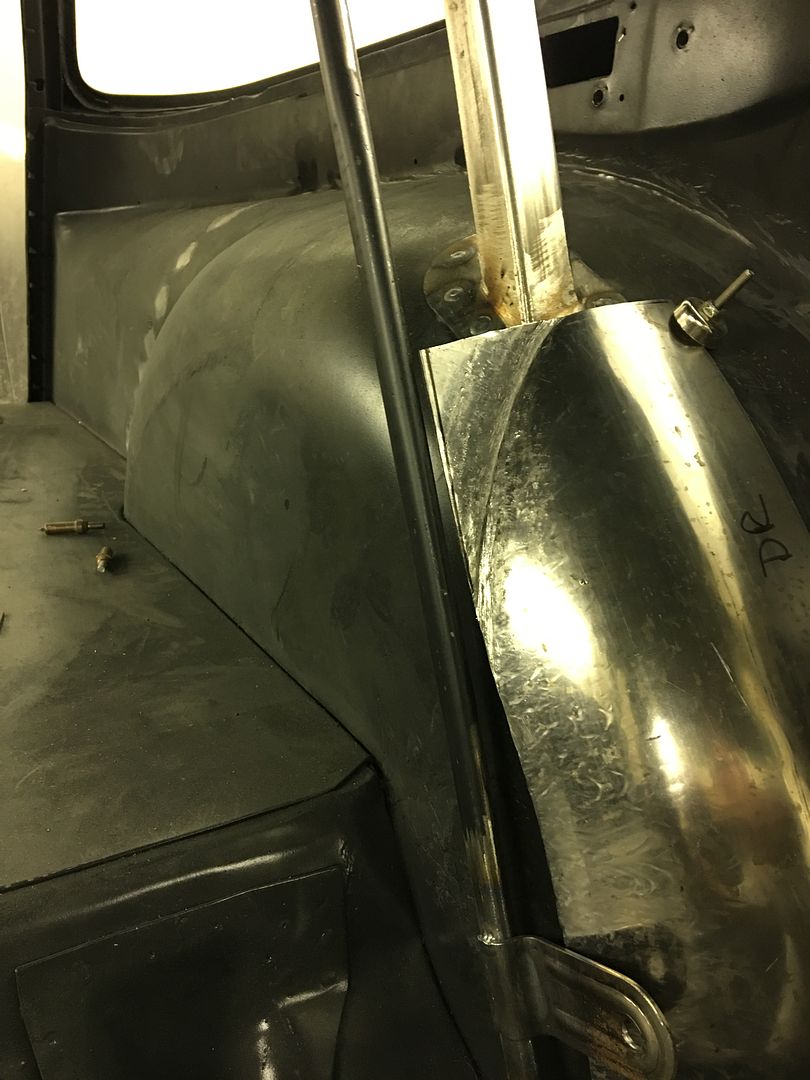
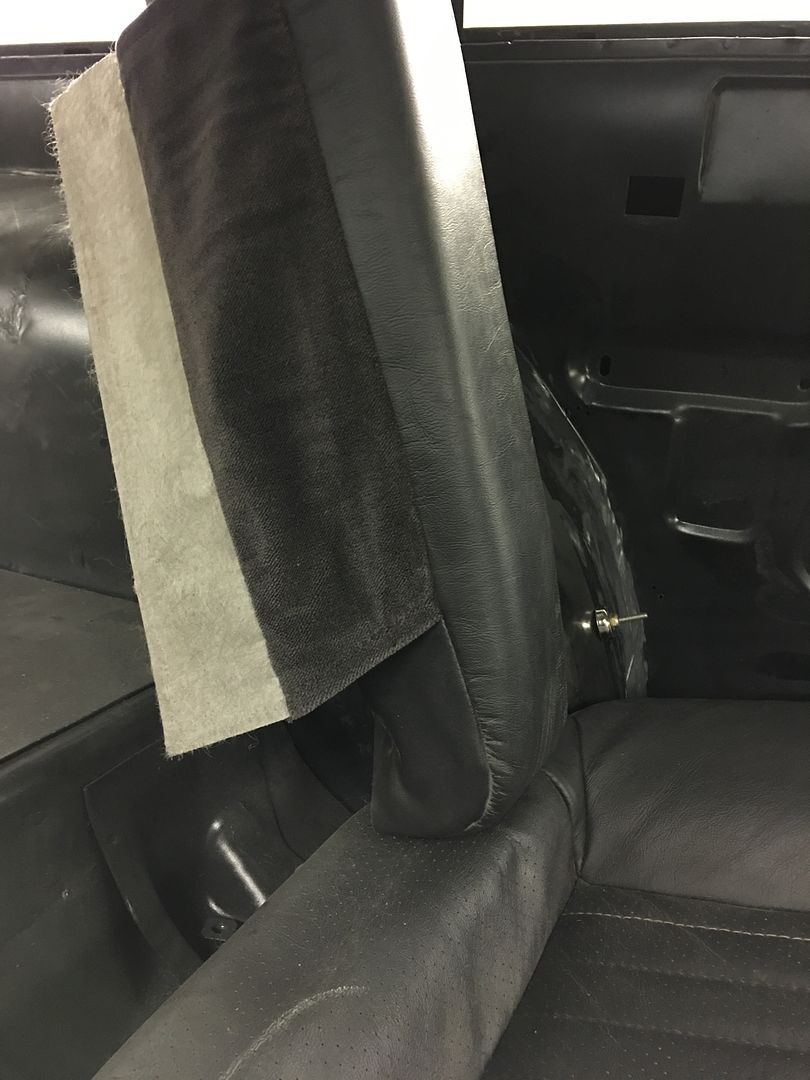
    This should JUST hide the wheel well, but doesn't look like the foam will be all that thick at the bottom...


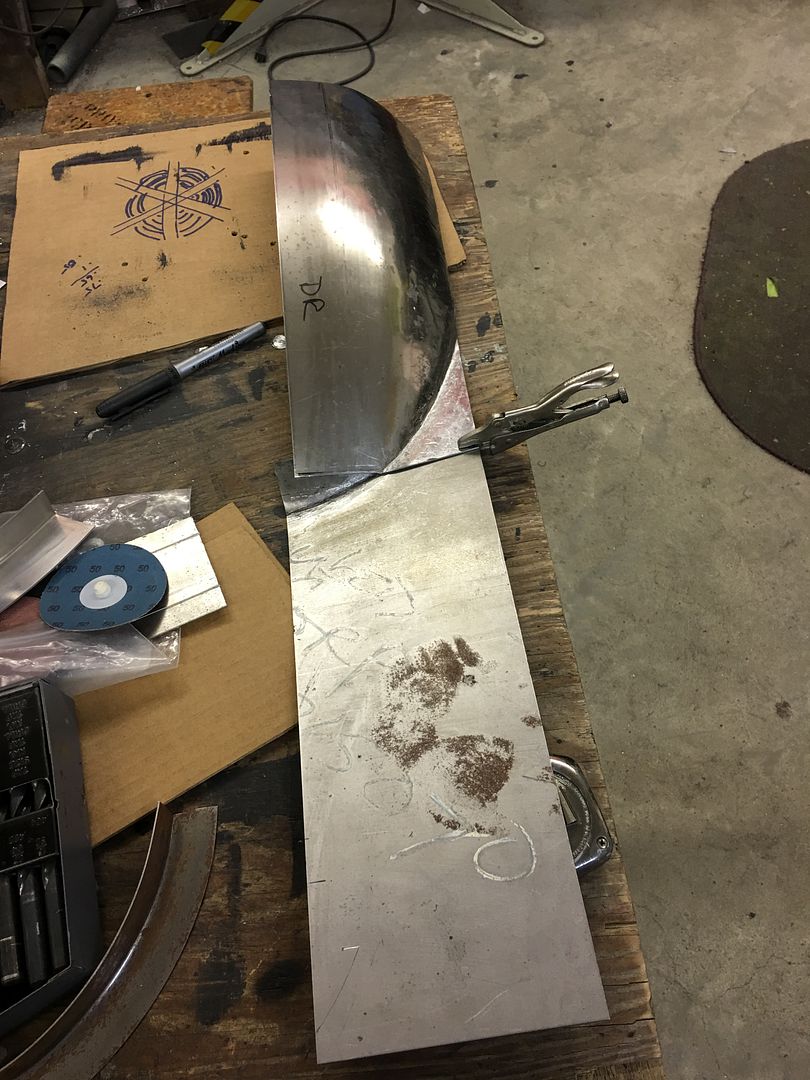
    Weld dressed and another fit, I was going to trim the sides but we'll be adding some stiffener beads to the flat area, so we'll wait until after that process to trim the sides.


    Robert


    MP&C Shop Projects-Metalshaping Tutorials


    Instagram @ mccartney_paint_and_custom


    .

  2. #432
    Registered Member chevynut's Avatar
    Join Date
    Nov 2011

    Member #:115
    Location
    Fort Collins, CO
    Posts
    10,846
    56 Nomad, Ramjet 502, Viper 6-speed T56, C4 Corvette front and rear suspension


    Other vehicles:

    56 Chevy 2-door BelAir sedan
    56 Chevy 210 4-door sedan
    57 Chevy 210 4-door sedan
    1962 327/340HP Corvette
    1961 Willys CJ3B Jeep
    2001 Porsche Boxster S
    2003 Chevy Silverado 2500 HD Duramax
    2019 GMC Sierra Denali Duramax

  3. #433
    Registered Member MP&C's Avatar
    Join Date
    Dec 2013

    Member #:2017
    Location
    Southern MD
    Posts
    1,293
    Nice work on the interior. Starting to see why it costs so much to get an interior done on an empty shell. We have similar plans for the rear armrests but have it moved forward that the retractor is enclosed inside the arm rest. Along with the mid-range speakers.. My wife's cousin does upholstery, just started at Interiors by Shannon. FWIW, he told me not to use any MDF on interior panels, too susceptible to moisture issues. they use birch plywood on consoles..
    Last edited by MP&C; 06-06-2017 at 06:35 AM.
    Robert


    MP&C Shop Projects-Metalshaping Tutorials


    Instagram @ mccartney_paint_and_custom


    .

  4. #434
    Registered Member chevynut's Avatar
    Join Date
    Nov 2011

    Member #:115
    Location
    Fort Collins, CO
    Posts
    10,846
    Thanks Robert. I guess great minds think alike eh?

    Starting to see why it costs so much to get an interior done on an empty shell.
    Yeah, I'm finding out there's a hell of a lot of work involved in a custom interior, especially with a center console and custom rear seat. I don't know how many hours I have in mine and I've been learning as I go. I haven't used MDF anywhere except on my console side trim pieces. It's nice to work with, but I prefer consoles made of metal so I've used aluminum on mine. I find that for me aluminum is easier to work with than steel and it's lighter. The plywood works great for the seat bottoms and backs, and the top of my speaker area. It will all be covered with leather.

    I ran across Interiors By Shannon 2-3 years ago when I was looking for ideas and construction methods and he does some great work...I follow him on FB. So does The Recovery Room in Lincoln, NE. Shannon uses quite a bit of wood in his interiors, I've noticed, but I don't think he uses much fiberglass or metal. Recovery room does some fiberglass parts that are nice.

    I know some higher end interiors go for $30-40K which sounds crazy until you look at all the work involved and cost of materials. After I'm done with all my construction work, my interior guy (Larry) says he'll still have over 260 hours (which is what he owes me ) in my interior plus 7 hides, the wool carpet and headliner, and other misc materials. He's selling me 4 hides from an abandoned project for a discounted price of $850 each but the rest I have to buy at full price. He only uses top quality leather. Just the perforation of 1 1/2 hides is $1000. I've already had Madmooks re-chrome all 23 pieces of interior trim for me. If I had someone build all the stuff I've done I hate to think what the interior would cost.

    Last time I was down to see Larry he had a 56 2DHT in his shop that wasn't done yet and the owner had $300K in it. Someone built a fiberglass full-length console that went from the dash up to the package tray and a couple small pieces for the door panels and he said it cost them $12K. And it doesn't fit in the package tray right, so Larry has to modify it. I showed him some really screwed up things on the chassis which amazed me for a car of that caliber.

    What are the plans for the interior finish on the wagon? Are you building the console too?
    56 Nomad, Ramjet 502, Viper 6-speed T56, C4 Corvette front and rear suspension


    Other vehicles:

    56 Chevy 2-door BelAir sedan
    56 Chevy 210 4-door sedan
    57 Chevy 210 4-door sedan
    1962 327/340HP Corvette
    1961 Willys CJ3B Jeep
    2001 Porsche Boxster S
    2003 Chevy Silverado 2500 HD Duramax
    2019 GMC Sierra Denali Duramax

  5. #435
    Registered Member MP&C's Avatar
    Join Date
    Dec 2013

    Member #:2017
    Location
    Southern MD
    Posts
    1,293
    I think I'm doing a console as well, not sure on design yet. trying to get all the basic details down on these seats so we can test fit once more and get console sizing at least to weld in brackets to hold console. After all floor welding done we can get the car to Line-X for the "undercoating".....
    Robert


    MP&C Shop Projects-Metalshaping Tutorials


    Instagram @ mccartney_paint_and_custom


    .

  6. #436
    Registered Member chevynut's Avatar
    Join Date
    Nov 2011

    Member #:115
    Location
    Fort Collins, CO
    Posts
    10,846
    Quote Originally Posted by MP&C View Post
    I think I'm doing a console as well, not sure on design yet. trying to get all the basic details down on these seats so we can test fit once more and get console sizing at least to weld in brackets to hold console.
    It's amazing how much detail there is to finish up when doing this stuff. FYI, here's how I started my console. I made brackets that are welded to the tranny hump and the console base screws to them. Then I made the sides.

    20130620_014.JPG
    56 Nomad, Ramjet 502, Viper 6-speed T56, C4 Corvette front and rear suspension


    Other vehicles:

    56 Chevy 2-door BelAir sedan
    56 Chevy 210 4-door sedan
    57 Chevy 210 4-door sedan
    1962 327/340HP Corvette
    1961 Willys CJ3B Jeep
    2001 Porsche Boxster S
    2003 Chevy Silverado 2500 HD Duramax
    2019 GMC Sierra Denali Duramax

  7. #437
    Registered Member MP&C's Avatar
    Join Date
    Dec 2013

    Member #:2017
    Location
    Southern MD
    Posts
    1,293
    Saturday Mike worked on the 55, with the seat belt retractor anchor plates now epoxied and cured for a week, they're ready to weld inside the quarters. He clamped them in place, scribed all the holes, removed them and cleaned paint off the hole locations....


    clamped in, ready to plug weld.....


    then he dressed the plug welds on the anchor plates as well as a few remaining ones on the drivers bucket seat pan. next on the list is to fabricate some arm rests for the rear seat area that will also serve to enclose the seat belt retractors.
    Robert


    MP&C Shop Projects-Metalshaping Tutorials


    Instagram @ mccartney_paint_and_custom


    .

  8. #438
    Registered Member chevynut's Avatar
    Join Date
    Nov 2011

    Member #:115
    Location
    Fort Collins, CO
    Posts
    10,846
    Hey Robert, how did you determine the position of the big holes in the quarter baffle? I installed a cable retractor with a string on it and ran the spring back through the rear cable guides near the tailgate. I came up with 2-2 1/8" from the inner quarter and 2-2 1/8" up from the top of the wheelhouse, roughly the same on both sides. Looks to me like yours are further away.

    Also, what size holes did you make? The cable clevises and pins have to go through them and I think the stock holes are larger than yours. Are you planning to install any grommet or seal in the hole.....there was none stock. I've been working on mine.


    56 Nomad, Ramjet 502, Viper 6-speed T56, C4 Corvette front and rear suspension


    Other vehicles:

    56 Chevy 2-door BelAir sedan
    56 Chevy 210 4-door sedan
    57 Chevy 210 4-door sedan
    1962 327/340HP Corvette
    1961 Willys CJ3B Jeep
    2001 Porsche Boxster S
    2003 Chevy Silverado 2500 HD Duramax
    2019 GMC Sierra Denali Duramax

  9. #439
    Registered Member MP&C's Avatar
    Join Date
    Dec 2013

    Member #:2017
    Location
    Southern MD
    Posts
    1,293
    They were based on location of the old part, and sized as that was. I can measure it for you next time in the shop? When I installed the retractors it appeared the hole was in the right location. Blind squirrel...
    Robert


    MP&C Shop Projects-Metalshaping Tutorials


    Instagram @ mccartney_paint_and_custom


    .

  10. #440
    Registered Member chevynut's Avatar
    Join Date
    Nov 2011

    Member #:115
    Location
    Fort Collins, CO
    Posts
    10,846
    I saw the pic of your original parts after I posted above and they look different than a Nomad's baffles....I wonder why. The retractors are the same, and I think the cable guides are the same.

    Here's my original one from my Nomad:

    20070513_629.JPG


    And here's the ones you took out of the wagon:

    56 Nomad, Ramjet 502, Viper 6-speed T56, C4 Corvette front and rear suspension


    Other vehicles:

    56 Chevy 2-door BelAir sedan
    56 Chevy 210 4-door sedan
    57 Chevy 210 4-door sedan
    1962 327/340HP Corvette
    1961 Willys CJ3B Jeep
    2001 Porsche Boxster S
    2003 Chevy Silverado 2500 HD Duramax
    2019 GMC Sierra Denali Duramax

Page 44 of 102 FirstFirst ... 3442434445465494 ... LastLast

Posting Permissions

  • You may not post new threads
  • You may not post replies
  • You may not post attachments
  • You may not edit your posts
  •