Looks good. As long as your making some progress it all good.


Looks good. As long as your making some progress it all good.
Spend more time driving mine than working on them in the summertime.Originally Posted by chevynut

Brian
What he said, some of us spend time driving them.


Bama, that's looking great, but maybe you should have just updated your build thread instead of hijacking Robert's. LOL!

56 Nomad, Ramjet 502, Viper 6-speed T56, C4 Corvette front and rear suspension
Other vehicles:
56 Chevy 2-door BelAir sedan
56 Chevy 210 4-door sedan
57 Chevy 210 4-door sedan
1962 327/340HP Corvette
1961 Willys CJ3B Jeep
2001 Porsche Boxster S
2003 Chevy Silverado 2500 HD Duramax
2019 GMC Sierra Denali Duramax

Progress pics from last night... Yep, we've been block sanding..
Using Evercoat 416 to address the few low spots..
Honing up on my painting skills with brush on seam sealer
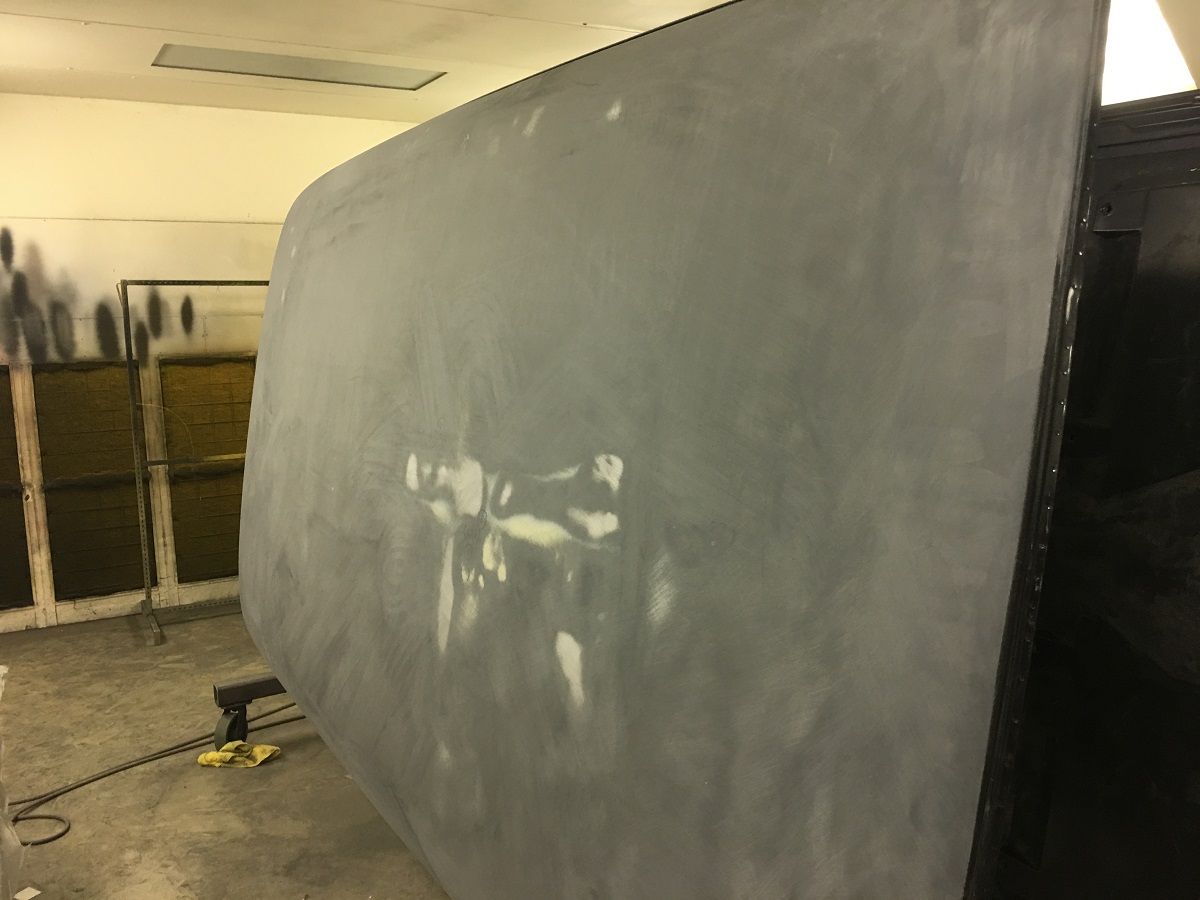
Today's lesson is on media blasting and stretch damage that occurs. Here’s what a sand blaster will do to a roof skin when blasting the braces underneath.
Our blaster was doing the brace from underneath/inside and the inadvertent stray media hitting the adjacent roof skin stretched it, pulling it inward toward the media stream . On the outside the “unstretched” area shows as a high spot, the stretched part that needs shrinking is seen as a low. So if you must media blast any braces or internal structure, block off the skin next to it so no media touches it. Save yourself the extra body work.
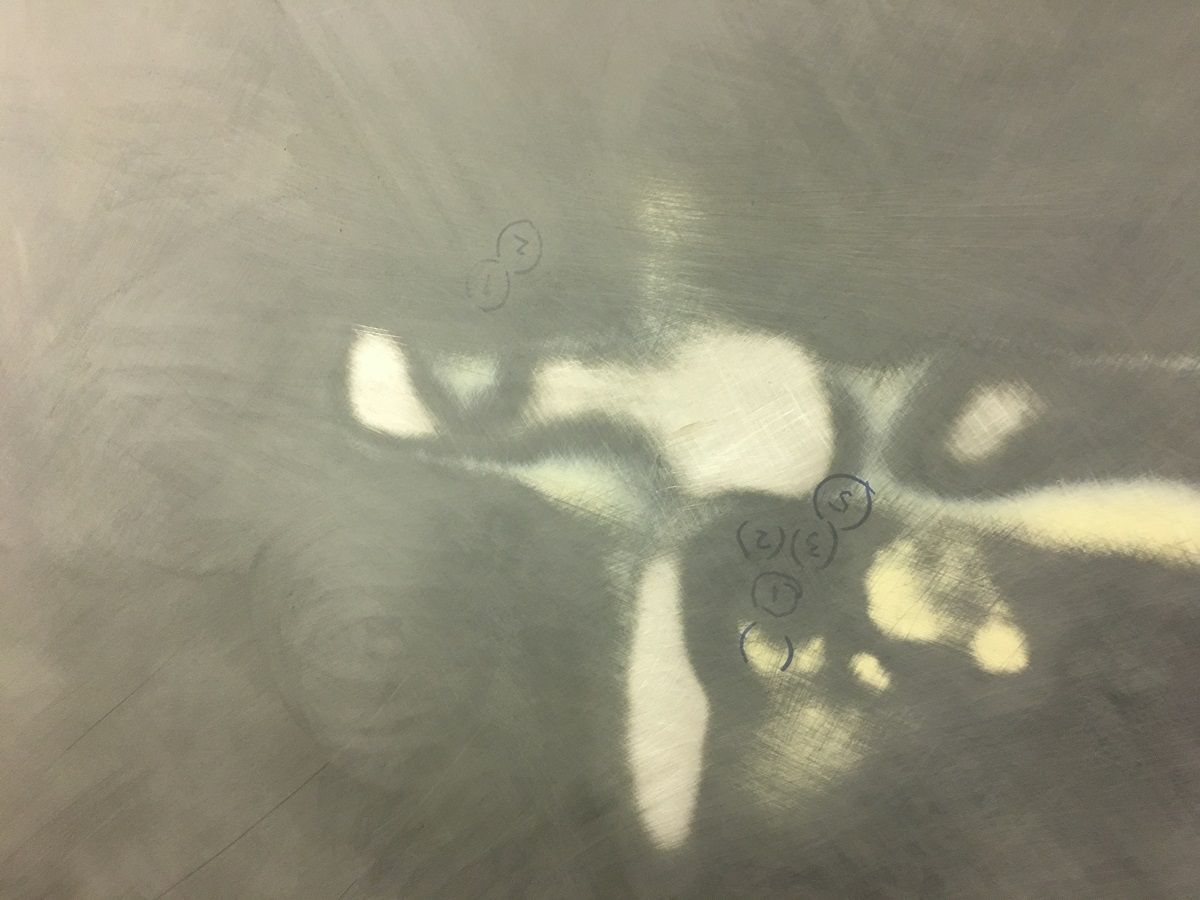
We fixed the lows by locating the exact spots on the inside that needed shrinking and tapping outward into a small shot bag. To locate, a rare earth magnet is placed outside on the roof skin in each low spot, and some grinding dust finds the magnet on the inside where we can mark the perimeter both inside and out, and work with one person on either side to remove the lows. (See video, magnet marks highs or lows, it doesn’t care) For multiple lows, mark both sides of all spots and number them, so you can move from one spot to the next, calling out the number desired to your shrinking assistant. If your car is too clean to have grinding dust, look under your bench grinder.
Magnet use video:
https://www.youtube.com/watch?v=HHHTKiWZ2Xo
Note on the inside roof skin picture the multiple numbered circles where we found low spots to address.
.
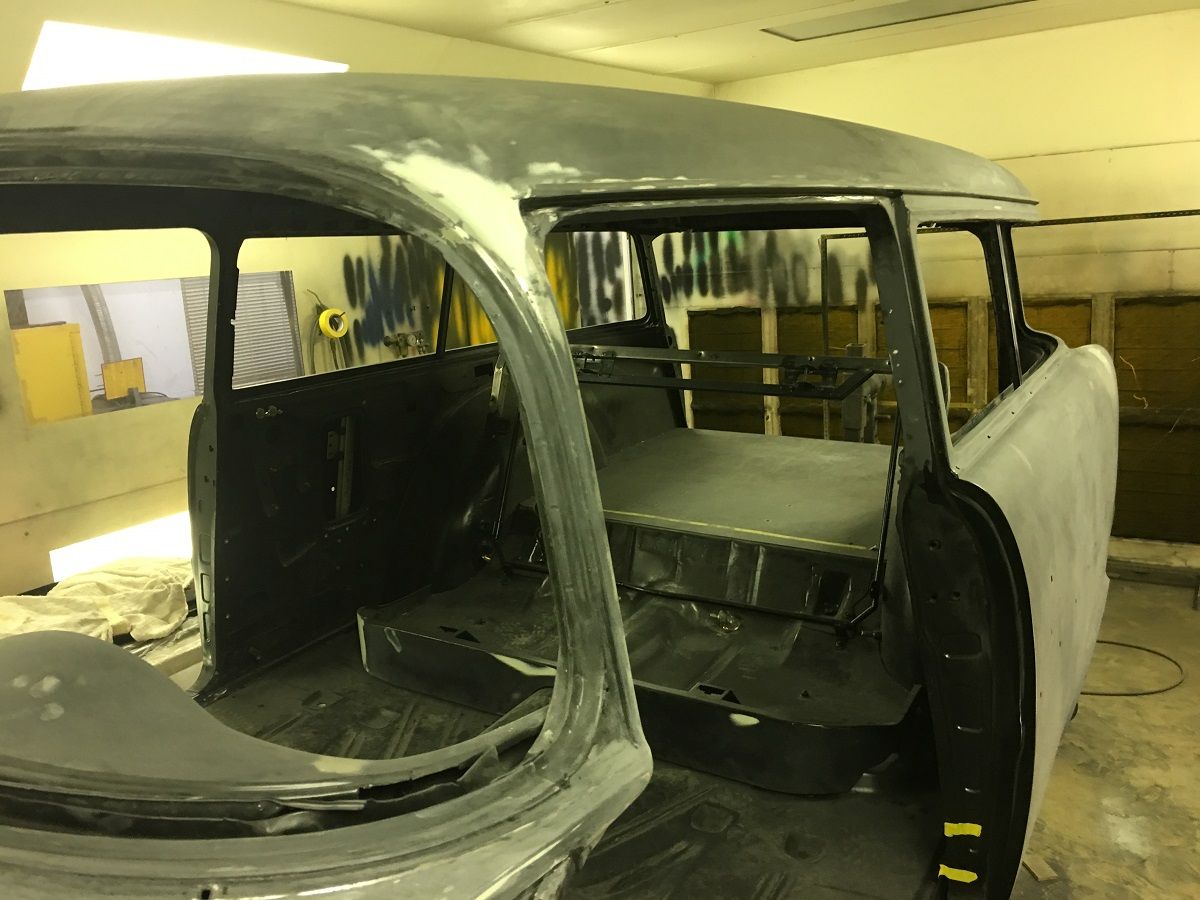
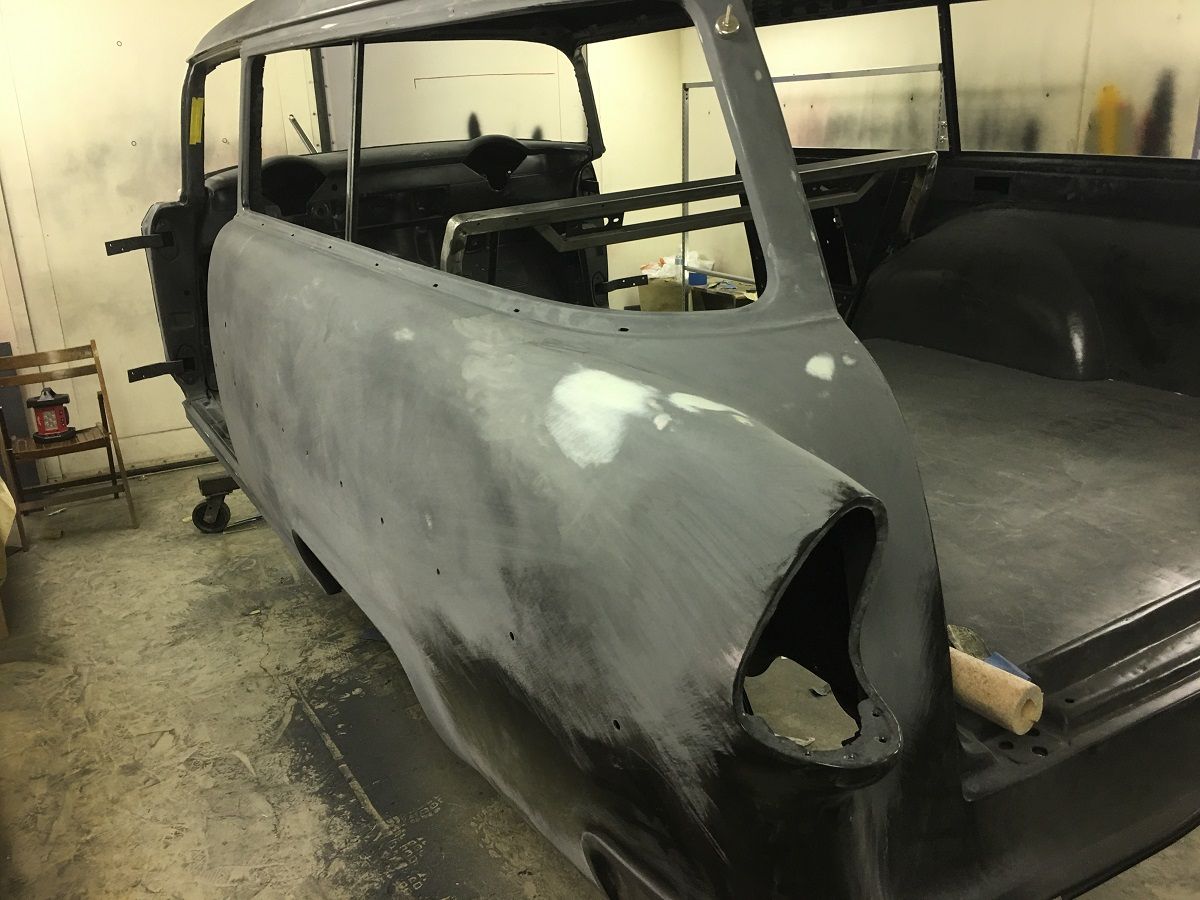
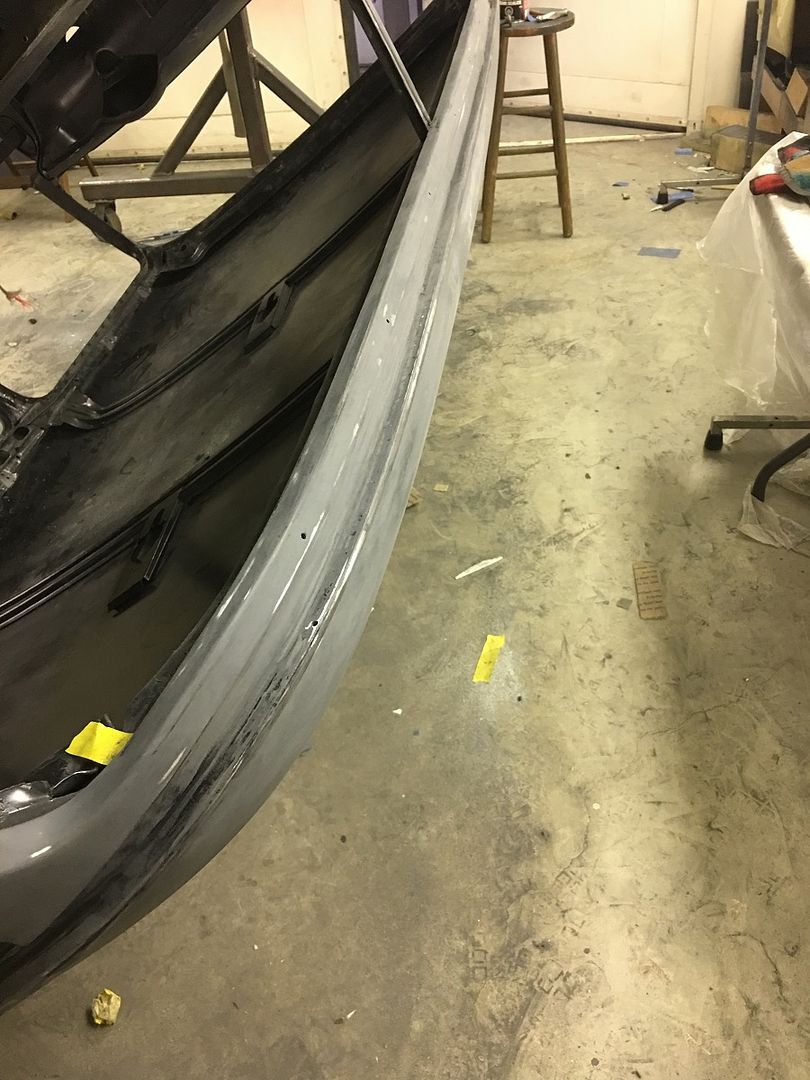
So we've been blocking out epoxy primer, it sure is nice to be able to rotate the car where you need it instead of sanding upside down on the bottoms of drip rails.
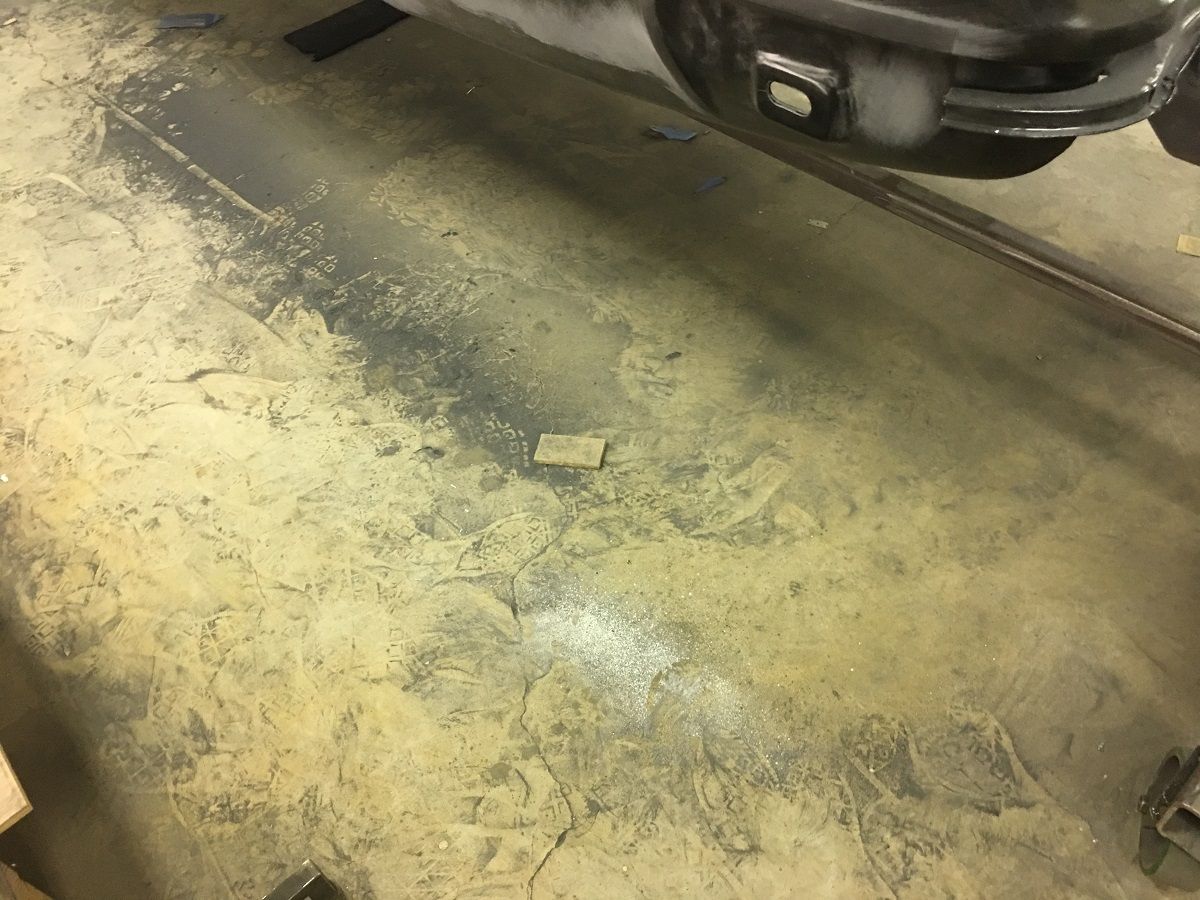
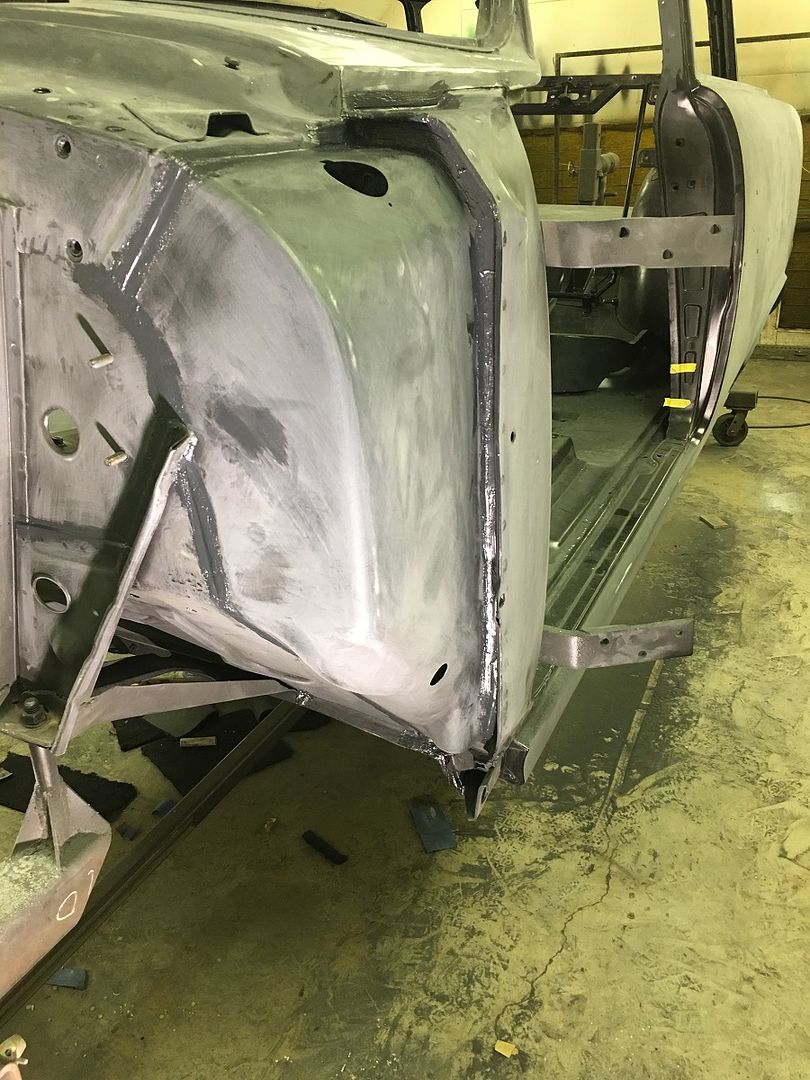
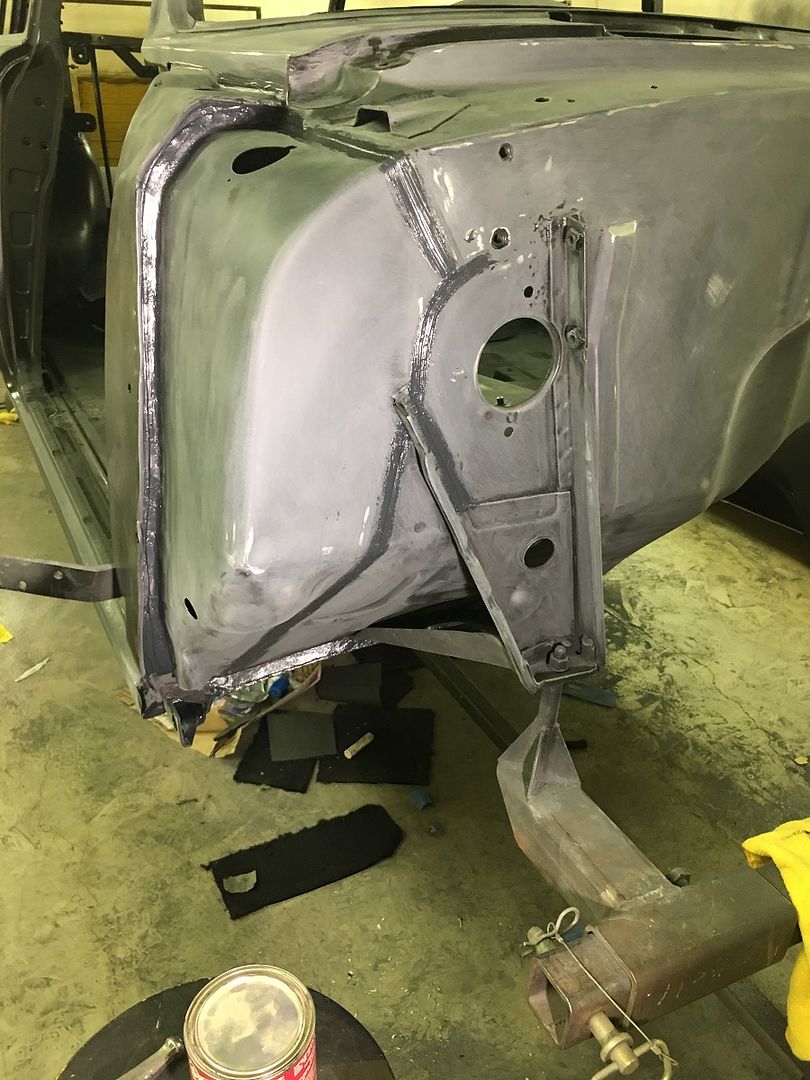
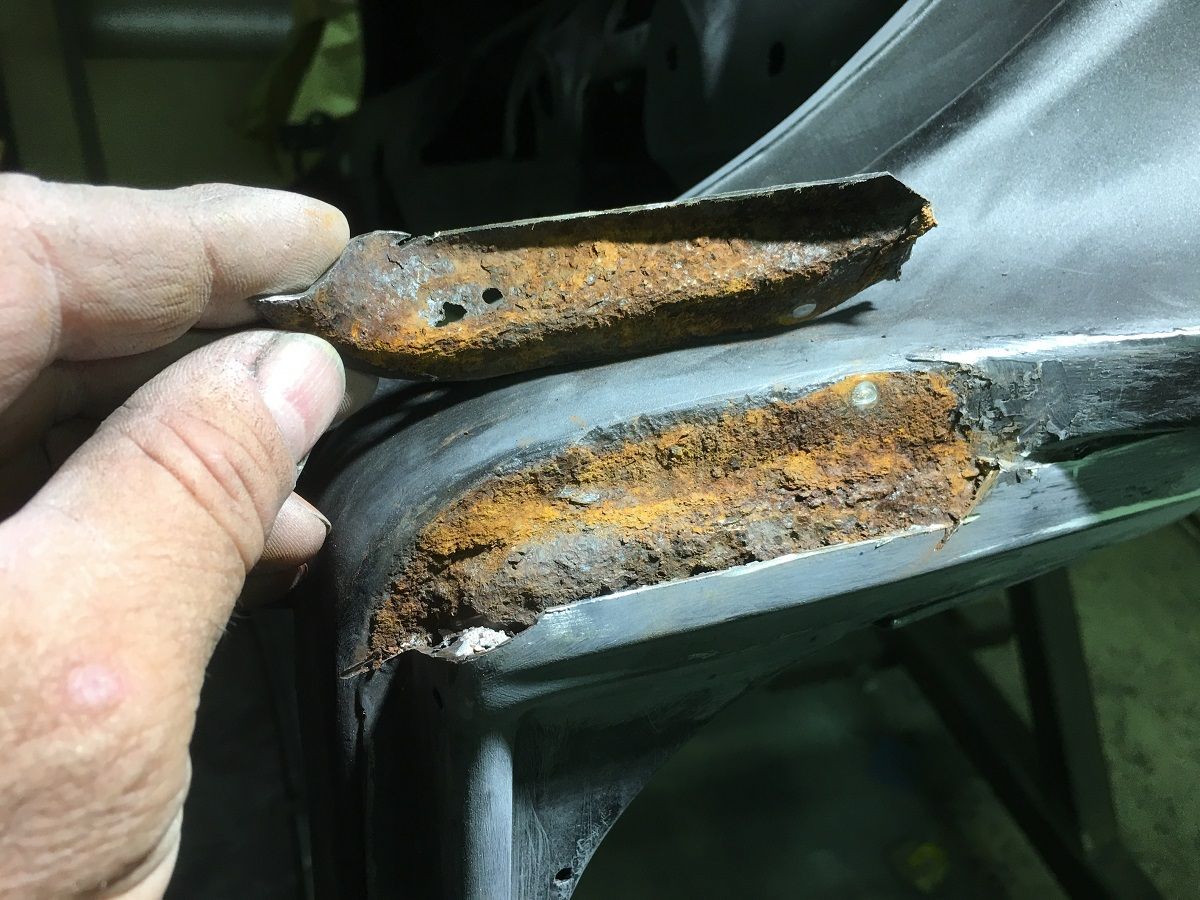
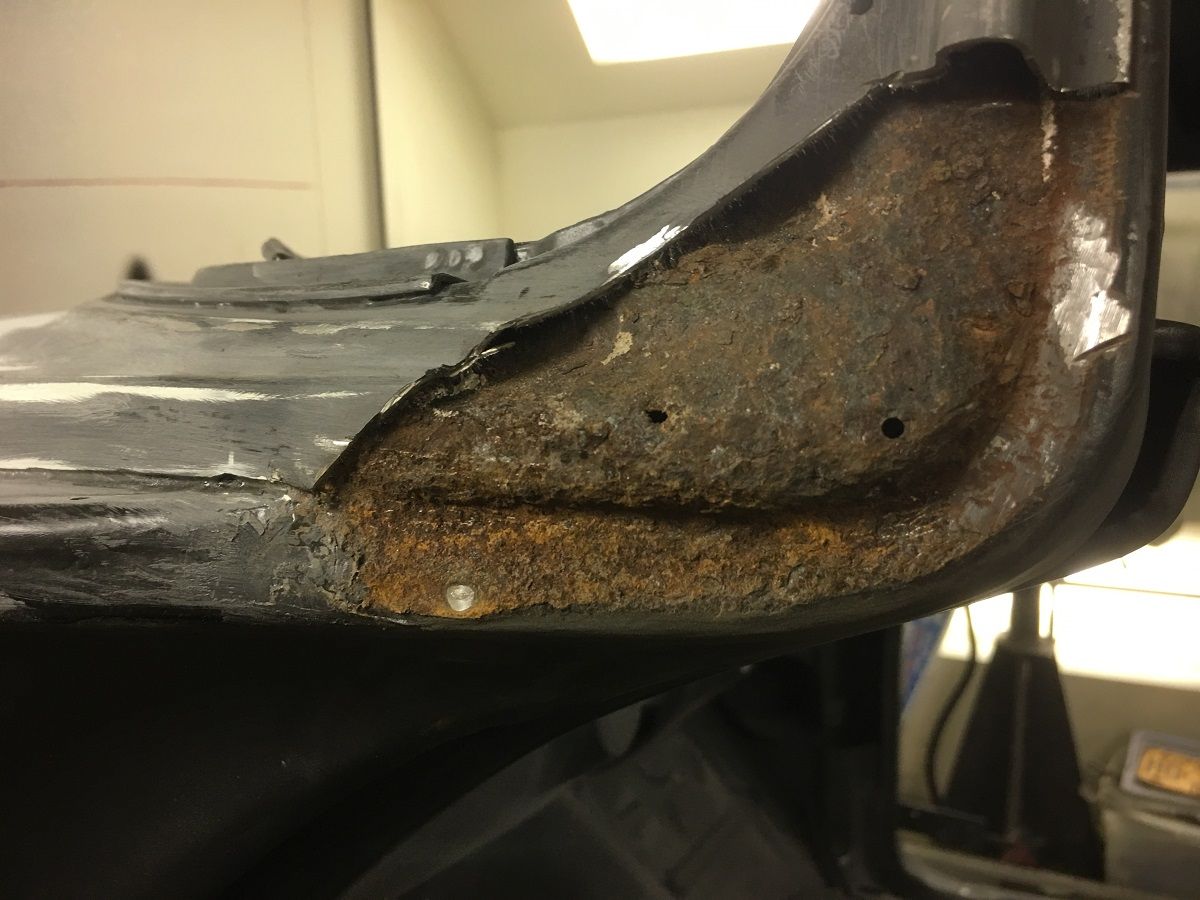
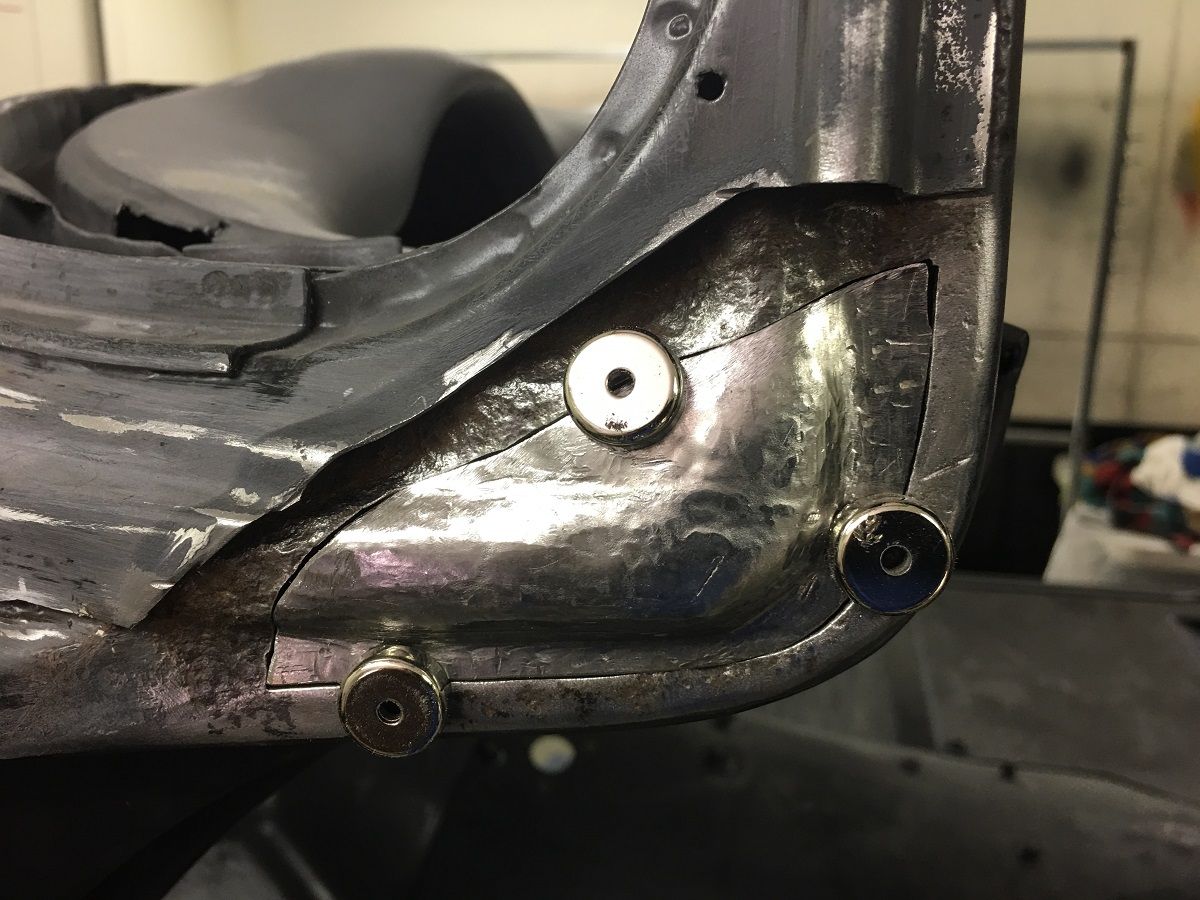
But then you walk past the Driver's A pillar and see holes that shouldn't be there.
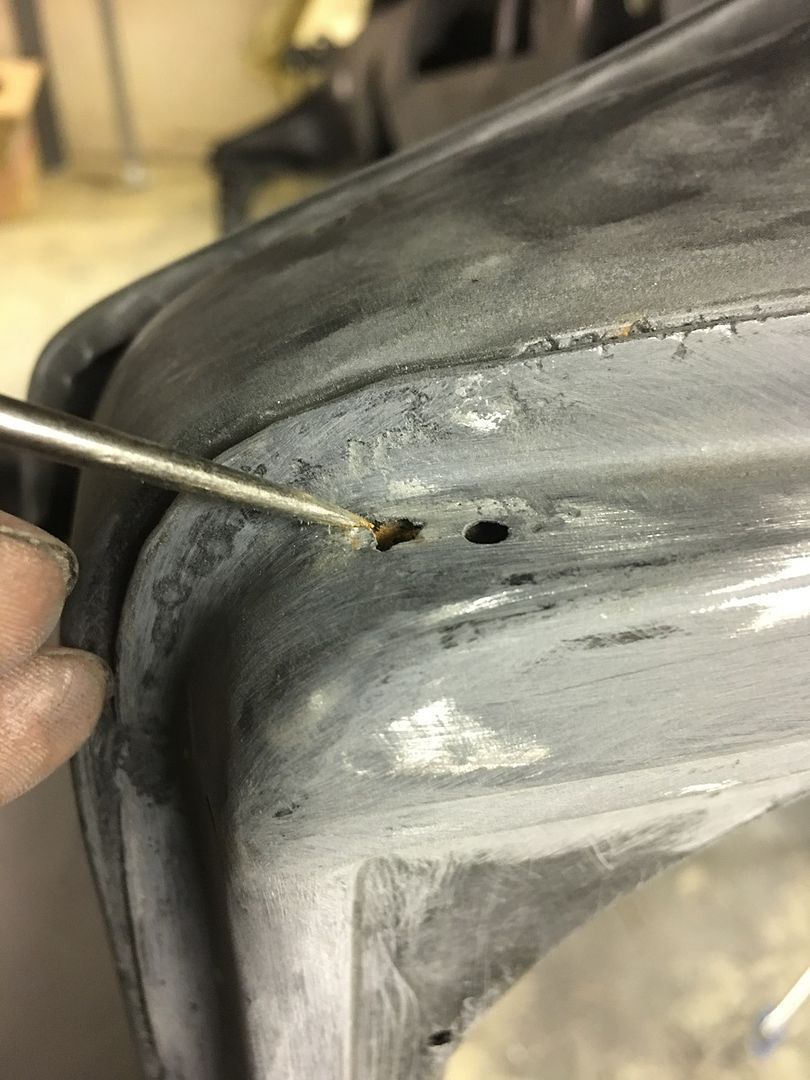
I don't know how I've missed this before. We did have this same repair done to the other side, I guess with the roof damage confined to that same side I must have not thought this side was suspect. Goes to show, check ALL problem areas, especially if issues show on one side.
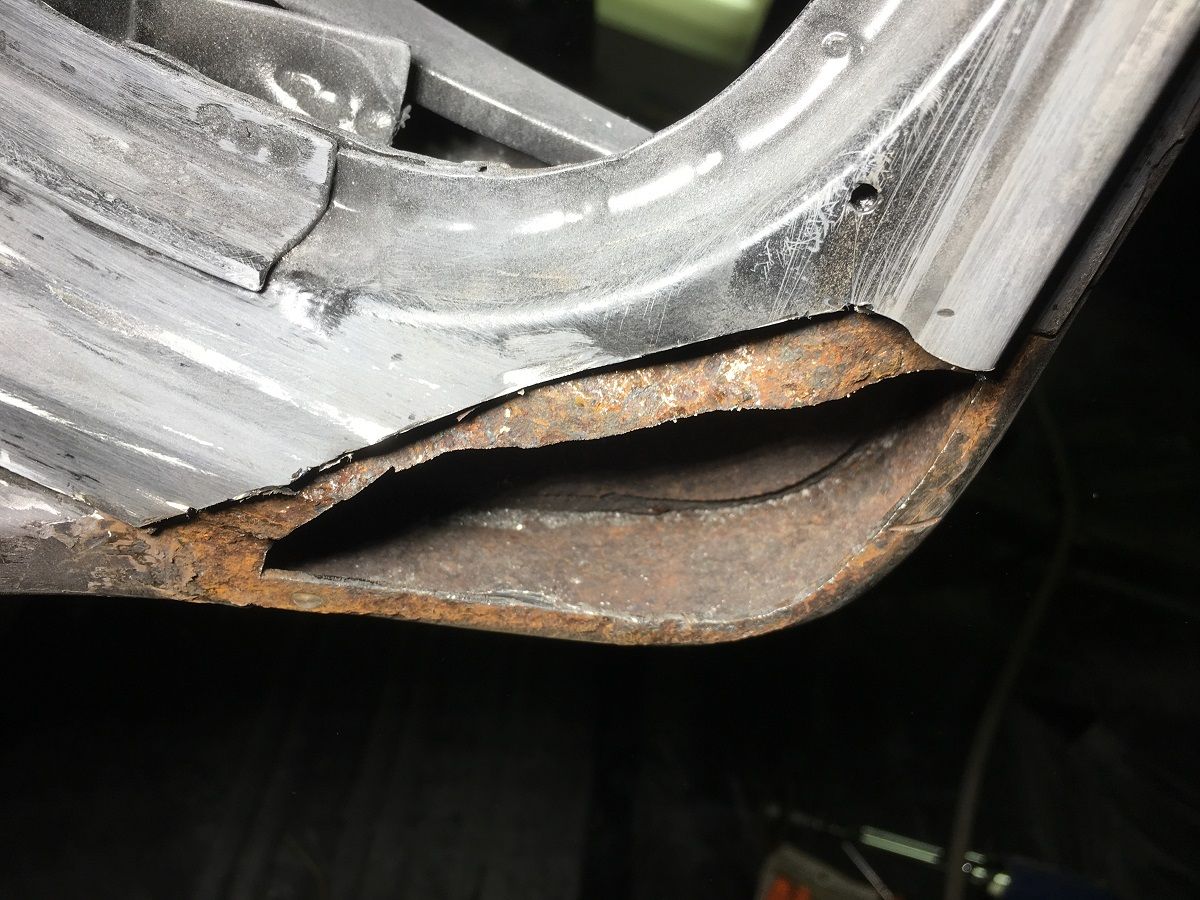
Inside the hole has a minimal amount of surface rust, especially for 64 years old. Safe to say the damage was caused by water/dirt accumulation between the center structure (the one we're remaking) and the outer skin. Oh well, it's been a while since I've had a back up and punt moment. Glad this was found before the green kandy went on.
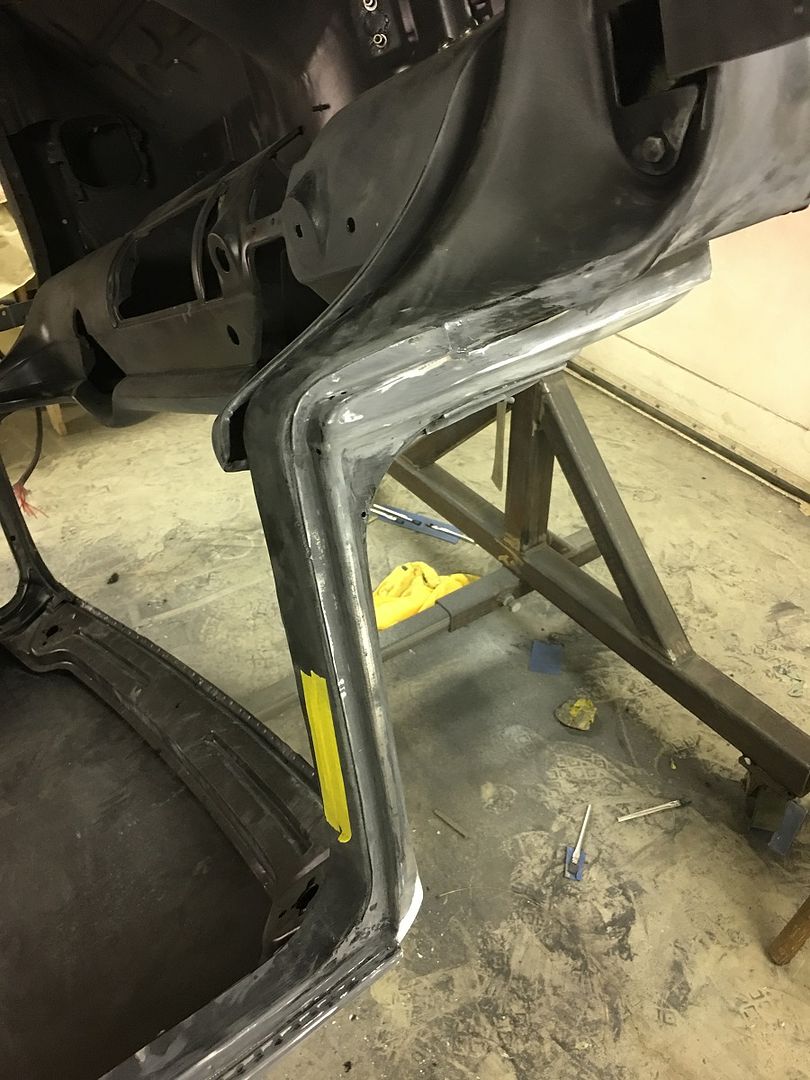
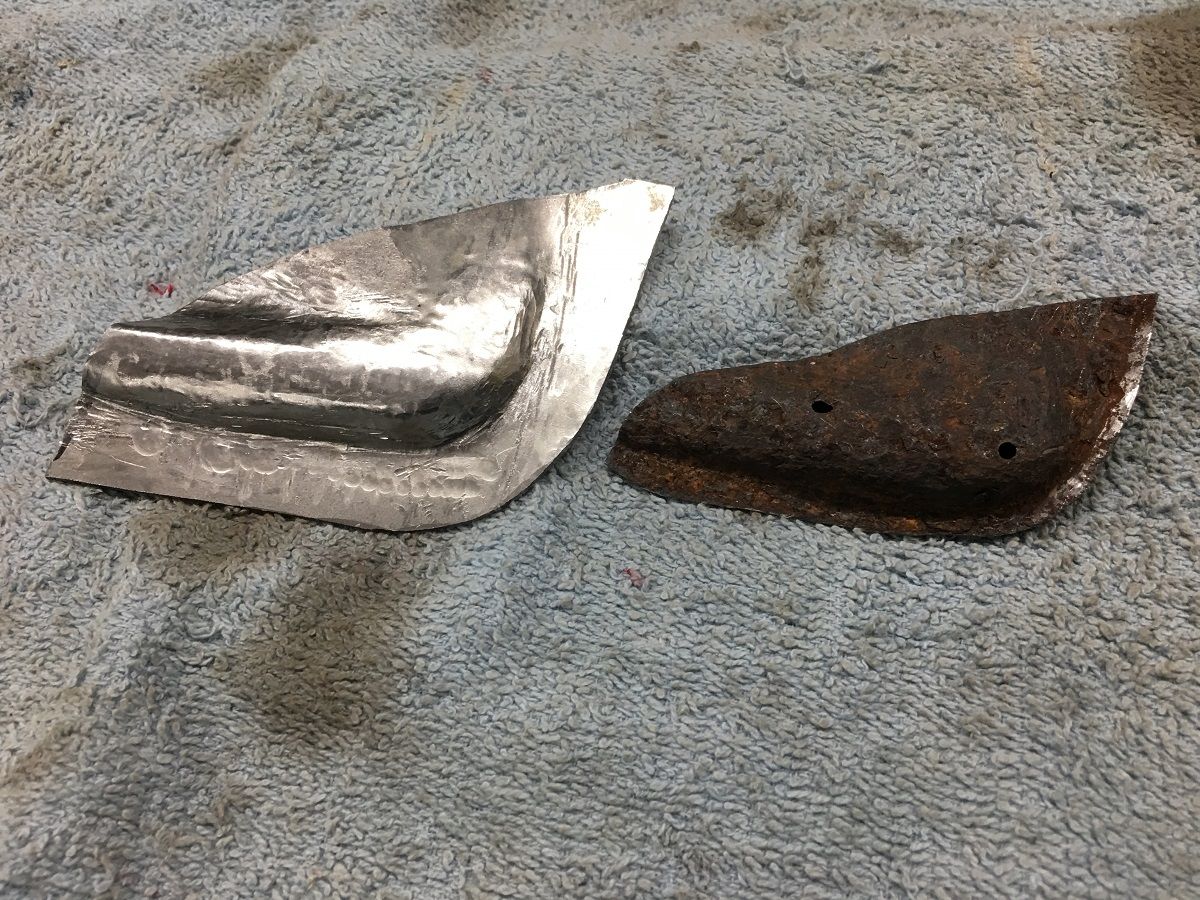
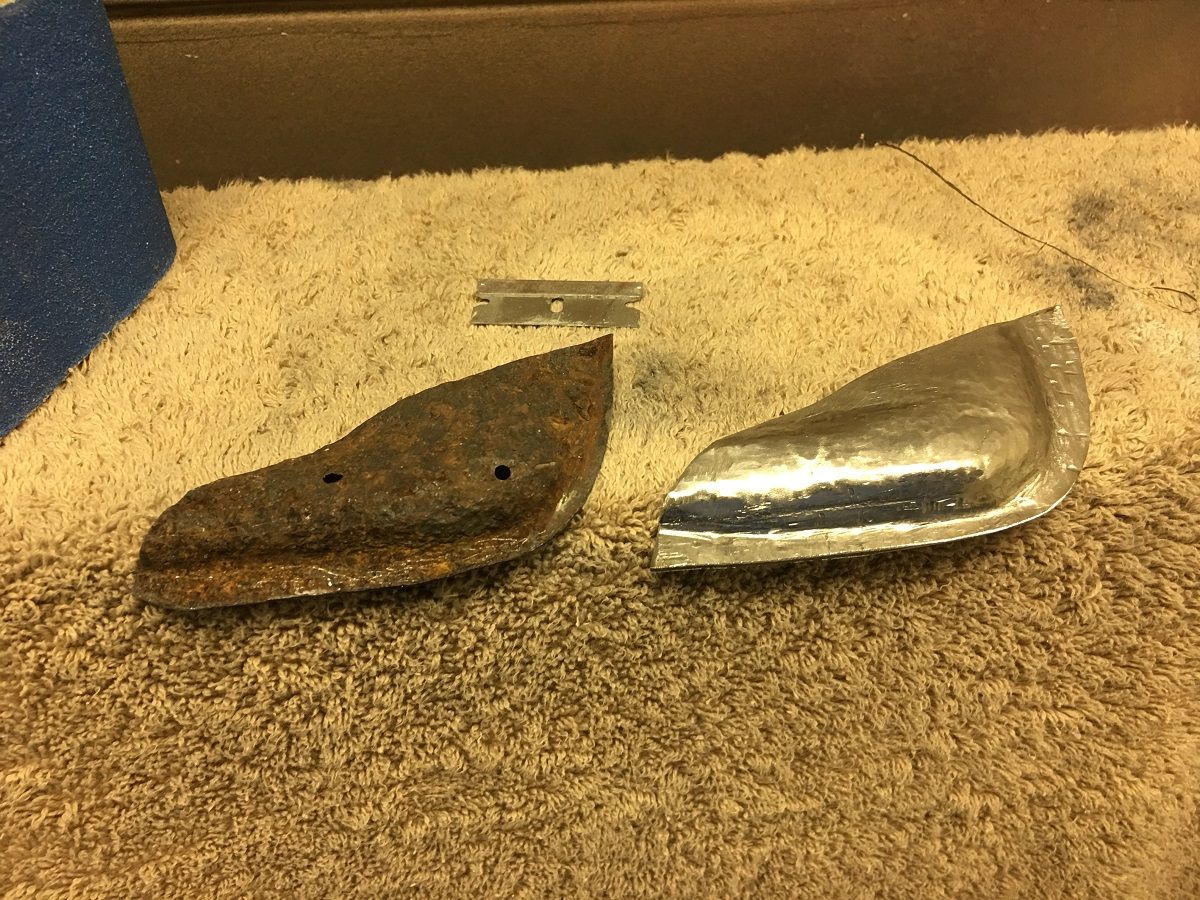
Starting to make the new replacement for the inside, using 14 gauge cold rolled steel.
https://www.youtube.com/watch?v=G7xV0t4WaVY
https://www.youtube.com/watch?v=0gpH2WfqWVc
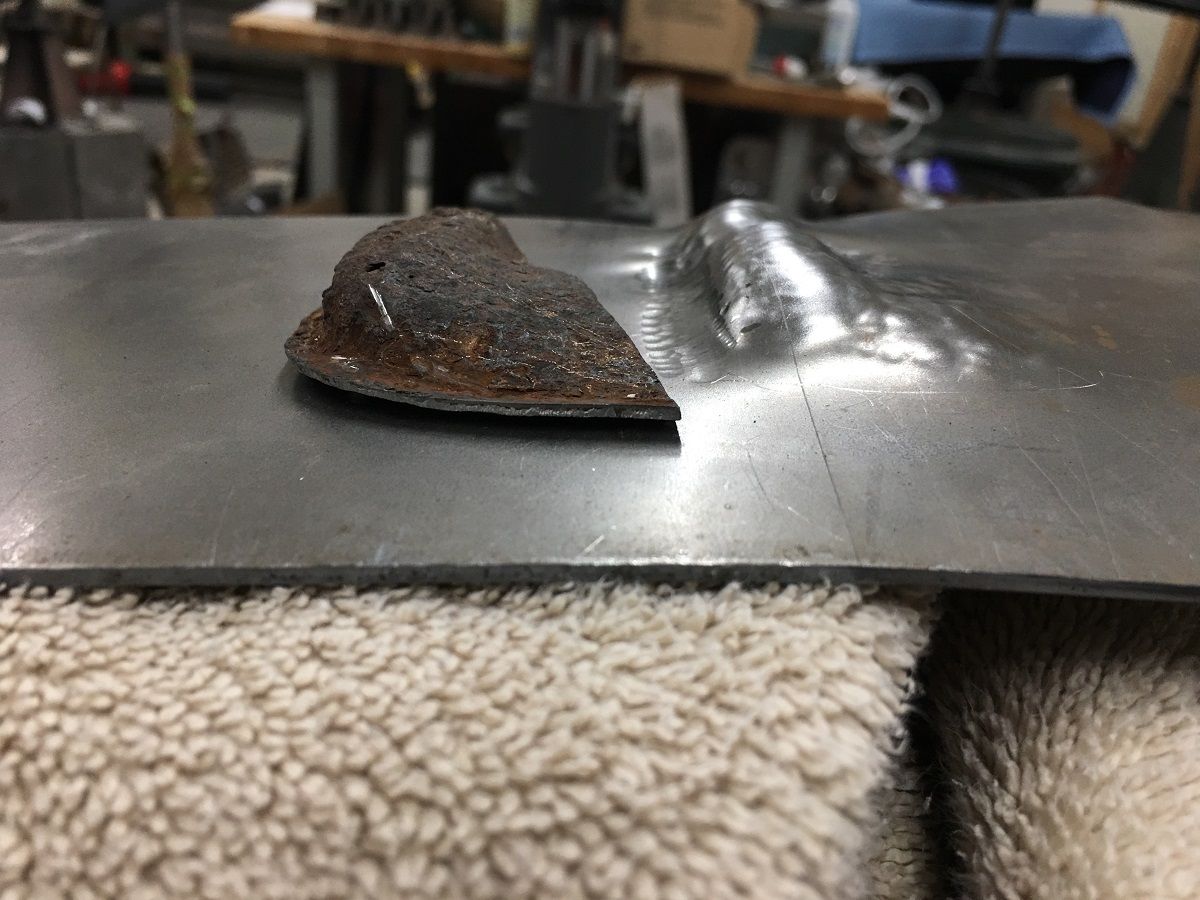
Quite a bit if stretch added for the part to match the original..
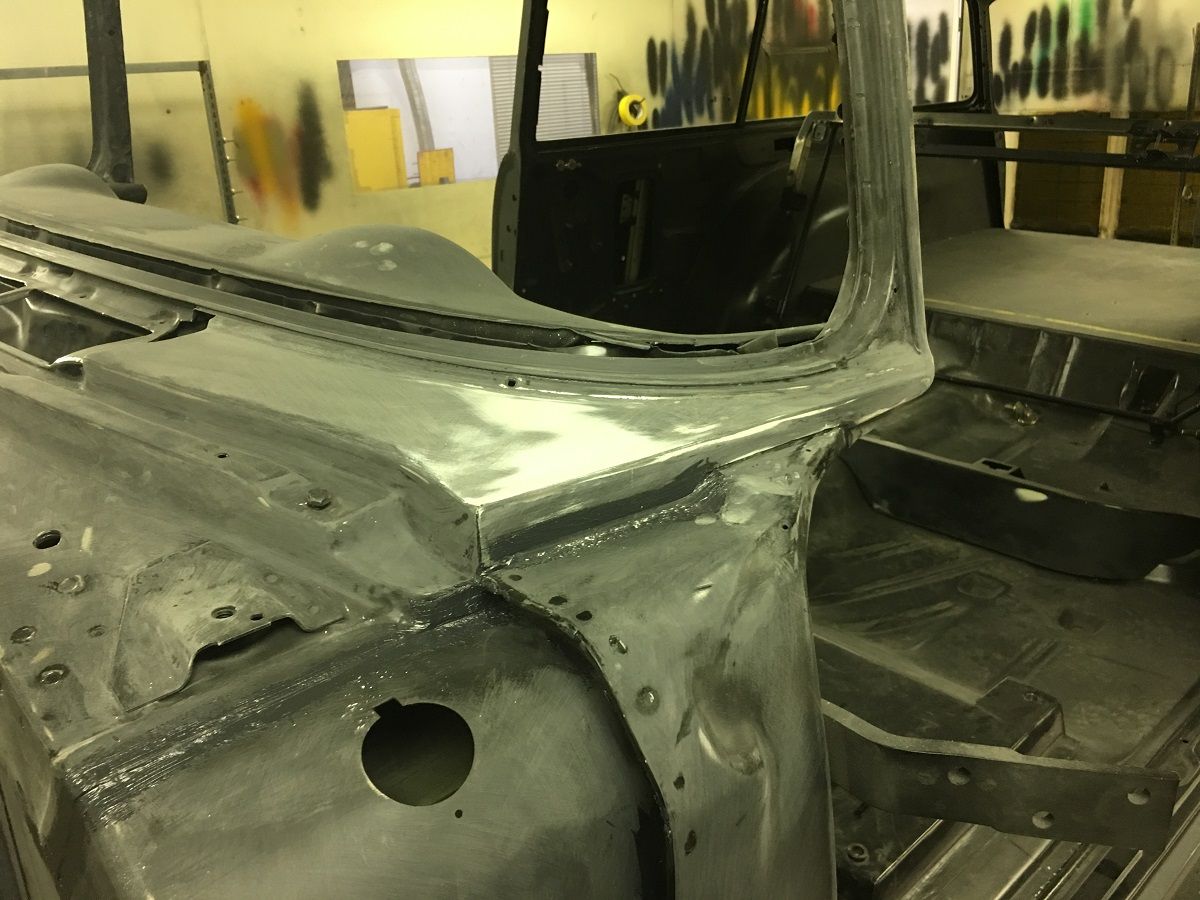
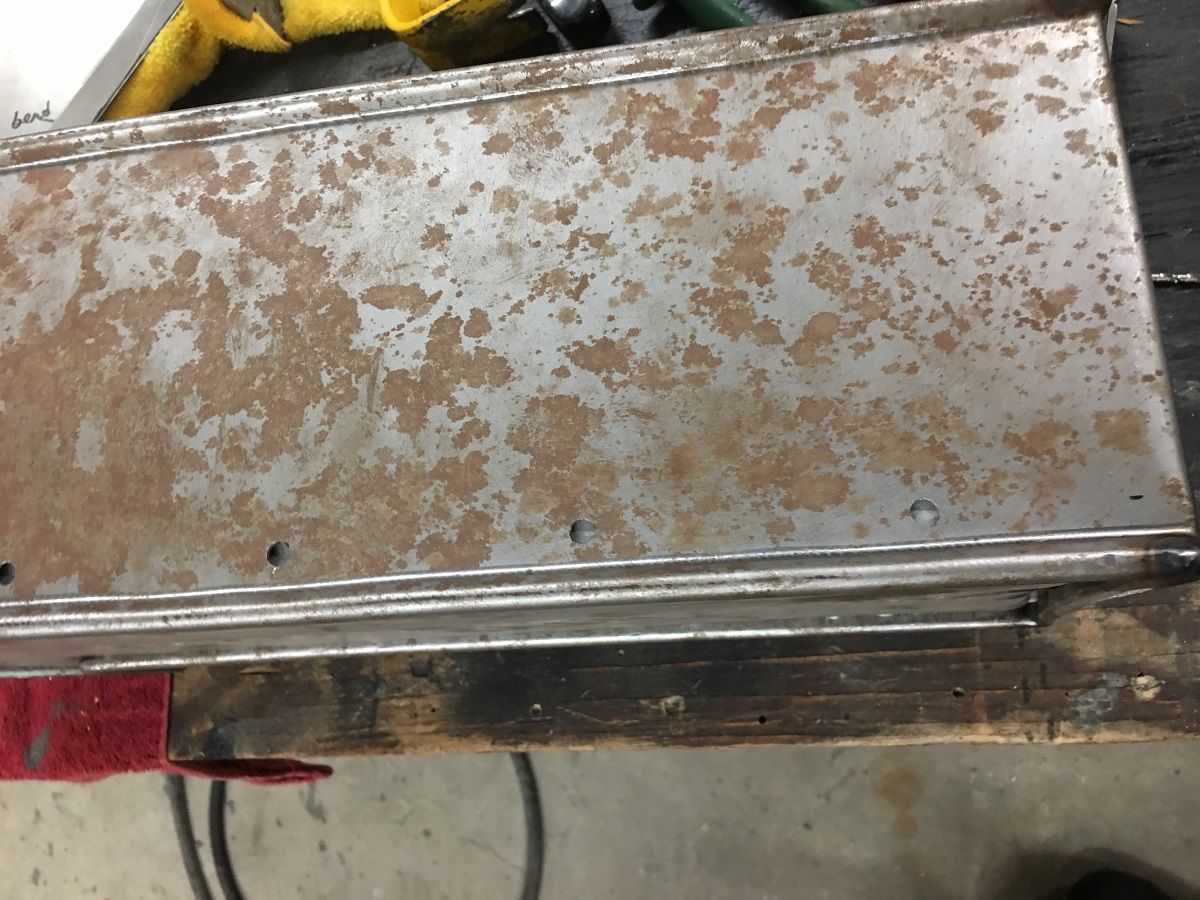
Rough shaped on the MH19, tuned up a bit with body hammers, punches used as anvils, and various other implements of destruction. Trimmed and fitted:
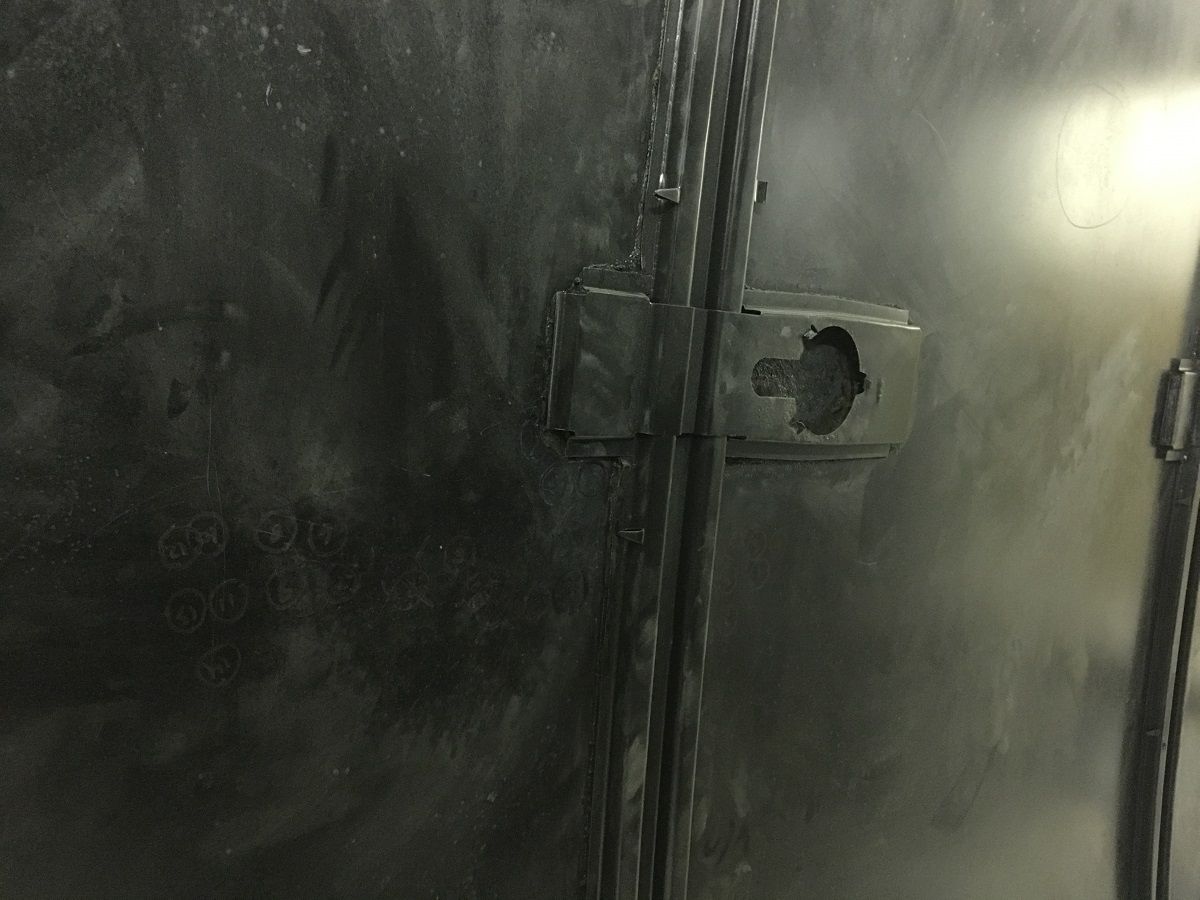
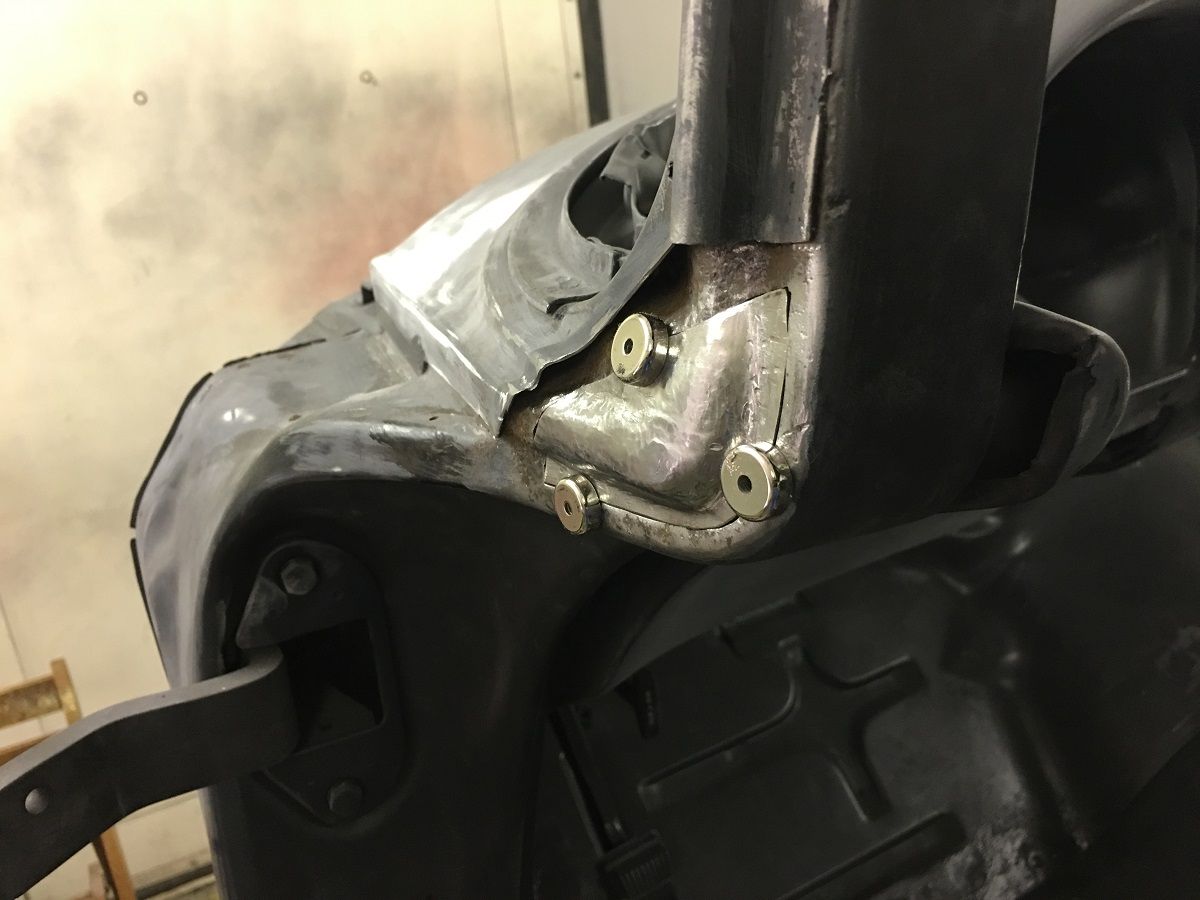
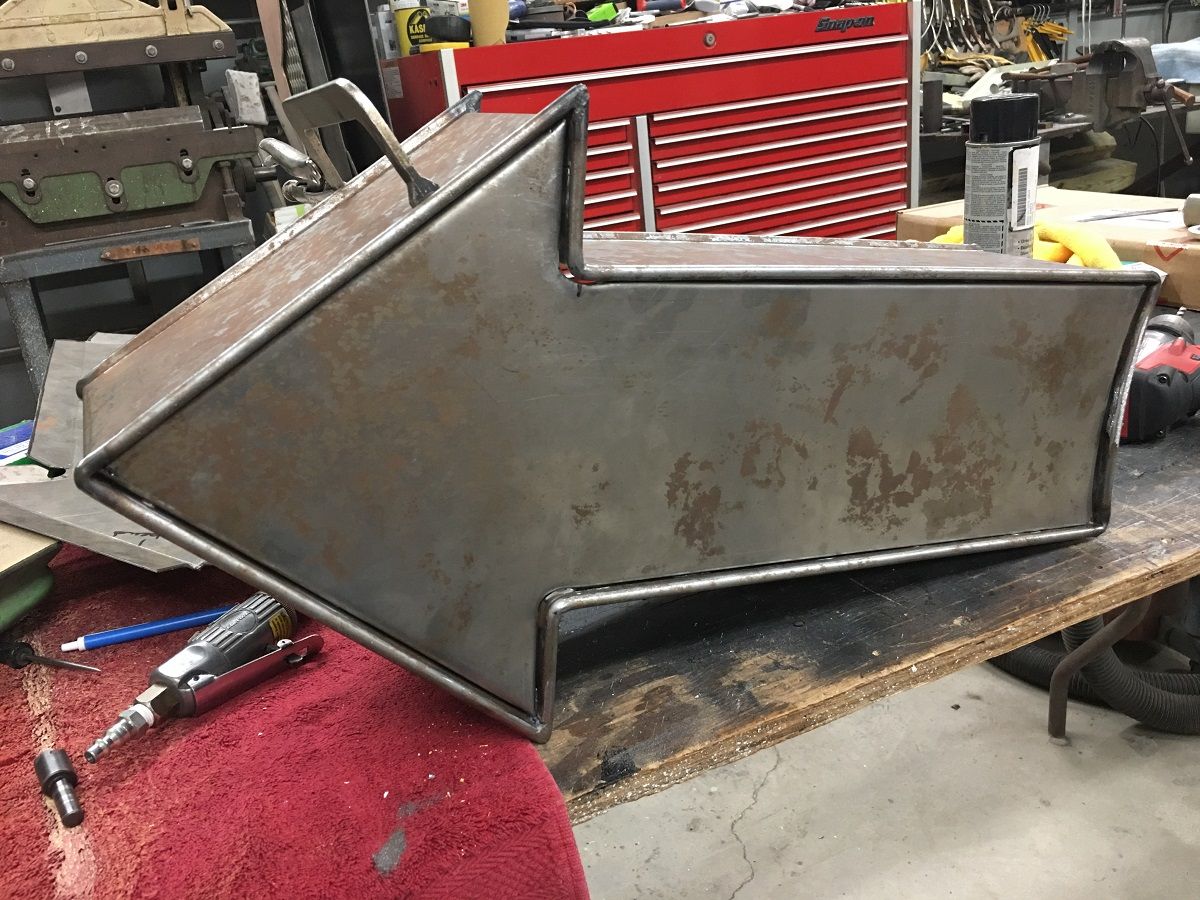
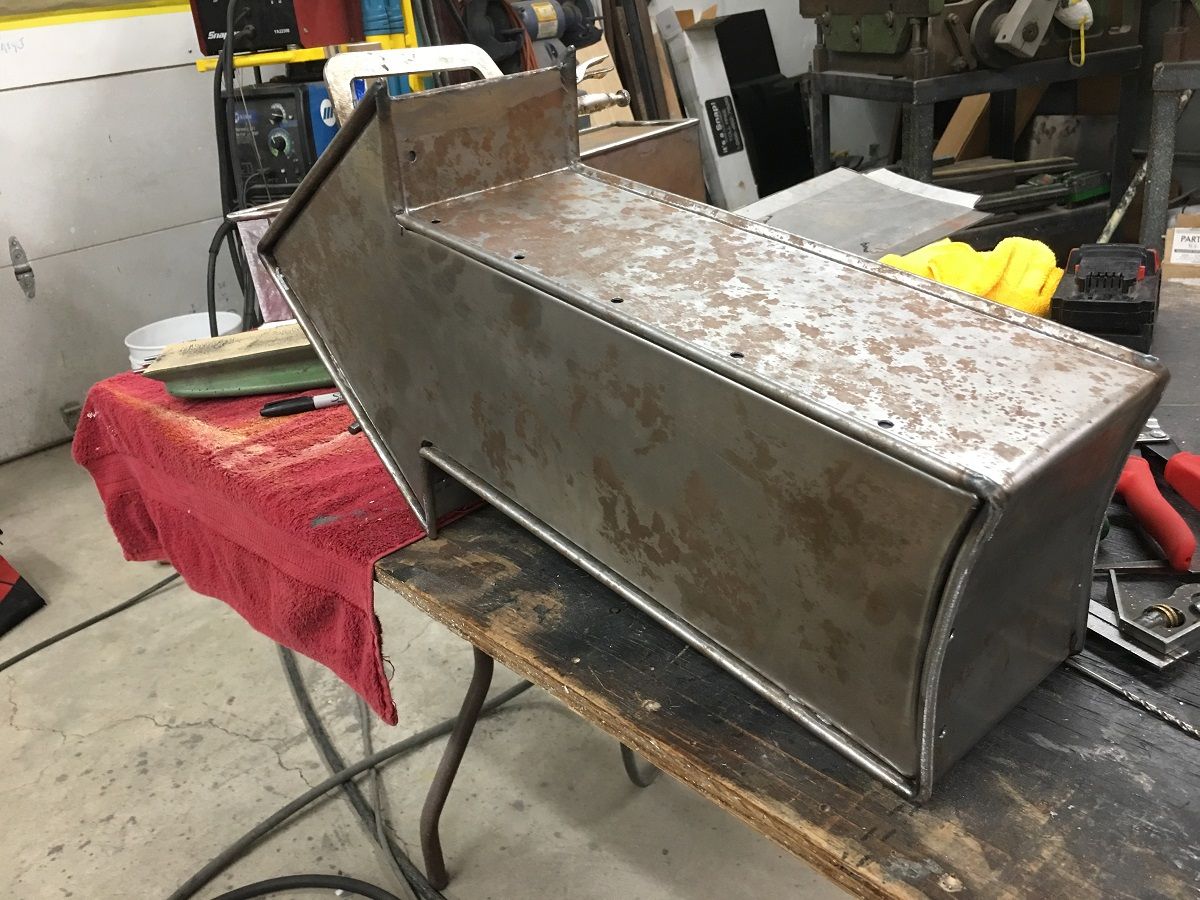
All ready for welding. Meanwhile, Mike has been working on the pointy end of the arrow, here stretching an inside corner to better fit the housing....
https://www.youtube.com/watch?v=ohC3TdJKy1o
And adding holes for the plug welds....
I thought you replaced those a-pillars with the ones I sent you long ago. Or was that only one side??Good thing you found it before paint.

56 Nomad, Ramjet 502, Viper 6-speed T56, C4 Corvette front and rear suspension
Other vehicles:
56 Chevy 2-door BelAir sedan
56 Chevy 210 4-door sedan
57 Chevy 210 4-door sedan
1962 327/340HP Corvette
1961 Willys CJ3B Jeep
2001 Porsche Boxster S
2003 Chevy Silverado 2500 HD Duramax
2019 GMC Sierra Denali Duramax
Just the passenger side. Didn’t notice here on this side

Robert,
I love your build it's teaching me a lot!! I have a question, I'm not a metal former but when you make a part like that corner and you draw the shape does the metal get thinner or do you start with thicker material to end up with the same thickness as the original? Thanks for the teaching!!!
Last edited by Troy; 09-09-2019 at 09:12 AM.
The original was measured at that outer flange and worked out to 14 gauge. The area that was stretched will indeed get thinner, but at outer flange still measures 14 gauge, just like the original.
 Posting Permissions

 Reply With Quote