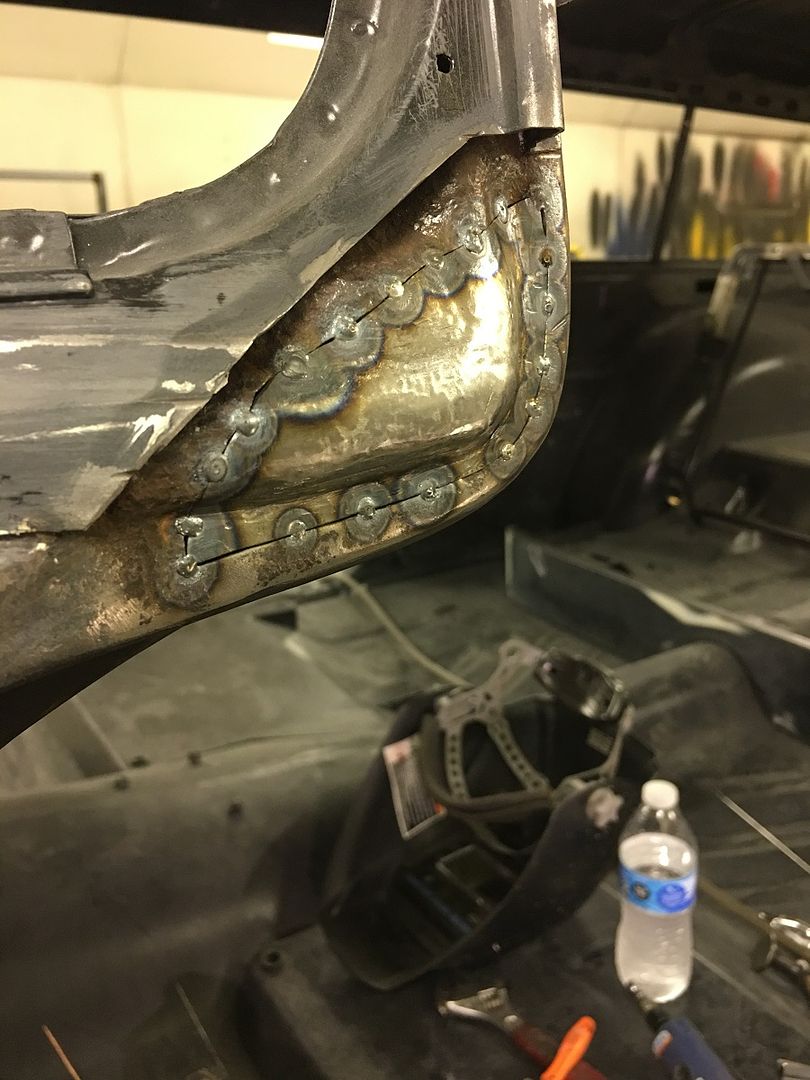
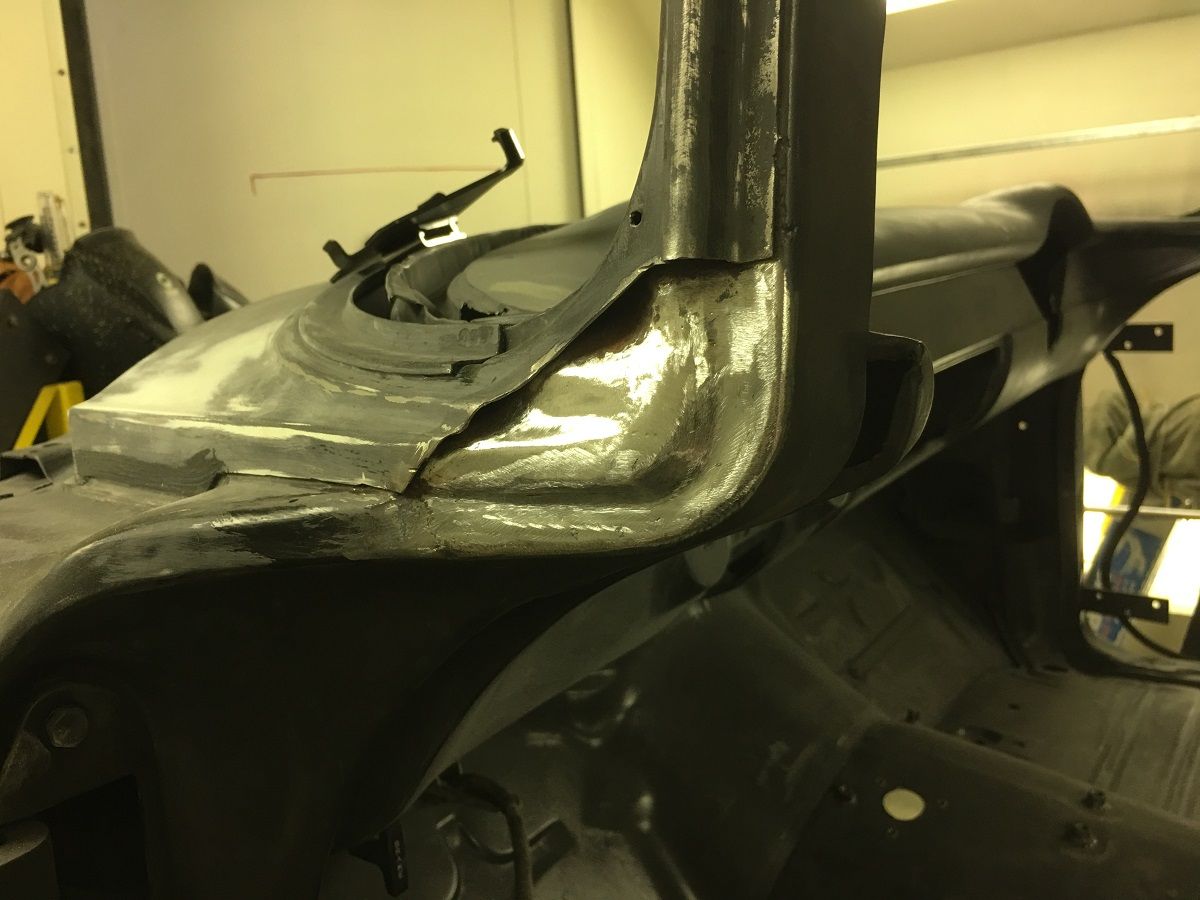
After a week in FL for the day job, time to get the inner patch welded in place.
Tacked using the TIG:
video:
https://youtu.be/UixLOAZejMI
welds dressed:
Epoxy primer added:


After a week in FL for the day job, time to get the inner patch welded in place.
Tacked using the TIG:
video:
https://youtu.be/UixLOAZejMI
welds dressed:
Epoxy primer added:


That section looks 'factory fresh', now...Outstanding work as always!
Thanks! Now to reproduce the outside portion..
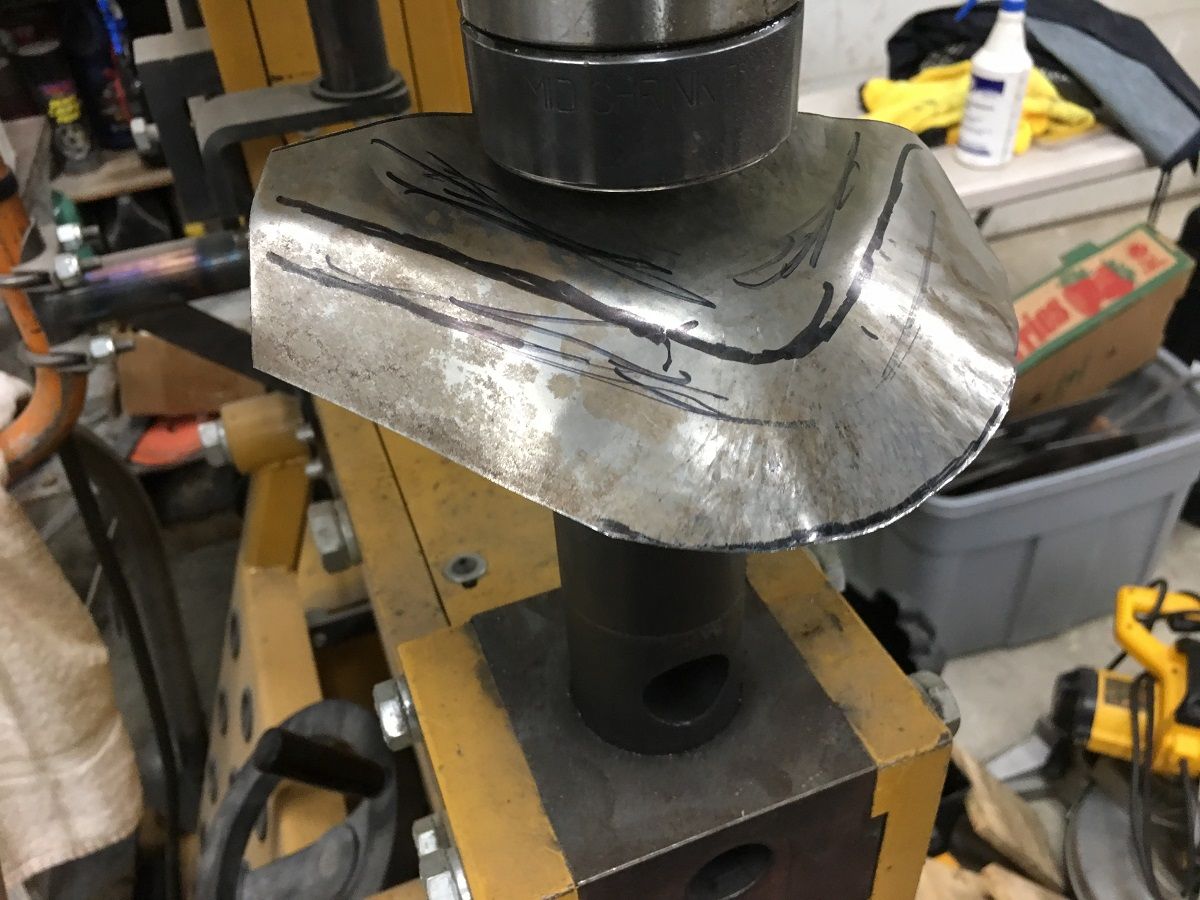
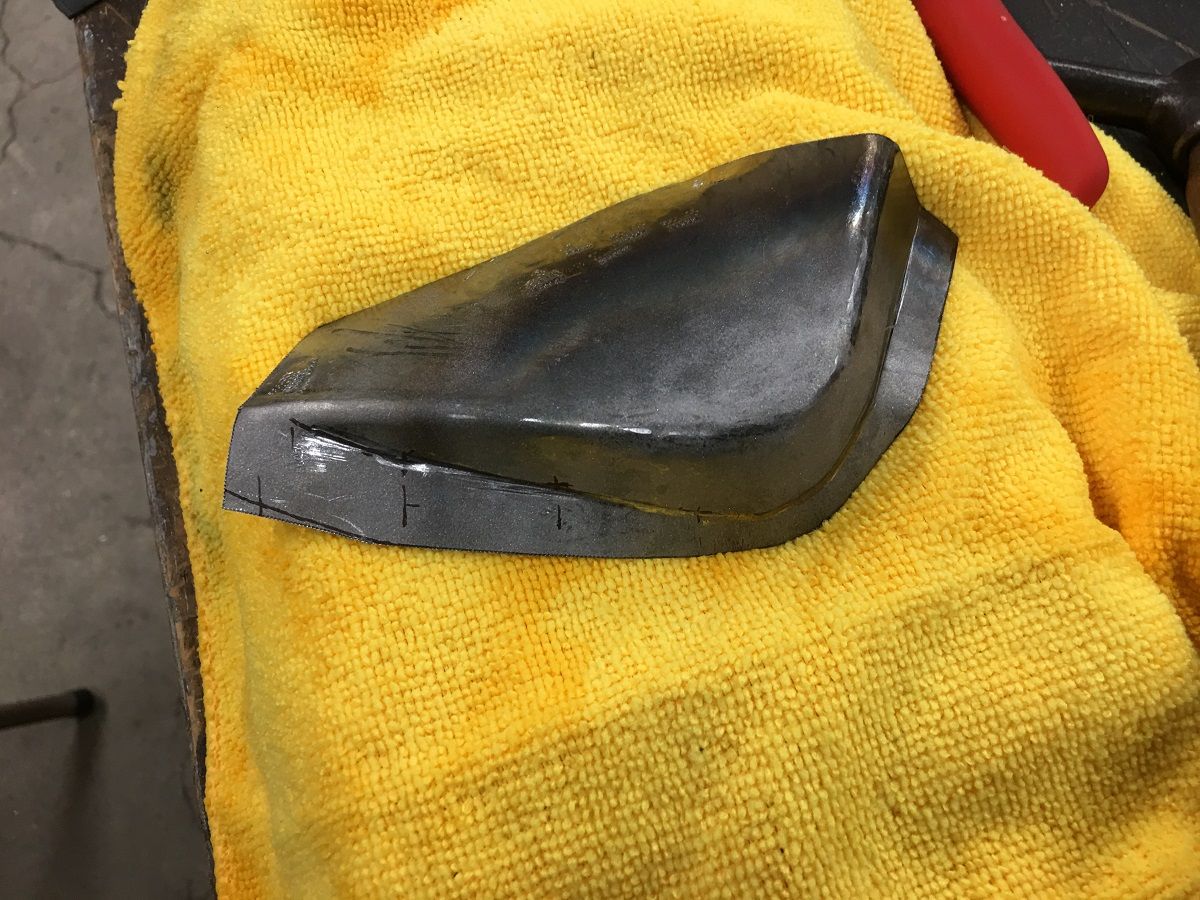
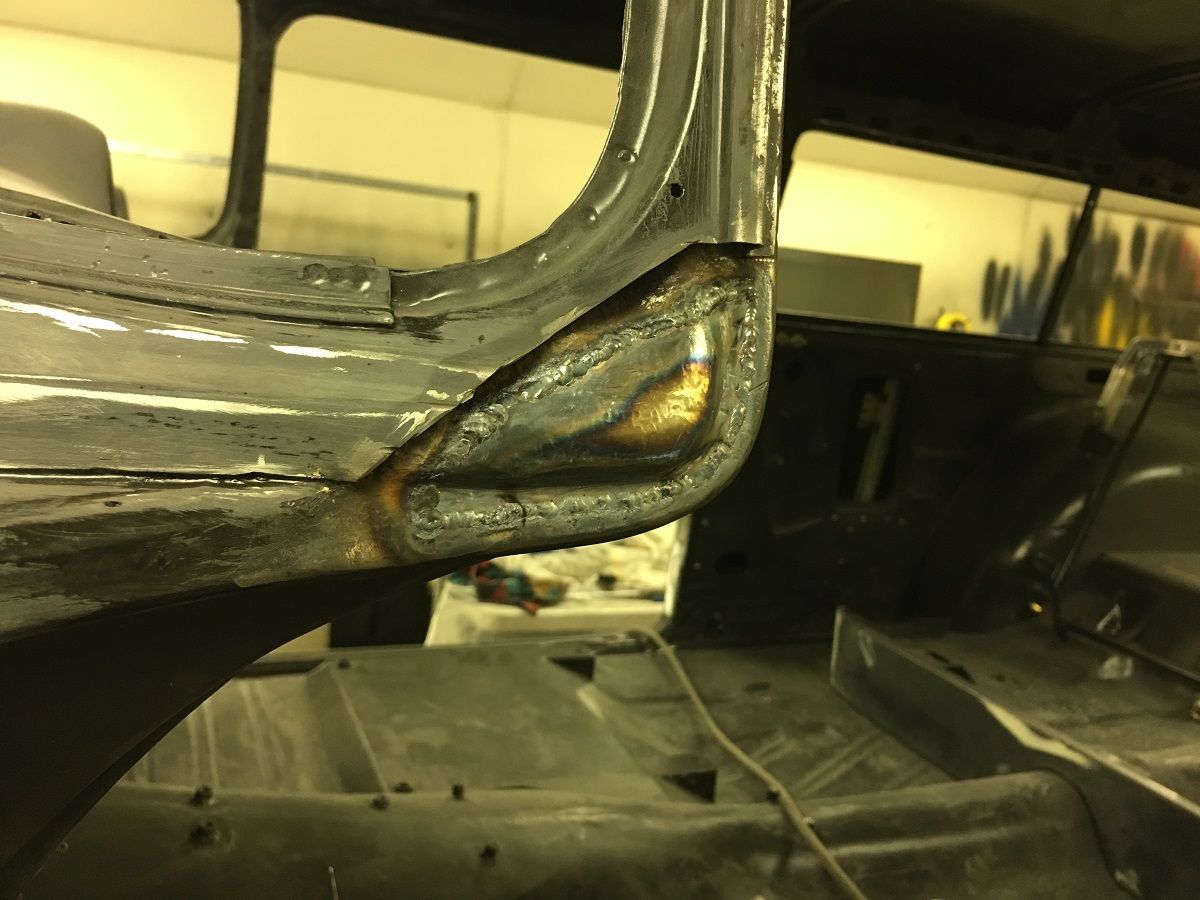
Now to get our outer patch fabricated.. The corner is going to need a GRUNCH of shrinking.. We started on the Baileigh, but the dies are only going to get us so far. So some tuck shrinking with some heat for persuasion was used..
A tipping wheel in the bead roller was used to mark our bend line, and an upper press brake die used as an anvil to hammer the flanges over..
Some hammer action to stretch the corner flange so it will tip the full 90*
https://www.youtube.com/watch?v=_FEIEQoGzdg
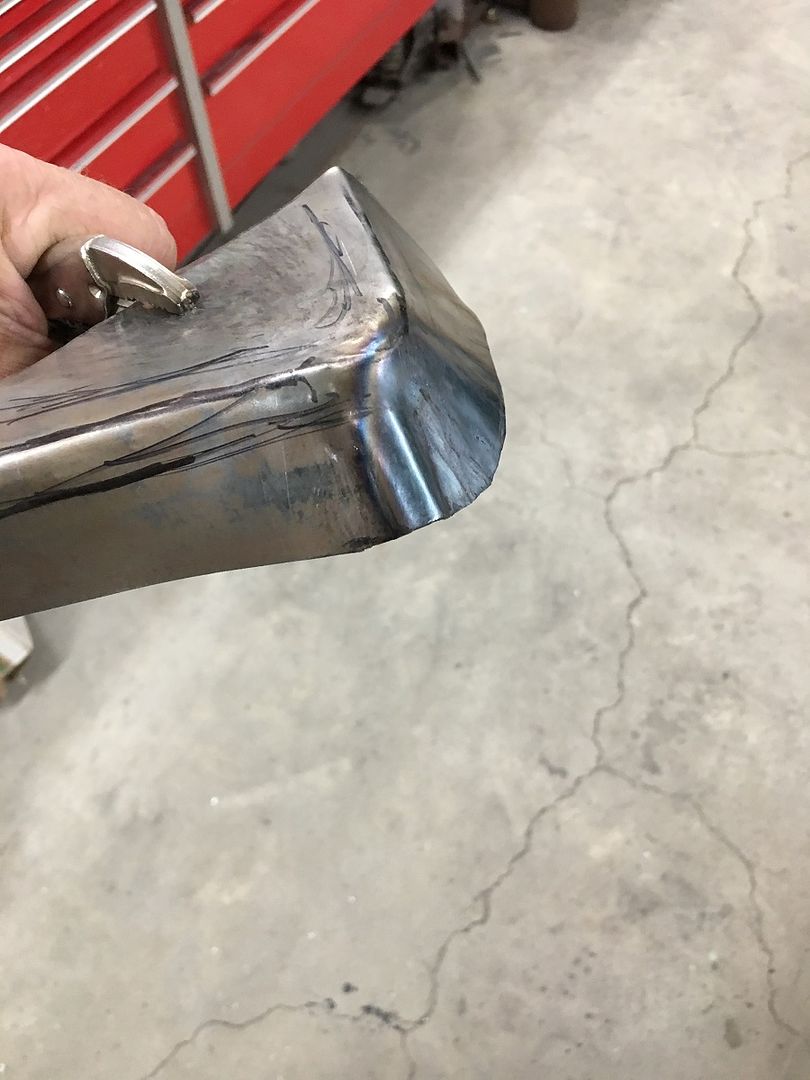
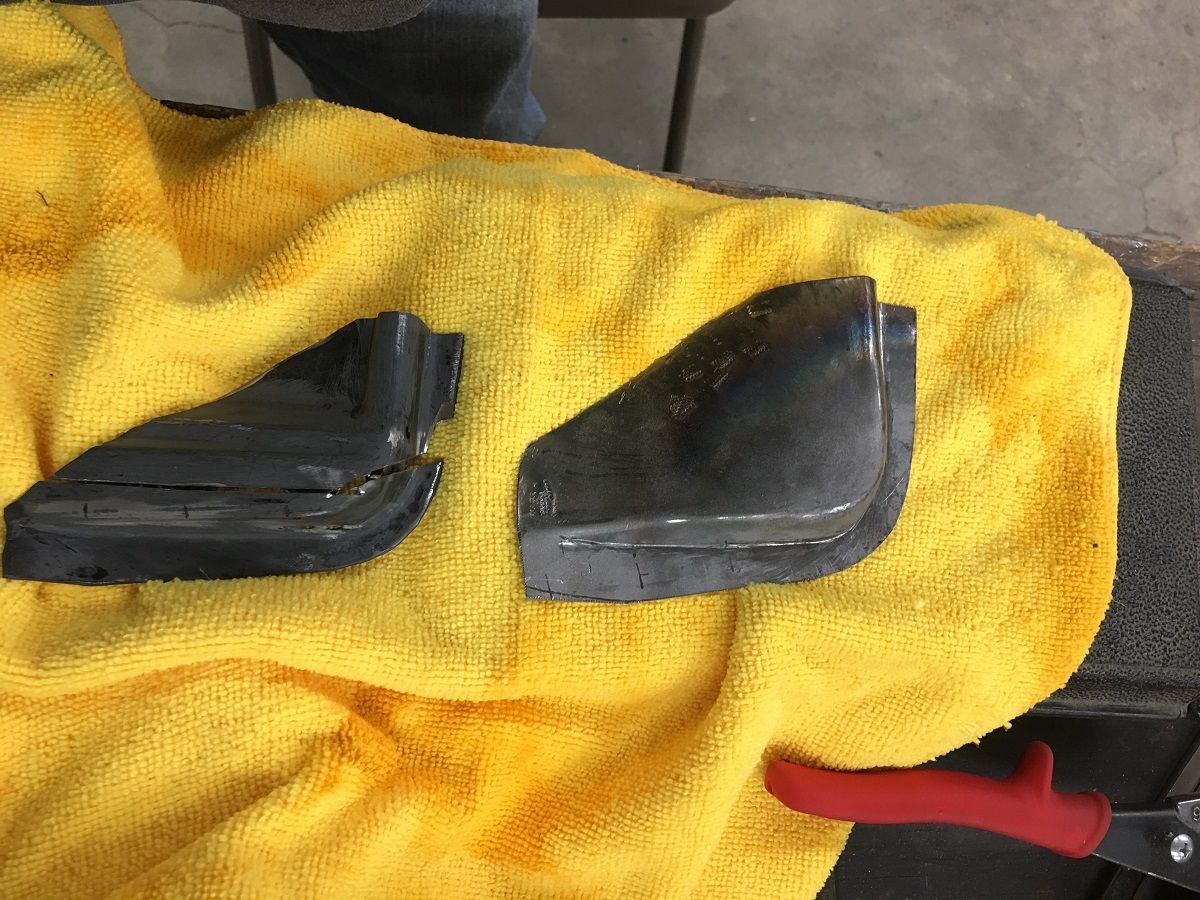
I missed some in process pictures here, but various hammers, anvils, punches, and other implements of destruction were employed to give us our basic shape...
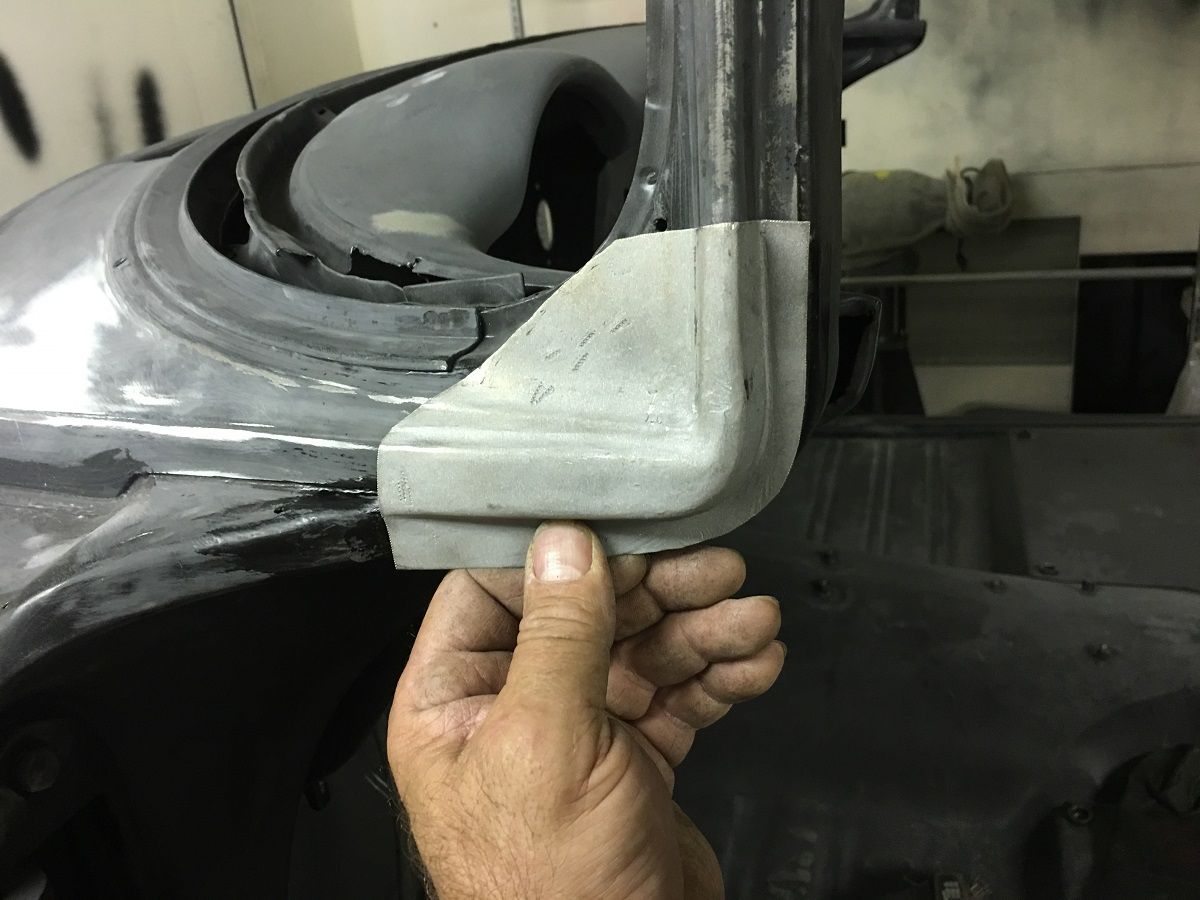
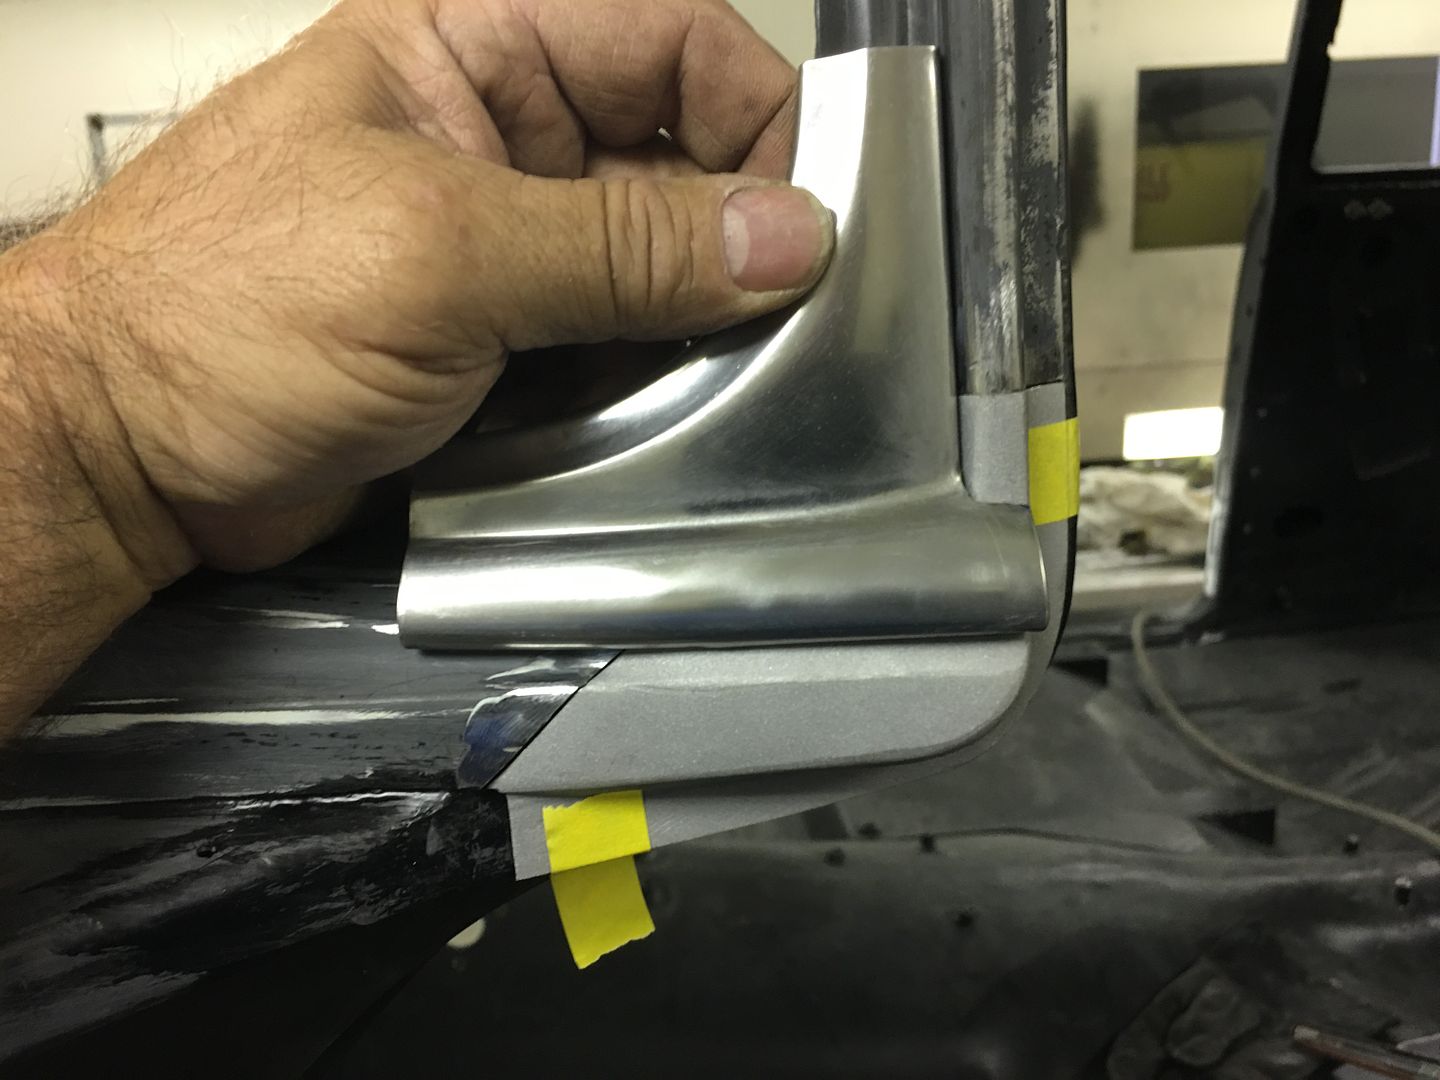
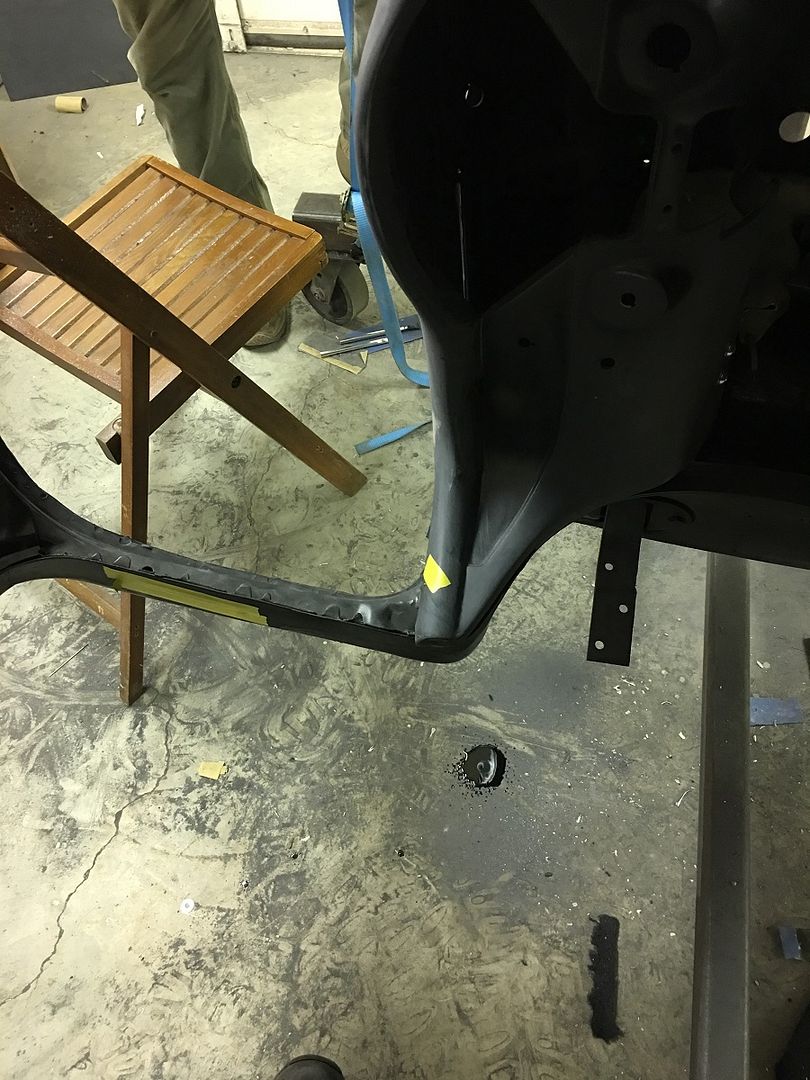
After a bit of fine tuning, it is trimmed and fitted into the A Pillar...
https://www.youtube.com/watch?v=HCDRj5uOU3s
and the windshield stainless is test fit for good measure..
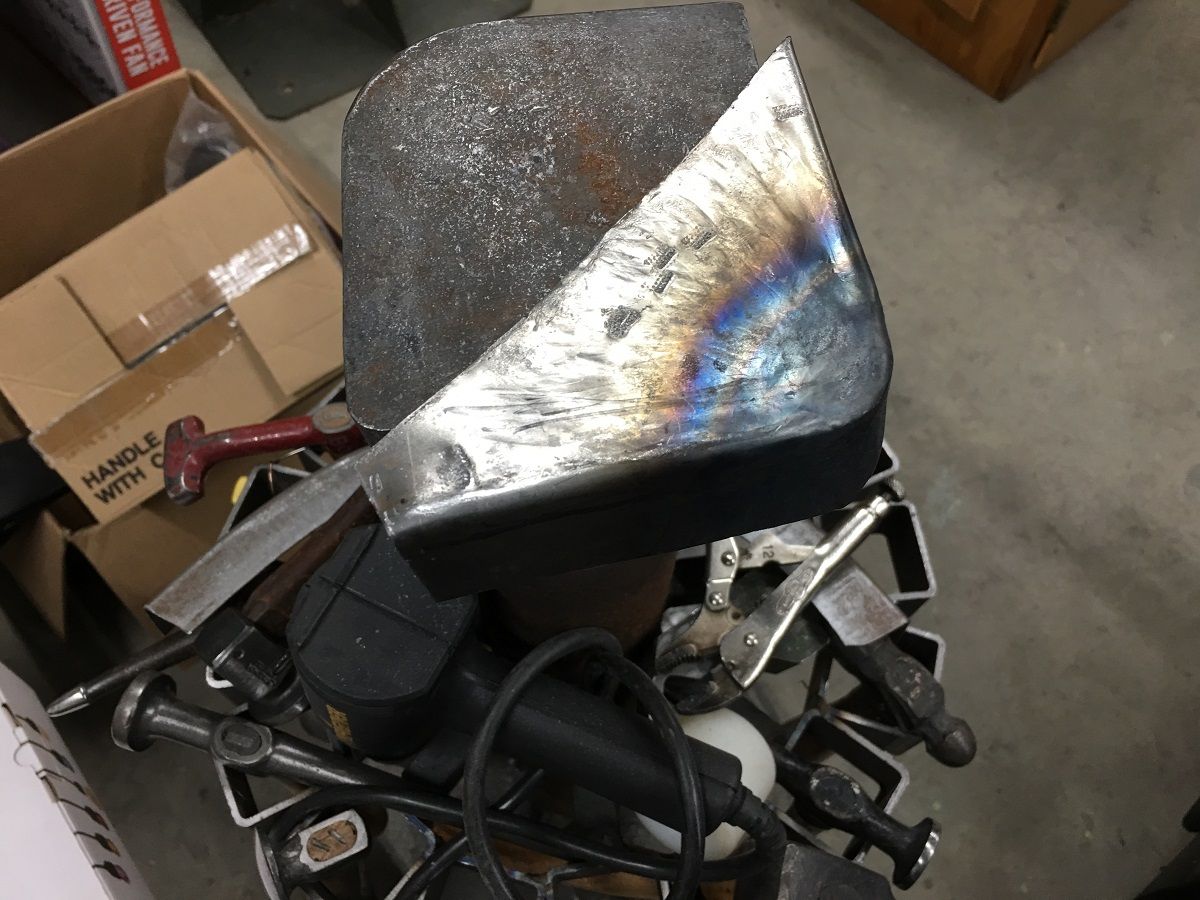
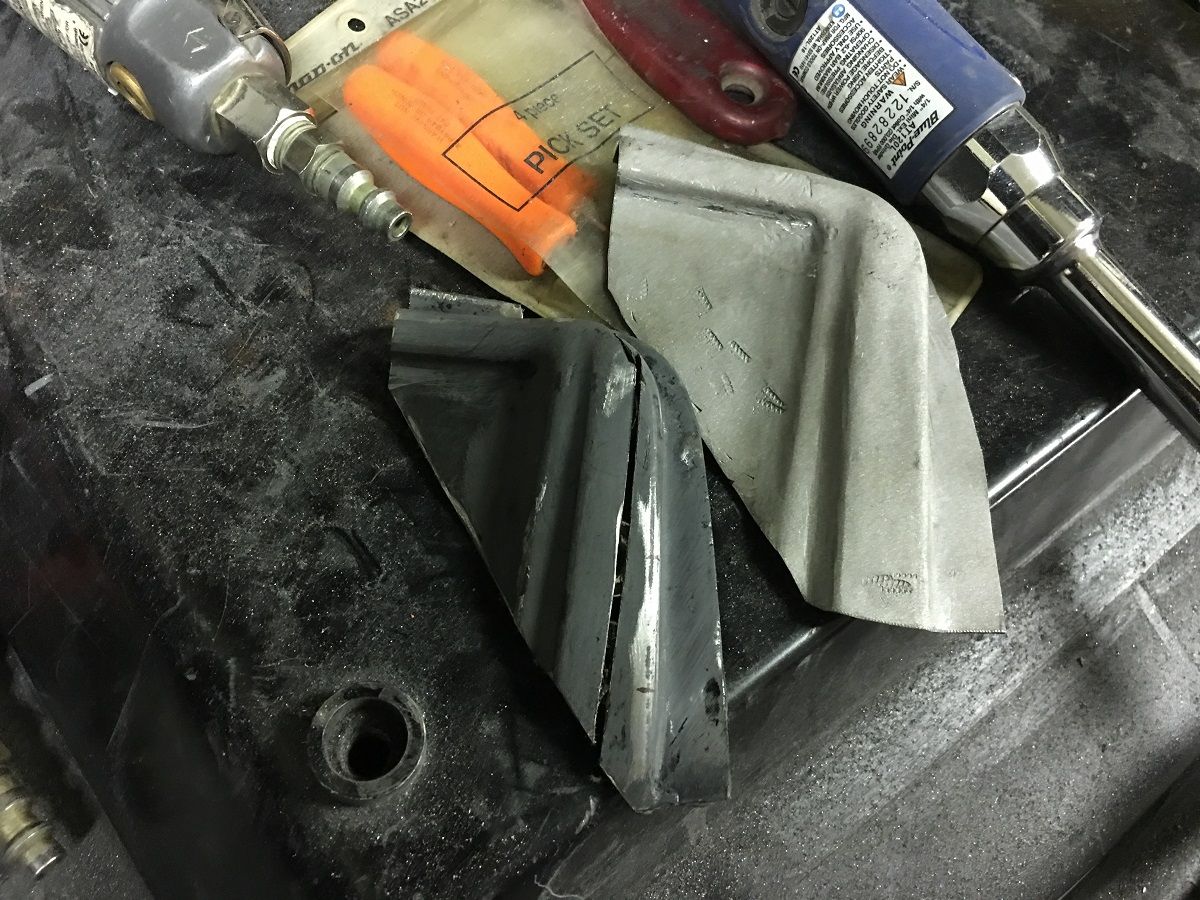
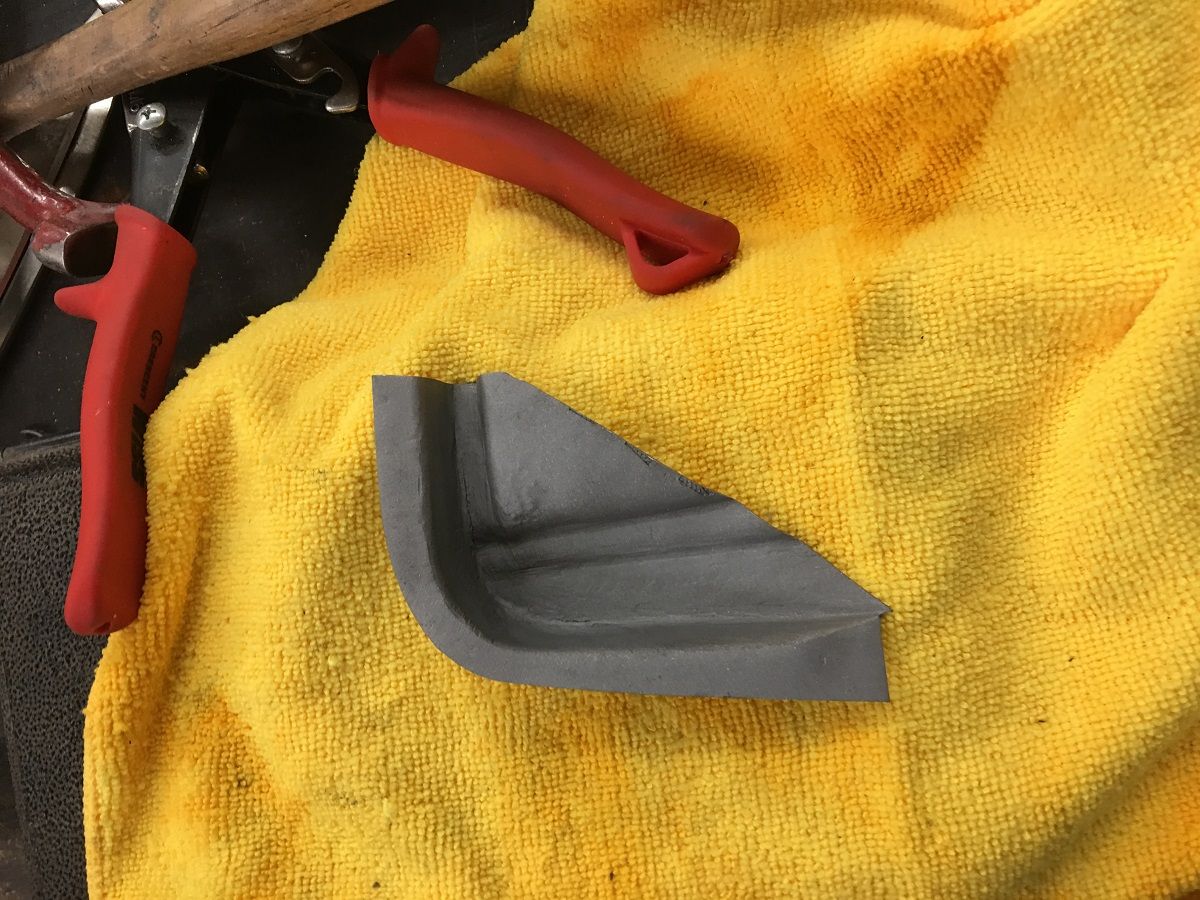
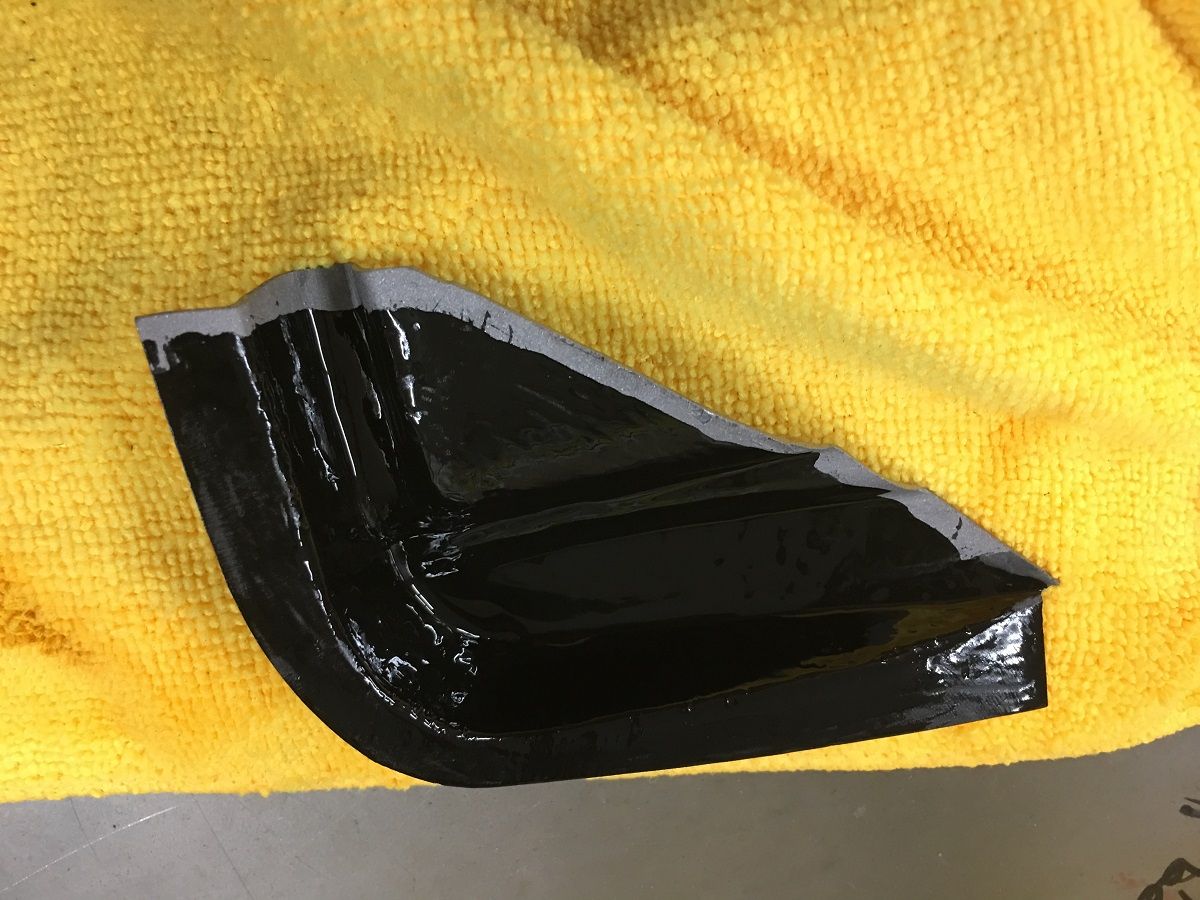
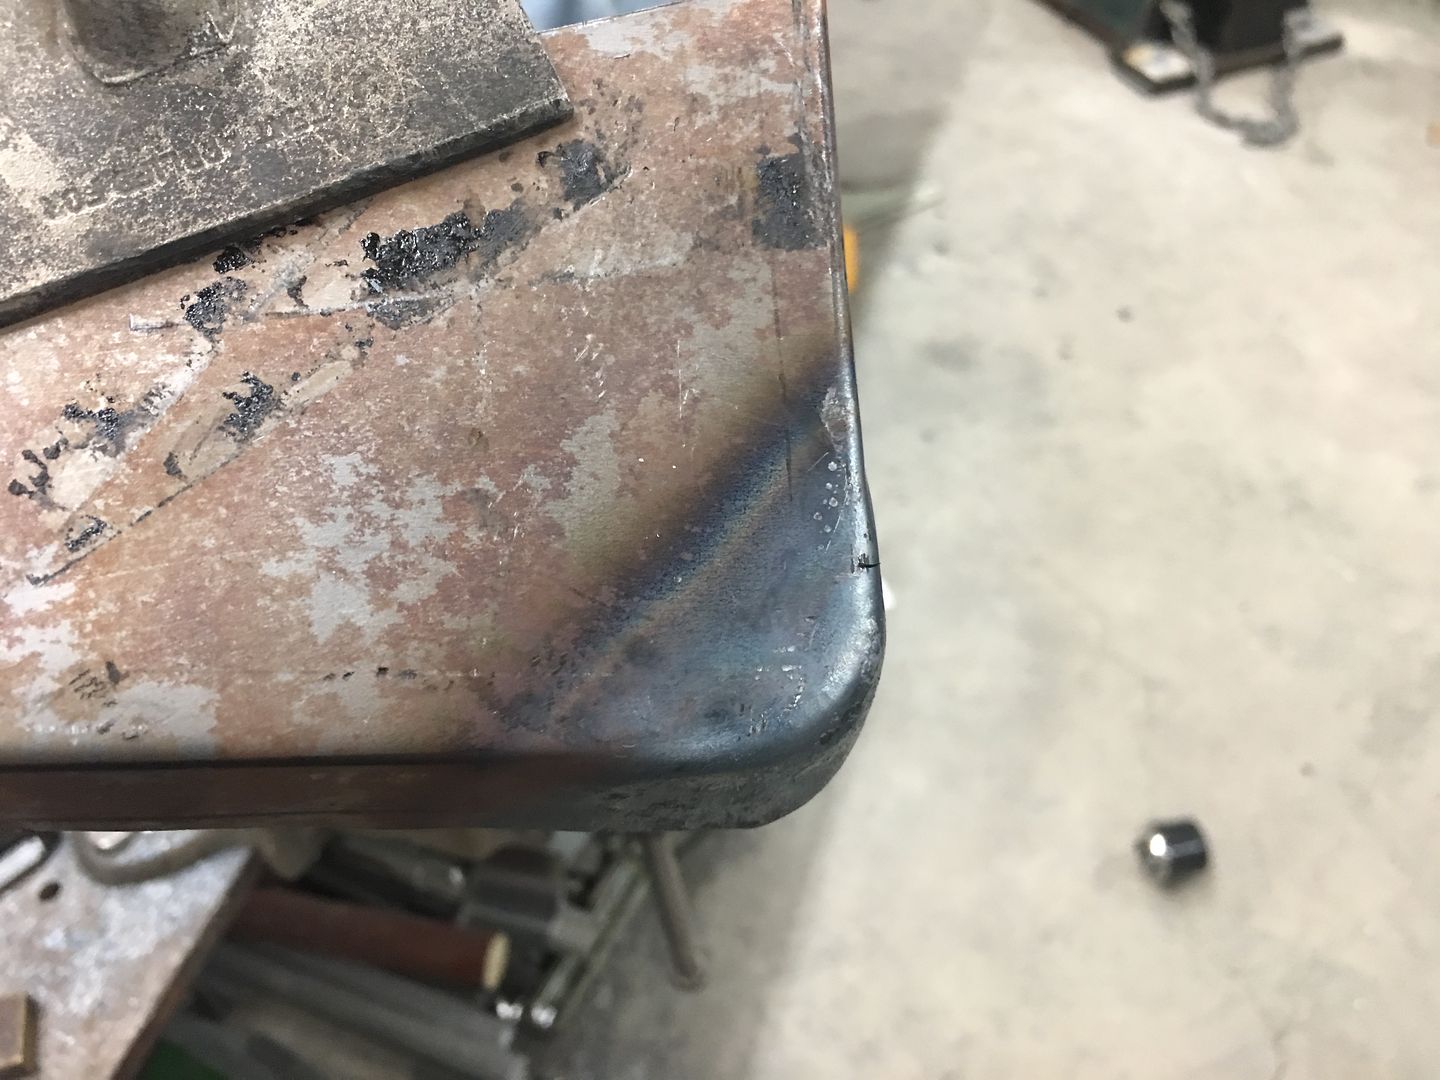
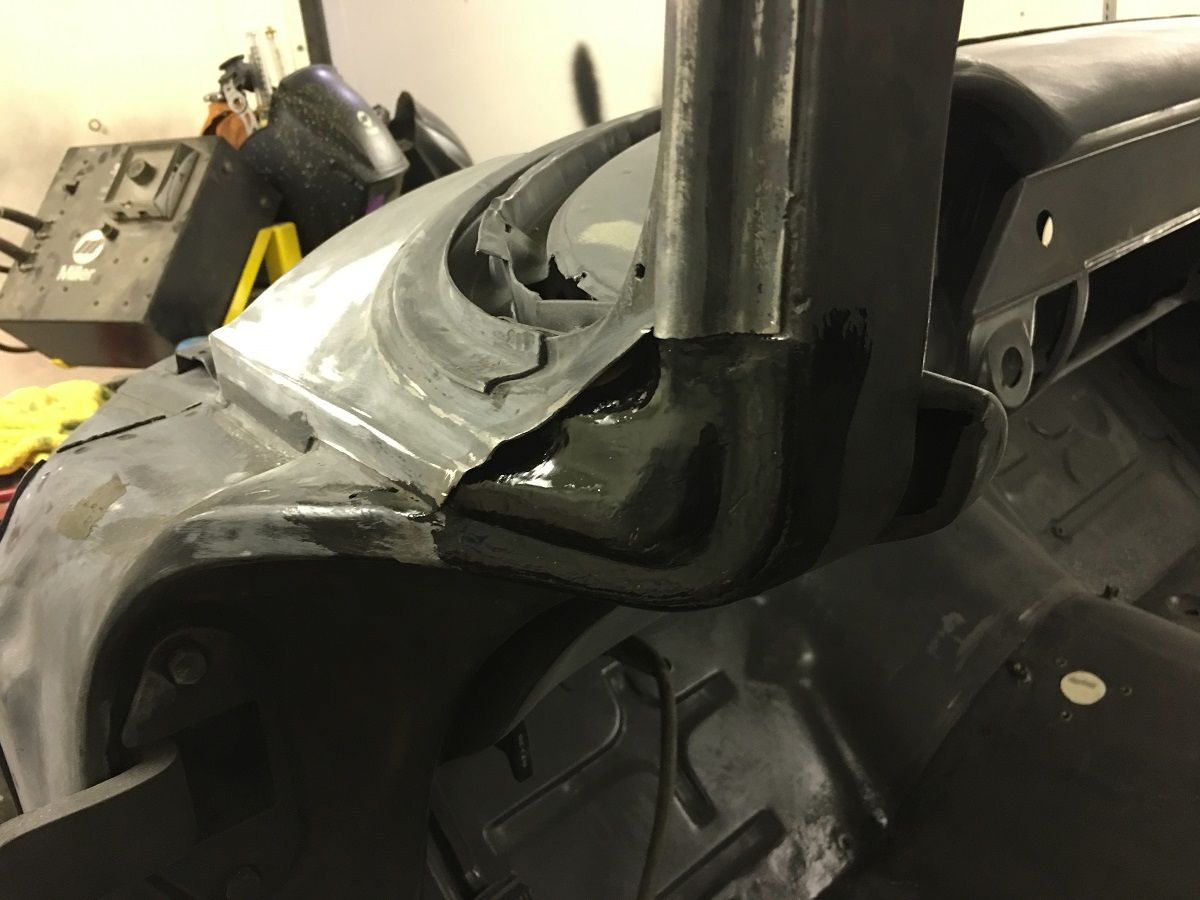
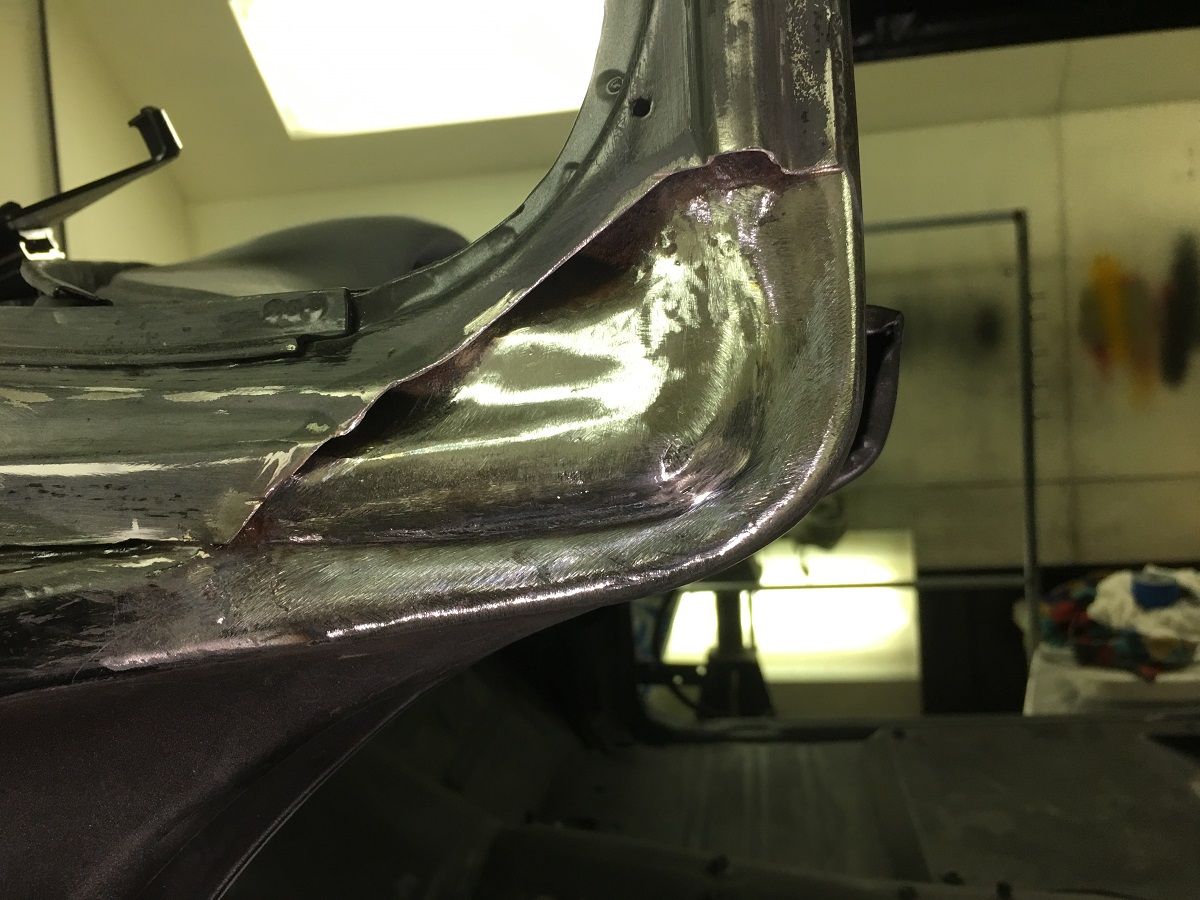
The finished piece is media blasted (Barton Garnet) so the SPI epoxy primer will have a good bite. The inside is primed as a bit more preventative measure over factory....
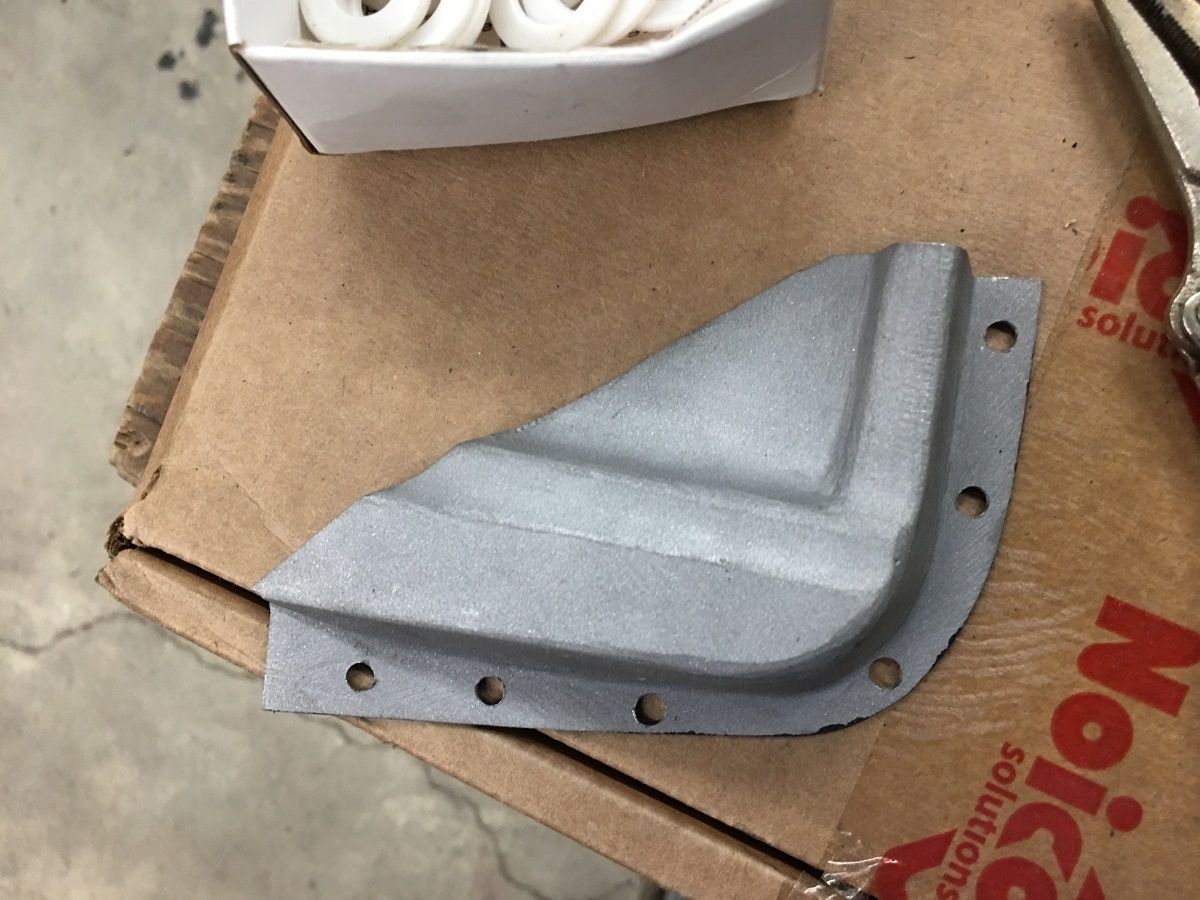
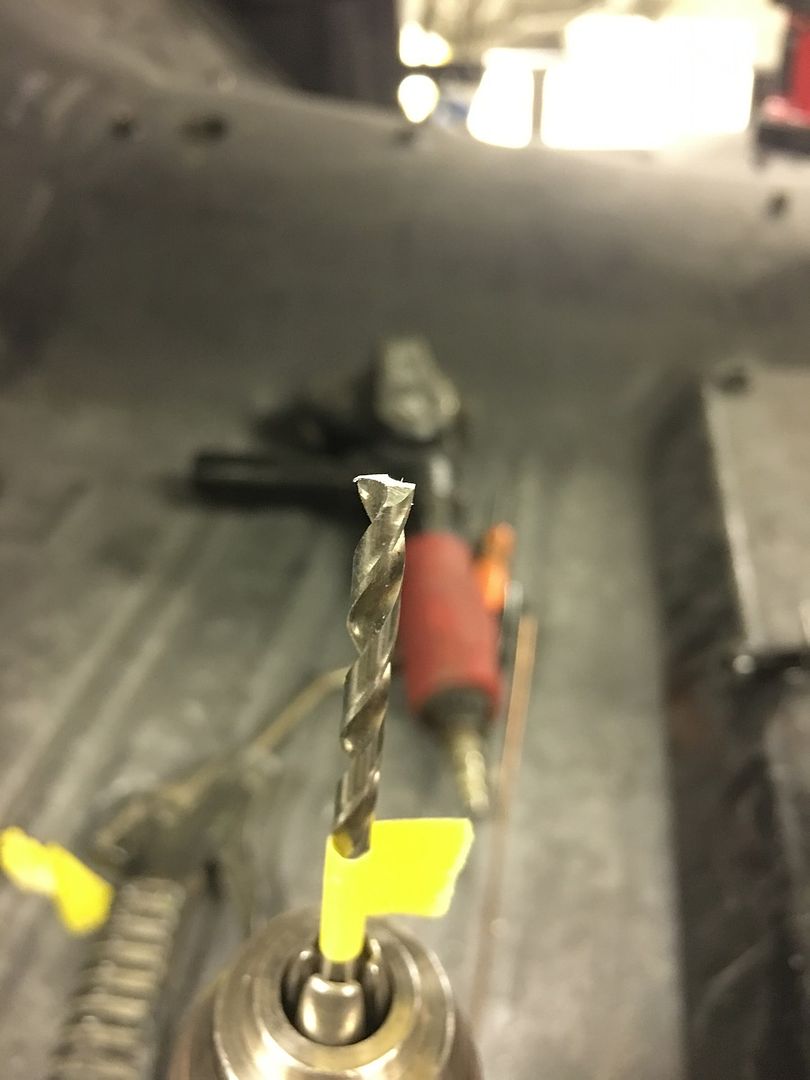
The flange is quite small compared to what we normally plug weld, so we opted for a .169 drill bit to keep the heat away from the edge...
In order to clean he primer out the inside of our plug weld holes, we flattened and backfaced our drill bit to mimic an end mill....
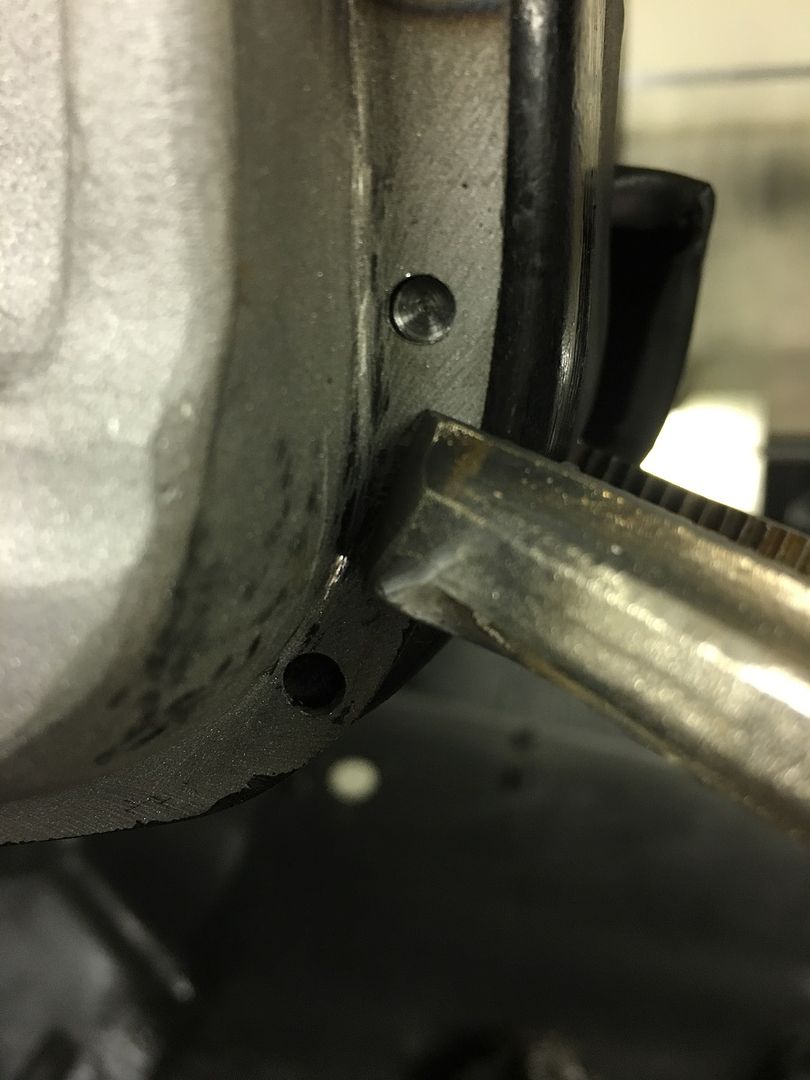
Does a good job of giving us nice clean metal for a good weld..
much better....
https://www.youtube.com/watch?v=T8ajeDMzOJ0
.

great work as always .........
Thanks! This was a good challenge.
Robert, you very obviously can handle about any challenge that pops up when it comes to metal work! We all have to be impressed!
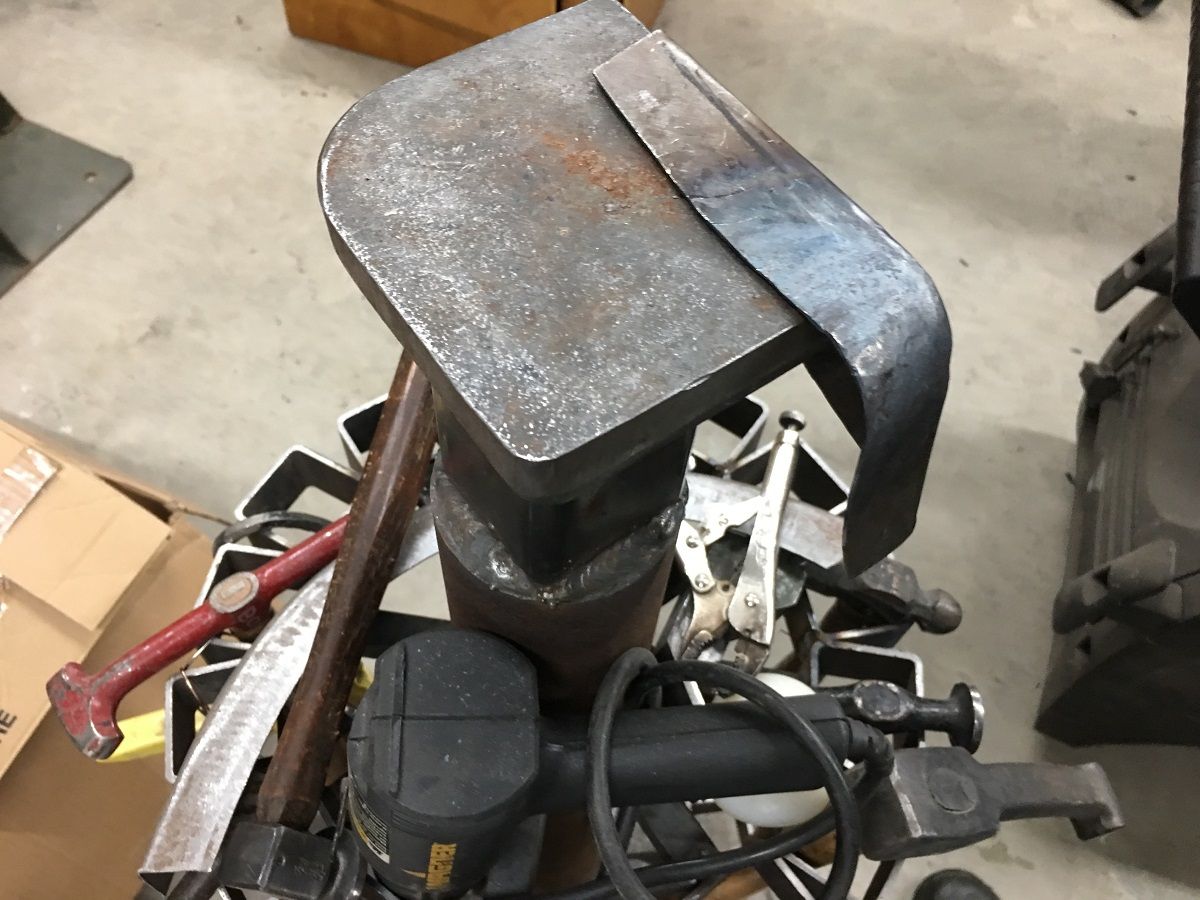
Thanks! Here's some of the forming process of our A-Pillar fabrication that I missed the other day. Did a couple time lapse videos, first shows the shrinking of the corner. The Vise Grip tucking tool, torch, and hammer is used to get the corner to come down about a 20* angle, then the two flanges were folded, which gives us one big tuck. At that point wide VEE is heated up and the high spots of the flange corner is hammered back into itself. Repeat for the next high spot, until the corner is folded where you want it.
https://www.youtube.com/watch?v=jH6lybdj94A
Here's the corner shrink complete...
Then the barrel end hammer is used to make the joggle creases by using an upper die from our press brake as a post dolly. That’s the basic process.
https://www.youtube.com/watch?v=-ZBpjeUw6us
If you find the time lapse too fast, you can change playback speed on YouTube to slow things down a bit..
.
.

That looks like it was a challenge. I would have had to make it from multiple pieces for sure!!
Great job as usual.
Thanks!!
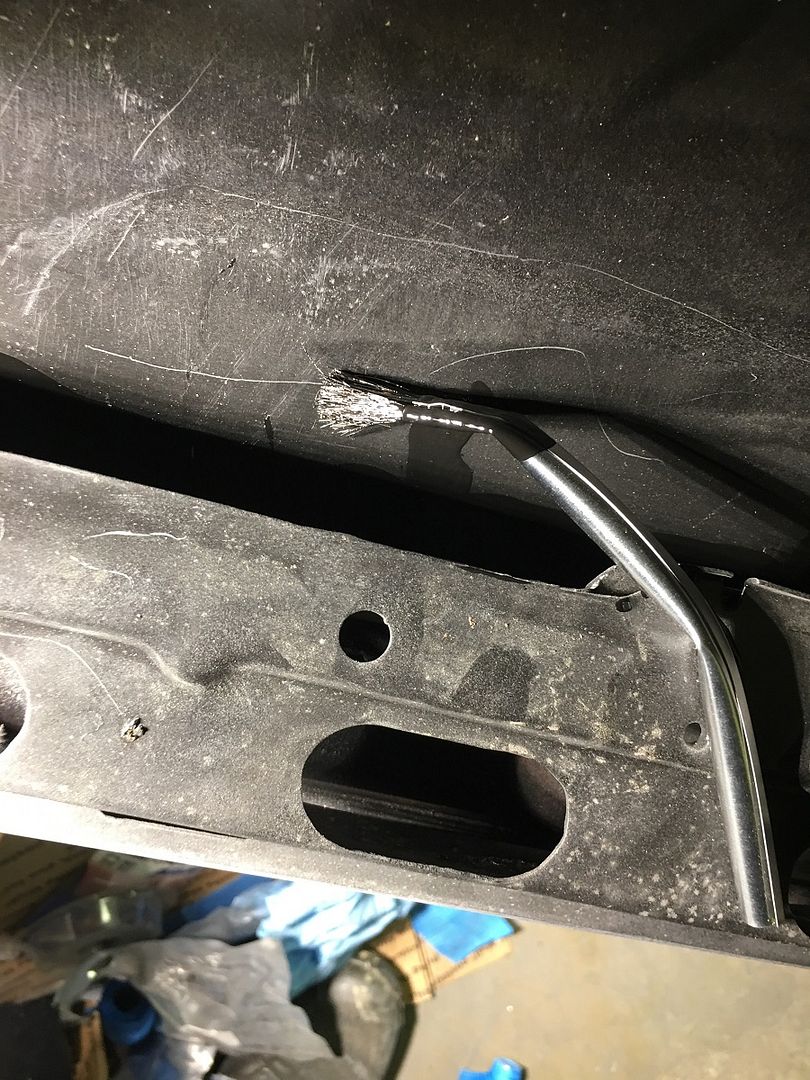
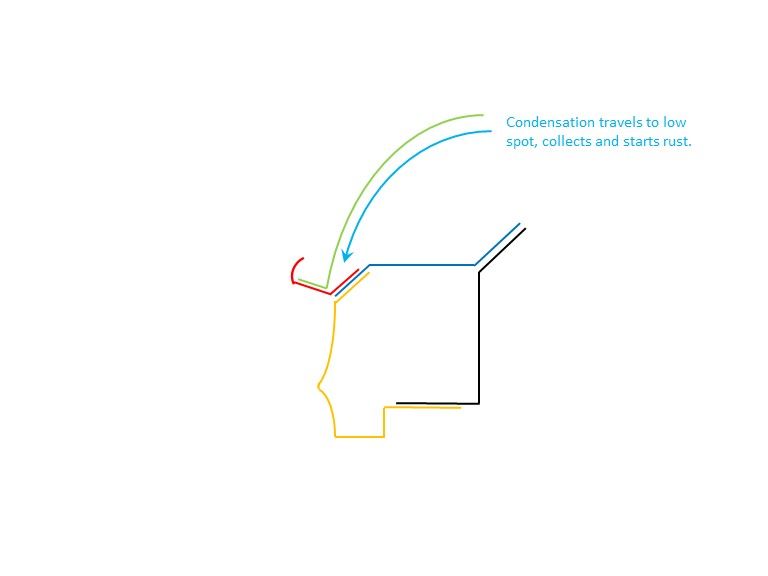
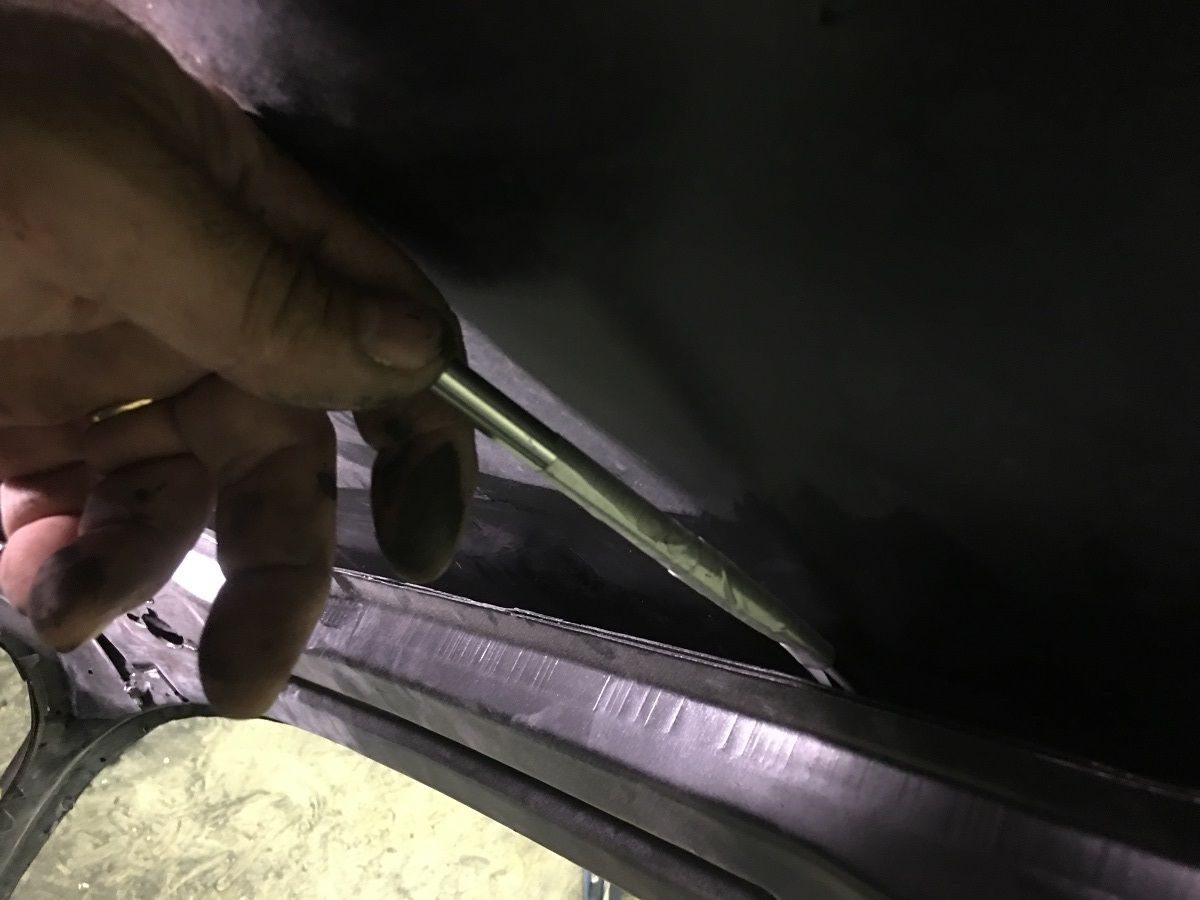
Today we worked on some rust prevention up inside the roof. This is between the roof skin and the perimeter structure just above the windows.
The car was rolled on it's side and SPI epoxy poured into the area, acid brush was used to cover everything we could..
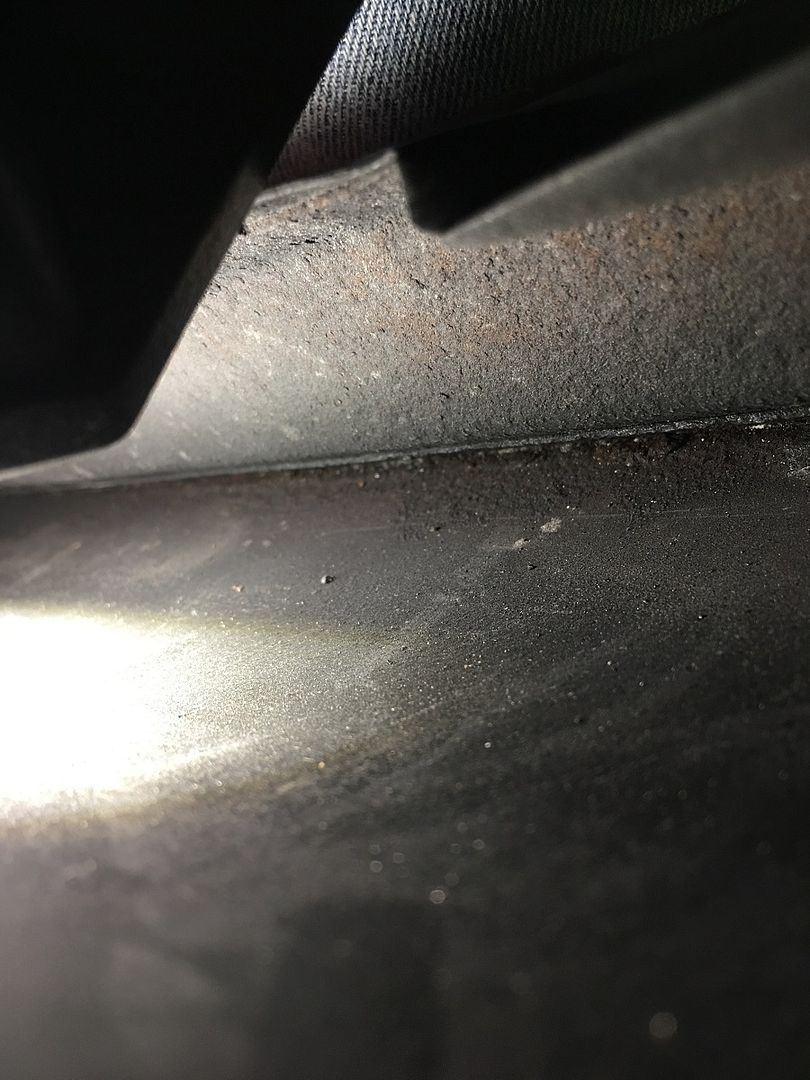
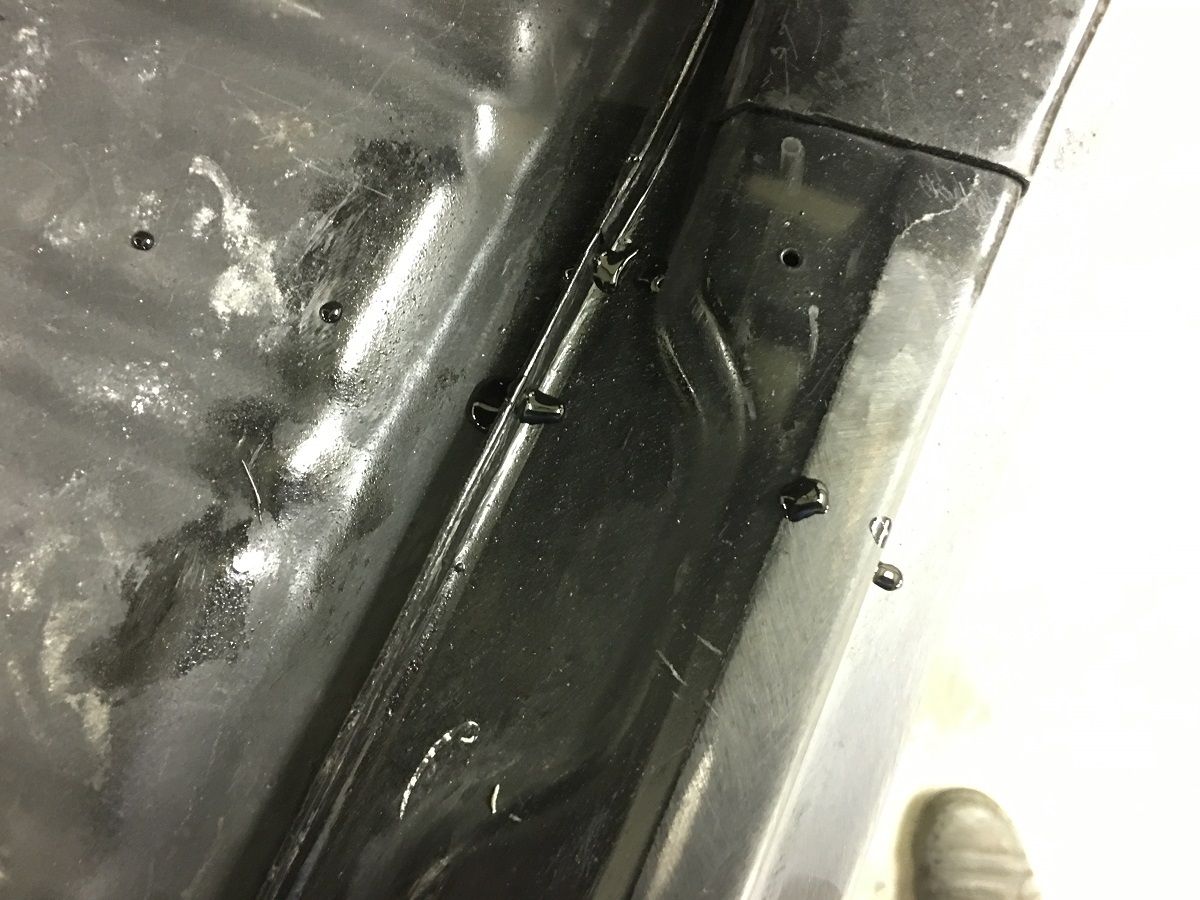
Once the entire passenger side had been flooded around to the liftgate hinge, we rolled the car right side up again. It wasn't long that we had paint dripping on the top of the rocker panel.. It was running down inside the A Pillar and running out the bottom of the dogleg. This is a good indicator of exactly where the roof condensation runs to when it reaches the A Pillar, and why we had rust issues there.
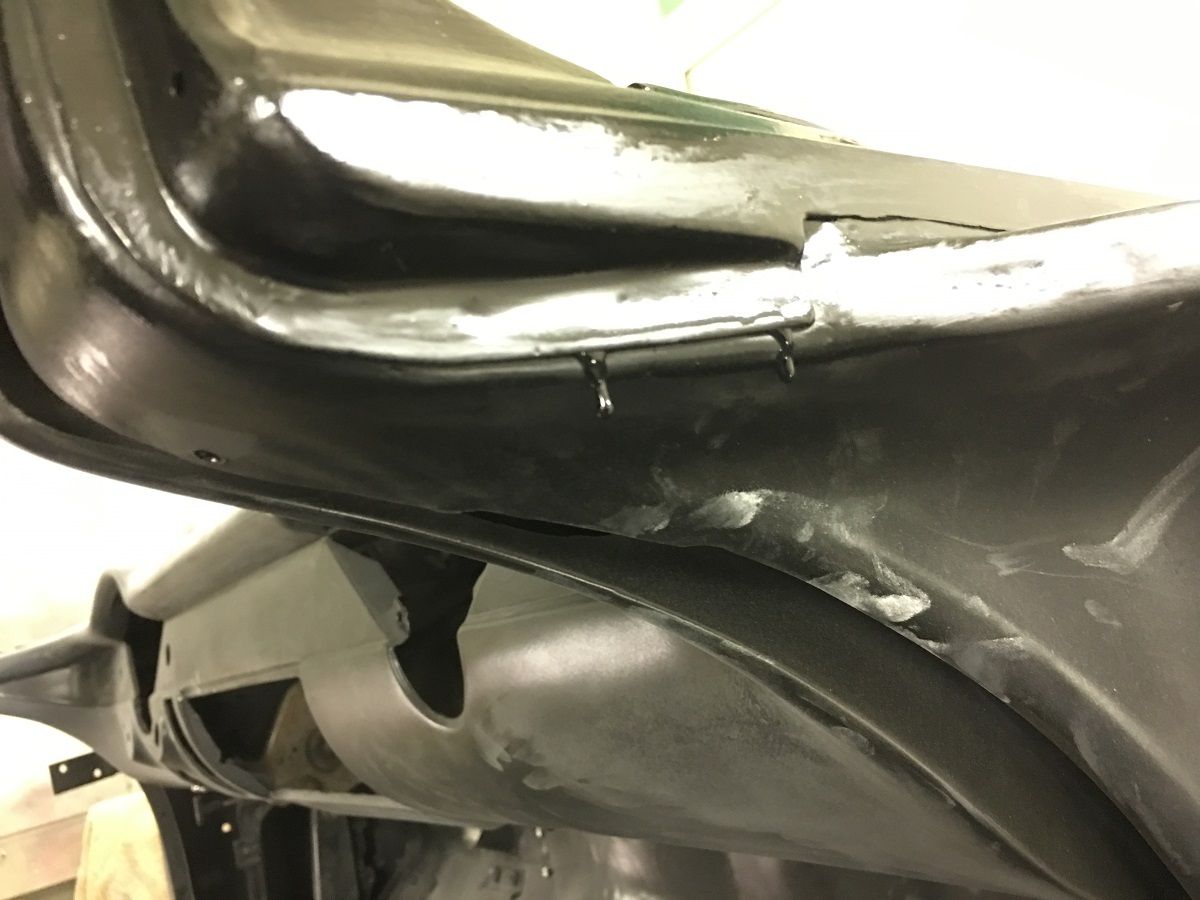
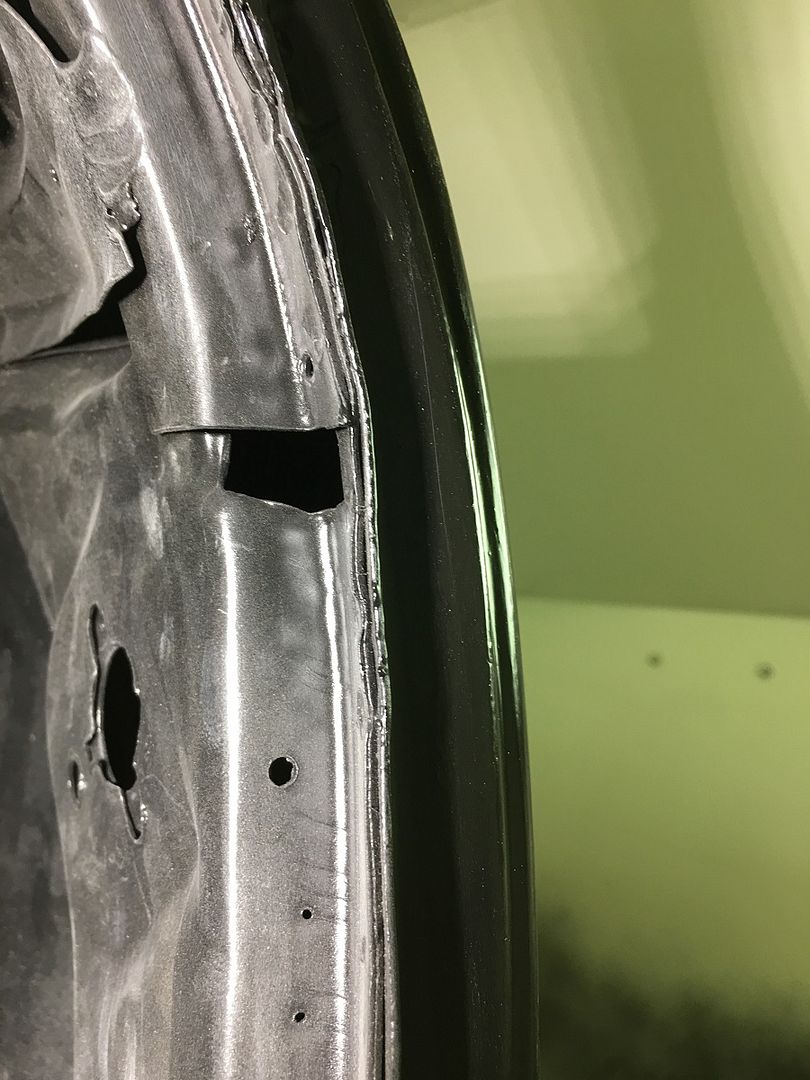
Here's a picture of when we opened the roof for rust repair, showing what the condensation did for us..
So our primer is sealing the joint between the roof skin and the structure.. We found an opening above the windshield that would help us to flood the front seam....
We opened up an acid brush to form a funnel, and poured SPI Epoxy in the area..
A puddle out of the A Pillar dogleg shows we have good flow through the windshield...
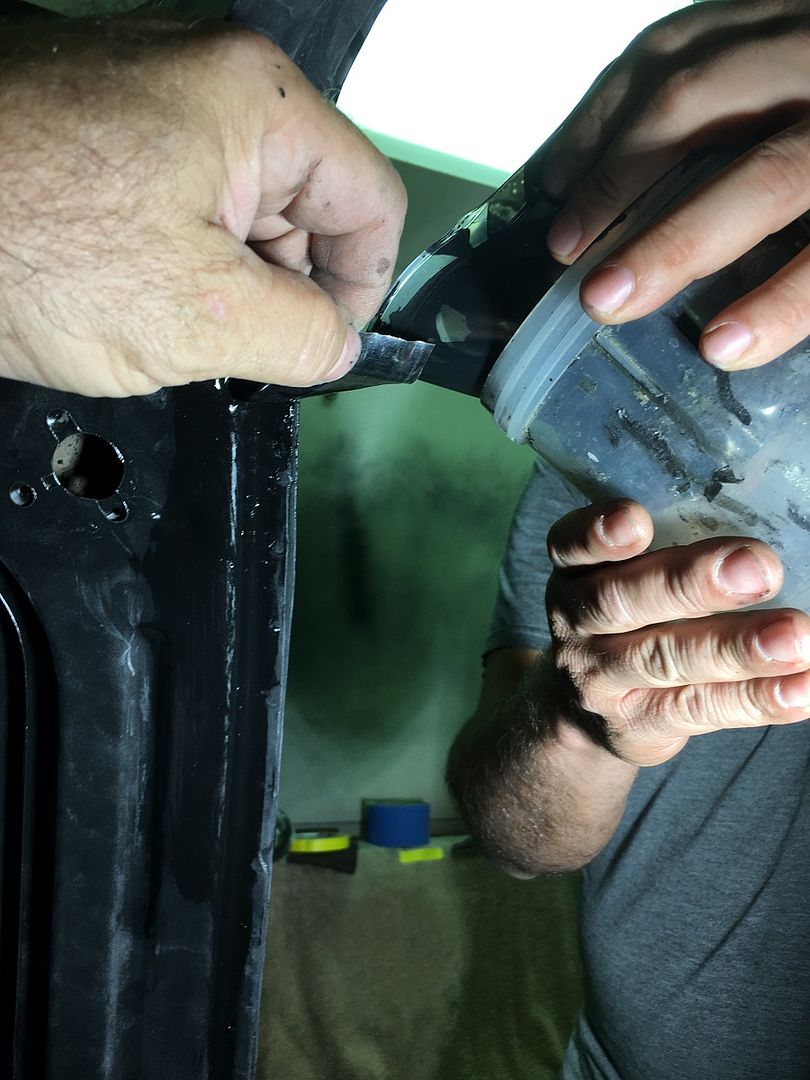
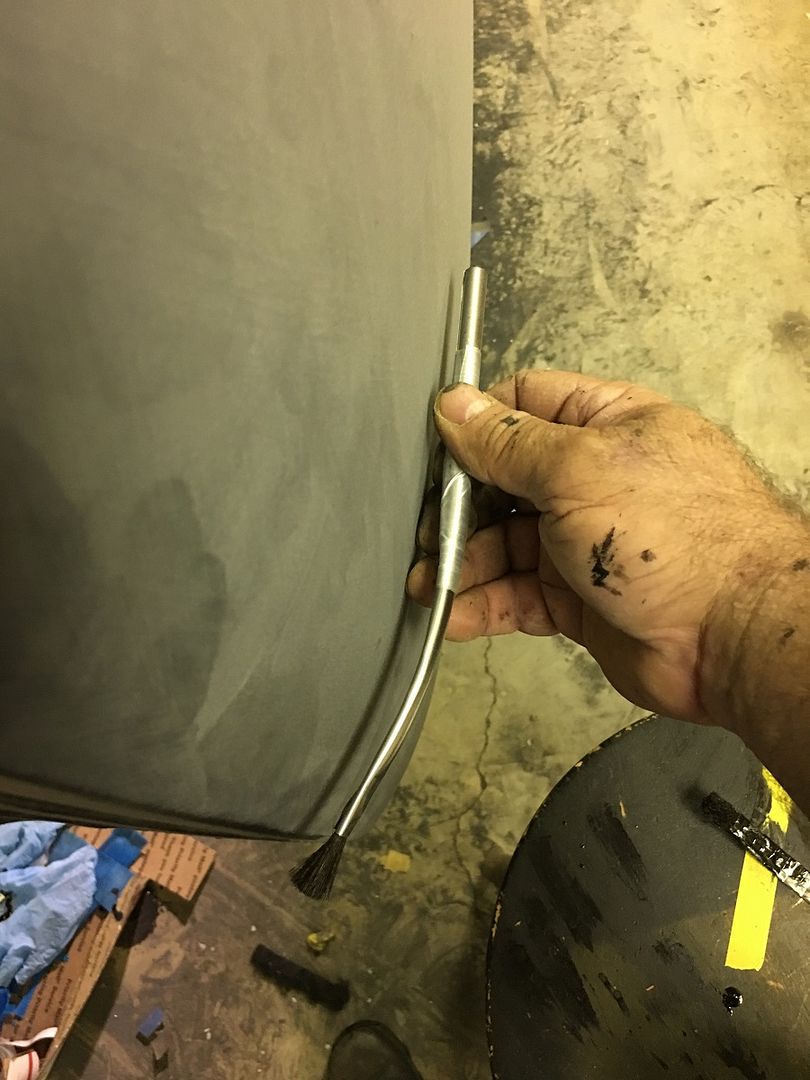
To insure everything was covered above the windshield header, we joined two acid brushes for an extended reach over the header, and bent to match the roof skin profile....
 Posting Permissions

 Reply With Quote