Nice Robert! If I ever get to do another project, it's going to be with a one-step primer like SPI or the high-build that my painter uses for the $1M+ cars he does. The 3-step process I used was a PITA.


Nice Robert! If I ever get to do another project, it's going to be with a one-step primer like SPI or the high-build that my painter uses for the $1M+ cars he does. The 3-step process I used was a PITA.
56 Nomad, Ramjet 502, Viper 6-speed T56, C4 Corvette front and rear suspension
Other vehicles:
56 Chevy 2-door BelAir sedan
56 Chevy 210 4-door sedan
57 Chevy 210 4-door sedan
1962 327/340HP Corvette
1961 Willys CJ3B Jeep
2001 Porsche Boxster S
2003 Chevy Silverado 2500 HD Duramax
2019 GMC Sierra Denali Duramax

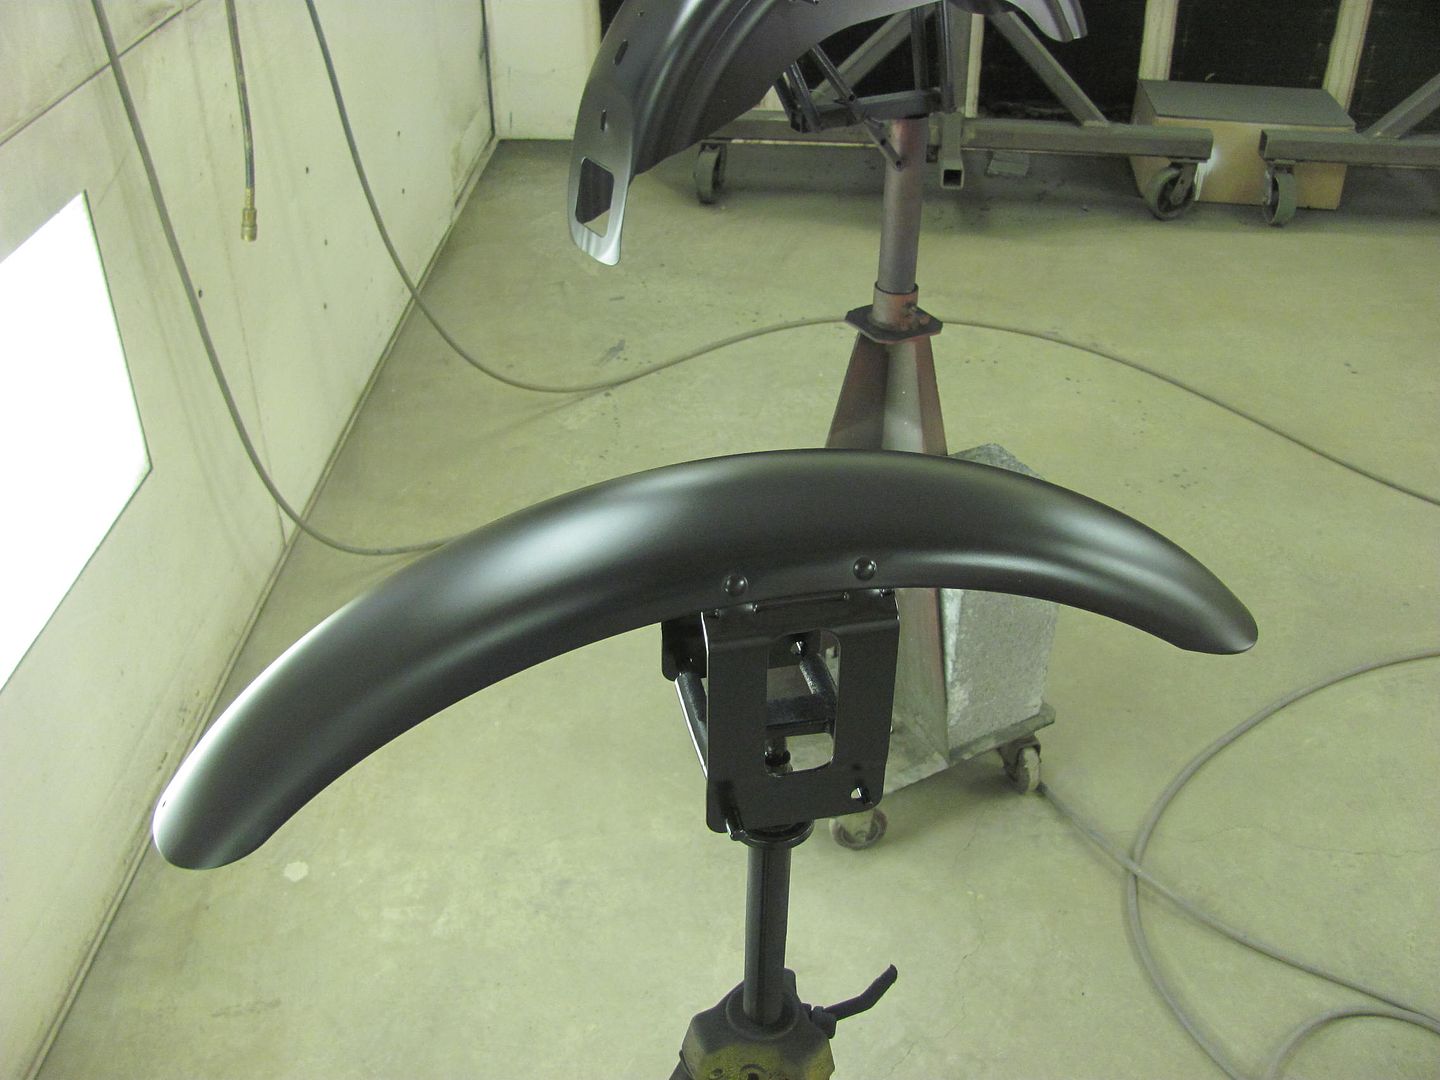
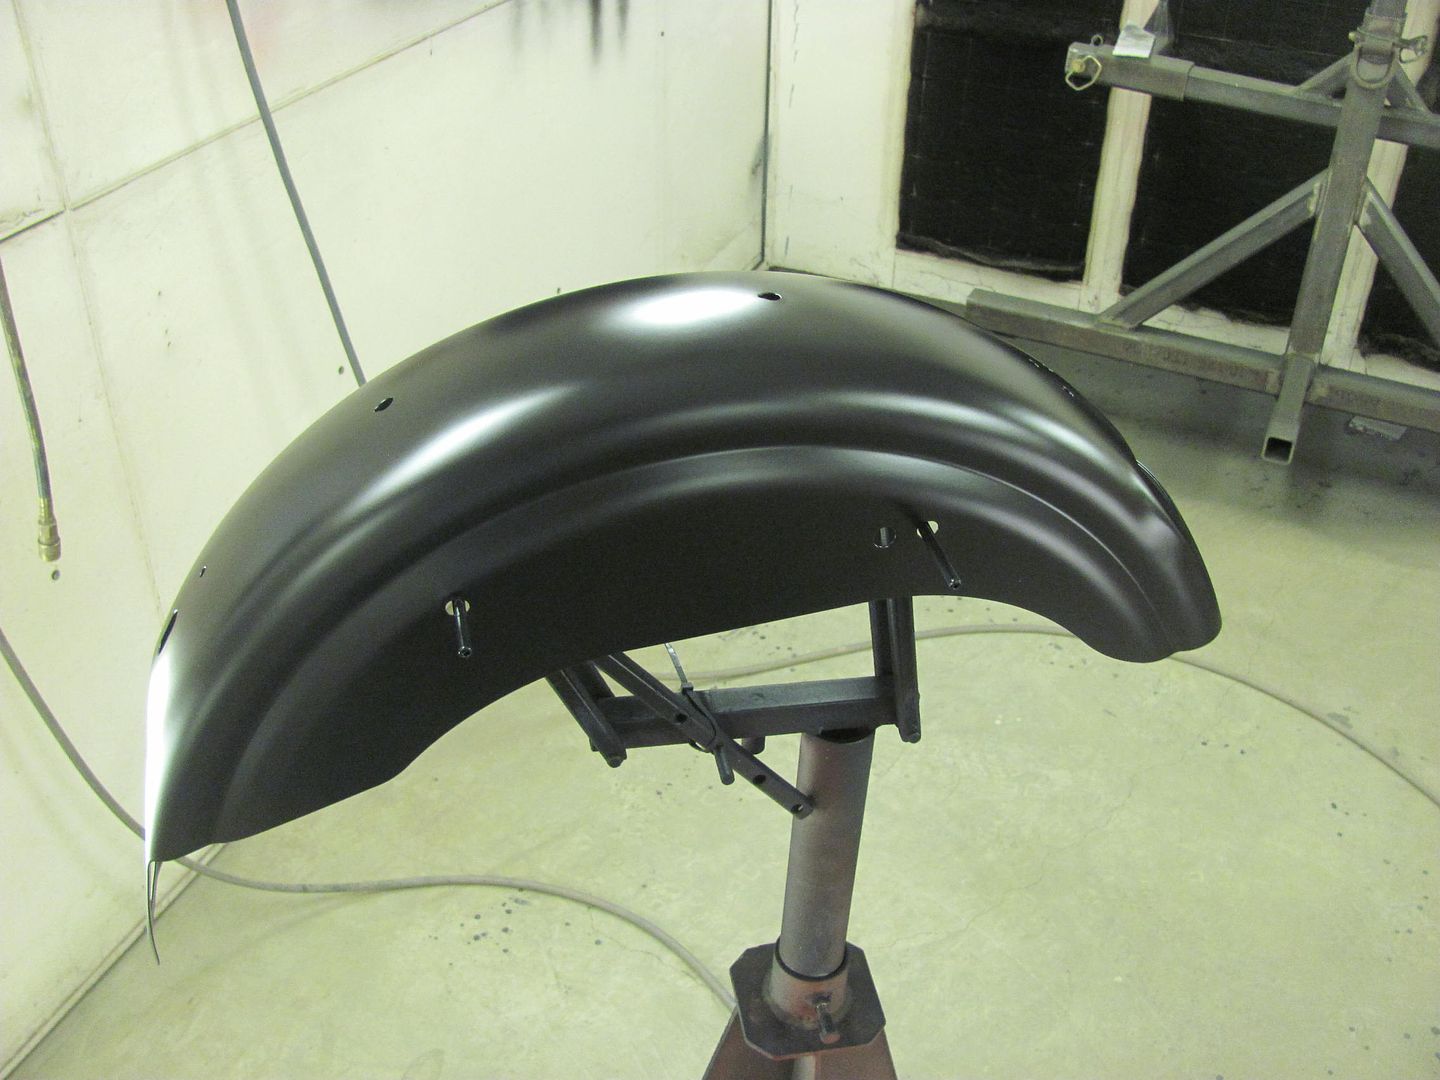
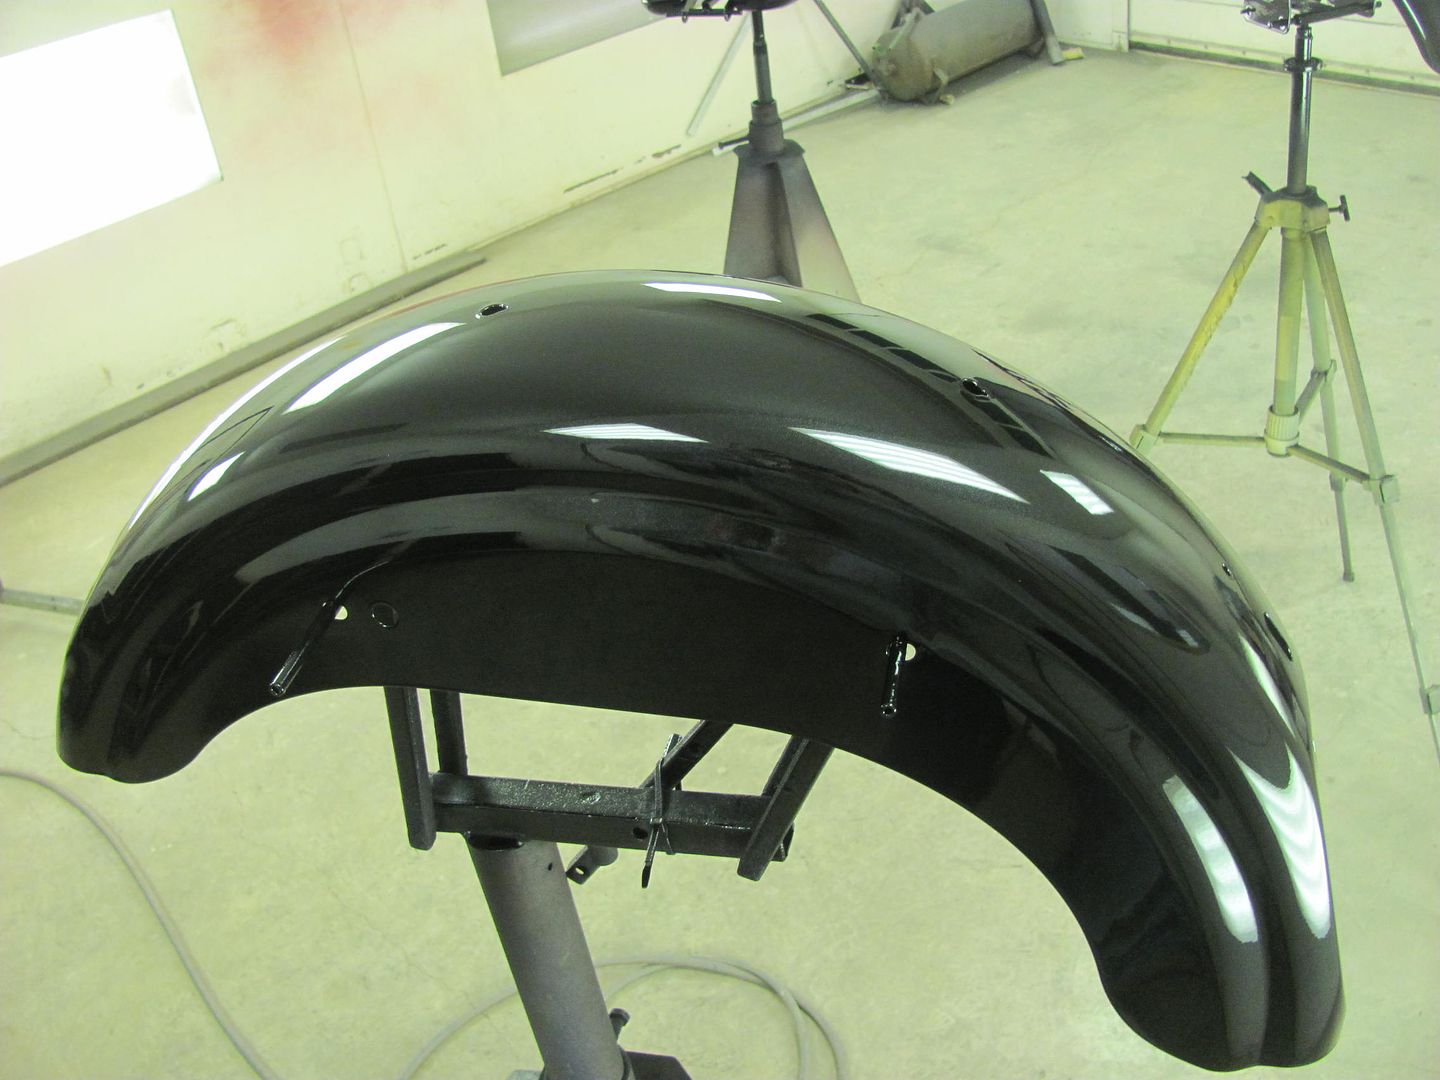
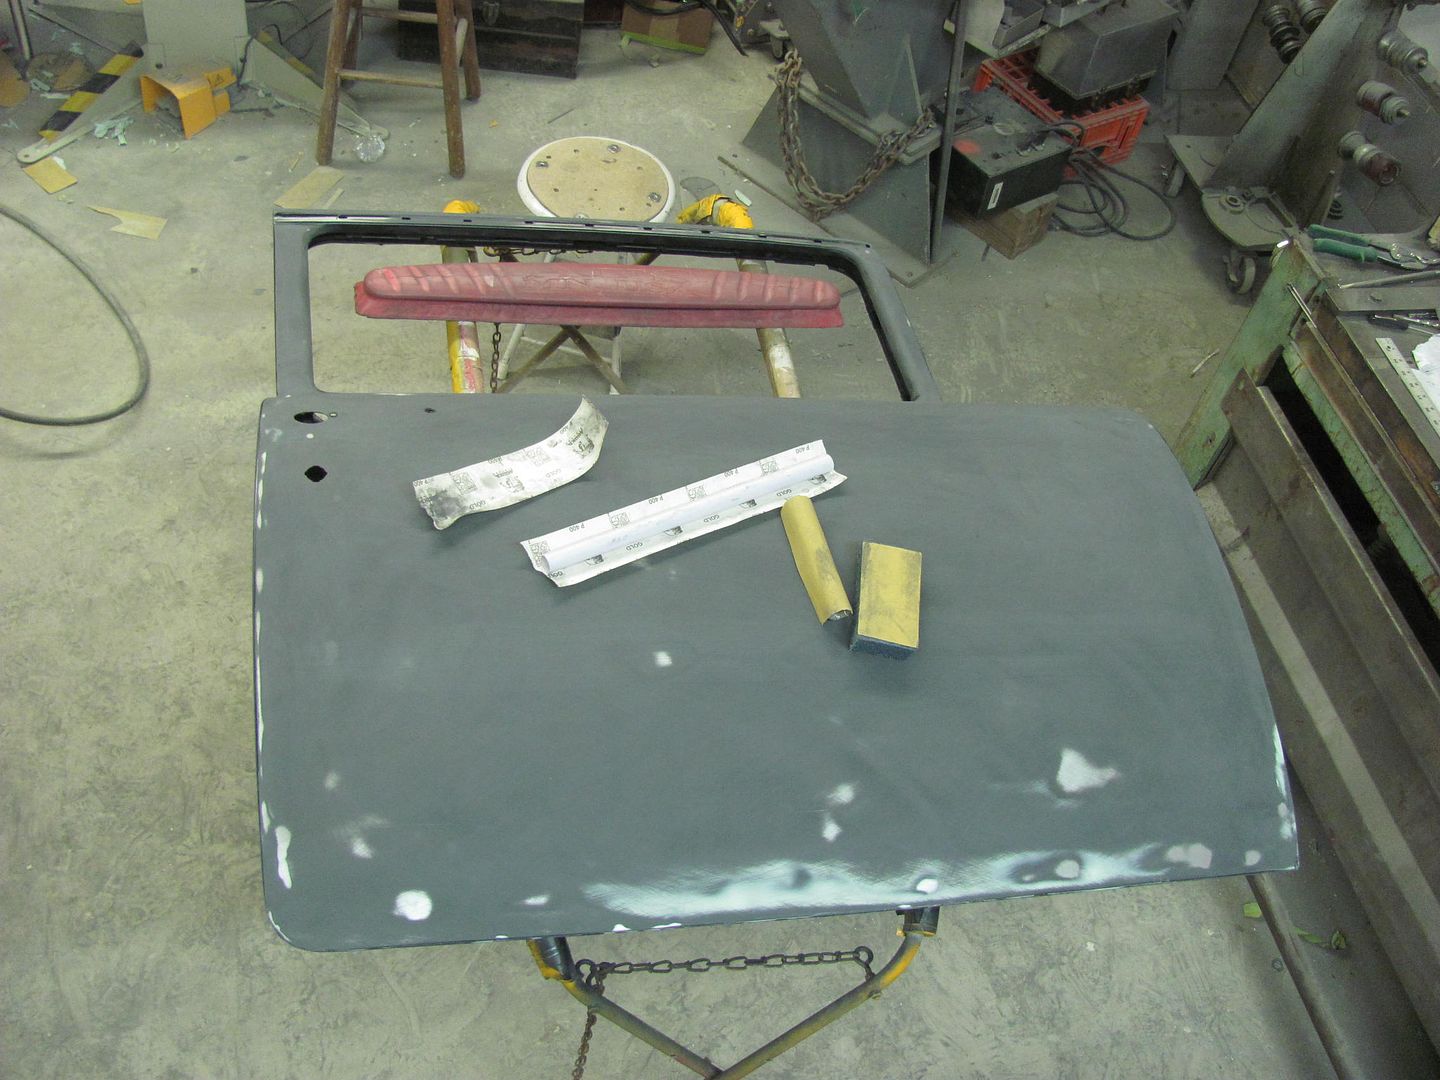
Wet sanded with 600
SPI Epoxy seal coat
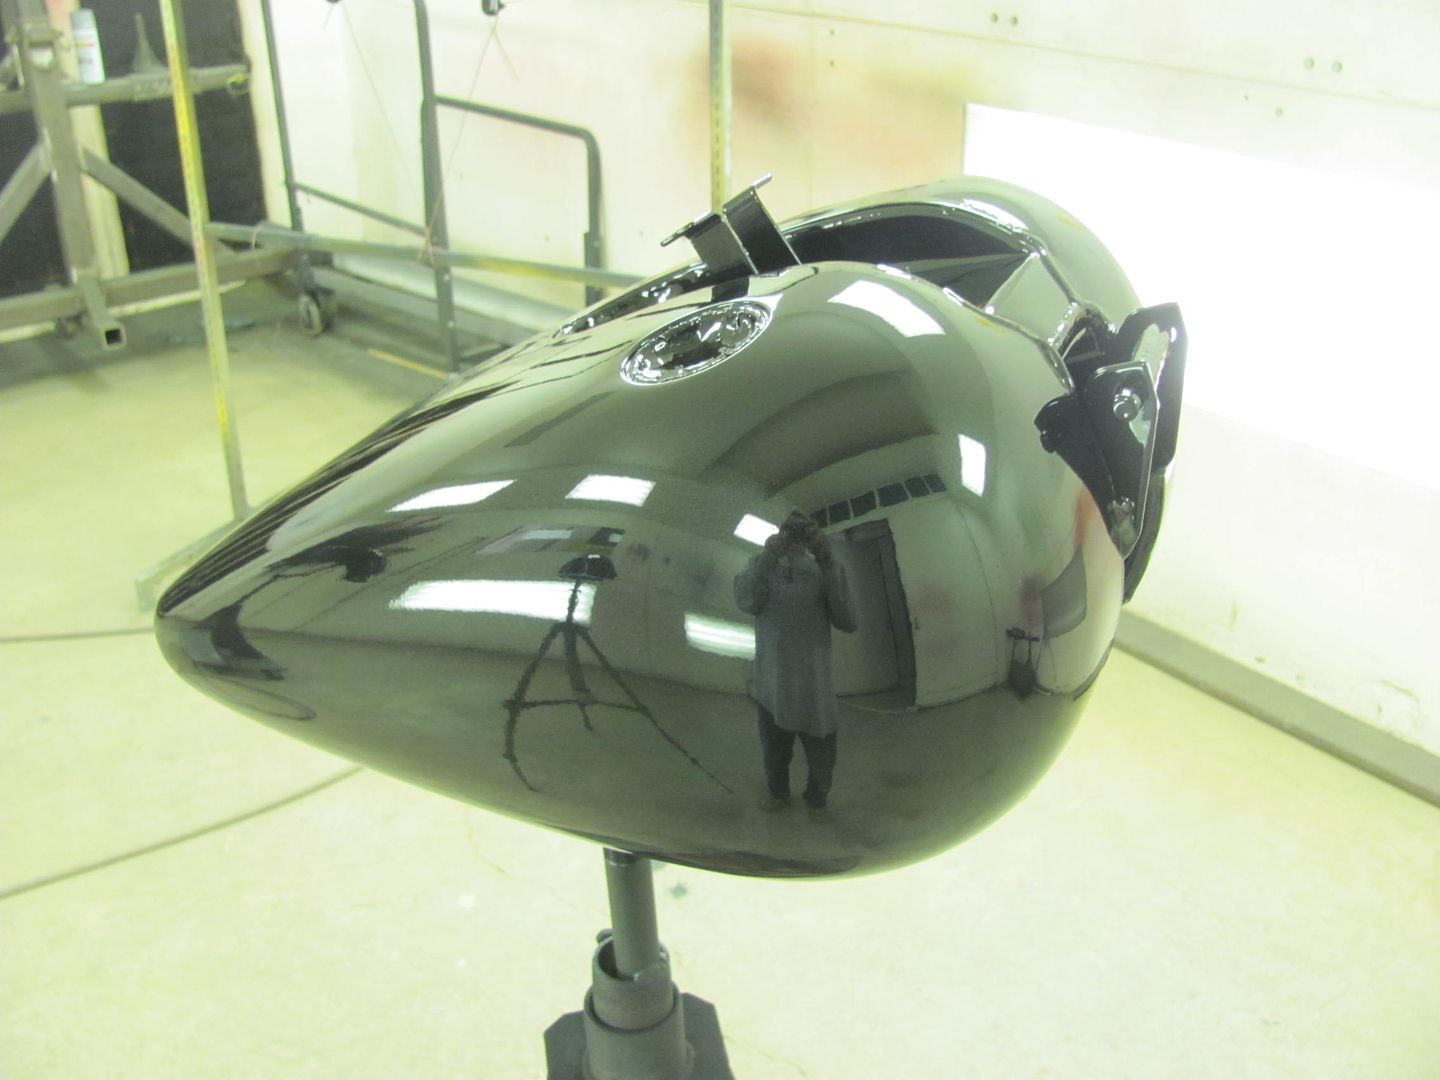
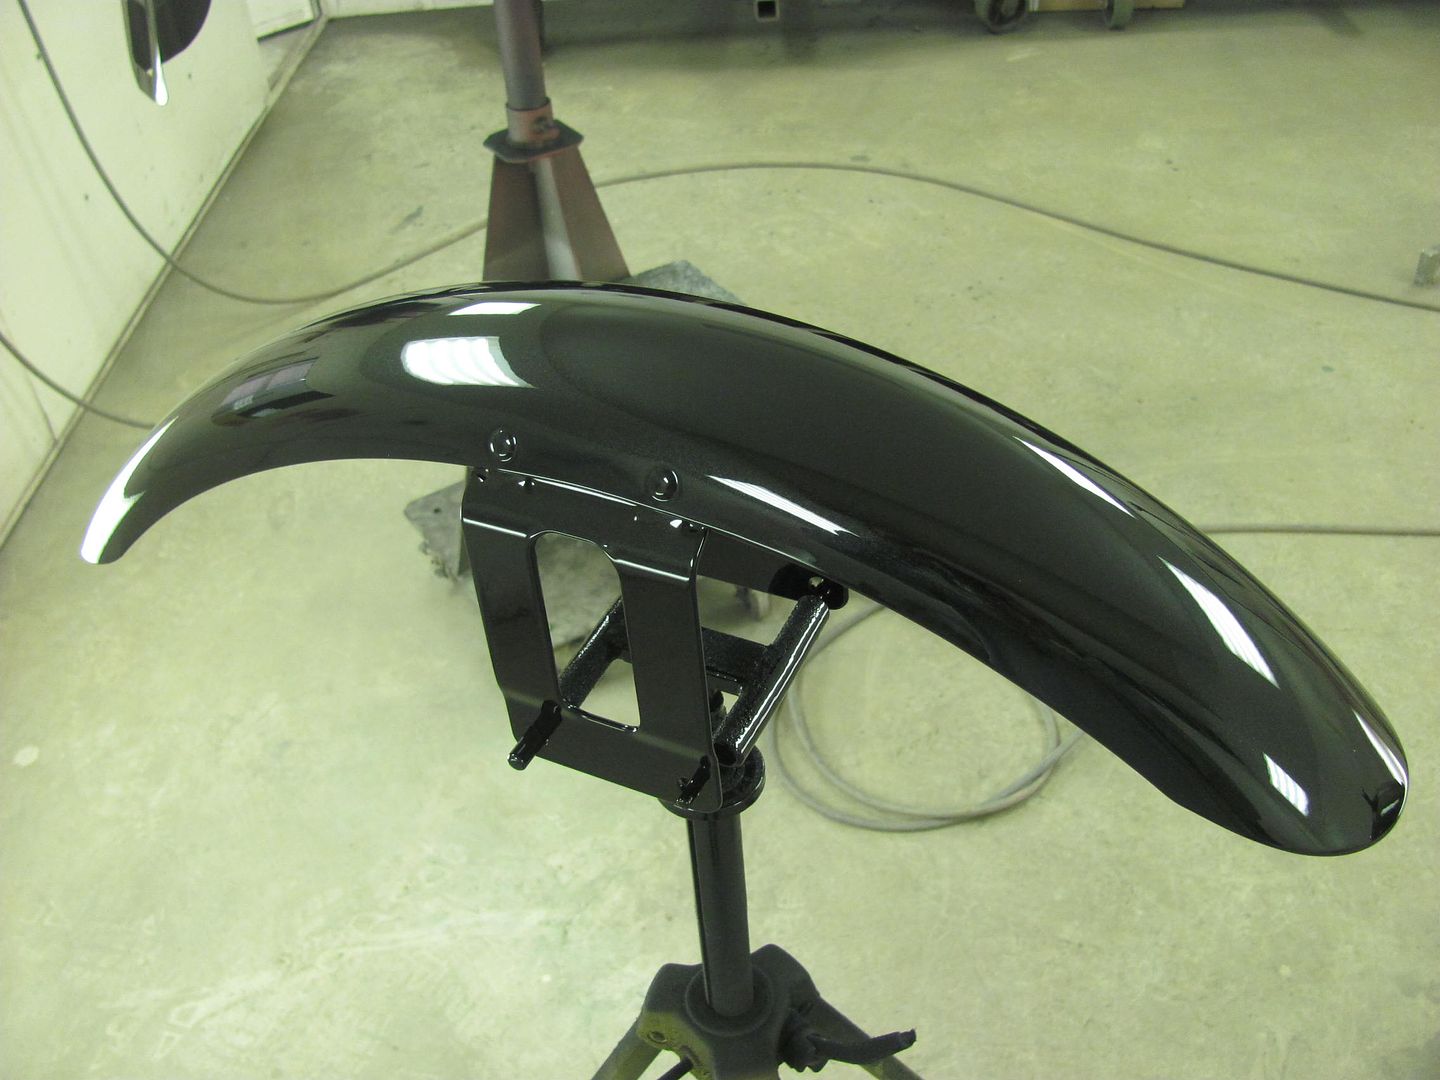
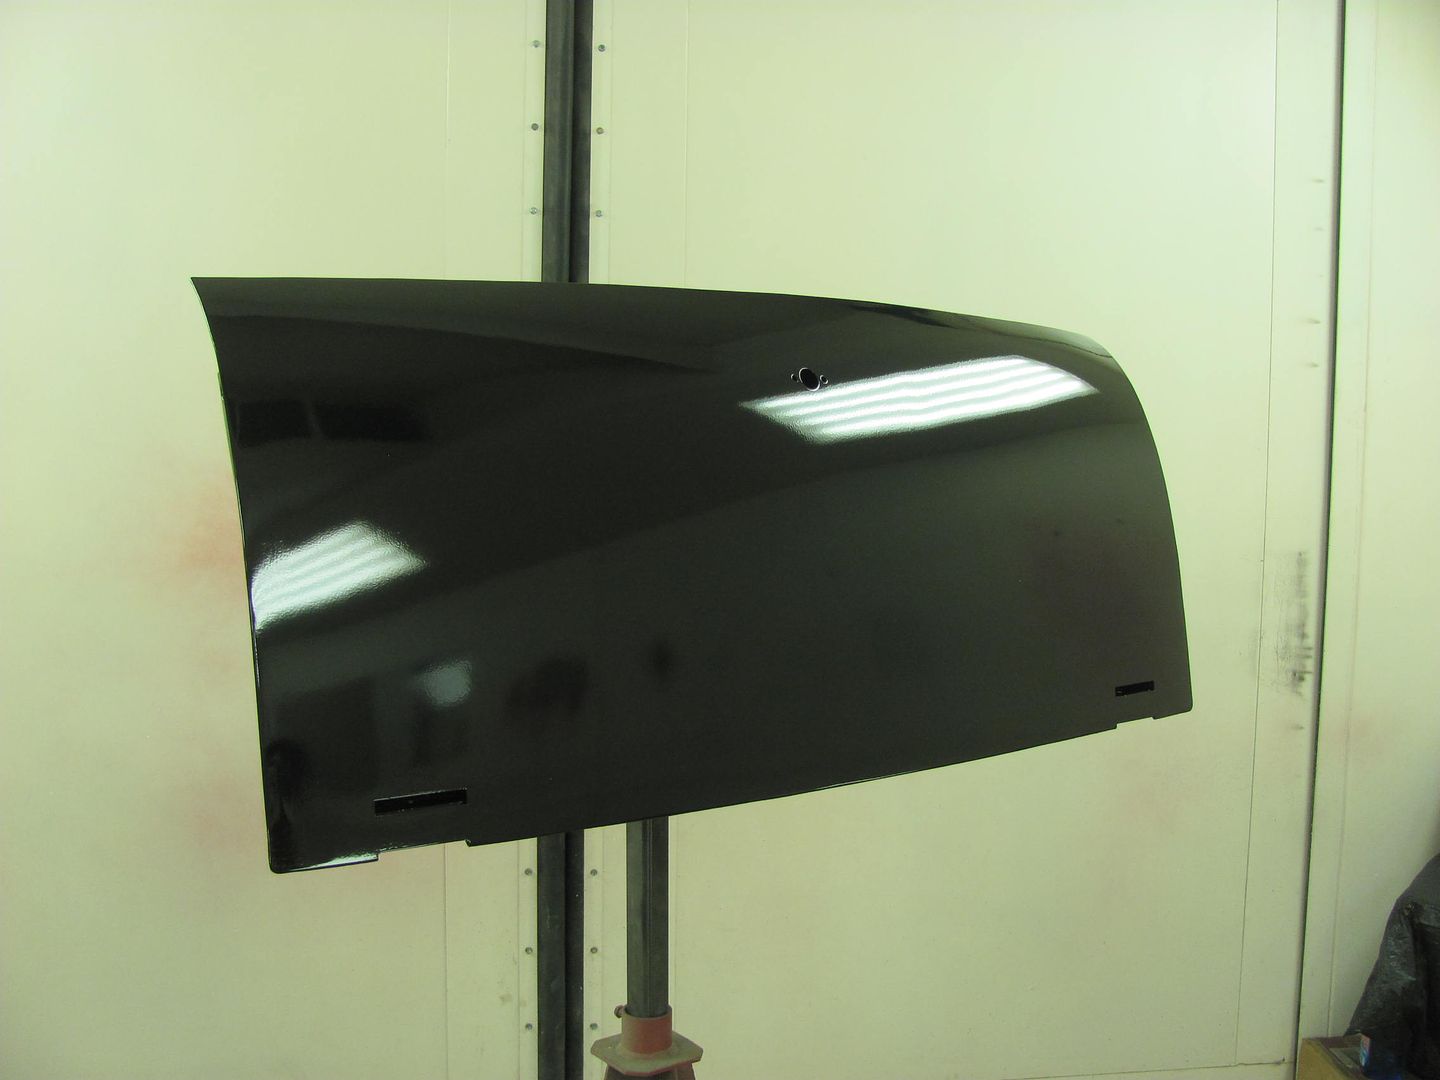
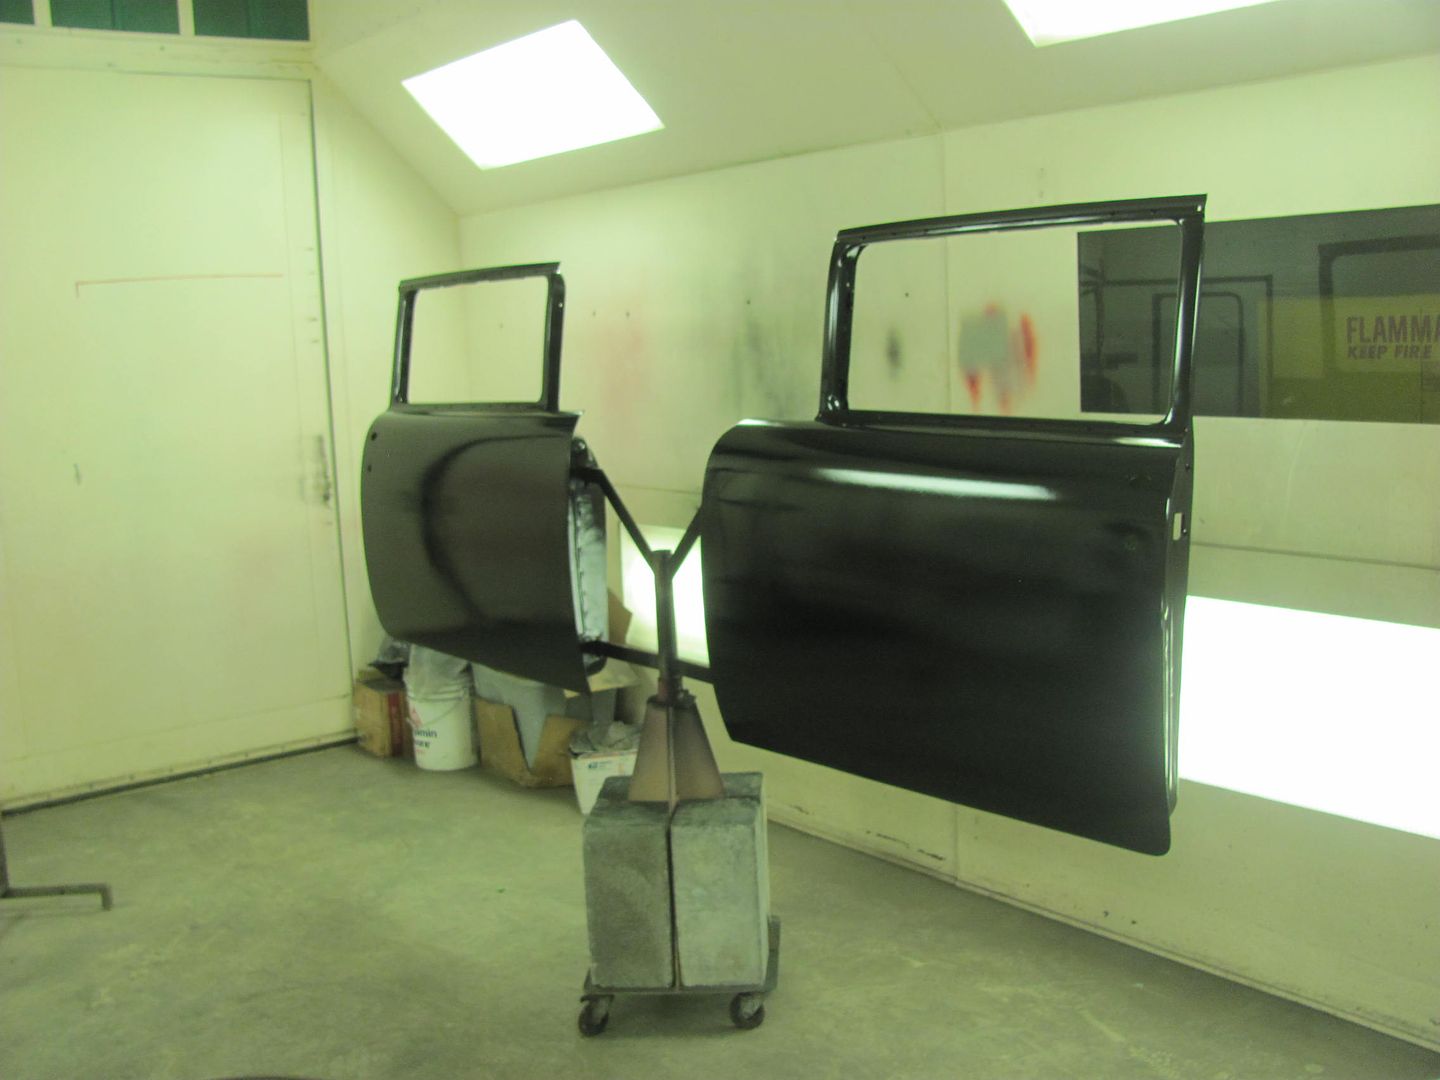
Dupont Cromax Black Diamond and clear
Well, we had gotten some more sanding done......
.....and since it was still early in the evening, mixed up some more epoxy....
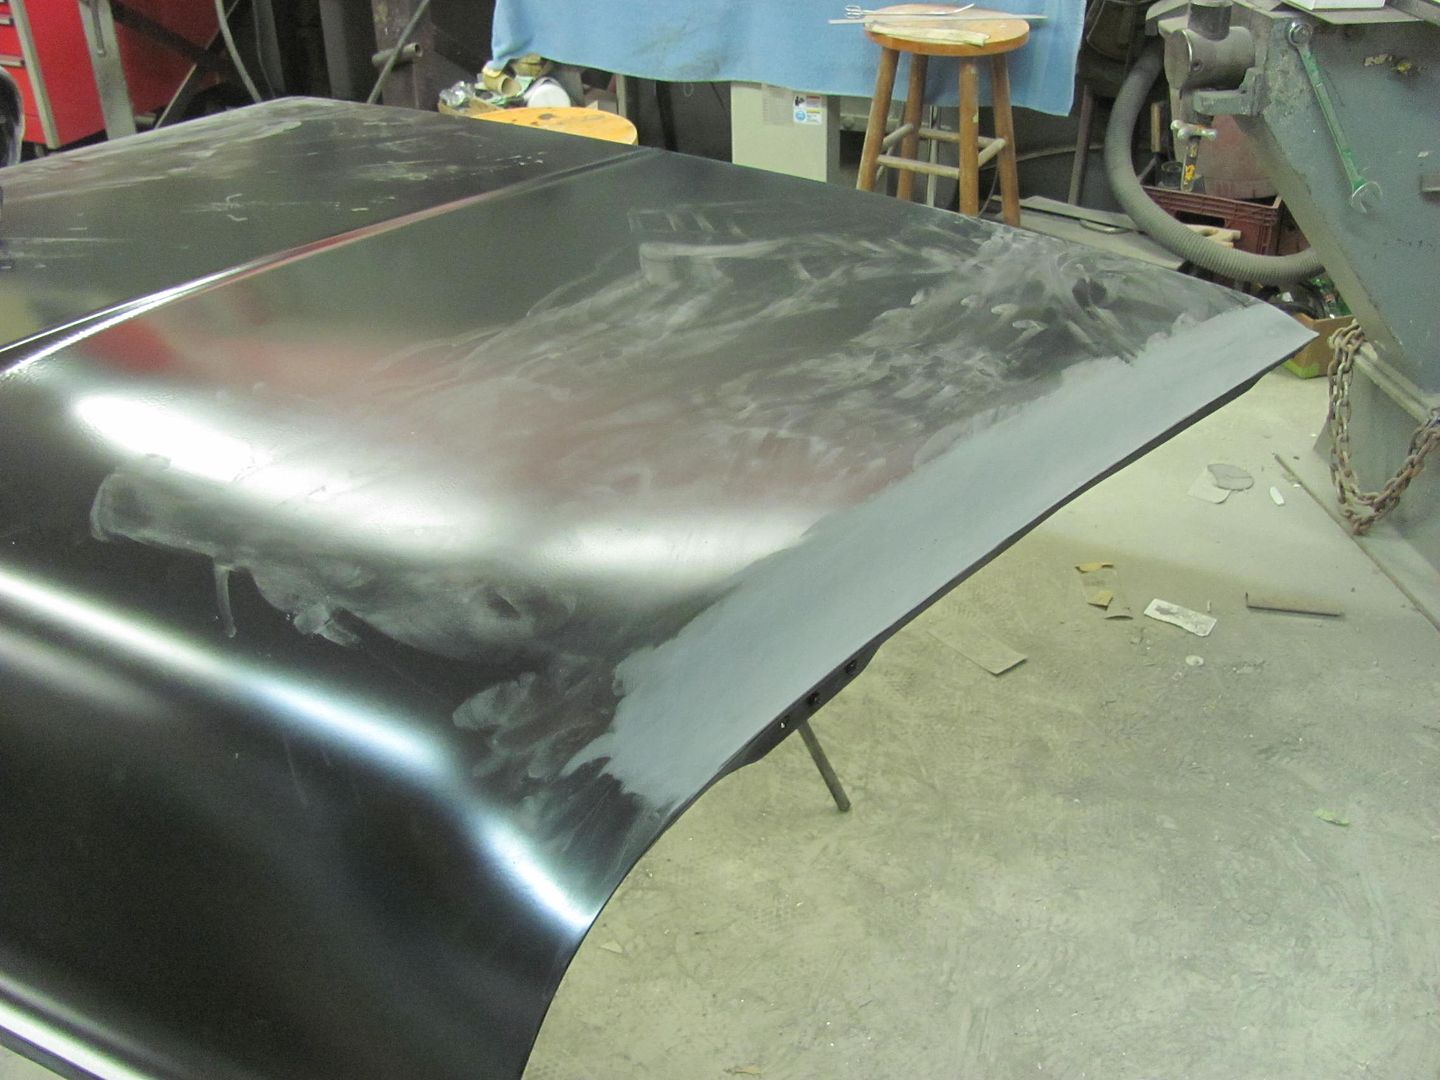
Doesn't seem like much to show, we're still sanding away....
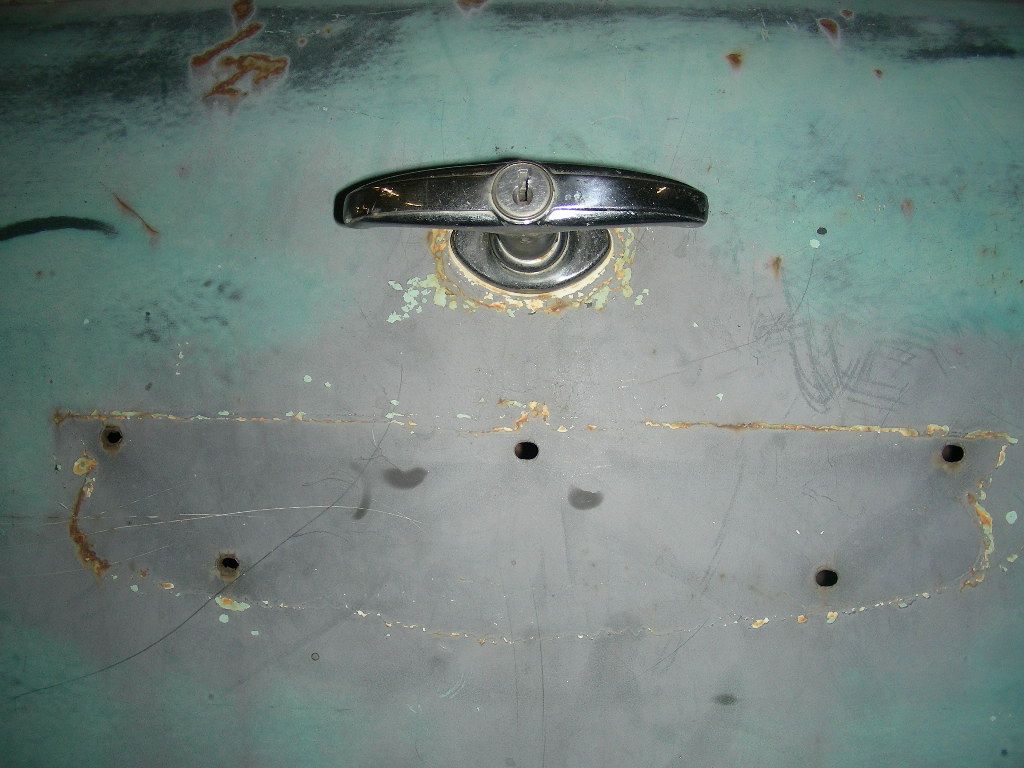
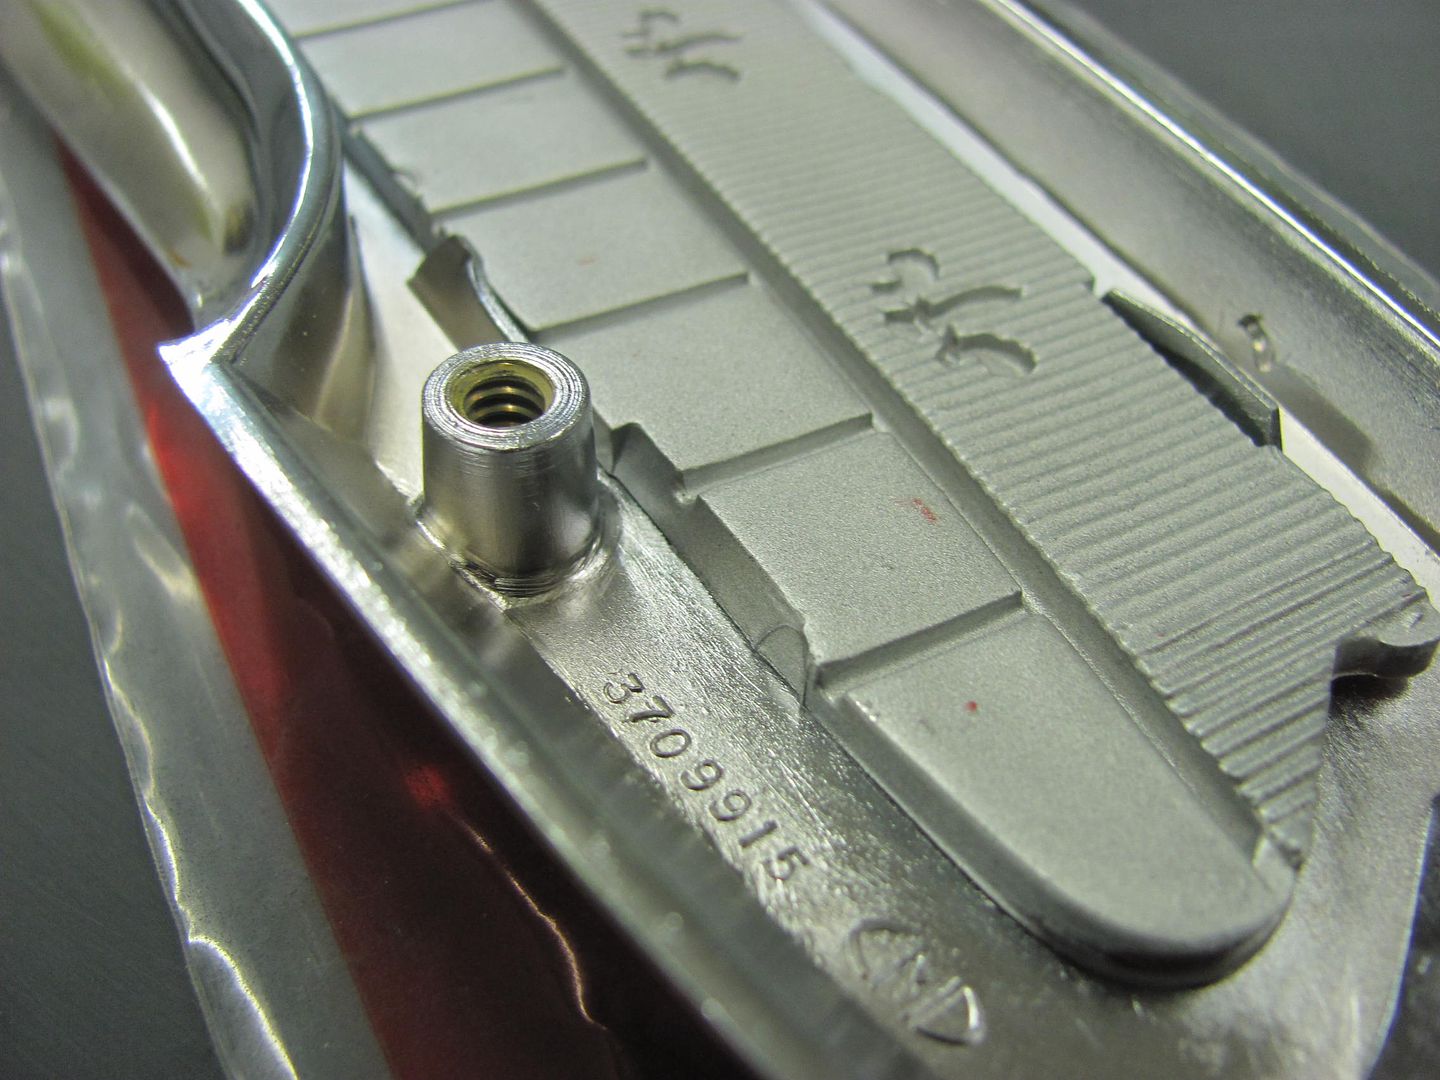
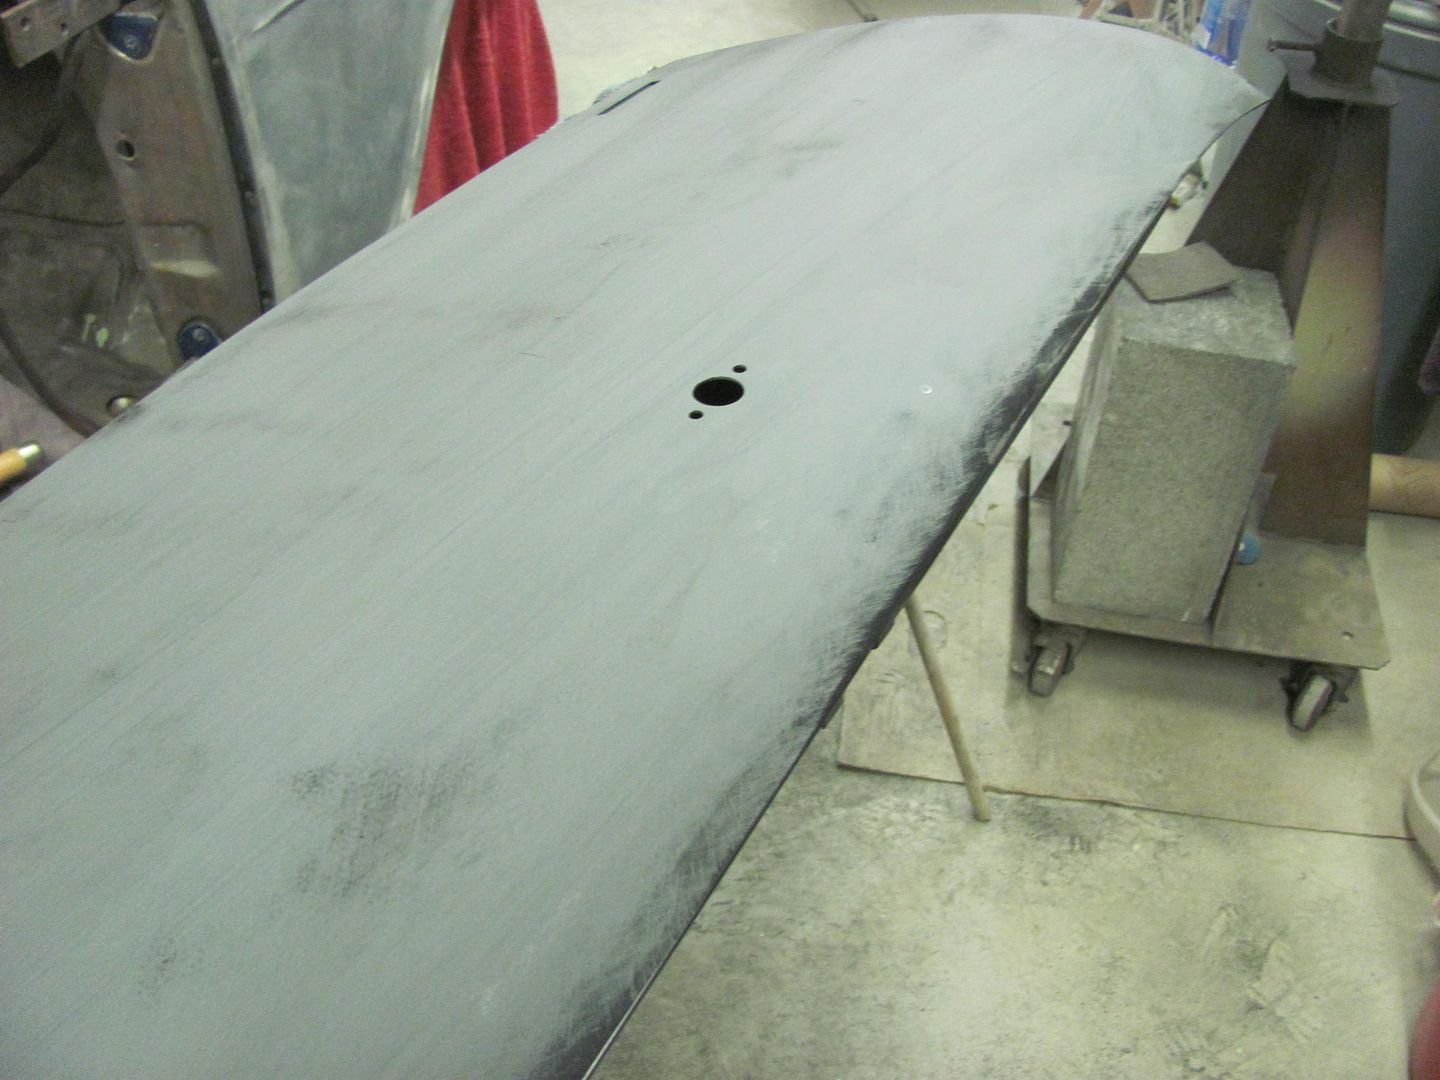
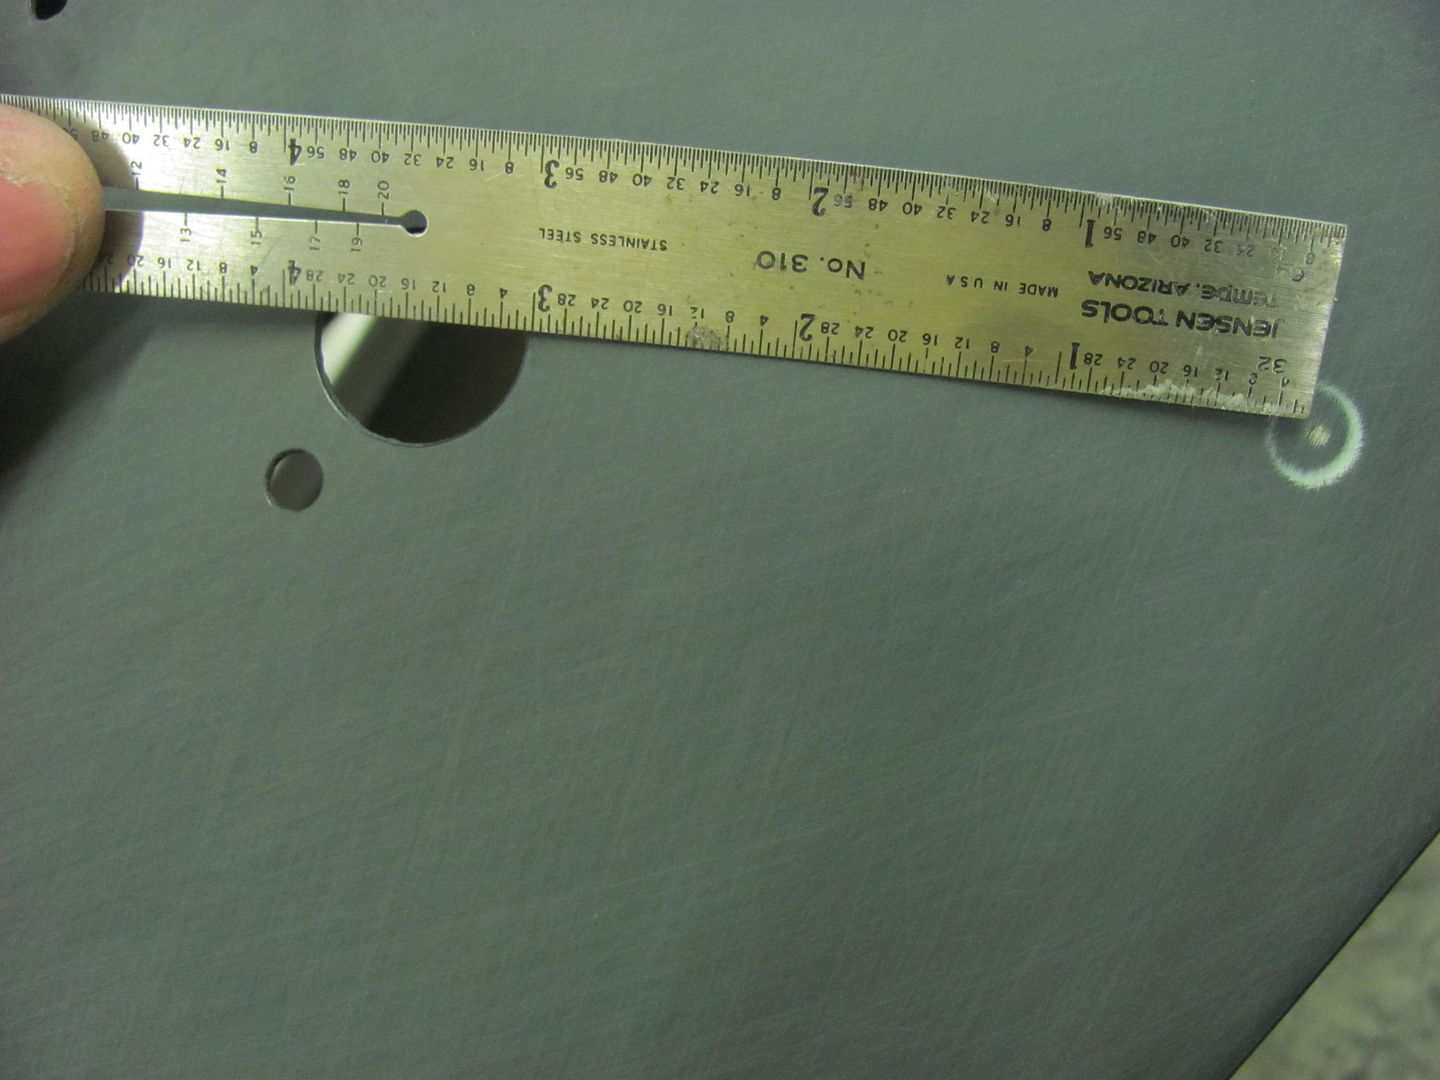
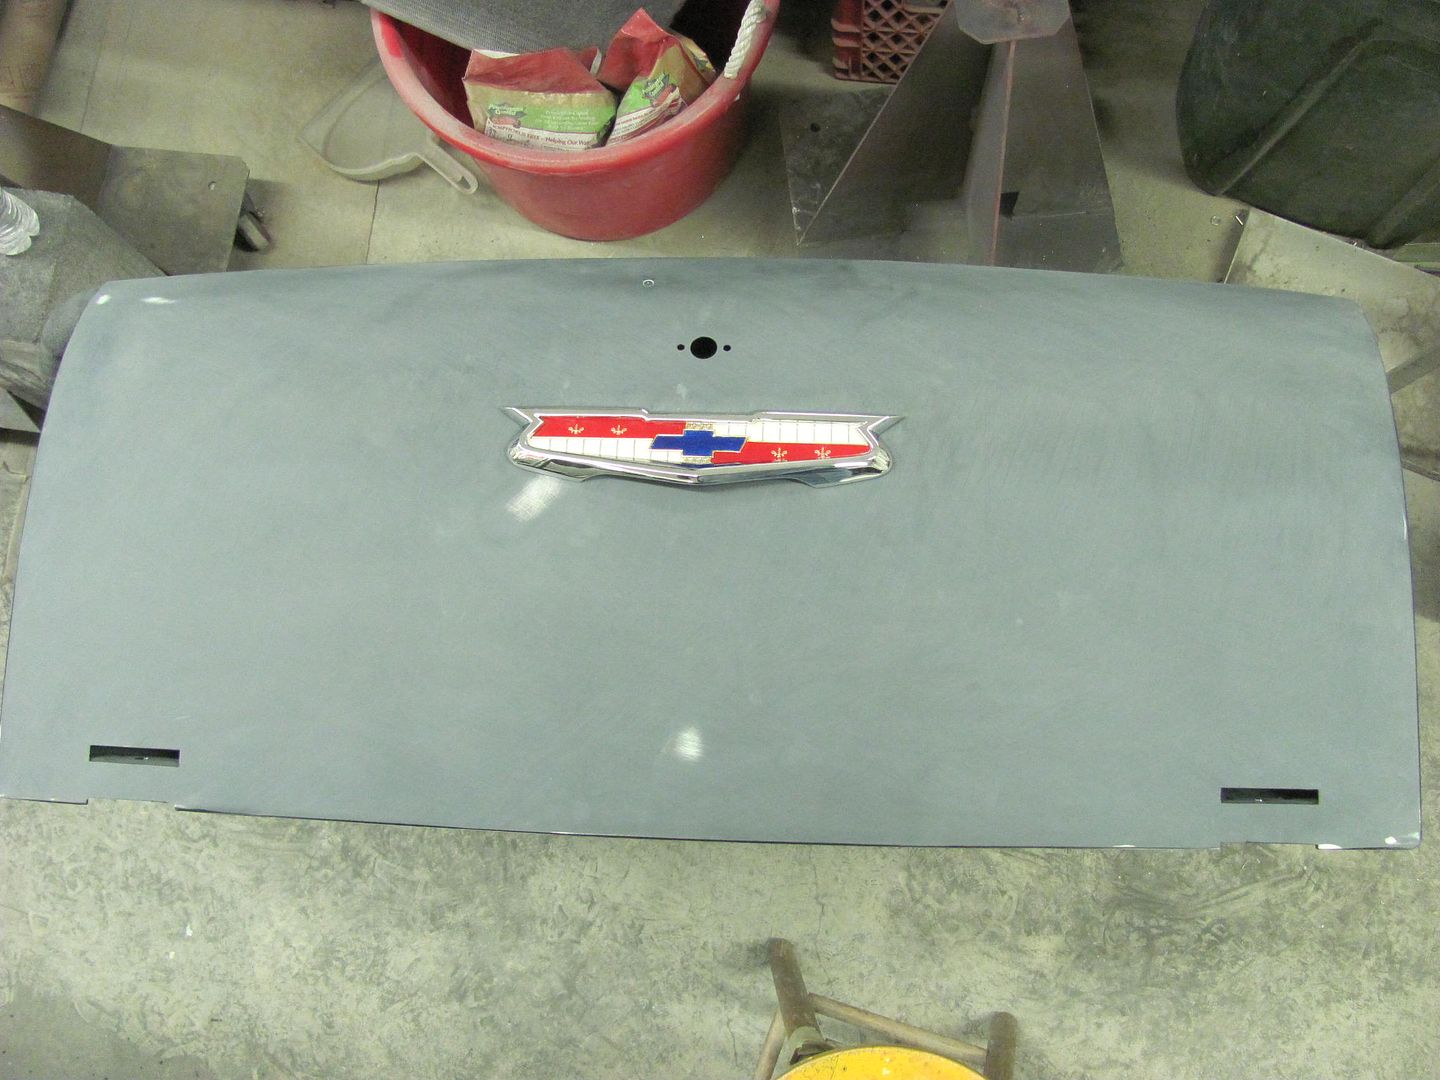
Got about half done with the tail gate and remembered we needed some holes drilled in the new skin for the emblem. Only issue was that I had done some spring cleaning earlier this year and the original skin with the hole pattern and location was now gone. So I sent an email to Mikey at The Stainless Shoppe, as he had an original, and he got me squared away... Thanks Mikey!
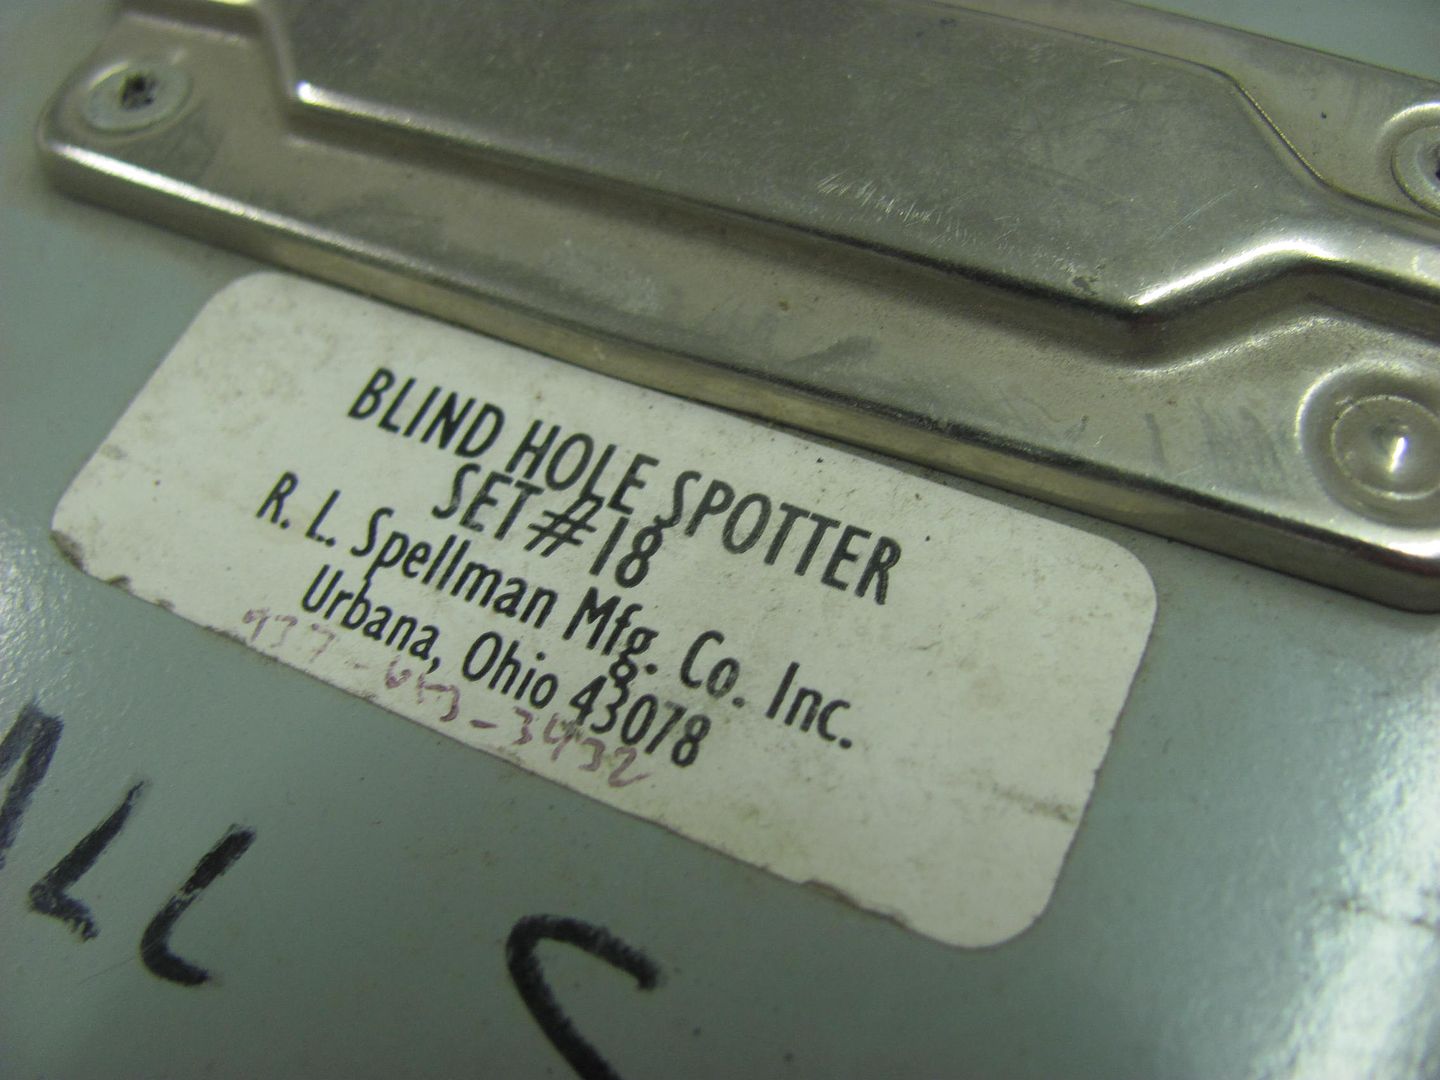
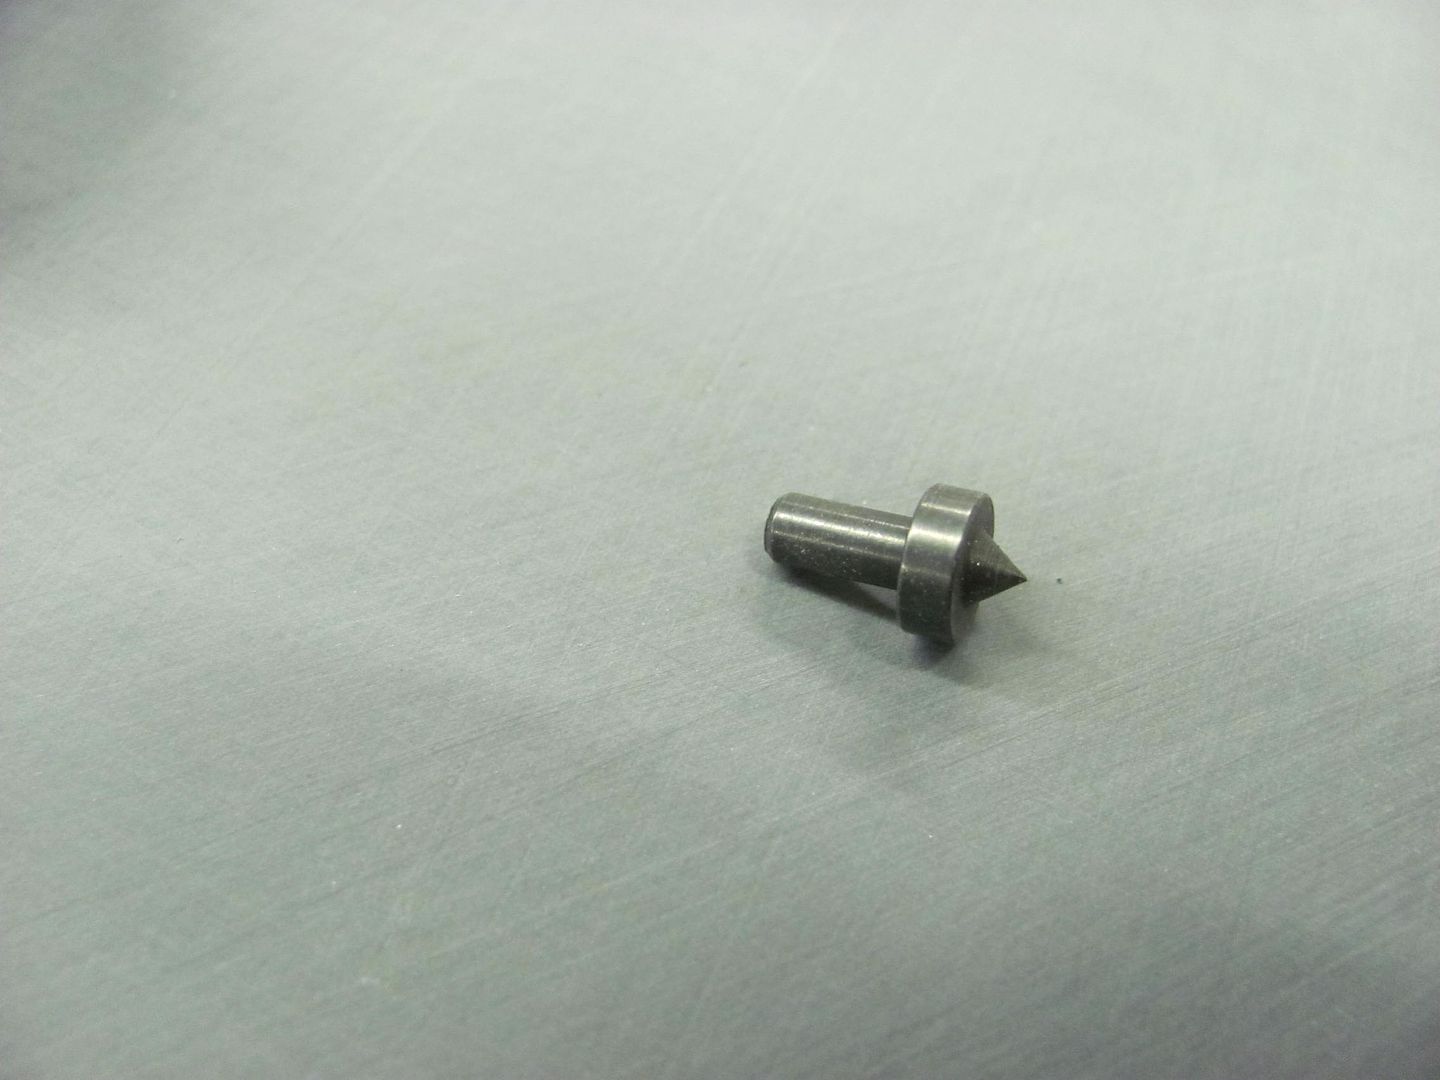
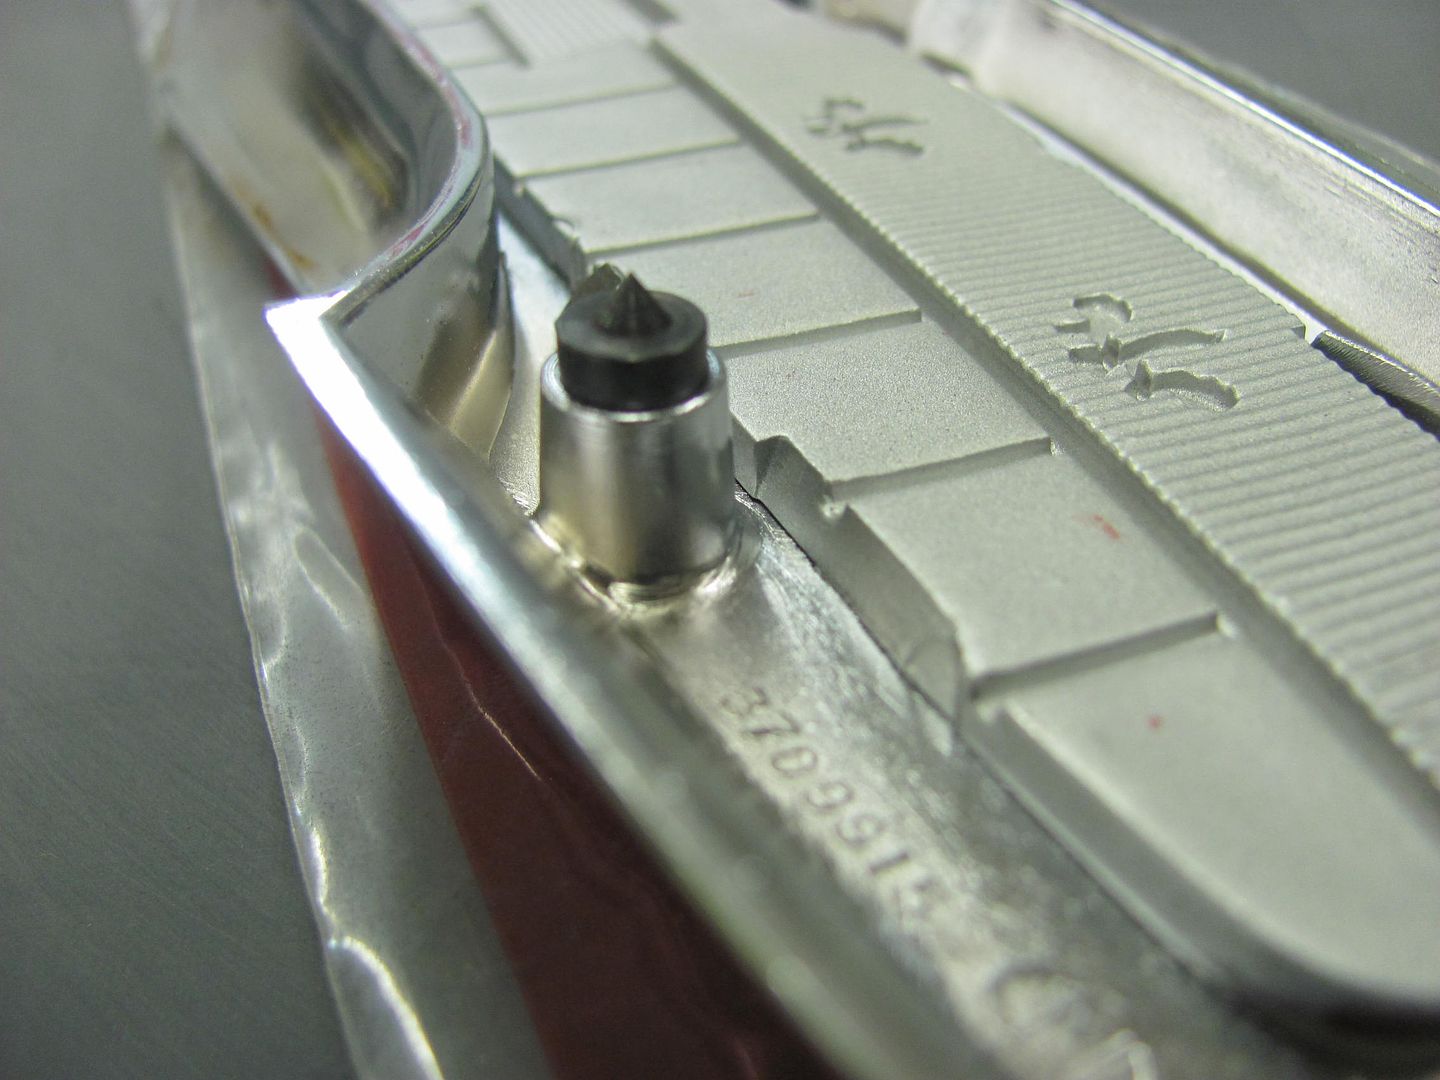
I located the hole for the center alignment pin first, and planned on using some spotters for the remaining 4 holes... Some measurements were taken to insure the emblem was on straight, and then some "backstops" used. The spotters come in a set of various sizes, and typically you never find the exact size you need...
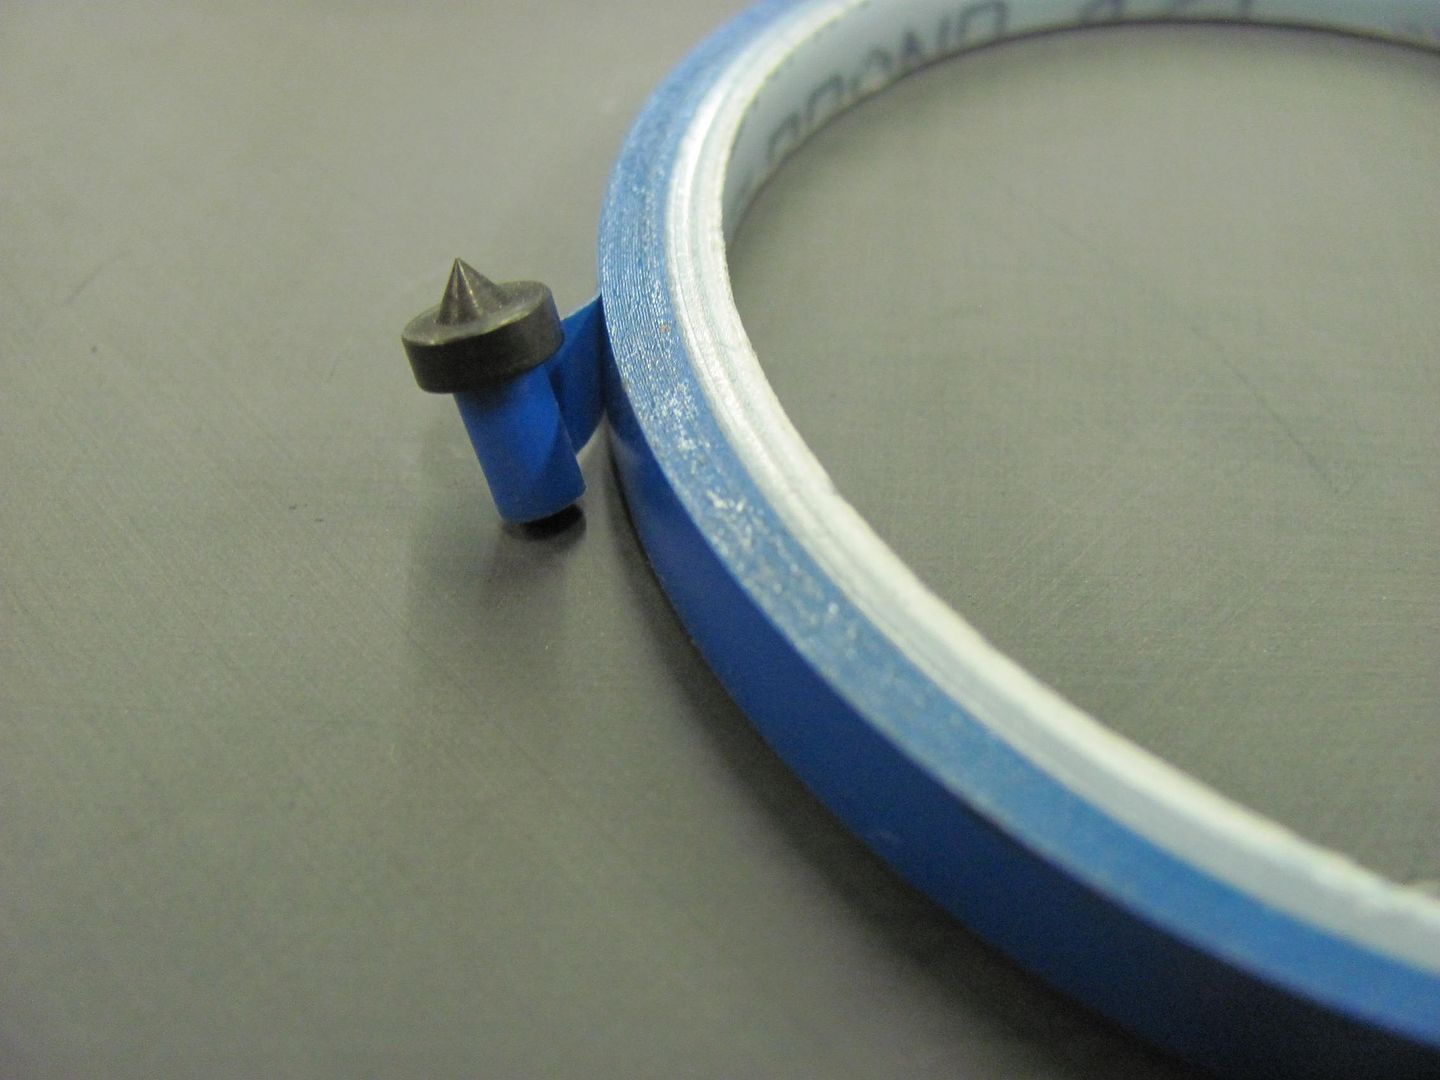
These will go in some 10-24 threaded holes on the emblem. The closest size was the 1/8" spotters, so we'll need to adjust the fit..
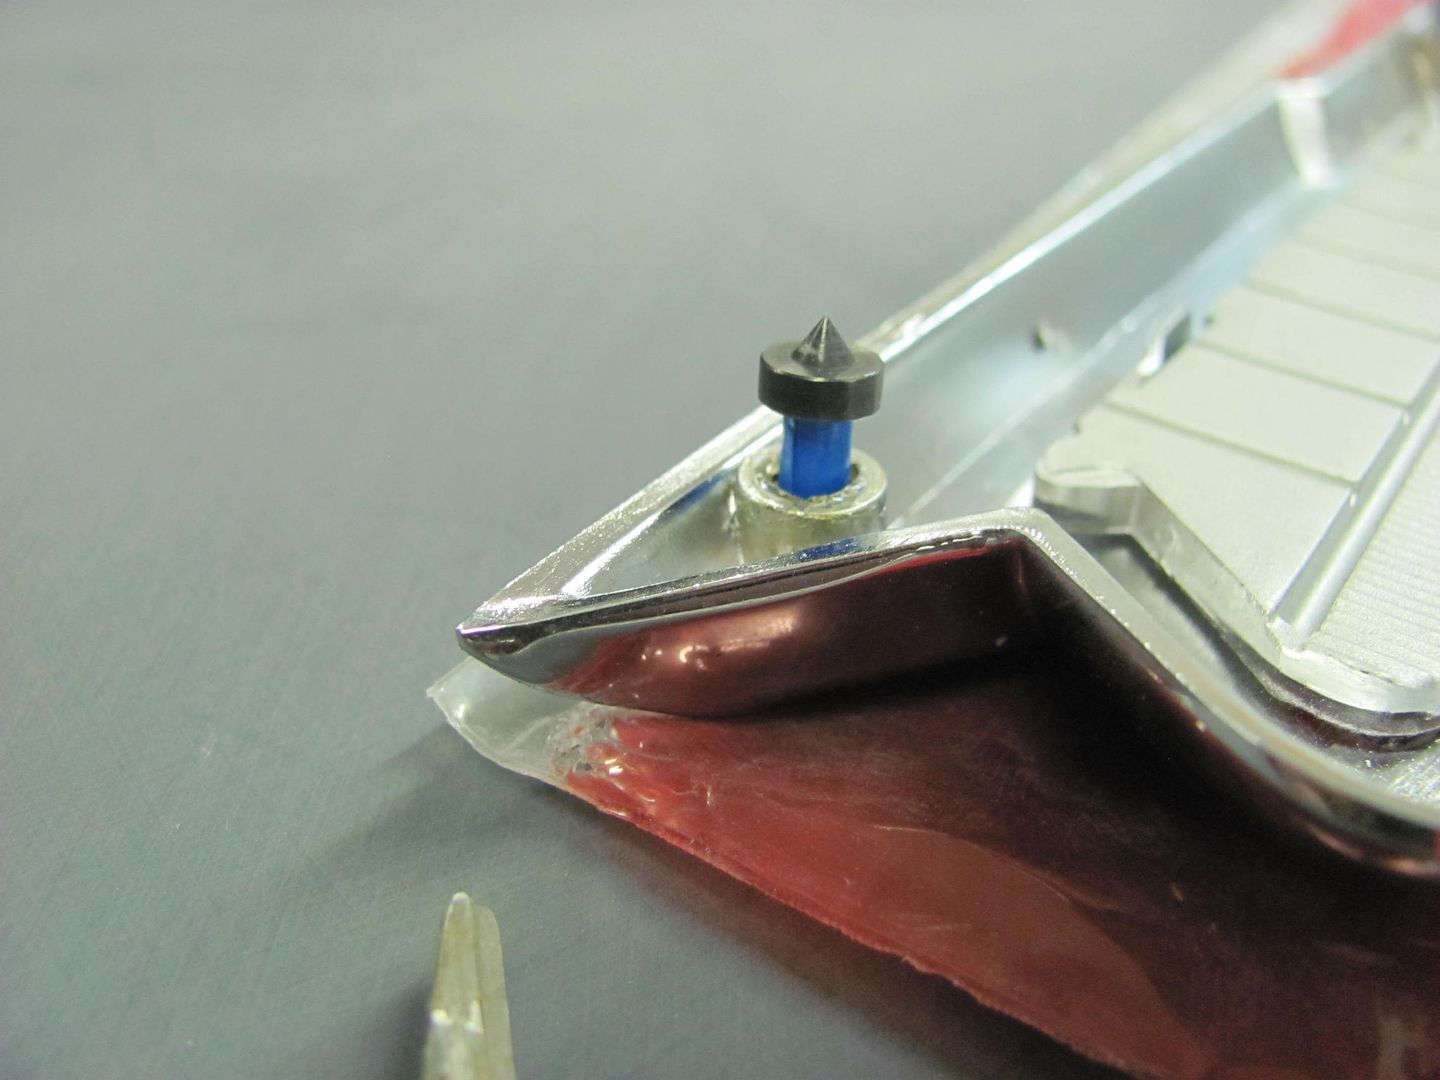
A couple wraps of fineline tape and we now have a snug fit so the spotters don't fall out..
Then the emblem is located on the tail gate with the center alignment pin, then the back stops. The emblem is pressed onto the tail gate, and the spotters leave their mark on the epoxy paint finish..
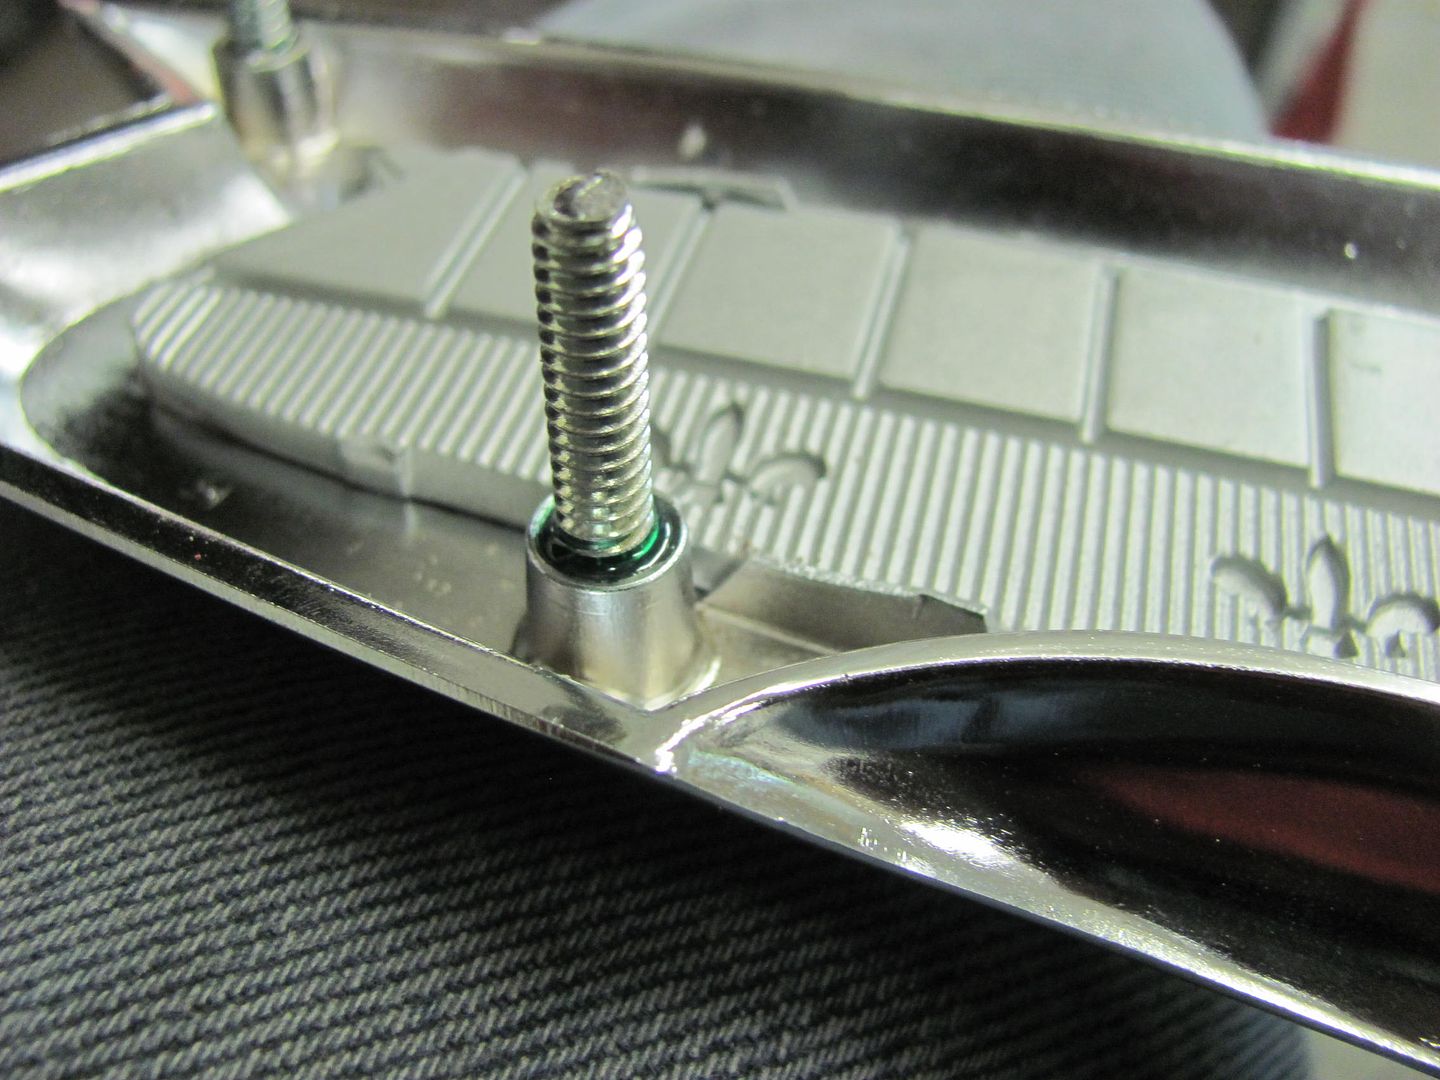
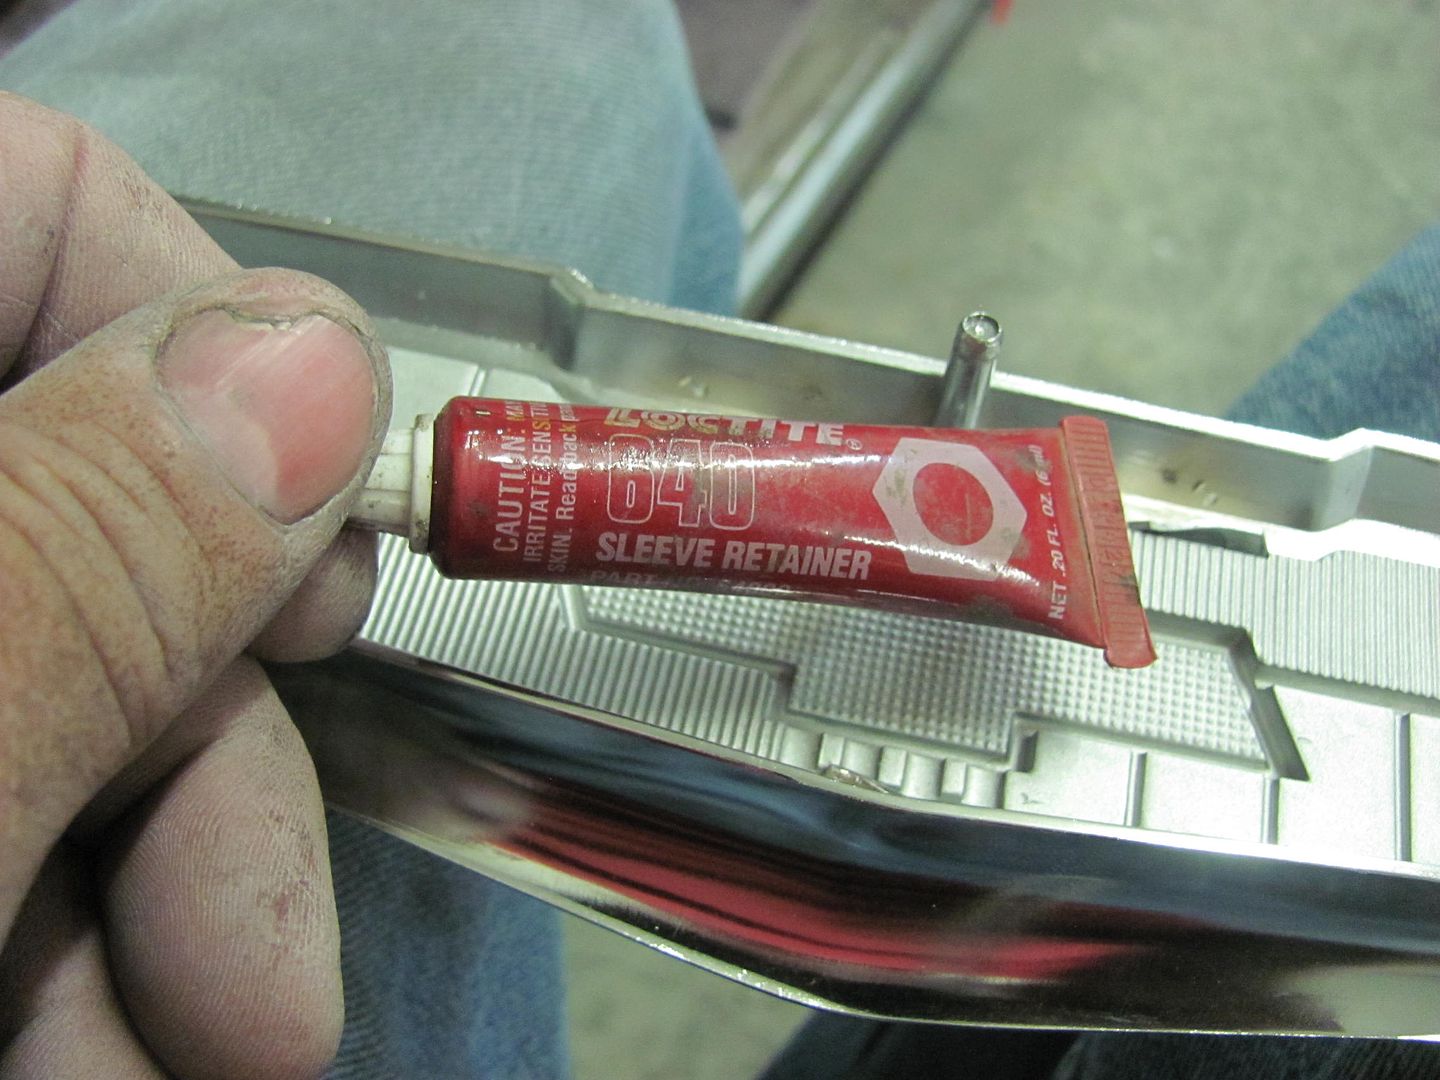
Next, the studs are installed finger tight using sleeve retainer. This will hopefully keep them from spinning inward any further risking possible damage to the chrome bezel...
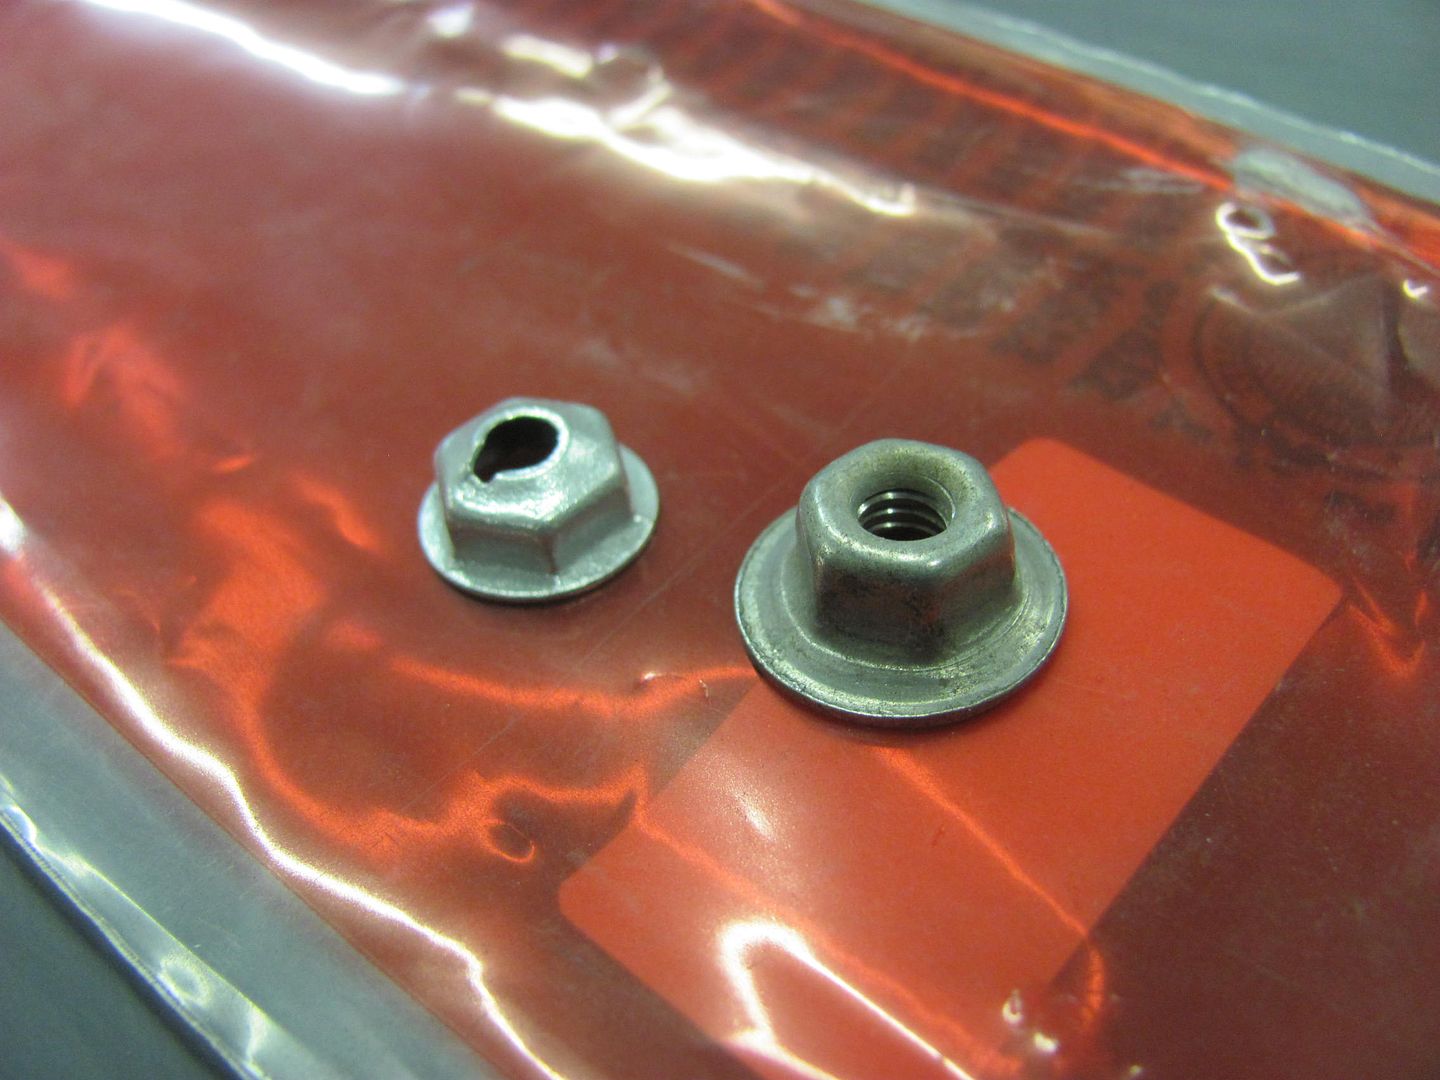
The nuts that come with the emblem are the split thread variety, and I had some threaded ones left over from the Fairlane build, that also are slightly larger in diameter, which may help out as the emblem also serves as a lift handle..
Holes drilled and emblem fitted


Robert you sure do fantastic work love your posts I have learned so much from you.Going to have to get some of those blind spotters.
McMaster Carr has them... but may want to shop price.
Couldn't you just use a 10-32 screw, cut the head off, and sharpen it? I've done that in the past.Originally Posted by MP&C

Looks good with that fresh new emblem on it.
56 Nomad, Ramjet 502, Viper 6-speed T56, C4 Corvette front and rear suspension
Other vehicles:
56 Chevy 2-door BelAir sedan
56 Chevy 210 4-door sedan
57 Chevy 210 4-door sedan
1962 327/340HP Corvette
1961 Willys CJ3B Jeep
2001 Porsche Boxster S
2003 Chevy Silverado 2500 HD Duramax
2019 GMC Sierra Denali Duramax
Nicely done Robert.
FYI be careful using those larger nuts. Because the tailgate has a curve on 2 dimensions you can "spike" the metal around them.......seen it done on lots of side trim using the larger pal nuts. An option is to install the smaller nut using a rubber washer as a seal behind it. In fact if you look in the assembly manual on the trunk lid emblem it even shows a rubber seal was used. The early cars had a special press on retainer, because the studs were cast with the bezel and NOT THREADED STUDS.
Mikey
Thanks Mikey. I also have some of the same style nuts as supplied with the emblem with the rubber already inside the cavity, so I'll likely use those. I think they were the same diameter..
Laszlo, also an option, I've done that in the past as well but need some fresh tooling for the lathe so the already sharp spotters were more appealing at this point..
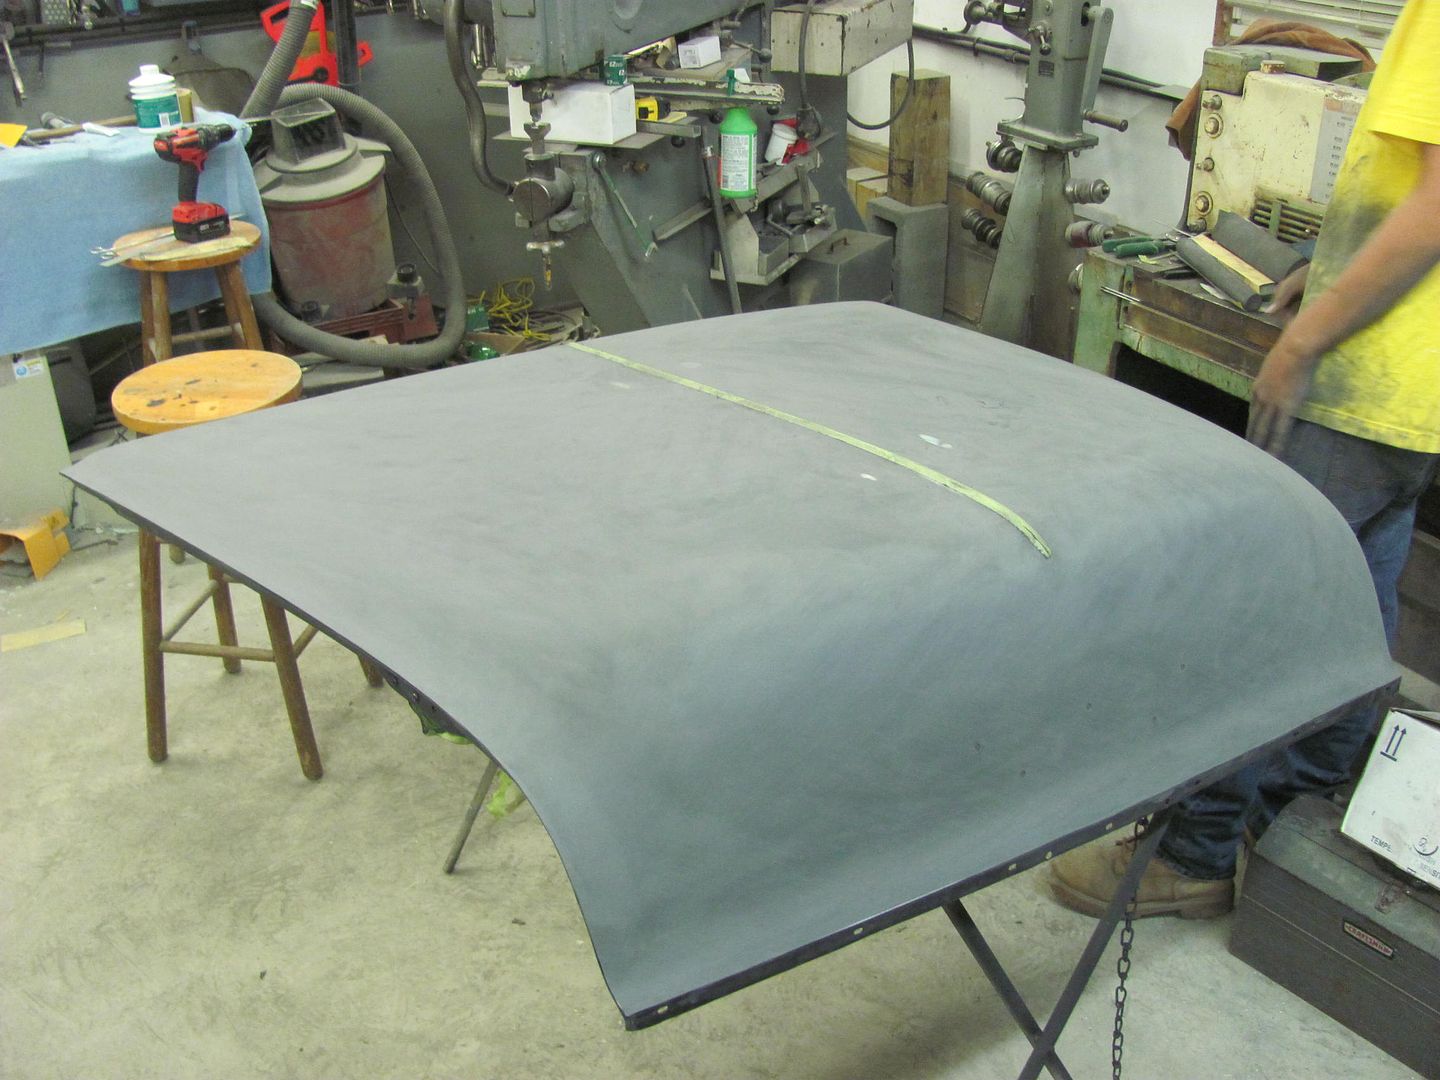
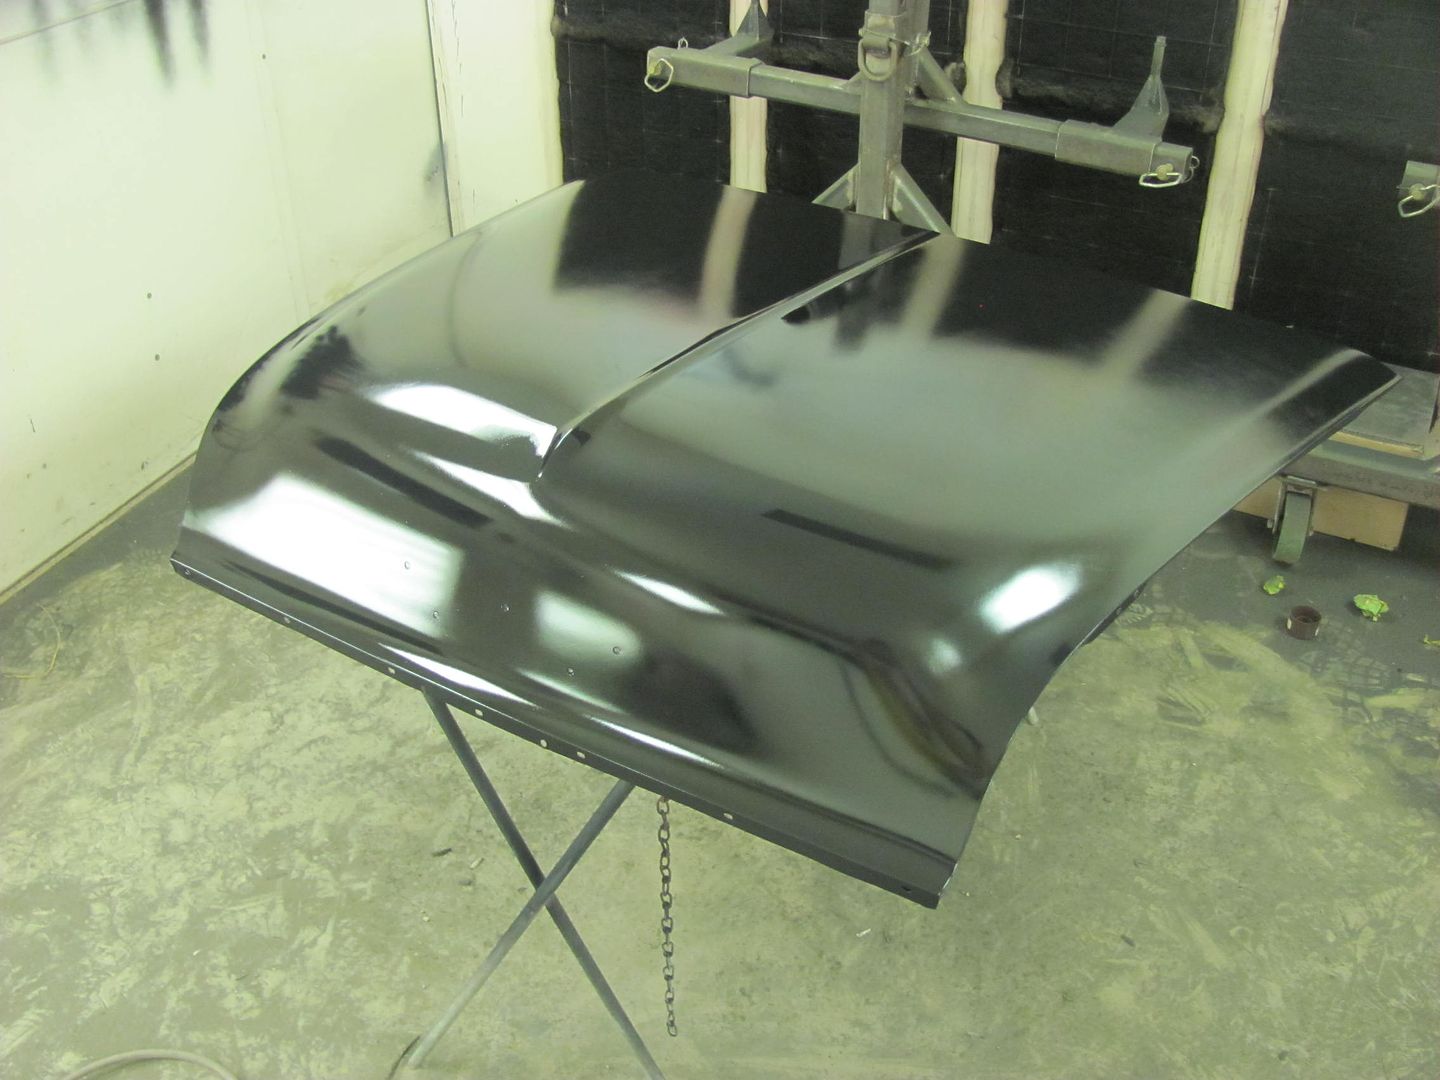
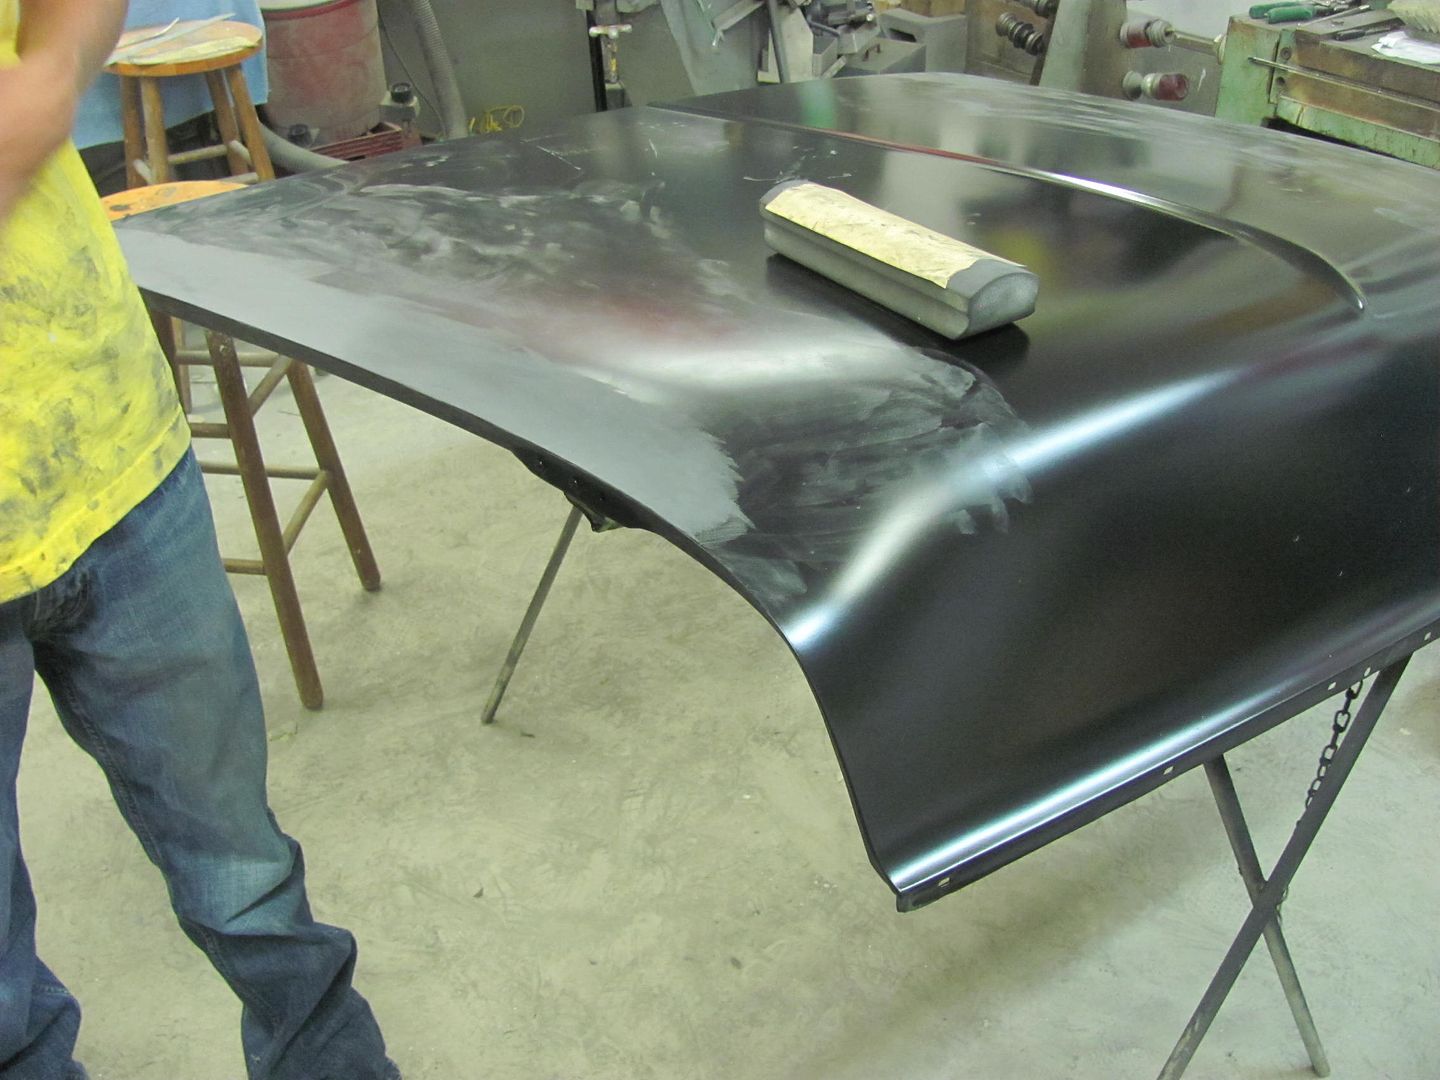
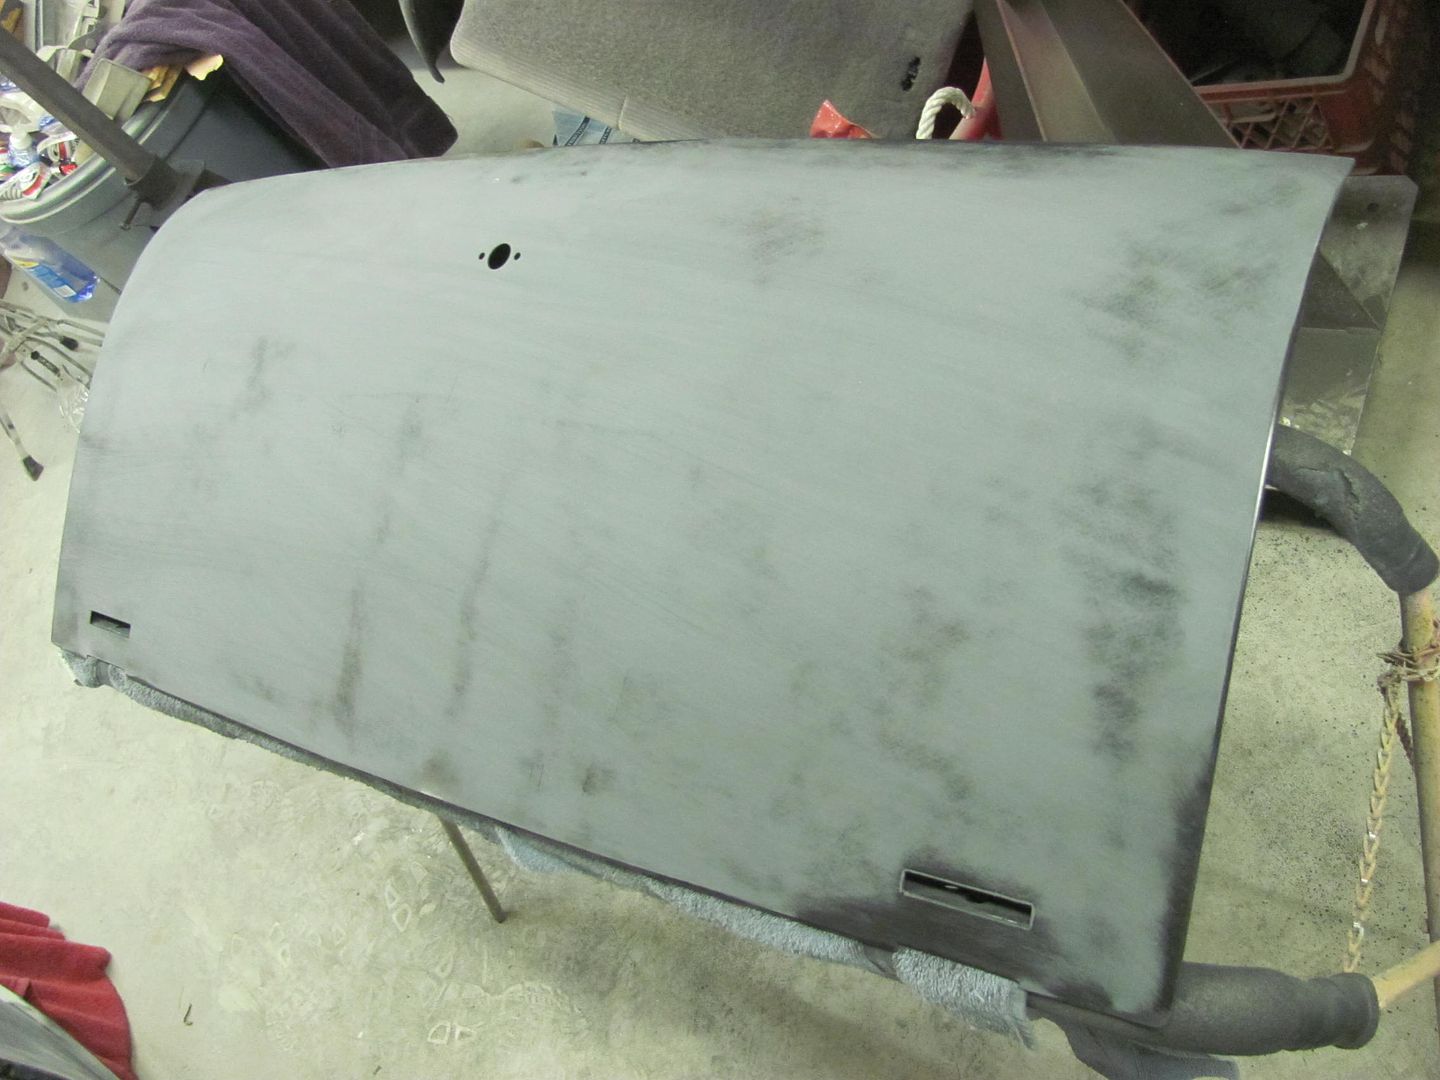
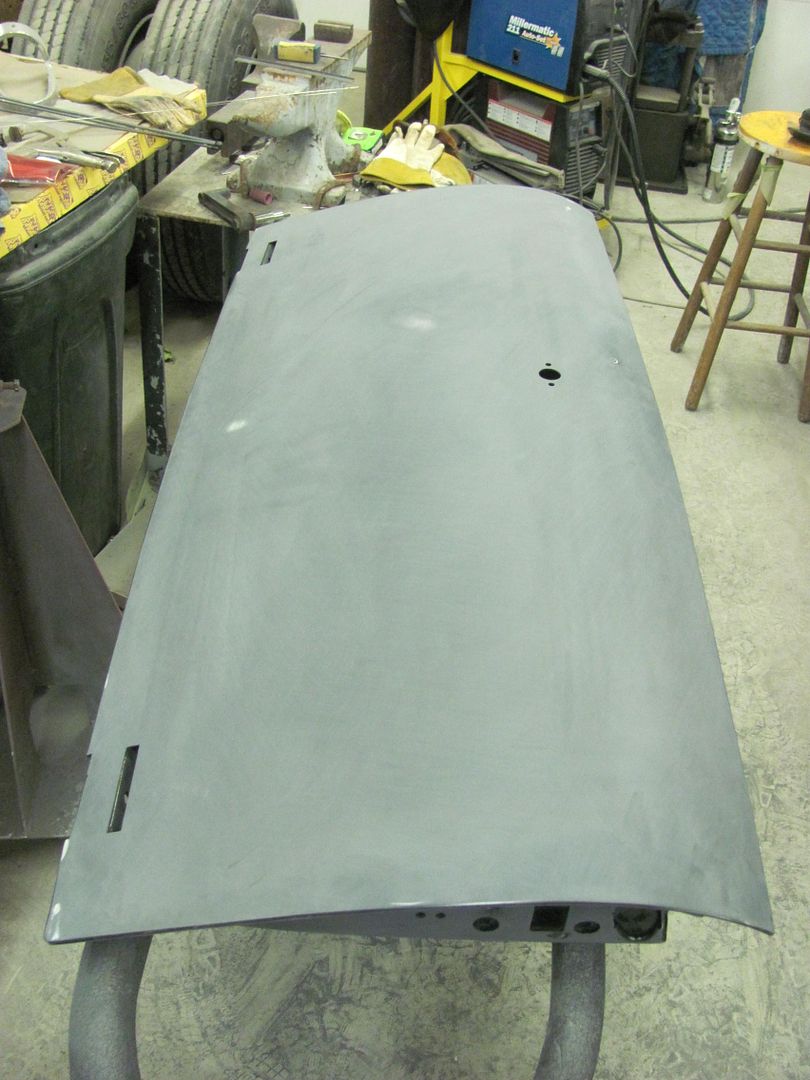
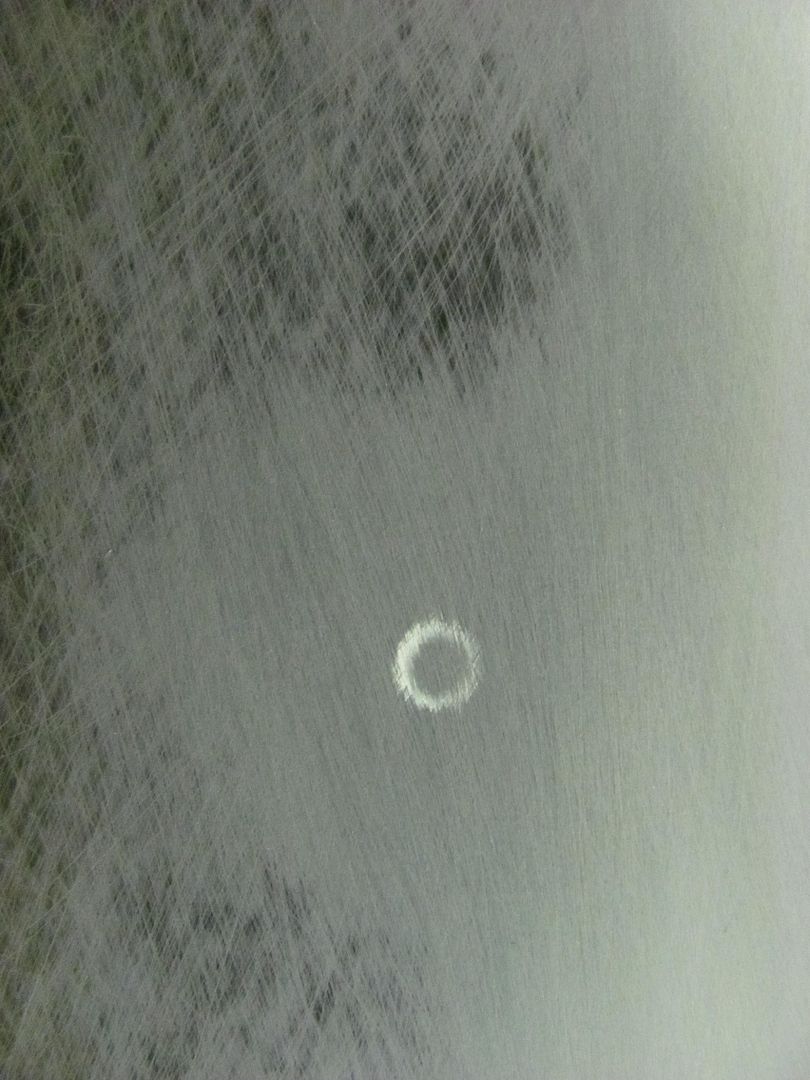
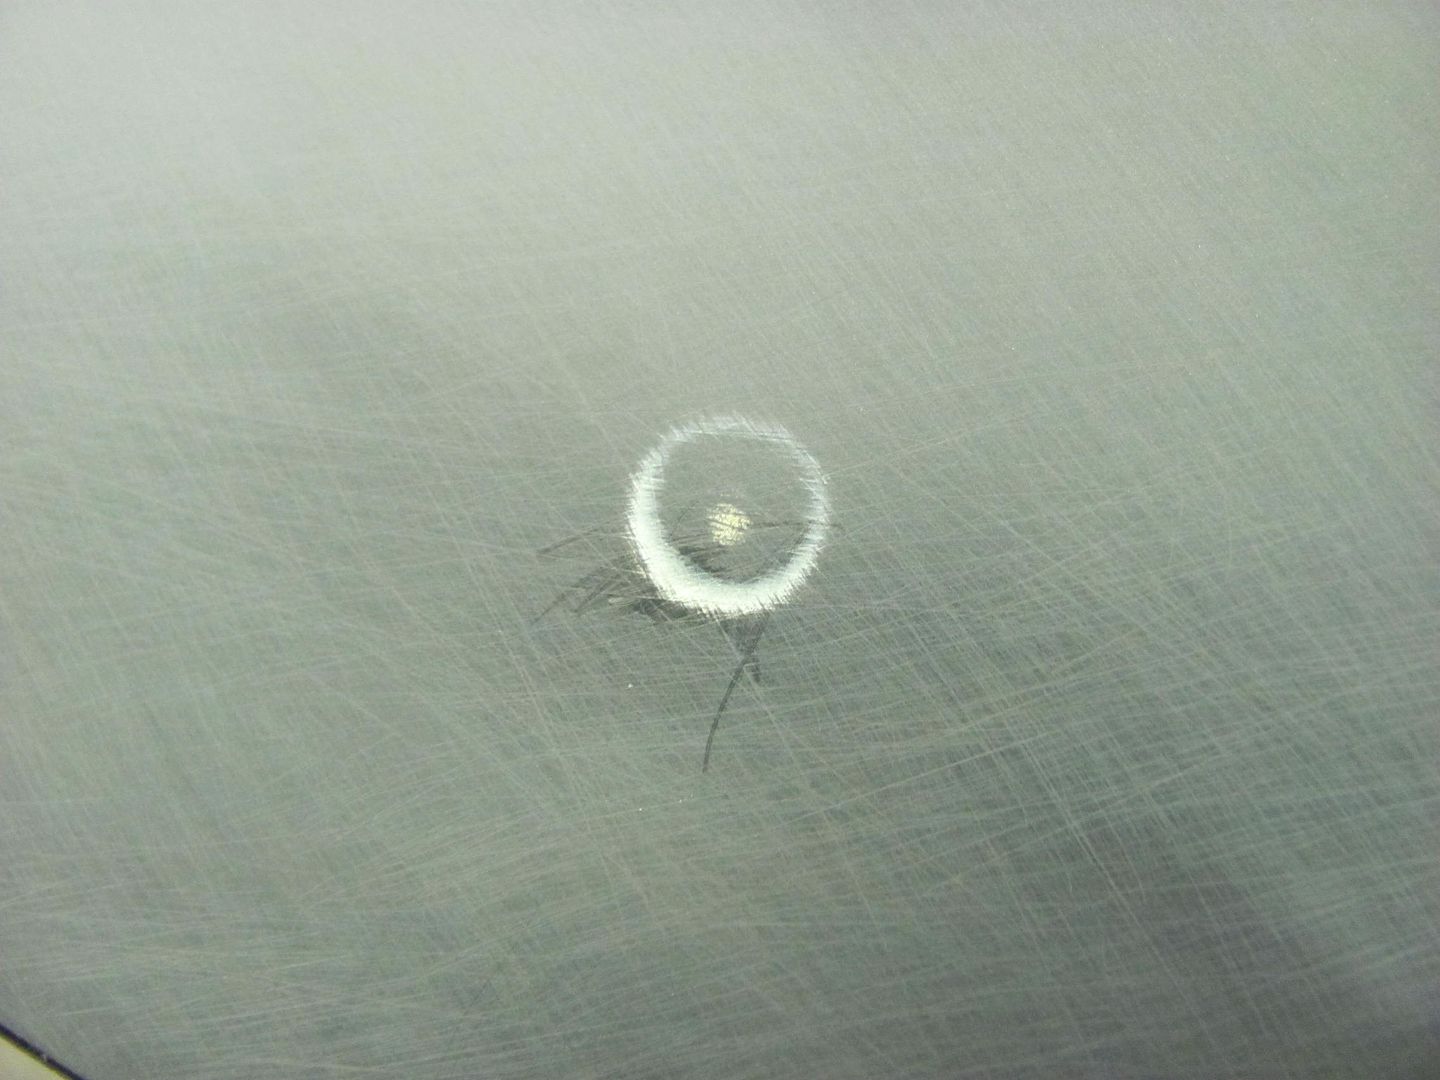
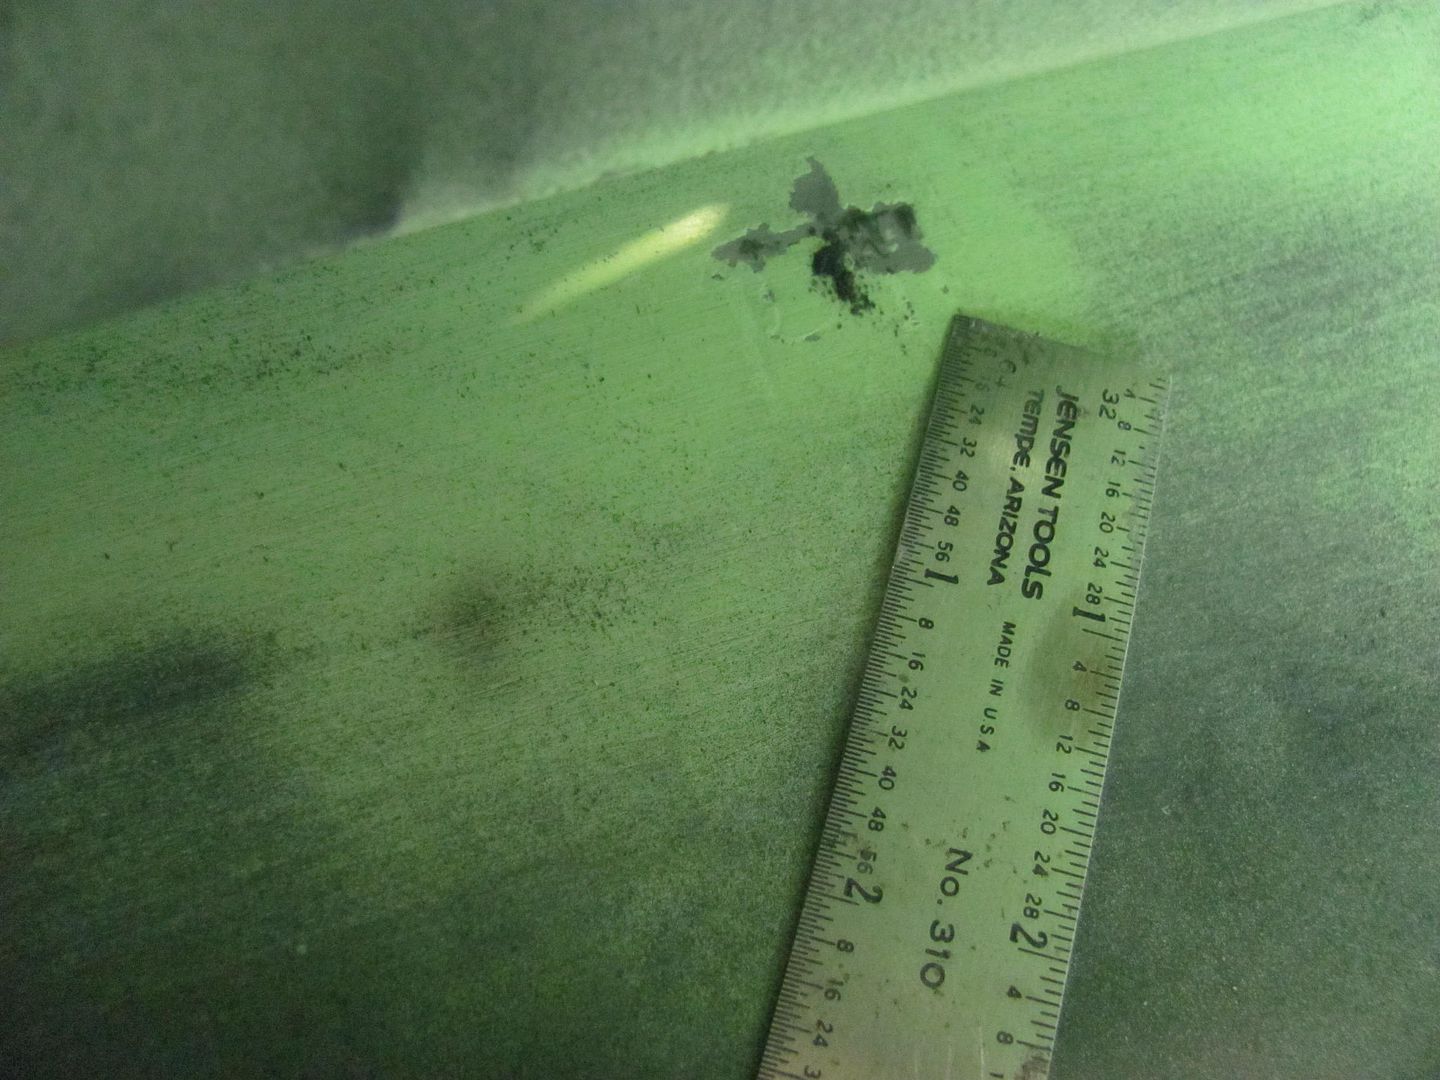
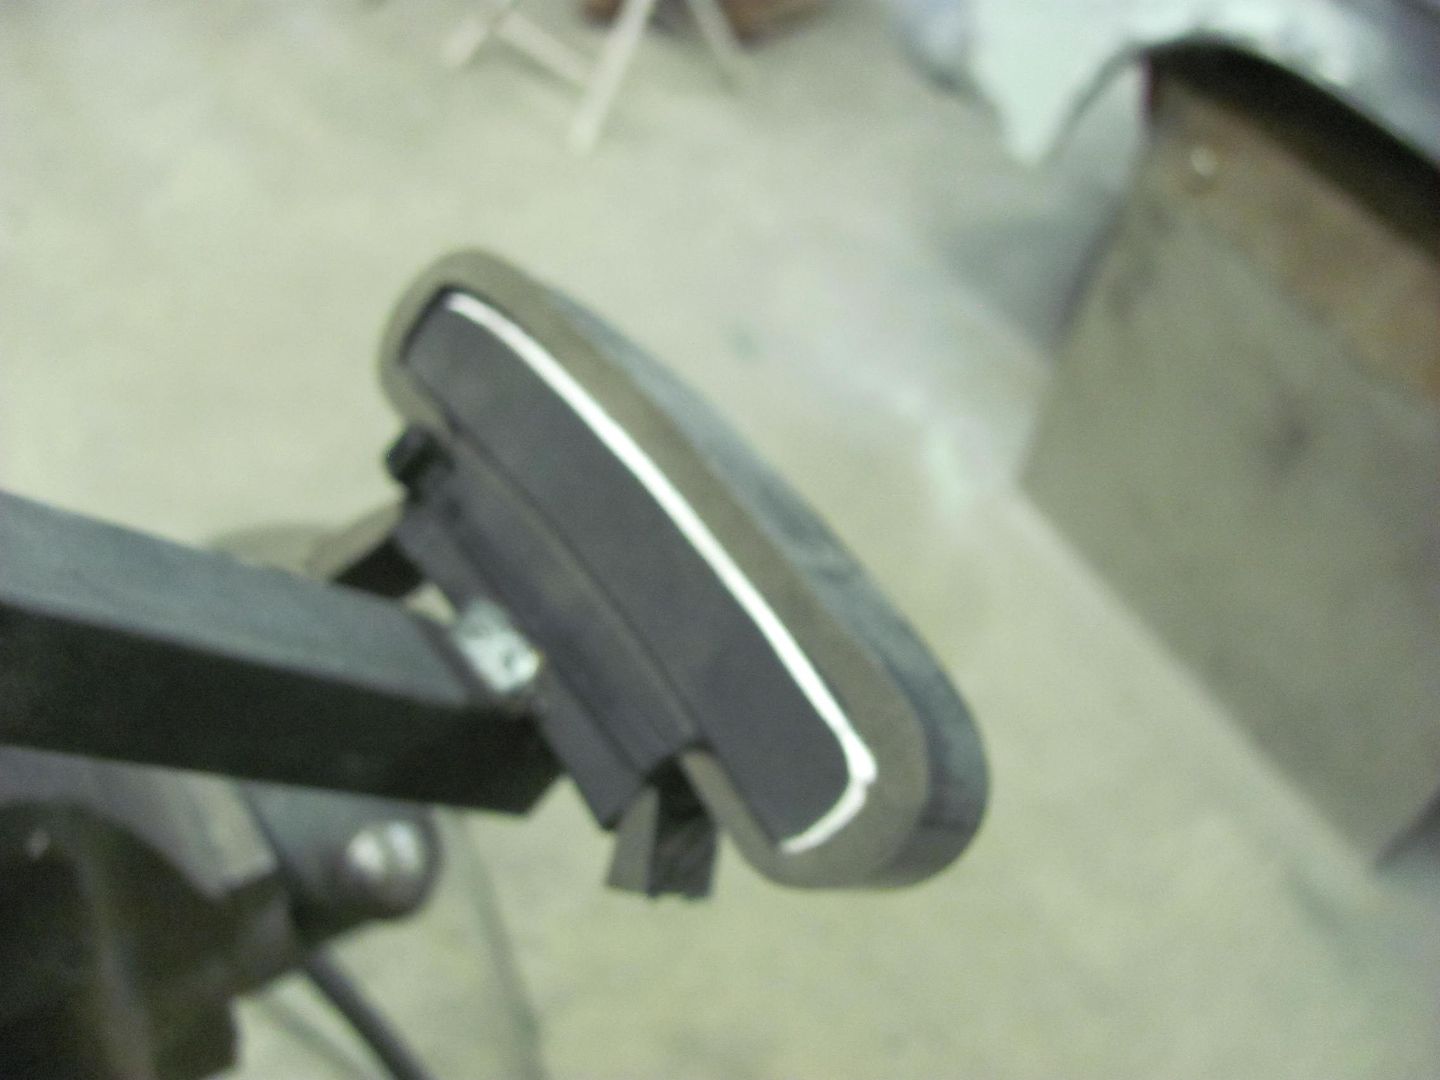
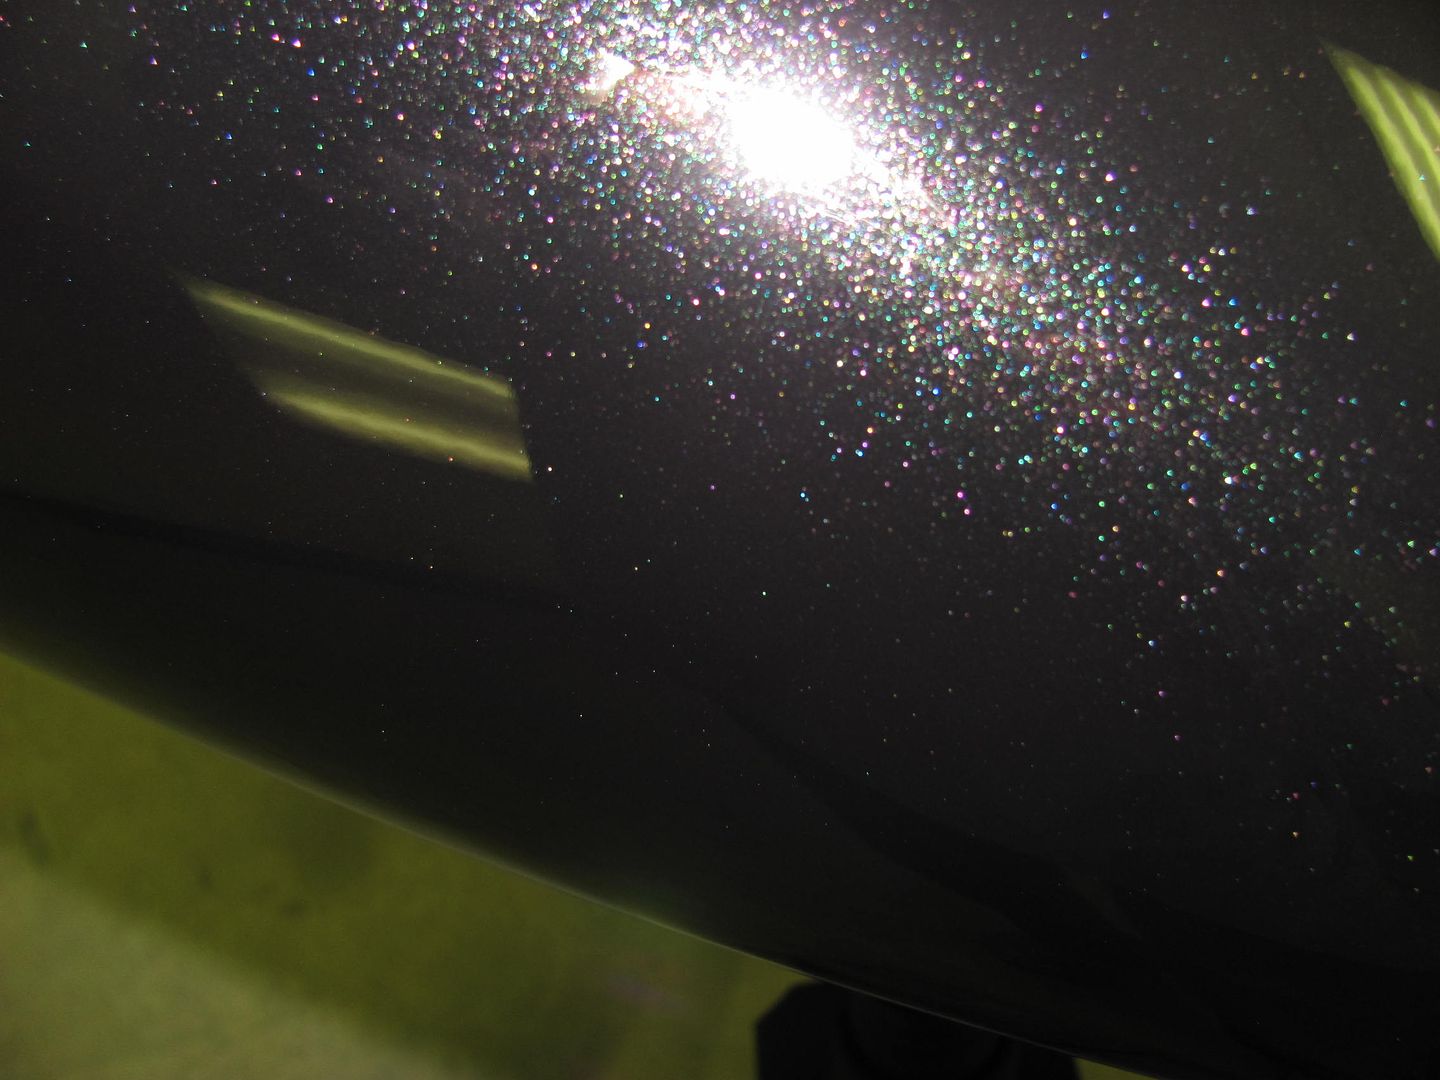
I was blocking out the tailgate the other day and had a "halo" effect appear in the epoxy, shown below just to the right of the latch hole. This has a light skim of Evercoat 416 beneath the epoxy in that area. It was nice and flat while in bare metal, after spraying epoxy, after blocking the Evercoat/ before spraying the last coat of epoxy. I was baffled at what would cause such a nicely formed circle in the paint...
Even scratched the area to see if there was any softness to the Evercoat, but no..
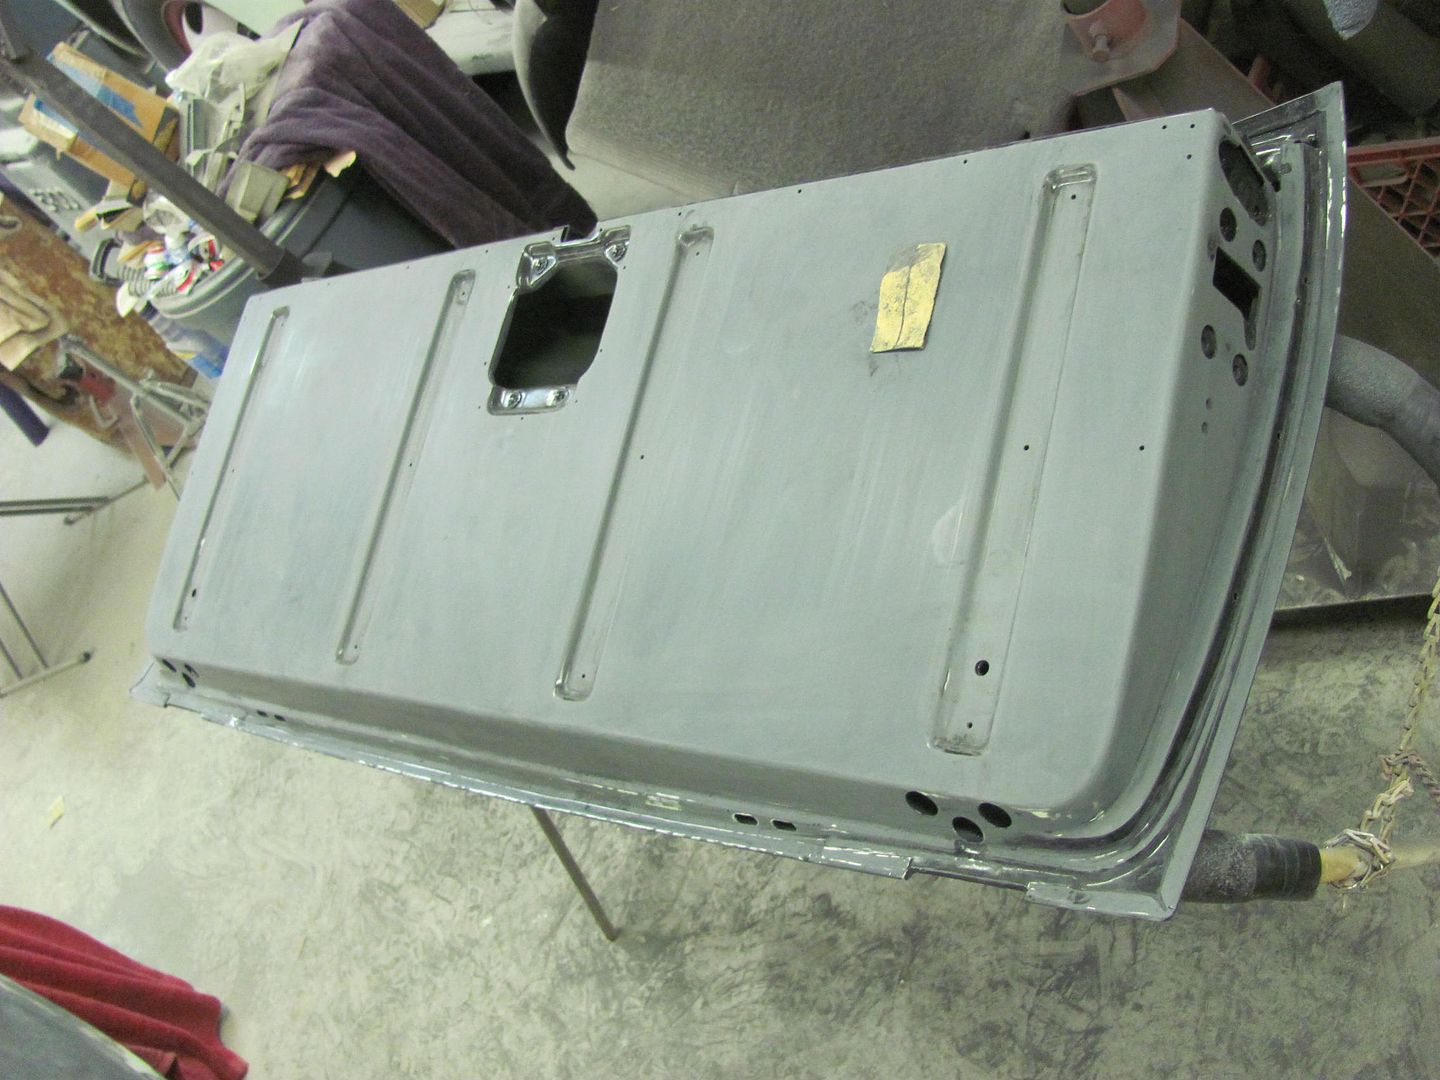
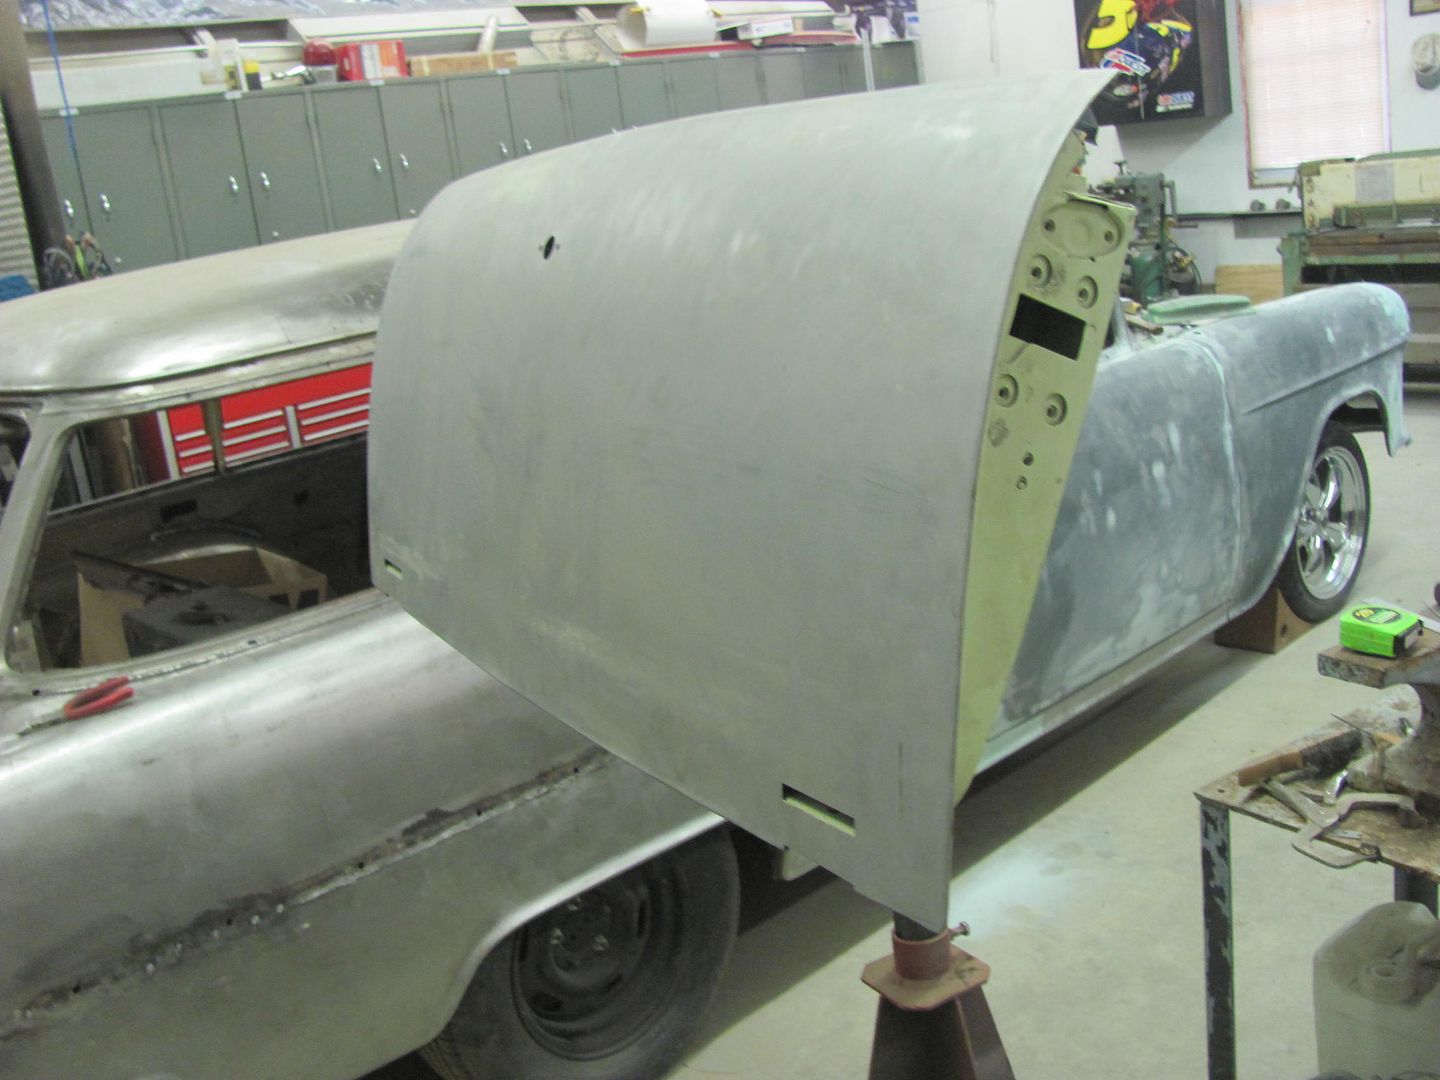
Here's the panel in bare steel before paint and after first coat of epoxy...
No dings, or defects otherwise seen. I had posted a query on the SPI forum to see if anyone had ever run into this. I don't know why I didn't think of this first, but it was suggested to: 1) look inside 2) only time this type of defect had been seen was dropping screwdriver inside door and left similar mark on outside of door bottom after sanding.
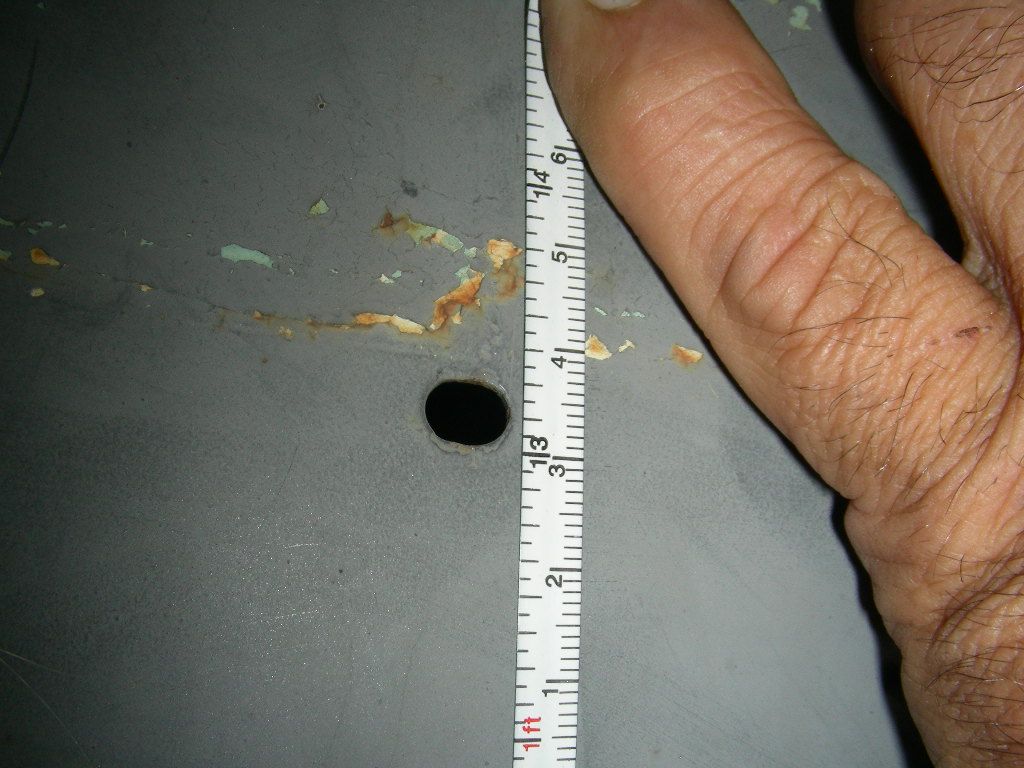
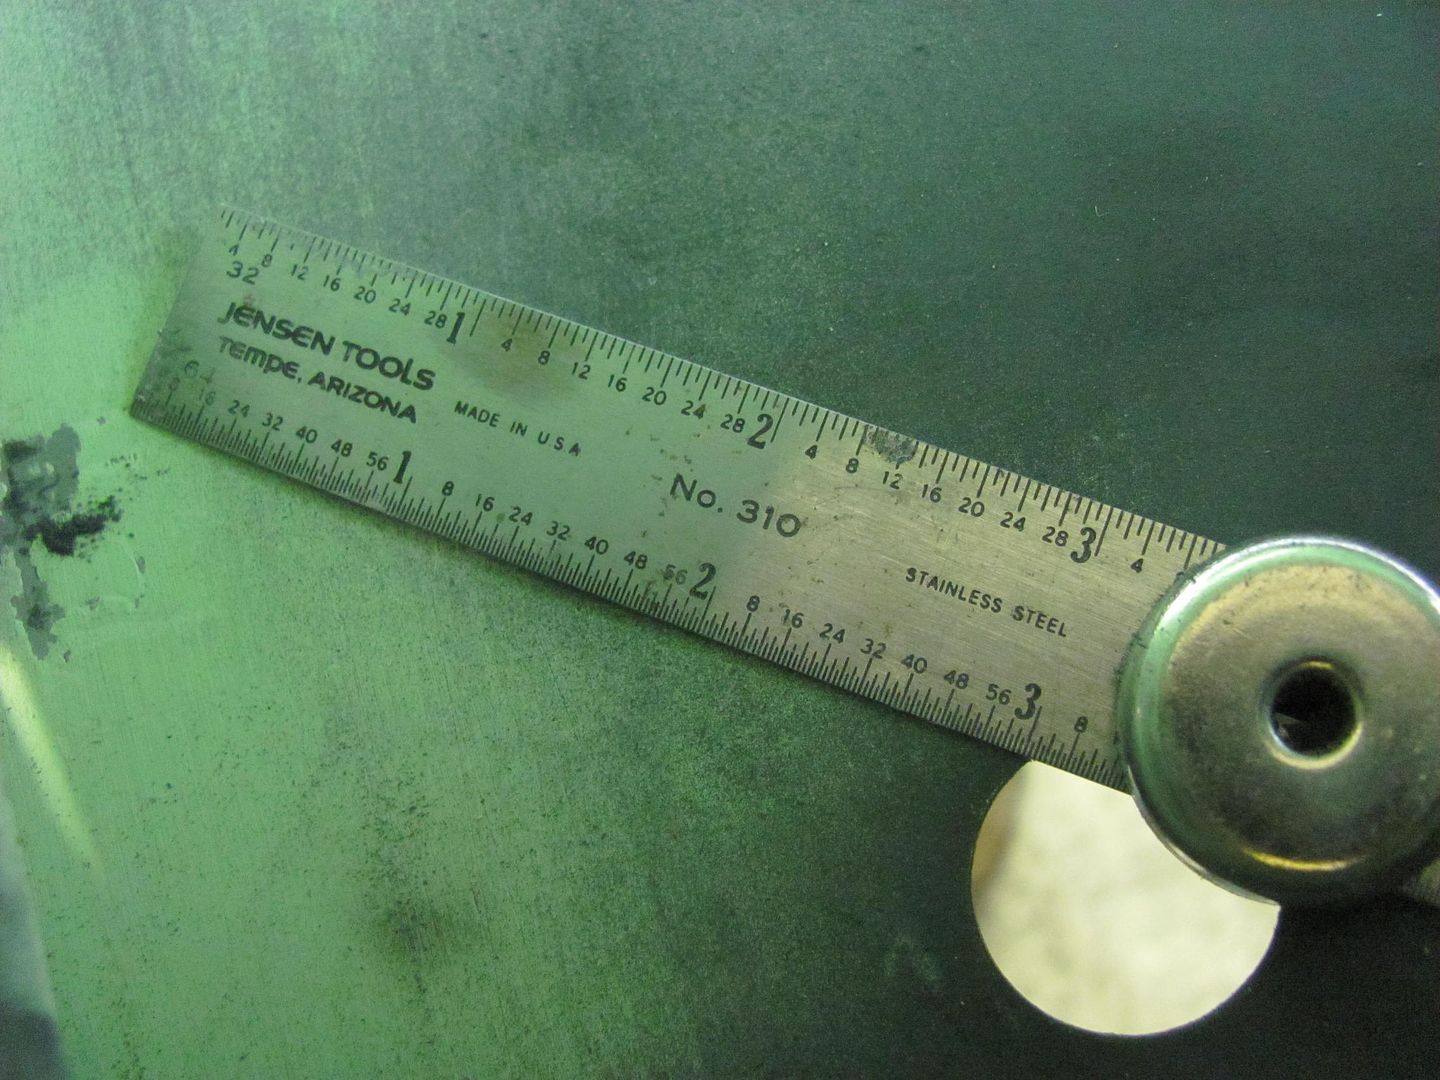
So in full investigative mode, I first measured the distance of the defect from the turn latch hole..
The Halo is approx. 3" away from the handle hole..
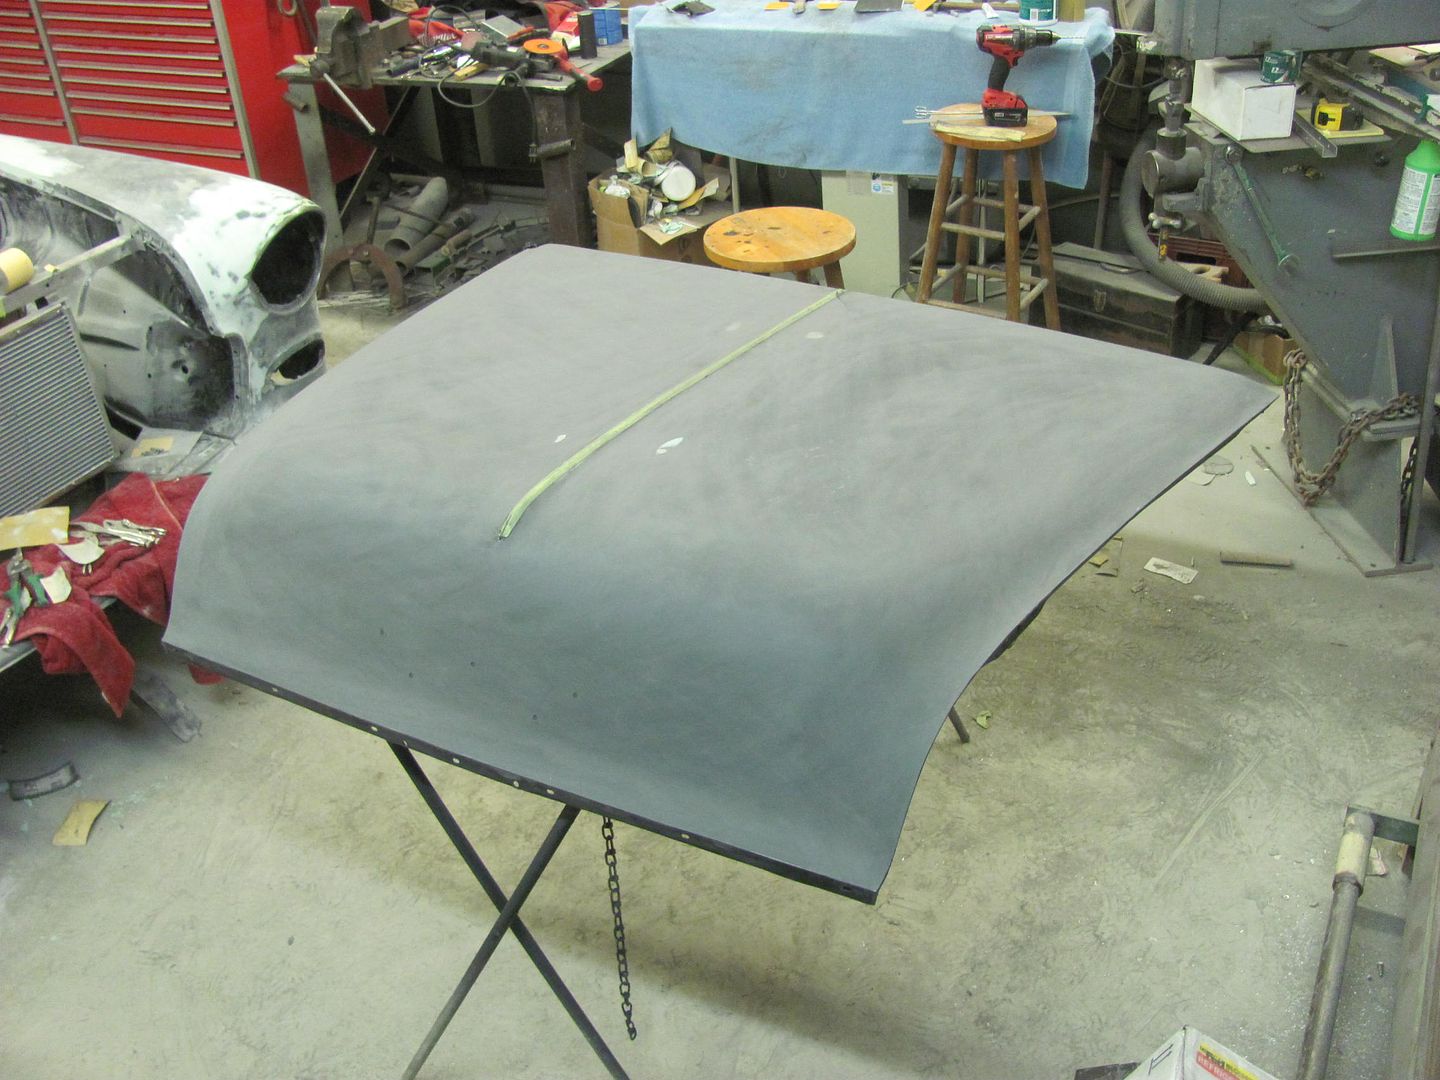
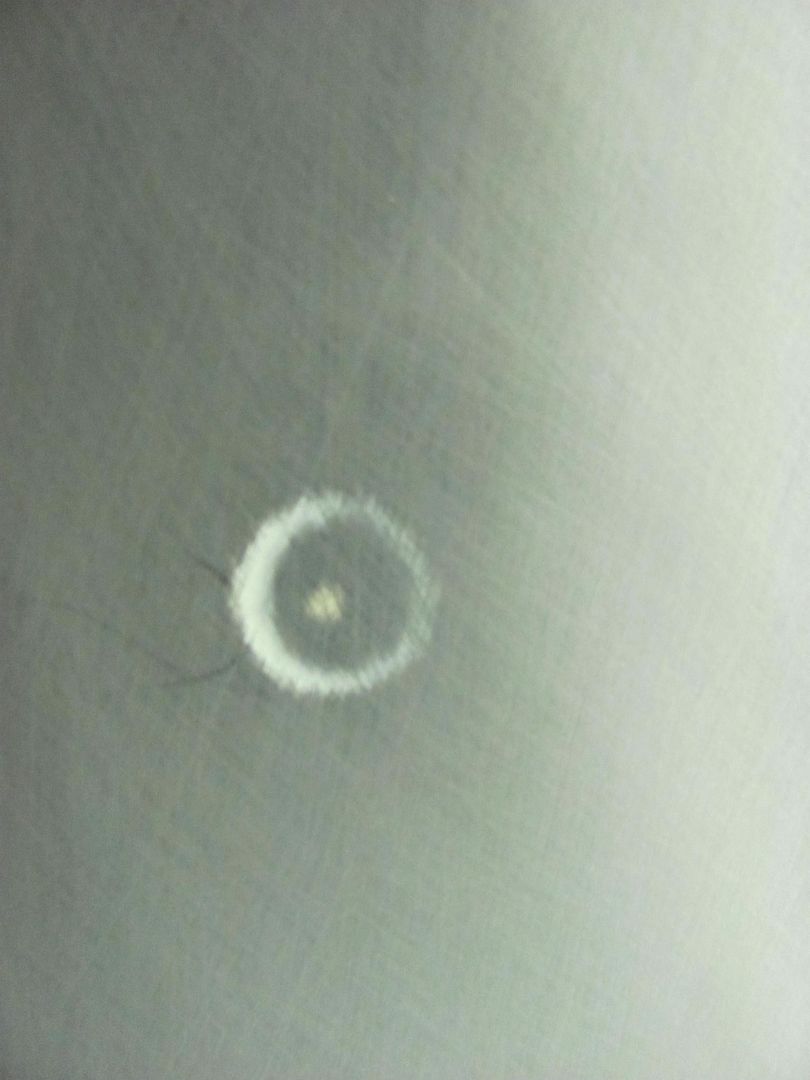
Measuring that distance on the inside shows.....oh wait....what's that bare metal?
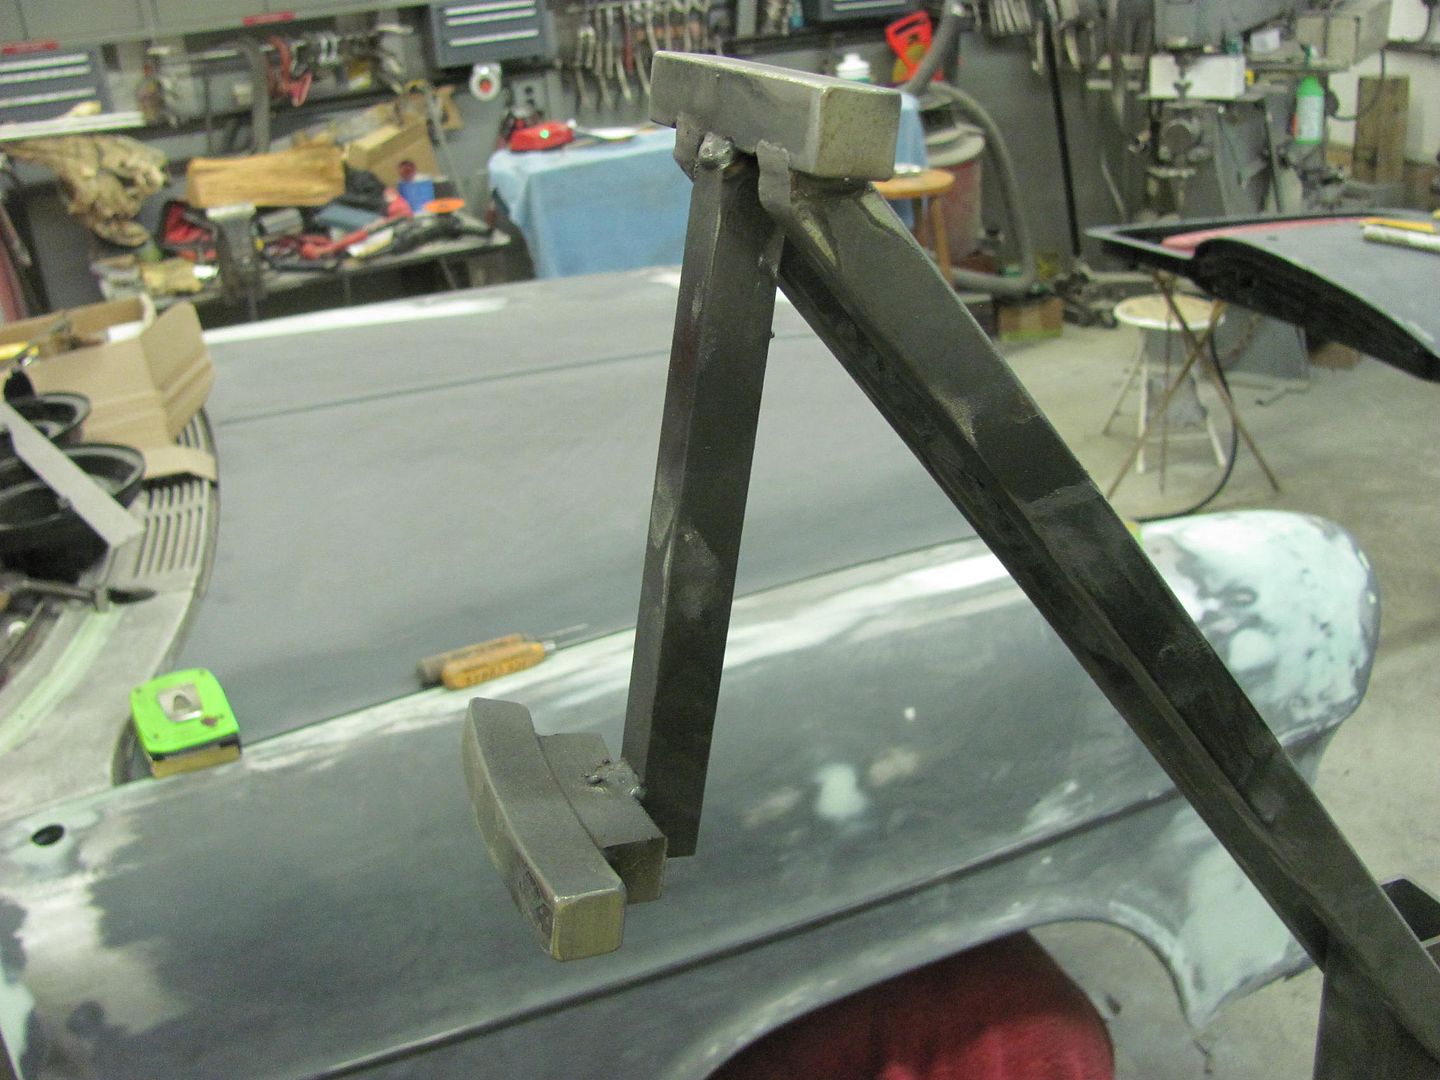
As soon as I saw this I realized there had only been one thing inside that could have caused it... the painting fixture we made..
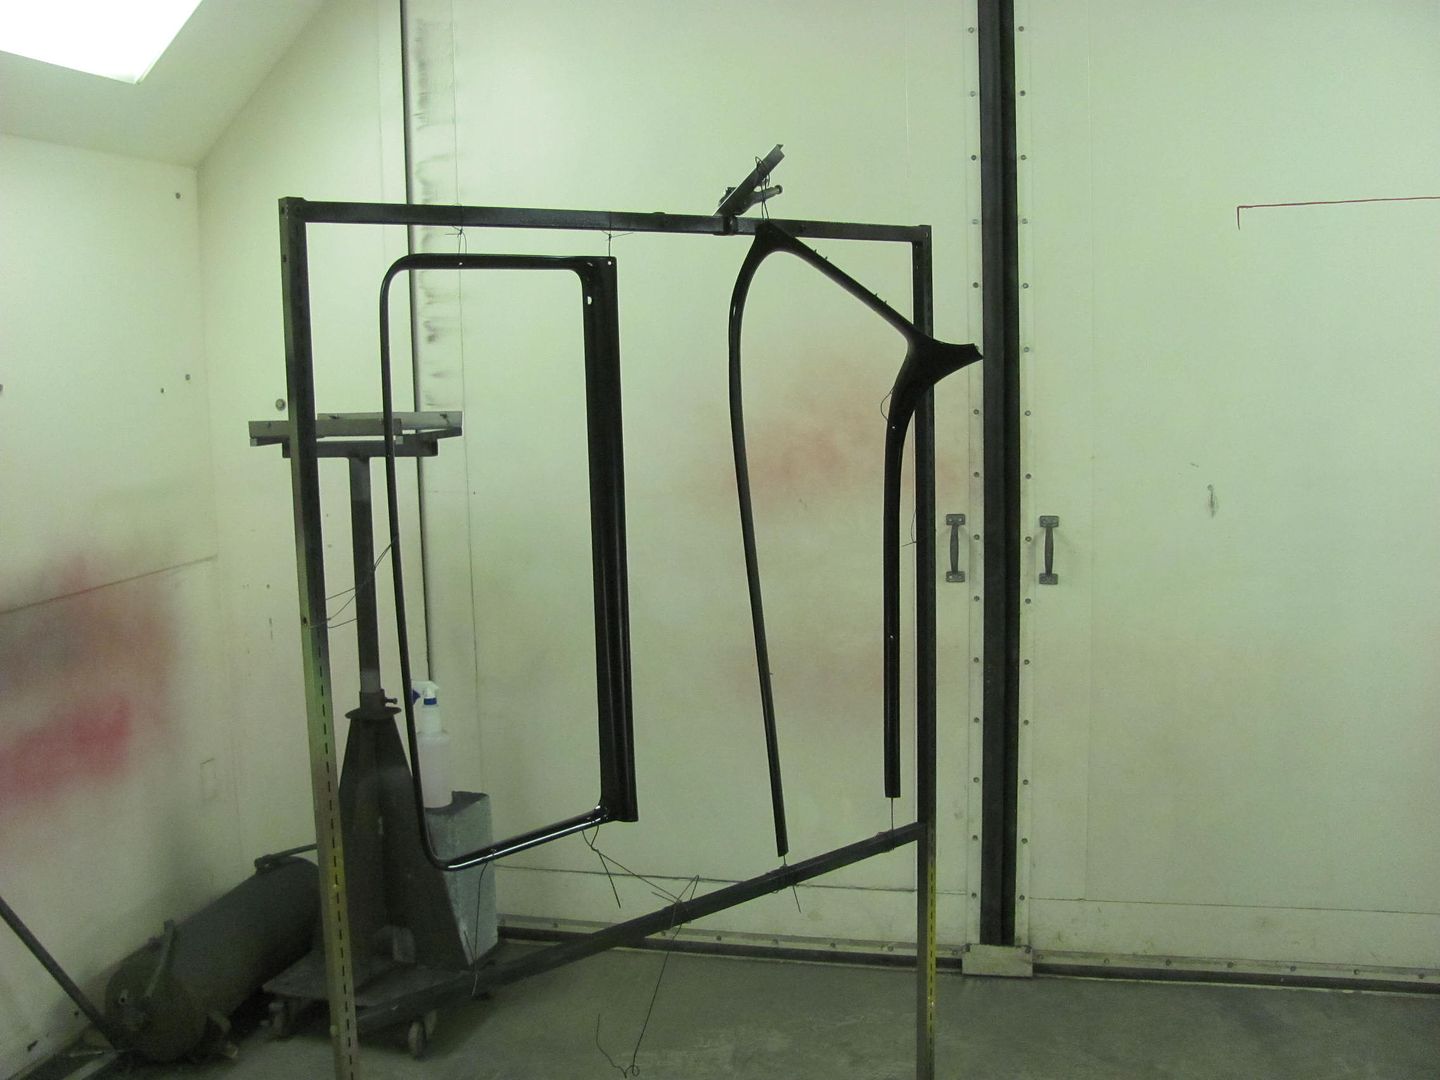
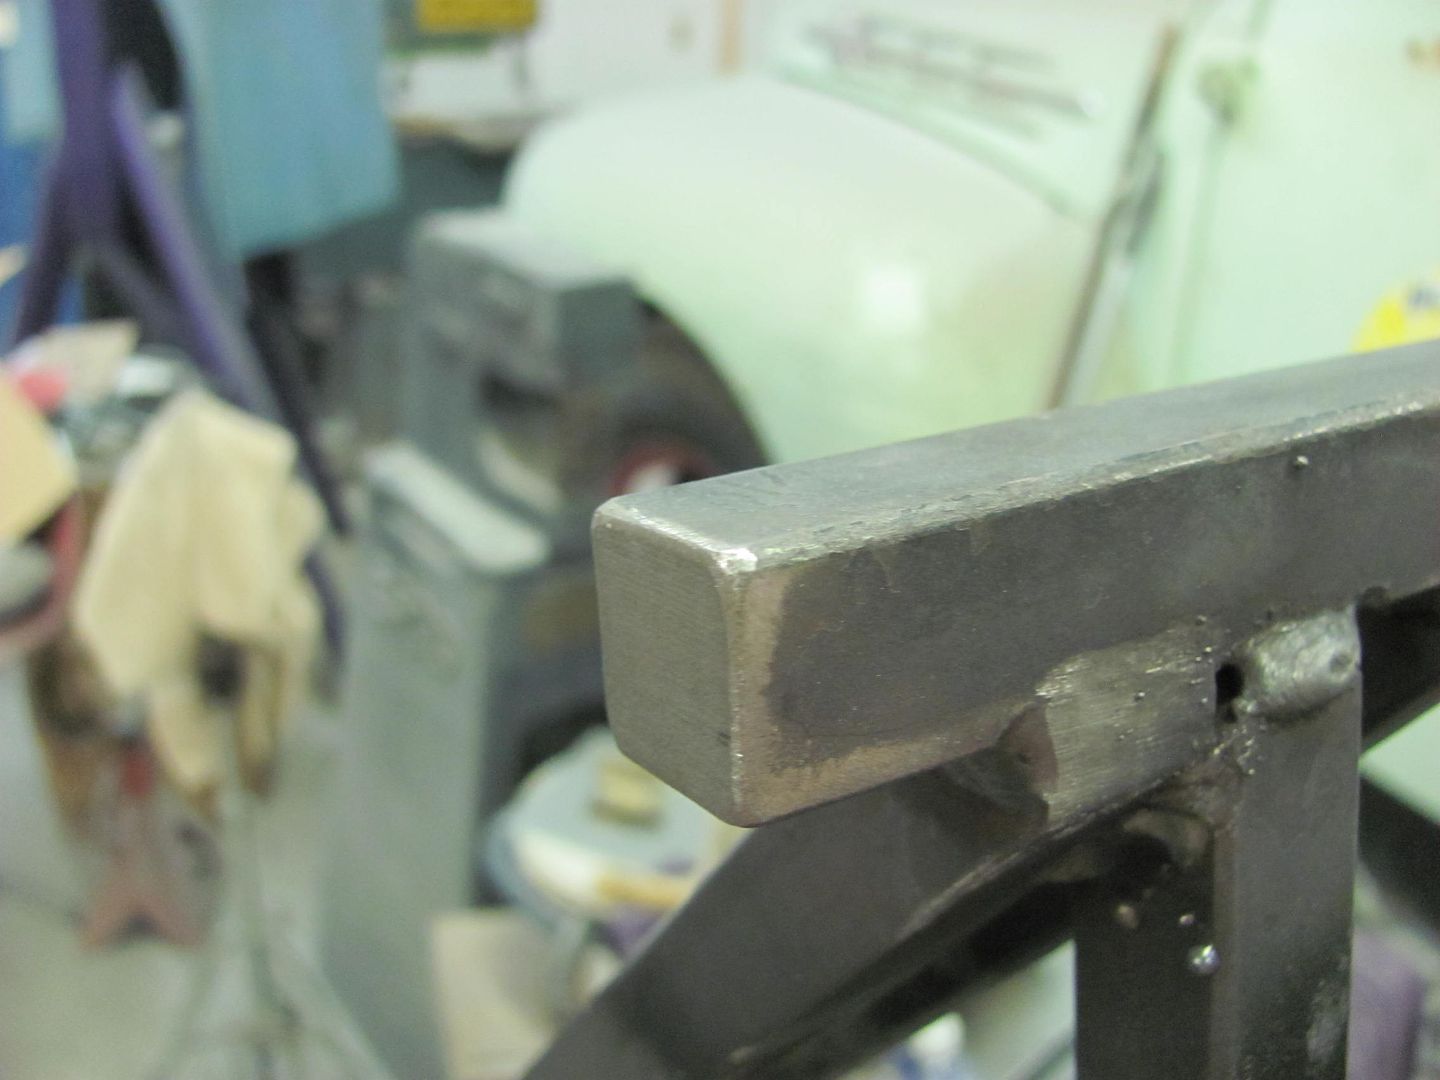
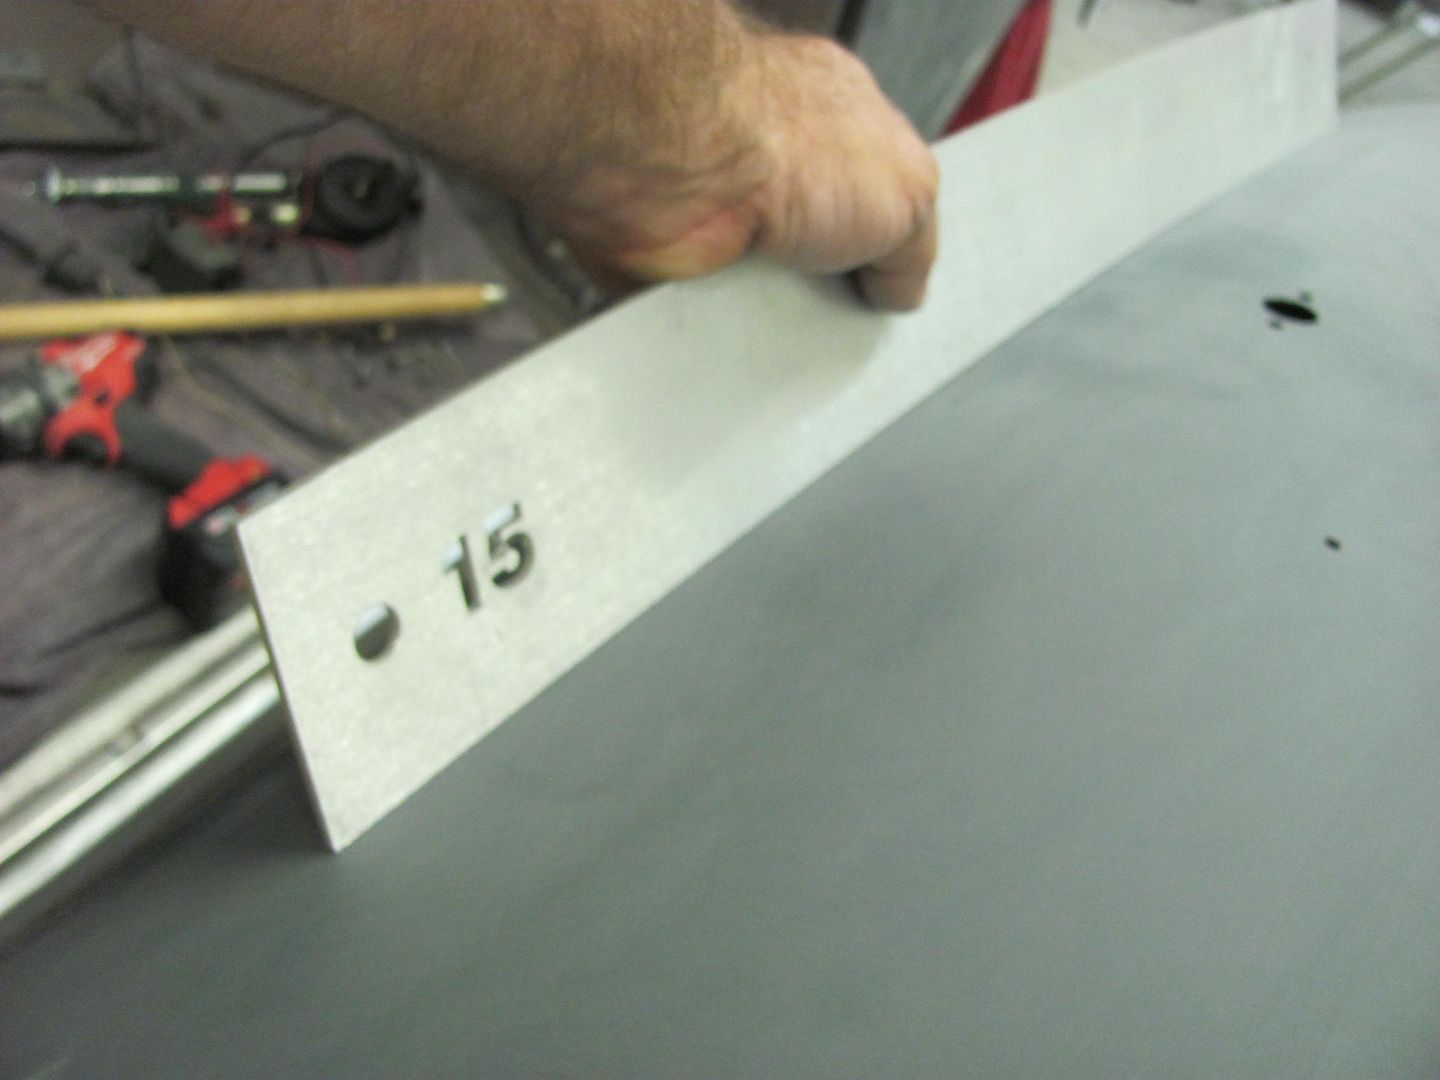
This was made to hold the tail gate in correct alignment as on the car for painting. I had radiused the lower bar but failed to do so on the top one. A check of the skin with body sweeps shows that a #15 sweep is about correct, so it was used to verify some relief grinding on the top bar...
As added insurance, some truck cap gasket seal was added to further isolate the issue on both top and bottom bar....
On a positive note, glad to find this issue in the primer stage......
But let's back up a second and look at this picture, it should have been my red flag. Where the second mark to the left in the picture was not as round, looking at it now does show a rather symmetrical device was causing this..
So please use my lesson in dumassery to prevent a similar occurrence.
 Posting Permissions

 Reply With Quote