Just joined? Please introduce yourself.
Page 4 of 7 FirstFirst ... 23456 ... LastLast
Results 31 to 40 of 68

Thread: Lower rear qtr patch panels which ones to buy?

  1. #31
    Registered Member chevynut's Avatar
    Join Date
    Nov 2011

    Member #:115
    Location
    Fort Collins, CO
    Posts
    10,847
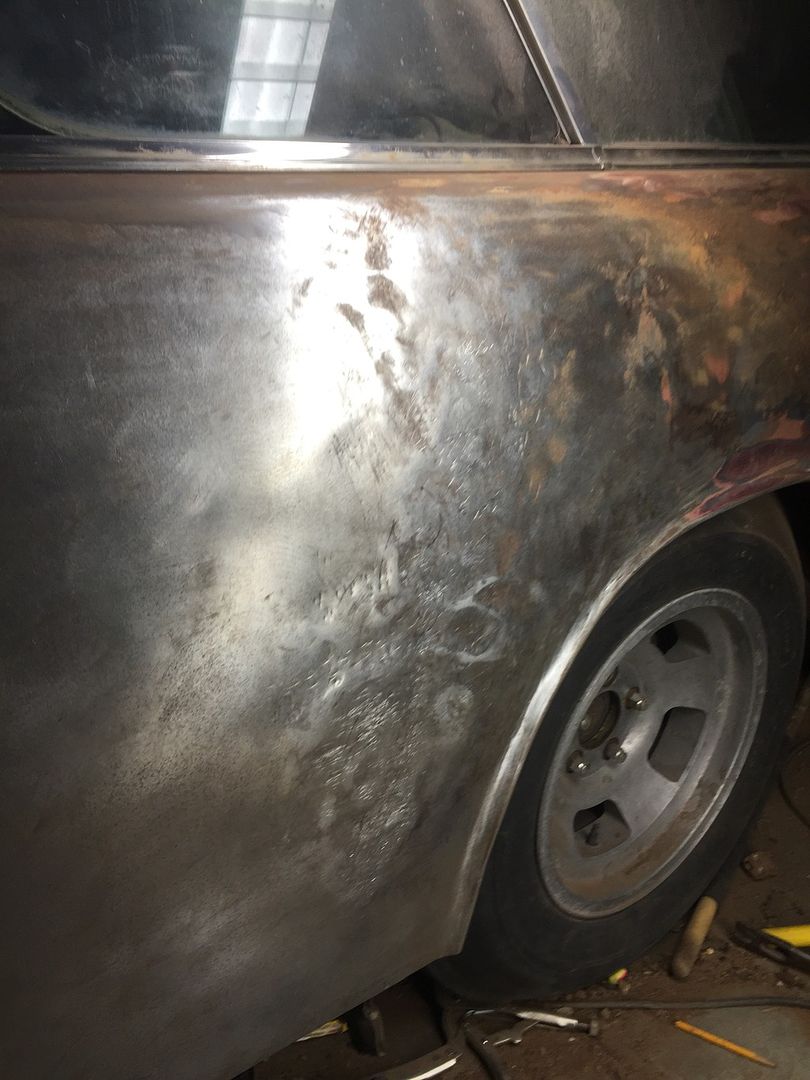
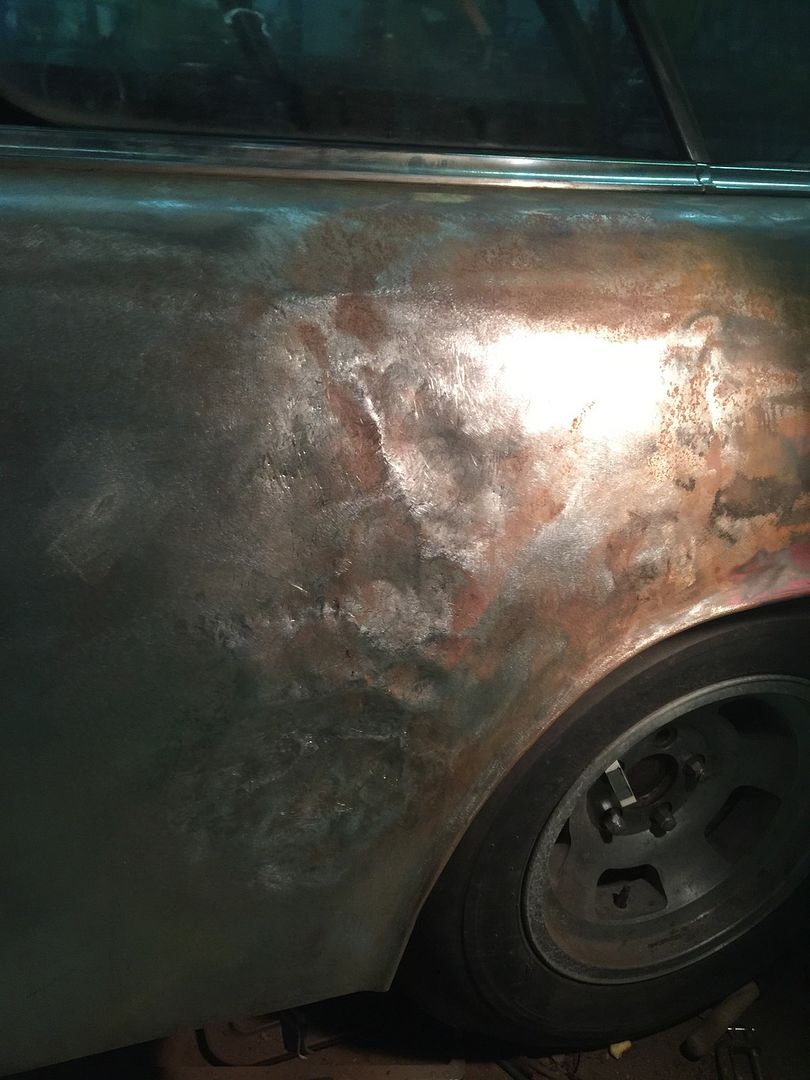
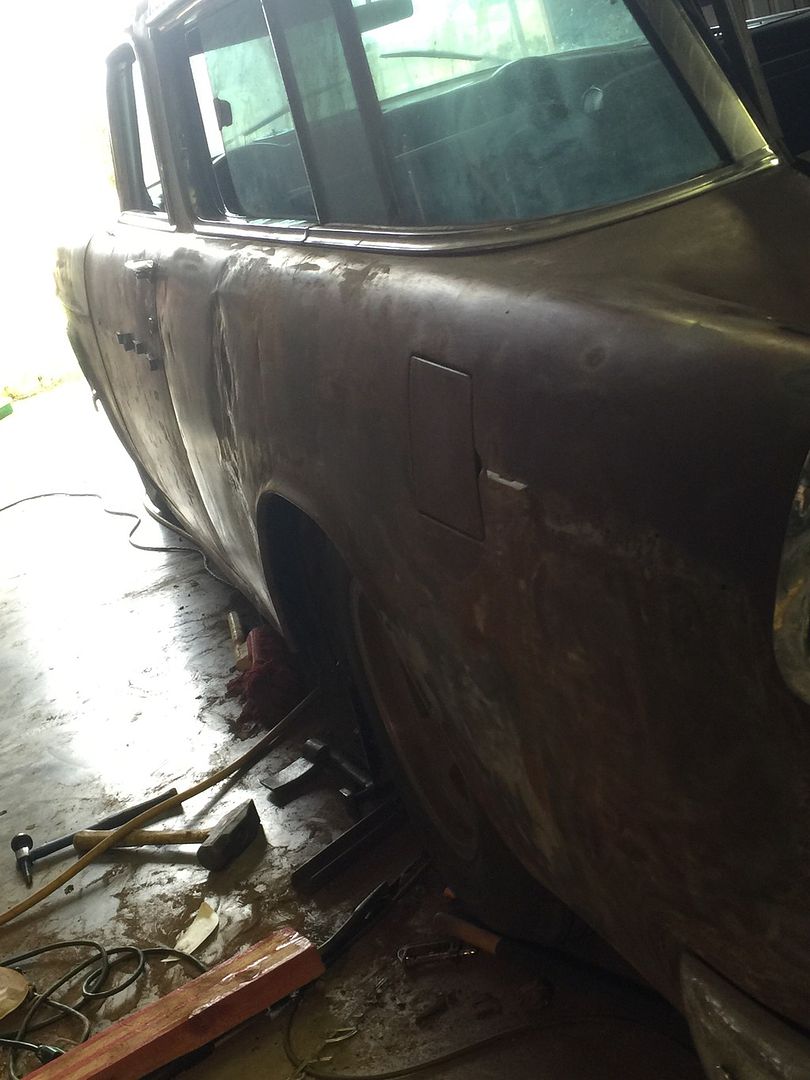
    Rocky, with what little rust you're dealing with I would be very hesitant to replace that panel, unless there's a lot of damage on it. Replacing the panel has it's own drawbacks and you can create even bigger headaches if you don't know what you're doing and you're not careful. And it's a lot of work.

    If I was you I'd patiently work those dents out and deal with the stretched metal before you hack that panel off. It really doesn't look that bad.
    56 Nomad, Ramjet 502, Viper 6-speed T56, C4 Corvette front and rear suspension


    Other vehicles:

    56 Chevy 2-door BelAir sedan
    56 Chevy 210 4-door sedan
    57 Chevy 210 4-door sedan
    1962 327/340HP Corvette
    1961 Willys CJ3B Jeep
    2001 Porsche Boxster S
    2003 Chevy Silverado 2500 HD Duramax
    2019 GMC Sierra Denali Duramax

  2. #32
    Registered Member bsa_bob2's Avatar
    Join Date
    Dec 2013

    Member #:2021
    Location
    lower mich
    Posts
    101
    I have chopped a lot of tops on streetrods and kustoms ..{myself}. One thing an ole pro shared with me-50 some years ago was this. "It doesn't matter how big of a panel you use.,always cut out the least amount of original steel that you can, Throw the left over on the shelf . you might use it somewhere else. especially if it has good stamped reliefs in it. bob s

  3. #33
    Registered Member rockytopper R.I.P 5-13-2017's Avatar
    Join Date
    Sep 2013

    Member #:1884
    Location
    Covington Texas
    Posts
    1,039
    Ive been pertenting(learning) to be a body man for three days now first time using hammer and dollys. I thought I was doing all the good but realized the panel had a bulge not sure if it was from previous work or something I created and Ive been chasing an oil can ever sense that caused me to loose my temper and take it out on the panel. Ive cooled down and re grouped slowly tapping it out I thank maybe it can be saved if someone one would save it from me lol.

  4. #34
    Registered Member rockytopper R.I.P 5-13-2017's Avatar
    Join Date
    Sep 2013

    Member #:1884
    Location
    Covington Texas
    Posts
    1,039
    Anyone ever use a shrinking disc? Ive been chasing a oil can and so far its still ahead if me.
    I believe when a tapped out the deep grove the oil can started. When measuring the passenger qtr with a straight edge it appears to be straight from the door edge all the way to the bottom rear edge of the slide window top to bottom of the panel. The drivers side I'm working appears to have a crown in it were all that mess is in the picture


  5. #35
    Registered Member
    Join Date
    Apr 2012

    Member #:571
    Posts
    4,672
    I have a shrinking disc and occasionally use it.

    From looking at the photos, and I know they can be misleading - I think that you need to raise some low spots before you do any shrinking. Otherwise the whole panel will be low. Thing is I can't tell how low they are from a photo. Once the whole panel is straighter, but with a few highs, then you can shrink. You may even need to use a shot bag and hammer to get those low spots up.

    If you would post a photo with a straight edge held to the panel showing how close you are to straight, then maybe we can be more specific.

    The shrinking disc is not a silver bullet.

  6. #36
    Registered Member rockytopper R.I.P 5-13-2017's Avatar
    Join Date
    Sep 2013

    Member #:1884
    Location
    Covington Texas
    Posts
    1,039
    Here are pictures of the panel prior to me doing any hammer or dolly work. All that has been done to this point is cutting the routed part off the bottom. If you look at page 3 of this post you will note the contour gage. I copied the contour on my passenger side at the door edge. I can move the gage all along the panel back to the wheel opening and it maintains this shape. Refer to other picture with gage on drivers side and the contour is quite different note 1/2 inch gap at bottom. Both are close to same at door edge but moving aft towards the wheel opening you can see the panel has a much higher crown in it top to bottom. You could say the bottm is in but it can't be and still align with the existing lower rocker edge. it is already out from cutting the bottom of panel in this picture it needs to go in from here.


    This is a picture of the panel after I did many hours of trying to remove the dents. When I put a straight edge on it I realized I had a bulge. As stated I can take a 4 ft long straight edge and place it anywhere on the passenger qtr panel up and down running horzontal and it lays flat on the panel all the way back to the center of the wheel opening. Not so on the drivers side. It is as if it has a higher crown in it both ways up down and fwd aft.
    This is after I worked the panel first time I noted this crown. The straight edge should be flat all the way to the wheel opening if passenger side is correct. It appears to be undamaged. It also is crowned up higher. Both areas would oil can in and out. I could push on one and it pops out the other or vise versus.


    This picture is after I lost my cool trying to bring the high spots down and beat them down. You can lay a flat edge on the panel at this point. But it is all knocked down. The picture above in my last post is where I am now with some of it worked out and high again. I only have my passenger side as a go buy. The last picture below is looking down the side after I knocked down the entire crowned areas. Both oil cans you can see them clearly in this pic. Except for the pushed in areas I created the rest looks straight to me as far as fwd and aft contour. I don't believe I will be able to match the up & down contour from passenger to driver side. With them pushed in it does move the bottom out were I have it cut for a patch. But as I remove the oil cans it moves inward as it should. Holding it in position at the bottom to align with patch does not appear to have much effect on the bulged areas. From research I gather that the shrinking disc is for the last amount of high area after you have it fairly straight. I can't seem to get to that point its like either these panels bont match right to left or the one is far out of wack with the other


    Last edited by rockytopper R.I.P 5-13-2017; 12-01-2015 at 01:48 PM.

  7. #37
    Registered Member
    Join Date
    Apr 2012

    Member #:571
    Posts
    4,672
    rocky, in that last photo it looks like you have a huge low spot from top to bottom, actually two or three of them. You need to get this area higher, then shrink it. You may need to use a blocking hammer and a shot bag to do this.

    You have a lot of work to do to get this acceptable. A quarter panel may be less work.

  8. #38
    Registered Member rockytopper R.I.P 5-13-2017's Avatar
    Join Date
    Sep 2013

    Member #:1884
    Location
    Covington Texas
    Posts
    1,039
    Yes I do Rick I created them. Look at the straight edge it drops off like a cliff. Its worse on bottom but is also high al the way up. I have a huge crown or bulge top to bottom that is not in the passenger side which Im using as a go by sense it appears to be undamaged best I can tell. Either they never matched from the factory or one is teaked pretty badly. All attempts to tap the bulge areas down only oil canned the entire areas you see in the last photo. Thats why I lost my cool and wacked the hell out of them. I tried a shrinking hammer backed up with question mark dolly but did not seem to do anything but cheese grade the panel were I hit it. I have been holding the hammer on the outside and slapping the low areas from the back side with the question mark dolly and also tapped them on the highs from the outside holding the dolly on the back low spots. This seems to do what you are saying with a bag? There were smaller dents up by the door which I slowly worked up and kept running the da over them flat until all the rust disappeared I have all of them in a very acceptable condition needing little or no filler now. I also worked a dent out of the Qtr wheel lip itself and dents further back near the center of the opening thanking this could be causing my problem but it didnot help the bad areas. If you look back up at picture I posted last night this is how it looks at present. I have knocked most of the top back out. I have worked the bottom but it stills has away to go but again I just seem to be chasing my tail and creating a bulge again.

    Rick reading other post (Cnuts repop qtr install) I found this your exact words. quote "They are REALLY flat from the door jamb to the center of the wheel opening, where they start to have a slight crown" unquote

    This is how my passenger qtr is which I call good. Not the case on the drivers side.

    I also found this quote from you" FWIW I did my best to ruin my good original quarters trying to shrink out a bumper crease just behind the door on each one. Lots of work to fix my mistakes."

    So it looks like I'm not the first rookie to have this happen to LOL. Maybe a glimmer of hope I hope.
    Last edited by rockytopper R.I.P 5-13-2017; 12-01-2015 at 03:48 PM.

  9. #39
    Registered Member
    Join Date
    Apr 2012

    Member #:571
    Posts
    4,672
    You are very correct, I got into a similar situation as you and the fix for me was a new quarter. I had the whole thing smoother than yours but it was low all over. Pretty much the whole panel was overshrunk from trying to shrink little low spots.

    That's where the bag and blocking hammer comes in. You need to get the low spots high so you can work them. You can't shrink a low spot unless you have full access to the back side. That's why you need to work those areas up with the hammer and shot bag. A slapper or heavy dolly works here too. Hammer the back side, hold the shot bag on the outside. Looking back, that's what I could have done to mine. After you get the whole panel high and pretty straight, then you can shrink the high spots back down to where they should be.

    I was hoping that Robert (MP&C) might have chimed in by now.

  10. #40
    Registered Member rockytopper R.I.P 5-13-2017's Avatar
    Join Date
    Sep 2013

    Member #:1884
    Location
    Covington Texas
    Posts
    1,039
    Rick the master already chimed in early on and said replace it lol. I think he is done lol. But I'm hard headed. That may be the problem. I hit my head with the question mark dolly when I missed the fender lip I was beating on and it slipped out of my hand and came down on my forehead just above the right eye. I dont think I could see a straight panel for the rest of the day lol. Its the crown up and down the panel thats killing me. Like its way over stretched. I'm not sure what the previous person did as far a hammer and dolly it was full of bondo and left with out paint or prime.
    Last edited by rockytopper R.I.P 5-13-2017; 12-01-2015 at 04:35 PM.

Page 4 of 7 FirstFirst ... 23456 ... LastLast

Posting Permissions

  • You may not post new threads
  • You may not post replies
  • You may not post attachments
  • You may not edit your posts
  •