Just joined? Please introduce yourself.
Page 1 of 4 123 ... LastLast
Results 1 to 10 of 35

Thread: '57 210 Del-Ray 2 Door Sedan Build & Story

  1. #1
    Registered Member
    Join Date
    May 2017

    Member #:3403
    Posts
    21

    '57 210 Del-Ray 2 Door Sedan Build & Story

    Greetings folks,

    This is a cross-post from that "other" forum -- ChevyNut enlightened me a while back that there was also another community, so figured I'd share my build progress here as well. Plus, it gives ChevyNut a chance to see what all my pestering him has resulted in.


    The Story
    Around the time I was 14 in '97, my father invited me along to check out a '55 Bel-Air HT a coworker had mentioned. This was rather exciting for me as I always loved the shoebox Chevy's and such things were usually reserved for my older brother. We drove out to the middle of nowhere in the U.P. (that's upper Michigan, for you uninitiated folk) to check it out. Unfortunately, there wasn't much left. The car had been converted to a stock car some time before and most of what remained had been scavenged or hacked apart considerably. Feeling a bit disappointed, we started to leave when I noticed the rear fin of a '57 stick out around the side of a building. My curiosity got the better of me and I walked over to check it out.


    What sat before me was a rather complete, '57 210 2-door sedan, with a plethora of extra side moldings, bumpers, carpet, and other parts cluttering up the interior area. The car was sitting in primer and looked decent to my rather inexperienced 14 year old mind.


    I had to have it.


    After about 30 minutes of begging and pleading, my father managed to negotiate an amicable sale price of $1,200 and off we went with our new toy.


    Unfortunately, in a family of 7 living in rural Michigan, we didn't have a whole lot of money to toss toward the old girl, so she sat in the garage waiting for a number of years. However, it became kind of a bonding point for my father and I, as we would often find ourselves in the garage seeing if we could get it to start again or debating over what color it should. However, that didn't stop him from trying to abandon the project at times. There were multiple occasions where he expected we would never get to it and tried to sell it. However, I would intercept all of the interested phone calls and promptly inform them it was SOLD and to bugger off. I wasn't about to let it get away from me! It was one of the few things we had that would bring us together, as we often struggled to find common ground -- I was a nerdy, brain of a kid obsessed with reading encyclopedias, physics, and so forth, and he was a mechanic interested in how much compression he could squeak out of his 454...


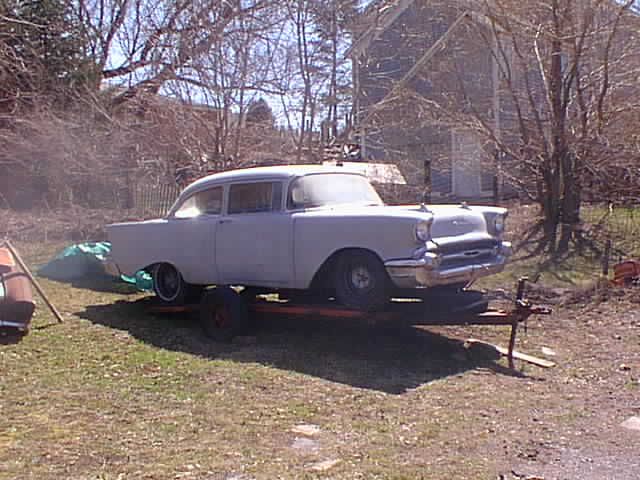
    This is what the car looked like a few years after we had picked it up, we really didn't do much at all other than get it running and drive it around the yard, so this is a good reflection of what I convinced him to buy for me.


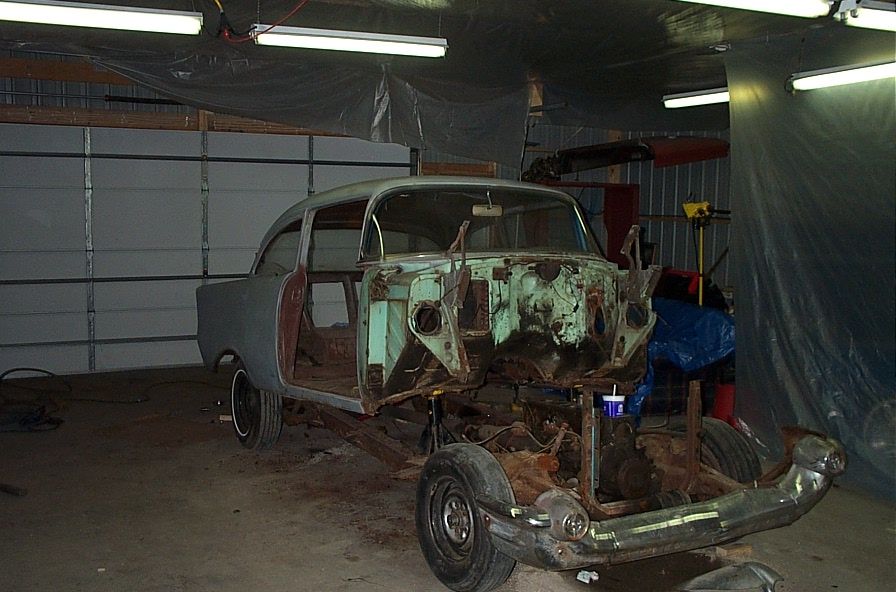
    Fate was against me, however, and he was killed in a work accident in early 2000. To cope, I fled the area and the car to get away from the constant reminders that he was gone. I returned a little bit later, determined to finish what we had started, but I was rather lost as I was depending upon his experience to help me through. But, I was determined to figure it out. So, I slowly began stripping the car and prepping to pull the frame out from below. That's when I began to notice that the body wasn't quite as straight as I remembered it being at 14...


    But, I trucked on anyway, and got it ready to pull from the frame.


    However, fate was once again not on my side and my brother blew the engine in his truck, requiring me to put the '57 on hold temporarily... Unfortunately, by the time I regained access to the garage I was embroiled in a legal battle over who was going to take ownership of the garage and the project sat for years once more untouched, until I lost the garage in its entirety. Feeling extremely depressed, I was forced to abandon the car under a lean-to sitting in a field, fearing I may never get to it.


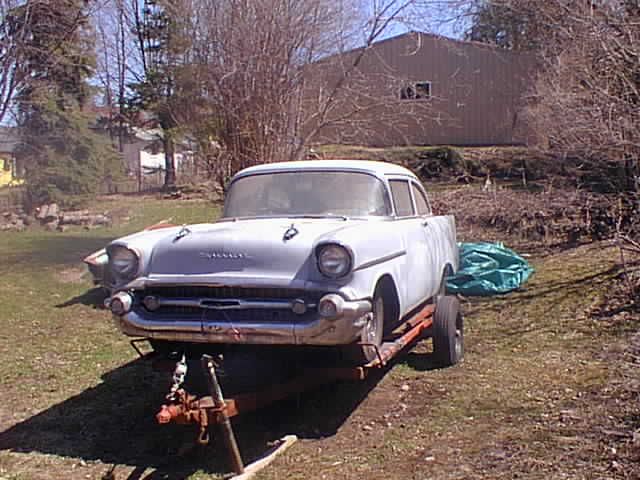
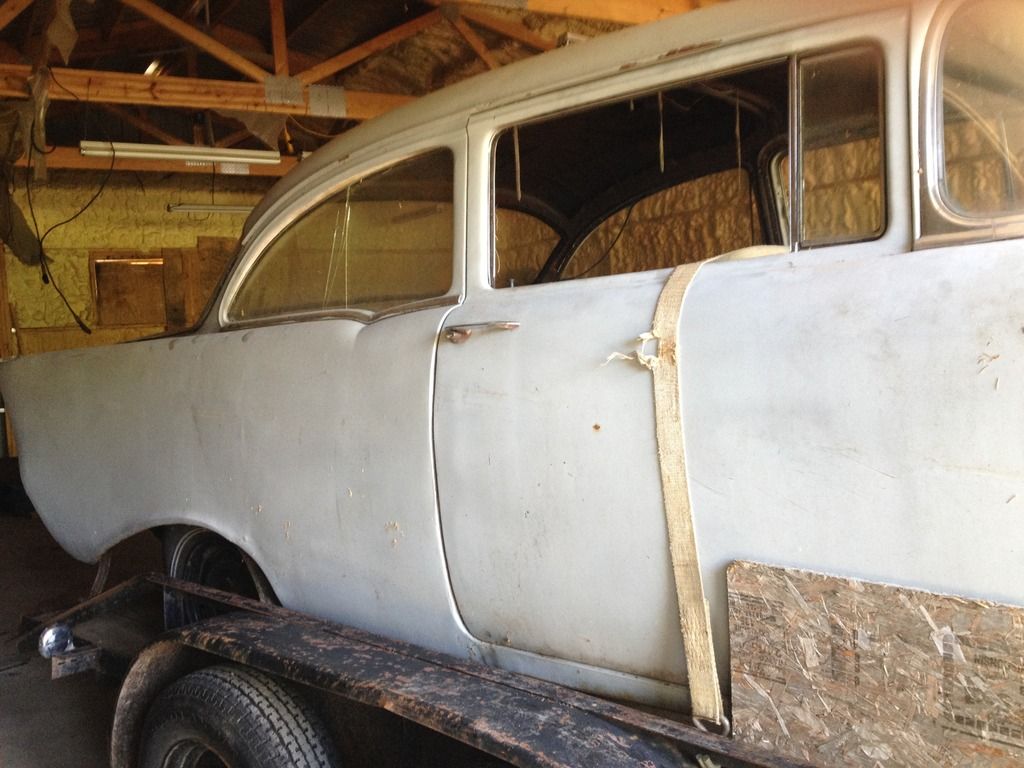
    Here it is being loaded up to be moved to the field, which I thought might very well be the last time I got to see it...


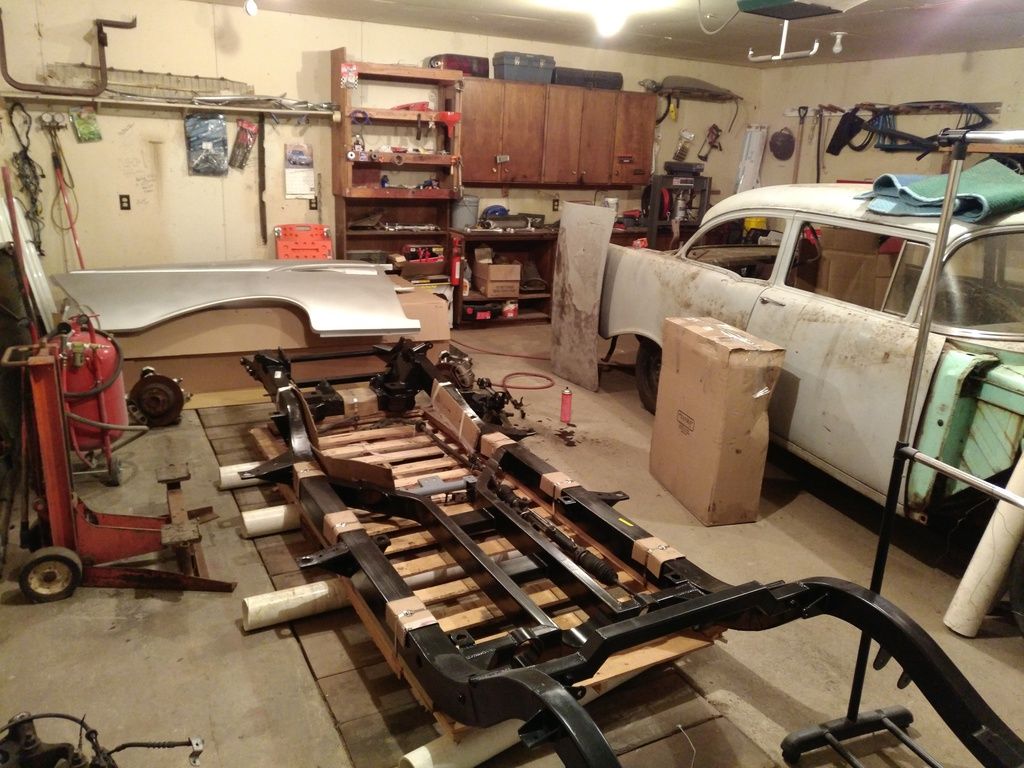
    However, a few years later, I managed to buy a house with a garage (albeit, much smaller) for the sole purpose of finally getting my '57 built.


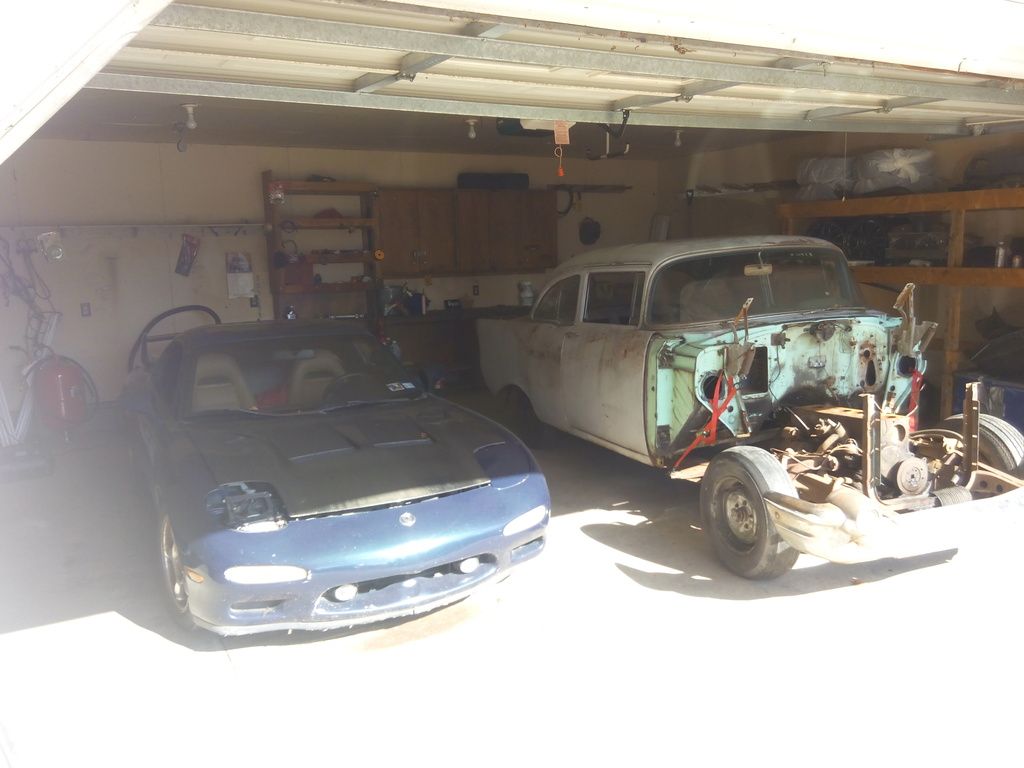
    On my wedding day, my sister and her husband brought the car down and dropped it off. Here it is in its new home, next to my '94 Mazda RX-7.


    So, I'm determined to get this thing done and finished before tragedy befalls me once more.


    So, I've set out a basic list of goals:

    • Stock, Bel-Air Exterior, painted Montego Blue (I keep changing my mind here....)
    • Stock appearance interior -- ie, no "modern" looking seats UPDATE: went with '63 Impala SS buckets
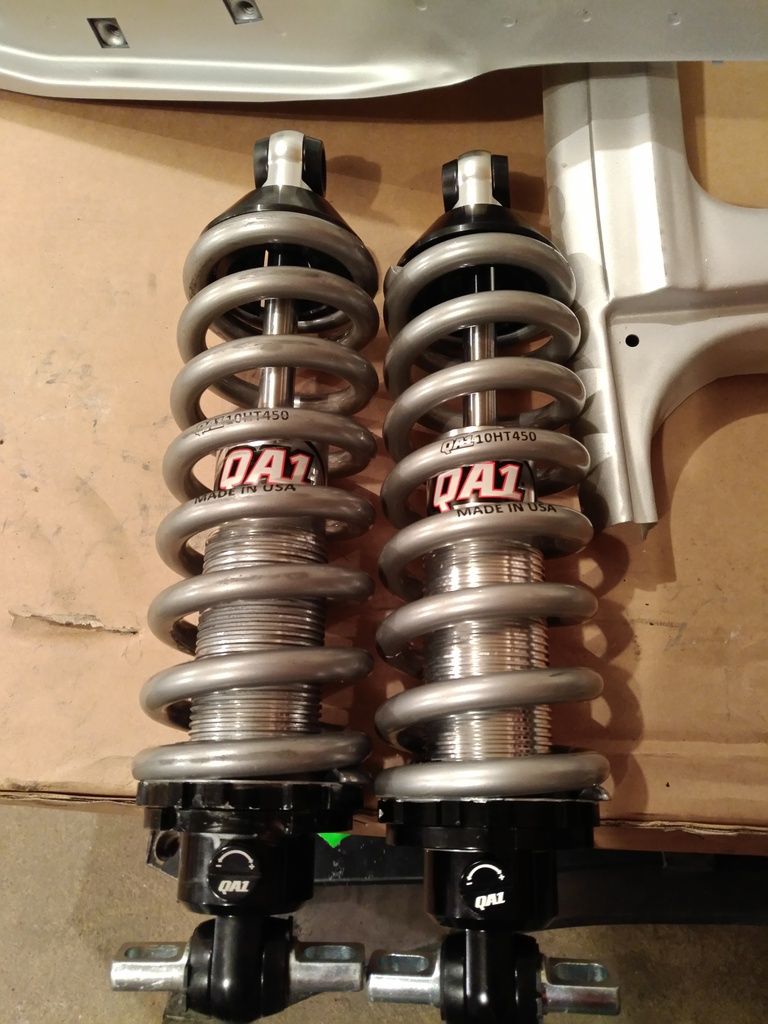
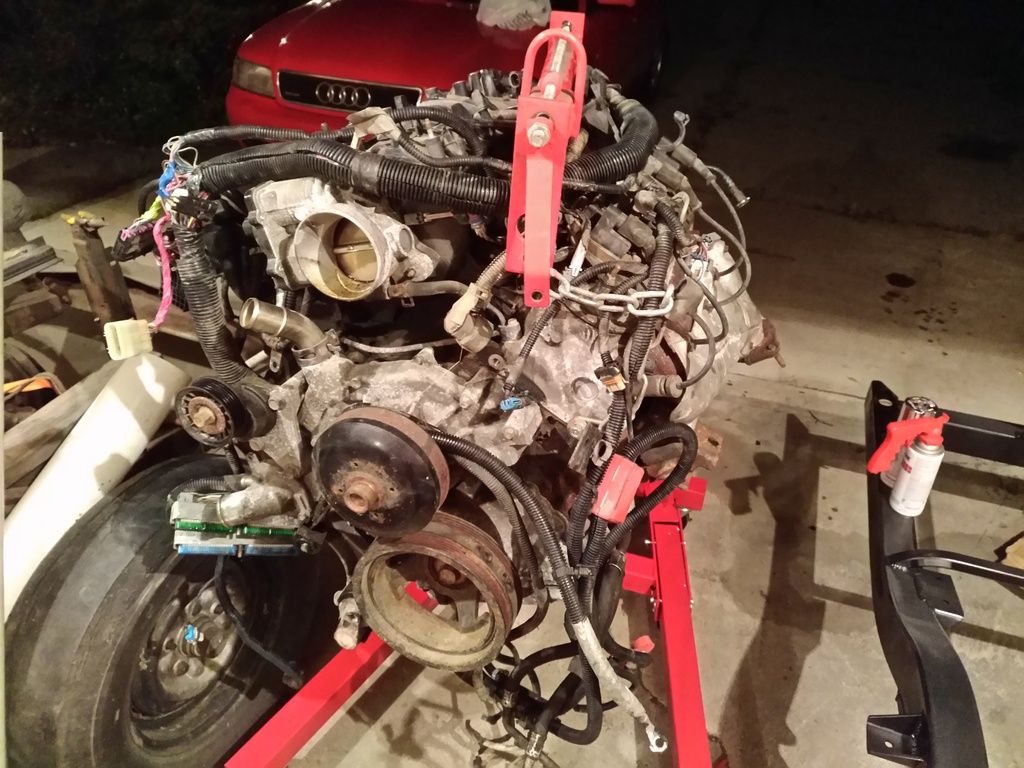
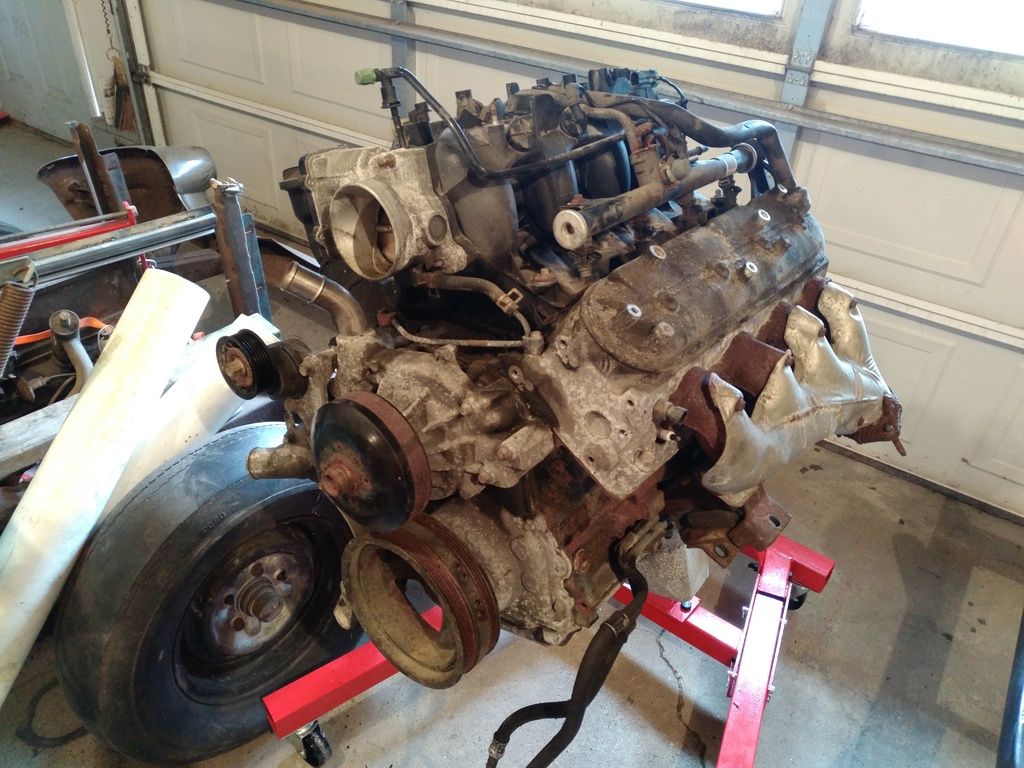
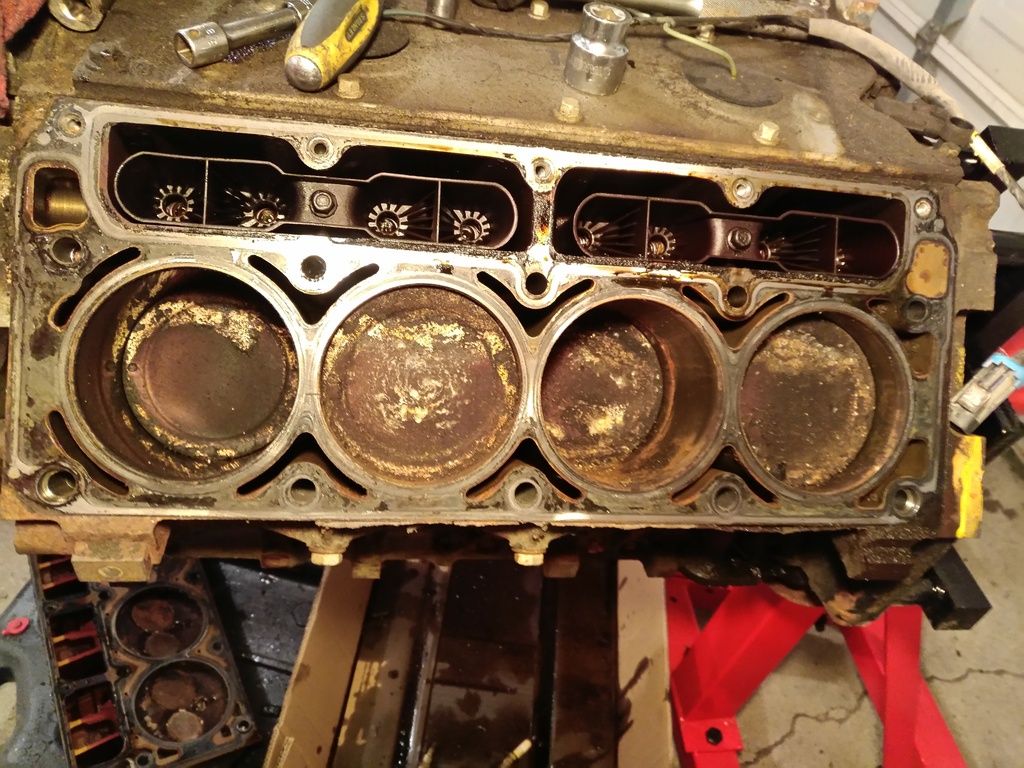
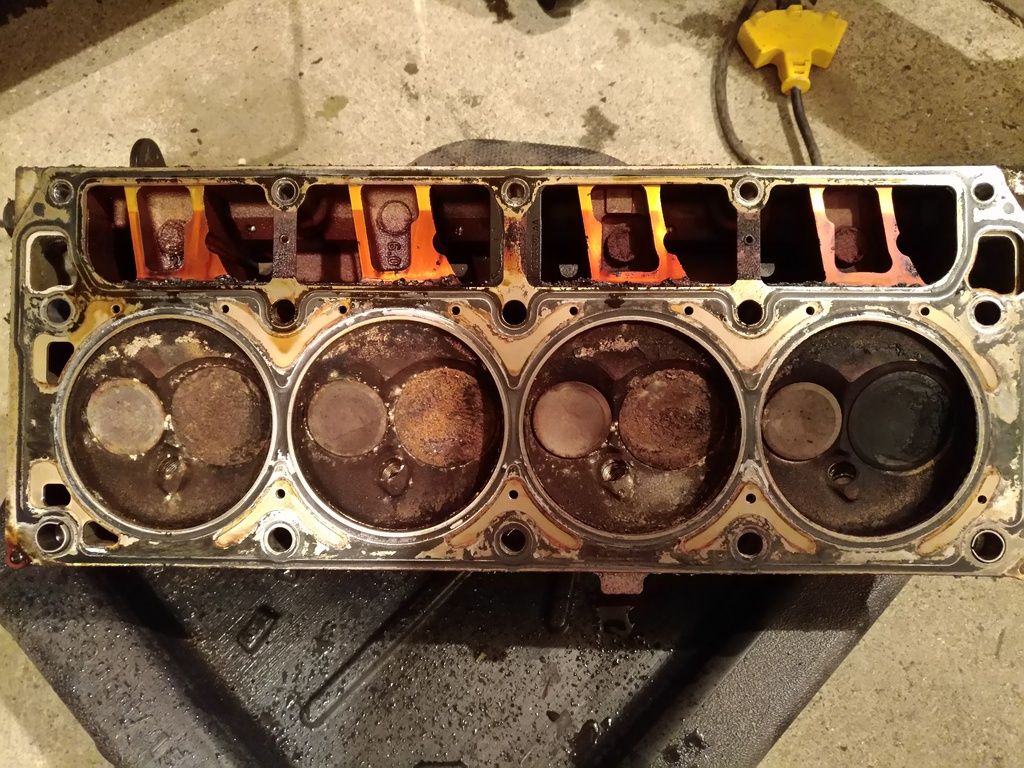
    • LQ4 w/T56 maintaining EFI -- debating on stroking to 408 or going twin-turbo (I have a tendency to turbo everything I touch)
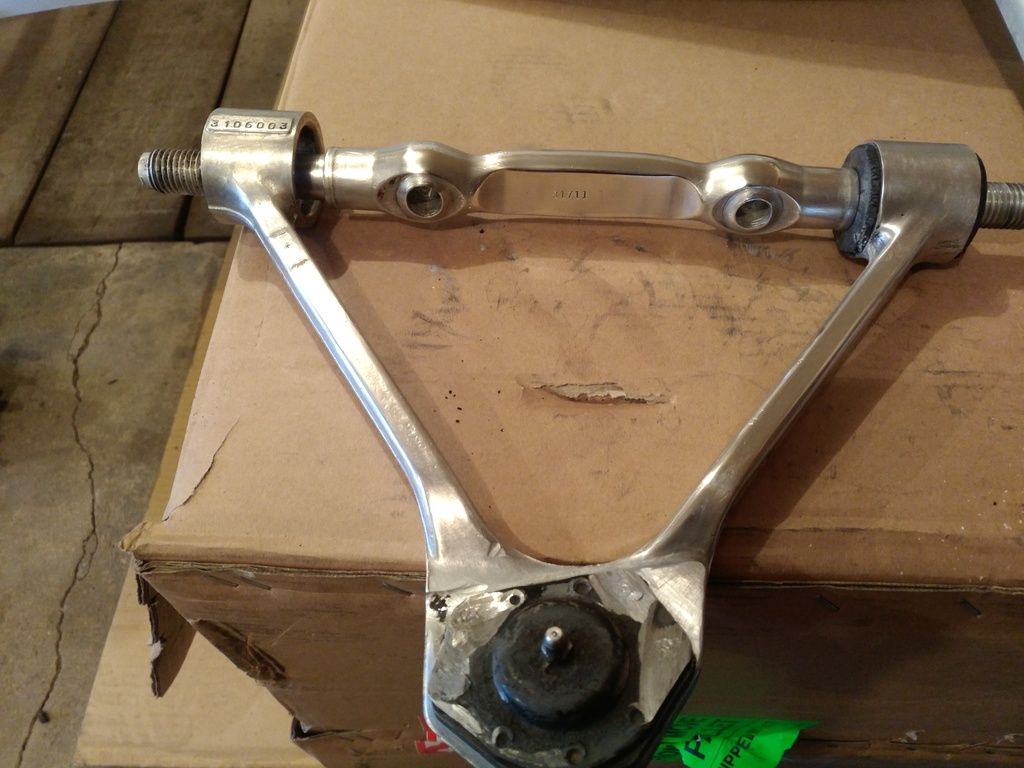
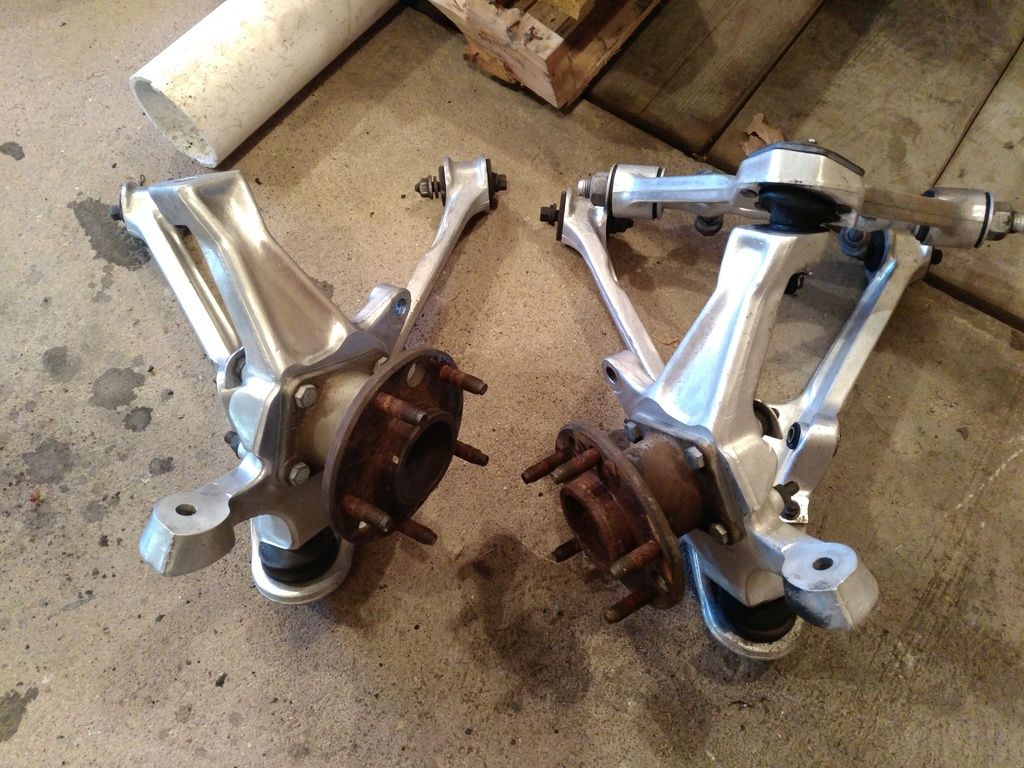
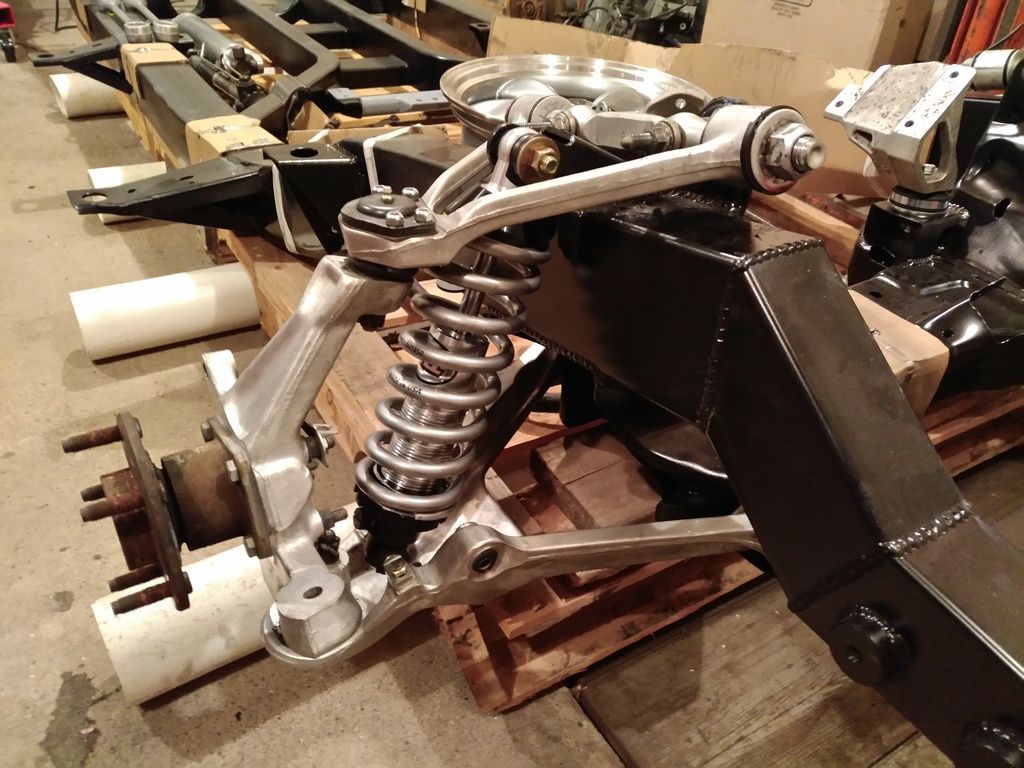
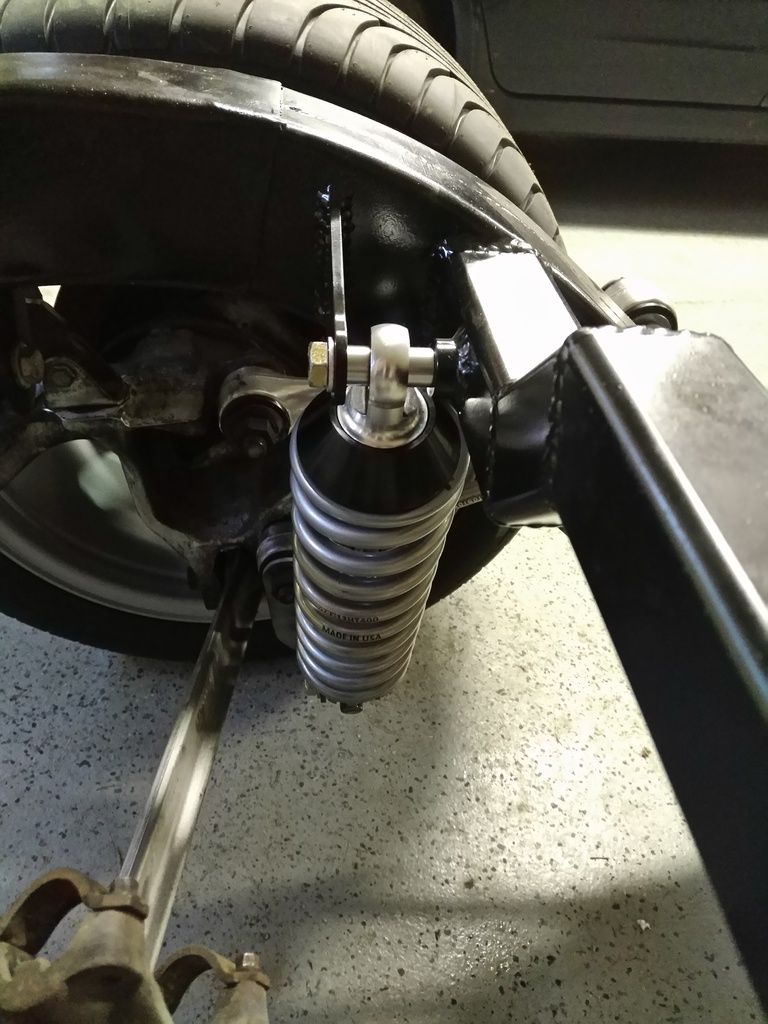
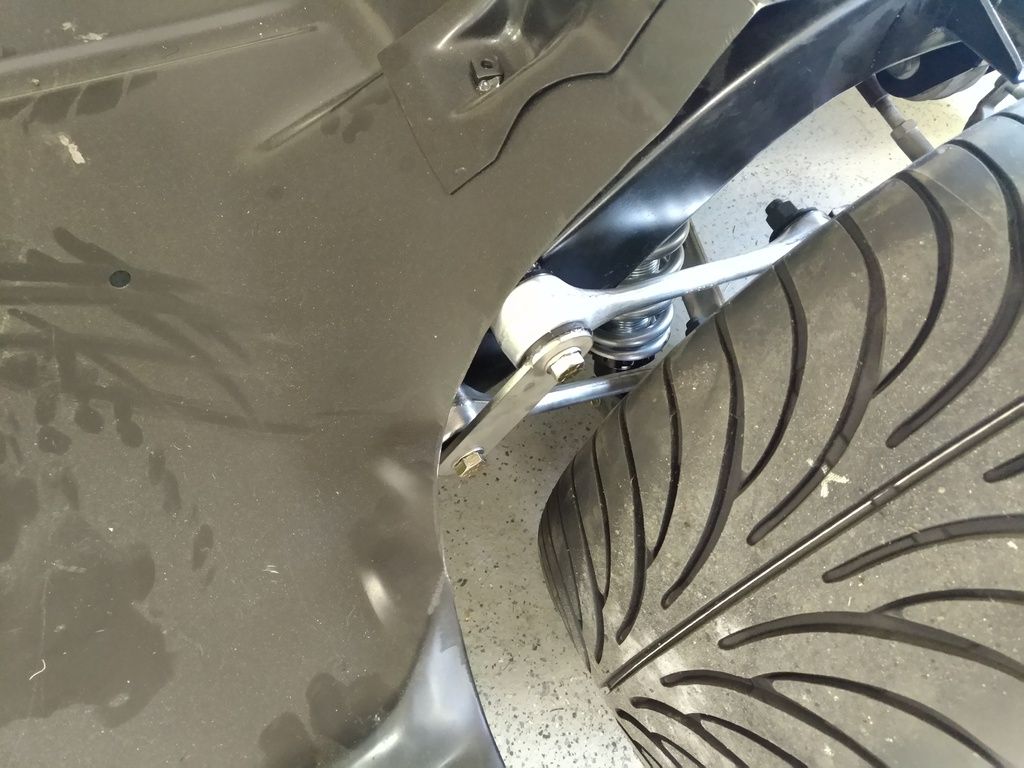
    • C4 Suspension (Thanks ChevyNut! )
    • Mini-Tubs


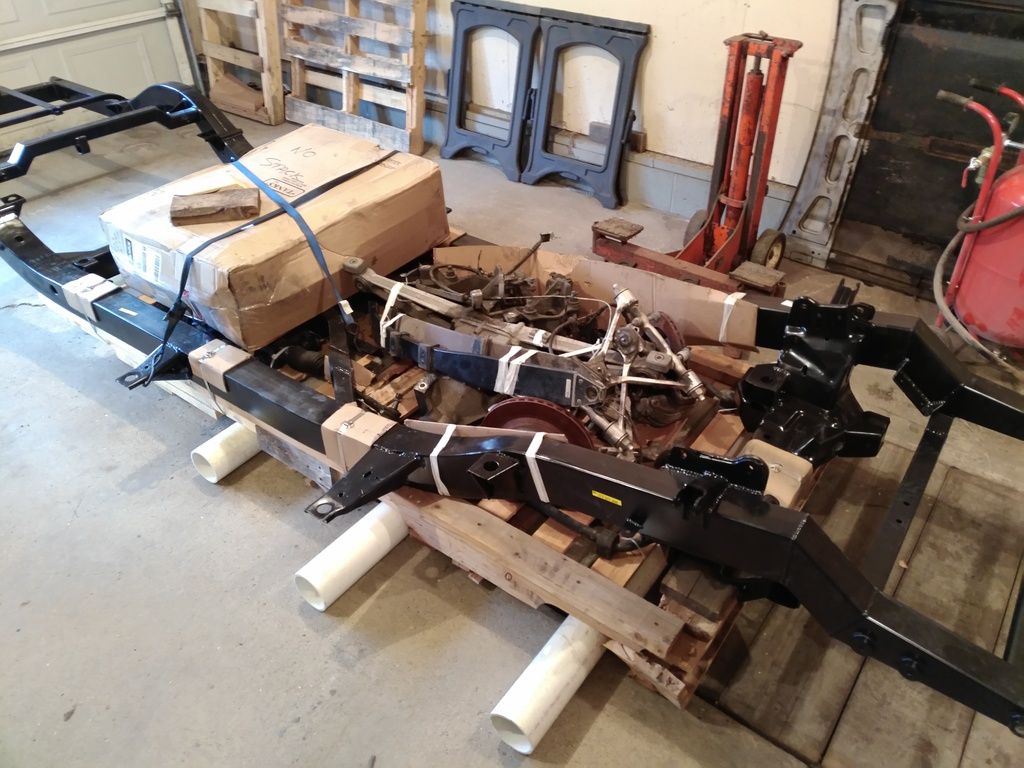
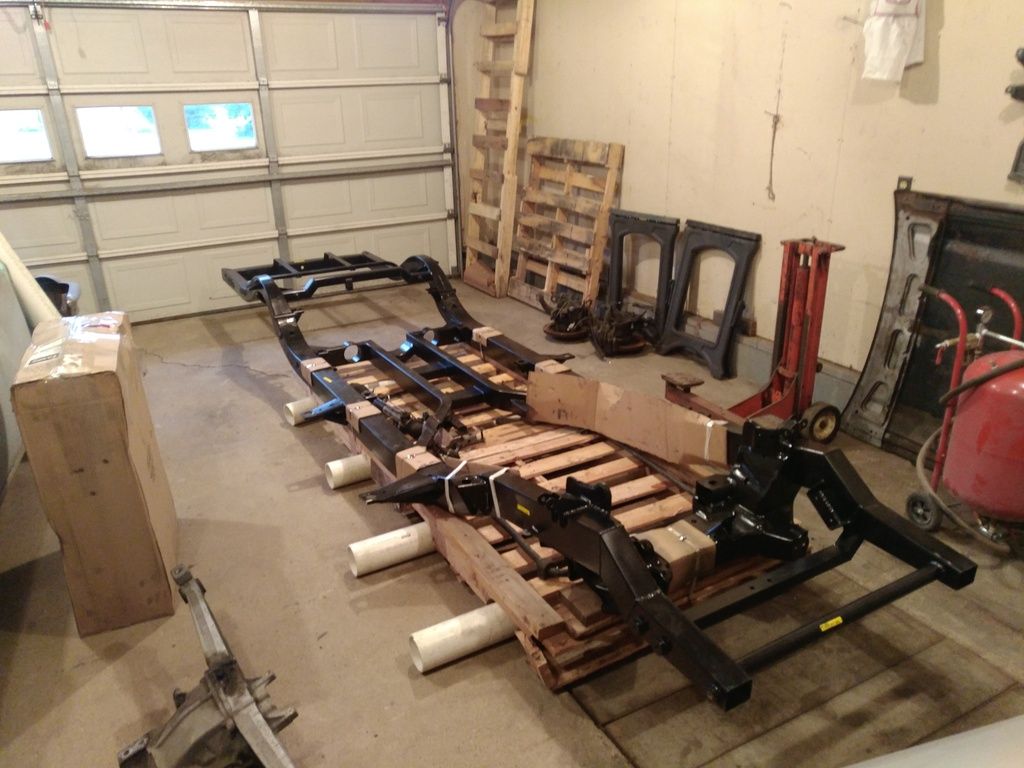
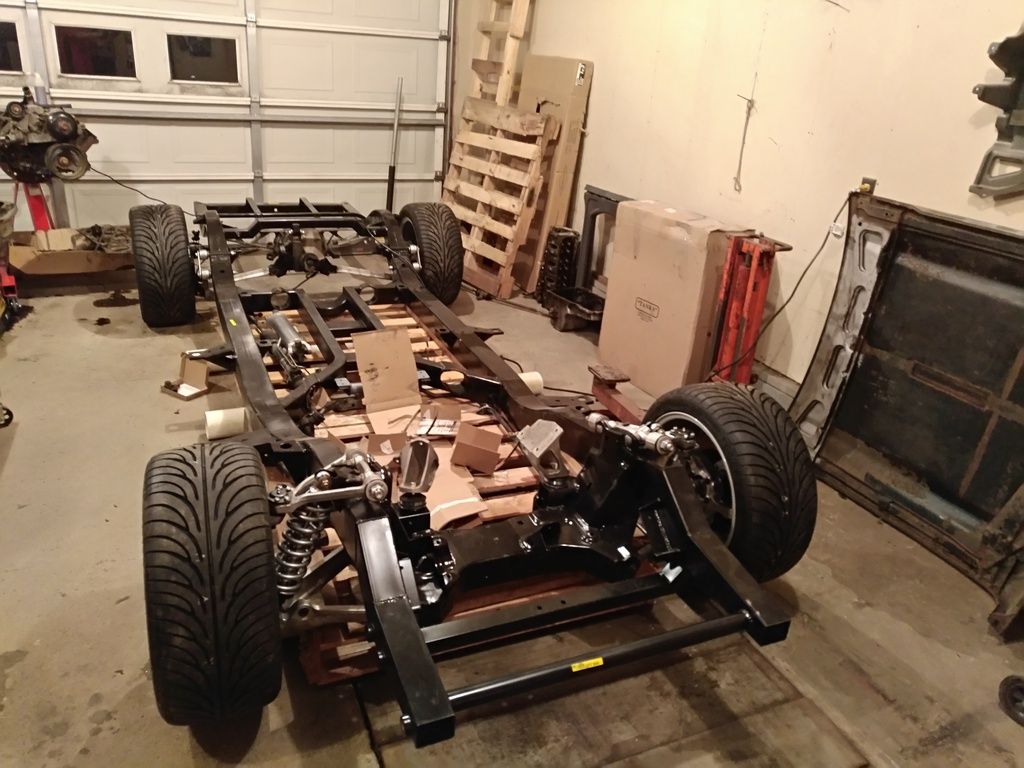
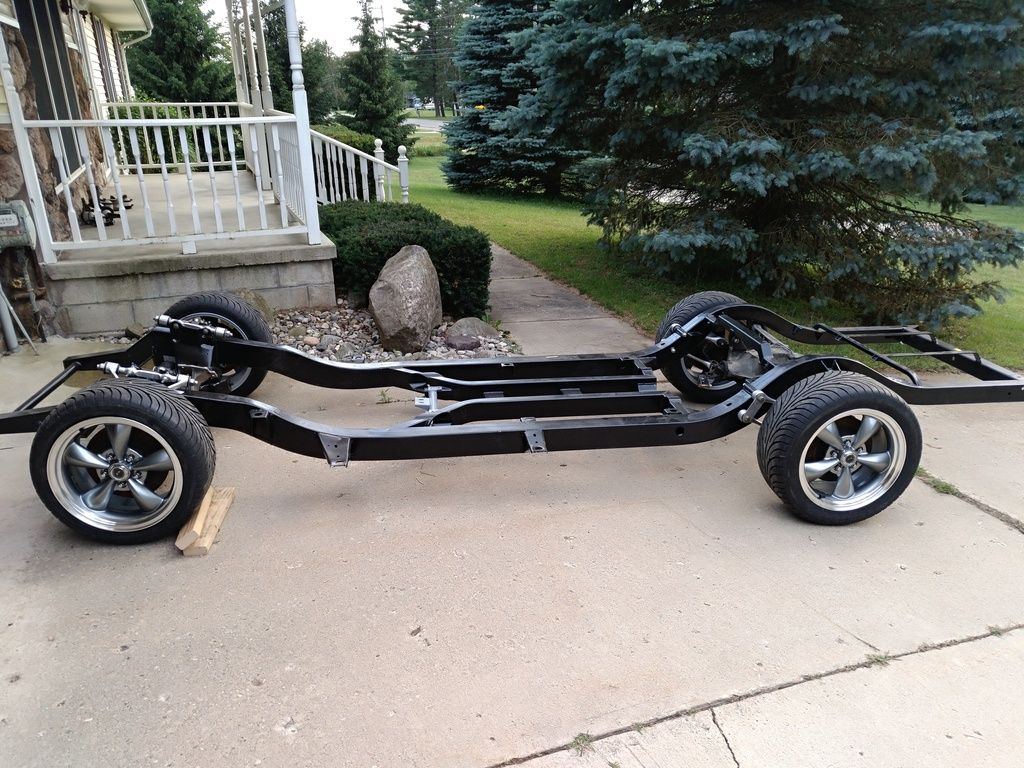
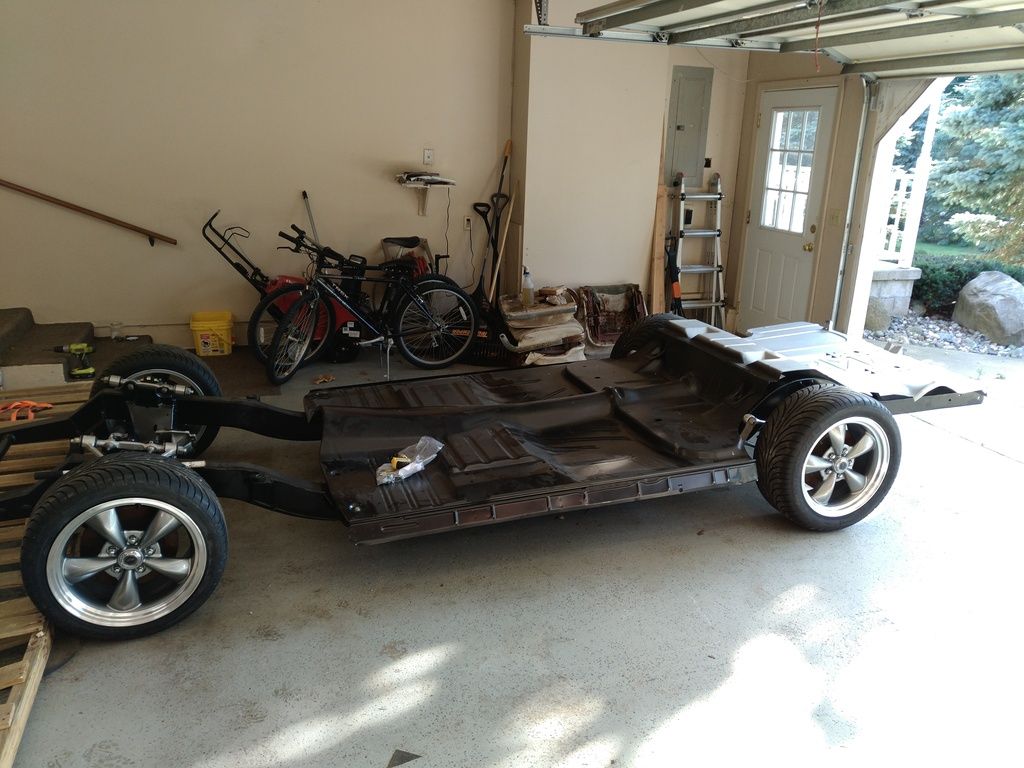
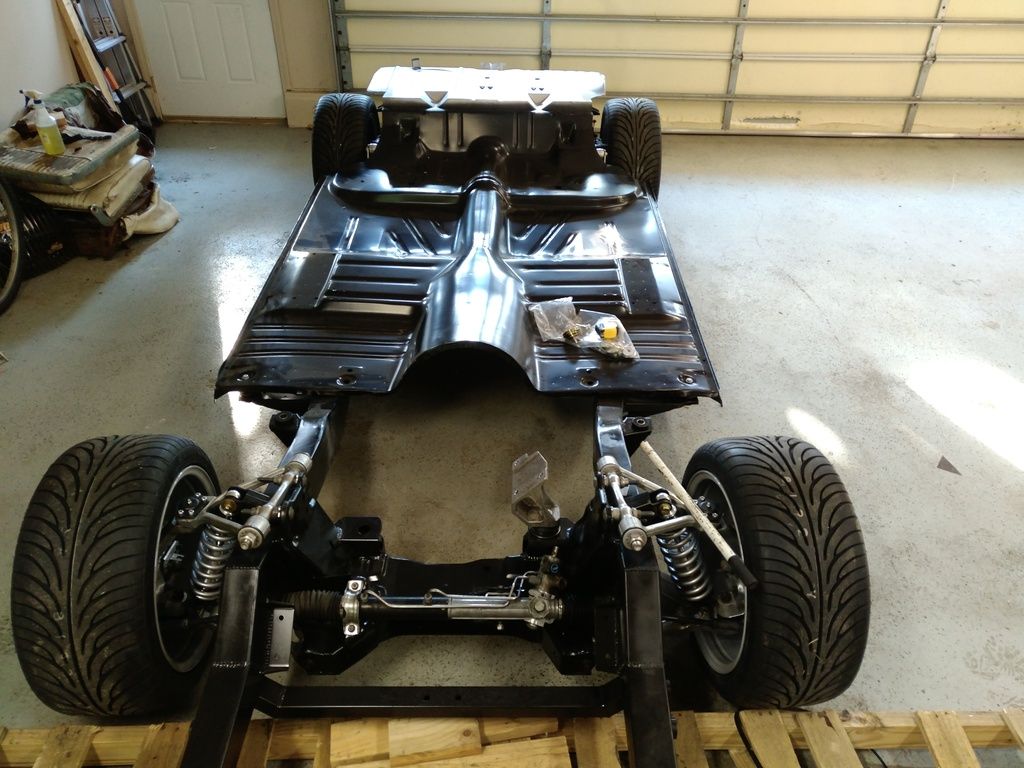
    I've employed the expertise of CLASSIC EDGE DESIGNS (www.classicedgedesigns.com) to put together the frame. Laszlo has been incredibly patient with me and an absolute joy to work with as he constantly endures my idiocy.


    With the frame underway, I set off to analyze my situation and determine what all I'm going to need. I didn't quite expect the can of worms I encountered.


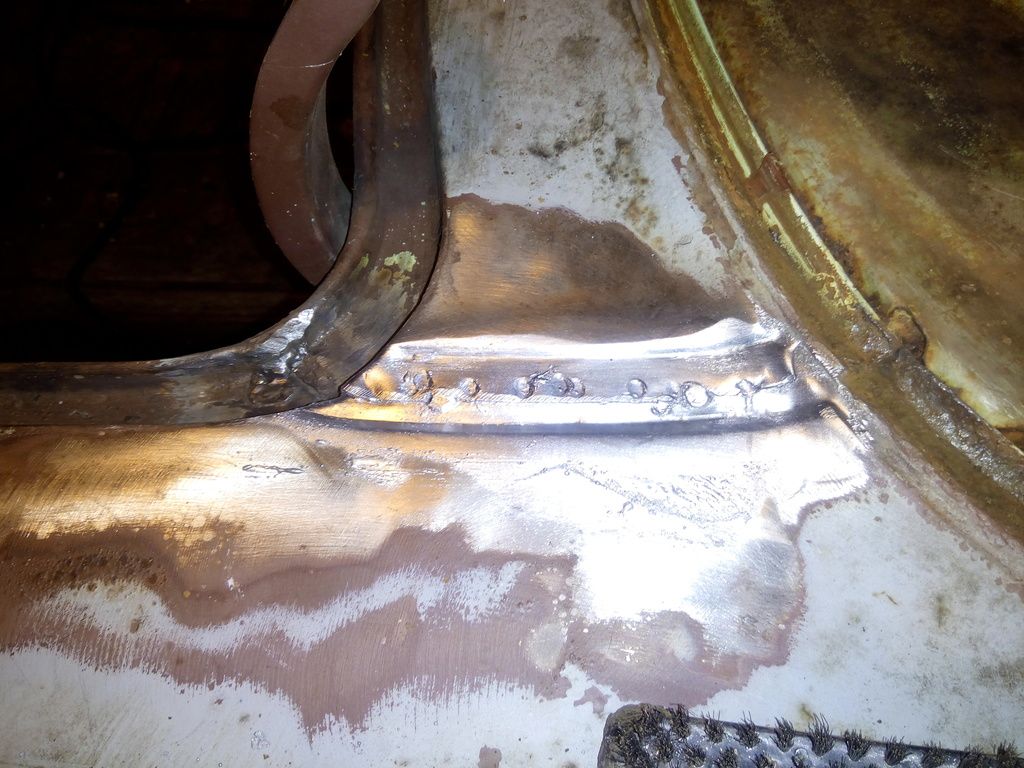
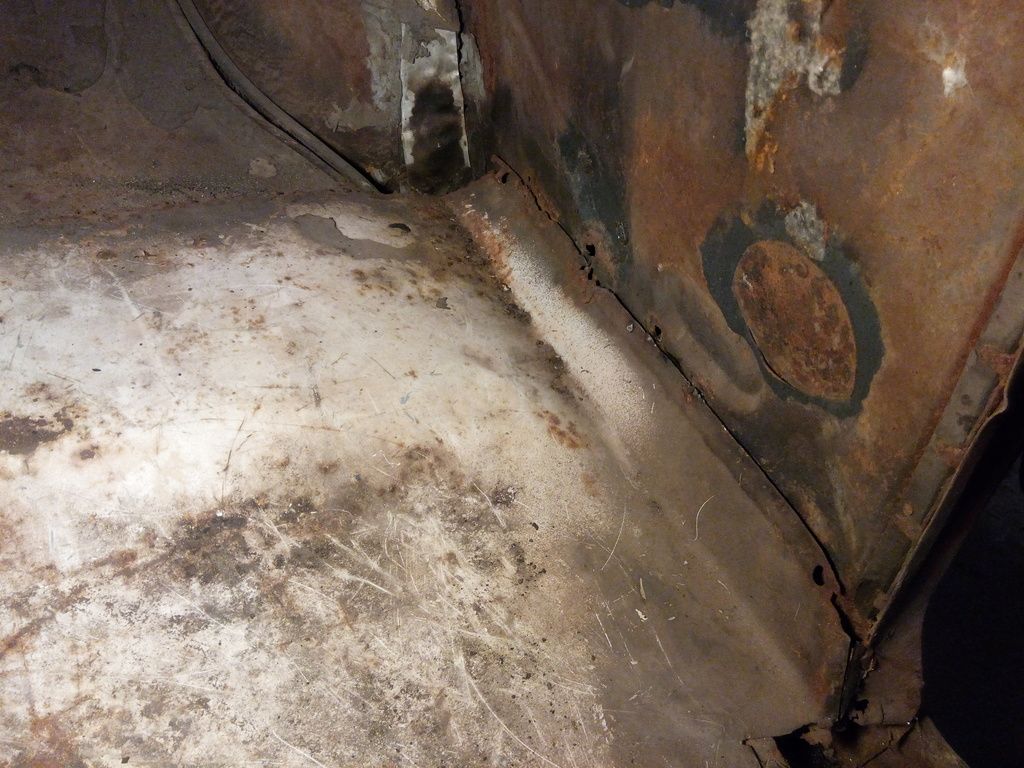
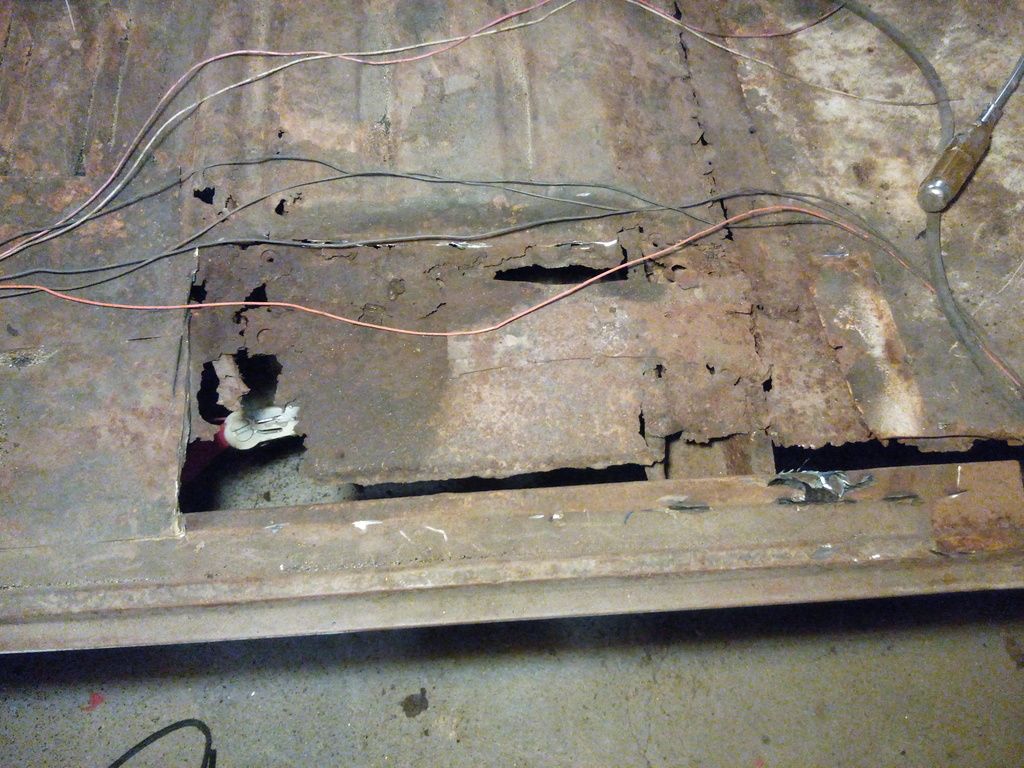
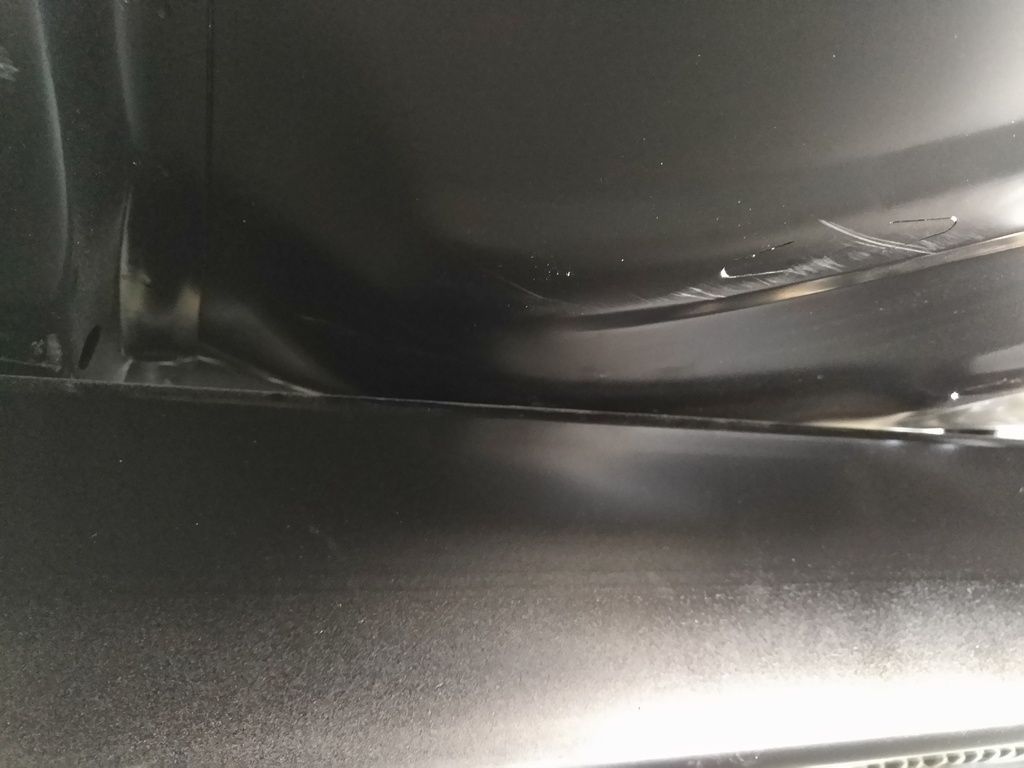
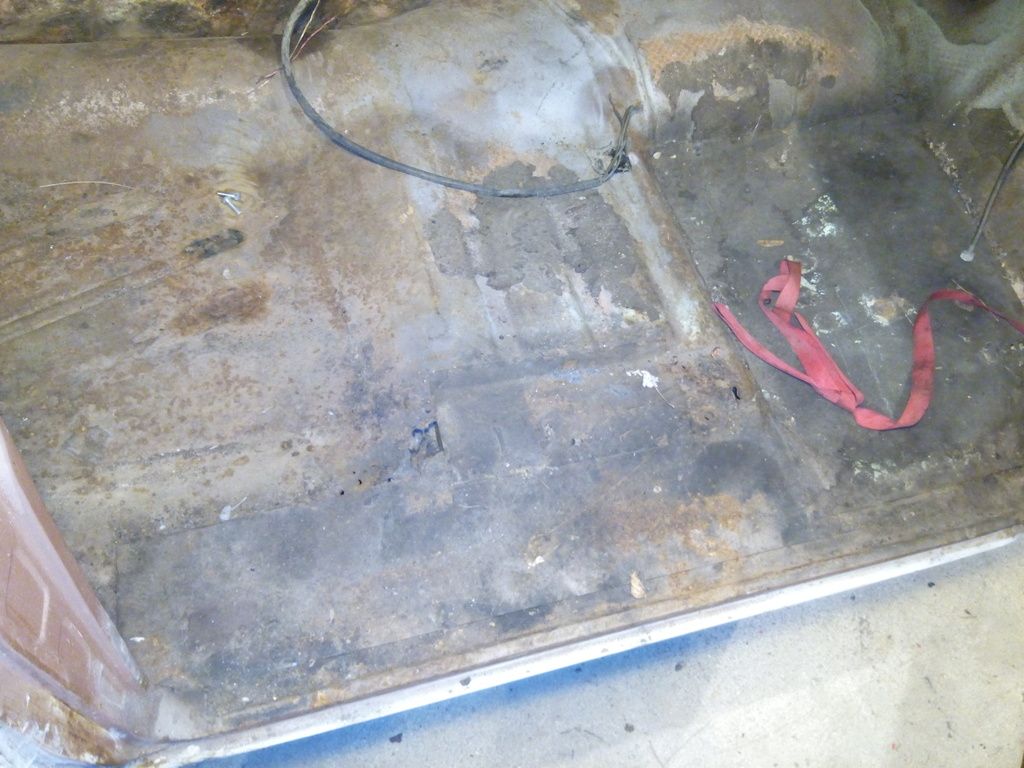
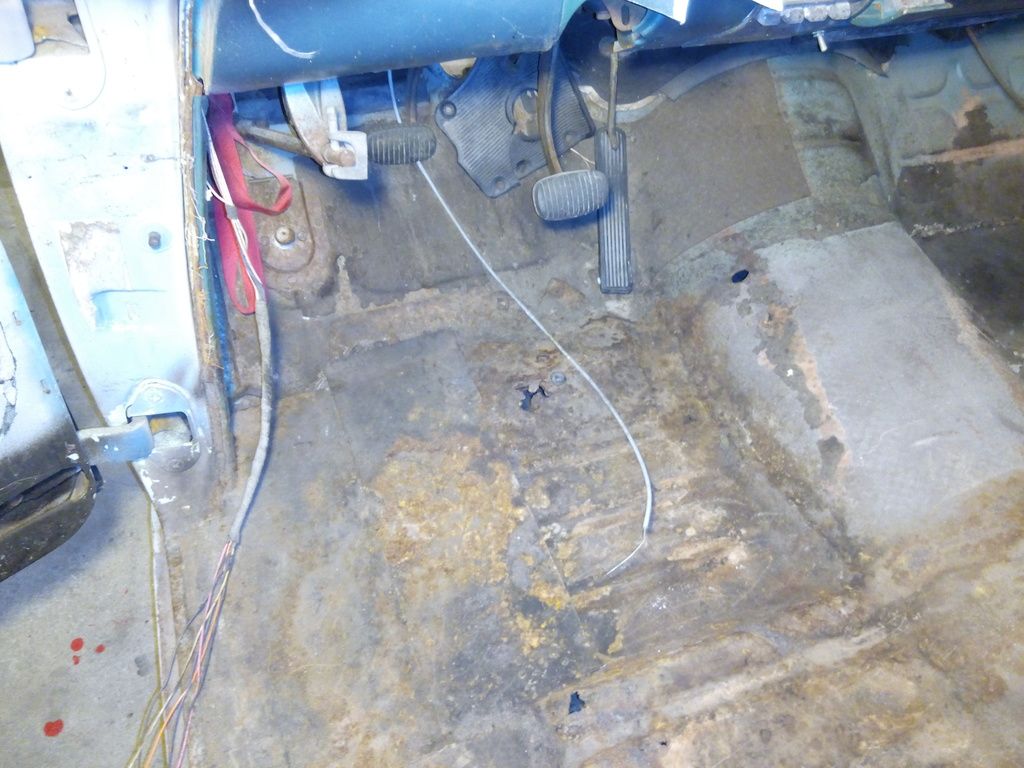
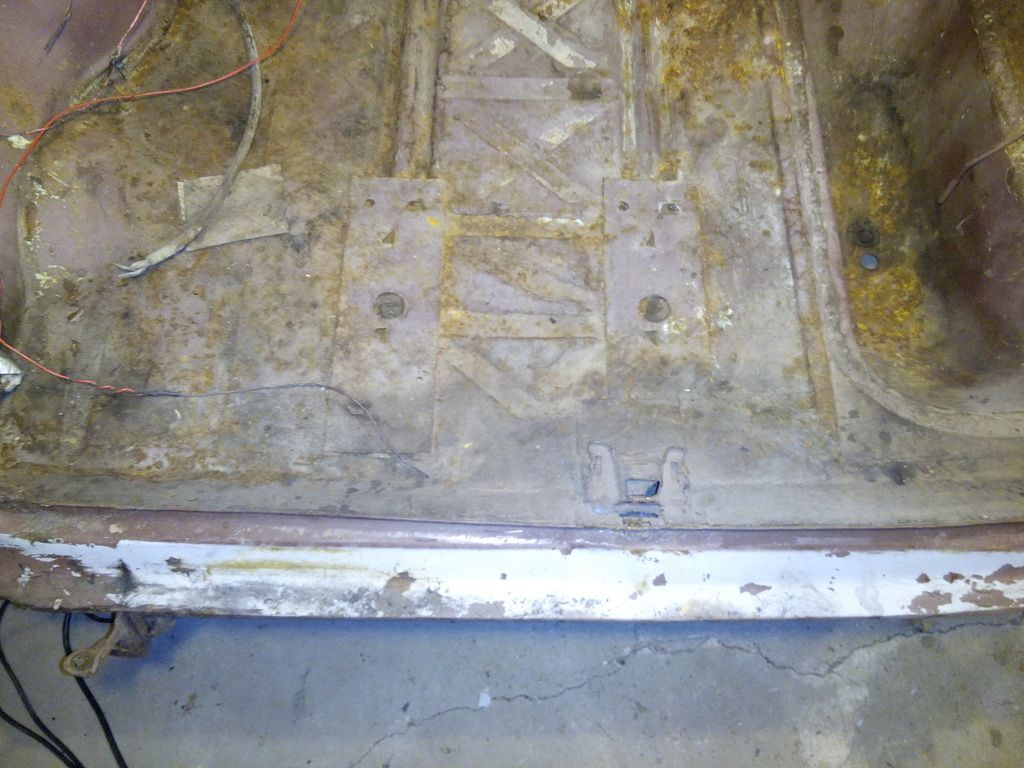
    The floor felt plenty solid years ago with the carpet in place. However, after removing the carpet it became obvious that the prior owners had installed a number of patches -- poorly. They simply installed panels over the existing floor and left what remained to rot away.


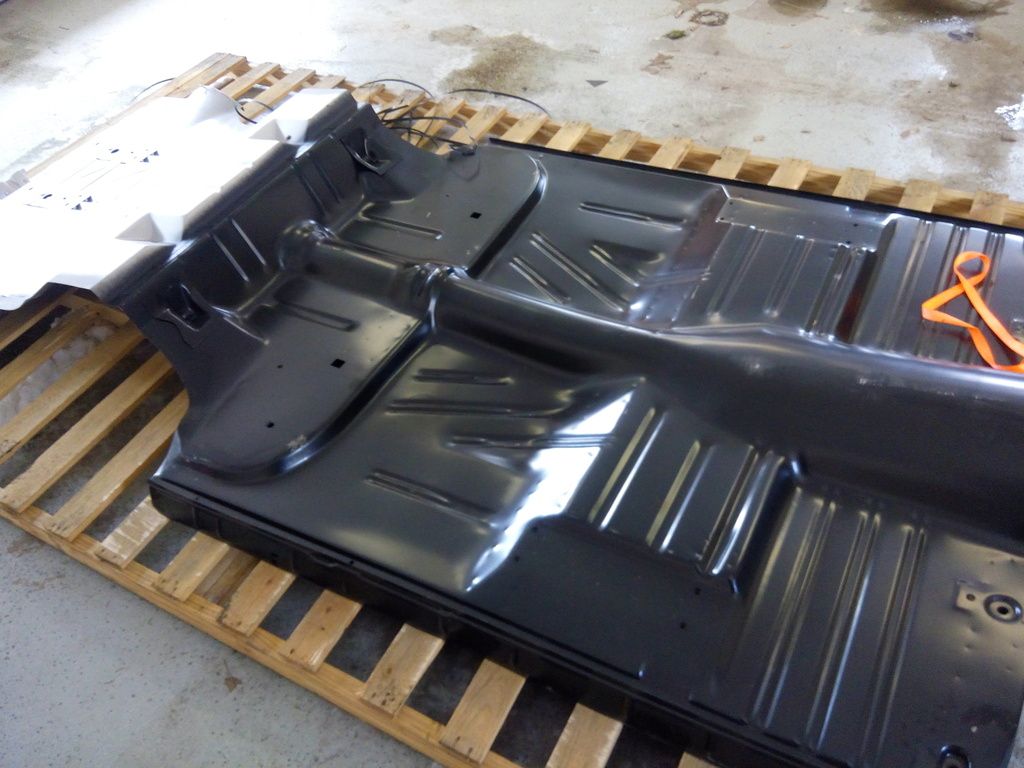
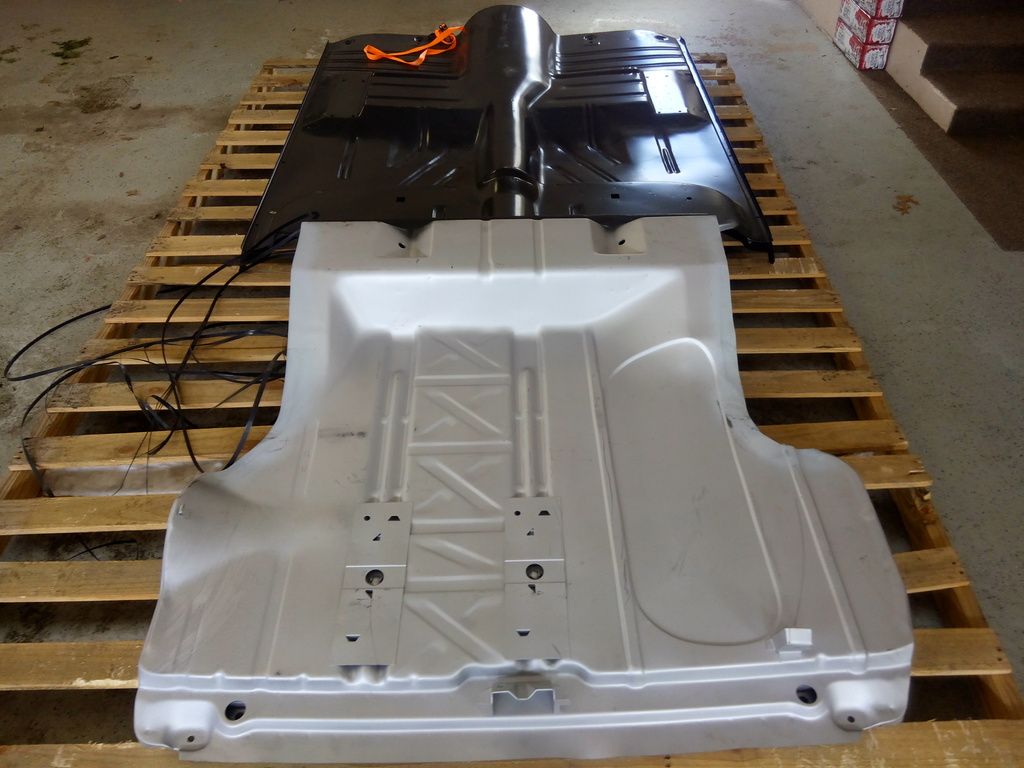
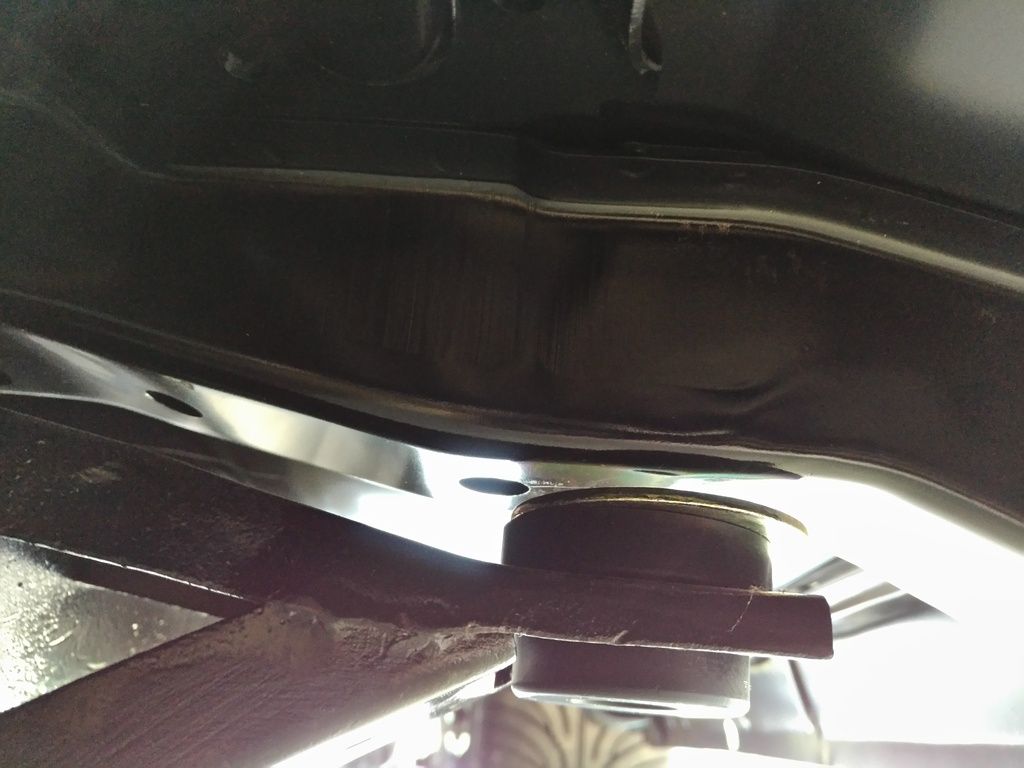
    A full floor will be necessary. The toe boards are solid all the way to the original seam, so I'm happy I won't have to do any fabrication or patching there.


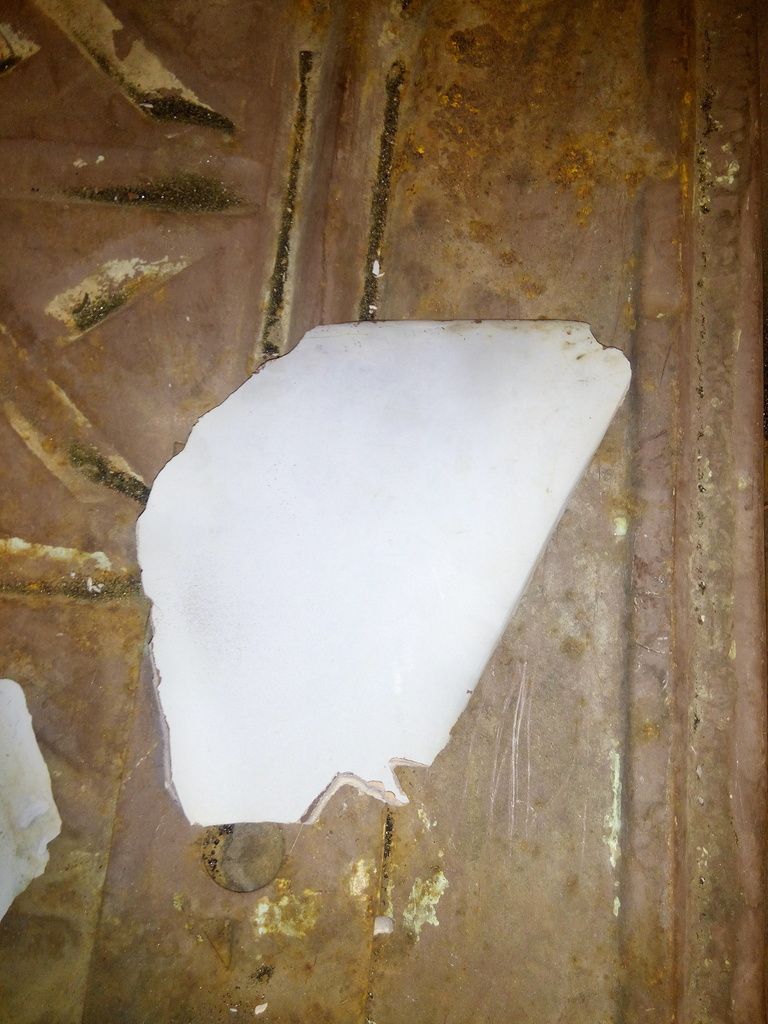
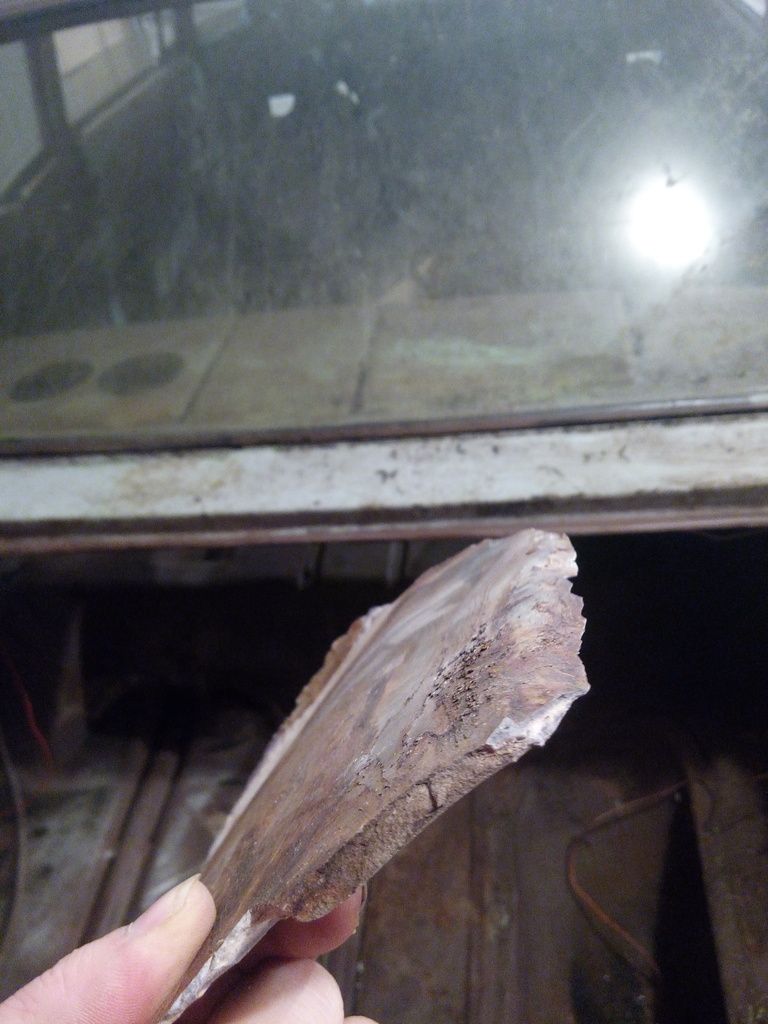
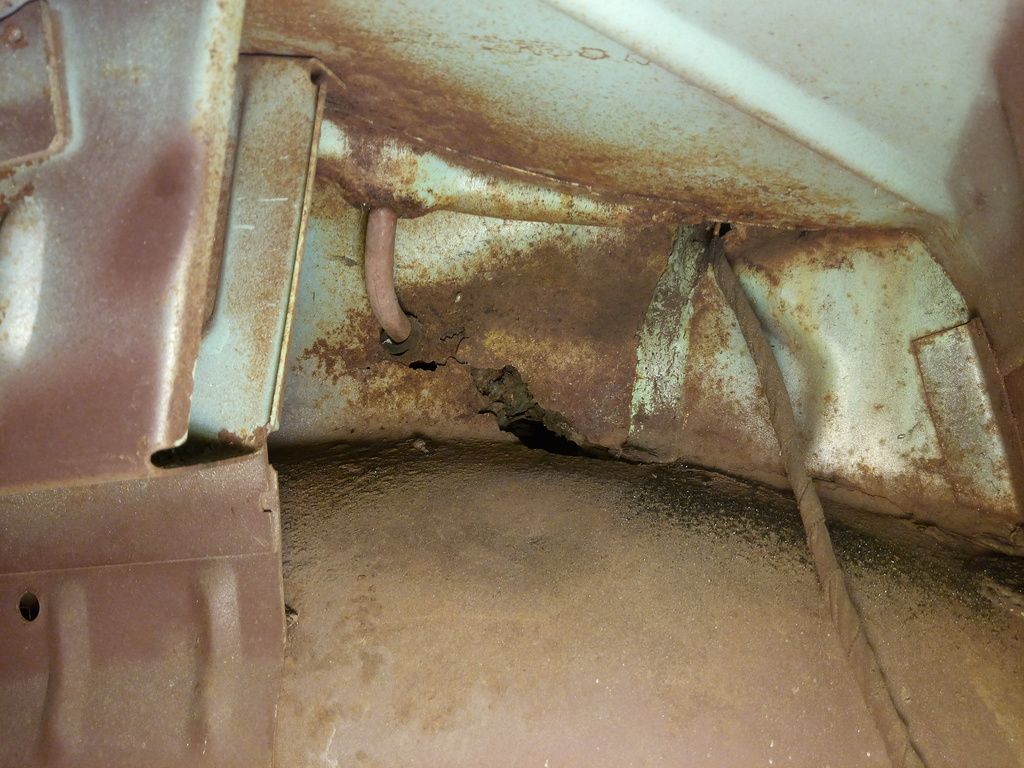
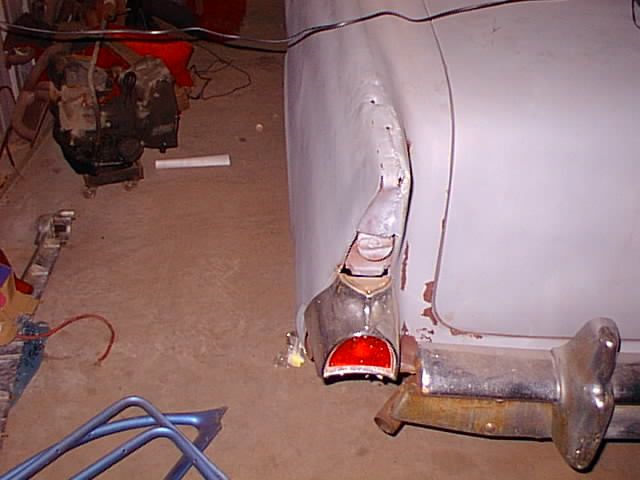
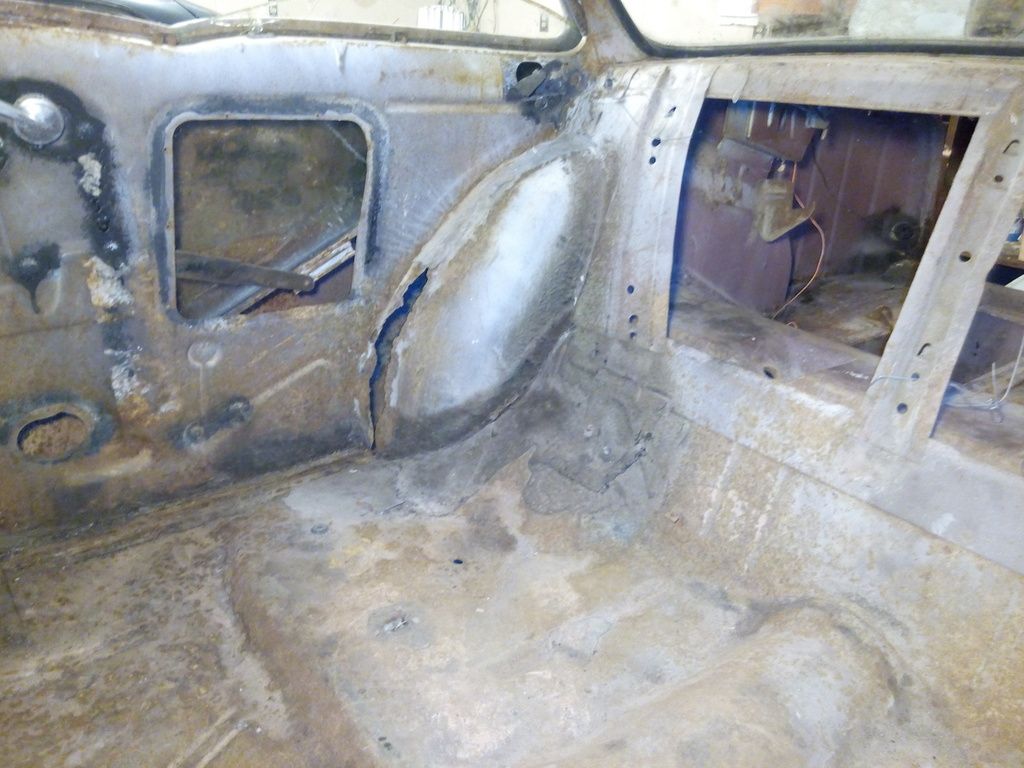
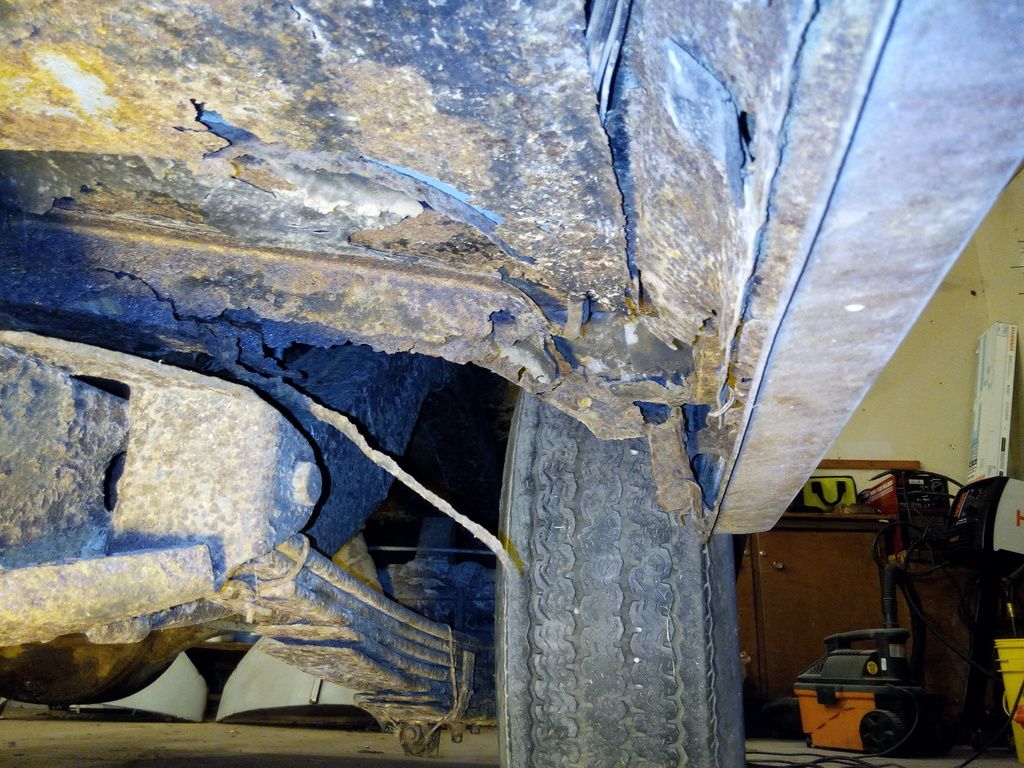
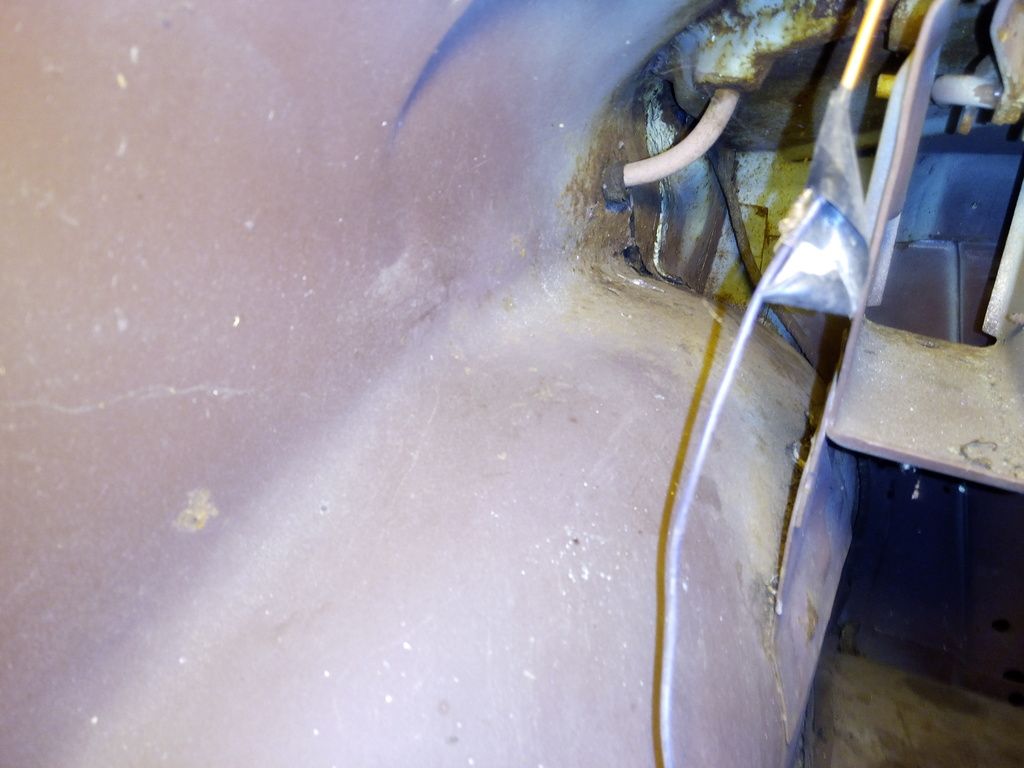
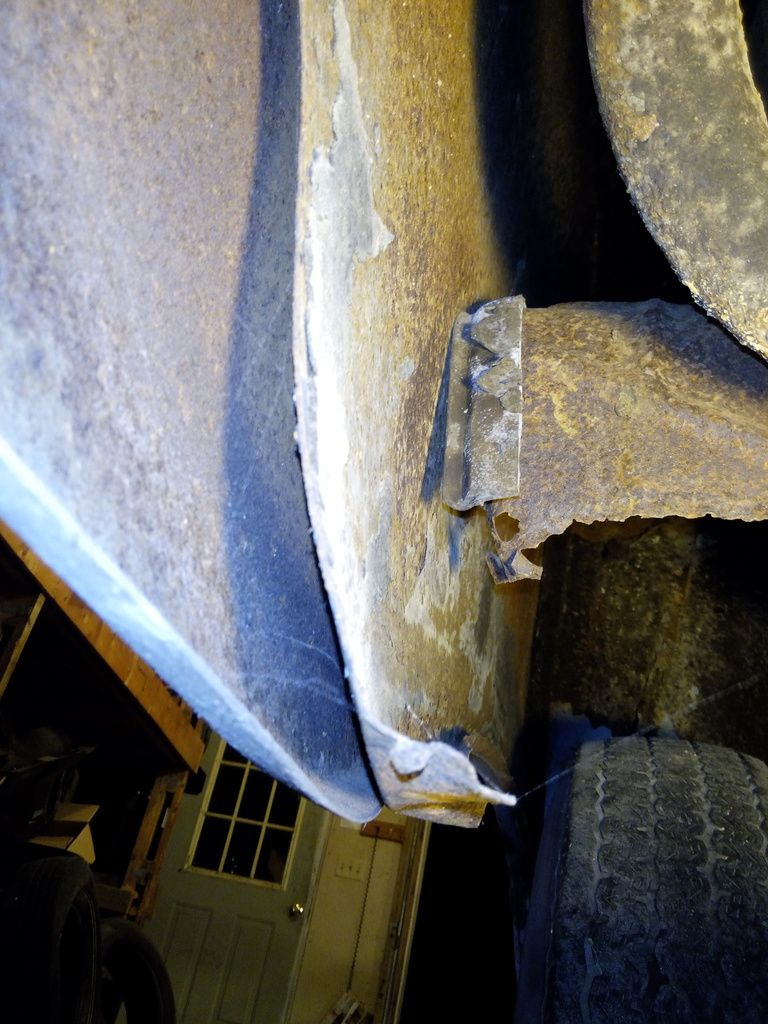
    The trunk had a rather well done patch in place, but again, it simply hid more bad news. The entire rear drip section, along with the trunk brace and body mounts are completely gone. Additionally, rust is lurking all along the inner wheel quarter panels, on both the wheel wells and the quarters...


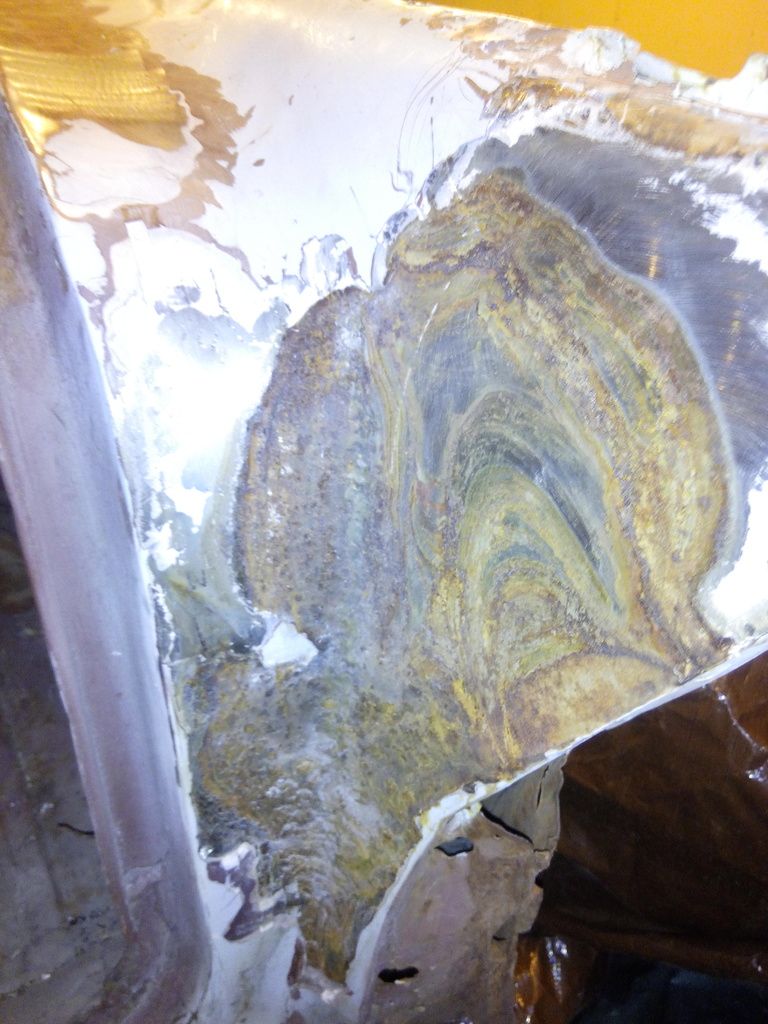
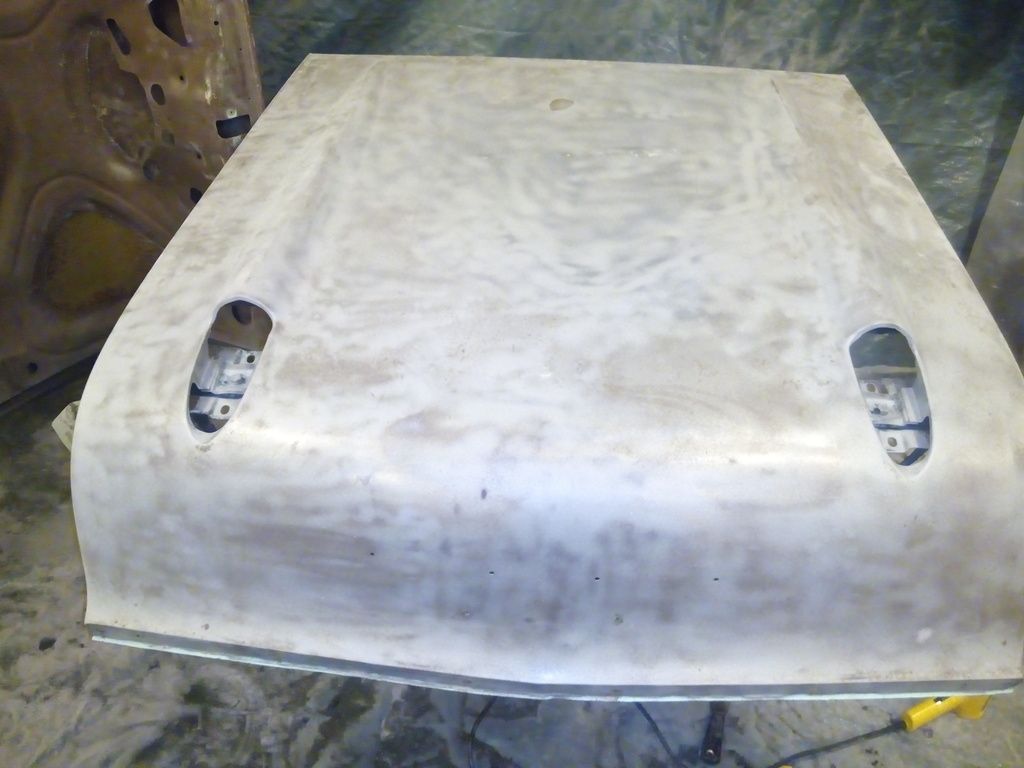
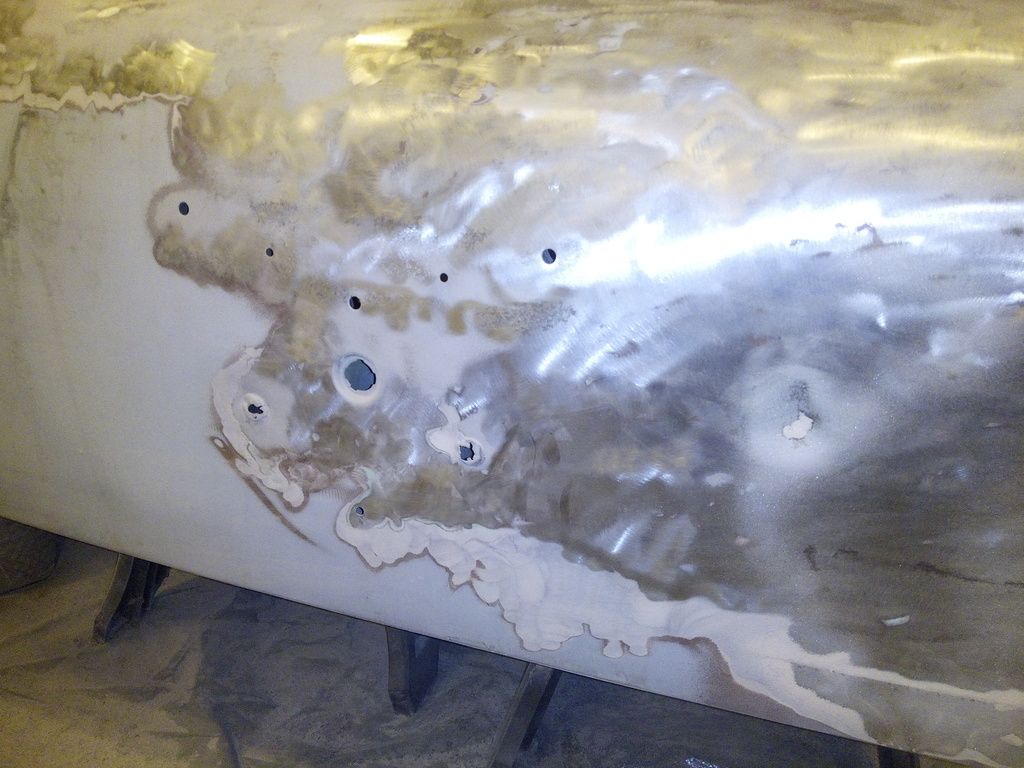
    Additionally, when I began investigating the rather poor quarter panel surfaces, i discovered the previous owner installed new quarter skins... on-top of the original quarters...


    I'm waiting for the new frame before I begin any major body surgery, as I'm unsure of how straight and true the current frame is. In the meantime, I've been torn over how I should go about repairing this. Both quarters are almost entirely unsalvageable, so I'll need to replace both -- I'm torn on if I should patch in the HT panels everyone seems to be using or if I should install the factory sedan panels that are available now. Additionally, my inner quarters are in extremely poor shape. Where they attach to the inner rockers is rusted out, the drain areas are rusted, the wheel wells are essentially falling out, and the rear panels at the trunk are almost completely gone. I can't decide if I should patch all of this or replace the entire inner quarter with the pre-tubbed ones, since I plan on going with the pre-tubbed floor anyway. Finding experience with the fitment and quality on those is rather difficult, so I may have to play a guinea pig.
    Last edited by SonicRaT; 06-20-2017 at 02:50 PM.

  2. #2
    Registered Member
    Join Date
    May 2017

    Member #:3403
    Posts
    21
    Decided to free up some space by migrating the RX-7 to the other garage, which will allow me to section off the workshop garage for blasting and other "dirty" work. Hopefully it doesn't mind keeping company with the Subarus.


    Back to the car, I noticed the rear fin was starting to separate from the metal underneath. After a little exploring, I found yet another example of a poor fix. The whole fin area came out as one giant chunk of body filler...


    Moving on, I pulled out the rear window to inspect the pinch welds and try to get a better idea of the assembly where the inner quarter, outer quarter, and filler panel come together. Melted the lead out of the rear seams and I think I've got a decent idea of how the panels come together, but accessibility to some of the spot welds looks to be extremely difficult. Also got a better shot of the rot coming through in the top of the inner quarter.


    There's also some heavy pitting inside the roof along the drivers side, with a large area that appears to have been patched previously. I'll be stripping the roof tomorrow to hopefully assess what will need to be done there.


    I tUnfortunately, a lot of the parts I had acquired previously (trim, lights, bumpers, etc) were all misplaced or lost when I was forced to downsize and move out of my father's garage, so it was a bit frustrating buying things I knew I once had. Parts can't seem to get here fast enough!


    Finished stripping the hood and spent an hour with a hammer and dolly knocking out all of the dents I came across. Looking pretty straight now.


    Unfortunately, as I began stripping the trunk I encountered even more body filler. It looks like someone tried to hammer the license plate stands in to make them flush with the rest of the trunk, which bent in a good portion of the remaining trunk face. Also, they've installed a patch along the bottom lip that sits above the layer of the other metal. It's a shame, as the rest of the trunk is in decent shape -- there's no rot or other issues anywhere. I may end up needing to just get a new lid. I may cut the skin off and see if I can straighten any of it to a respectable degree. It was hard to get a picture of just how bad it was and how much bondo there was on it.


    I spent some time going back and forth on if I wanted to repair my existing inner quarters or replace them, so I began pulling up the old patch panels the previous owner put in place to see what I had to work with. Unfortunately, there was nearly nothing left underneath.


    My plan moving forward will be to replace the entire floor first, clamping to as much of the existing material as possible. Afterwards, I'll begin replacing one side at a time -- both the inner and outer quarters. My next project will be fabricating a jig to keep all of the panels aligned accordingly.


    Also, my doors are likely going to need a bit of attention as well. The inner structures are in very good condition. However, it looks like they were skinned at one point with a 3/4 skin -- leaving an overlap of approximately 2-3 inches. Externally, it looks OK, though I'm fearful of rust creeping in and the seam showing up, so I'll strip those down and inspect and possibly look into reskinning the doors entirely.

  3. #3
    Registered Member
    Join Date
    May 2017

    Member #:3403
    Posts
    21
    The frame arrived around the start of May and the result was worth the wait. Laszlo did one heck of a job on it and spent so much time filling already that there's not a whole lot left for me to do on it -- I may just spray a few more coats of SPI on it and call it a day, as I like the contrast of black with the body color I'll be going with (Montego Blue).


    I've also acquired a hoard of parts. Some of the big ticket items include:


    Full factory sedan quarter panels
    Full inner quarter panels (tubbed)
    Full floor w/ trunk (tubbed -- more on this below)
    New trunk to replace my poorly repaired, beat-up monstrosity
    Almost all new stainless all around (primarily so I can test the lines as I'm replacing panels)
    '63 Impala SS bucket seats
    American Racing Torq Thrust "M" Anthracite wheels (17x9, 6.77" backspacing -- will be running 245/40R17 up front and 275/40R17 in the rears)


    As for the floor, since I need to replace both inner quarters and my entire floor, I figured I might as well install the pre-tubbed option and give myself some room down the line for fat rear tires. While I was quite impressed with the quality on the inner quarters, I was a bit disappointed with the pre-tubbed floor. Rather than flanging the edge along the tub seams, they simply cut the floor to the tub width, and expect you to stitch weld the floor seam rather than spot-welding along a mating flange. While not that much of a headache, I was a bit disappointed that this was the route they took -- I could've done as much on my own and likely saved some bucks.


    With the frame finally here, I set out unboxing, organizing, and stripping the donor C4 suspension components.


    The frame has late C4 components all around and I'm kicking myself for not having done a bit more research before going the "cheap" route of a Dana 36. Unfortunately, it's equipped with a 2.59 gear which will not pair well with the T56 I have planned for the car and aftermarket gear sets will nearly cost me what I could have spent on the D44 -- another of those live and learn moments. Found a shop nearby that works on a boatload of jeep differentials and is willing to do the gear swap on my Dana 36 for a steal -- may put that off until after the floor has been swapped which will give me some room back in the garage.


    While waiting for parts, I've been spending my free time cleaning up the suspension components. Eventually I will probably have them sent off to be powder coated, but for now a quick clean and a polish has things looking considerably better.


    As you can see, I'm stuck with some tight quarters at the moment. Things have overflowed into my attached garage and into the basement...


  4. #4
    Registered Member
    Join Date
    May 2017

    Member #:3403
    Posts
    21
    Once the coil-overs finally arrived, I set out to assemble the suspension. Bellow is the setup I settled upon:


    QA1 DS402 w/ 10HT450 springs up front -- using the 3.5" QA1 T-bar for the lower mount and the poly eyelet mount up top
    QA1 DS501 W/ 12HT400 springs in the rear -- using spherical bearings instead of bushings for the rear


    Unfortunately, the springs were too narrow for any of my compressors, so I had to order a new set and wait. When they finally came in, I ran into a host of problems with the suspension components interfering at full ride height. A quick call to Laszlo and a good bit of measuring later, we realized I didn't have any caster/camber shims installed. Tossed in some 1/8" shims and it solved the problem.

    Also discovered the box of goodies Laszlo sent with the frame I had forgot about -- which included motor mounts and all of the assorted bolts and hardware. I had already picked up a set of C5 mounts for my RX-7 and transferred them to the '57 -- so it was nice seeing that I won't have to buy another set!


    I've come to the realization that I have a tendency to plan way too far ahead to the point that I'm acquiring an endless assortment of parts by means of justification. For example, my next step was going to be mounting the new factory floor to the frame once it was rolling, then start working on replacing the floor. However, I realized that the T56 often interferes with the floor. So, I figured I might as well go pick up the engine so I can mock everything up. I keep "justifying" more parts under the guise that once I start assembly, I'll need this part and that part to verify proper fitment. Needless to say, I have a nearly constant stream of boxes arriving every day and have probably acquired an entire car in parts by now....


    So, on to the engine. A local yard had an LQ4 laying around that was "supposed" to be grade "A" quality with a little over 100k miles on the clock. So, I went and picked it up and they were nice enough to toss in the unmolested harness as well so I can reloom it into a standalone.


    So, I began tearing it down in hopes that I'd be able to clean it up, replace the gaskets, and run it as-is for a summer until I could devote more effort in its direction and build a stroked 408. Unfortunately, the junkyards definition of "grade A" differed rather significantly from mine.


    Looked like it had been sitting a LONG time and acquired some water in the cylinders during the process. THANKFULLY, I was able to clean up all of the cylinders with just a scotch brite and NO pitting of any kind was left behind -- even the carbon deposits and glazing came off to reveal the original GM crosshatching underneath.


    I'm currently undecided if I'll just run the stock bottom end with a wild cam for now and settle somewhere in the 425hp range or if i want to bite the bullet and stroke it to 408 and aim for 600. I unfortunately don't get out as much as I used to, so track days are few and far between -- even autocross has become a rarity as of late, so I might just settle for now... Decisions appear to never end on this build.


    Hopefully tomorrow I'll be able to mount the rear suspension and get the wheels on. From there I'll toss the LQ4/T56 back on the frame and see what type of transmission tunnel modifications I'll need to make before finally moving onto the floor replacement.

  5. #5
    Registered Member chevynut's Avatar
    Join Date
    Nov 2011

    Member #:115
    Location
    Fort Collins, CO
    Posts
    10,826
    Great story SonicRat! Glad to see you're moving along so well on it.
    56 Nomad, Ramjet 502, Viper 6-speed T56, C4 Corvette front and rear suspension


    Other vehicles:

    56 Chevy 2-door BelAir sedan
    56 Chevy 210 4-door sedan
    57 Chevy 210 4-door sedan
    1962 327/340HP Corvette
    1961 Willys CJ3B Jeep
    2001 Porsche Boxster S
    2003 Chevy Silverado 2500 HD Duramax
    2019 GMC Sierra Denali Duramax

  6. #6
    Registered Member WagonCrazy's Avatar
    Join Date
    Mar 2012

    Member #:530
    Location
    Santa Clarita, CA
    Posts
    1,789
    Welcome to the brotherhood of "learn by doing" car guys. Dig your story man...you and that car have come a long way, and you have a solid build plan going forward.

    You made one comment that cracked me up:
    Laszlo has been incredibly patient with me and an absolute joy to work with as he constantly endures my idiocy.
    I laughed not because of your self incriminating statement, but because a few others here have their opinion of Laszlo, and it's not the same as yours. (Full Disclosure-He built my frame too)

    So anyhow, CARRY ON with that build and keep posting progress and we'll all chime in with our suggestions as needed.

    This website needs 100 other guys like you to GET MOVING on their projects.

    Cheers and beers!

    Paul
    1957 Nomad- LS1/T56 on C4 chassis
    1959 Fleetside Apache 1/2 ton, shortbed, big window, 327ci.

  7. #7
    Registered Member
    Join Date
    May 2017

    Member #:3403
    Posts
    21
    Quote Originally Posted by WagonCrazy View Post
    I laughed not because of your self incriminating statement, but because a few others here have their opinion of Laszlo, and it's not the same as yours. (Full Disclosure-He built my frame too)
    Hah -- yeah, I've seen some examples of that. Seems like he's pretty straight forward and no-nonsense, which works fine for me. So far he's put up with my questions, which is all I could ask.


    As for the car, spent some time trying to clean up the suspension parts but ran out of aluminum brightener. Threw some blocks in the rear to hold the suspension up while I wait for the spherical bearings for the QA1s. Been trying to get the floor mounted, but the weather hasn't been agreeing with me. Starting to actually look like something...


  8. #8
    Registered Member
    Join Date
    May 2017

    Member #:3403
    Posts
    21
    Moved the frame over to the other garage to install the new floor -- not fun pushing that thing up the incline...


    The QA1 bearings showed up, so I installed the rear coilovers.


    Afterwards, finally installed the floor.


    Unfortunately, it did not fit well. The rear passenger floor pans are hitting the AME center section, which is causing the most of the body mounts to sit roughly 1/2" too high. I expected the C4 doglegs to interfere -- for those I'll fabricate some reliefs into the wheel tubs. I'm unsure of what to do with the other issue though. I'm considering bolting everything down tight, using a floor jack and a 2x4 to lift the transmission tunnel to try to get clearance back on the floor pans. Not even sure what to measure to figure out where the pan is having issues...


  9. #9
    Registered Member chevynut's Avatar
    Join Date
    Nov 2011

    Member #:115
    Location
    Fort Collins, CO
    Posts
    10,826
    As I mentioned in e-mail we've built 6-8 frames now with AME center sections and nobody has said they've had any problems with the floor. Wagoncrazy has one of our frames with an AME center section and I think it fits fine. Maybe he'll chime in and offer some input. I suspect your floor is either designed differently or it's malformed or bent. Not sure what else it could be.
    56 Nomad, Ramjet 502, Viper 6-speed T56, C4 Corvette front and rear suspension


    Other vehicles:

    56 Chevy 2-door BelAir sedan
    56 Chevy 210 4-door sedan
    57 Chevy 210 4-door sedan
    1962 327/340HP Corvette
    1961 Willys CJ3B Jeep
    2001 Porsche Boxster S
    2003 Chevy Silverado 2500 HD Duramax
    2019 GMC Sierra Denali Duramax

  10. #10
    Registered Member
    Join Date
    May 2017

    Member #:3403
    Posts
    21
    Quote Originally Posted by chevynut View Post
    As I mentioned in e-mail we've built 6-8 frames now with AME center sections and nobody has said they've had any problems with the floor. Wagoncrazy has one of our frames with an AME center section and I think it fits fine. Maybe he'll chime in and offer some input. I suspect your floor is either designed differently or it's malformed or bent. Not sure what else it could be.

    Yeah, I suspect my floor got mangled in shipping or by design -- I don't think I've received an aftermarket panel yet that hasn't been bent or mangled in some manner. Not quite sure how to go about getting it where it "needs" to be other than some guesswork by just forcing the center of the floor up enough to gain the clearance I need.

Page 1 of 4 123 ... LastLast

Posting Permissions

  • You may not post new threads
  • You may not post replies
  • You may not post attachments
  • You may not edit your posts
  •