Great job repairing that hood!


Great job repairing that hood!
56 Nomad, Ramjet 502, Viper 6-speed T56, C4 Corvette front and rear suspension
Other vehicles:
56 Chevy 2-door BelAir sedan
56 Chevy 210 4-door sedan
57 Chevy 210 4-door sedan
1962 327/340HP Corvette
1961 Willys CJ3B Jeep
2001 Porsche Boxster S
2003 Chevy Silverado 2500 HD Duramax
2019 GMC Sierra Denali Duramax


Thanks GaryOriginally Posted by BamaNomad

Thanks Lazlo
The 39 is really taking shape, body is really looking good
Thanks Richard, Slow but sure it is getting there.
After finishing up on the hood side repairs I got them prepped and a couple of coats of epoxy sprayed on them before the weather cooled off.
Here is a shot of the last mount hole repair after reforming the area to weld in a patch.
Here I have a patch piece welded in place. It just needs to be trimmed off and the hole opened back up, which I didn't get a picture of.
Here I have the pair of hood sides all ready for a couple of coats of epoxy primer.
Looking much better with primer applied on this one. Even with the cheapest Harbor Freight spray gun they sell the Tamco epoxy goes on pretty well.
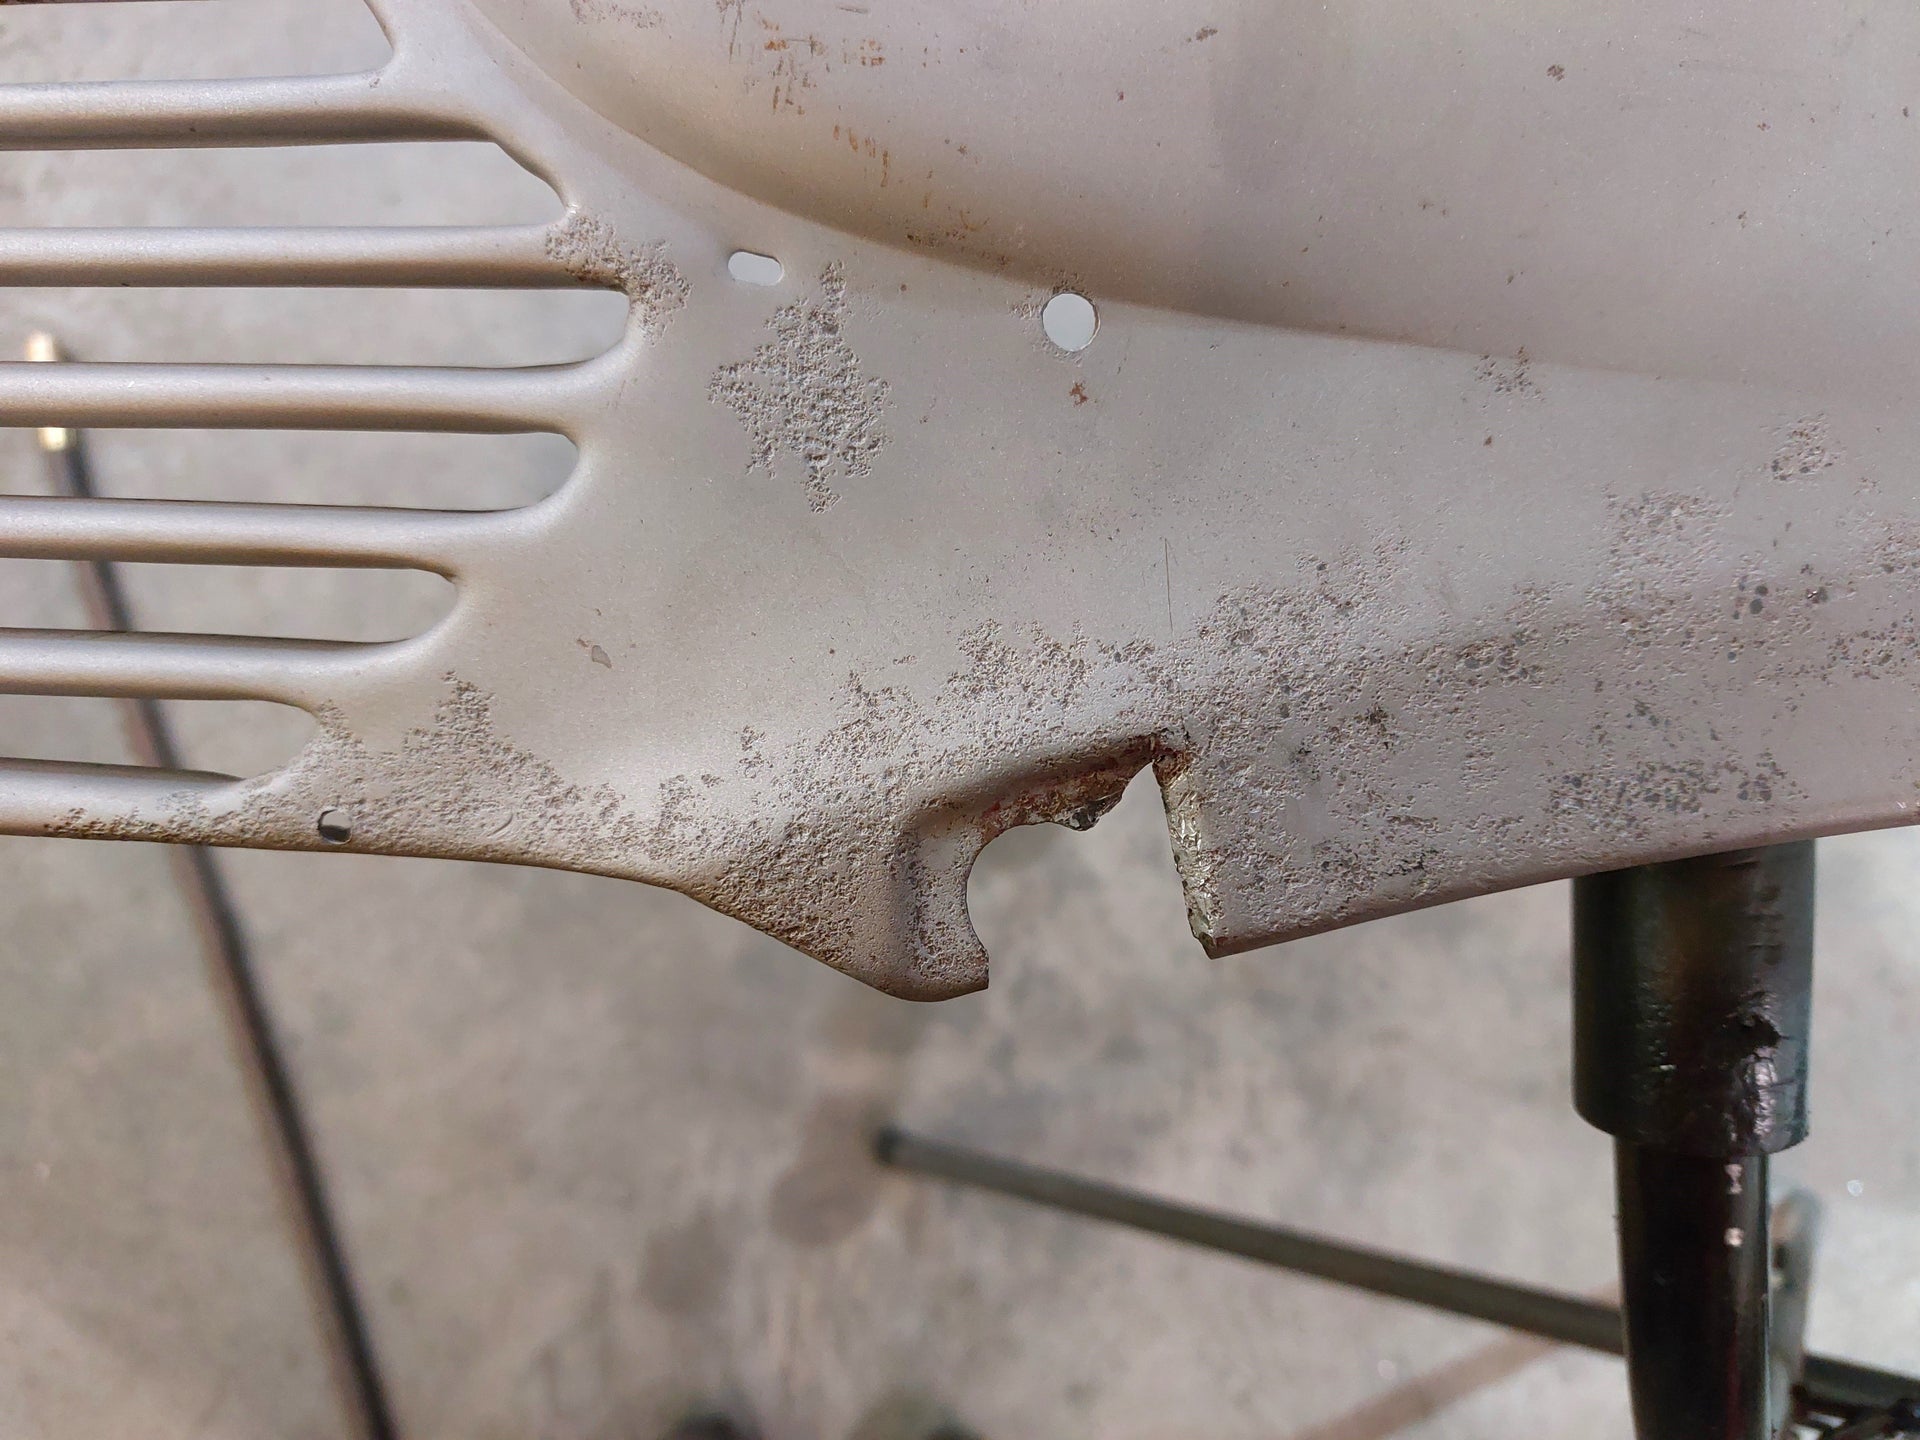
So with those done on to the front fenders and grill. Starting with the drivers side since it is in slightly better shape. Both front fenders will need some rust repair where they meet the running boards, but before I get to that I want to get the fenders as straight and dent free as possible. As you can see in this shot the shape of the fender doesn't match the grill very well in this area.
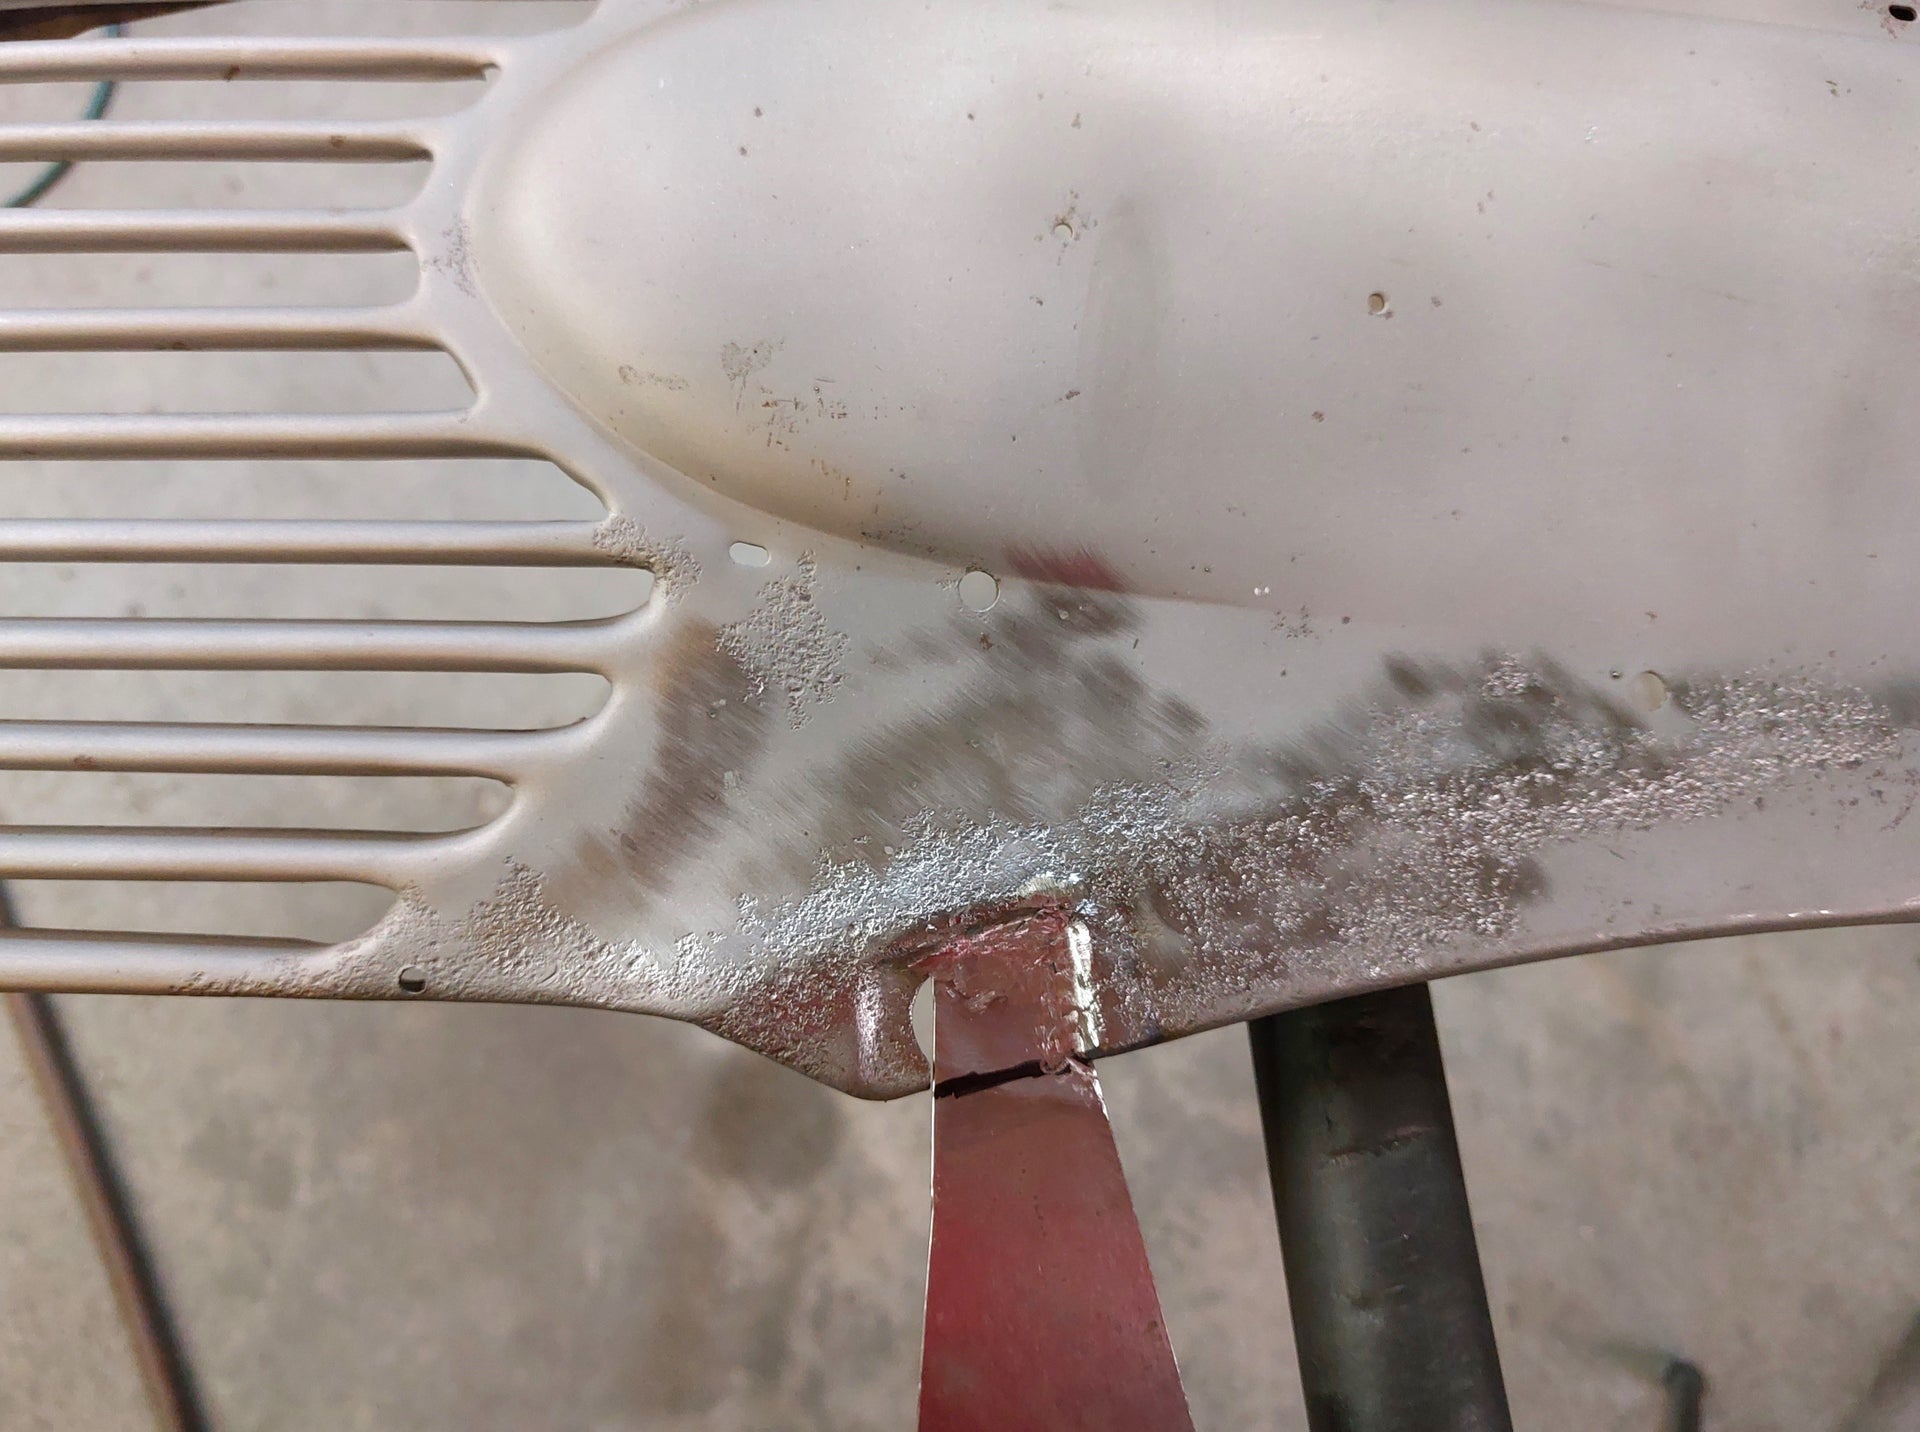
Before fixing the fender in that area I made repairs to the mount holes on the grill. I am assuming this damage was caused by the same thing that caused the fender damage.
All the damage around the holes welded up using a copper backer (which I rarely use) then ground smooth and the holes opened back up in the proper locations.
Here I have the fender fitting the grill much better. It took a bit of hammer and dolly work on the edge but mostly I got it back in shape by shrinking the flange. It was a challenge to hold the fender up and get the flange into the shrinker dies but it worked pretty well to reshape the fender.
Then I started on smoothing out some dents in this area. I didn't get a before picture of the damage but it wasn't too bad. Also had to weld up a crack or two on the lower edge of the fender as well as a bad previous crack repair.
And lastly from this angle you can see farther up in the wheel opening where I had to weld up some cracks at the edge of the wheel opening which will also need some hammer and dolly work to smooth it out better.
Brian

Brian, Great work as usual from you!
Have you had any issues priming over, or painting over the Tamco epoxy primer??
Thanks Gary!
I have not sprayed anything else over the Tamco yet. I don't think it will be an issue as long as I scuff it up good before spraying over it though.
Work continued on the drivers side front fender this week. After smoothing out a few more of the dents and welding up a couple of small cracks in a few spots I noticed some small rust pin holes on the flange where the fender meets the hood side and inner fender. There was a bit too many deep pits to just weld up so I made a small patch for this area.
Here I have the patch fit up and tack welded in place.
And here it is all welded up and finished out.
The next problem to fix was the lower rear corner of the wheel opening. There is a tab for a fender brace at that corner which also had some stress cracks. I attempted to weld up the cracks but the metal was pretty thin in that area so it didn't turn out very well.
I made up these wood blocks to form a replacement piece.
I first tried to make the new lower corner in 1 piece but it didn't work very well so I ended up making it in 2 halves. Here I have them tacked together.
And here it is all welded up and finished out.
Here it is next to the corner it will replace. Should look much better and be much stronger than the original.
Fitted up and ready to weld in place.
And a view from the inside of the fender before welding.
Welded up and finished out. I am pretty sure the passenger side fender will need same area repaired as well. I think I might try welding the outer half of the patch to the fender before welding the inner half of the patch in place. This should make it easier to finish out the welds on the outside of the fender. It was a pain on this one as the inner tab was in the way to hammer out the welds easily.
And this will be the last of the repairs on this fender. I am going to attempt to make the patch for this in one piece but not too sure how well that will go. There is a good possibility that it will need to be done in multiple sections, as the shape has to fit to the running board pretty close. We will see what happens.
Brian

Hi Brian,
Really liked the tip about the wooden forming blocks. I will have to stuff that one in my brain, not that I will likely know where to access it there!
Thanks! Doug

Great progress! and great updates here. Thanks for sharing your techniques. it helps all of us.
1957 Nomad- LS1/T56 on C4 chassis
1959 Fleetside Apache 1/2 ton, shortbed, big window, 327ci.
 Posting Permissions

 Reply With Quote