Just joined? Please introduce yourself.
Page 1 of 2 12 LastLast
Results 1 to 10 of 15

Thread: Wagon Tailgate Rust Repair

  1. #1
    Registered Member MP&C's Avatar
    Join Date
    Dec 2013

    Member #:2017
    Location
    Southern MD
    Posts
    1,293

    Wagon Tailgate Rust Repair

    This thread will document the repairs for a handyman wagon tailgate, but the process should be similar/adaptable for a Nomad tailgate as well.

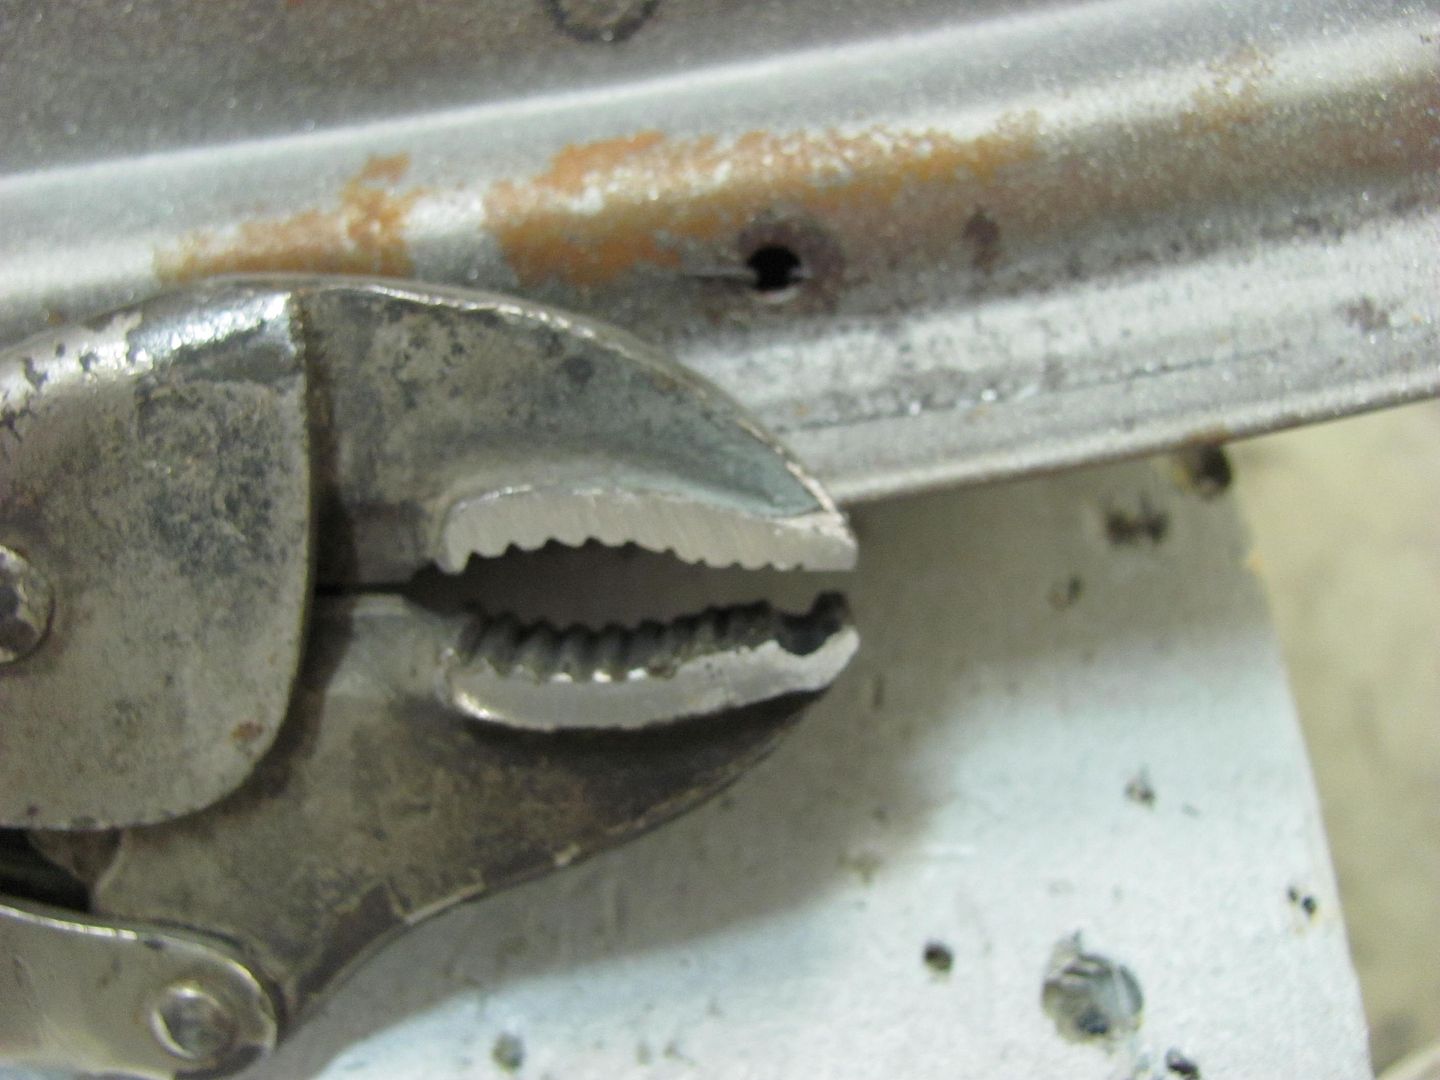
    Time for dissecting the wagons tail gate. The outer skin looked fairly decent for 55 year old metal, only a couple pin holes showing....


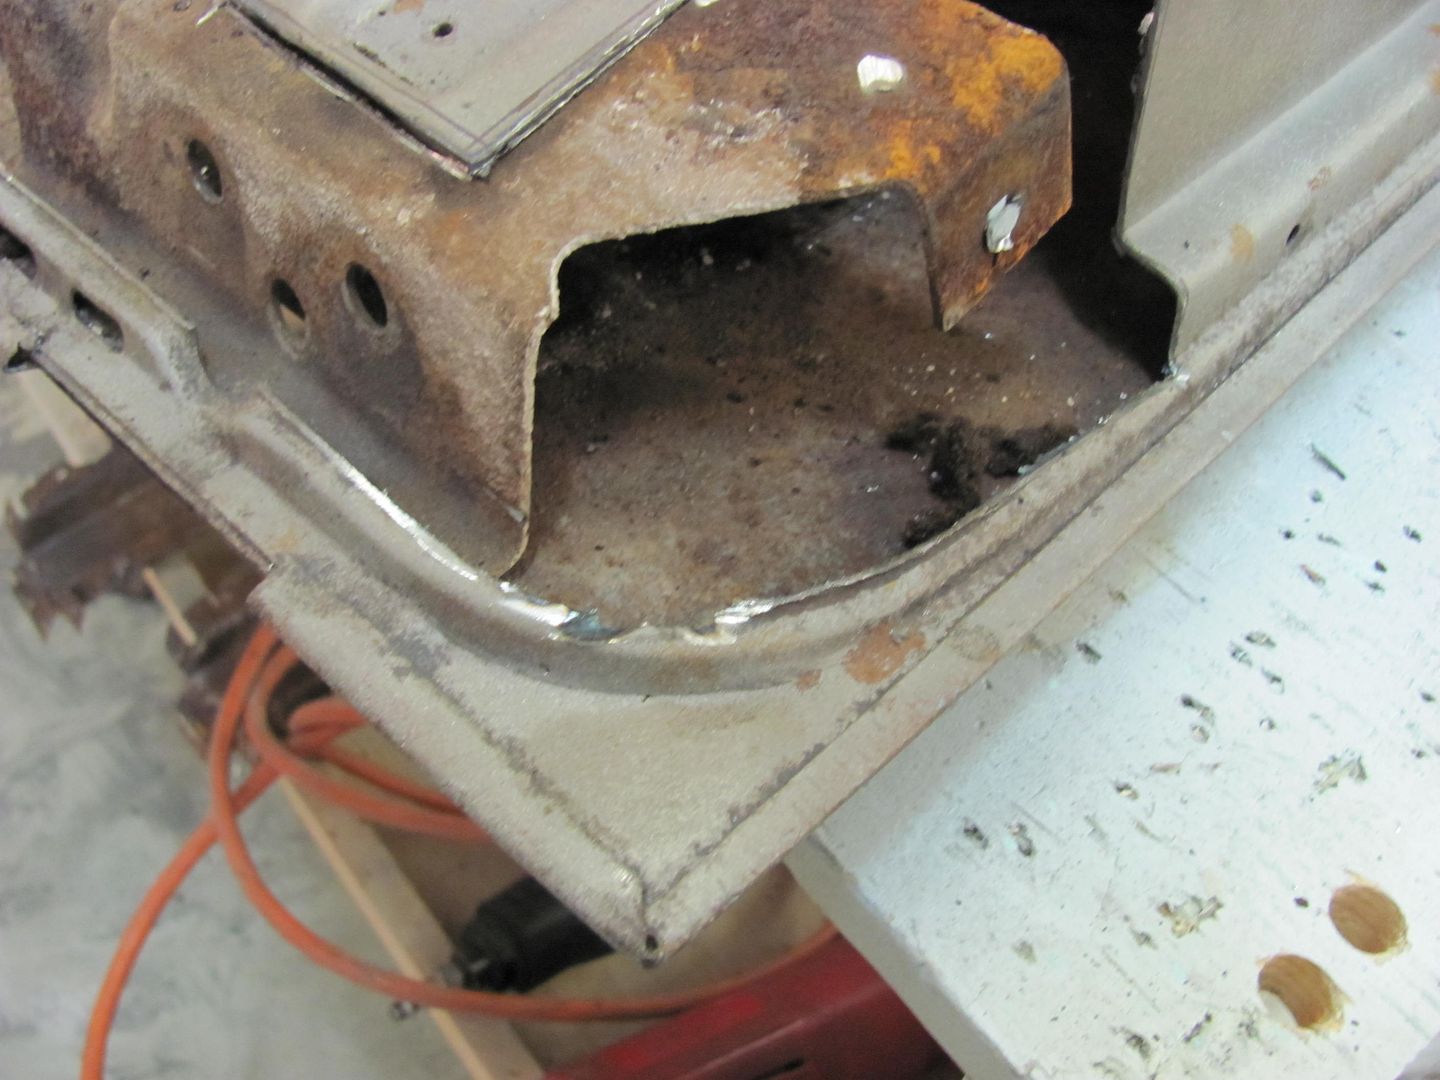
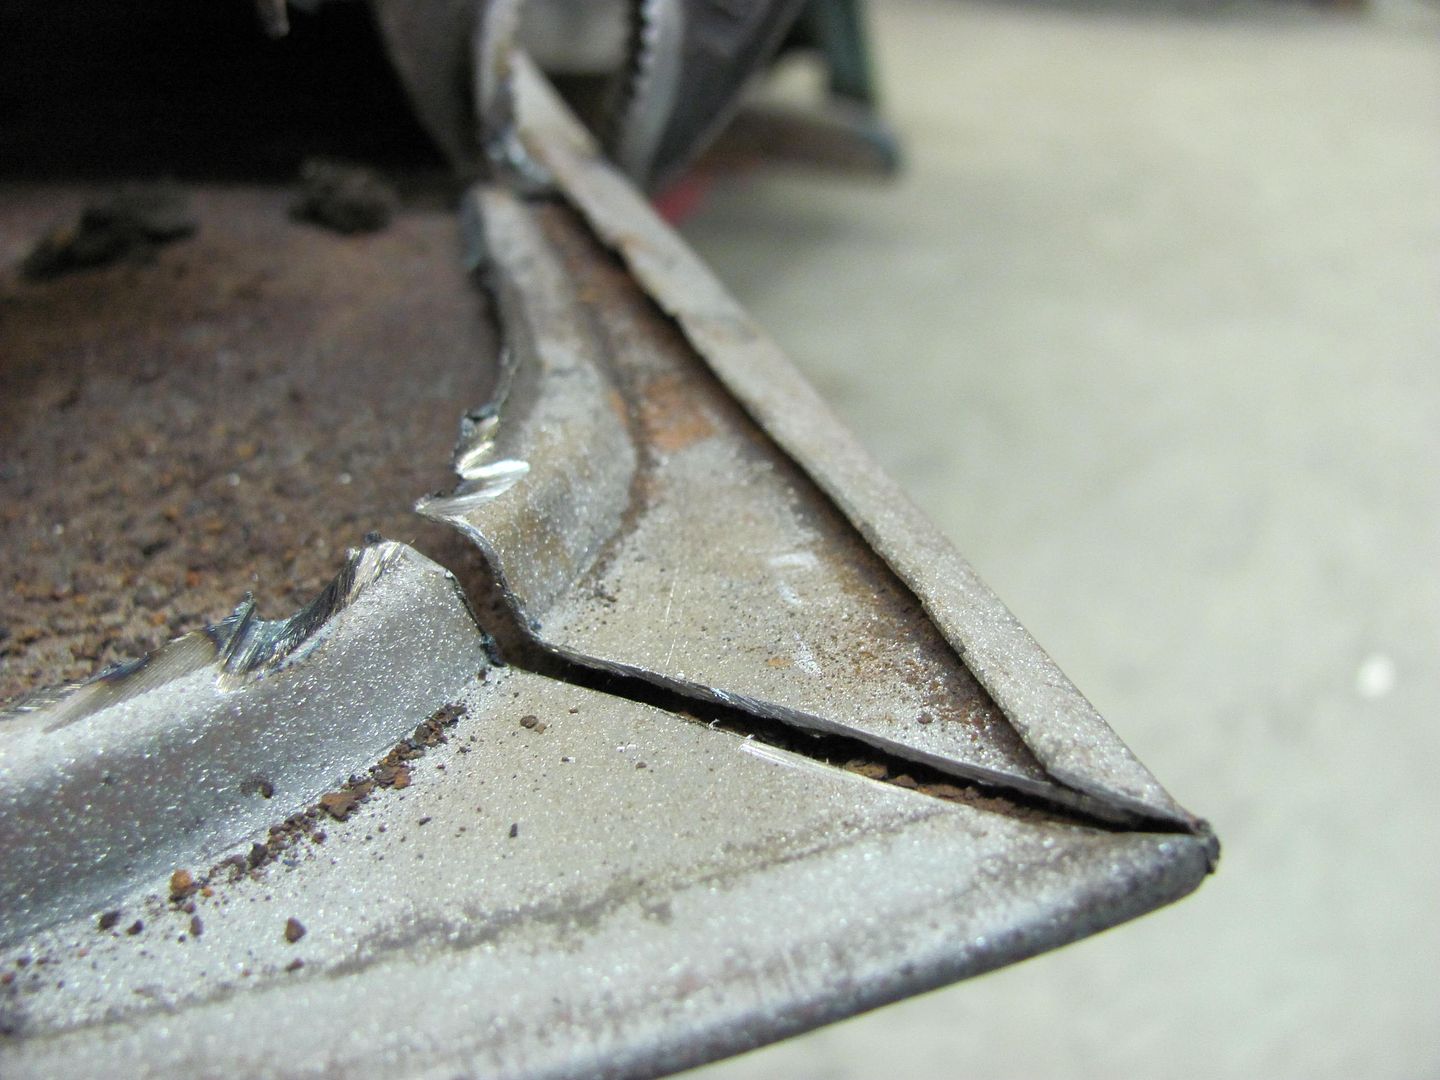
    The major issue with these tail gates, due to how they lean forward, any water collecting inside lays in the inner panel....


    .......as you can see from the back side....


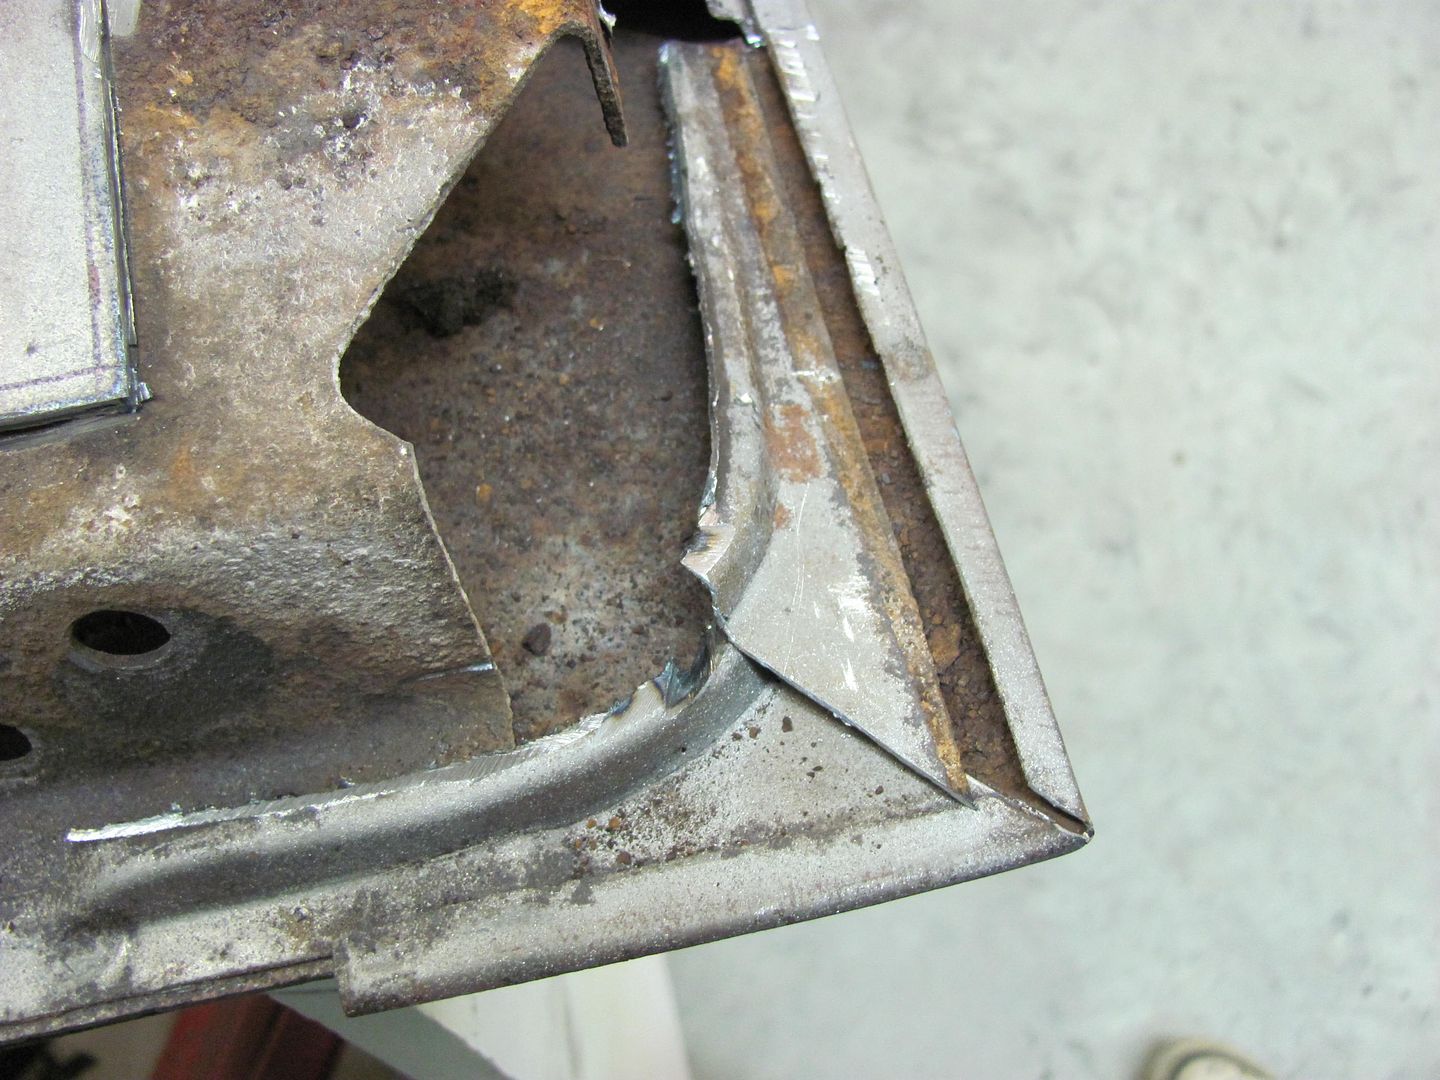
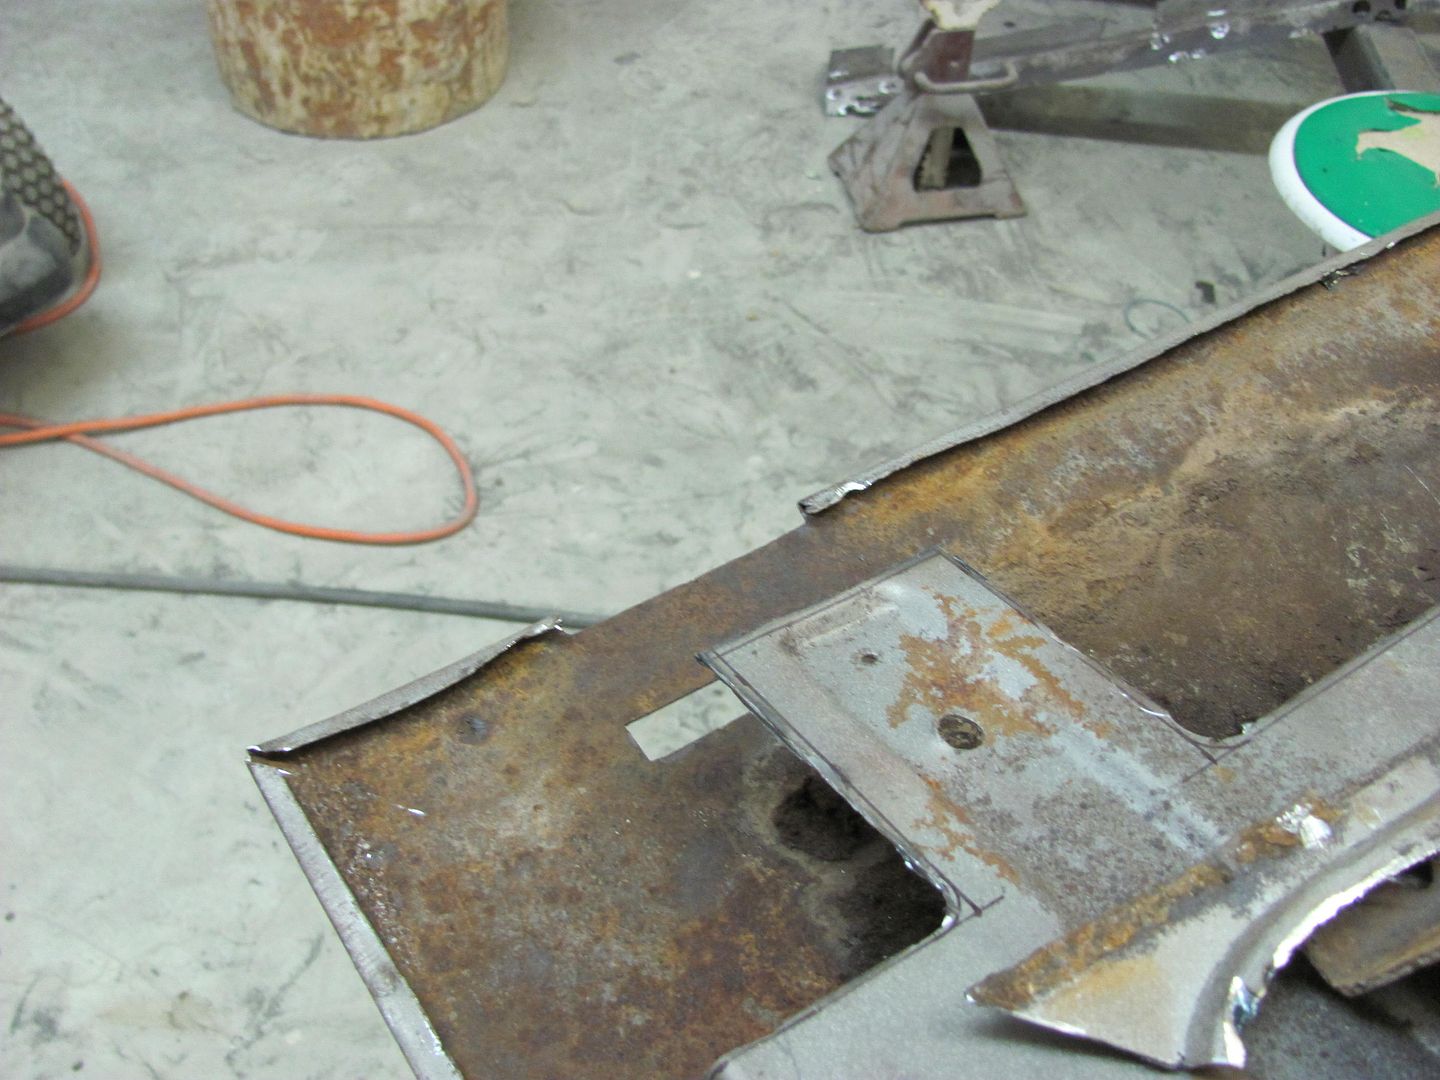
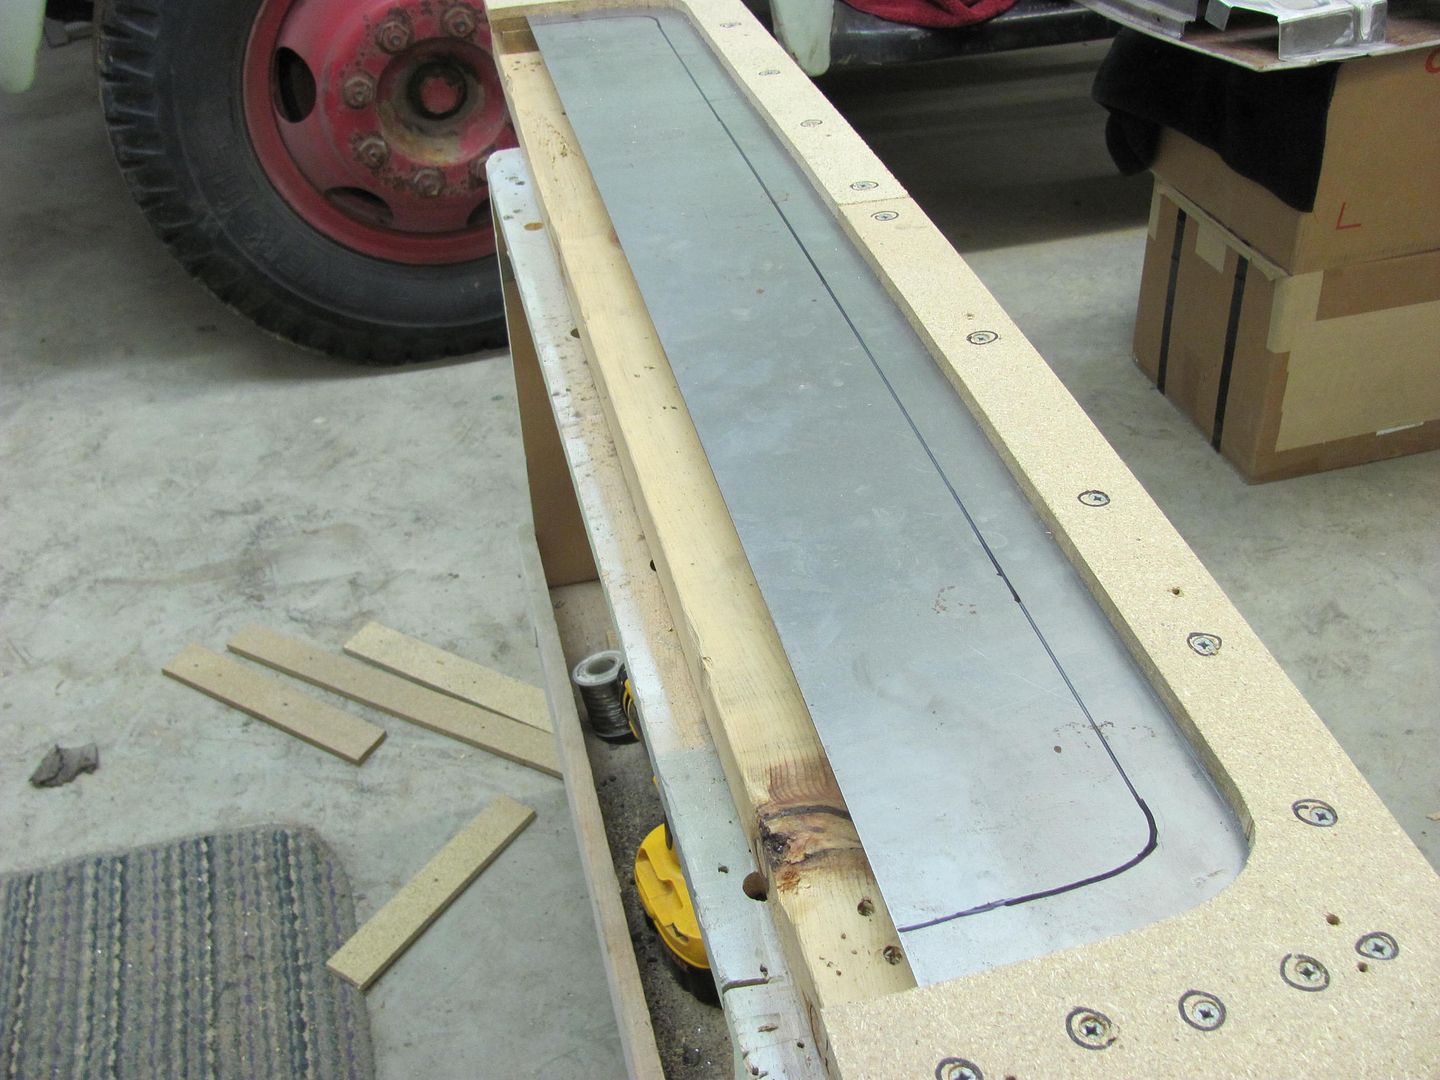
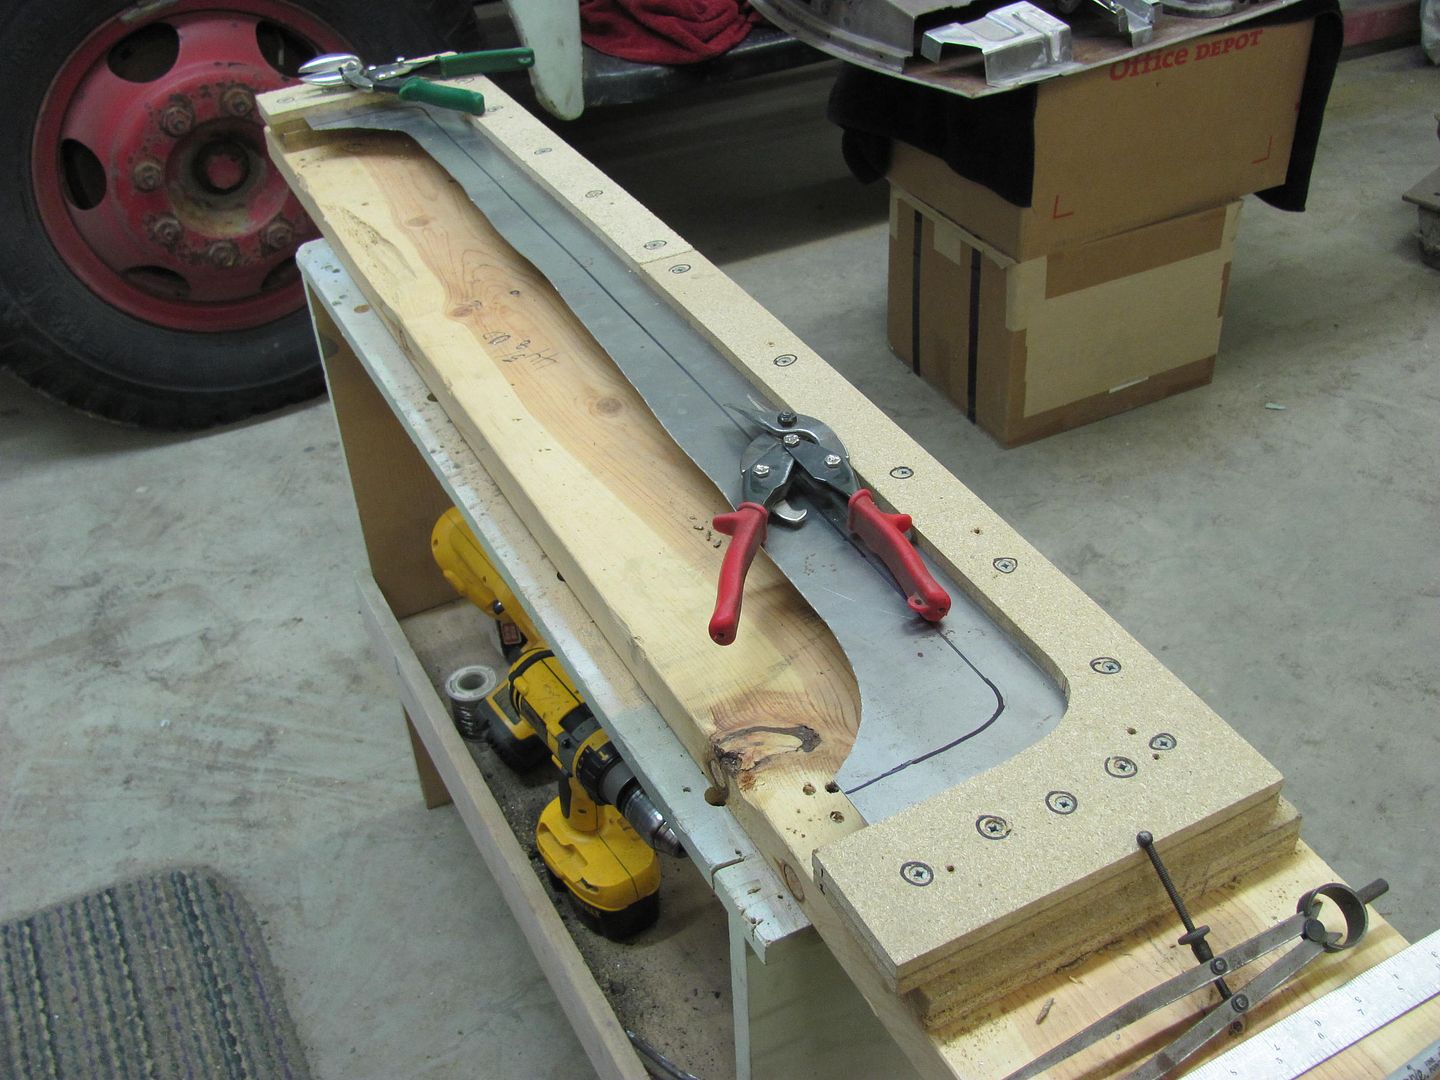
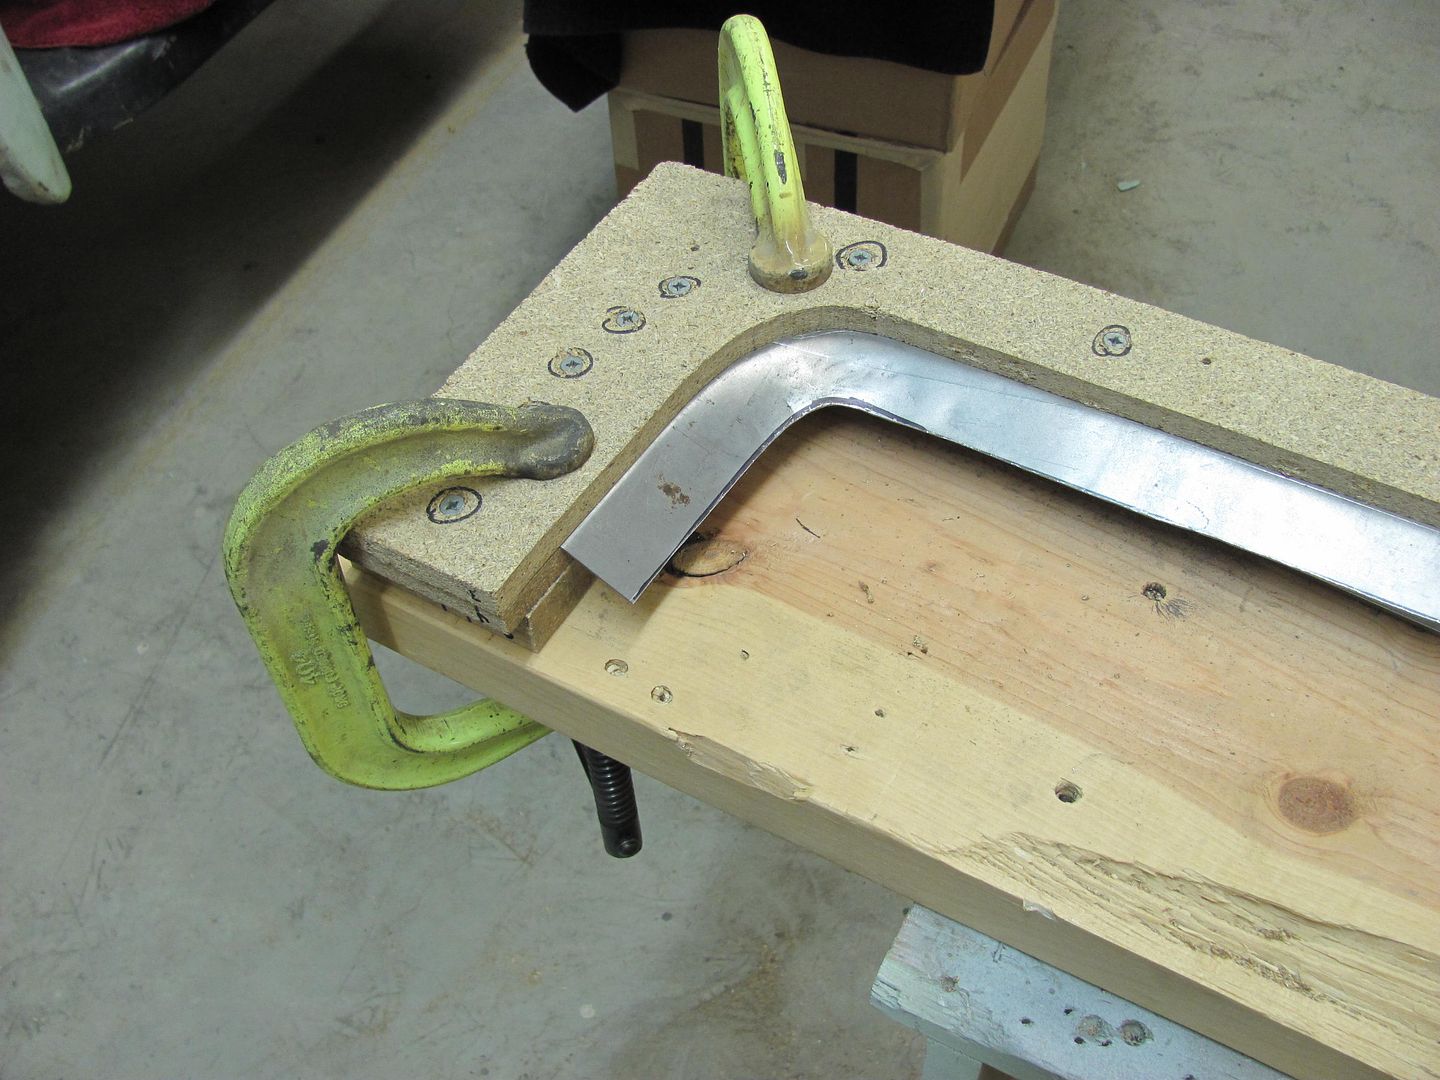
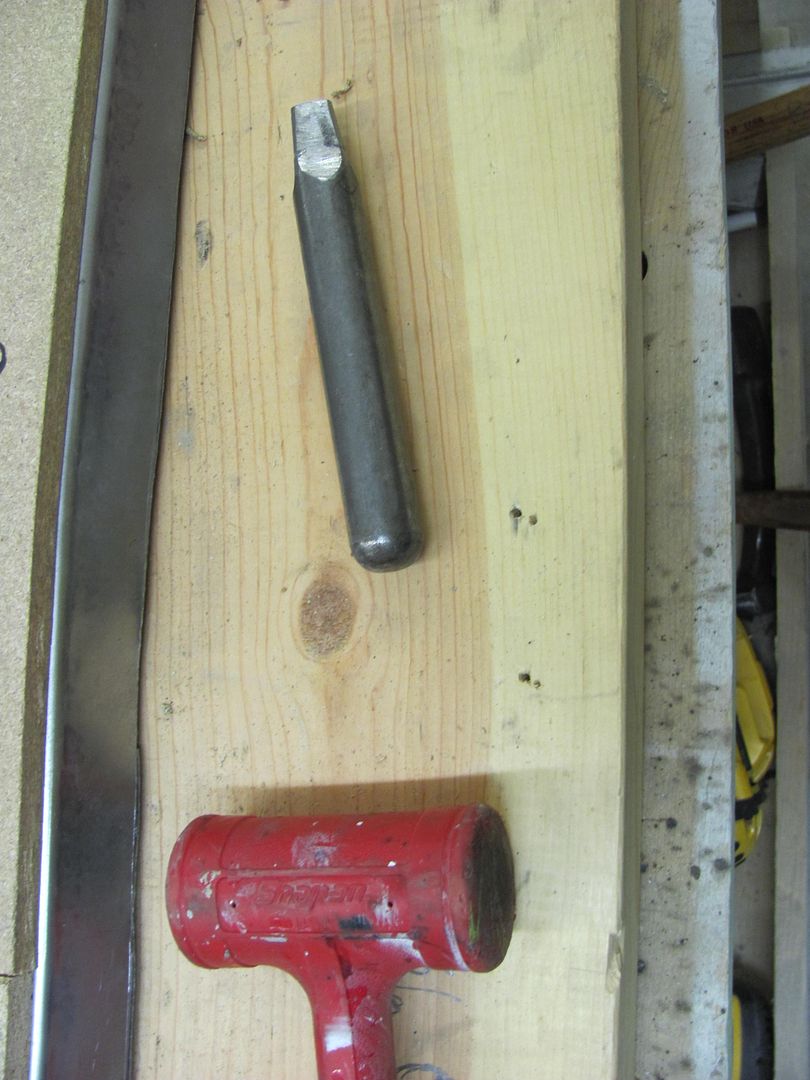
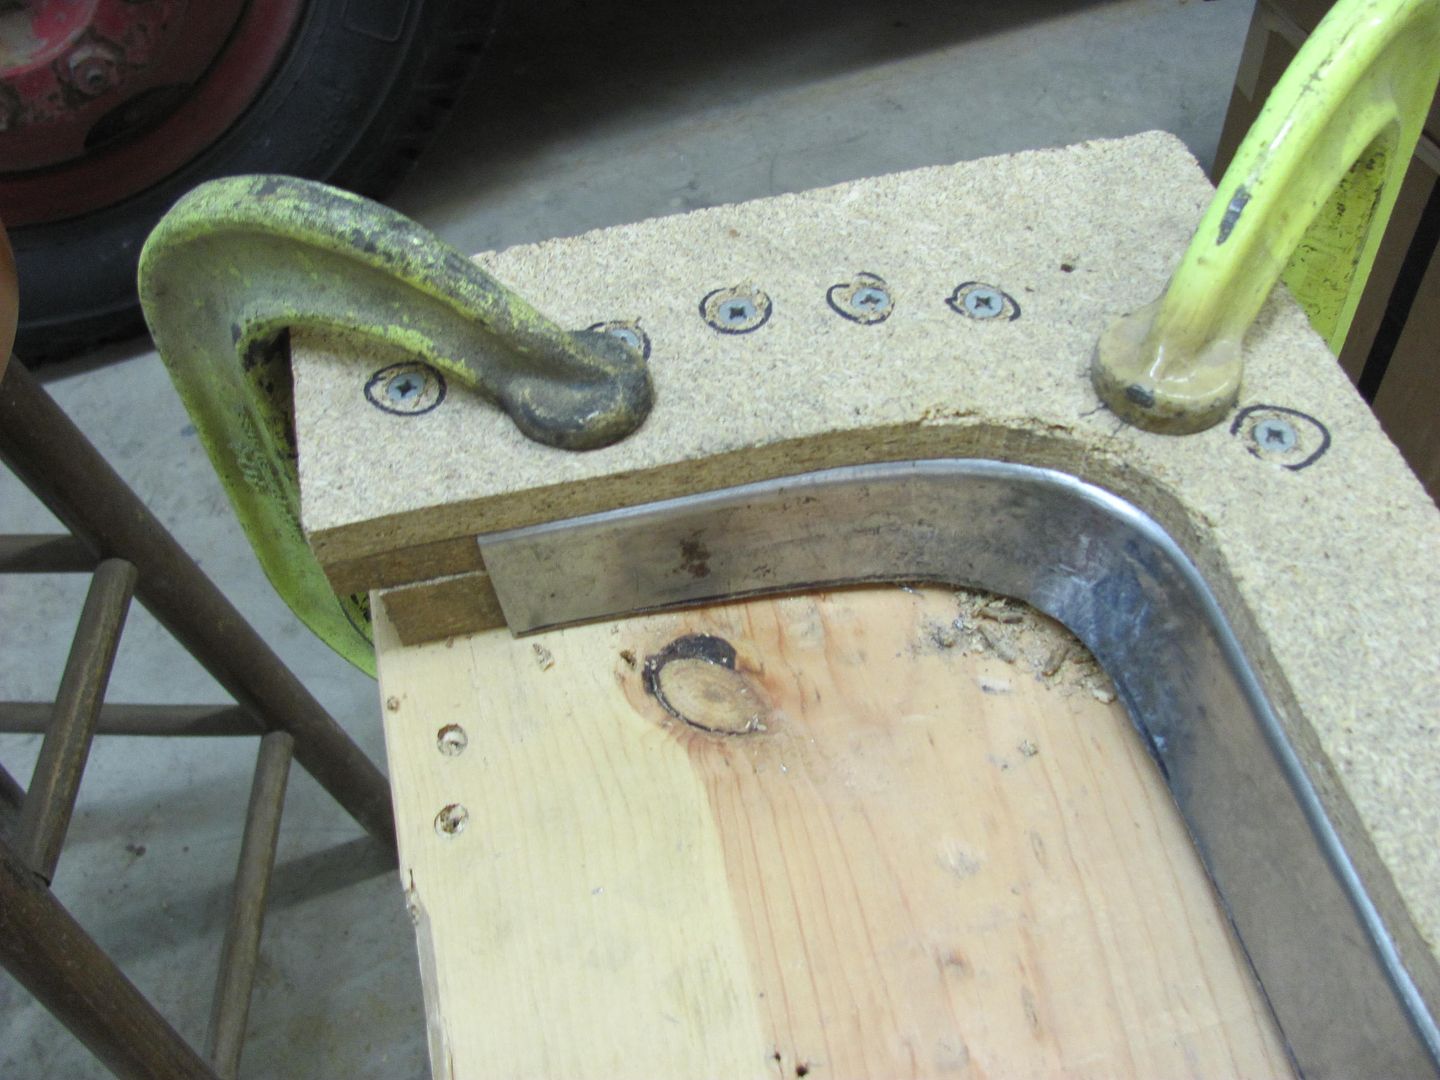
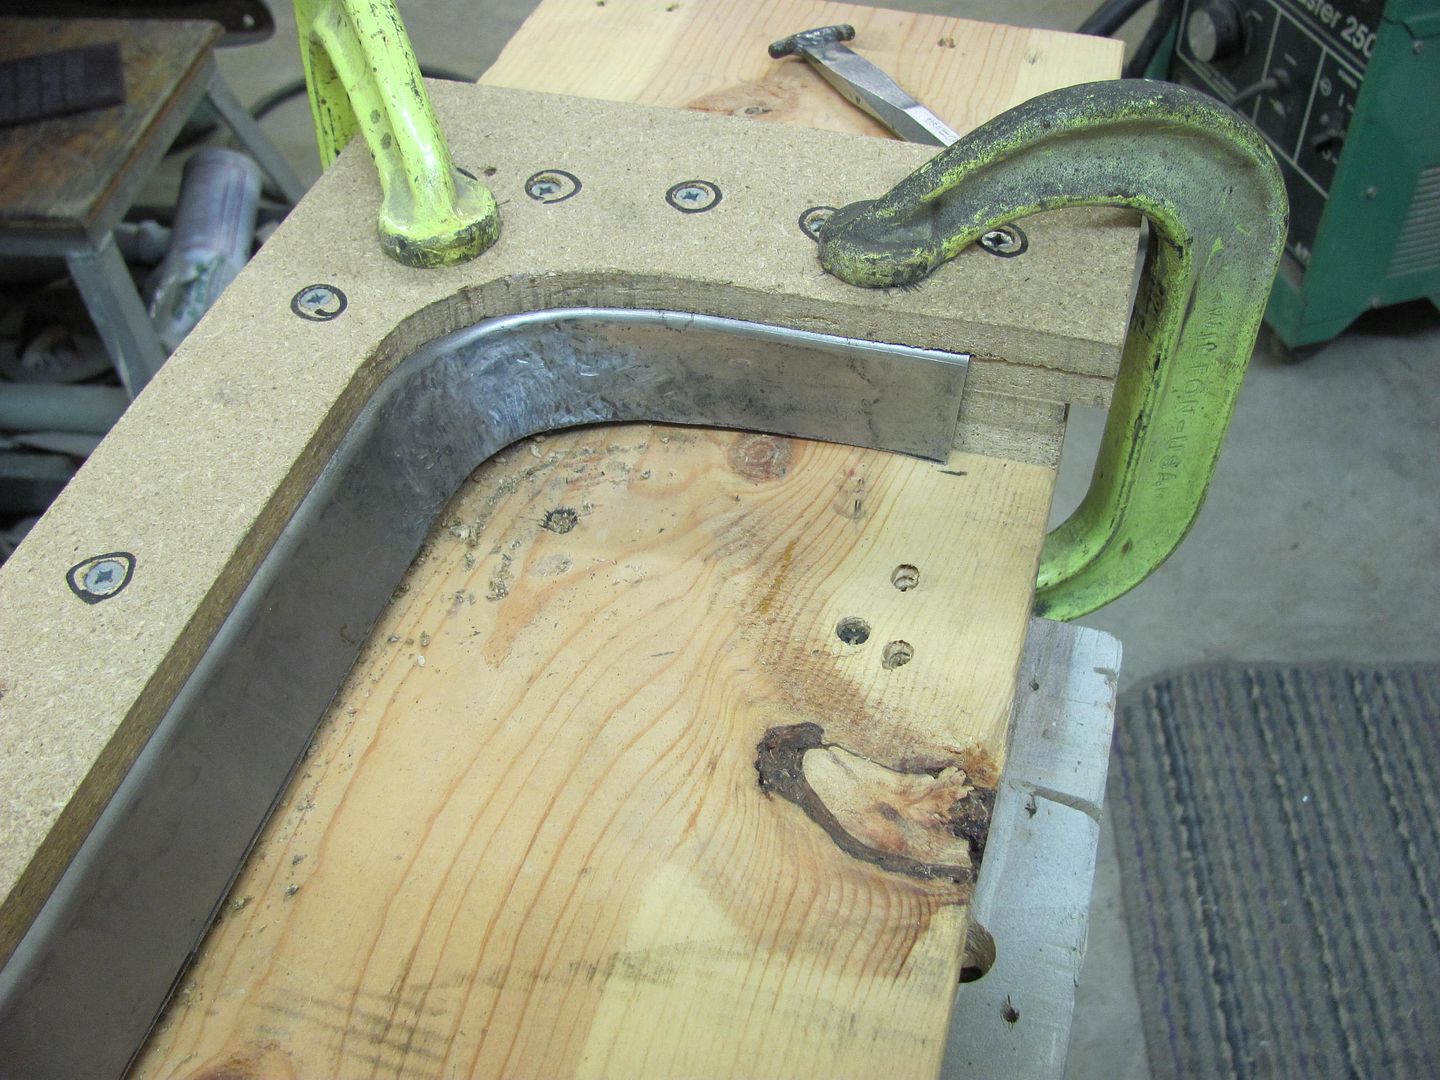
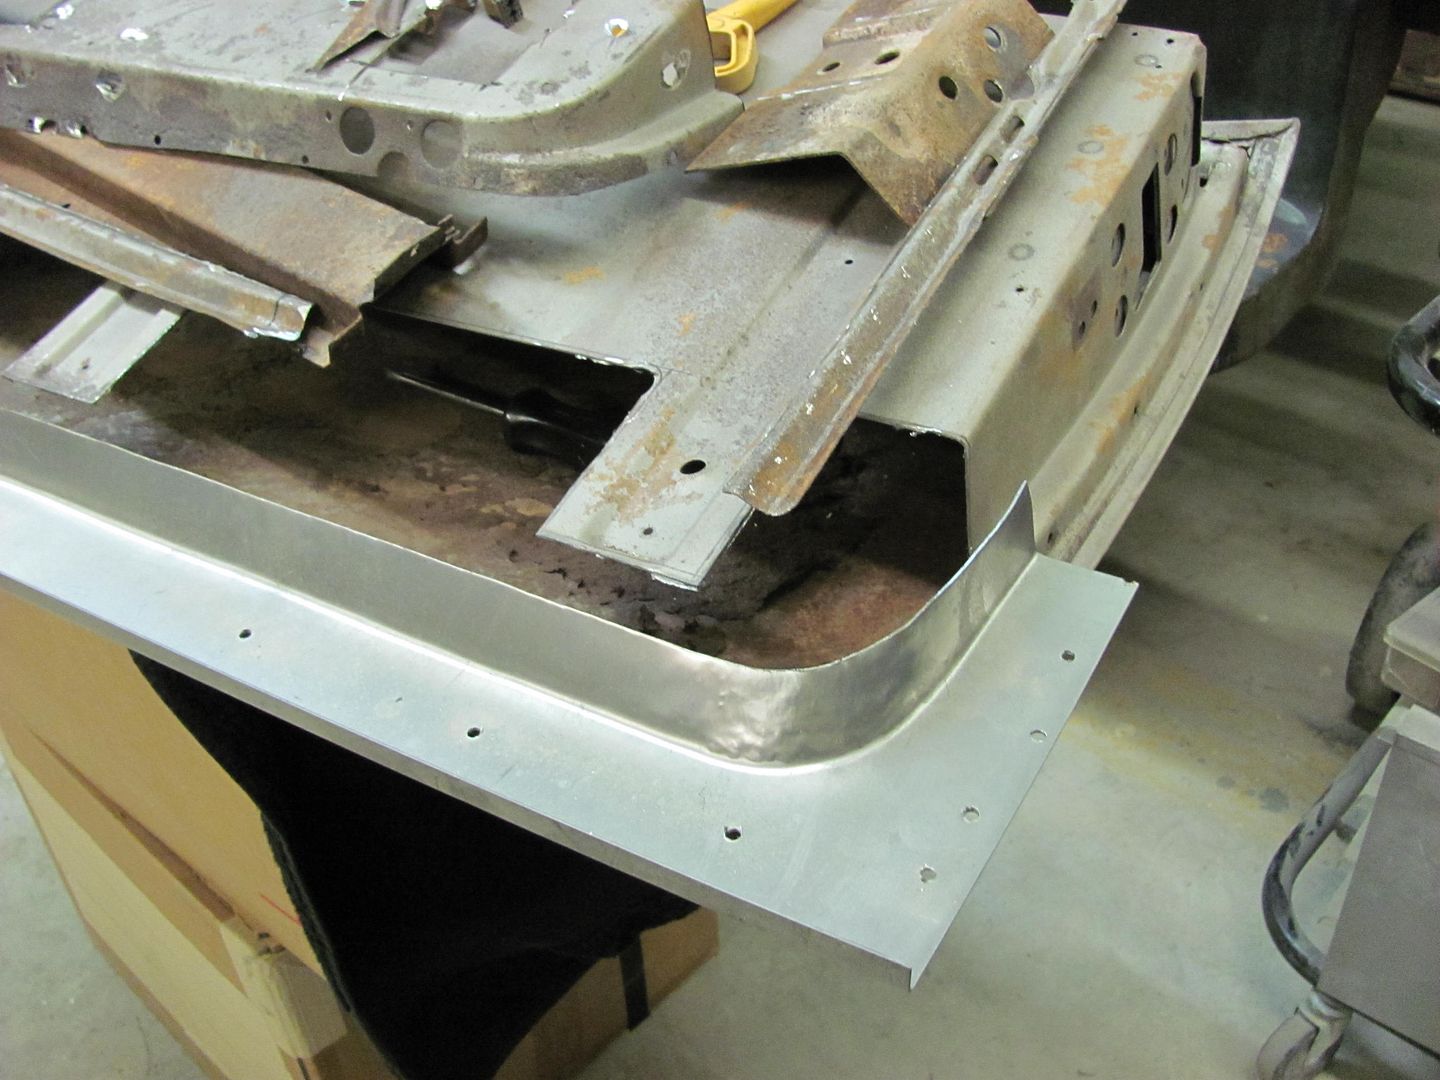
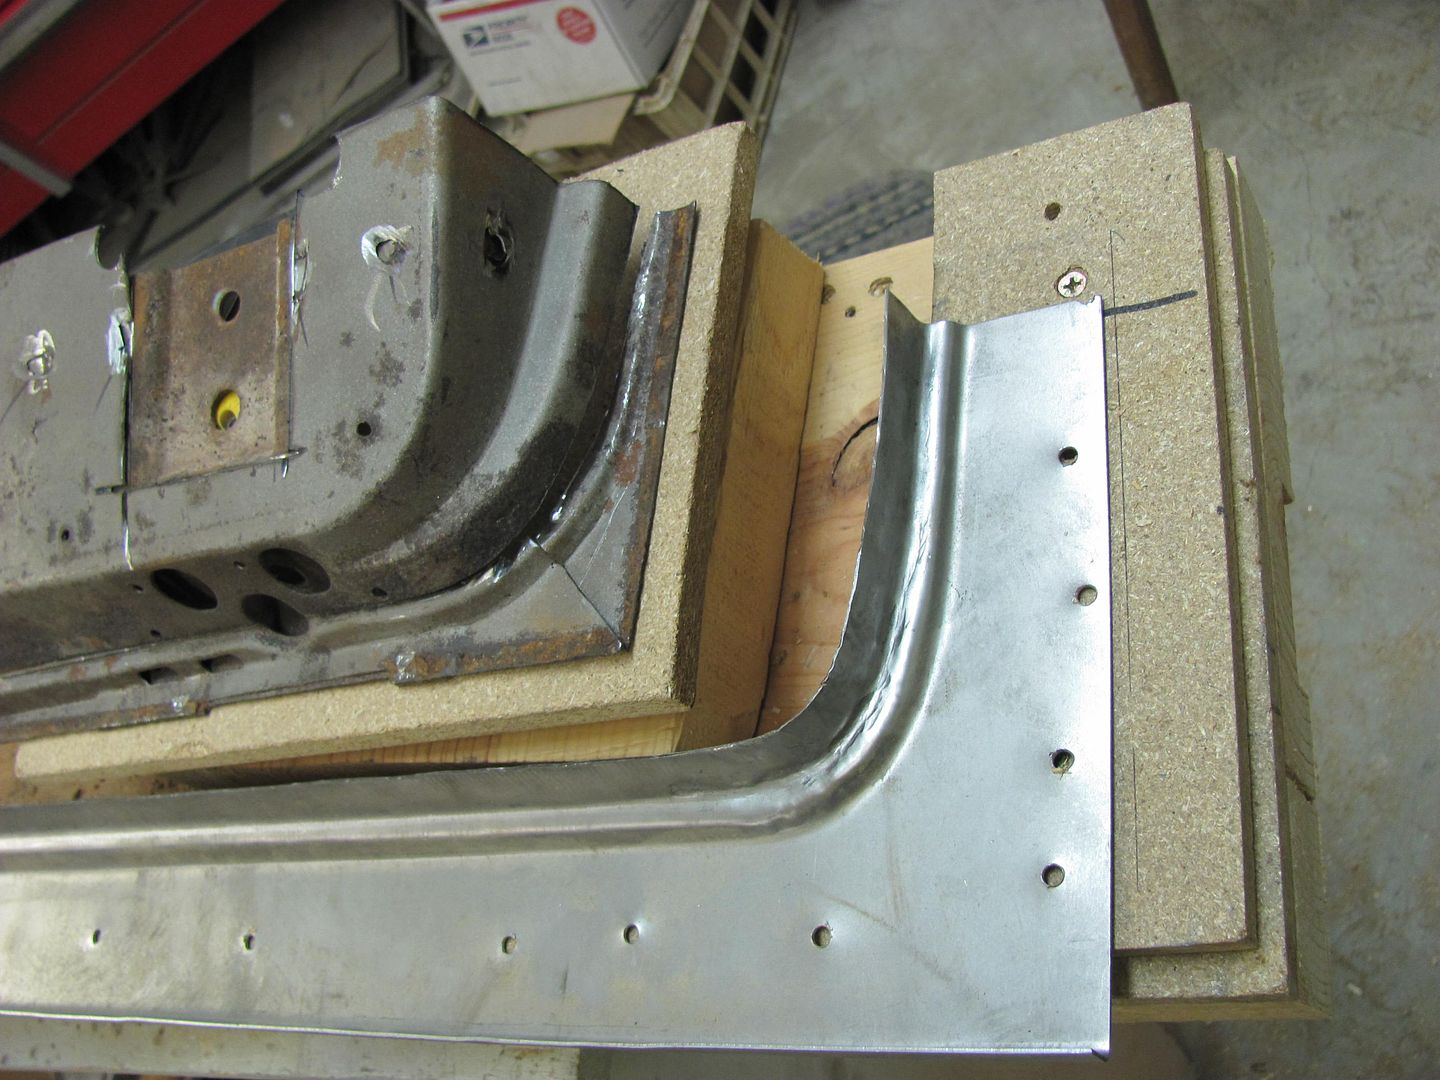
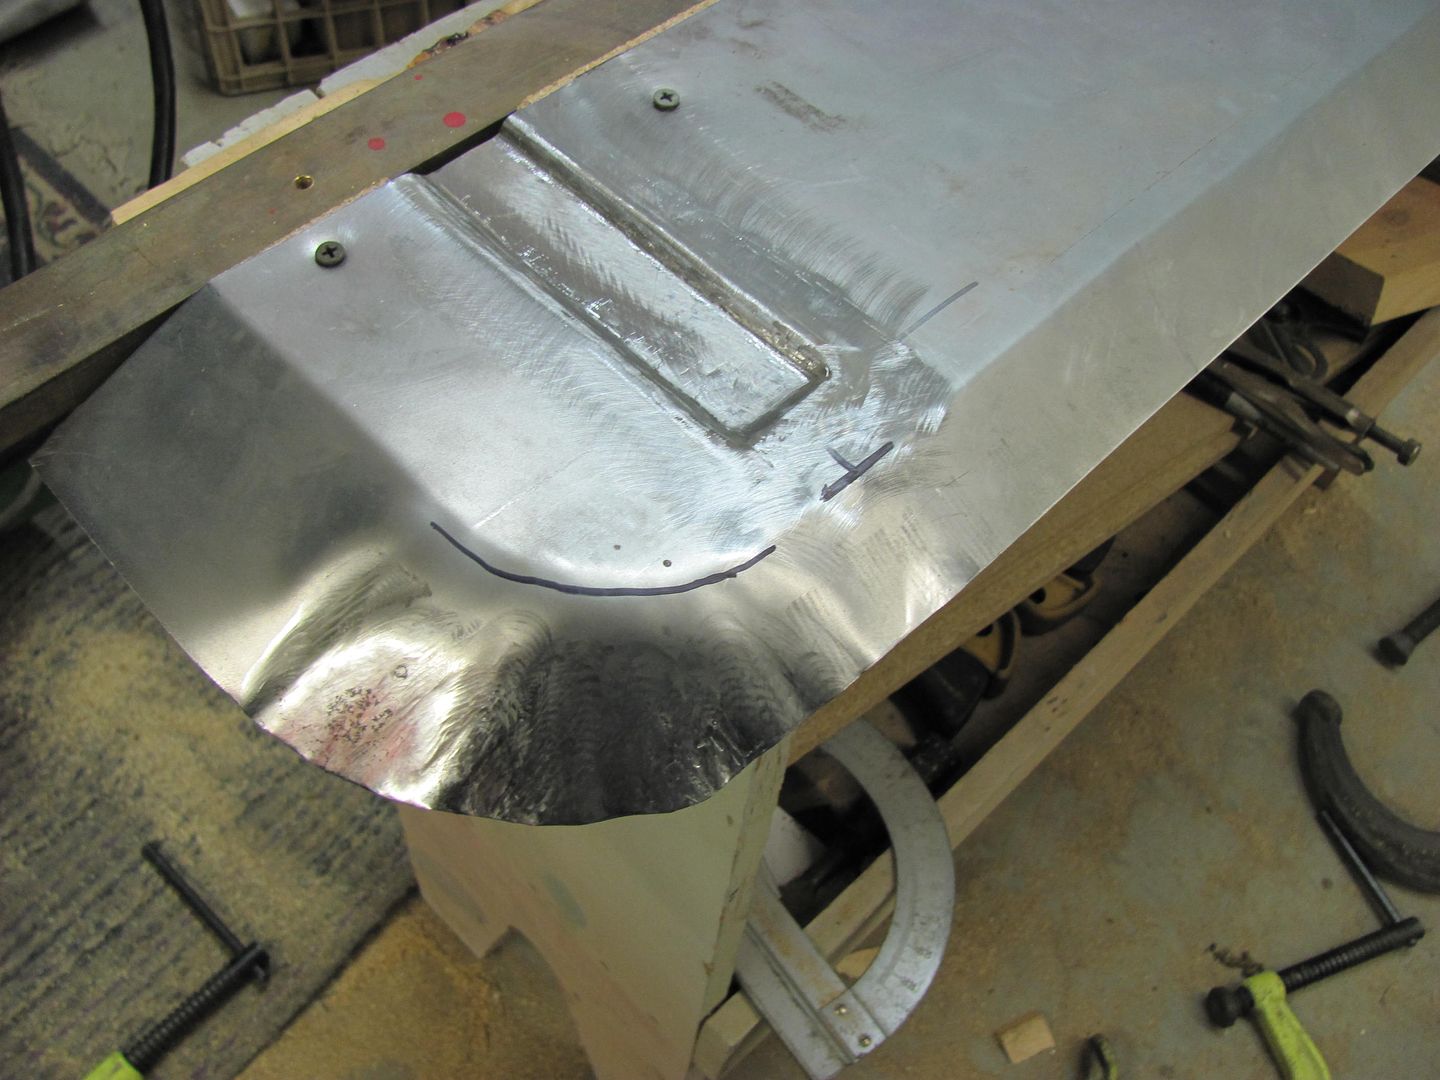
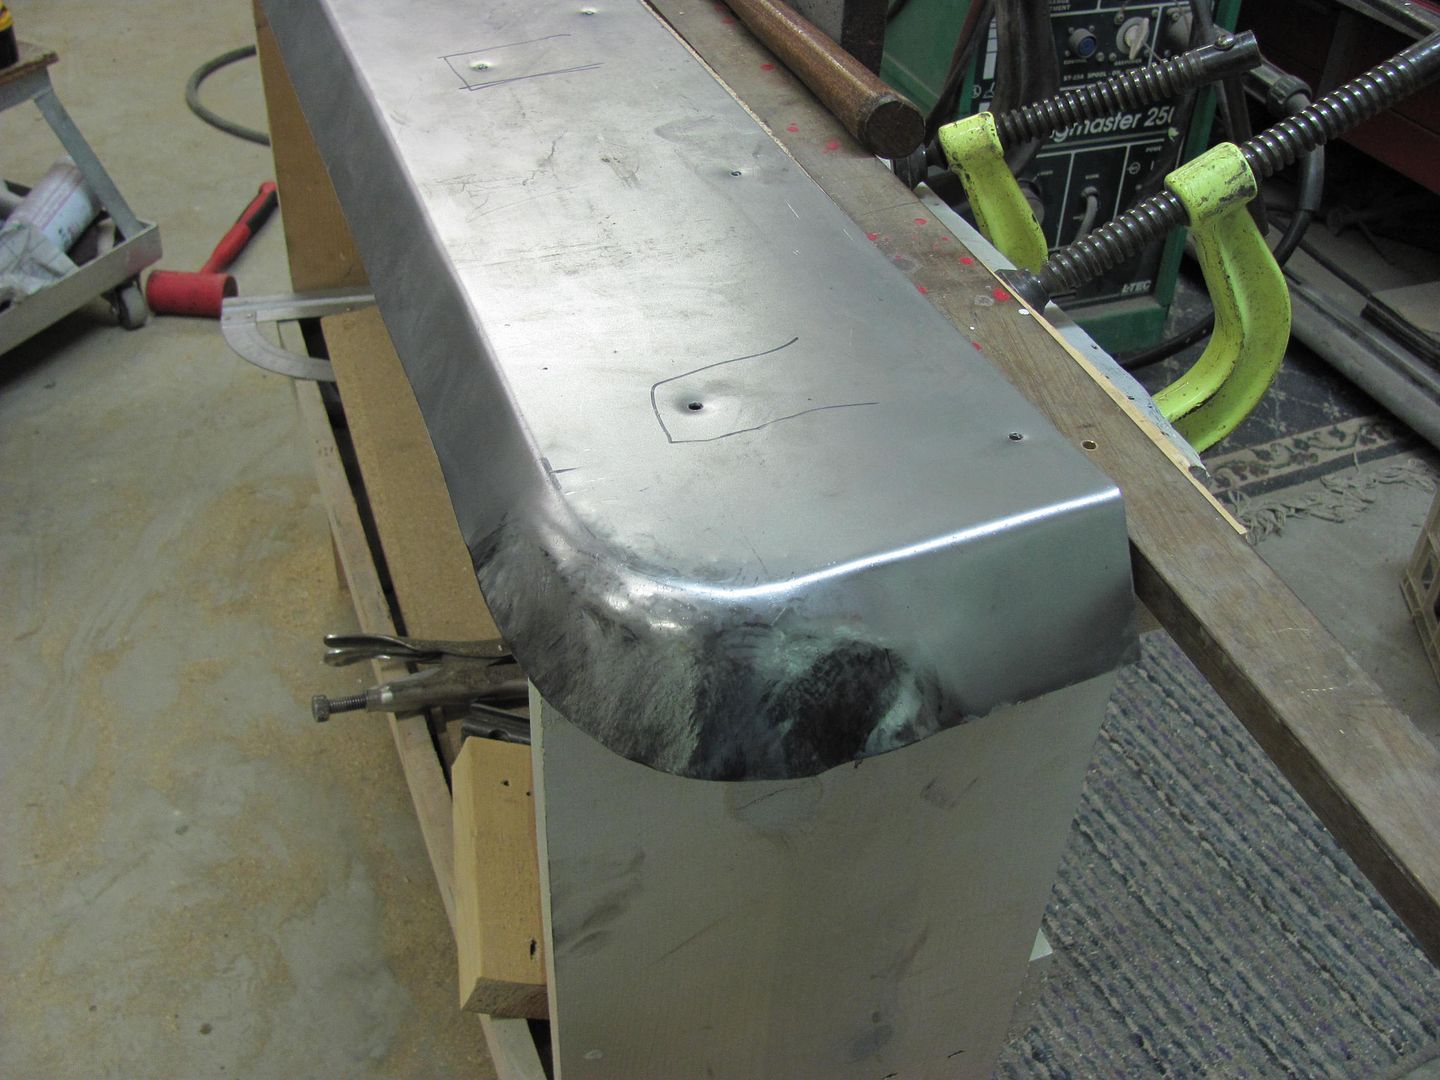
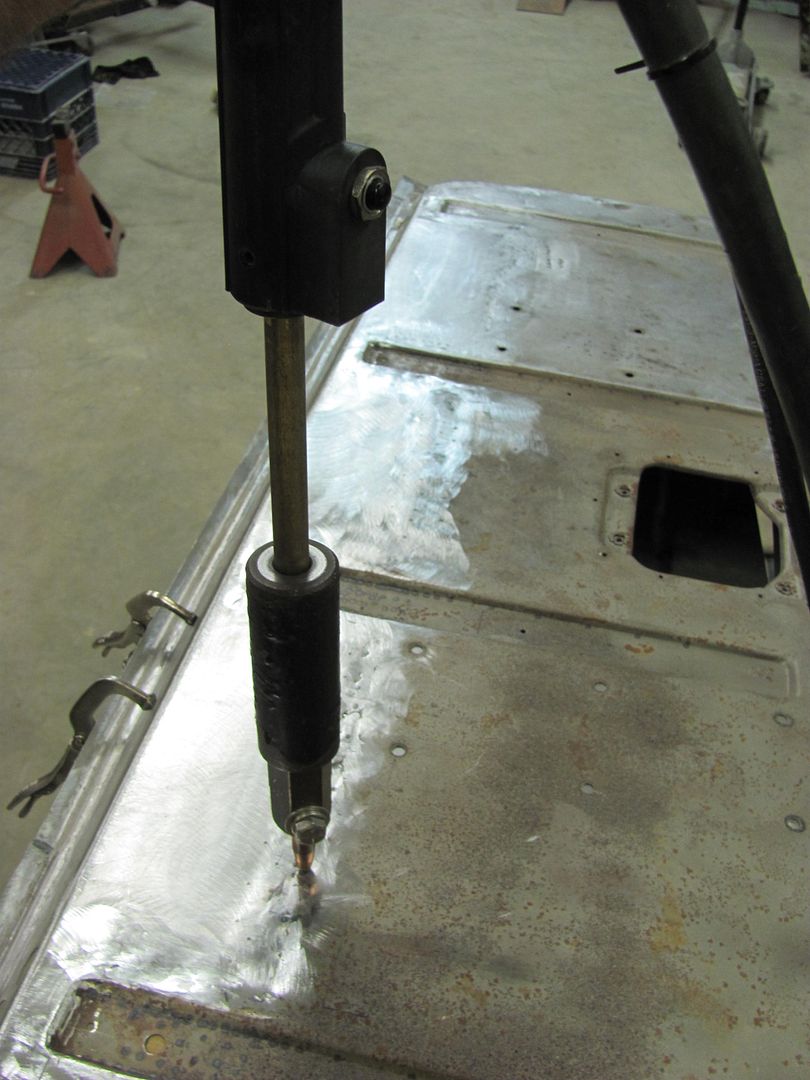
    We laid out the proposed cut lines, used holes in the inside corners to add a radius, and made some sparks...


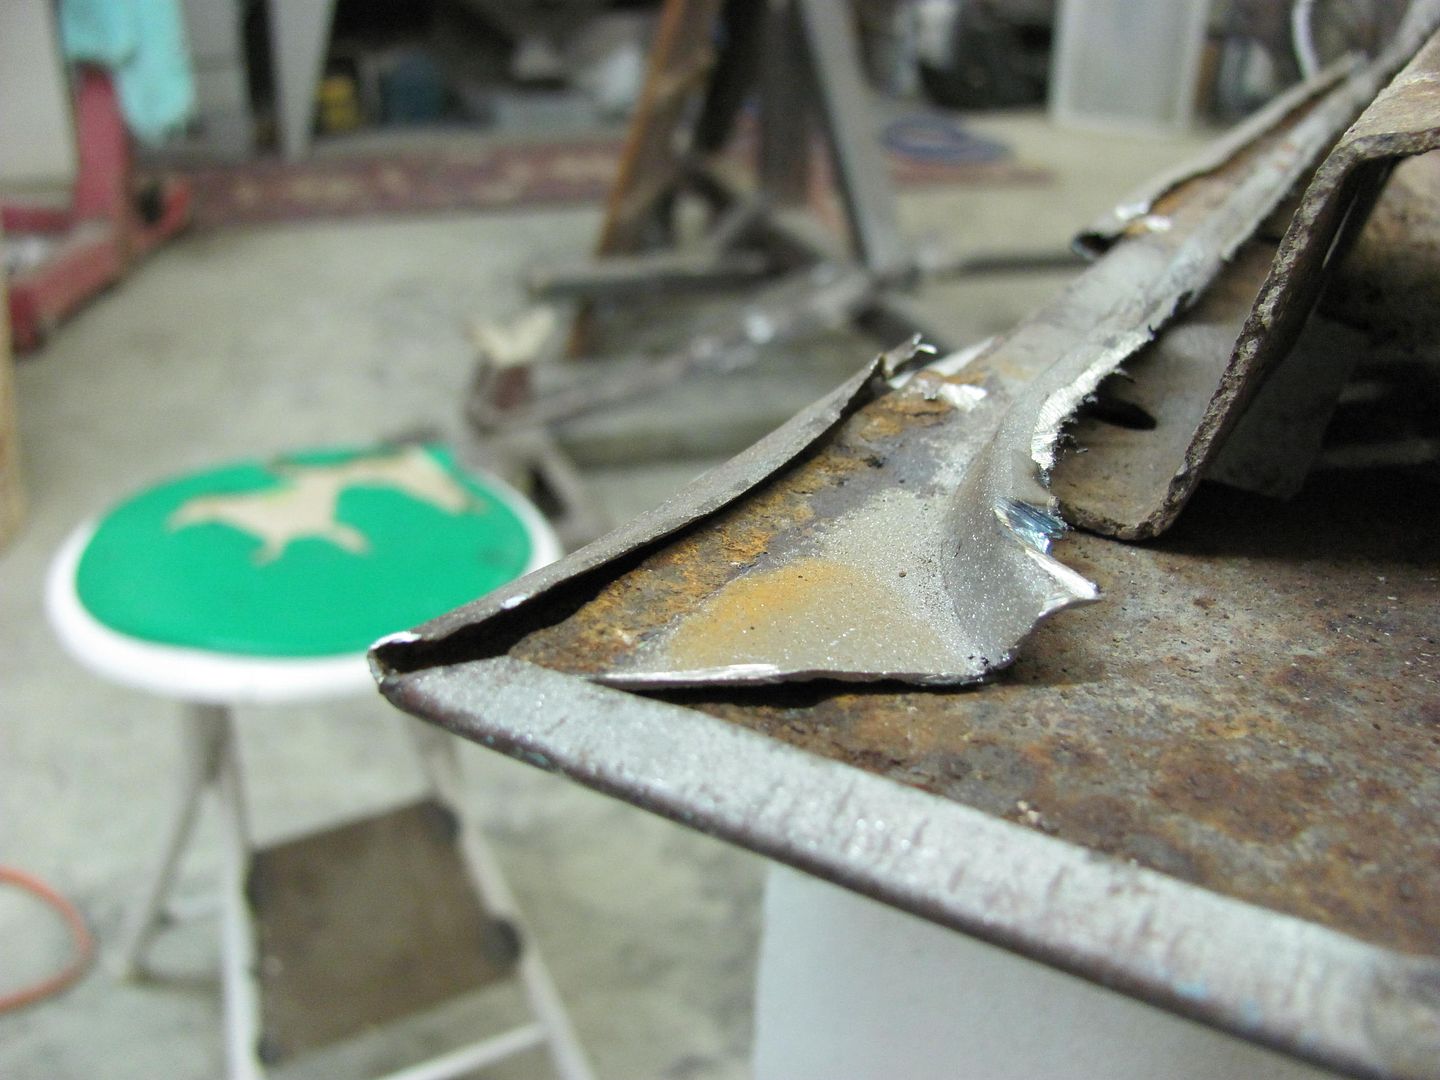
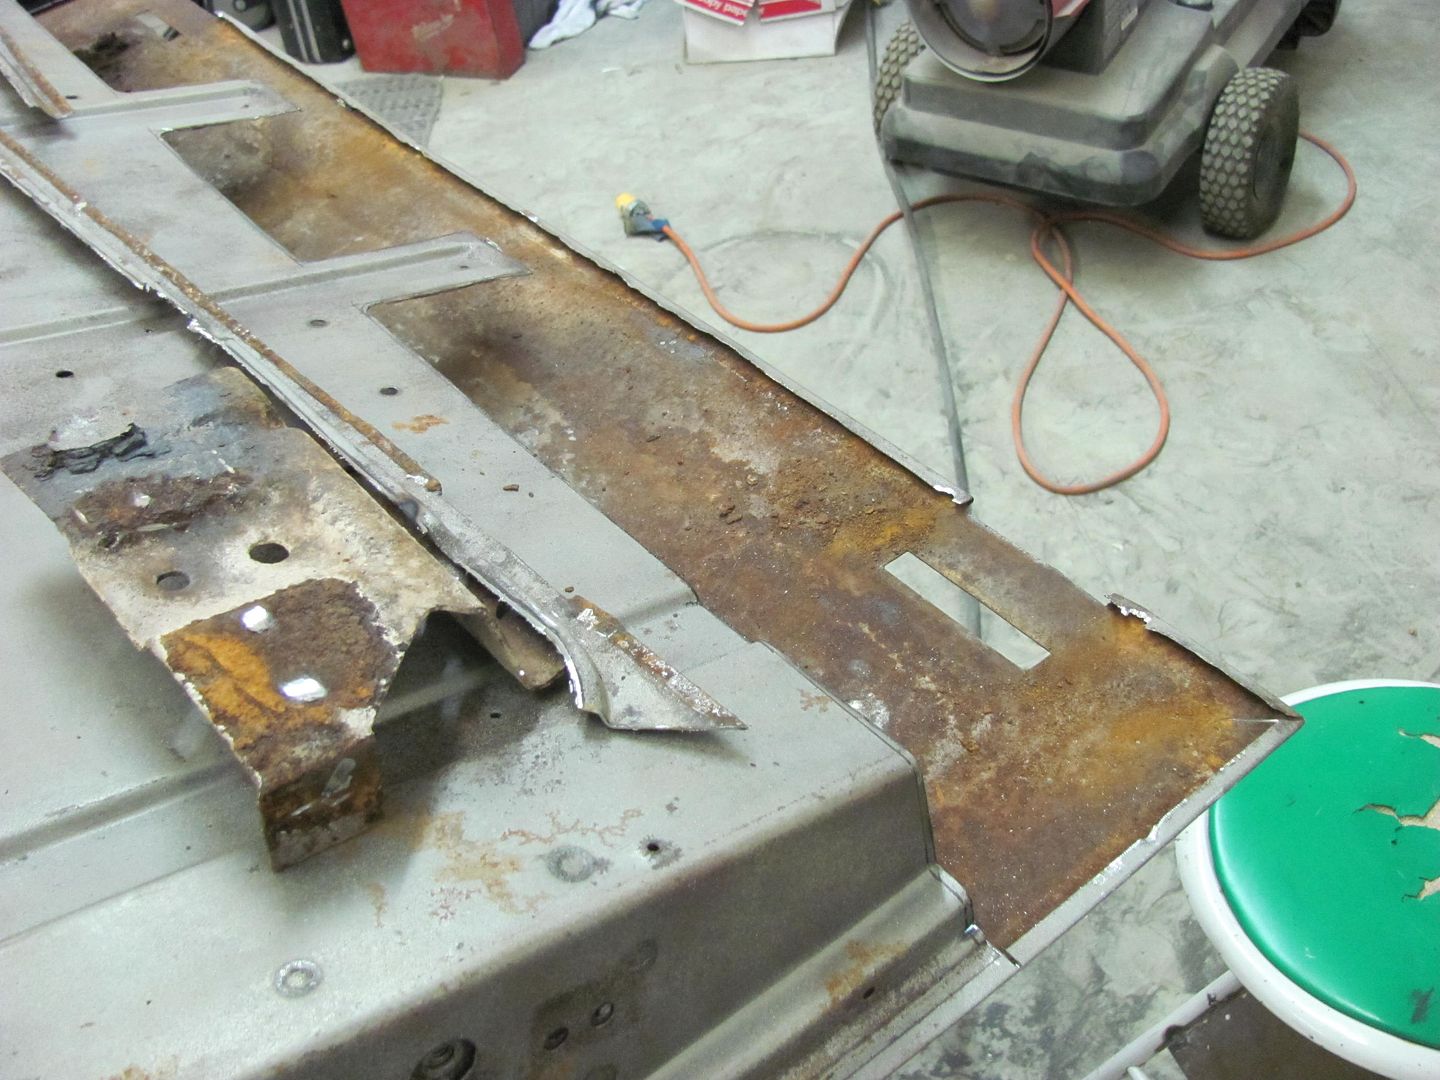
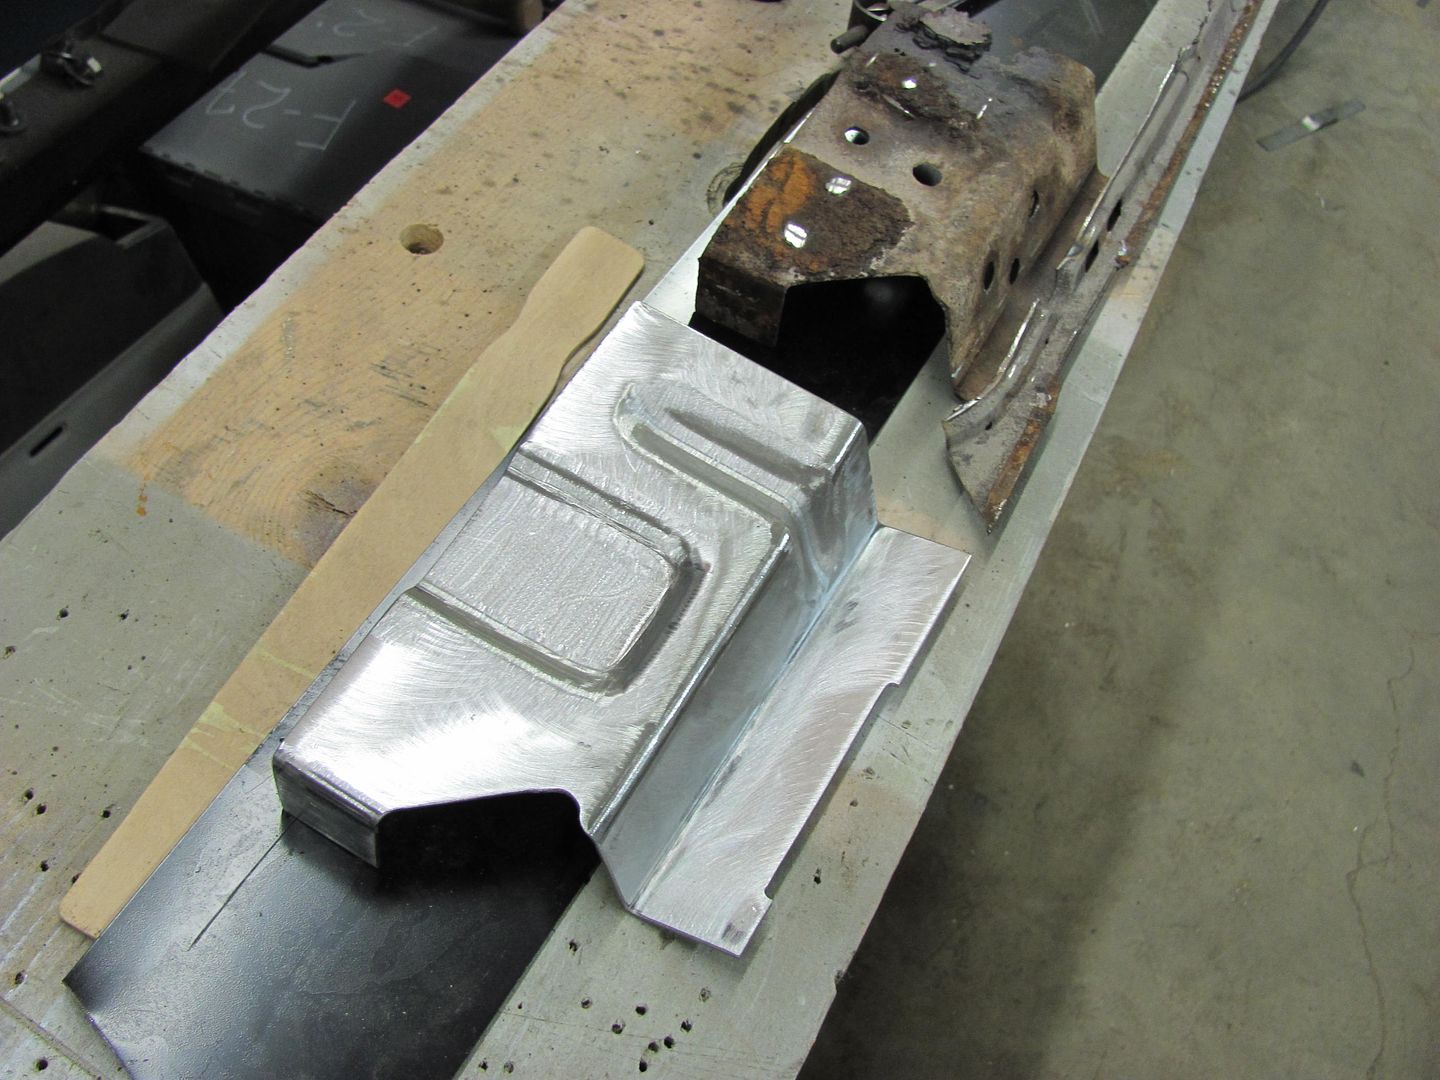
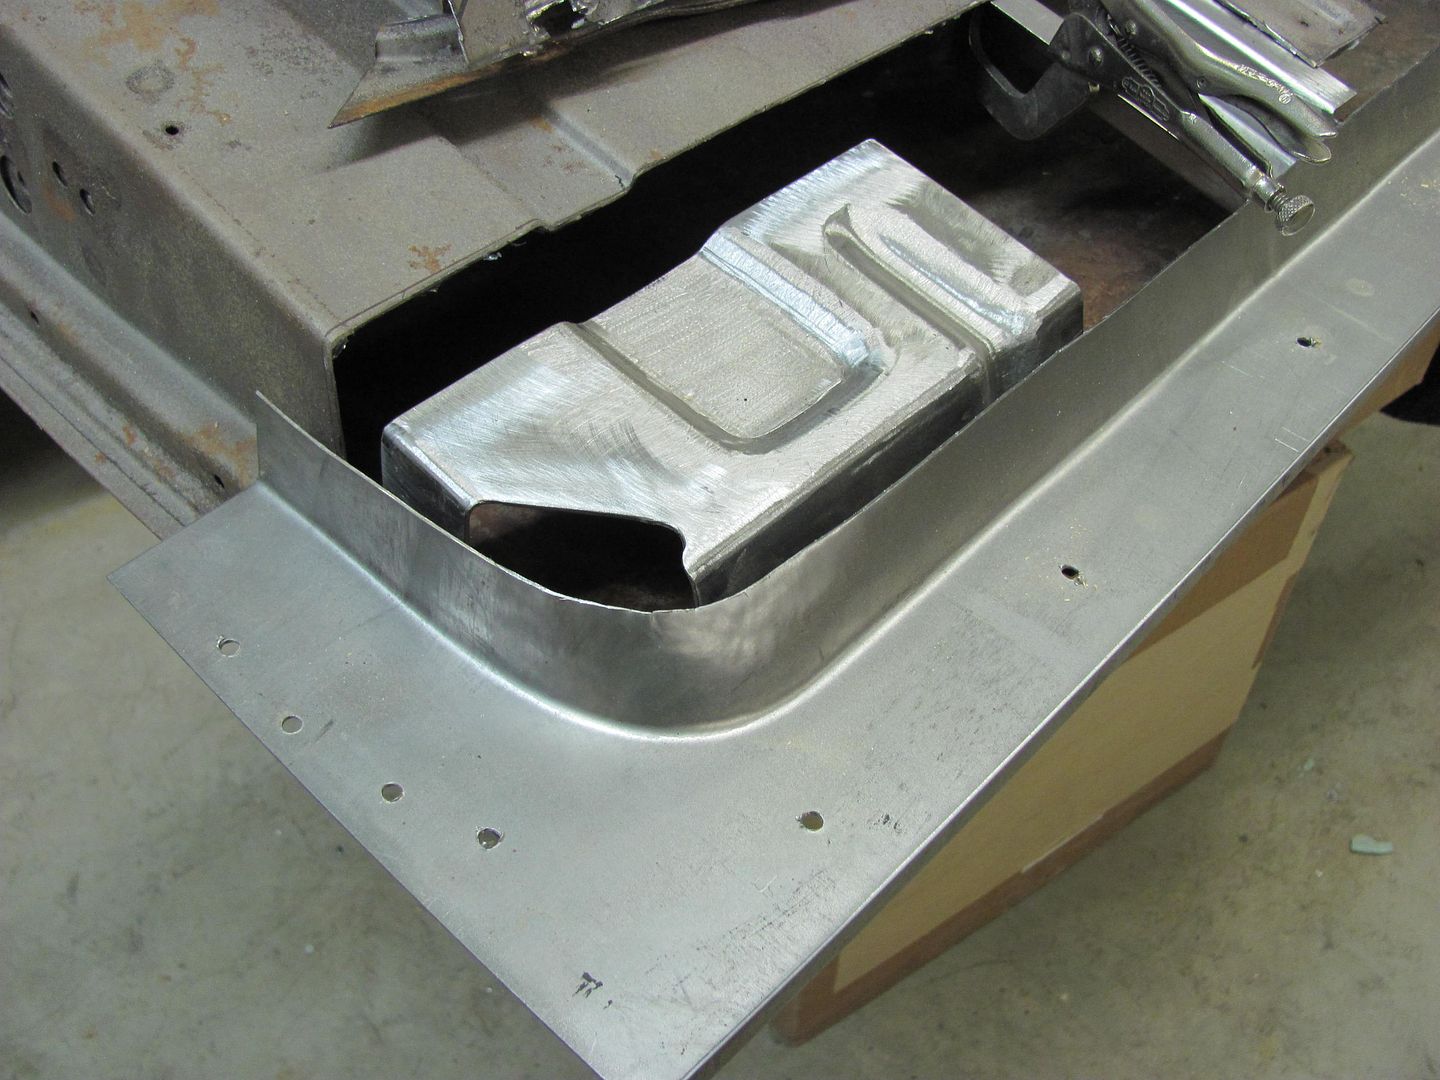
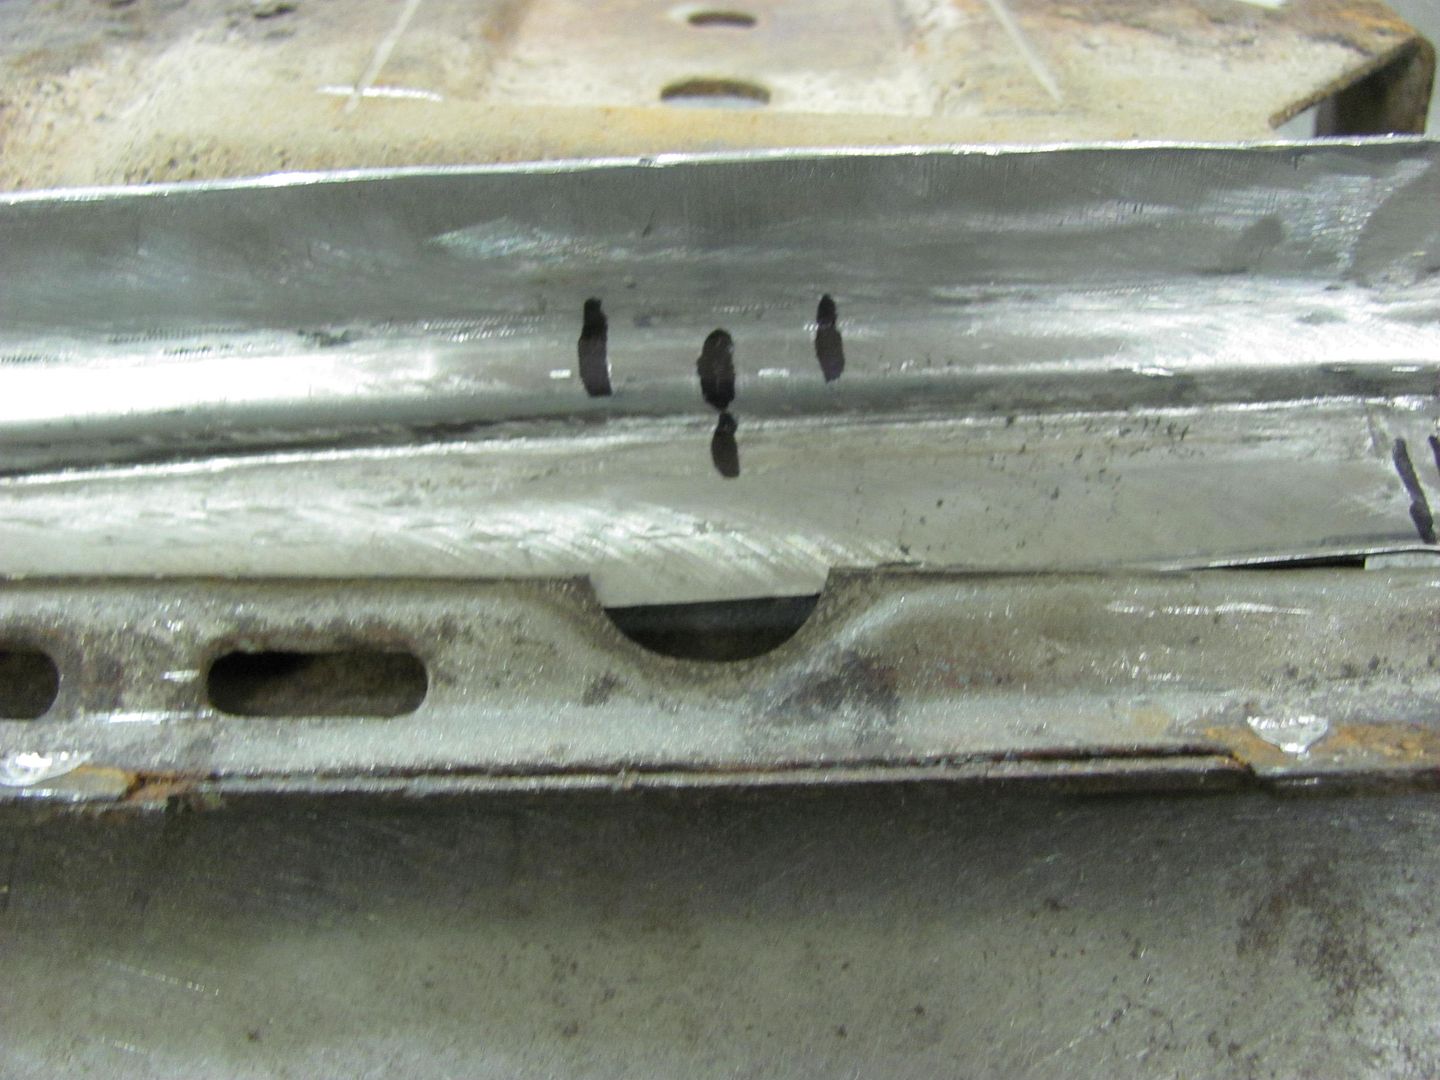
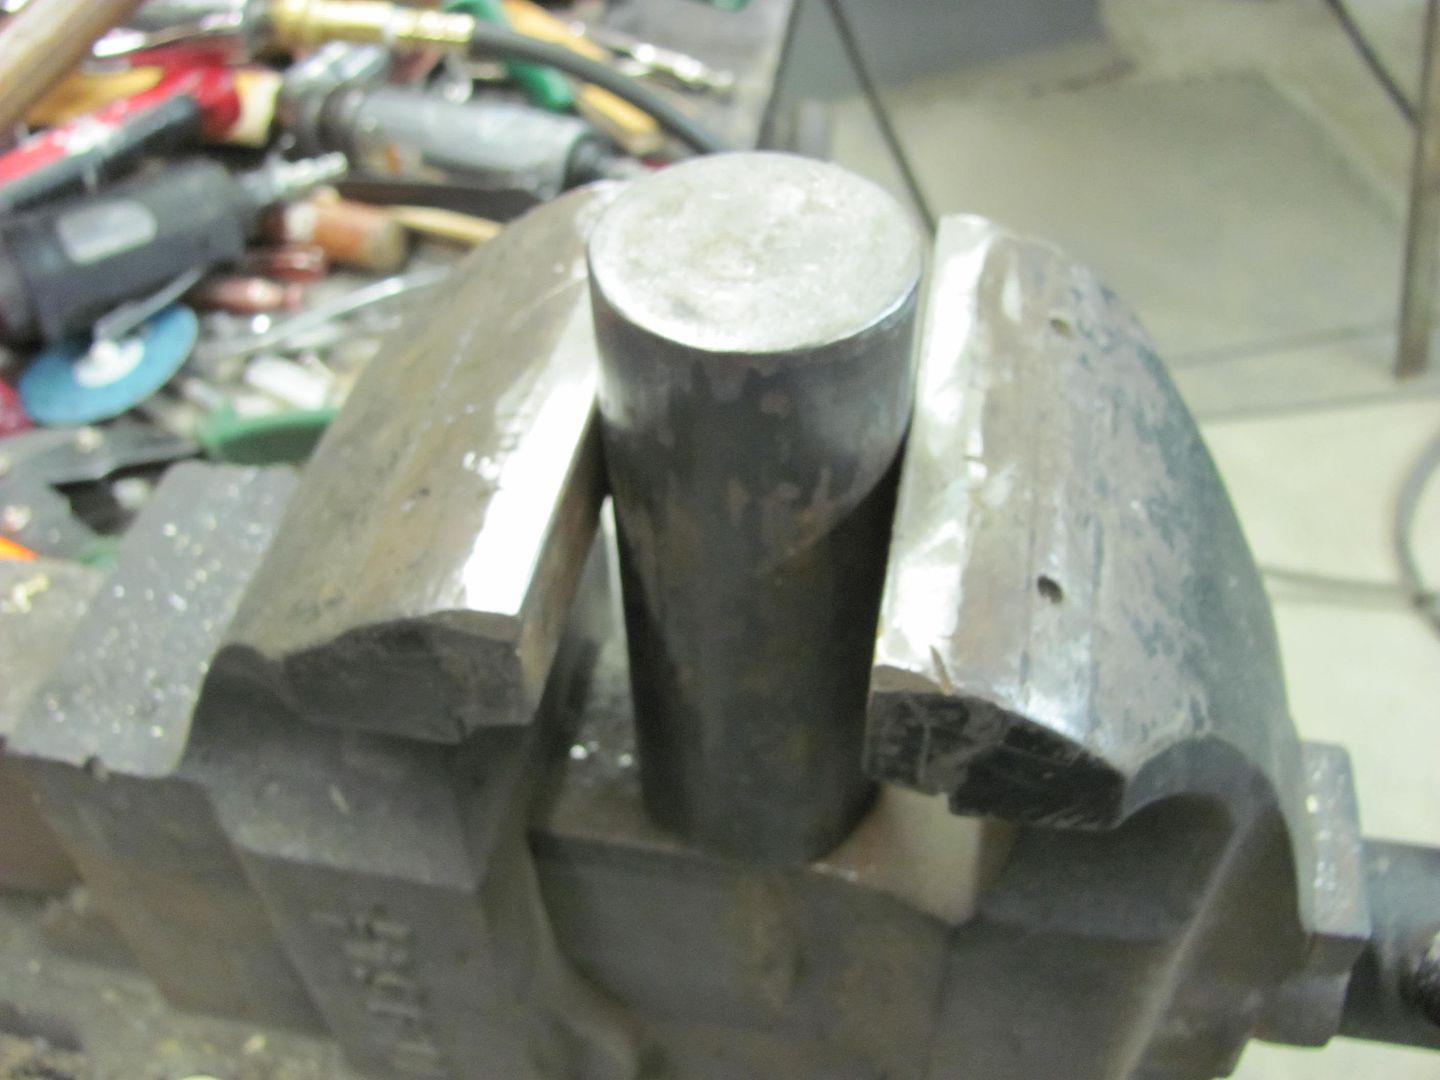
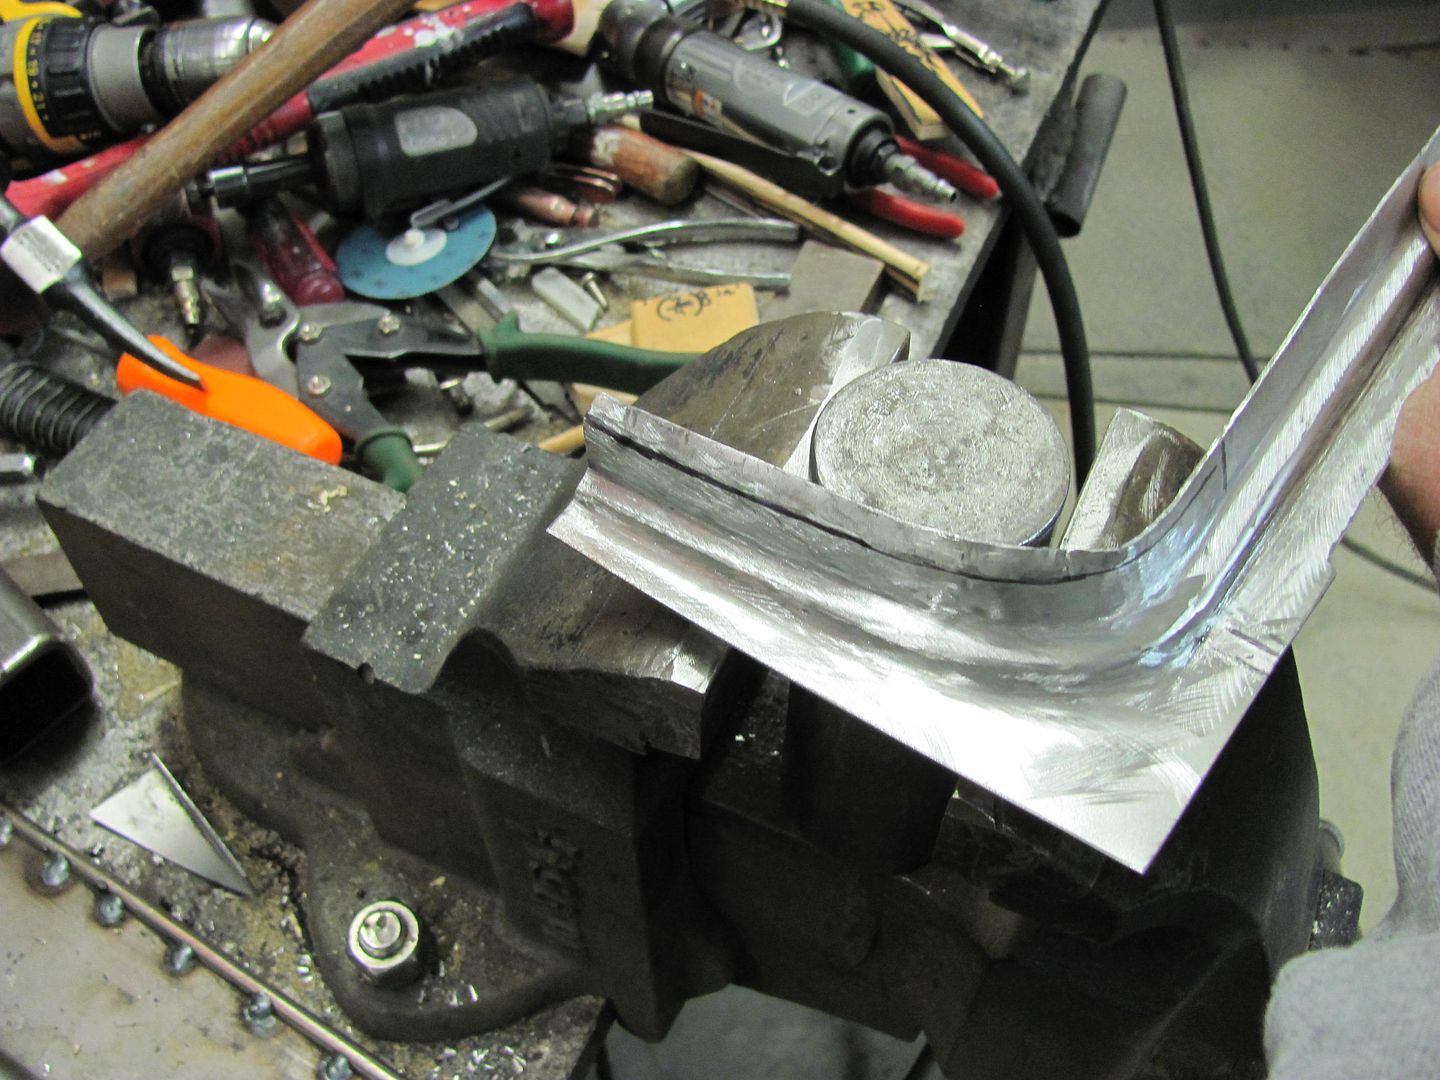
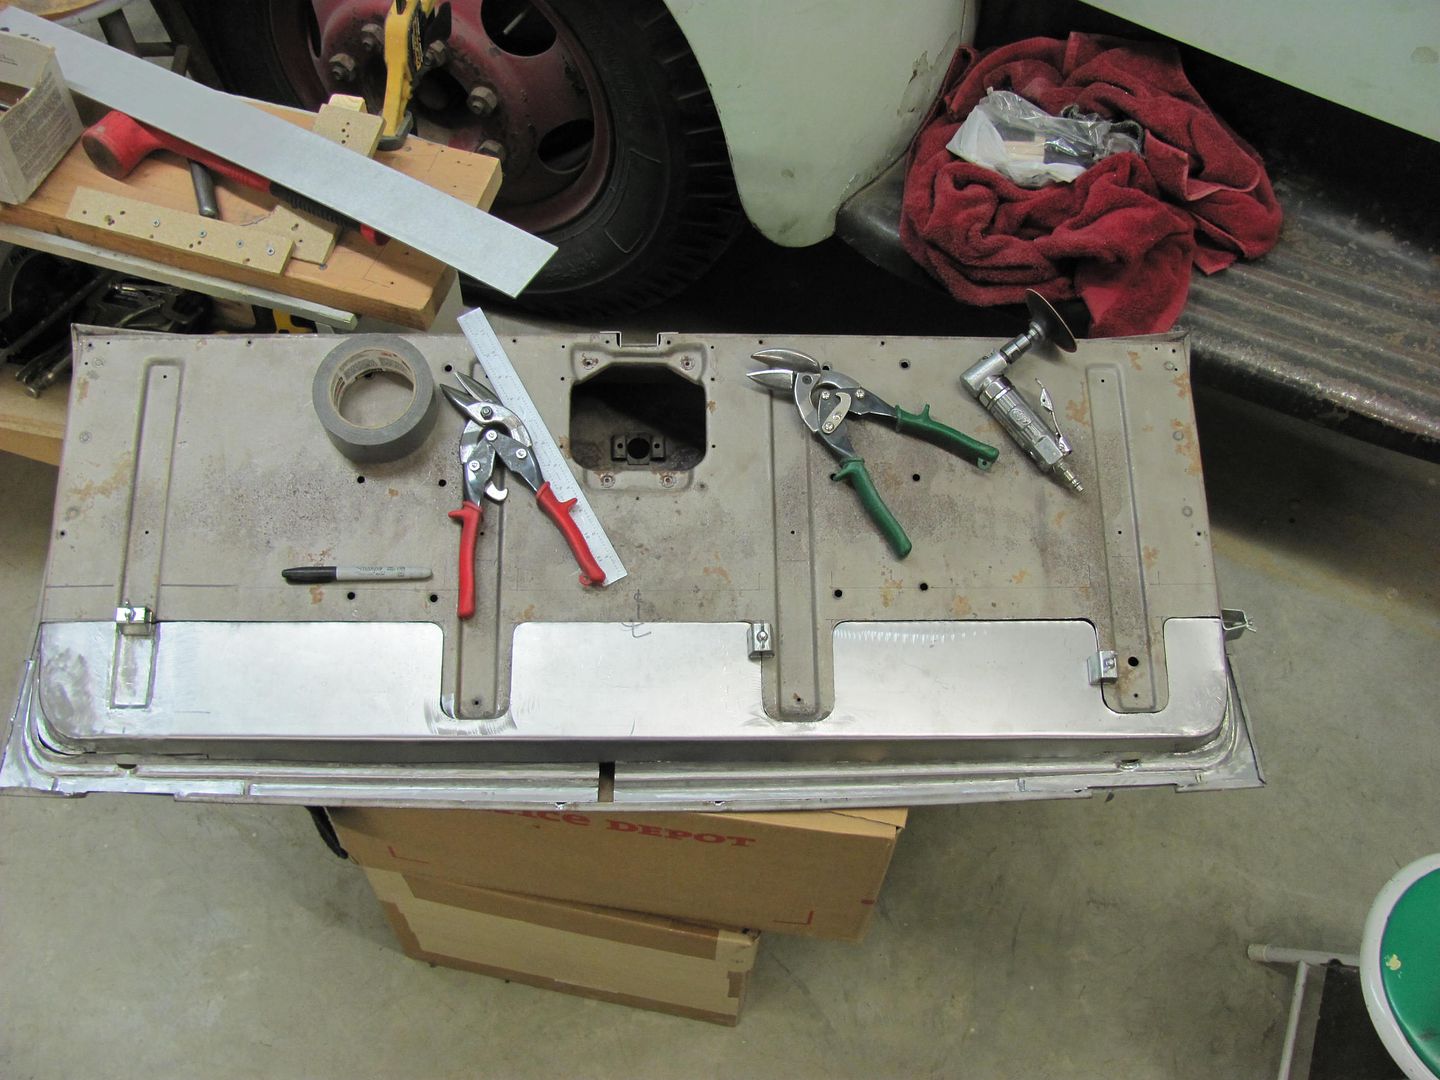
    The tailgate has some internal stiffeners to help support the loading and unloading, and they have suffered some damage as well....


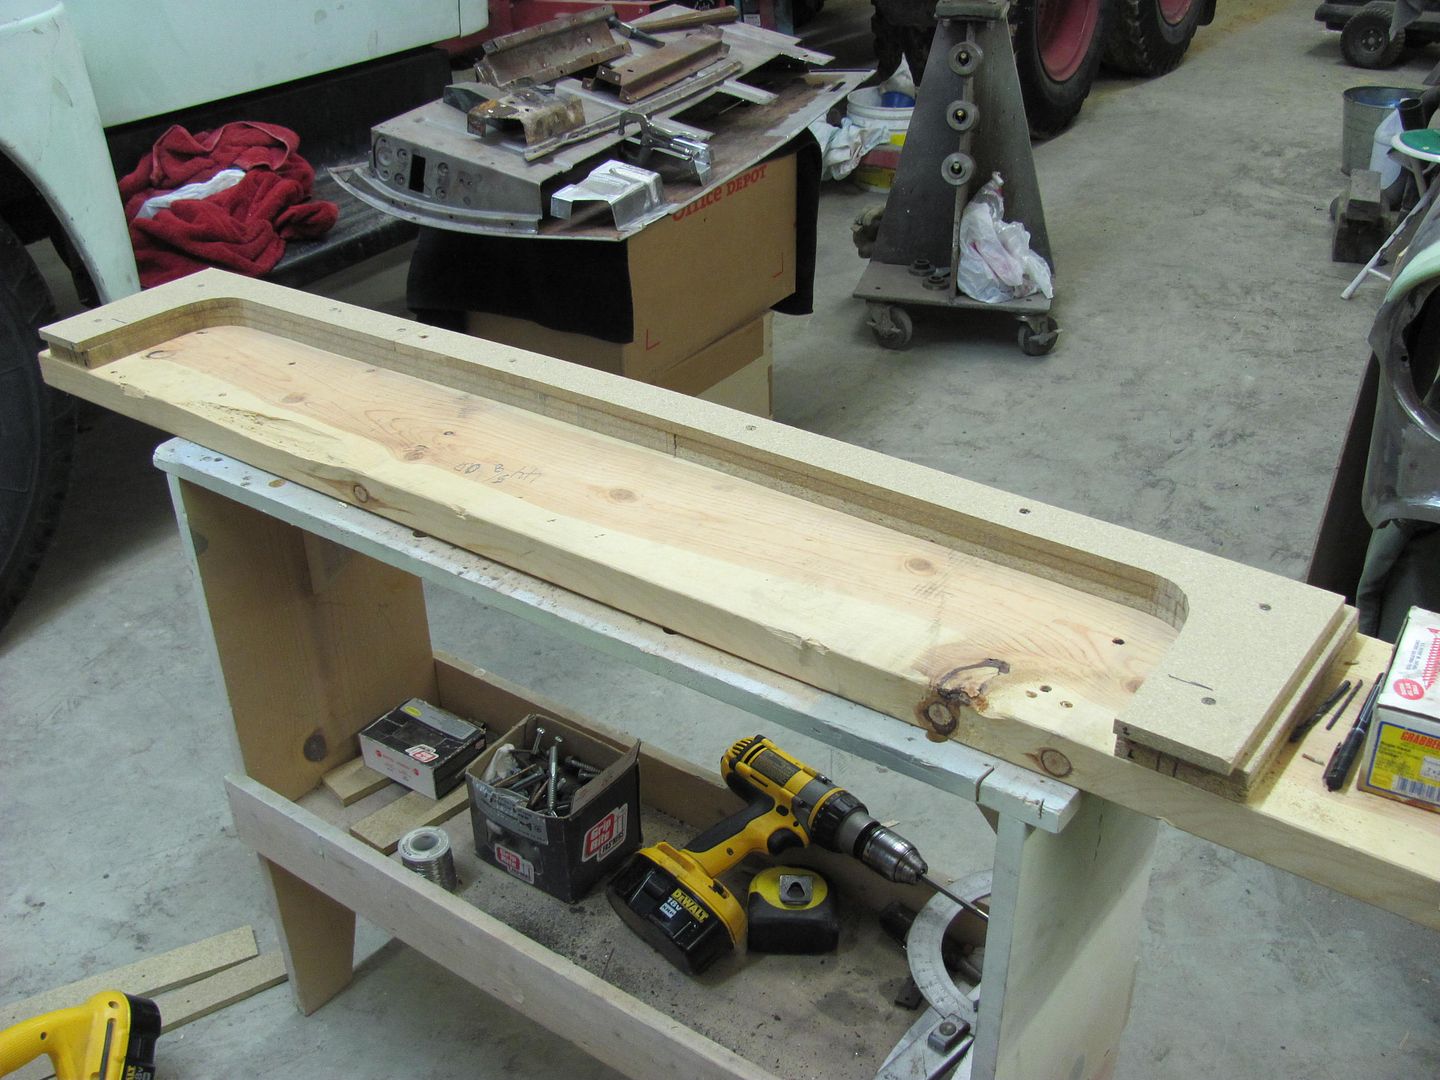
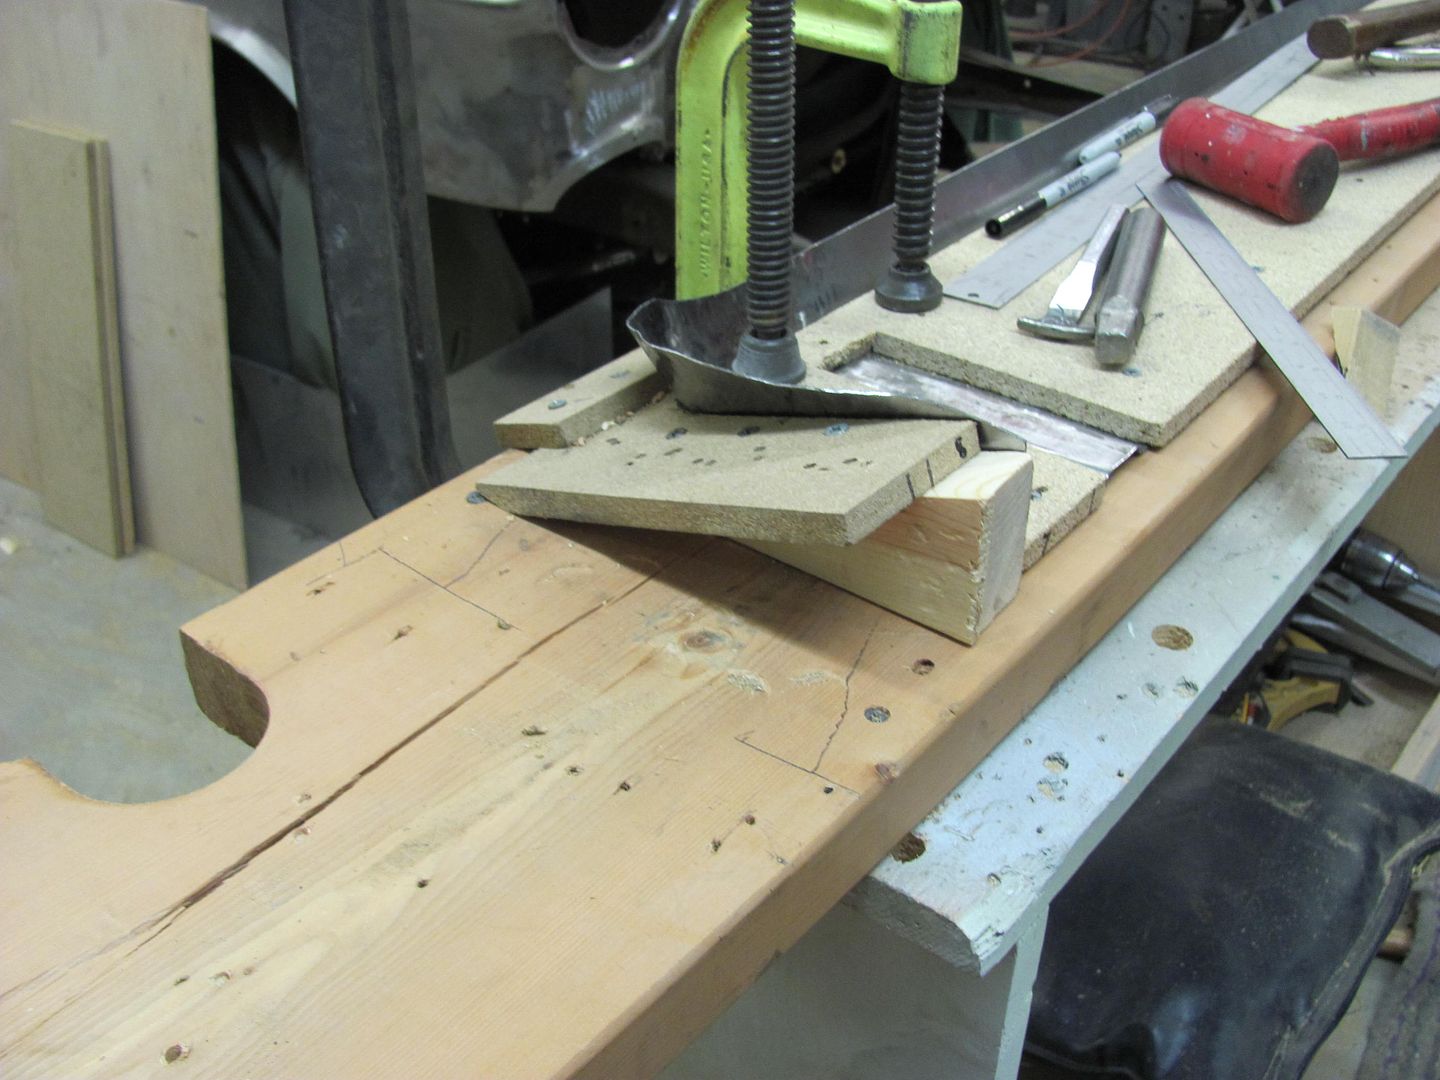
    Since they're just spot welded in, and it will be easier to weld in newly fabricated ones than attempt repairs of the rusty ones in place......


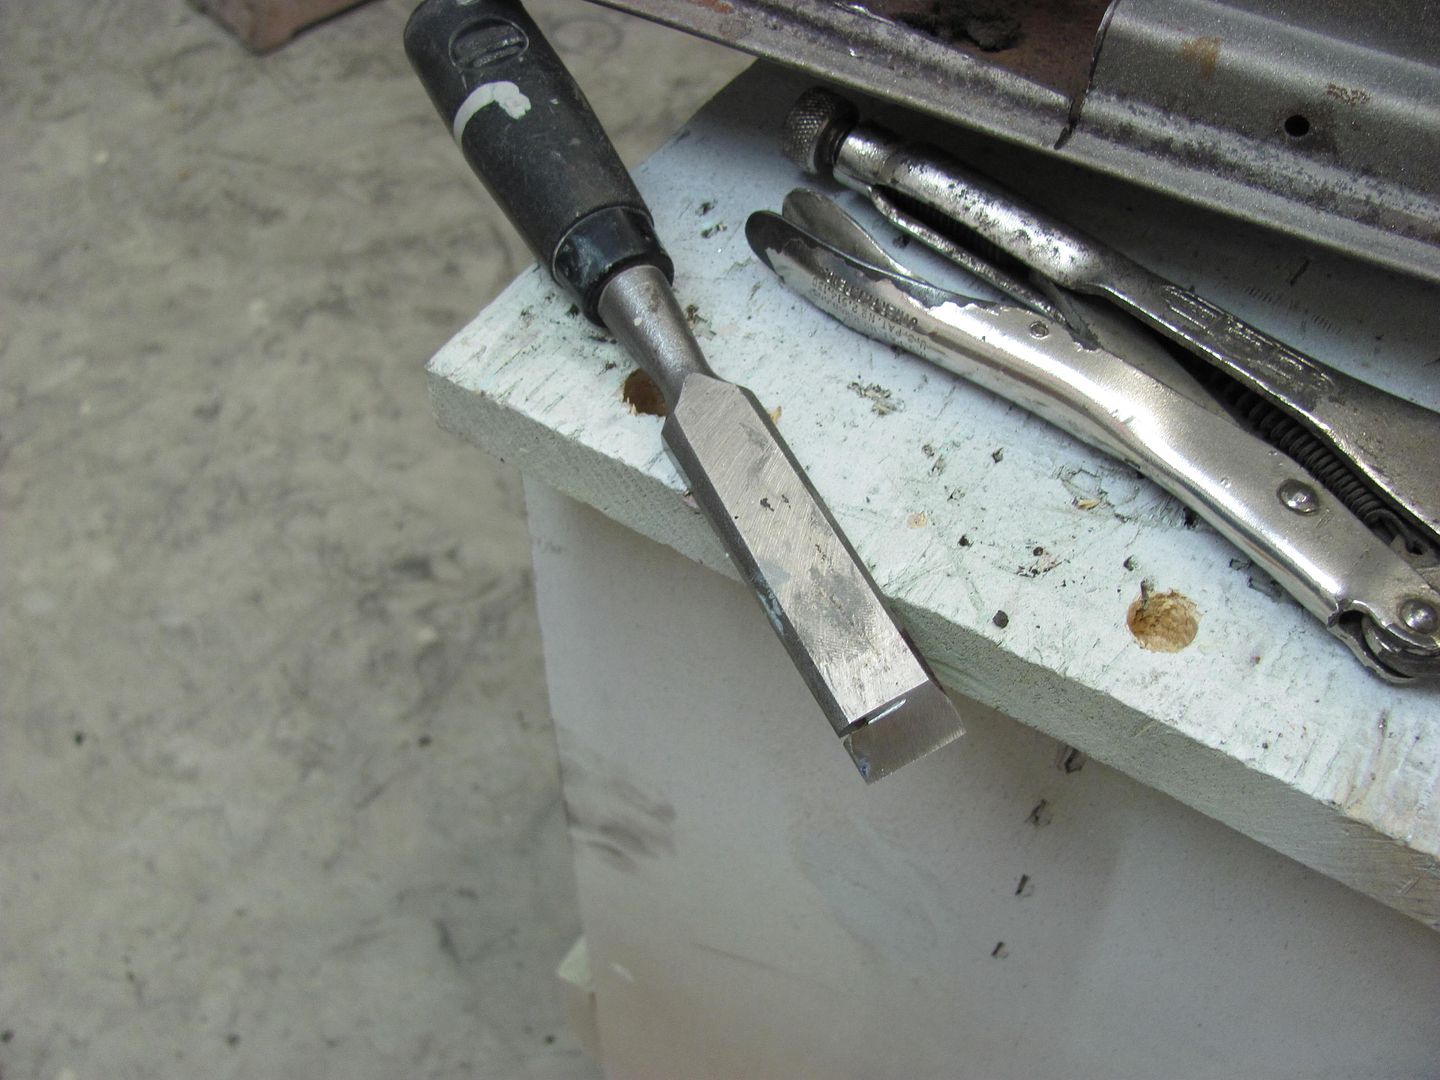
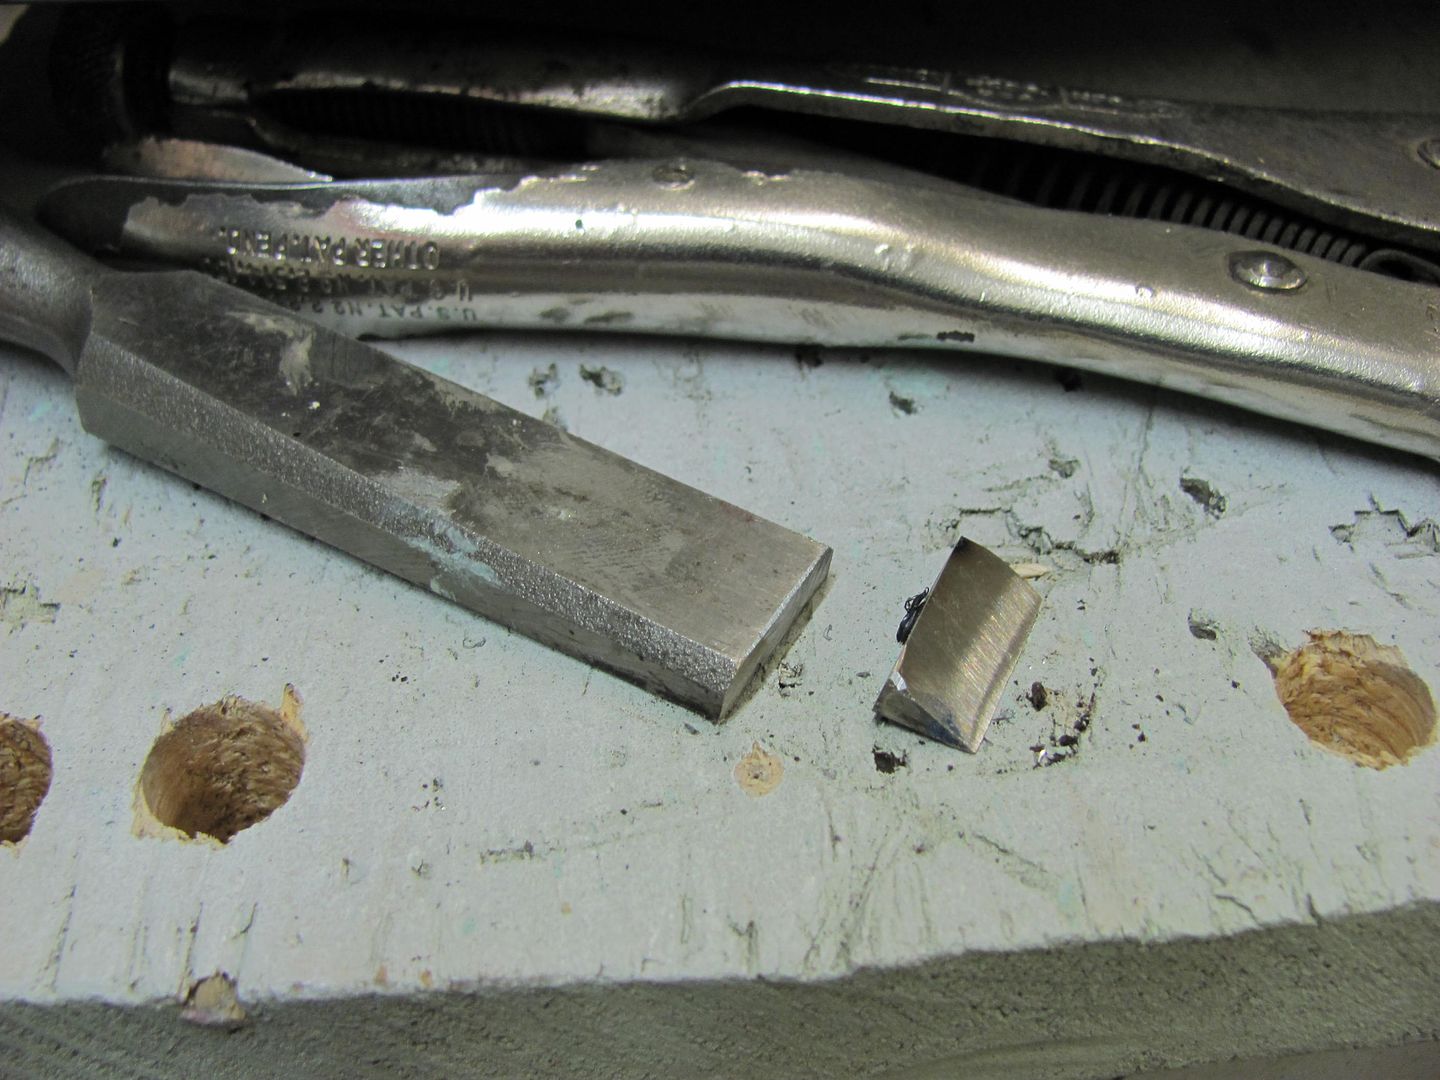
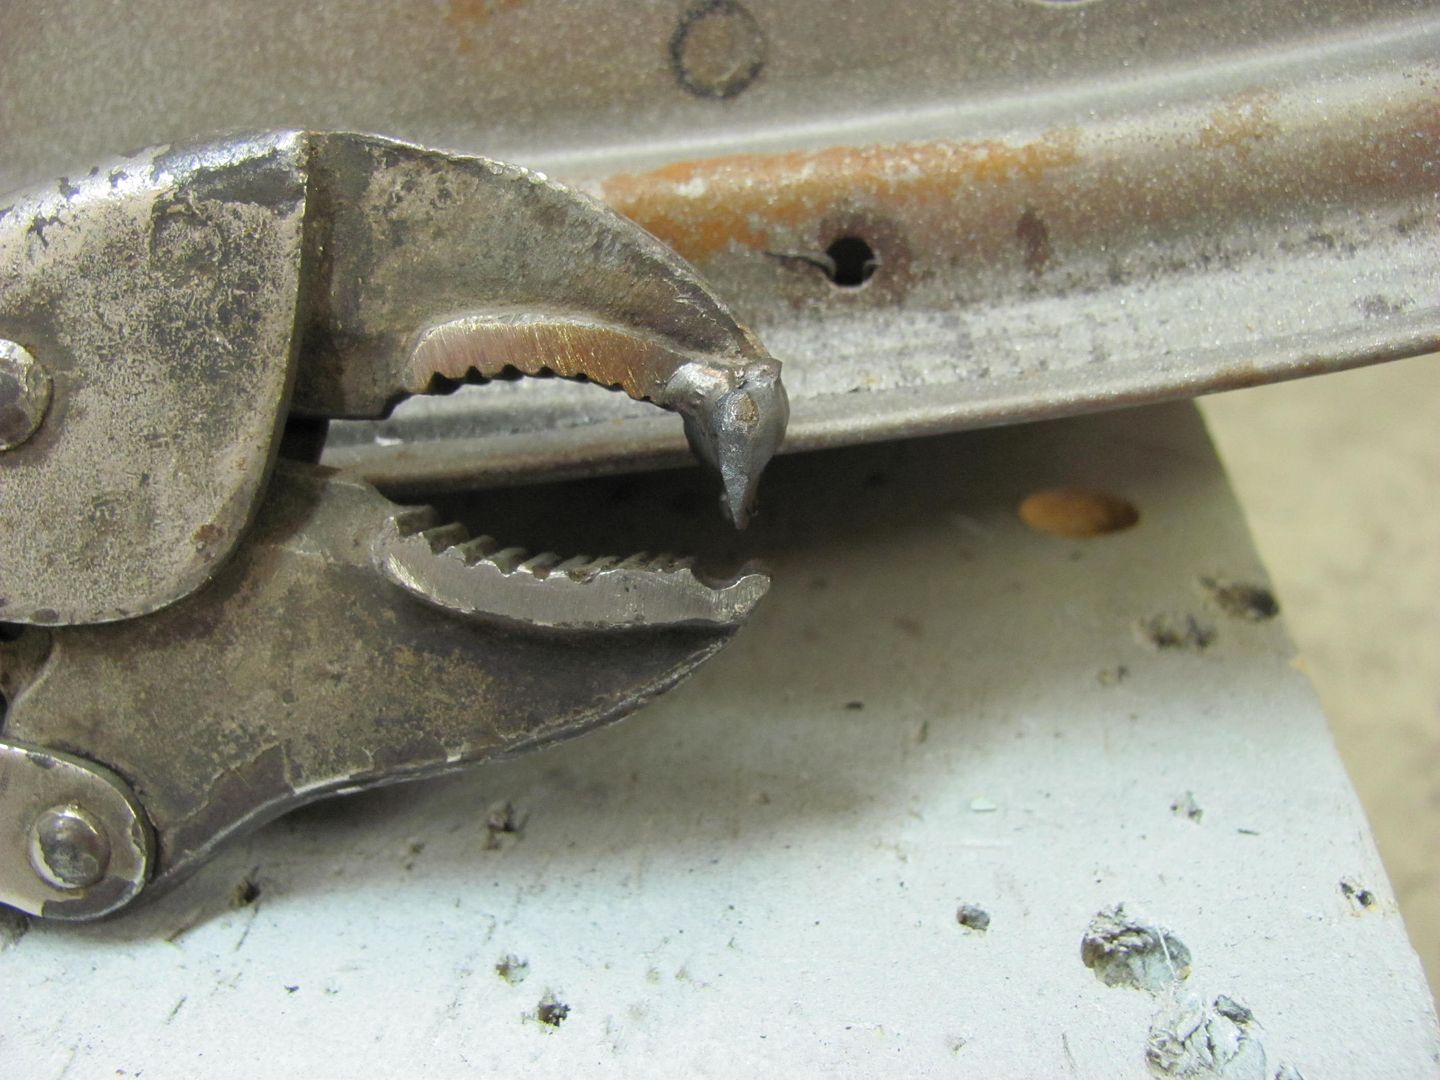
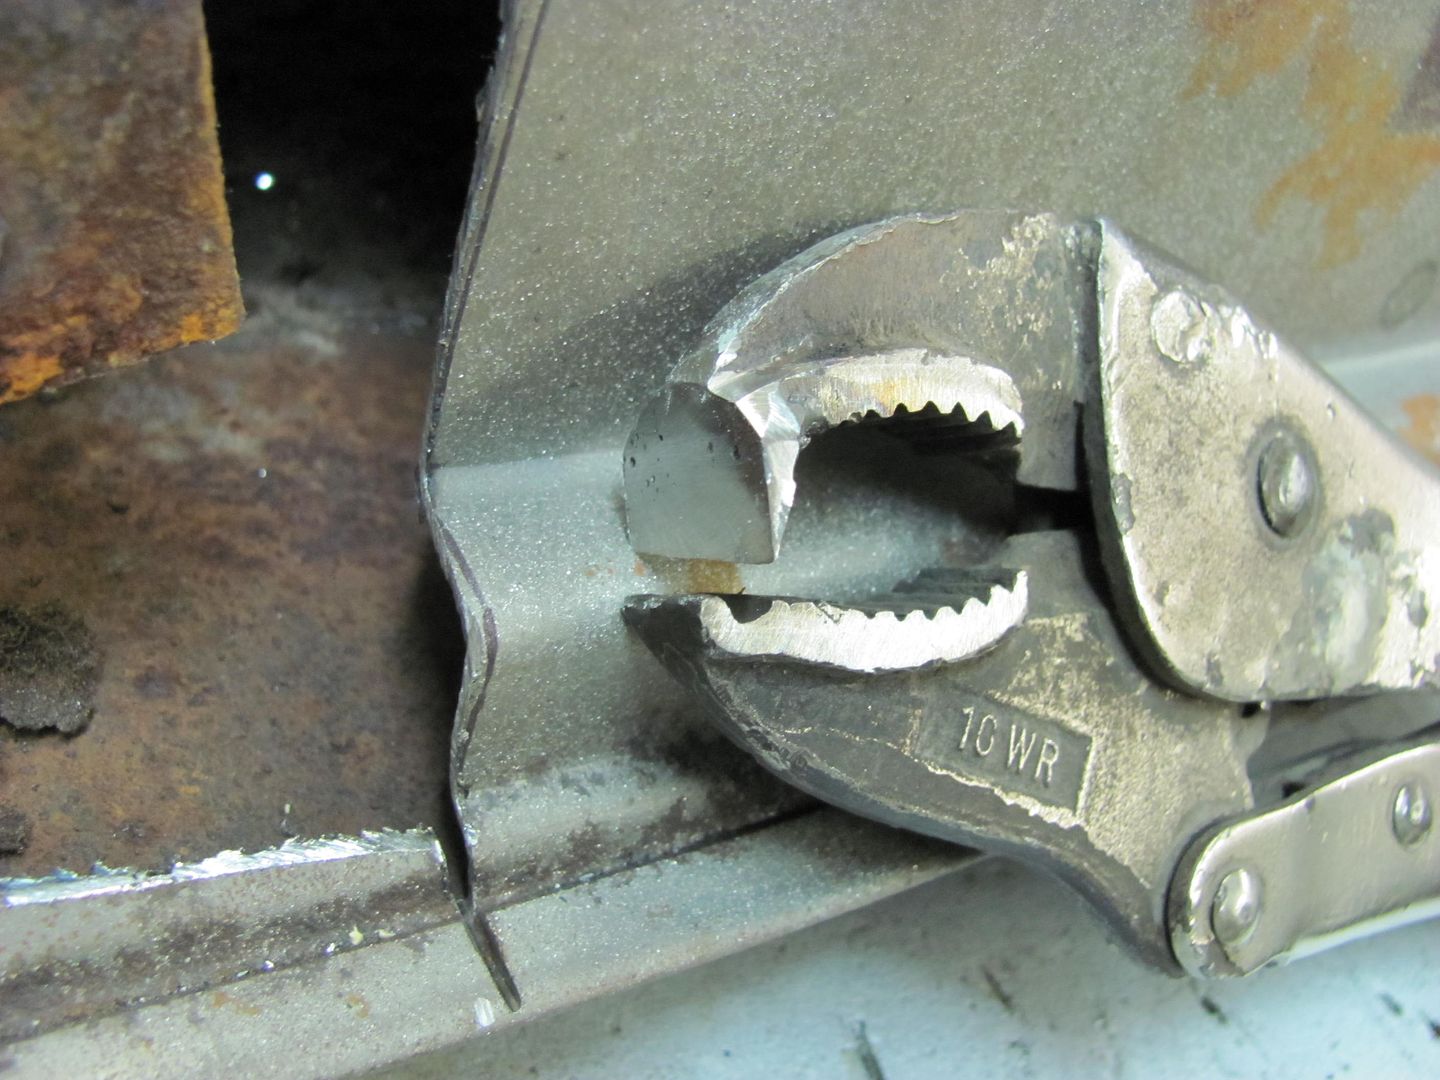
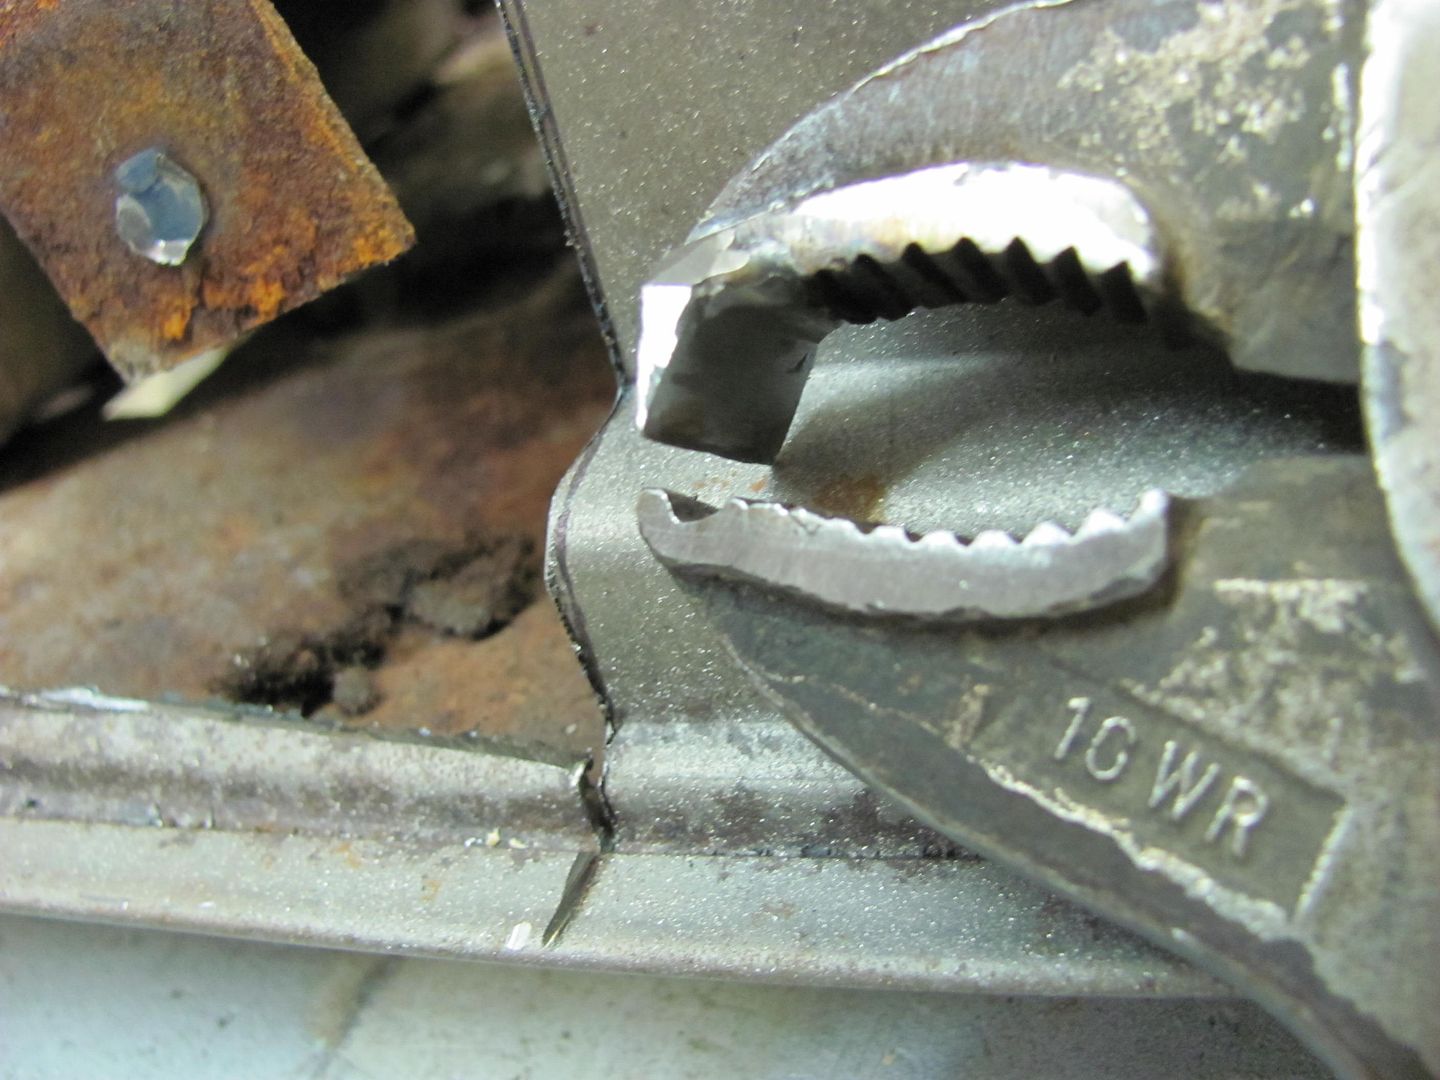
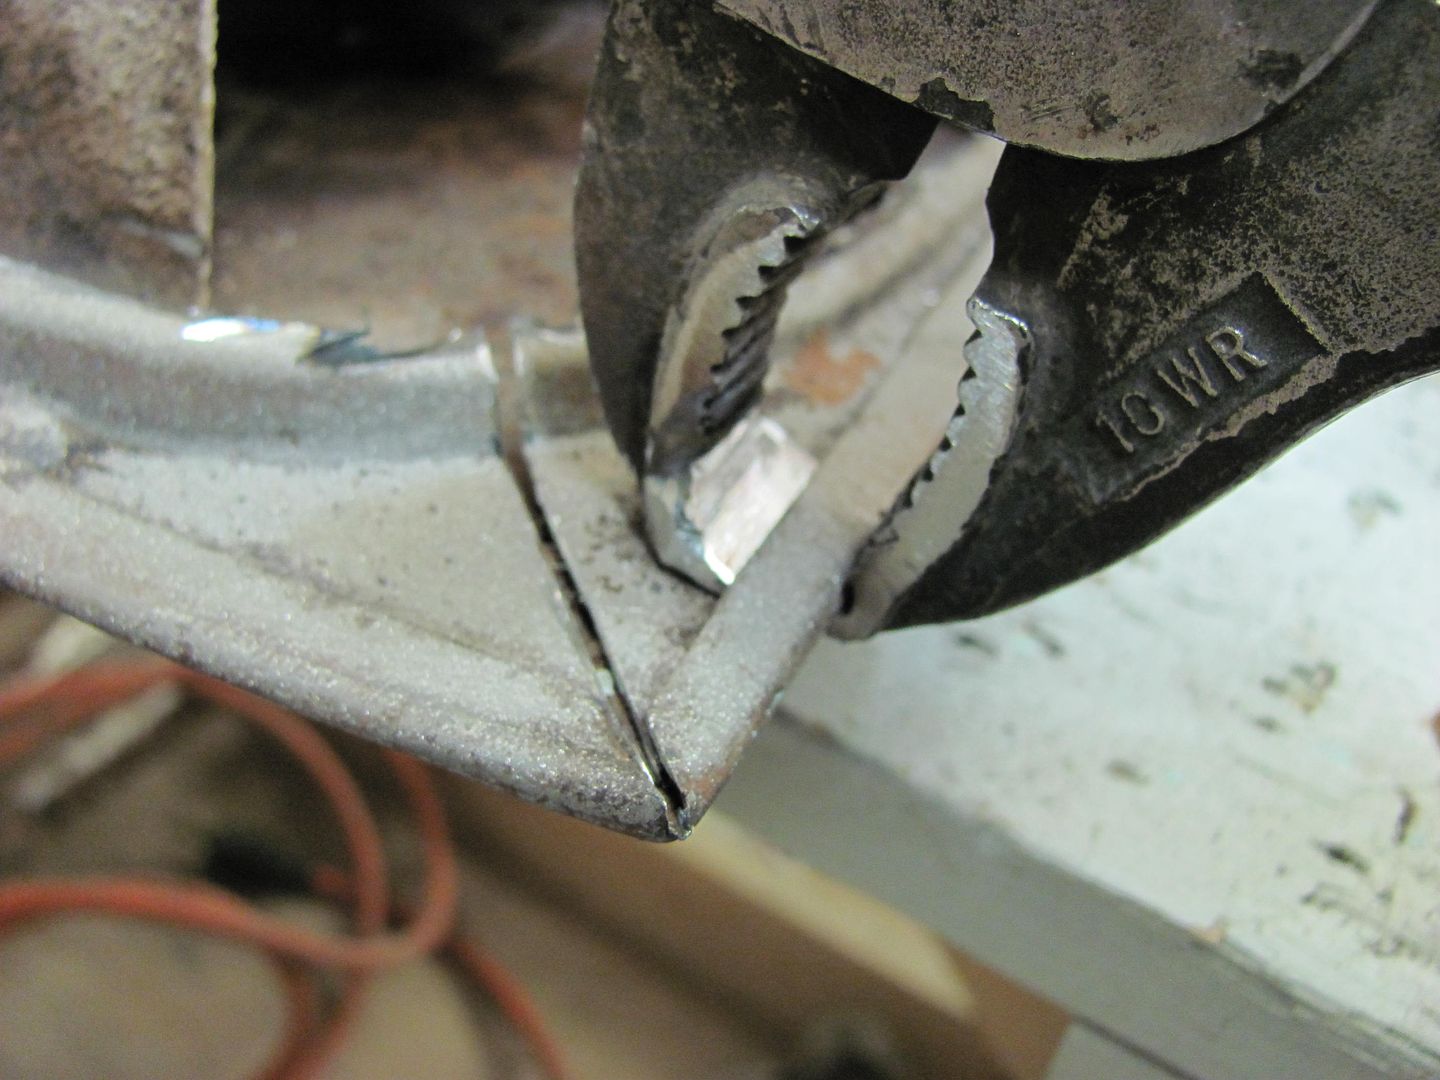
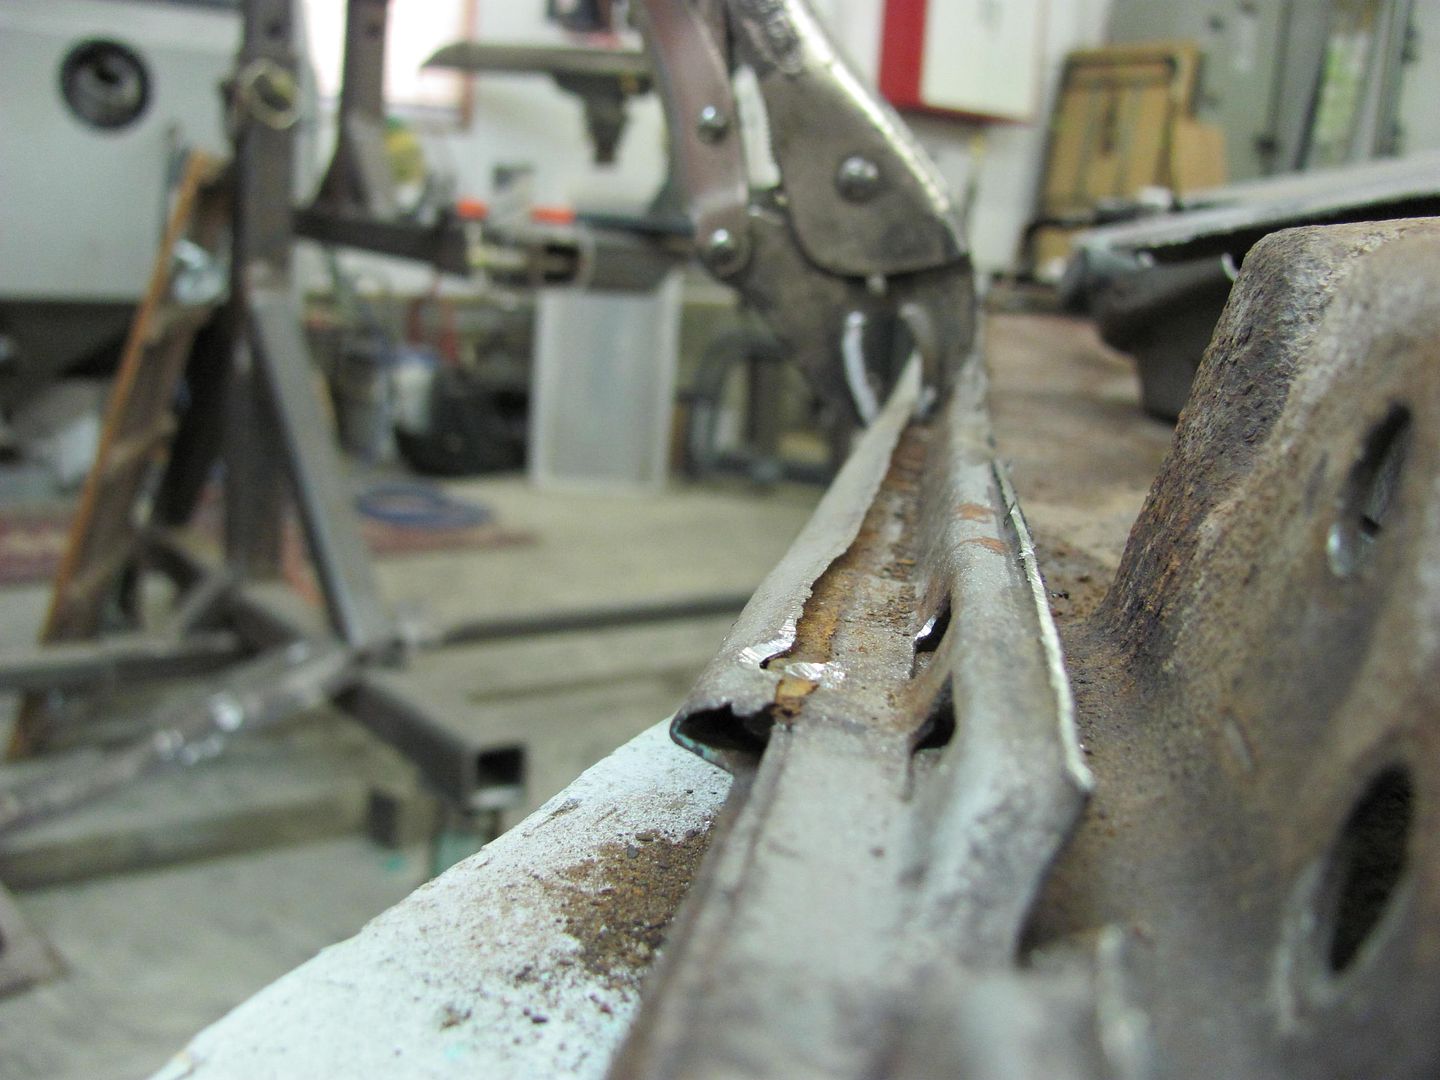
    We'll need to unfold some flanges to remove the rest of the inner panel....


    Robert


    MP&C Shop Projects-Metalshaping Tutorials


    Instagram @ mccartney_paint_and_custom


    .

  2. #2
    Registered Member MP&C's Avatar
    Join Date
    Dec 2013

    Member #:2017
    Location
    Southern MD
    Posts
    1,293
    Probably one of the biggest challenges in taking things apart for repairs is doing so without inflicting more damage. I had seen a recent post on pliers used to remove door skins, and thought they would come in handy here on the bottom of the tailgate.
    This is why you never throw away Vice grips that have the worn off teeth that have just lost their bite. The lower jaw is modified to receive the edge of the door skin...


    Then a suitable "blade" is found....


    Some welding and grinding, and we have a new body tool.....


    Starting at the corner, a diagonal slice is made in the inner panel so it will remove easier...


    ....and the tool is used to gently pry up on the flange of the tailgate skin.....


    Spot welds were removed with a burr grinder, in an attempt to keep the damage (and hole diameter) to the skin flange at a minimum. Continuing:


    Next we'll work on making replacements for these structural members:


    Robert


    MP&C Shop Projects-Metalshaping Tutorials


    Instagram @ mccartney_paint_and_custom


    .

  3. #3
    Registered Member MP&C's Avatar
    Join Date
    Dec 2013

    Member #:2017
    Location
    Southern MD
    Posts
    1,293
    Laying out the bend relief holes as per the originals.....


    Bends....


    Next, fixing one of the rather "rotted" parts that came out of the tailgate. This actually serves as a bolting plate for the tailgate hinge, so it definitely is in line for replacement.


    Started with a piece of 16 gauge CRS and using the Wheeling Machine, prestretched the area for the stiffening bead.


    ...and with bead...


    The Neil Dunder tooling....


    A bend relief cut in the bead, panel bent, and welded...


    Missed a few in process pictures here, but using a piece of 3 x 3 square tubing as a die, a 2 x 2 as a punch, and a BABPH to apply pressure, a relief for the tailgate rib is formed.


    Trimming to size....(note 3 x 3 die in lower right corner)


    Needs holes drilled yet...


    test fit....


    Alignment of hinge hole....

    Robert


    MP&C Shop Projects-Metalshaping Tutorials


    Instagram @ mccartney_paint_and_custom


    .

  4. #4
    Registered Member MP&C's Avatar
    Join Date
    Dec 2013

    Member #:2017
    Location
    Southern MD
    Posts
    1,293
    Next I got to try a bit of woodworking. Cut out some MDF to use as a hammerform to try and fabricate the bottom of the inner panel..


    Now time for some hammerforming, the MDF is stacked to allow the flange to be folded downward.


    The first three layers are aligned and screwed down, then the 18 ga CRS and "locking" layer of MDF is screwed down, through the entire pile using 4" long screws. A slight flange is also folded at the bottom to help "lock" the bottom edge of the plate against the MDF and hopefully prevent any pulling. Don't think it is needed on the straight bends, but it may help toward the corners.


    Flange width marked and trimmed. The corners are cleaned of any burrs that may promote cracks to form by using a 3/4" dia drum sander.


    Straight bends are worked with a low crown hammer to start the profile........


    ........and as the corners tighten, this was the most effective stretching device. Repeated overlapping rows made short work of the stretching..


    ....and the door skin hammer was used around the perimeter to "sharpen" the bends...


    With the first bend complete, the Lancaster shrinker is used along the folded flanges to match the crown of the tailgate skin.....


    ............here matched to the lower tailpan....


    Robert


    MP&C Shop Projects-Metalshaping Tutorials


    Instagram @ mccartney_paint_and_custom


    .

  5. #5
    Registered Member MP&C's Avatar
    Join Date
    Dec 2013

    Member #:2017
    Location
    Southern MD
    Posts
    1,293
    continuing....

    The second bend in shows a bit of a taper, from about 1/8" height thickness at the side, to about 1/4" on the corners, to about 1/2" in the center of the gate.


    This will require the next set of MDF to taper off on the ends....


    ....and folded over as before. Because there is another reverse bend in about another 1/4", there was no need to completely shrink the corners flat. Just enough to provide that bend, and also shown is todays tool of choice for working the corners for this exercise.


    And if you'll notice the lower section is now in two pieces, that comes from measuring incorrectly (wrong bend). About a 3/8 wide strip will be bent, added afterward and welded in place.


    And the reverse bend after forming....


    Comparison to the original. Needs a bit of clean up work, but should work fine.


    Next I got the repair parts (the ones made so far...) trimmed and fit up for a better look..


    Moving on to the stiffening bead in the tailgate, most were still intact but one did have rust issues, just like the surrounding metal.


    To make this detail, a suitable "punch" is made by welding some 1/8 thick plate to the end of a 1-1/4" square tube. For the "die", the nicks and welding slag was cleaned off the vice, and it was opened to the correct size.


    The next repair patch is centered over the tailgate and the approximate position of the stiffener bead is marked. The area is prestretched in the wheeling machine.


    After some forming with my high tech punch and die, and some fine tuning afterward, the roughly finished product and a test fit against the tailgate...


    Robert


    MP&C Shop Projects-Metalshaping Tutorials


    Instagram @ mccartney_paint_and_custom


    .

  6. #6
    Registered Member MP&C's Avatar
    Join Date
    Dec 2013

    Member #:2017
    Location
    Southern MD
    Posts
    1,293
    Here's the hammer form for the final piece of the puzzle. A notch is cut out for the stiffener bead to lay in...


    I had a nice heavy brass flat bar, so it was put to use with the c-clamps, and the intial bends are formed to mark where the corners will be......


    Then the points are trimmed off the corners and over we go to the Lennox with the Thumbnail shrinking die. Tonight I had a nine year old photographer helping for a bit...


    The initial shrinking....


    One thing I had to keep in mind, the dies need to be loosened up as you go, as the corners shrink and the metal thickness increases. Here's where I stopped... A bit more and we should be ready to tip the reverse bend..


    And starting with the hammerform for the corner reverse bend detail..


    After quite a bit of hammering....


    ...and a trial fit to the tailgate

    Robert


    MP&C Shop Projects-Metalshaping Tutorials


    Instagram @ mccartney_paint_and_custom


    .

  7. #7
    Registered Member MP&C's Avatar
    Join Date
    Dec 2013

    Member #:2017
    Location
    Southern MD
    Posts
    1,293
    Now to back up a bit, and fine tune the flange parts. The originals had an offset relief for the hinge bolting plate so it could sandwich between the inner and outer skin.


    ...and after a bit of hammer work, here is the result....


    Next, to form the relief around the center bolt hole. The hole is marked, and a negative formed in a piece of MDF with a 3/4" drum sander.....


    After using various punches with newly rounded tips, and a 3/4" dia piece of round stock as an anvil......


    And the next bend is formed...


    ....and starting on the next side..


    This is about my favorite "vise mounted" anvil. 2" diameter works well for hammering around most radiuses.


    The hole relief for the other side is tackled, I'll show a bit more detail on the high tech tools used....


    Rounded tips on some punches...


    3/4 round stock....


    Test fit.....


    And after numerous times of hammering, tweaking, fitting, trimming, not all in that order, this corner is starting to take shape.....


    Robert


    MP&C Shop Projects-Metalshaping Tutorials


    Instagram @ mccartney_paint_and_custom


    .

  8. #8
    Registered Member MP&C's Avatar
    Join Date
    Dec 2013

    Member #:2017
    Location
    Southern MD
    Posts
    1,293
    I did get some good forearm exercise in using the snips. Just about ready to tack in the top part there, and then check the crown of the outer skin once more with the radius sweep before the final trim between the repair pieces.


    One step closer.

    The top repair patch was tacked on first, aligning flat to the original surface.


    Needed a profile gauge for the tailgate opening, so the top of the tailpan location, and tailgate "gap" was marked, and a leftover piece of MDF used to make the gauge.


    Once the lower repair patch was fitted up, the profile gauge was checked to the tailgate skin and the side section tacked.


    And the #10 radius sweep verified the bottom radius and the lower setion tacked


    Once everything gets tacked together, the outer skin will be removed so the welds can be planished as we go to try and keep things straight.
    Robert


    MP&C Shop Projects-Metalshaping Tutorials


    Instagram @ mccartney_paint_and_custom


    .

  9. #9
    Registered Member MP&C's Avatar
    Join Date
    Dec 2013

    Member #:2017
    Location
    Southern MD
    Posts
    1,293
    All of the inner gate was tacked in place so the outer skin could be removed..


    The new skin was prepped and epoxy primed on the inside while some other parts were bring sprayed.


    Before removing the old skin, some reference measurements were taken at various locations......


    Then a 50 grit disc is used to sand the edges until the folded flange is separated from the skin.


    Although the amount of pinholes from the outside looked to be minimal, the inside shows that it would not have been long before another found its way through front side, risking a fresh paintjob. I think the new skin was the right choice.


    Sandblasted adjacent to the weld area and test fit the support brace.


    The rear side of the weld....


    Getting closer... (slowly but surely)


    Robert


    MP&C Shop Projects-Metalshaping Tutorials


    Instagram @ mccartney_paint_and_custom


    .

  10. #10
    Registered Member MP&C's Avatar
    Join Date
    Dec 2013

    Member #:2017
    Location
    Southern MD
    Posts
    1,293
    All the welding on the tailgate done, time to clean up the inside to get it ready for Epoxy Primer...


    Next thing I noticed, even though the weld dots were planished as we went, you could see where the metal had shrunk from welding around the lower perimeter of the bead detail. As the inside (bottom) of the bead did not shrink, this caused the metal to deform in the shape of an arc, or concave bow.


    To help to remedy this situation, and since we had already stretched the welds a bit, I thought I'd try my hand at shrinking the bottom area of the bead detail.. I put the heat tip in the trusty dent puller....


    .......And working alongside the lower edges of the bead.....


    ....was able to get most of the deformation out.


    Some of the other shrinks outside our repair area were to help flatten out where the "loading side" of the tailgate has been used and abused over the years.


    Test fitting some of the internal components:


    Why is it I always miss something.....one more piece to bend up.......


    Next, we'll start by showing more shrinks and the results in straightening the bead details.....


    Checking the angle to form up the second stiffener brace.....


    In the booth for a good coat of epoxy primer before all the parts get welded together......


    Robert


    MP&C Shop Projects-Metalshaping Tutorials


    Instagram @ mccartney_paint_and_custom


    .

Page 1 of 2 12 LastLast

Posting Permissions

  • You may not post new threads
  • You may not post replies
  • You may not post attachments
  • You may not edit your posts
  •