Just joined? Please introduce yourself.
Page 2 of 4 FirstFirst 1234 LastLast
Results 11 to 20 of 36

Thread: Progress on door panels and rear side panels

  1. #11
    Registered Member chevynut's Avatar
    Join Date
    Nov 2011

    Member #:115
    Location
    Fort Collins, CO
    Posts
    10,853
    JT56, I have electric door locks, power windows, and power vent windows. The switches for the power windows and door locks will be on the console. I will probably put the switches for the power vent windows on the dash valence.

    I was little worried about the angle of the taper in that armrest section and thought about rounding it at the top before, and I wish I would have done it now. I'll just have to grind some off at the top, re-shape it, and re-fiberglass that section. I just don't want the seat rubbing on it and don't want to make the bolster on the seat any smaller.
    56 Nomad, Ramjet 502, Viper 6-speed T56, C4 Corvette front and rear suspension


    Other vehicles:

    56 Chevy 2-door BelAir sedan
    56 Chevy 210 4-door sedan
    57 Chevy 210 4-door sedan
    1962 327/340HP Corvette
    1961 Willys CJ3B Jeep
    2001 Porsche Boxster S
    2003 Chevy Silverado 2500 HD Duramax
    2019 GMC Sierra Denali Duramax

  2. #12
    Registered Member JT56's Avatar
    Join Date
    Mar 2013

    Member #:1608
    Location
    DFW Texas
    Posts
    1,209
    Did you ever think of removing the vent window? I personally like the vents, but when do the custom work stop lol!

  3. #13
    Registered Member chevynut's Avatar
    Join Date
    Nov 2011

    Member #:115
    Location
    Fort Collins, CO
    Posts
    10,853
    Quote Originally Posted by JT56 View Post
    Did you ever think of removing the vent window?
    JT, if you look at the pics of my car you can see that externally, except for the smoothie bumpers, the stance, and the wheels it''s going to looks pretty much "stock" with all the emblems and trim and even the stock paint scheme (different colors). Everything under the car, under the hood, and inside will be more custom and modern. I will have gray smoked glass too.

    I just took a grinder to the driver's side door panel and cut it back about 1/4", further from the seat. It's mostly in the middle of the armrest.
    56 Nomad, Ramjet 502, Viper 6-speed T56, C4 Corvette front and rear suspension


    Other vehicles:

    56 Chevy 2-door BelAir sedan
    56 Chevy 210 4-door sedan
    57 Chevy 210 4-door sedan
    1962 327/340HP Corvette
    1961 Willys CJ3B Jeep
    2001 Porsche Boxster S
    2003 Chevy Silverado 2500 HD Duramax
    2019 GMC Sierra Denali Duramax

  4. #14
    Registered Member chevynut's Avatar
    Join Date
    Nov 2011

    Member #:115
    Location
    Fort Collins, CO
    Posts
    10,853
    Got the fiberglass re-applied. I used two layers of mat and 8 ounces of resin and it turned out it was exactly the right amount. Good guess.

    After I ground down the passenger side to match the driver's side, I decided to reinstall the passenger seat to check clearances. For some reason the passenger side had quite a bit more clearance than the driver's side. It makes no sense because the seat mounts are identical mirror images, and the seats should be exactly the same. Maybe the bolster is a little smaller on the passenger side.

    Anyhow, they're re-shaped. After the fiberglass cures I can sand it back down and resume building the removable aluminum pieces.
    56 Nomad, Ramjet 502, Viper 6-speed T56, C4 Corvette front and rear suspension


    Other vehicles:

    56 Chevy 2-door BelAir sedan
    56 Chevy 210 4-door sedan
    57 Chevy 210 4-door sedan
    1962 327/340HP Corvette
    1961 Willys CJ3B Jeep
    2001 Porsche Boxster S
    2003 Chevy Silverado 2500 HD Duramax
    2019 GMC Sierra Denali Duramax

  5. #15
    Registered Member
    Join Date
    Apr 2012

    Member #:571
    Posts
    4,672
    Did you ever think of removing the vent window? I personally like the vents, but when do the custom work stop lol!
    While it's not a piece of cake, it's a lot easier to delete the vent windows on a sedan or non-Nomad wagons than it is to do on hardtops and Nomads. The reason for that is the chrome frame around the window has to be lengthened, and you have to deal with the A post interface.

    I like the functionality of the vent windows myself.

  6. #16
    Registered Member chevynut's Avatar
    Join Date
    Nov 2011

    Member #:115
    Location
    Fort Collins, CO
    Posts
    10,853
    Rick is right, the vent window delete for a Nomad isn't nearly as straightforward as it is on a sedan. You have to lengthen the window frame and modify the exterior trim somehow. I kinda like the vent window delete on some cars, but not on my Nomad. The vent windows are like all the stainless....they define the era.
    56 Nomad, Ramjet 502, Viper 6-speed T56, C4 Corvette front and rear suspension


    Other vehicles:

    56 Chevy 2-door BelAir sedan
    56 Chevy 210 4-door sedan
    57 Chevy 210 4-door sedan
    1962 327/340HP Corvette
    1961 Willys CJ3B Jeep
    2001 Porsche Boxster S
    2003 Chevy Silverado 2500 HD Duramax
    2019 GMC Sierra Denali Duramax

  7. #17
    Registered Member carls 56 (RIP 11/24/2021)'s Avatar
    Join Date
    Jan 2011

    Member #:33
    Location
    Culpeper, Va.
    Posts
    1,857
    luv the vent windows too. like you said, they are part of the era.
    ARMY NAM VET, very proud!

    56 210 4dr

    drive and enjoy them while you work on them, life is to short.

  8. #18
    Registered Member chevynut's Avatar
    Join Date
    Nov 2011

    Member #:115
    Location
    Fort Collins, CO
    Posts
    10,853
    You guys FAILED me!!! Don't you know you're supposed to keep me from doing stupid stuff?

    I was just talking to my brother about having to slightly re-do my door panels, because the seat rubbed the armrest when the seat back was pushed forward. He then pointed out the obvious to me....

    The seat back won't be pushed forward unless the DOOR IS OPEN!

    Holy crap, this just caused me a lot more work that I didn't need to do. I have it almost finished, as I had to apply another layer to get to the right level, but it's taken me 3-4 hours to get there. To be honest, I have thought it probably needed to be shaved a little anyhow but it would have worked fine as it was.
    56 Nomad, Ramjet 502, Viper 6-speed T56, C4 Corvette front and rear suspension


    Other vehicles:

    56 Chevy 2-door BelAir sedan
    56 Chevy 210 4-door sedan
    57 Chevy 210 4-door sedan
    1962 327/340HP Corvette
    1961 Willys CJ3B Jeep
    2001 Porsche Boxster S
    2003 Chevy Silverado 2500 HD Duramax
    2019 GMC Sierra Denali Duramax

  9. #19
    Registered Member chevynut's Avatar
    Join Date
    Nov 2011

    Member #:115
    Location
    Fort Collins, CO
    Posts
    10,853
    The past few days I worked on finishing the fiberglassing of the bottom of my door panels. I actually put the first layer on with the panels attached to the doors to make sure they fit right. Once you glass these, they don't bend. I also finished cutting out the holes for the courtesy lights.

    I got some of the gapping between the sections done as well. My interior guy wants .110" between panels for the leather to wrap around and I'm a bit less than that so he can tweak it to where he wants it.

    I think I'm changing my plan for the armrests. Making them out of aluminum has proven to be really tricky to get the correct shapes, so I may make a foam block and fiberglass them as well. It will require a change in my strategy to attach them, but I think I can figure that out.

    Here's the panels as they are today (the sections above the armrests are not screwed down). Notice the dark areas near the armrests where I ground a little off for better clearance. I don't know why they got darker but the resin is thicker there. I think I'm going to spray a coat of Slicksand on these, final sand them, then spray a coat of PPG DPLF epoxy primer for the leather glue to adhere to.

    20141228_004.jpg 20141228_005.jpg

    And this is what they're supposed to look like per my original drawing of them....

    20140903_220.jpg

    I have ordered the stainless bar for the trim pieces that go between the bottom sections and the narrow ones above them. I plan to make some speaker grilles using hammerforming from a pattern taken off of the panels.

    Now I can move on to fiberglassing the rear panels, which should go much faster. Then I need to work on the console and the cargo area construction.
    Last edited by chevynut; 12-28-2014 at 06:06 PM.
    56 Nomad, Ramjet 502, Viper 6-speed T56, C4 Corvette front and rear suspension


    Other vehicles:

    56 Chevy 2-door BelAir sedan
    56 Chevy 210 4-door sedan
    57 Chevy 210 4-door sedan
    1962 327/340HP Corvette
    1961 Willys CJ3B Jeep
    2001 Porsche Boxster S
    2003 Chevy Silverado 2500 HD Duramax
    2019 GMC Sierra Denali Duramax

  10. #20
    Registered Member MP&C's Avatar
    Join Date
    Dec 2013

    Member #:2017
    Location
    Southern MD
    Posts
    1,293
    Laszlo, you have a bead roller if my memory serves me right, correct? What kind of shape do you need for the armrests? I did this out of 14 ga steel on a bead roller, and used the same dies to make the inner panel for the lift gate (see thread in fab section)


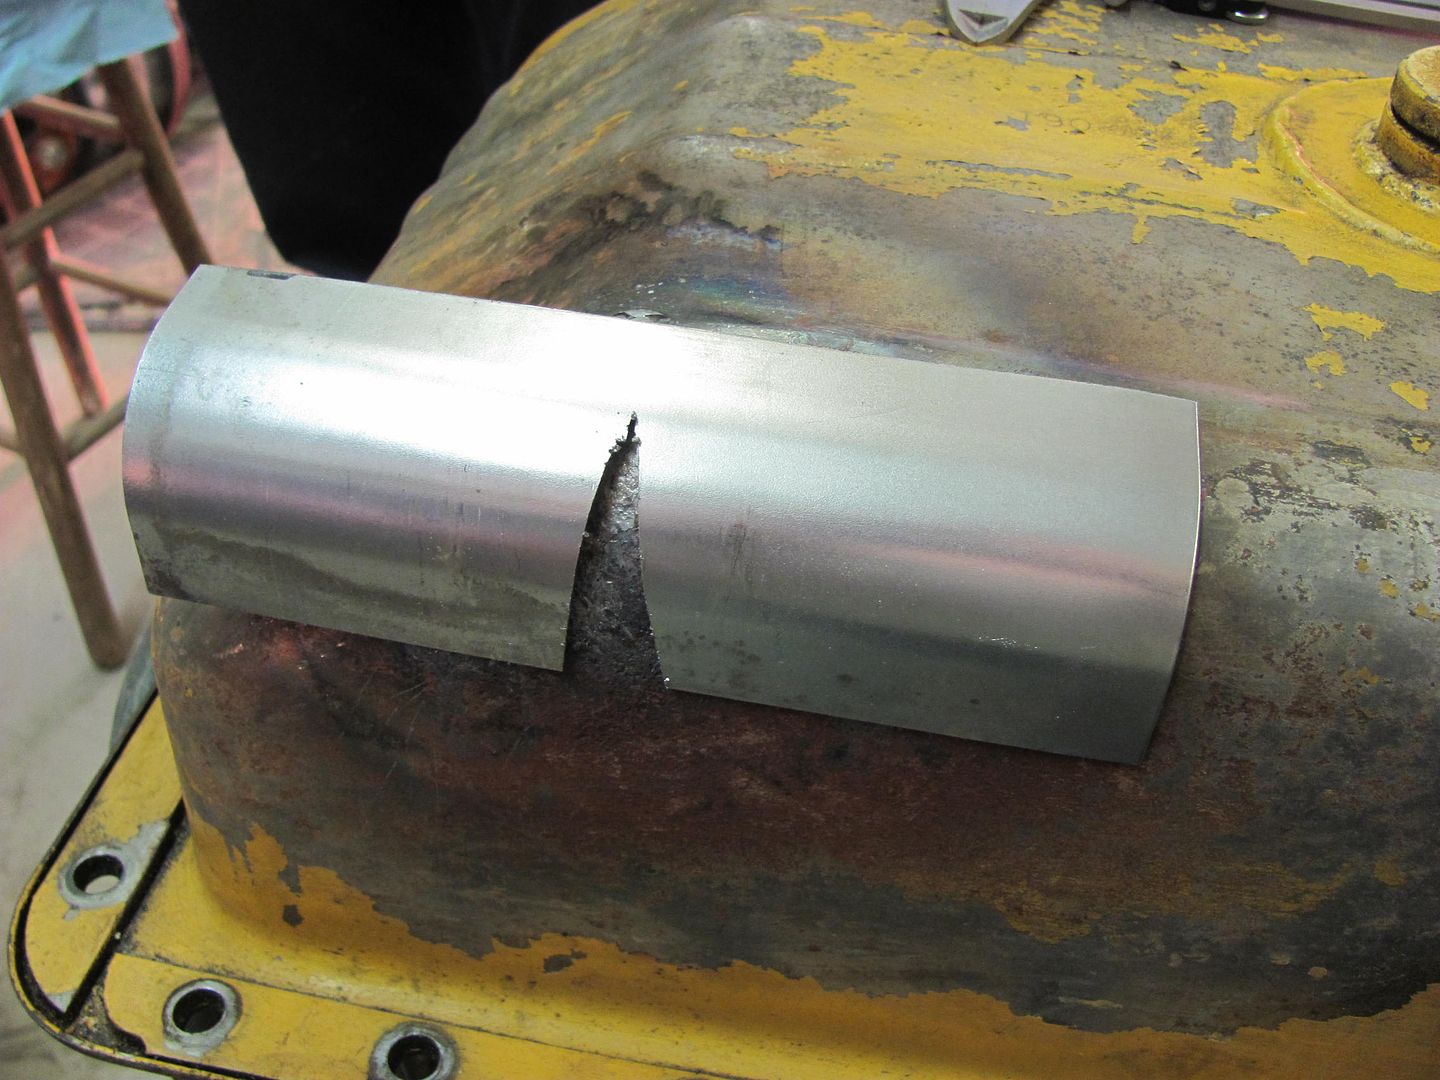
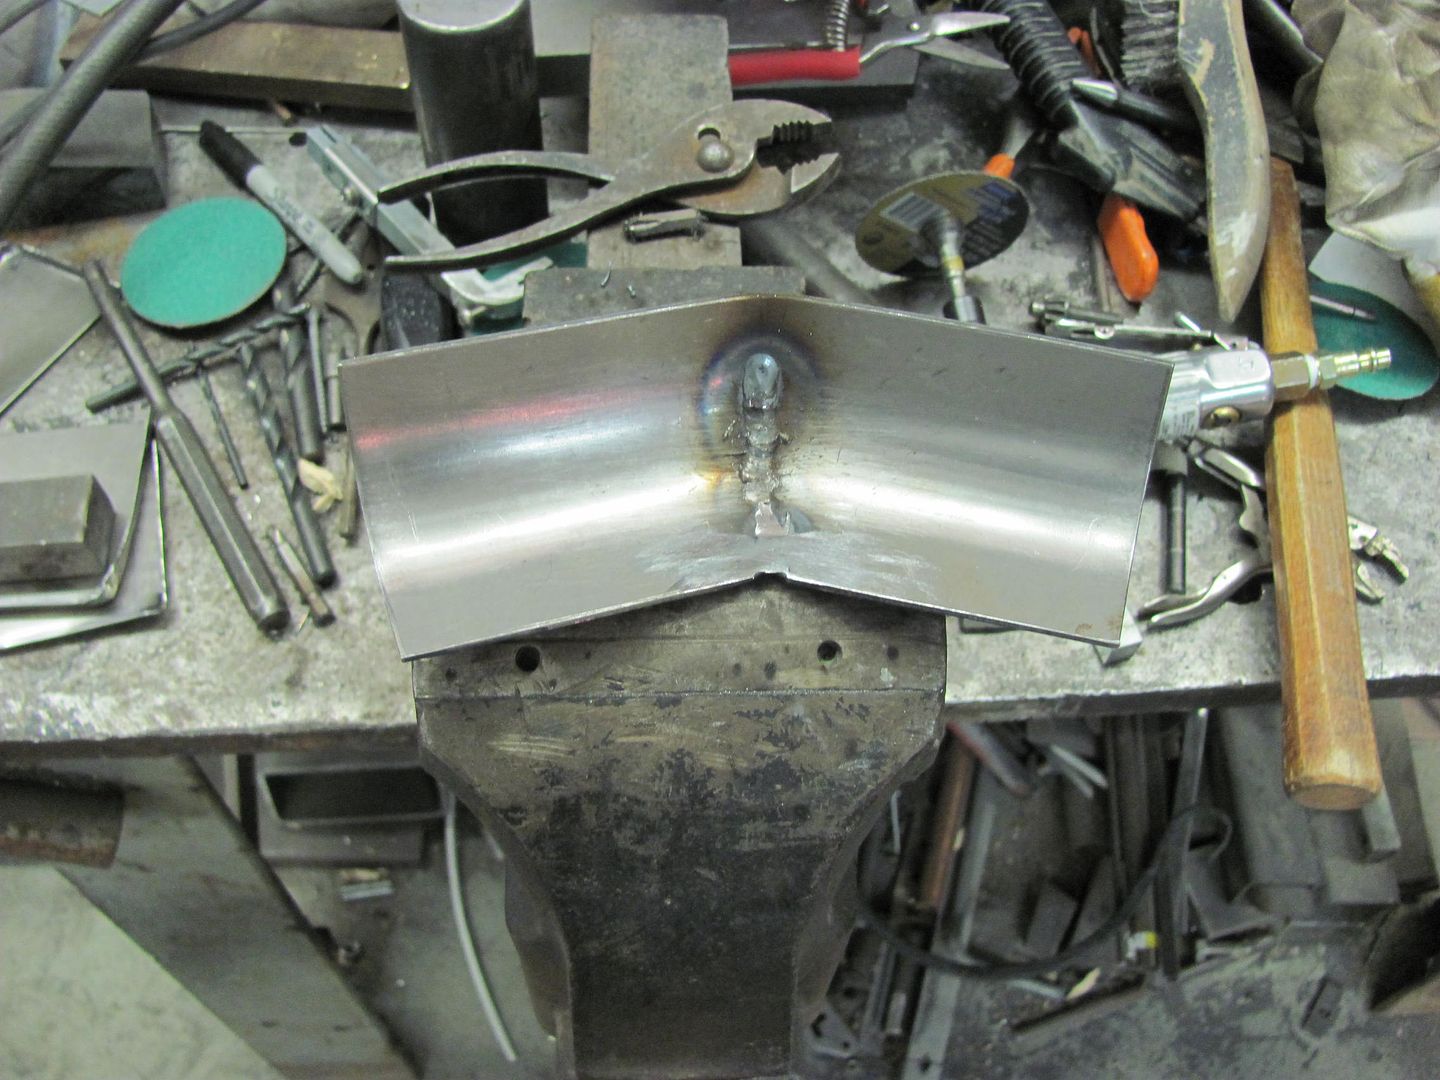
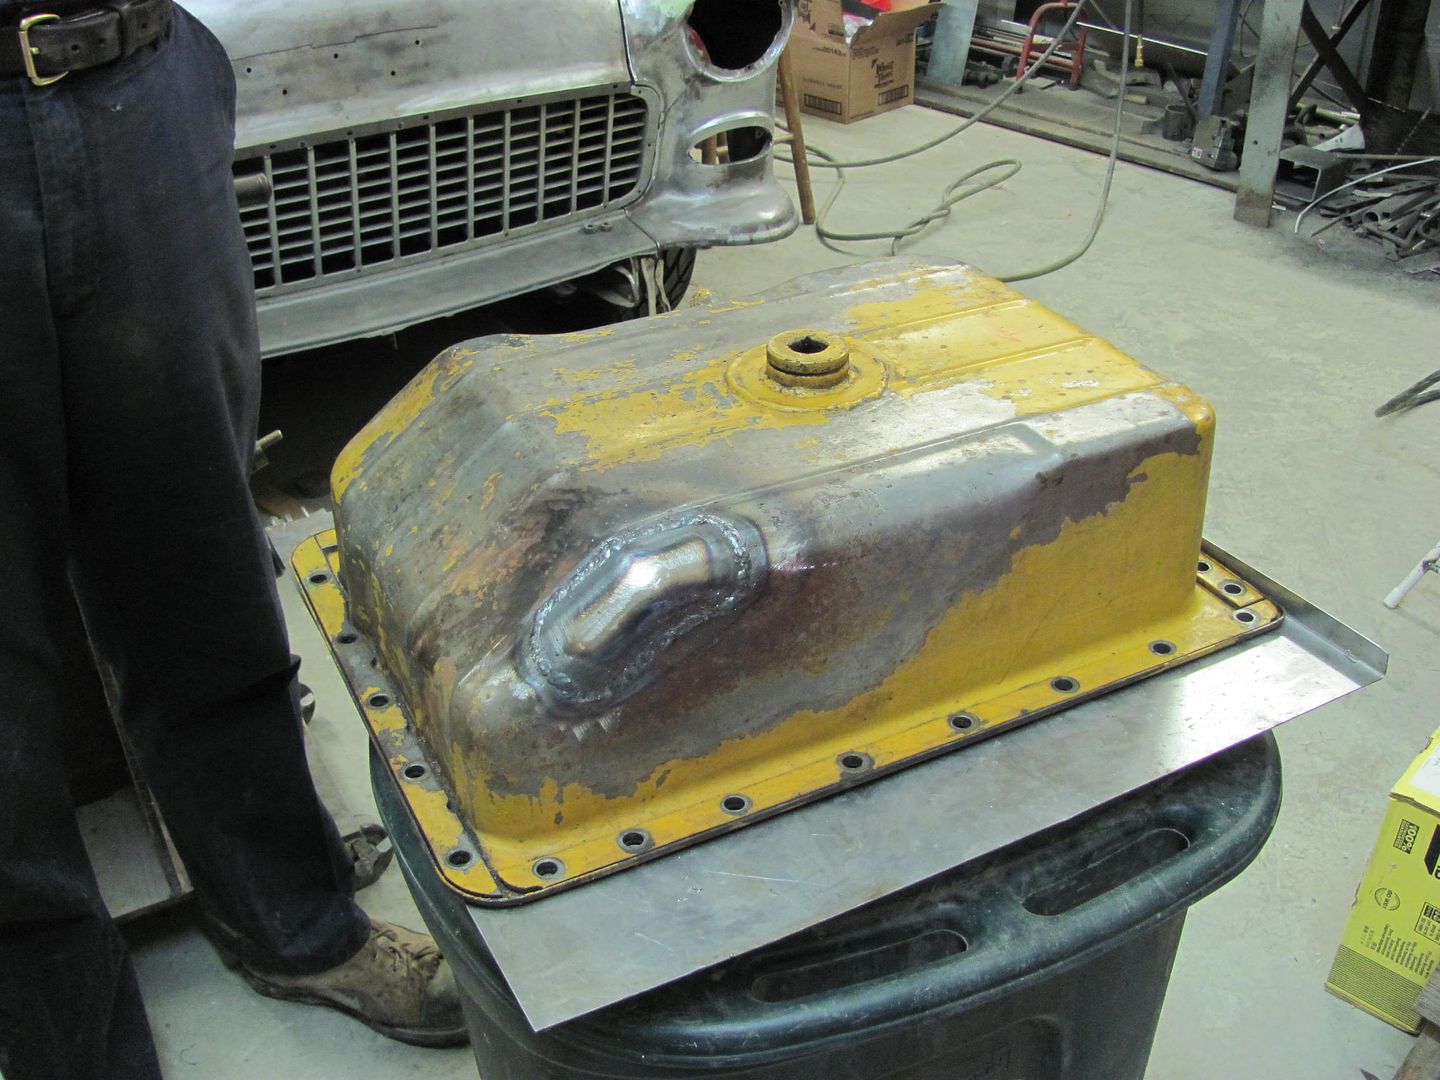
    So today I got a phone call, and long story short, needed to do some metalshaping for a Caterpillar D5 dozer. No, really! The last time this same mishap occurred was over ten years ago in my back yard. It seems dirt/mud gets packed between the stump pan and the oil pan, until a hole rusts through the oil pan. Last time Paul bought a new oil pan, but it sounded like he needed to use the dozer this week, so he brought it over for repair..
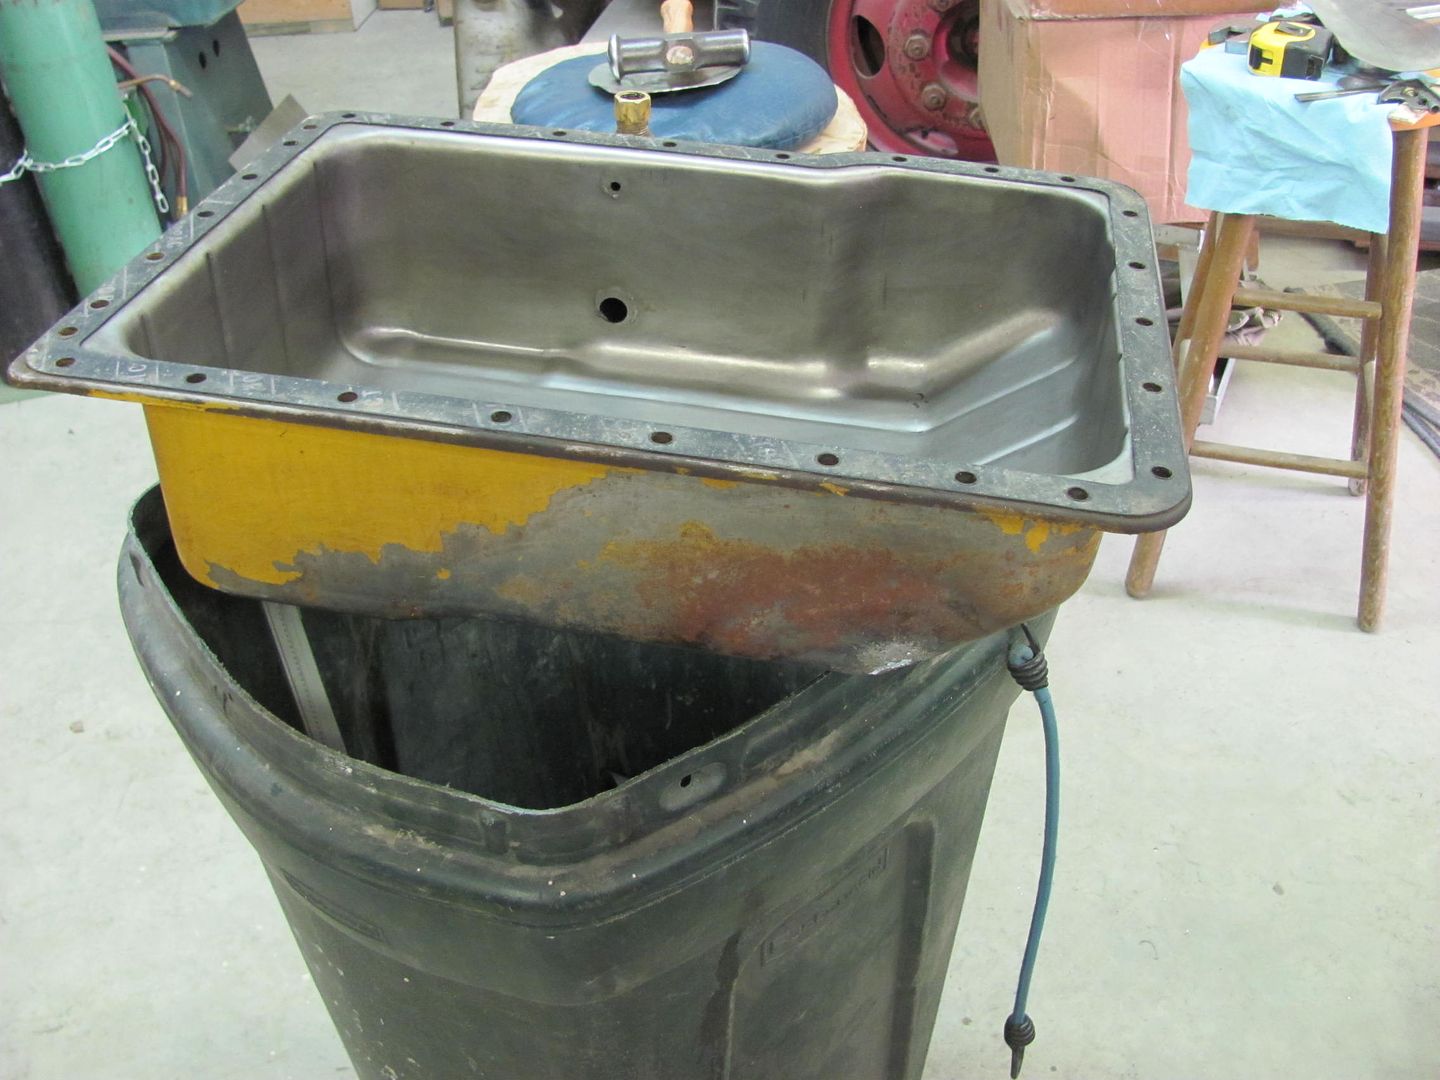
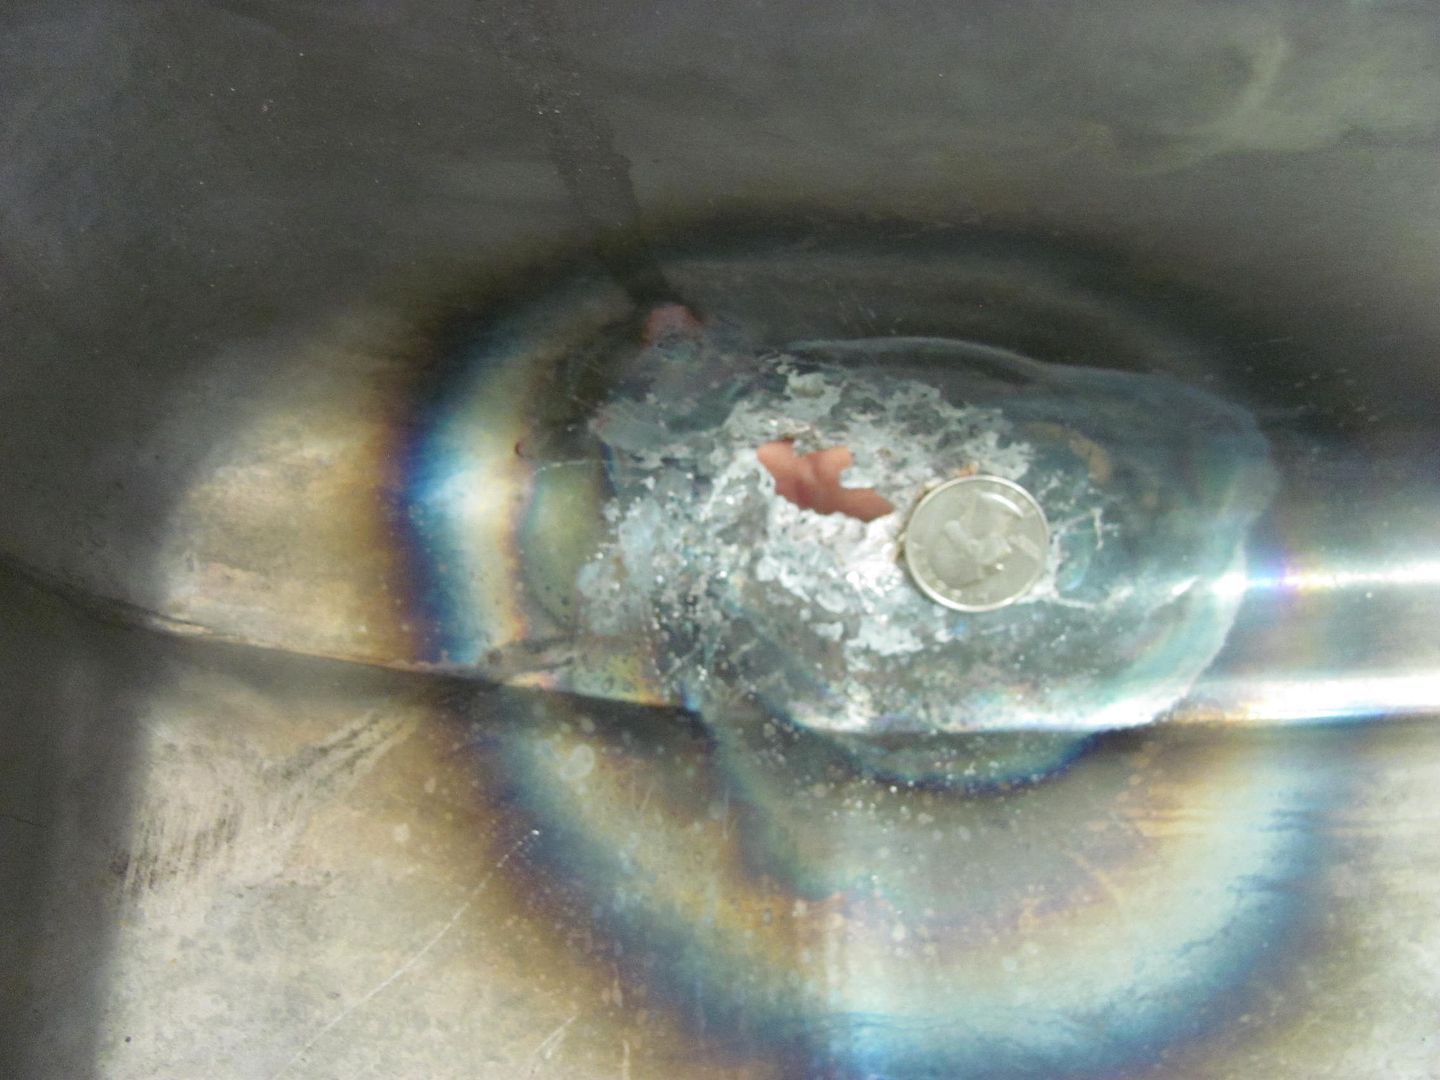
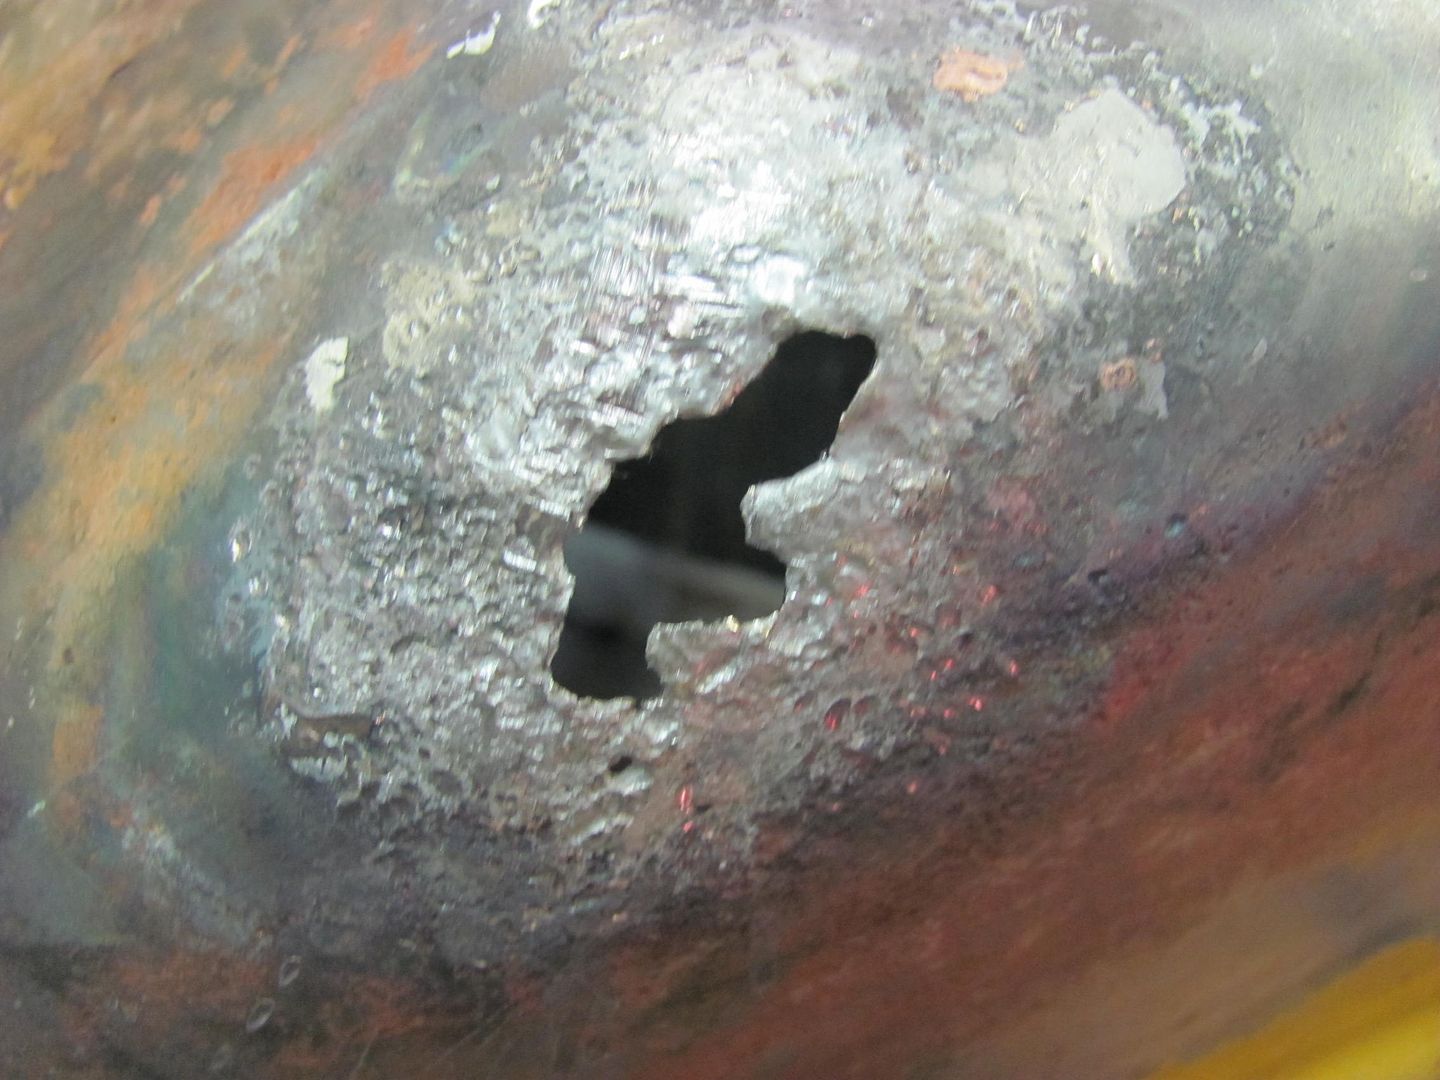


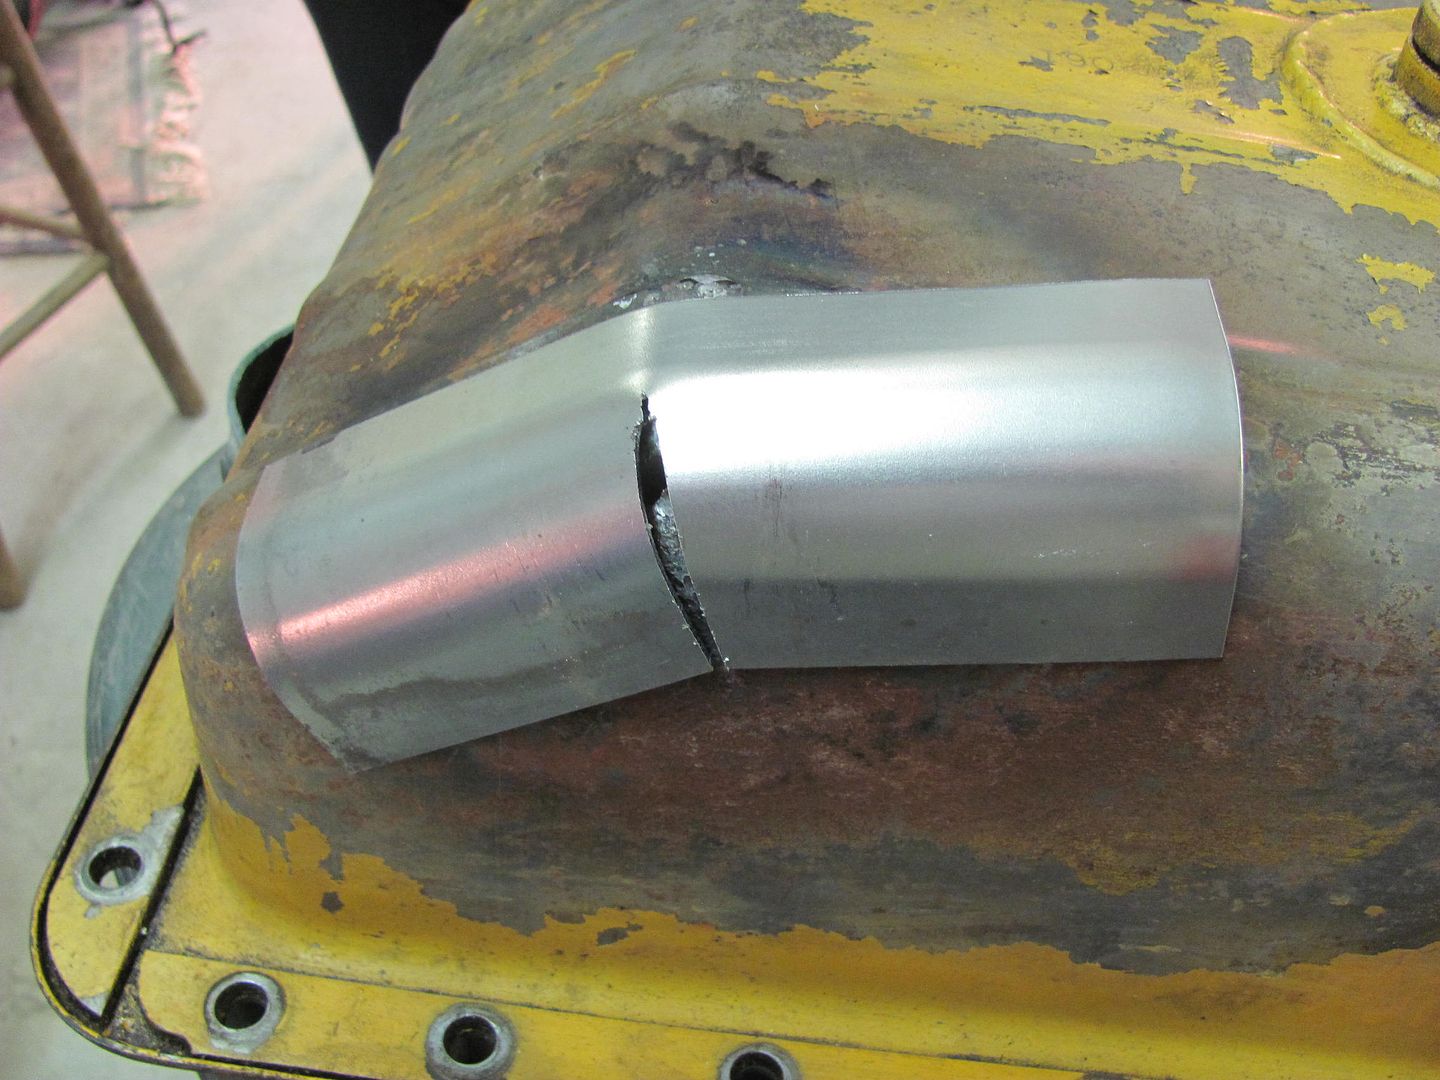
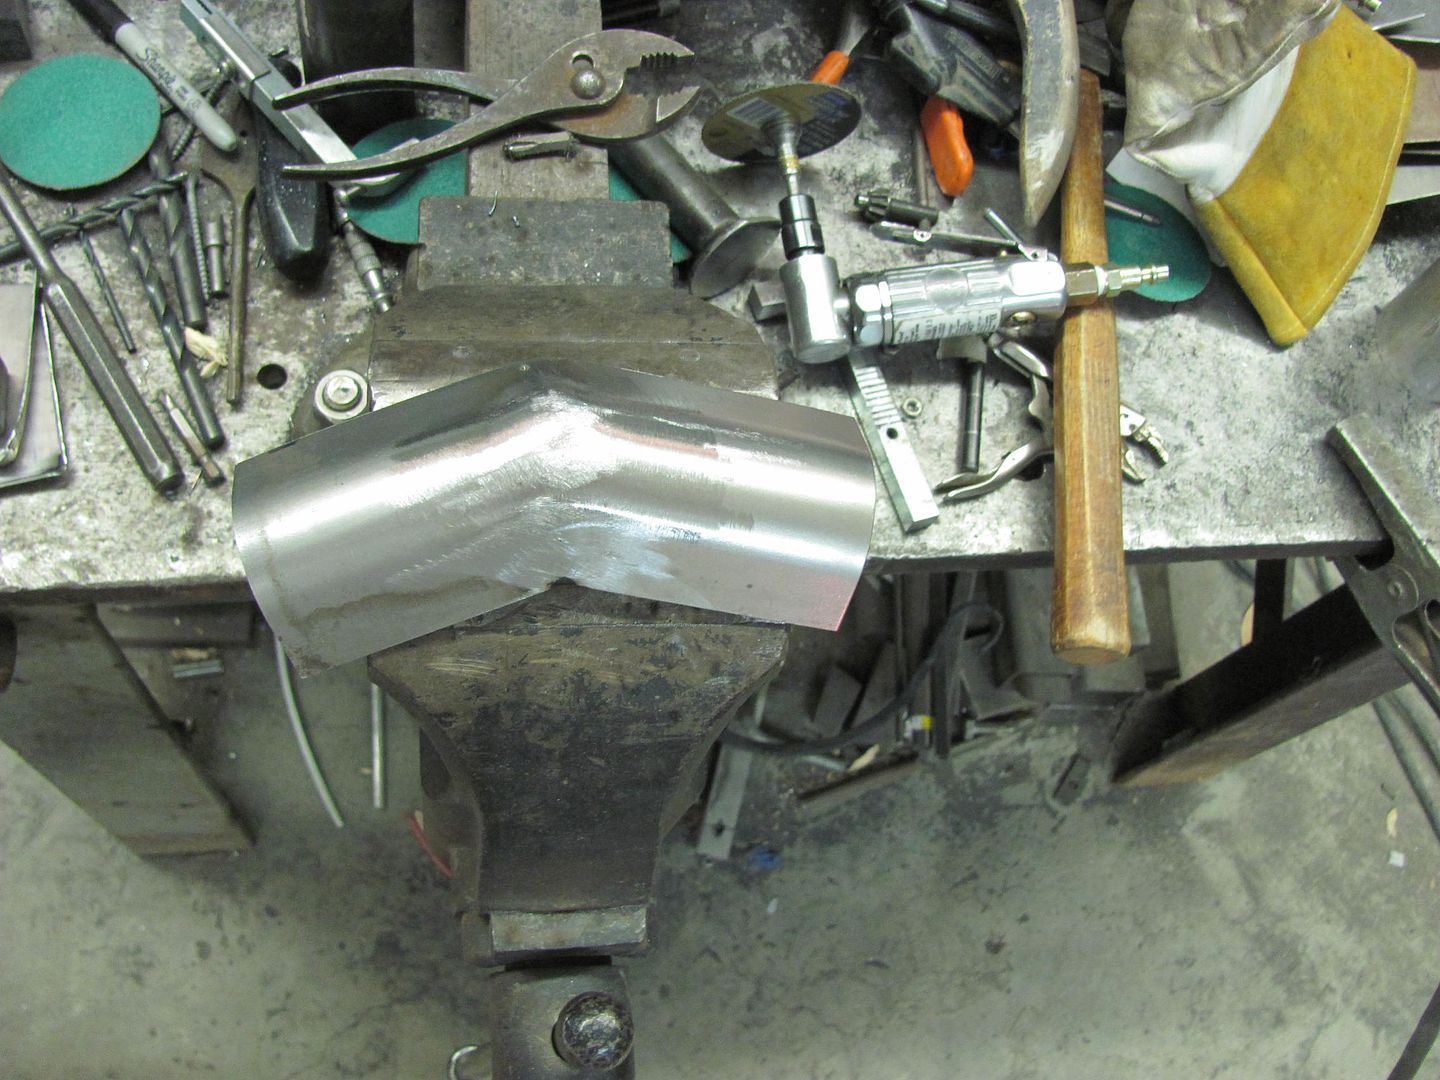
    The heat marking is where he was attempting to braze it closed, with little success. Calipers showed the pan to be 14 ga, and I just happened to have some in stock. I've used the bead roller before to form a radius, but never on metal this thick before. This will be a good test of the fancy 75A durometer skateboard wheel to see how well it works.
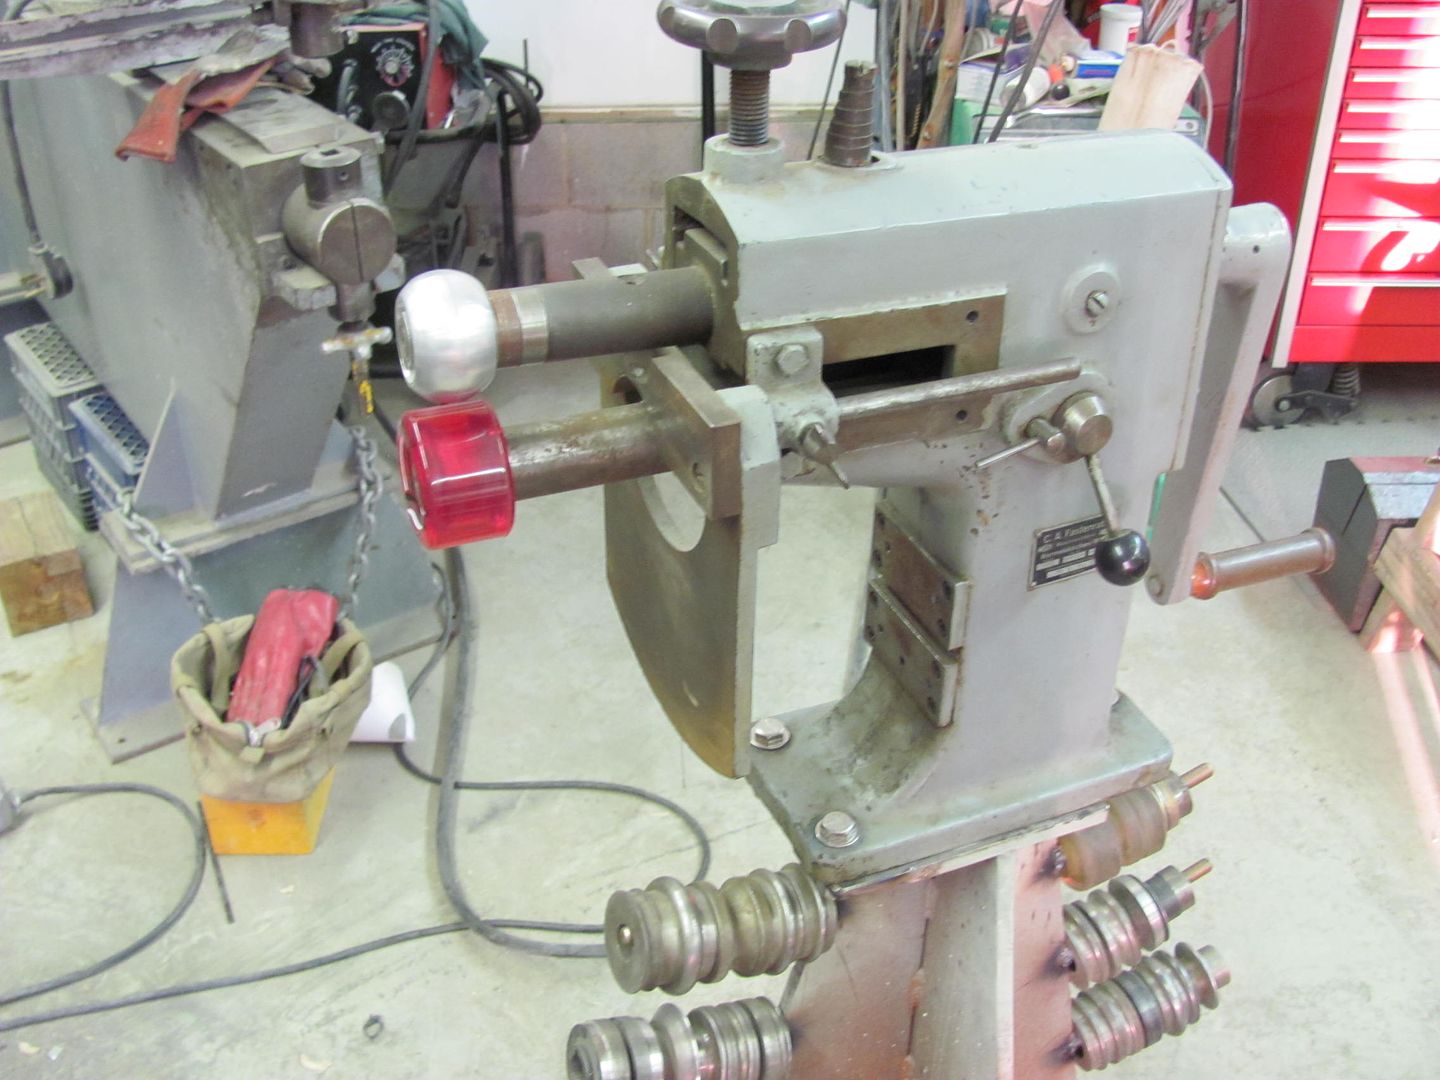
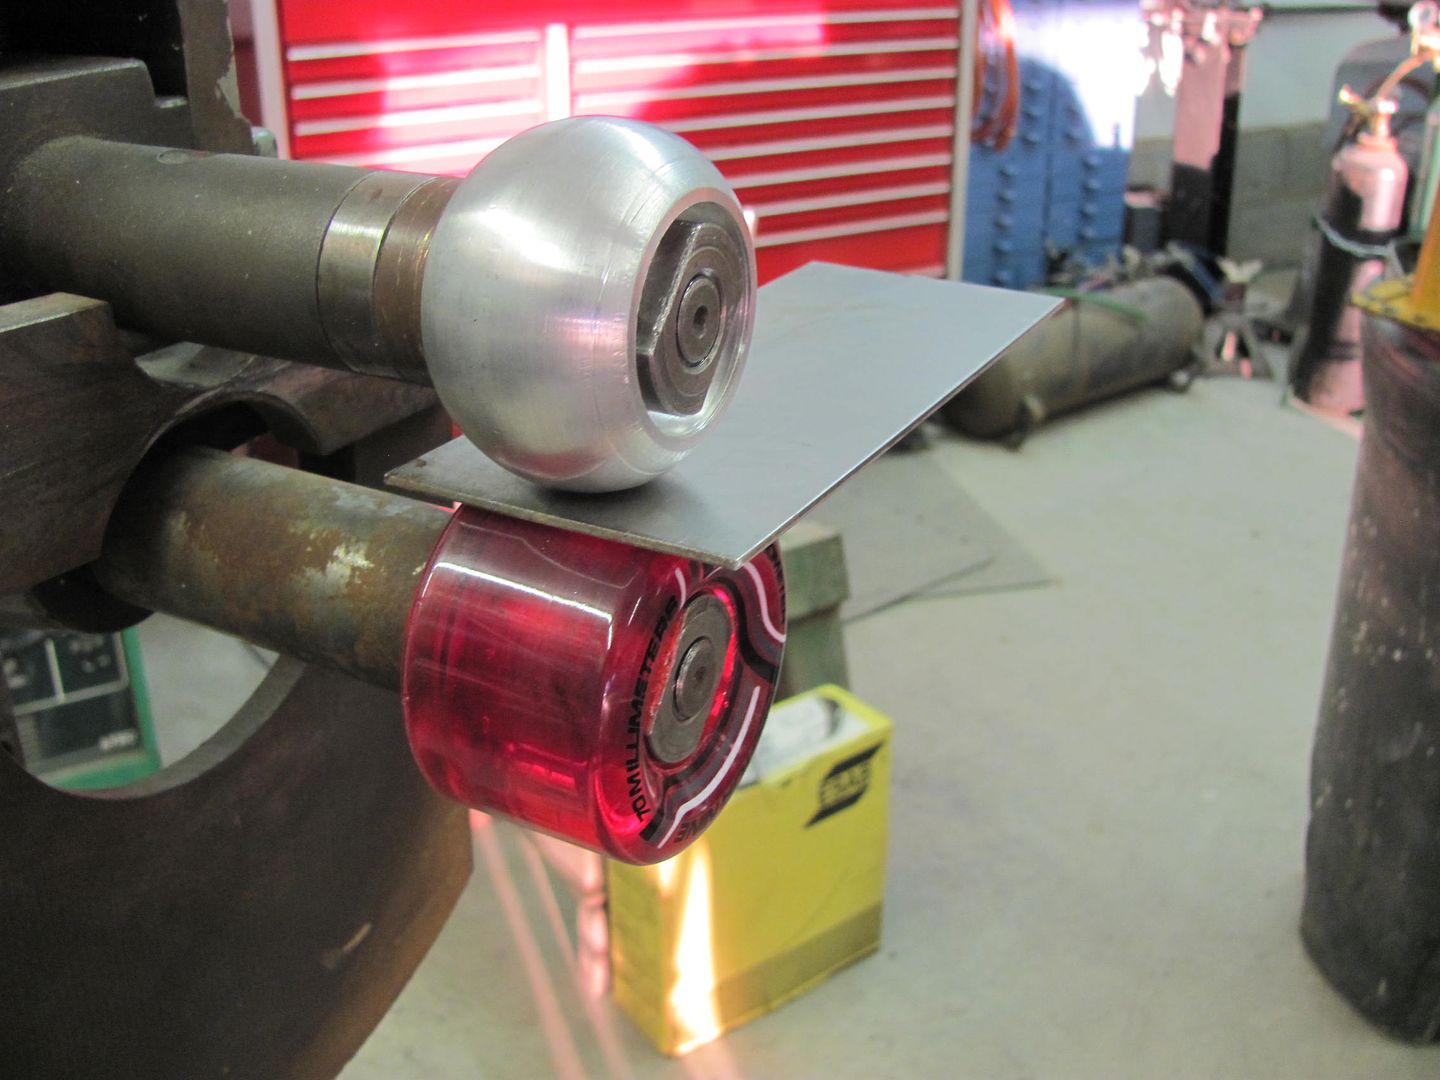
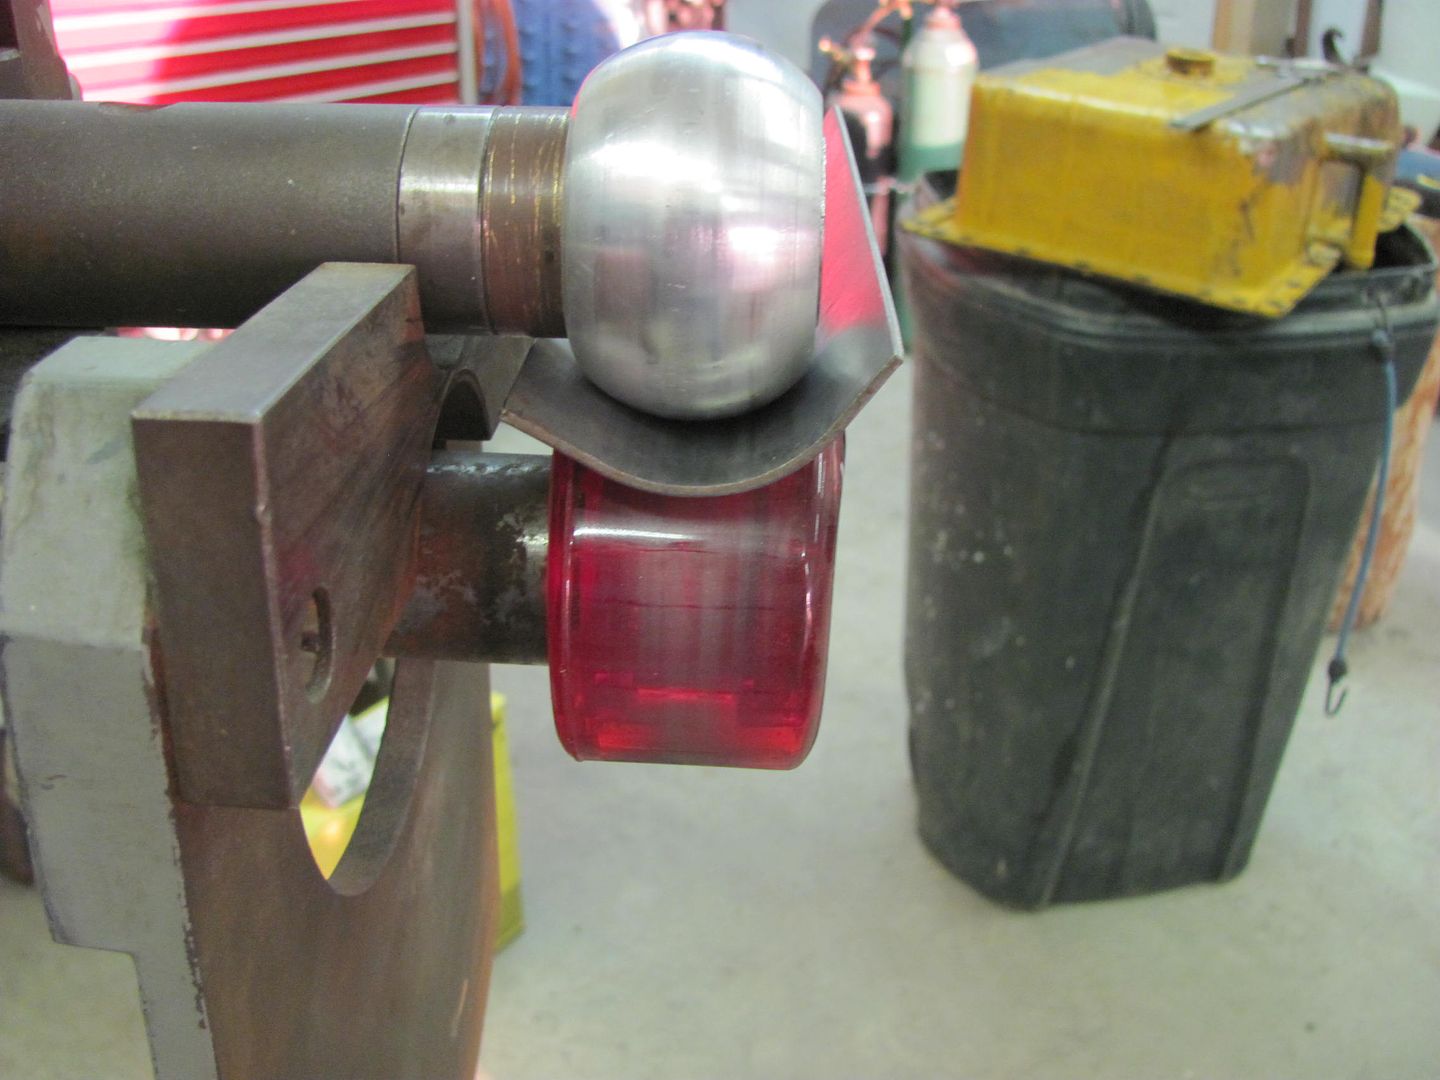


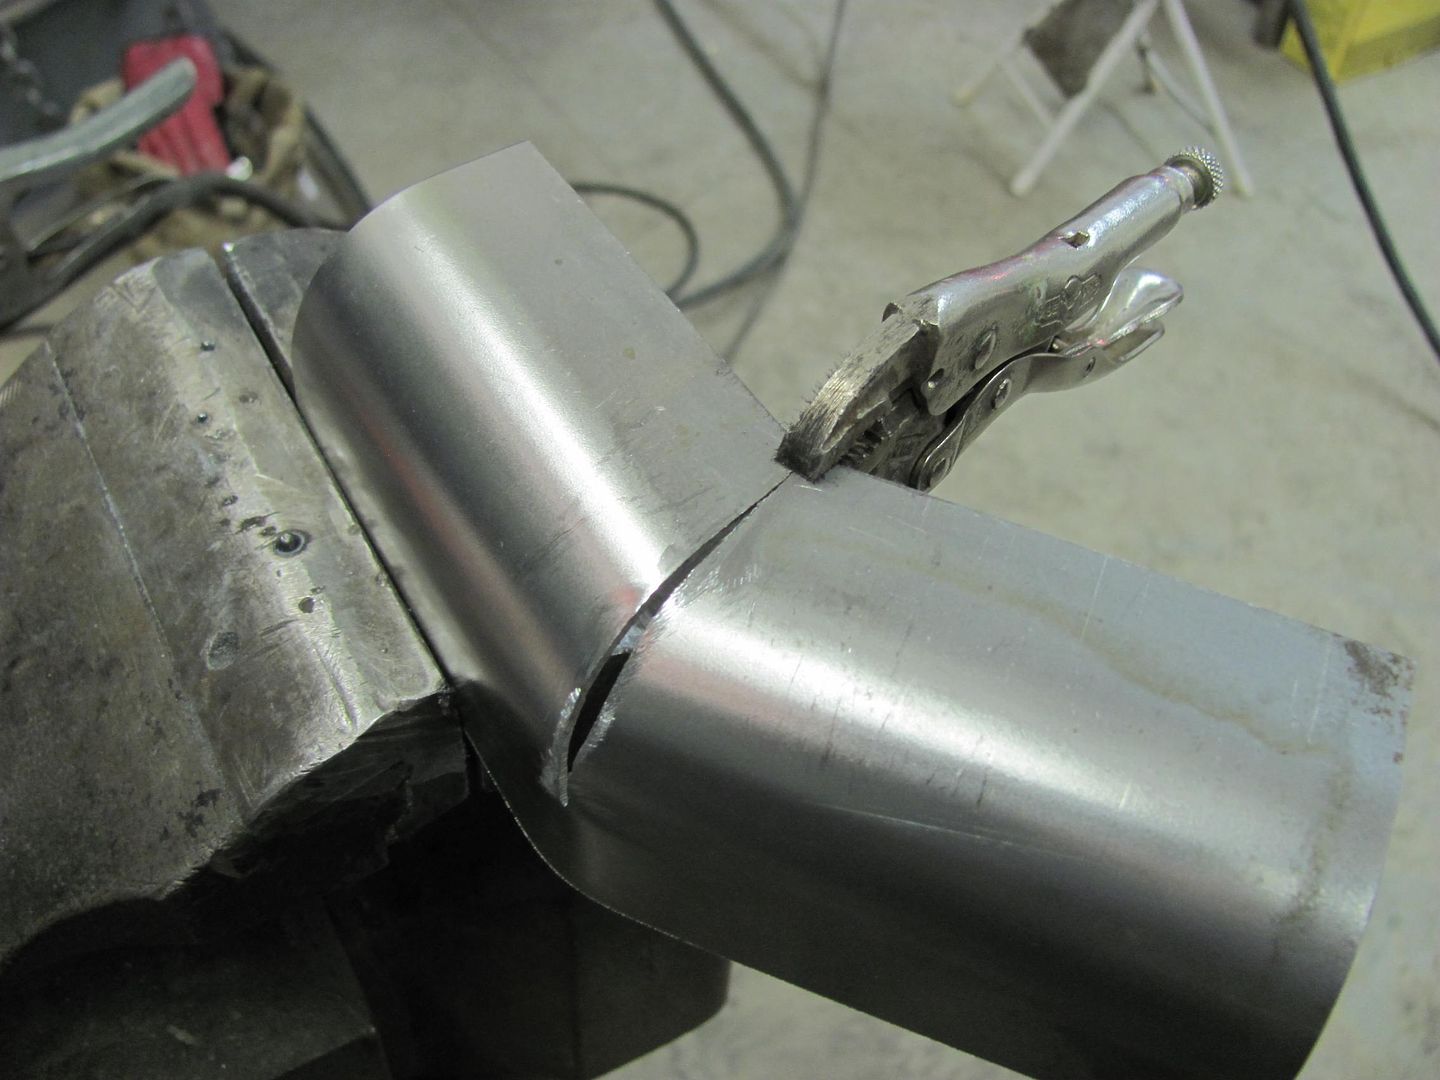
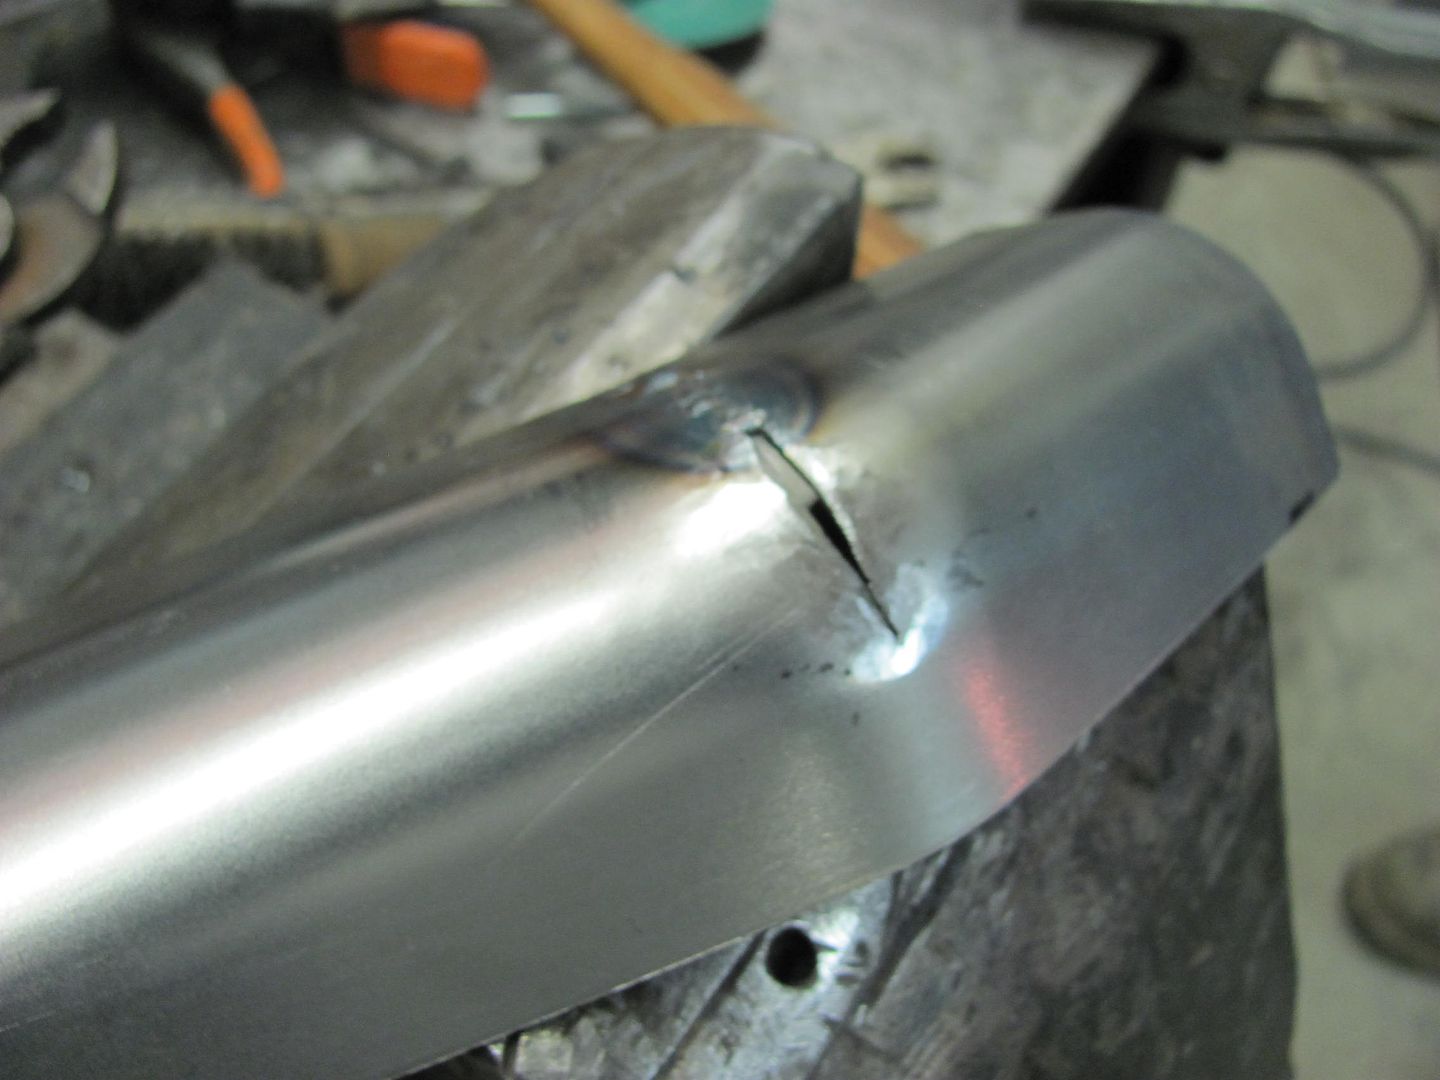
    Took a few passes, but worked real nice. Now for a relief cut and a weld...
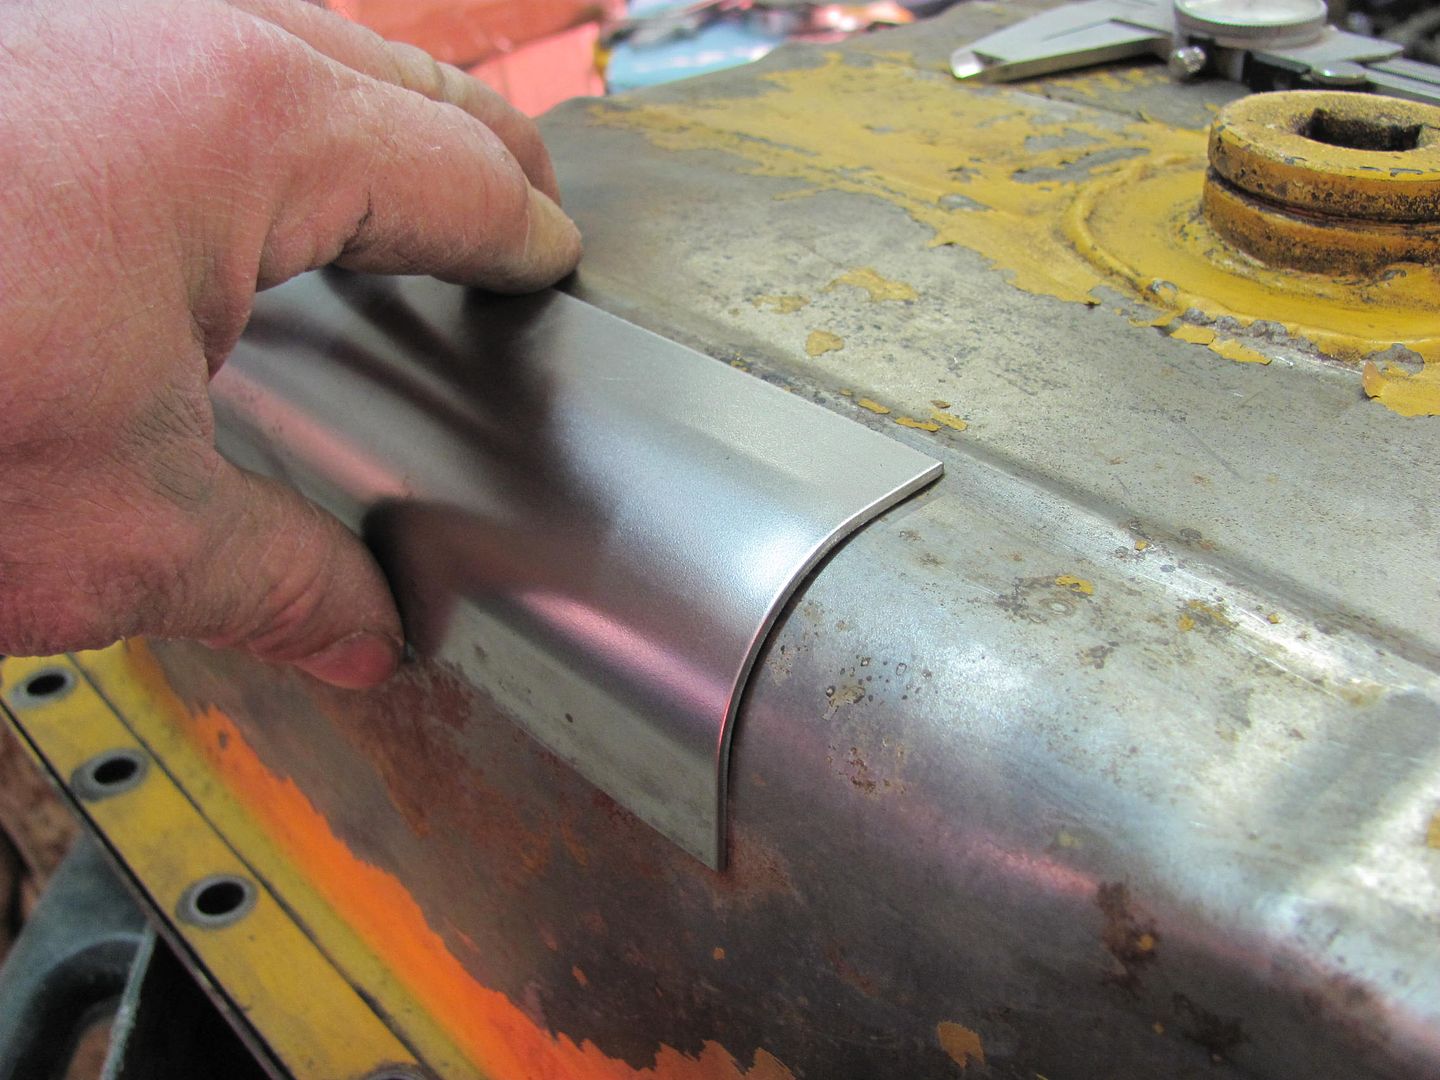


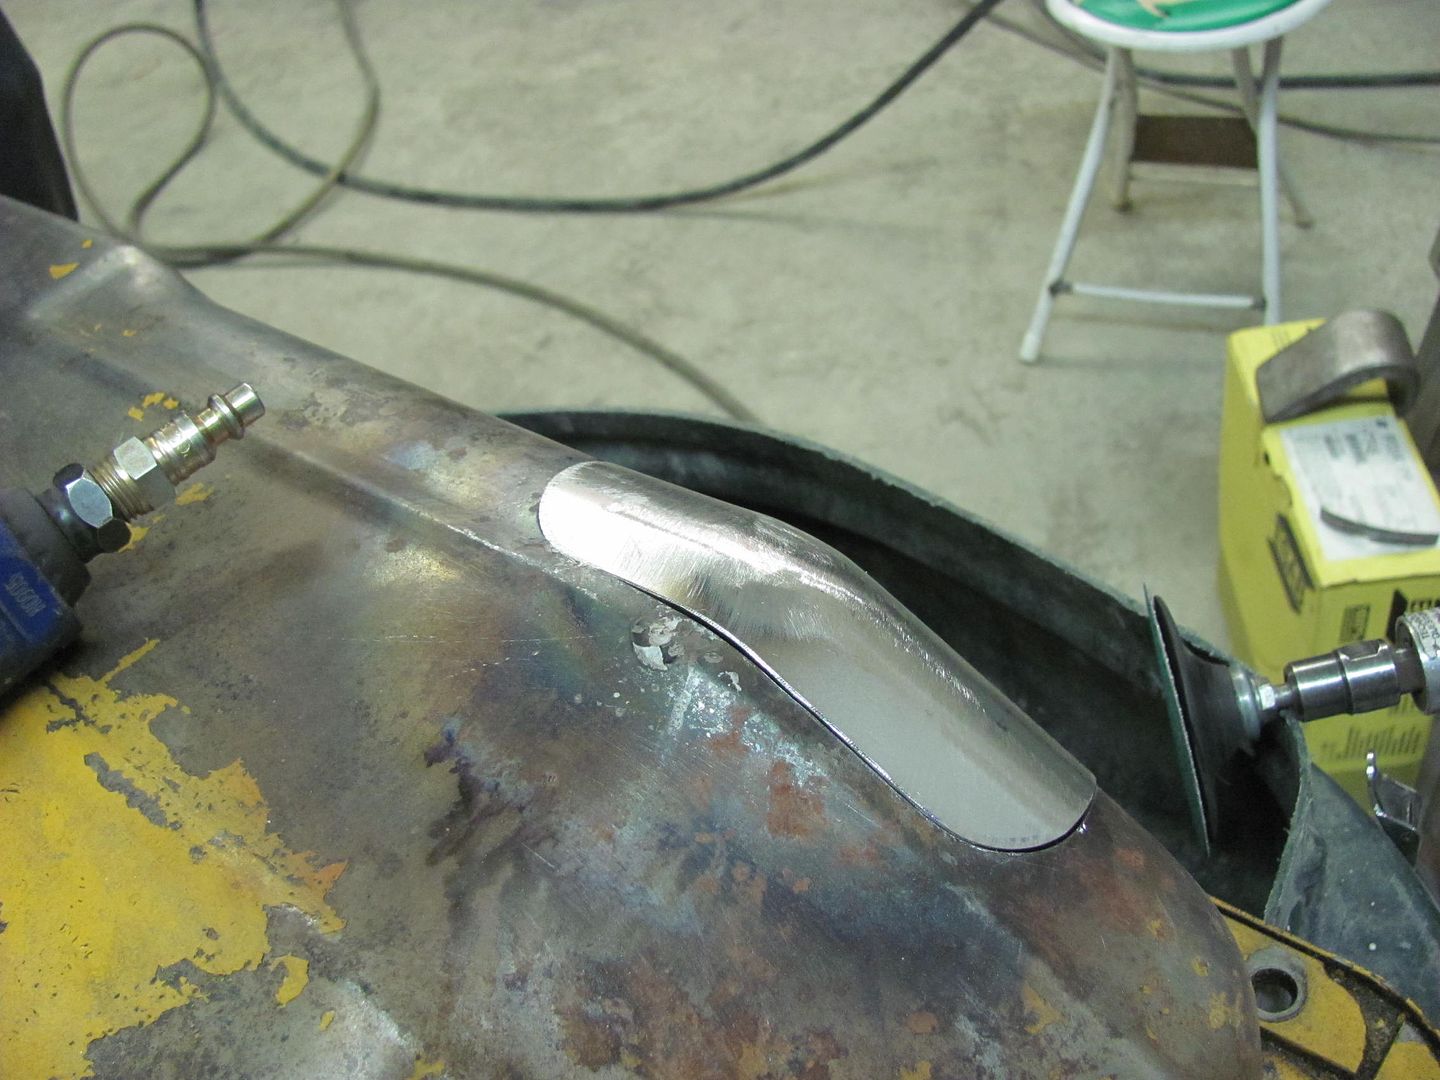
    Rust hole removed, patch trimmed and fitted, then welded in place..
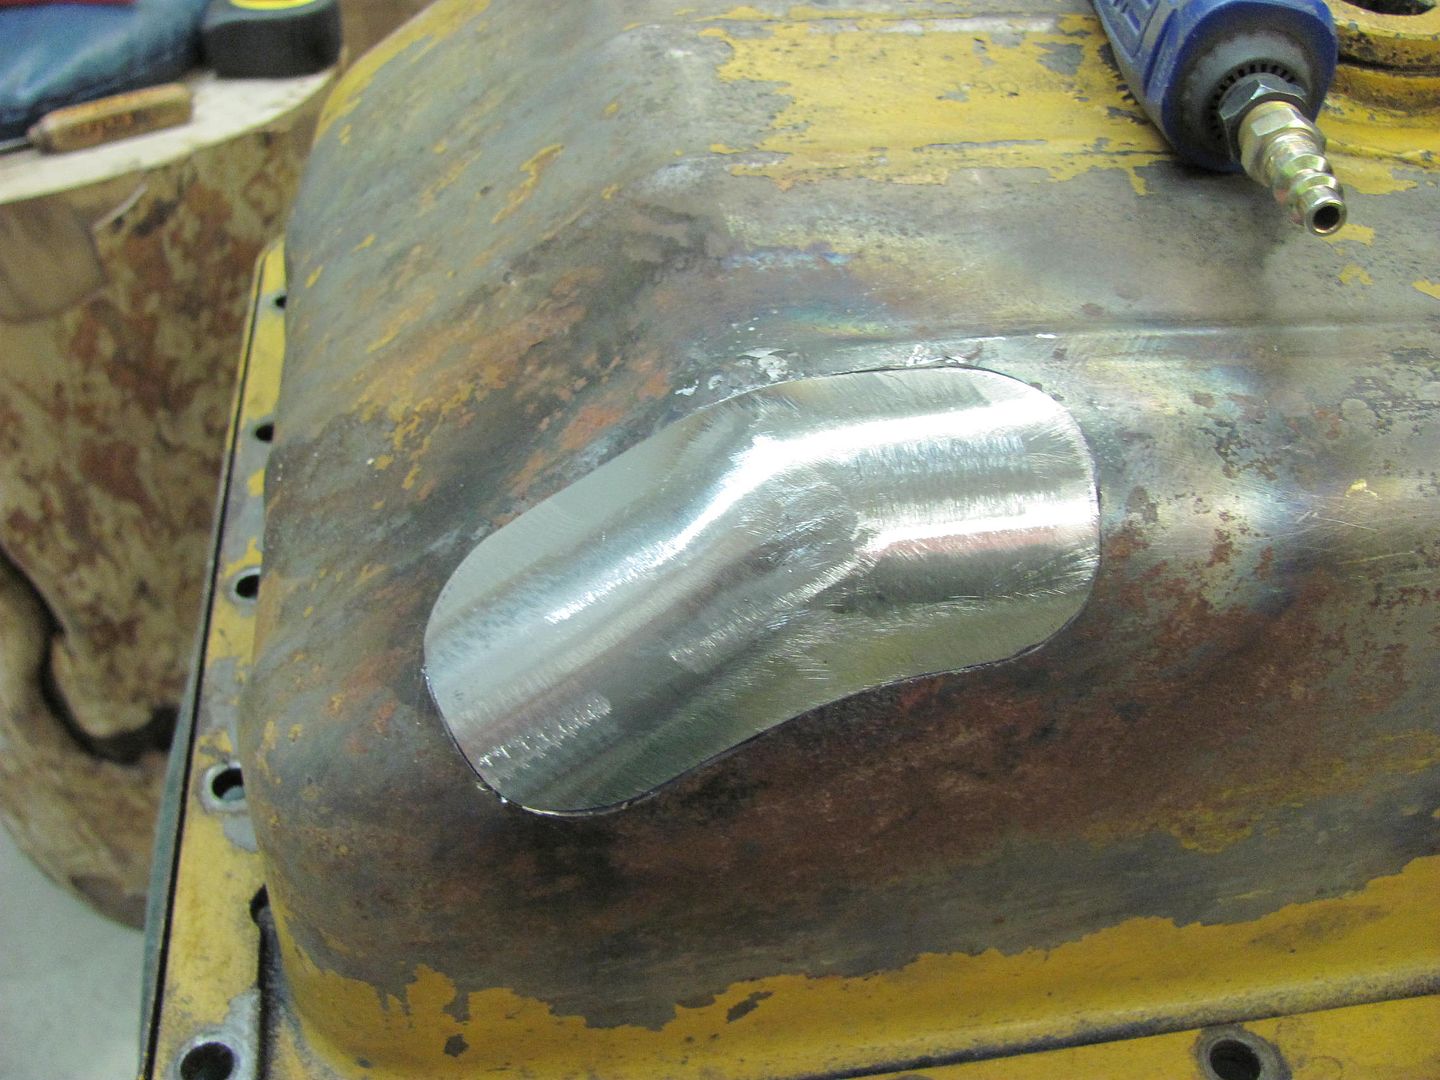


    .....and Paul cleans it up for paint..
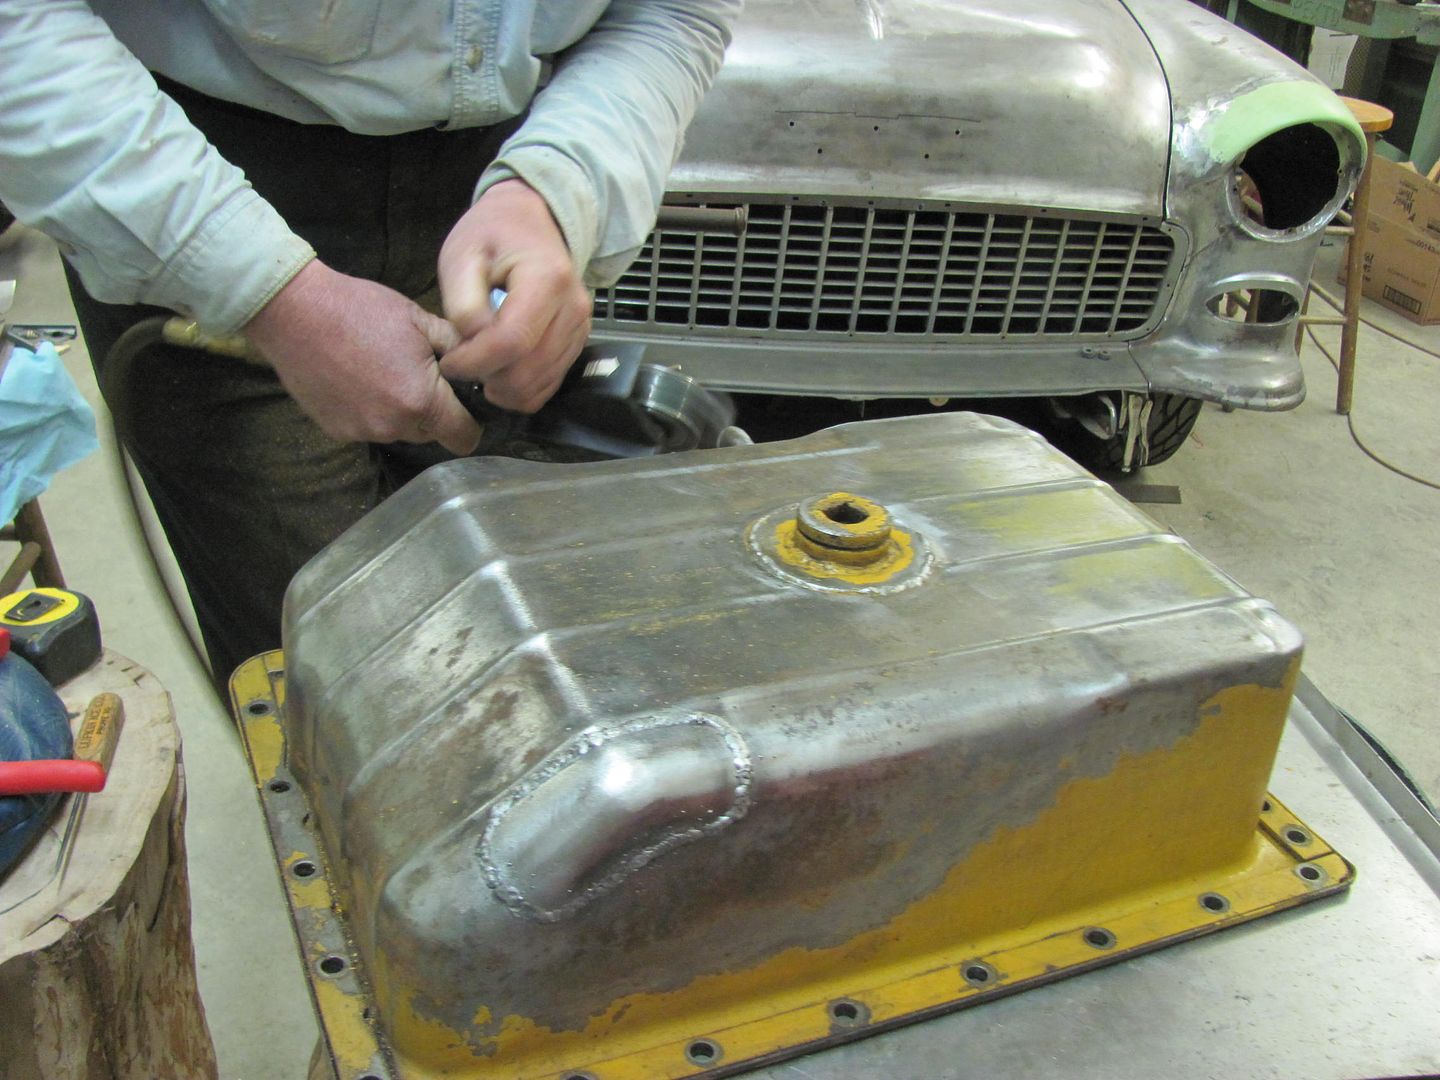


    You never know what you see over here in the shop... :lol_hitti


    If you're still open to using aluminum, I'd think for sure these type dies would work well in your bead roller to produce similar shapes..
    Robert


    MP&C Shop Projects-Metalshaping Tutorials


    Instagram @ mccartney_paint_and_custom


    .

Page 2 of 4 FirstFirst 1234 LastLast

Posting Permissions

  • You may not post new threads
  • You may not post replies
  • You may not post attachments
  • You may not edit your posts
  •