Just joined? Please introduce yourself.
Page 21 of 102 FirstFirst ... 1119202122233171 ... LastLast
Results 201 to 210 of 1019

Thread: wagon progress

  1. #201
    Registered Member MP&C's Avatar
    Join Date
    Dec 2013

    Member #:2017
    Location
    Southern MD
    Posts
    1,293
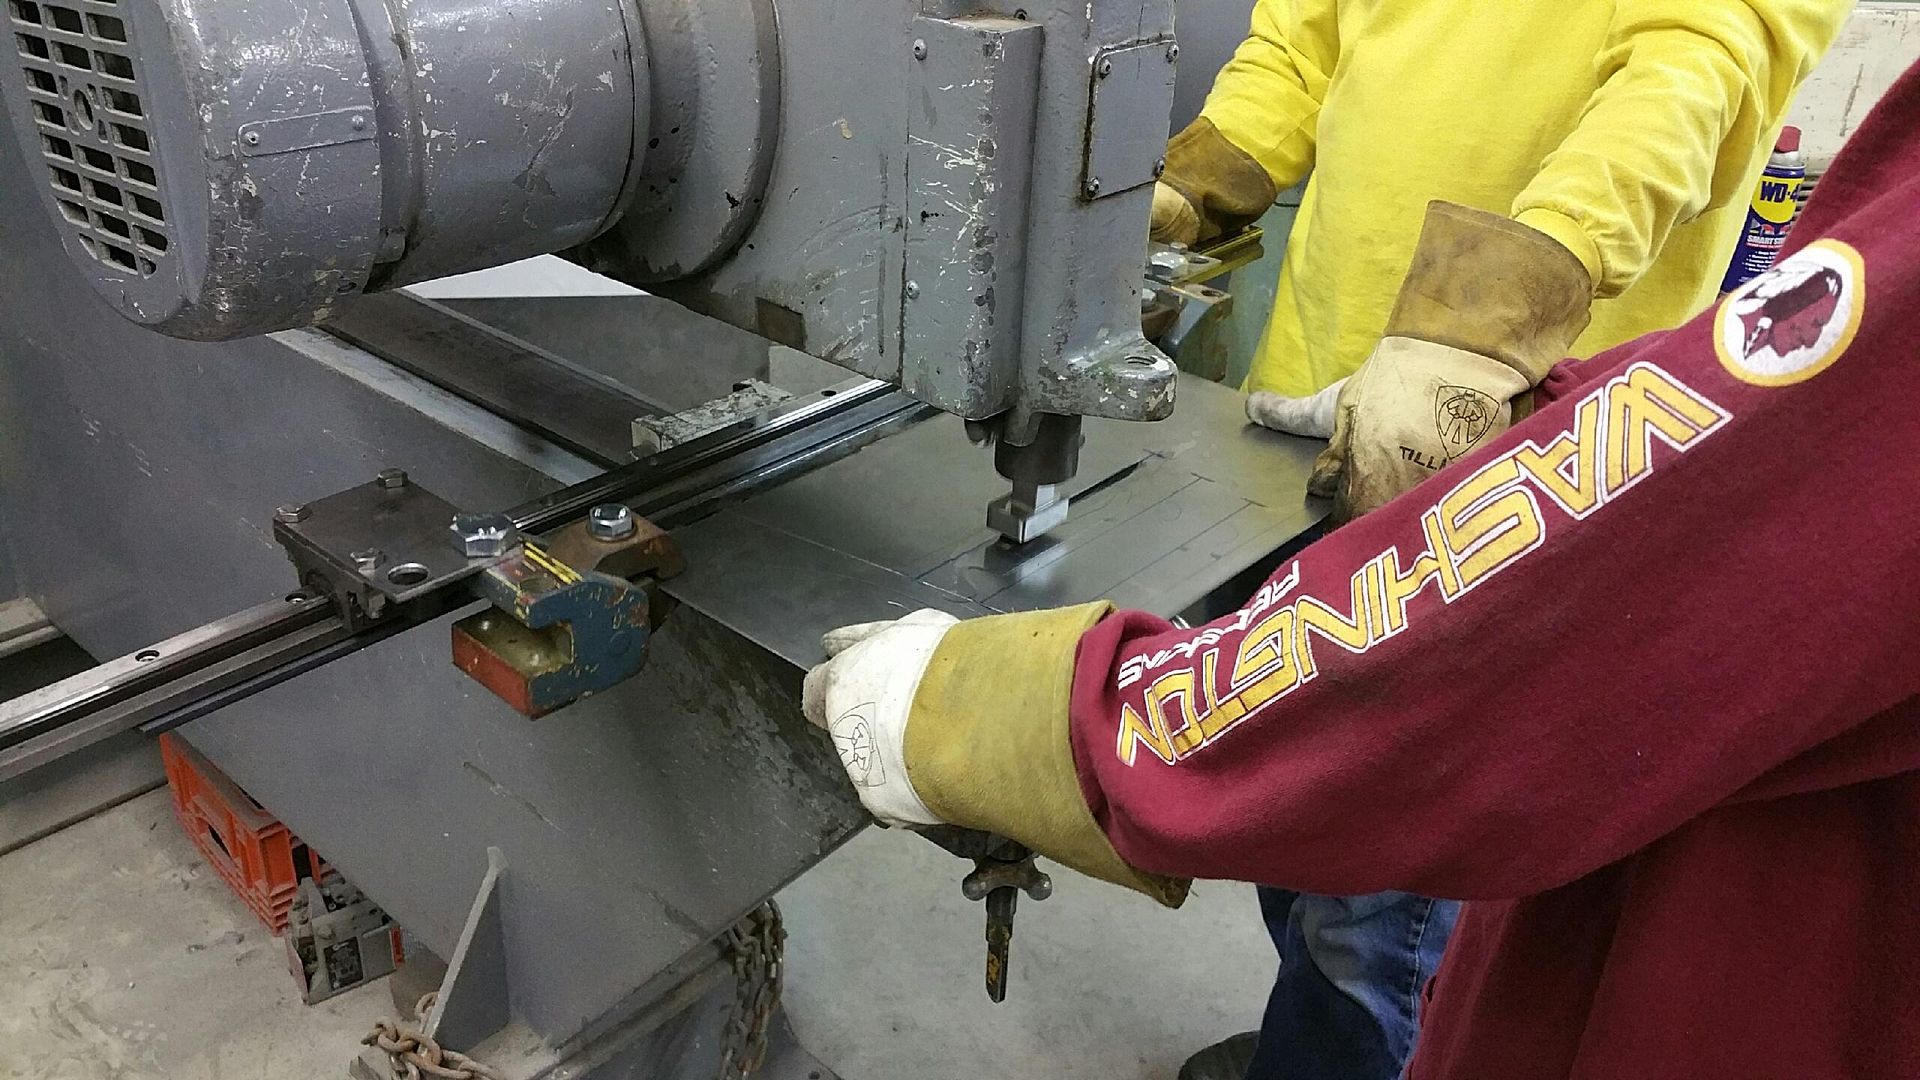
    The more I looked at our panel with the spot weld carnage, the more I disliked the result, so with new linear guides installed, we made all new today using stainless pop rivets to hold the guides in place. This will leave a few 1/8" holes to fill, but should be much less issue than cleaning up after the spot welds...

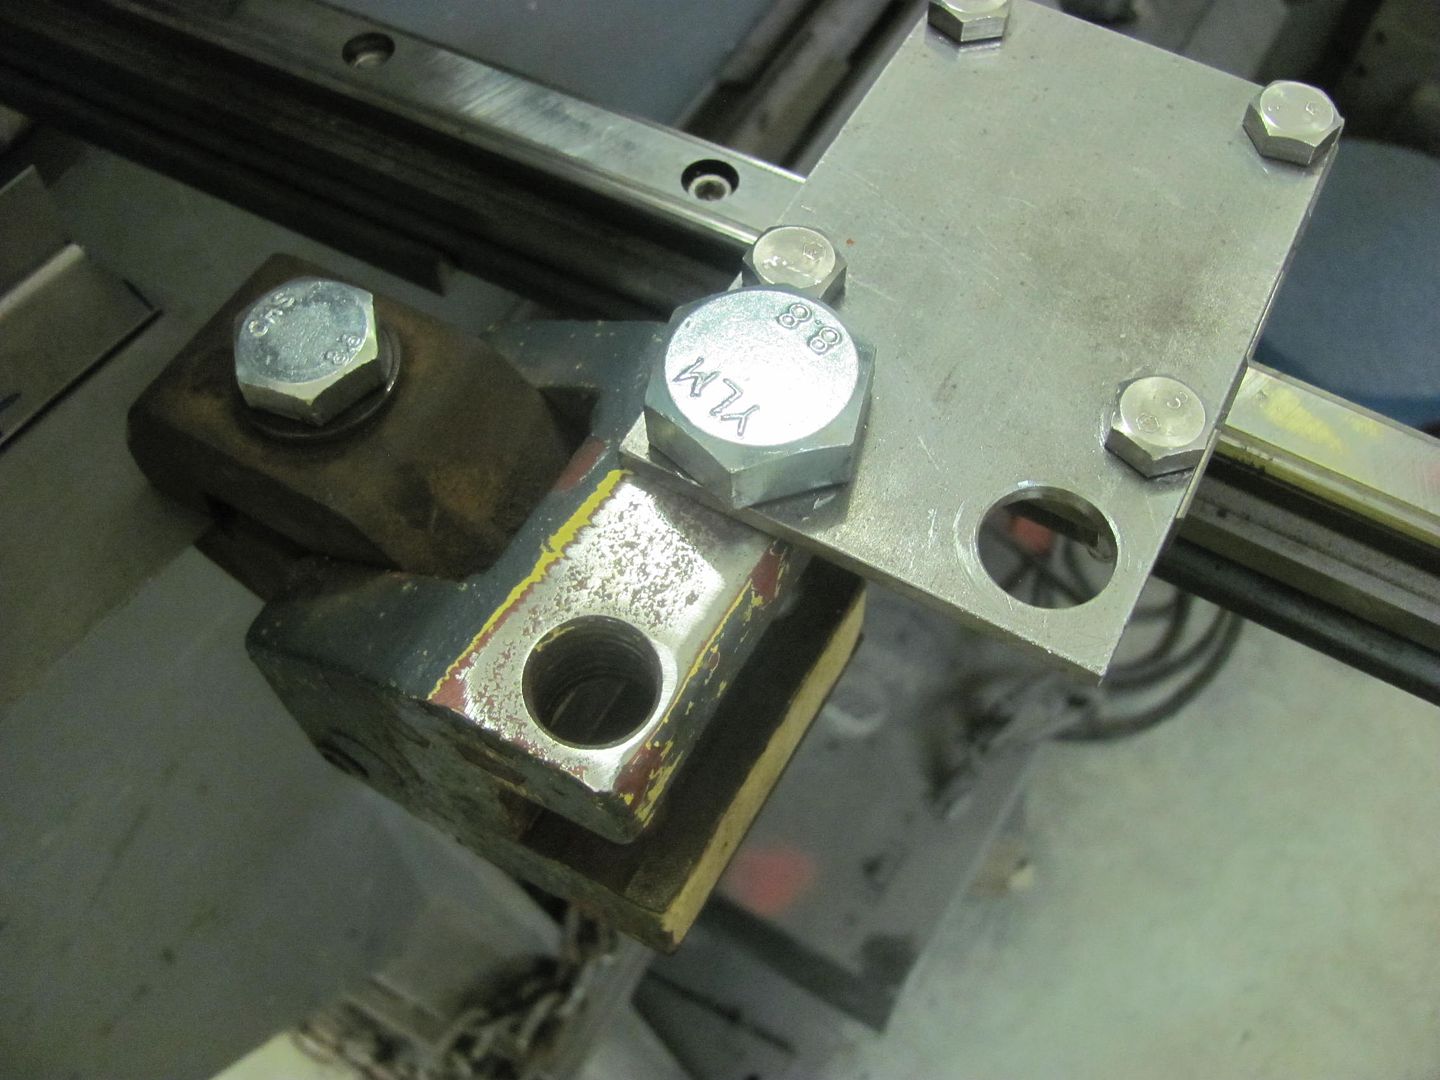
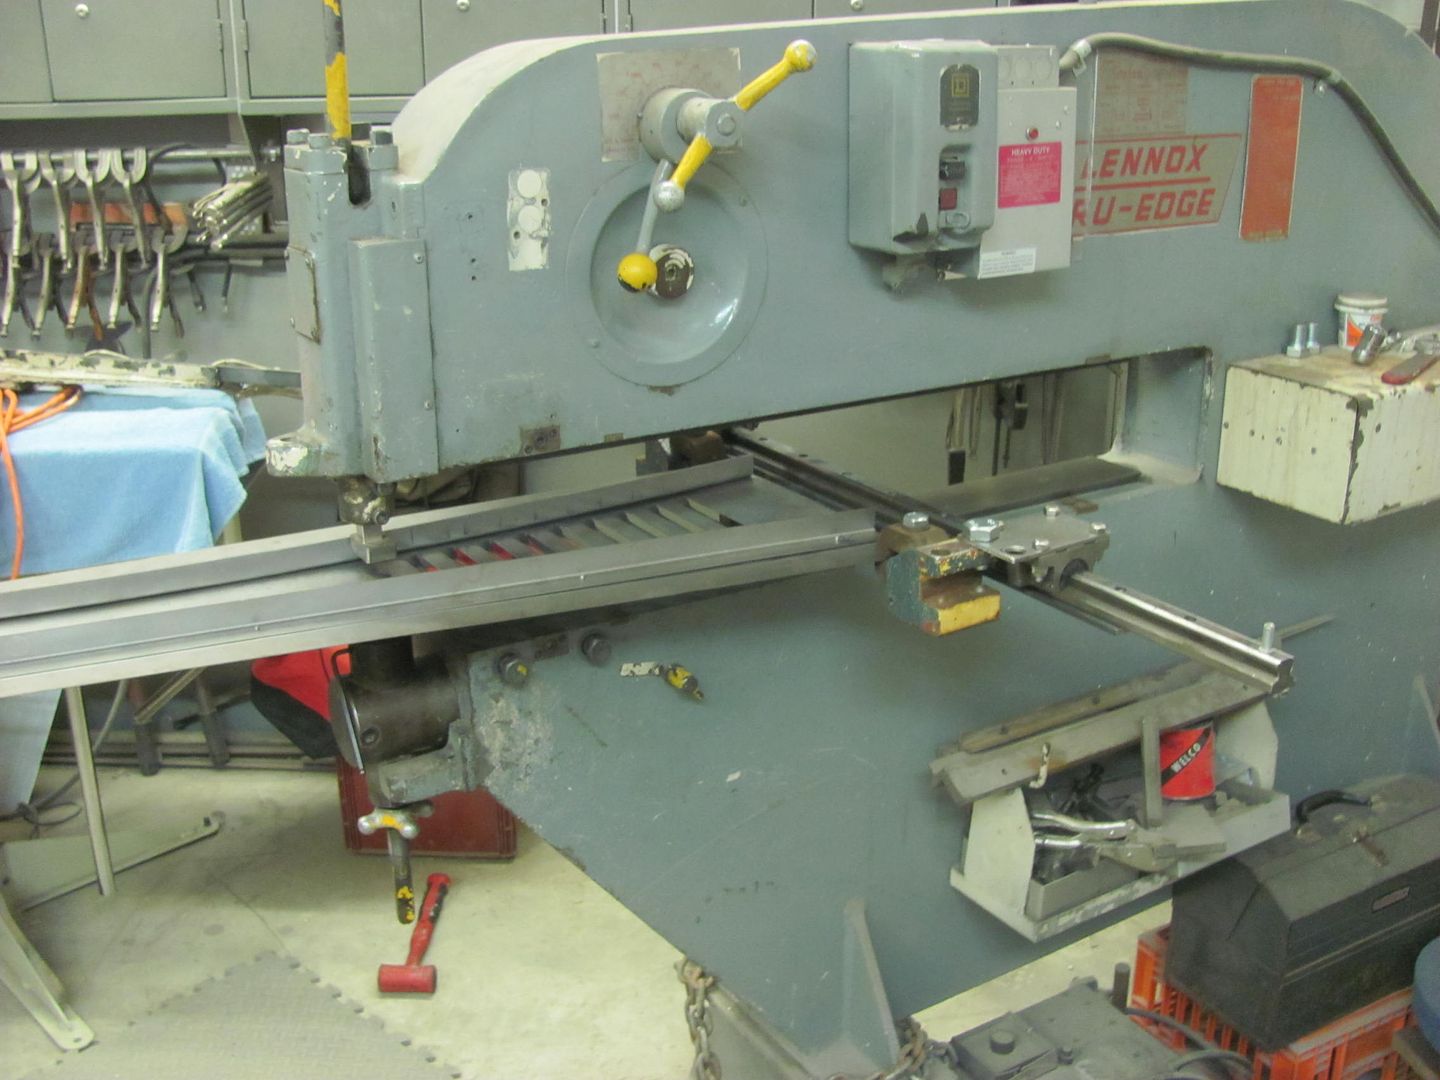
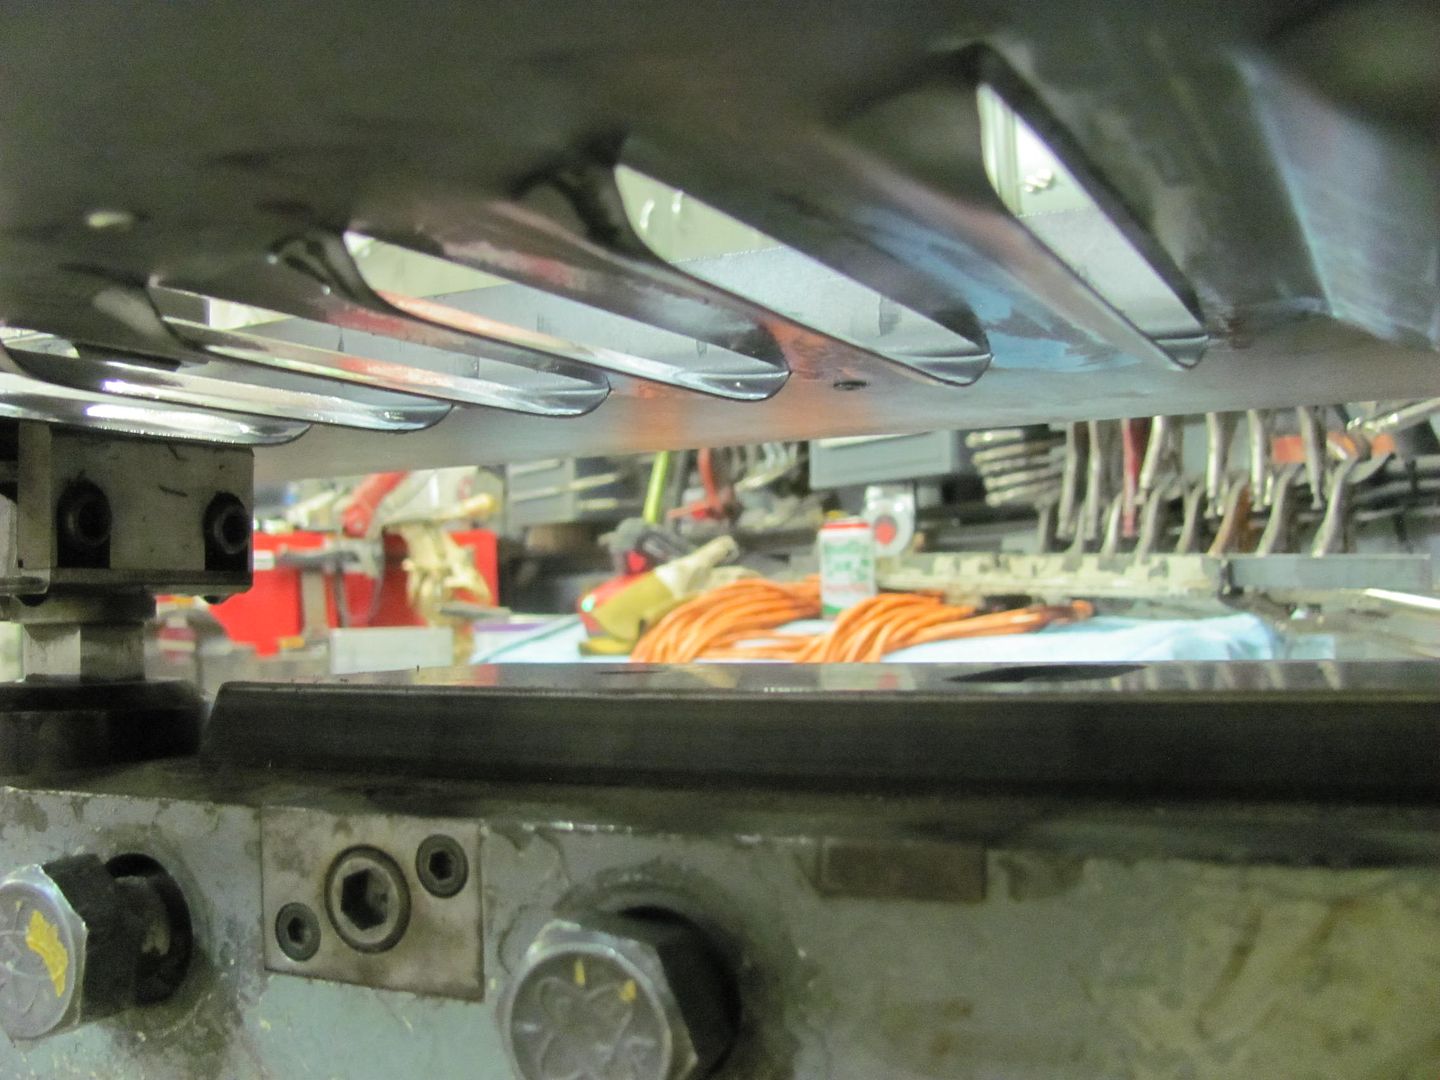
    We needed just a bit more throat for this set of "lengthened" hood sides, so one bolt was removed from the material clamp and then rotated the clamp inward 90". This lets the panel pass through rather than bottom out in the clamp.


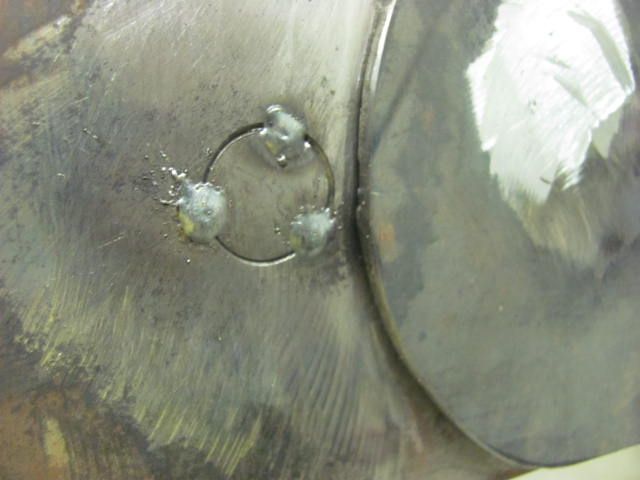
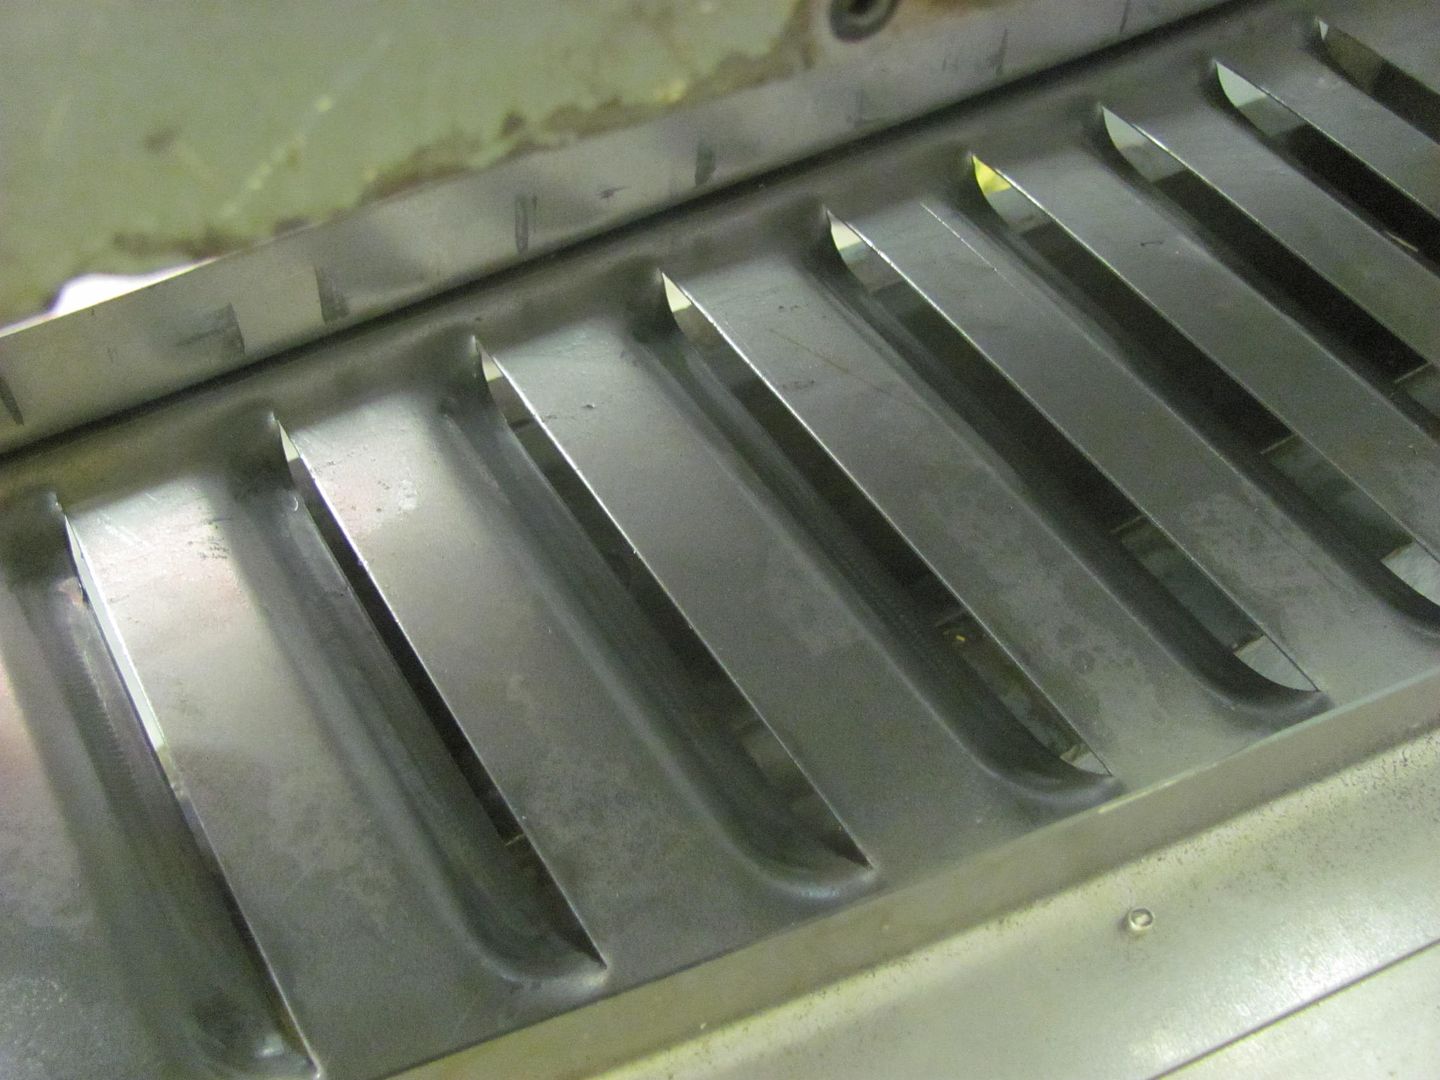
    Guides riveted in place....


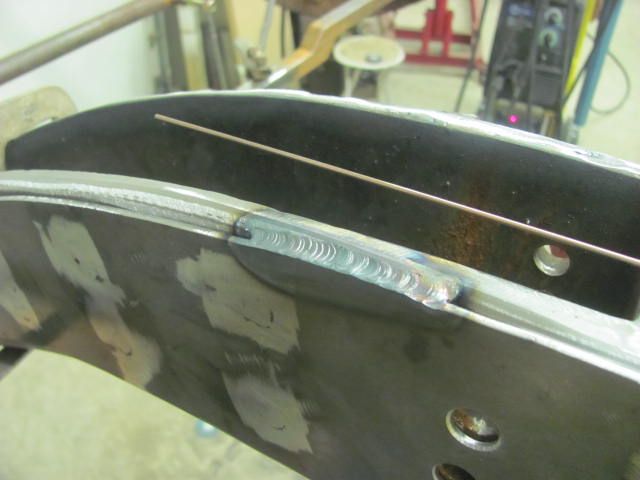
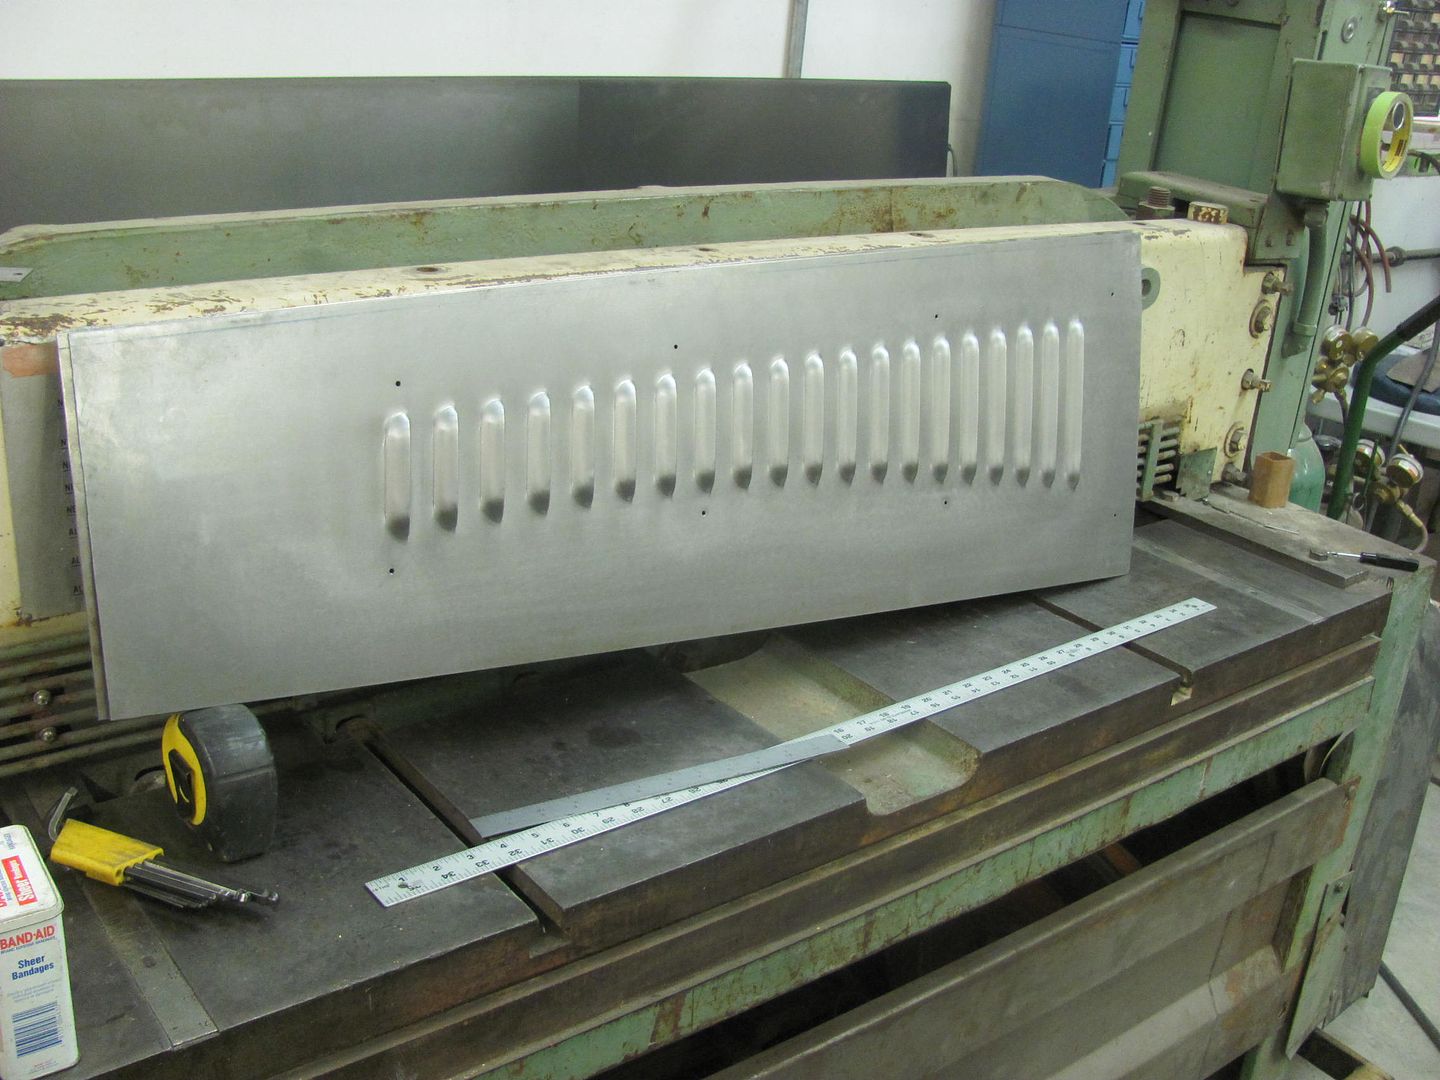
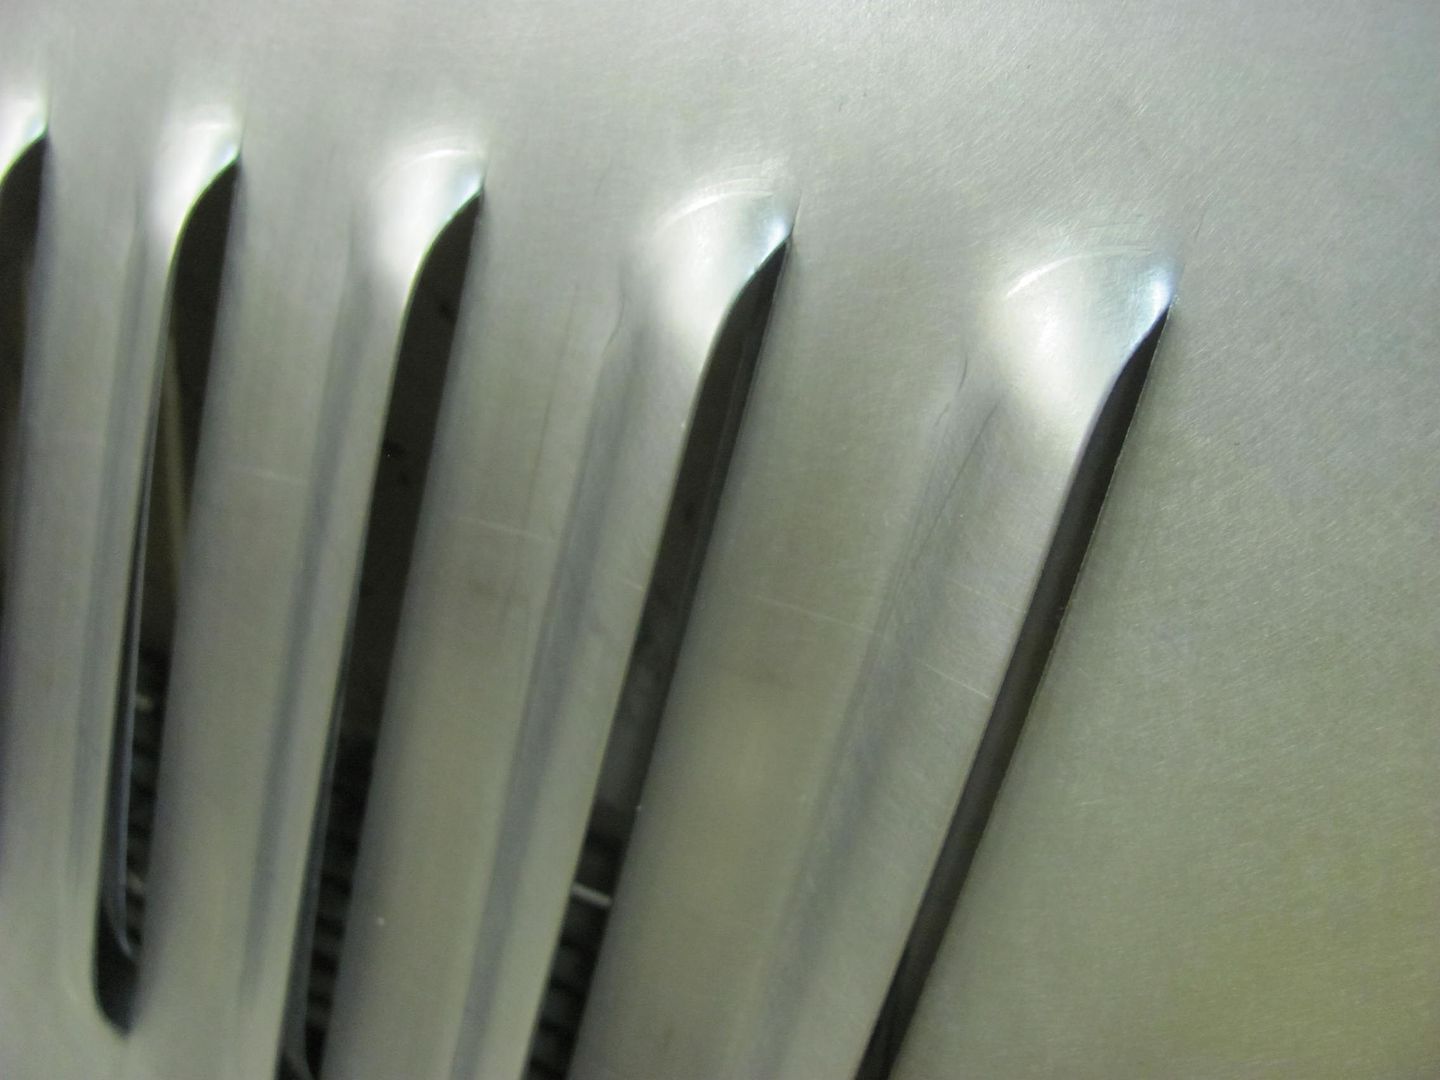
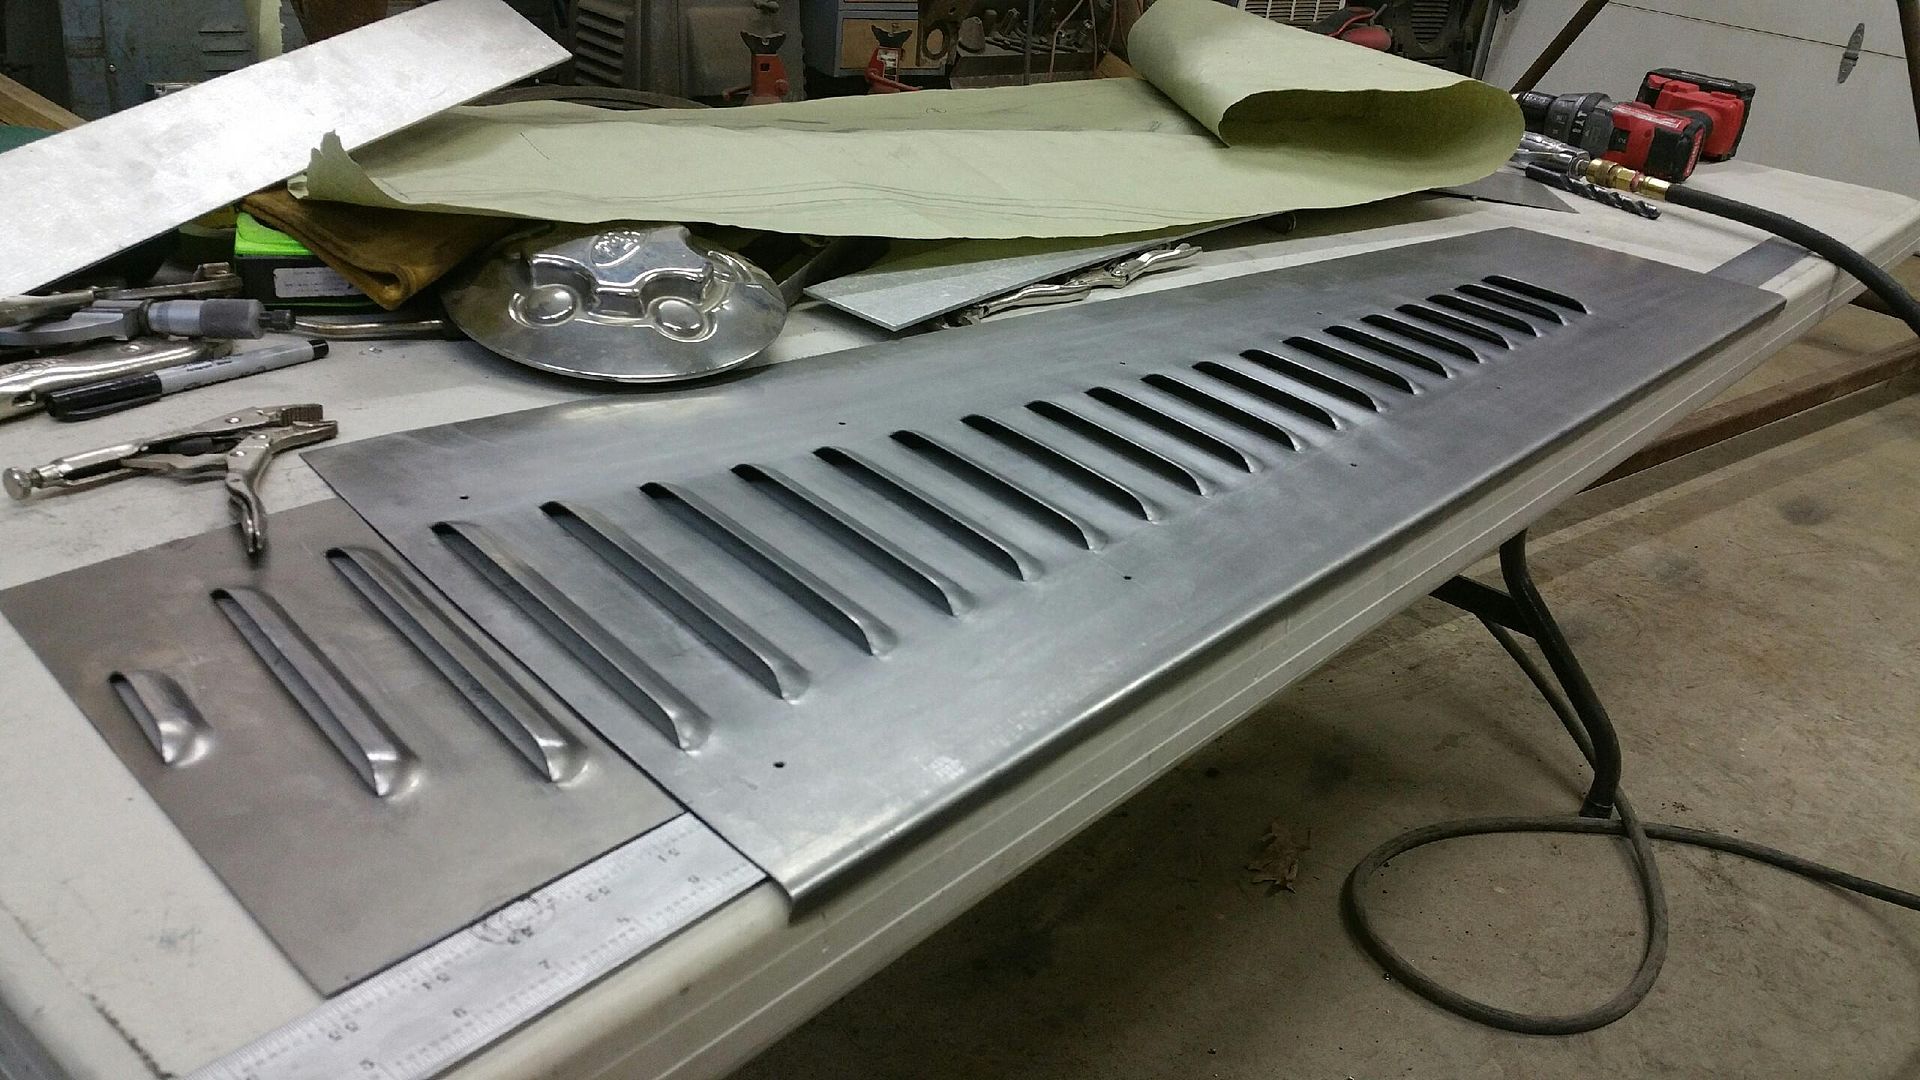
    Here's the new version 1, much cleaner, less distortion, and we can re-use the guides...


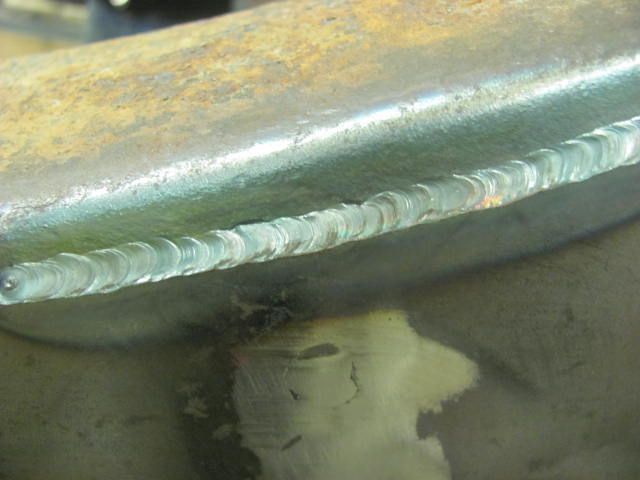
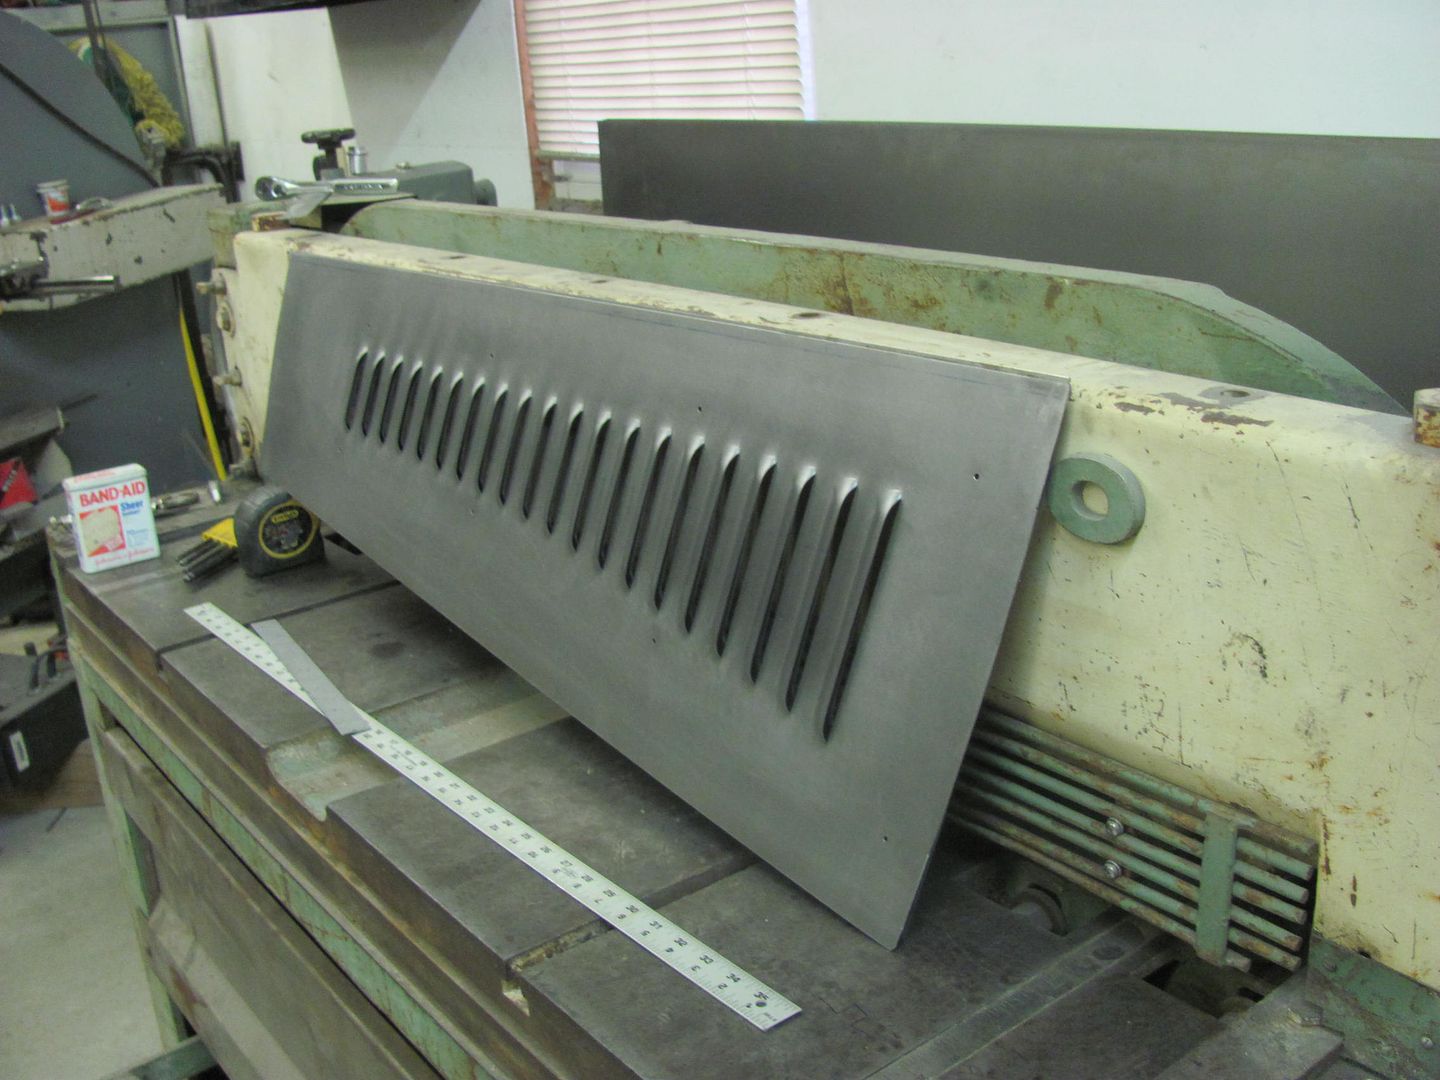
    The cowl piece was done without guides....


    And version 2 with the cowl piece.....


    Dave (the car owner) stopped by this afternoon and picked up the samples, and indicated he was being over-ruled by most parties on louvers in the cowl, so likely that version won't be used...
    Robert


    MP&C Shop Projects-Metalshaping Tutorials


    Instagram @ mccartney_paint_and_custom


    .

  2. #202
    Registered Member MP&C's Avatar
    Join Date
    Dec 2013

    Member #:2017
    Location
    Southern MD
    Posts
    1,293
    Now, in the interest of showing the good with the bad, the lessons learned if you will, Safety tip of the day is to deburr your sheet metal even if it's only for practice pieces....


    Robert


    MP&C Shop Projects-Metalshaping Tutorials


    Instagram @ mccartney_paint_and_custom


    .

  3. #203
    Registered Member WagonCrazy's Avatar
    Join Date
    Mar 2012

    Member #:530
    Location
    Santa Clarita, CA
    Posts
    1,794
    Consider that as "paying the tax man" for all the great work you do Robert.
    1957 Nomad- LS1/T56 on C4 chassis
    1959 Fleetside Apache 1/2 ton, shortbed, big window, 327ci.

  4. #204
    Registered Member MP&C's Avatar
    Join Date
    Dec 2013

    Member #:2017
    Location
    Southern MD
    Posts
    1,293
    So far so good, nothing turning green...


    Tonight we worked on the frame, used some poster board to make a pattern for a strengthening plate to span the pocket kit on each frame rail..


    While Kyle filled in some frame holes by plug welding to the pocket kit, I cut out the frame plates...


    And the shop vacuum is about on it's last leg, it leaves behind about as much as it picks up. For anyone at DYSON or SHARK vacuum that would like to send a test sample, we can sure do a stress analysis on your product..
    Robert


    MP&C Shop Projects-Metalshaping Tutorials


    Instagram @ mccartney_paint_and_custom


    .

  5. #205
    Registered Member MP&C's Avatar
    Join Date
    Dec 2013

    Member #:2017
    Location
    Southern MD
    Posts
    1,293
    More prep and welding on the frame....


    and we cleared out the remaining vacuum inventory from the yard sale pile.. This one is working a bit better!


    We've been going through a dry spell here in the shop, it's been quite some time since we've seen any yellow body panels. Soon to change....


    Robert


    MP&C Shop Projects-Metalshaping Tutorials


    Instagram @ mccartney_paint_and_custom


    .

  6. #206
    Registered Member MP&C's Avatar
    Join Date
    Dec 2013

    Member #:2017
    Location
    Southern MD
    Posts
    1,293
    Still working on the frame, Kyle was prepping the frame for welding on the strengthening plates while I drilled the plates for plug welds..

    Plug welding....


    The outer perimeter will be Tig welded...
    Robert


    MP&C Shop Projects-Metalshaping Tutorials


    Instagram @ mccartney_paint_and_custom


    .

  7. #207
    Registered Member MP&C's Avatar
    Join Date
    Dec 2013

    Member #:2017
    Location
    Southern MD
    Posts
    1,293
    Still working the frame, here's the driver's side plate all clamped up and ready to go.. Hindsight and all that, should have made the plates about 2" longer and we wouldn't have those pesky holes in the way at the front end..


    So we decided to cut out some 14 gauge and fill in those holes. Cut a piece the same width as the hole, and rounded the end. Then used the band saw to cut a vee on the back side of the "plugs" and continued to clean up the radius with the 3" Roloc sander. Once close, a bit more on the band saw and break off the remaining, then fine tune with the sander..


    Magnet used to hold in place for tacking..


    For TIG welding the perimeter of the plates, we decided to make up a "crutch" that we could rest our hand on for better holding the torch...


    Kyle is getting a pretty good hold on this welding stuff...


    He even let me get in some practice....

    Robert


    MP&C Shop Projects-Metalshaping Tutorials


    Instagram @ mccartney_paint_and_custom


    .

  8. #208
    Registered Member 1320GASSER's Avatar
    Join Date
    Mar 2012

    Member #:227
    Posts
    127
    been following your work from the begining, all I can say is incredible skill and attention to detail...

  9. #209
    Registered Member Custer55's Avatar
    Join Date
    Feb 2015

    Member #:2442
    Location
    Custer, WI
    Posts
    641
    NIce work!!! I like your welding crutch Idea. That has to make it lots easier to get a nice weld.
    Hind Sight is always 20/20.
    Brian

  10. #210
    Registered Member MP&C's Avatar
    Join Date
    Dec 2013

    Member #:2017
    Location
    Southern MD
    Posts
    1,293
    Thanks for the comments fellas. The crutch definitely helps out..
    Robert


    MP&C Shop Projects-Metalshaping Tutorials


    Instagram @ mccartney_paint_and_custom


    .

Page 21 of 102 FirstFirst ... 1119202122233171 ... LastLast

Posting Permissions

  • You may not post new threads
  • You may not post replies
  • You may not post attachments
  • You may not edit your posts
  •