wagon progress

Collapse
This is a sticky topic.
X
X
 
  • Time
  • Show
Clear All
new posts
  • MP&C
    Registered Member
    • Dec 2013
    • 1302

    Had a couple questions on what the heck I'm showing in the video.. Haha... so let's clarify..

    We were blocking out the primer on the roof and came across a few low spots. These were low enough to be seen in the paint if left alone, and yet mixing and sanding any filler "repair" would have taken longer than some simple bumping of the low area.

    Since I don't have a Bullseye Pick, we thought to use some gentle hammering with a crowned body hammer beneath into a small shot bag on the top (outside) of the roof. We have some 65 lb pull rare earth magnets that we typically use for our paper patterns, and this showed to have enough strength to pull through the roof skin. So we placed the magnet in the center of the low area, and in order to locate on the underside, would skim across the roof from beneath with the hammer face to see where the pull was strongest. The location was then marked underneath with a sharpie, magnet removed and replaced with the shot bag, and the area was tapped into the shot bag until blocking showed the area where it should be.

    On one of these "marking with a sharpie" efforts, there was a slight bit of dust on the bottom side of the roof, so I gave it a wipe with my hand to displace the dust and instantly saw the outer circle of the magnet. This was much more accurate than using the magnetic pull test, so we changed to this, and the metal bumping effort worked well. We surmise that this "dust" that clings to the magnetic field is likely sanding residue from the primer, or sanding residue from dressing welds inside the car, or both. In any case, it worked well to help transpose the low spot locations to the bottom side for more accurate hammering.
    Robert


    MP&C Shop Projects-Metalshaping Tutorials


    Instagram @ mccartney_paint_and_custom


    .

    Comment

    • 55chevysedanX4
      Registered Member
      • Mar 2018
      • 42

      I have used black diamond oxide for sand blasting and I bet a small amount applied on the bottom would show up well.

      Comment

      • DocHarley
        Registered Member
        • Jun 2015
        • 111

        Is that paint I see? Won't be long now Robert, your almost done! hehe

        Comment

        • MP&C
          Registered Member
          • Dec 2013
          • 1302

          Well, we have the new engine dropped in place.


          ....and she decided on fuel injection over the 770 CFM Holley (still new in the box). Of course this meant and O2 sensor bung on an already finished H-pipe. The bung that came with the FI Tech kit matched well to the outside radius of the exhaust pipe, but was rectangular in shape, and included a gasket for a "clamp installation"... As we aren't having any of that nonsense, the bung found it's way into the lathe, where a round outer perimeter will serve better for our TIG welded installation..


          And after some touch up at the powder coaters....


          Next, our arm rest enclosures for the rear seat needed a base for the padded arm rests. So Jake used the Go Kart slick to add some radius to 14 gauge cold rolled steel in order to match the enclosure...


          .....and trimmed to fit....


          These will be held in place with Mopar style door panel retainers, so we can still have ready access for any future maintenance on window mechanisms.

          Robert


          MP&C Shop Projects-Metalshaping Tutorials


          Instagram @ mccartney_paint_and_custom


          .

          Comment

          • MP&C
            Registered Member
            • Dec 2013
            • 1302

            Originally posted by DocHarley
            Is that paint I see? Won't be long now Robert, your almost done! hehe

            Yes, say it isn't so! 
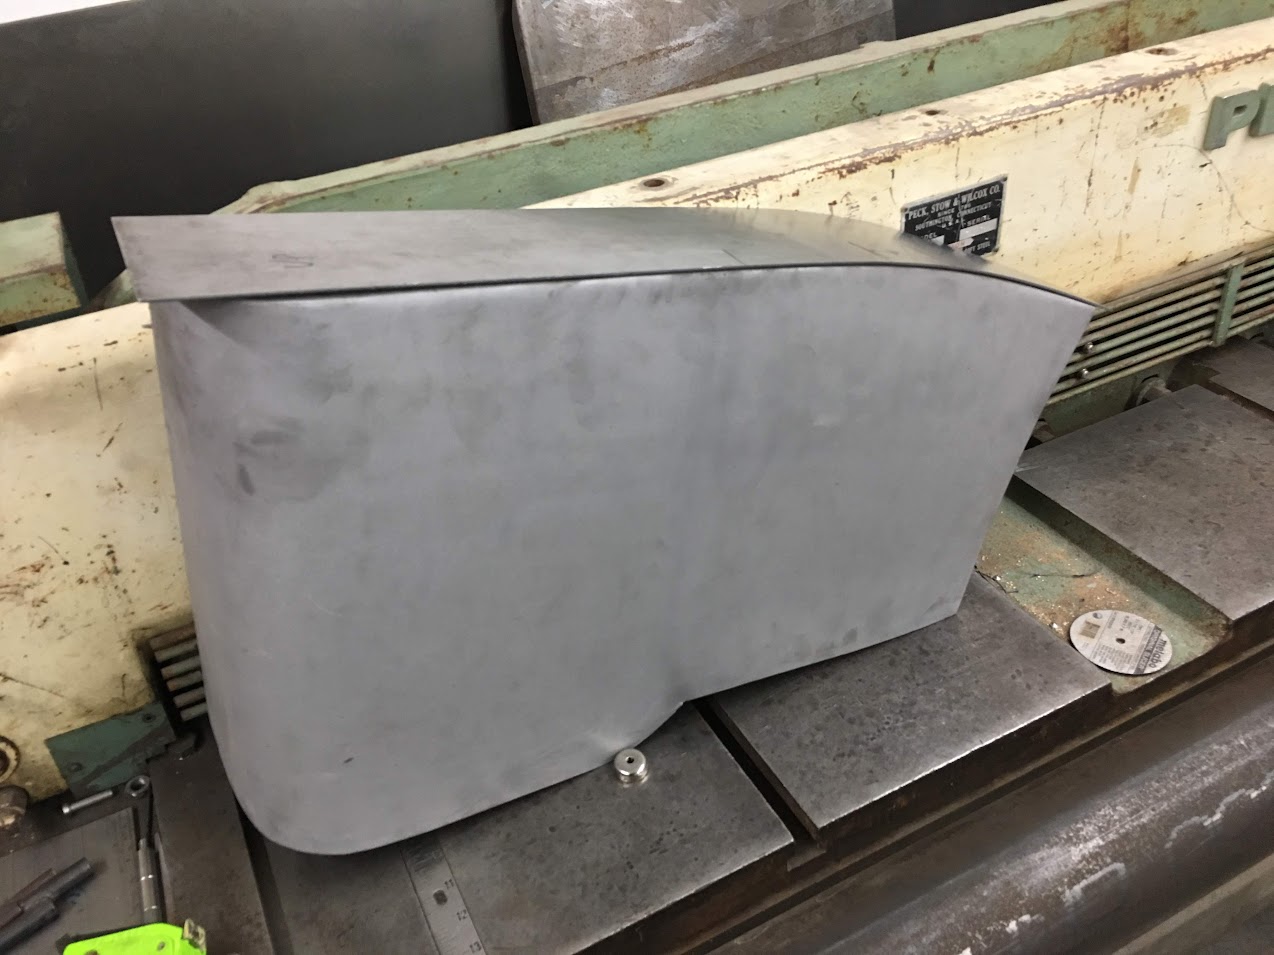
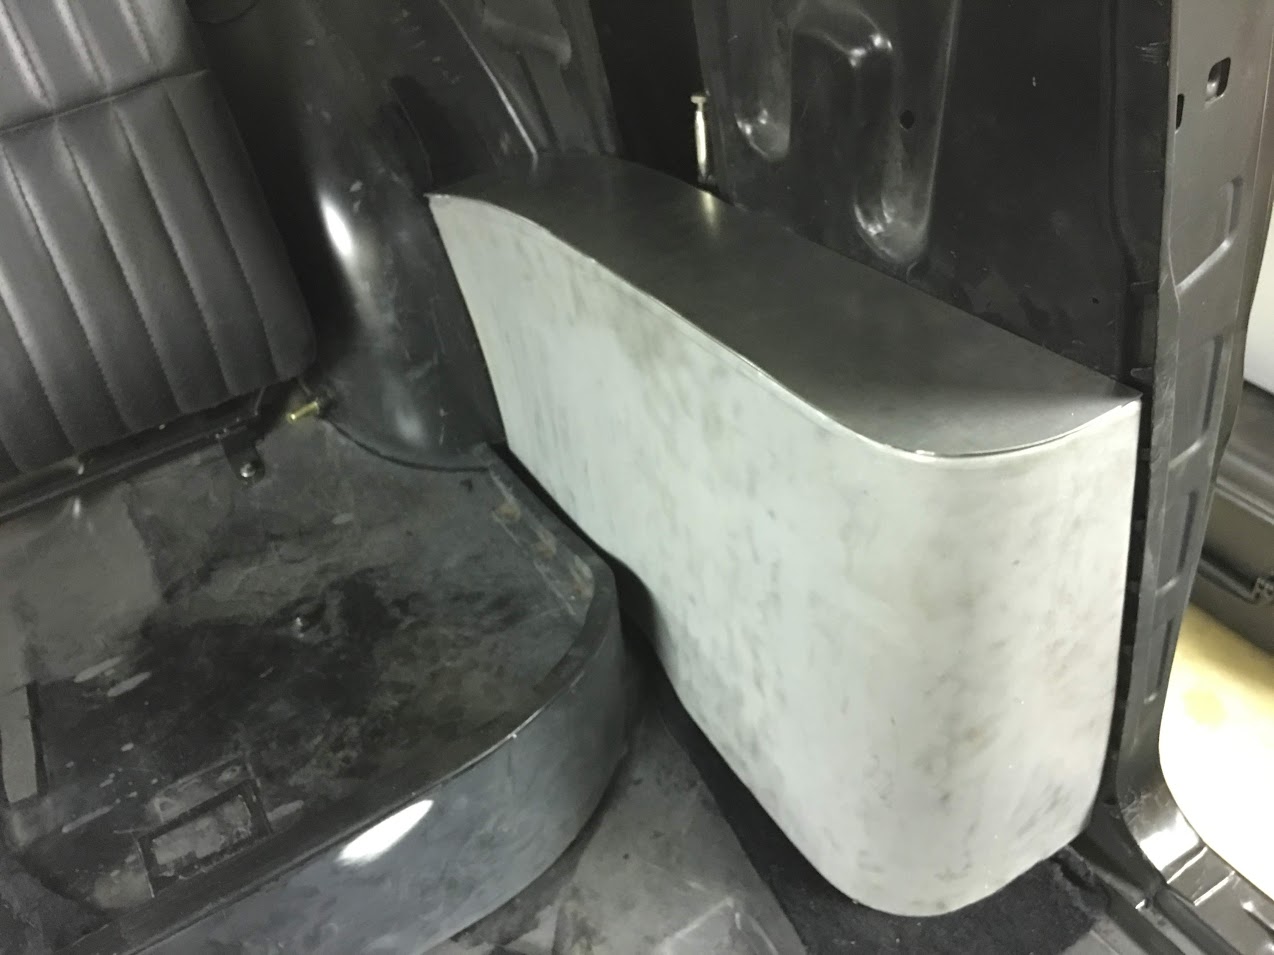
Unfortunately any deviation from stock means one-off parts, and we're in the midst of making all those bits right now, So light at the end of the tunnel, but not so much that it blinds you.
            Robert


            MP&C Shop Projects-Metalshaping Tutorials


            Instagram @ mccartney_paint_and_custom


            .

            Comment

            • MP&C
              Registered Member
              • Dec 2013
              • 1302

              Progress on the wagon...

              Mike got the new fuel tank all prepped with the fuel pump...


              Tank mocked up so we can do test fit/fabrication of the filler neck down to the tank...


              An elbow will be needed to join these two together.


              The local NAPA store had some smooth elbow exhaust pipe that we used to fabricate the complete filler neck, all the pieces were TIG welded together, and Dana powder coated the assy black for us.


              Bracket we fabricated for bolting to the floor flange.


              Next, the drip rail area was scuffed well and the car inverted so we can seal the bottom of the drip rail to the top of the quarter area. This is using the self leveling sealer, so we needed to counter the gravity effect.


              Next time we'll get the top side done..
              Robert


              MP&C Shop Projects-Metalshaping Tutorials


              Instagram @ mccartney_paint_and_custom


              .

              Comment

              • MP&C
                Registered Member
                • Dec 2013
                • 1302

                We found a flat spot in the drip rail that needed to match the rest, found a suitable worn jaw pair of Vise grips that was ripe for modification.


                Robert


                MP&C Shop Projects-Metalshaping Tutorials


                Instagram @ mccartney_paint_and_custom


                .

                Comment

                • WagonCrazy
                  Registered Member
                  • Mar 2012
                  • 1865

                  I dig the ingenuity of your tool making Robert. Good work and thank you for sharing video content. I learn by seeing & then doing....
                  1957 Nomad- LS1/T56 on C4 chassis
                  1959 Fleetside Apache 1/2 ton, shortbed, big window, 327ci.

                  Comment

                  • 567chevys
                    Administrator
                    • Oct 2010
                    • 2478

                    Thanks for showing us Robert,
                    Now I can try to fix my rail on my car

                    Sid
                    sigpic
                    1955 2 DR Post
                    1937 Chevy Coupe
                    2023 Ford Super Duty F350 TREMOR
                    2019 Corvette Z06
                    1955 Chevy Nomad
                    1935 Ford 2dr Slant back I have 4

                    Comment

                    • chevynut
                      Registered Member
                      • Nov 2011
                      • 11003

                      It's cool and all, but where's the GREEEEEEEEEN?
                      56 Nomad, Ramjet 502, Viper 6-speed T56, C4 Corvette front and rear suspension


                      Other vehicles:

                      56 Chevy 2-door BelAir sedan
                      56 Chevy 210 4-door sedan
                      57 Chevy 210 4-door sedan
                      1962 327/340HP Corvette
                      1961 Willys CJ3B Jeep
                      2001 Porsche Boxster S
                      2003 Chevy Silverado 2500 HD Duramax
                      2019 GMC Sierra Denali Duramax

                      Comment

                      • NickP
                        Registered Member
                        • Mar 2012
                        • 4158

                        Splendid work!

                        Comment

                        • MP&C
                          Registered Member
                          • Dec 2013
                          • 1302

                          Well, we've had about a month long hiatus as I've been in VA for the day job. Back to some wagon progress, we made a sanding block for the drip rail, this will get some PSA paper applied and sand away!


                          We did have a back up and punt moment. The factory style radiator that we had from Be-Cool did not have quite enough room behind the core support to use a cooling fan. Plus, it was questionable if the size would be enough for the 383 cooling needs. So we are going to use a cross flow, specifically the aluminum version for a V8 S10 pickup. Of course, this will require modification of the core support.


                          Shown above mocked up with the splash pan, the stiffening edge along the c-channel follows the splash pan. We need to insure any future version also clears the splash pan. Also note the three drilled holes in the side adjacent to the blue sharpie. These were added for our version of the AC car battery tray, so having the new upright just outside the old will allow us to bolt to the new upright on the inside, and keep the battery tray in the same locaton.


                          So the hired help started grinding out the spot welds that hold the lower radiator baffle in place.


                          After some modification, one side is taking shape. We will likely add some rings to the weldment to route the water hoses to the front side of the core support.


                          .....and more progress on the core support... Note comparison to old core support, we've added 3" in width to the opening.


                          As with most changes we've done to the wagon, we try to keep them subtle enough that they could be mistaken for factory.


                          Like so.....


                          Still need to add mounting brackets for the radiator and fabricate a new baffle, but happy with the results so far..

                          Yesterday we got some seam sealer applied in the drip rail. I had tried a few different brands over the years and have to say I'm really liking the Norton 97121 epoxy sealer. Really smooths out well.


                          Spreader was modified to help get things consistent, as well as pull the sealer up into the hemmed edge...

                          Robert


                          MP&C Shop Projects-Metalshaping Tutorials


                          Instagram @ mccartney_paint_and_custom


                          .

                          Comment

                          • Rick_L
                            Registered Member
                            • Apr 2012
                            • 4676

                            Wow, your radiator support widening job was way more elegant than mine! Nice work.

                            Comment

                            • Custer55
                              Registered Member
                              • Feb 2015
                              • 688

                              Nice job on the core support mods. I have been looking at S-10 V8 conversion radiators for my 55 so I'll be interested on how that works out.
                              Brian
                              Brian,

                              Comment

                              • MP&C
                                Registered Member
                                • Dec 2013
                                • 1302

                                We couldn't go any wider because of needing to bolt up our AC car battery tray and still have all of its parts still align, so the uprights had to go in that location. With our inside width at ~ 26.5" and the core width at 26.13", we will need to use some round sleeves for the hoses to come through the uprights. So Rick, it may be elegant now, but it has a good case of ugly on the way! Good thing for side baffle covers!
                                Robert


                                MP&C Shop Projects-Metalshaping Tutorials


                                Instagram @ mccartney_paint_and_custom


                                .

                                Comment

                                Working...