Really cool work!!


Really cool work!!

Robert,
Whatever you are working on is always of interest to we 'un-initiated'...
IS that a 'time clock' you repaired? Do you have employees and use that in your business?


Yes, time clock we use in the shop. Beforehand, I was always forgetting to keep track of time, so this helps tremendously.. Bought at an auction for $25, and too much of a tightwad to buy a new one so we had to fix it..
What won't you work on.
Originally Posted by markm

It's all a challenge that helps fill the experience void to draw on for the next challenge. A vicious circle indeed..
More blocking, then more epoxy...
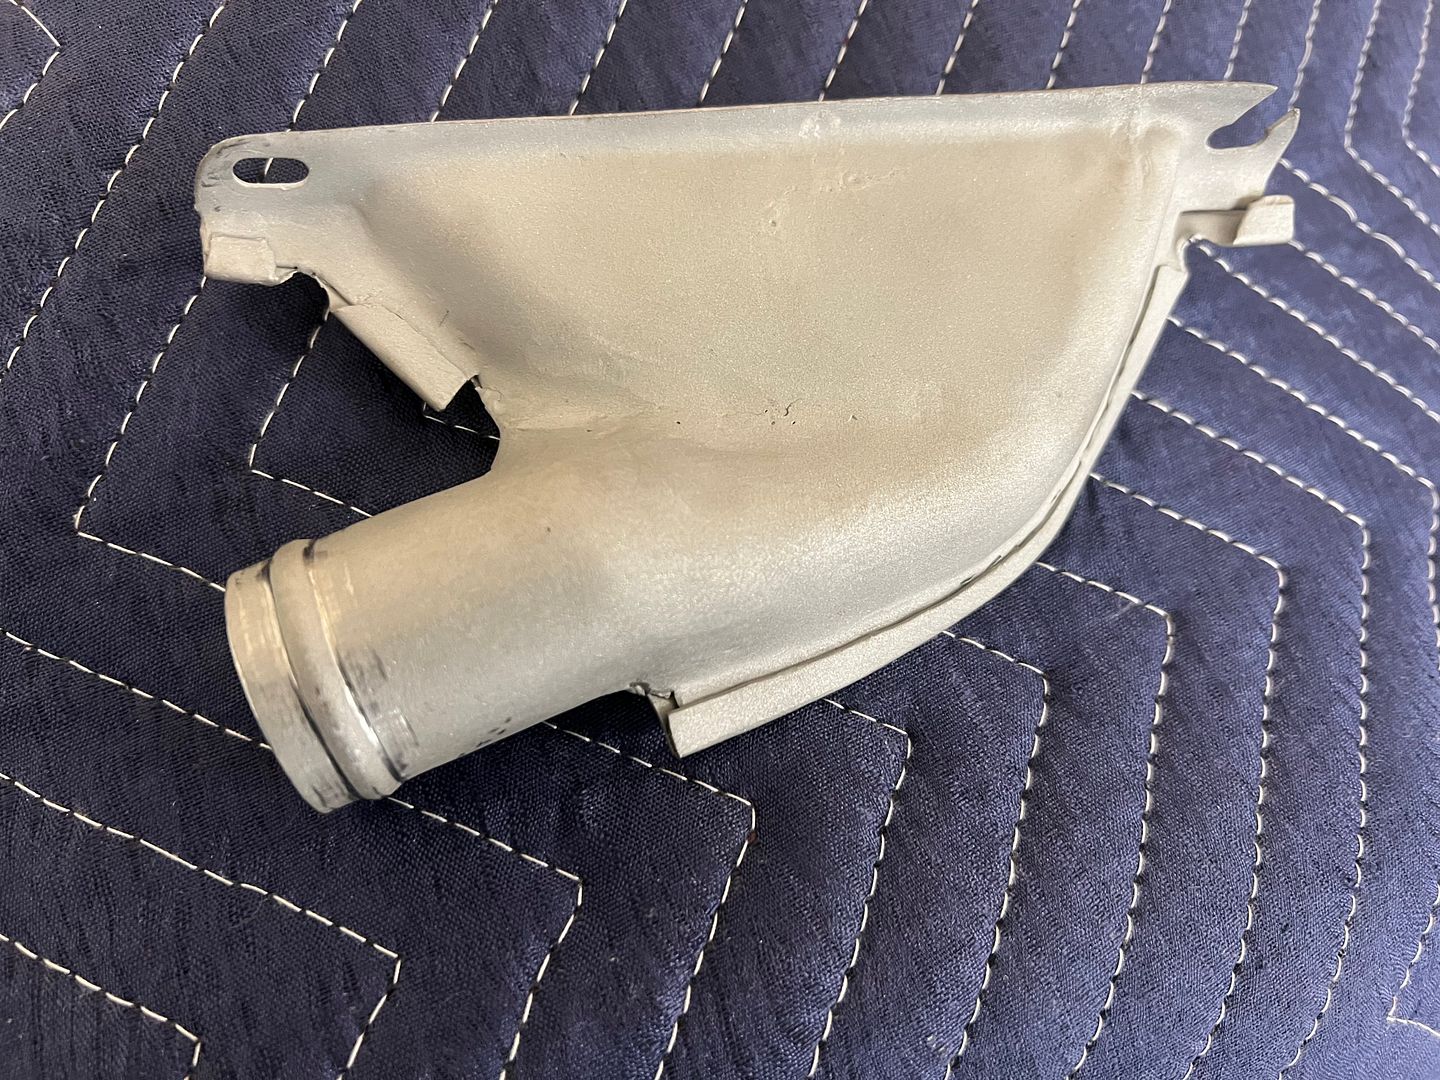
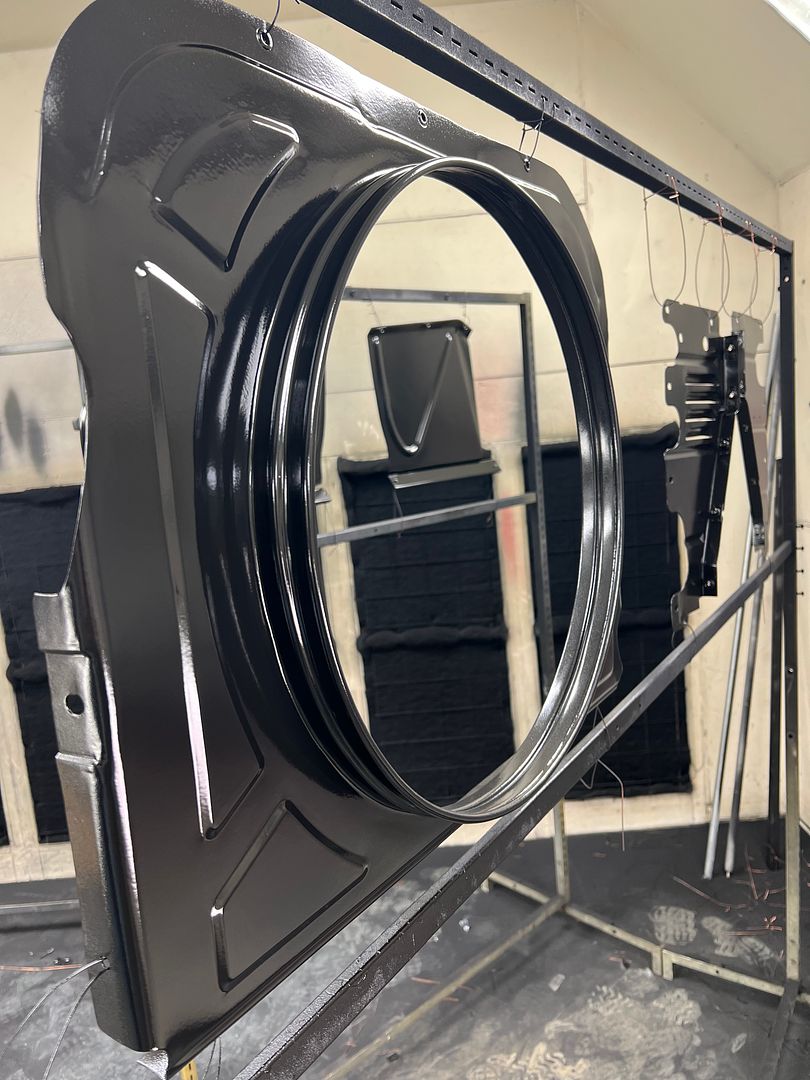
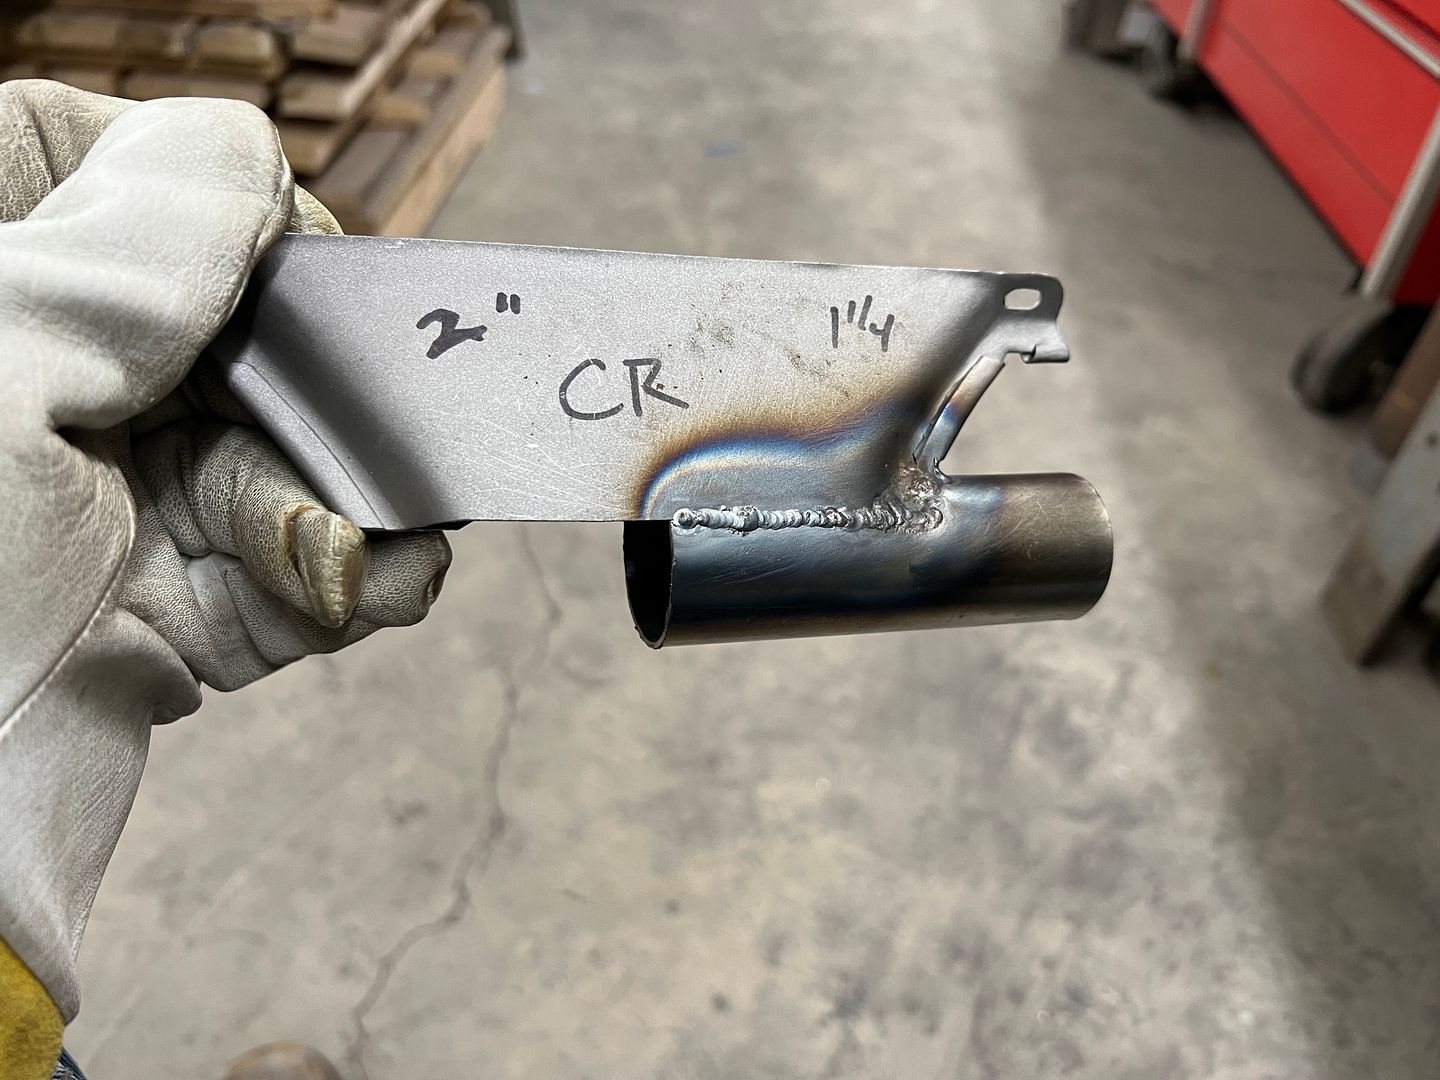
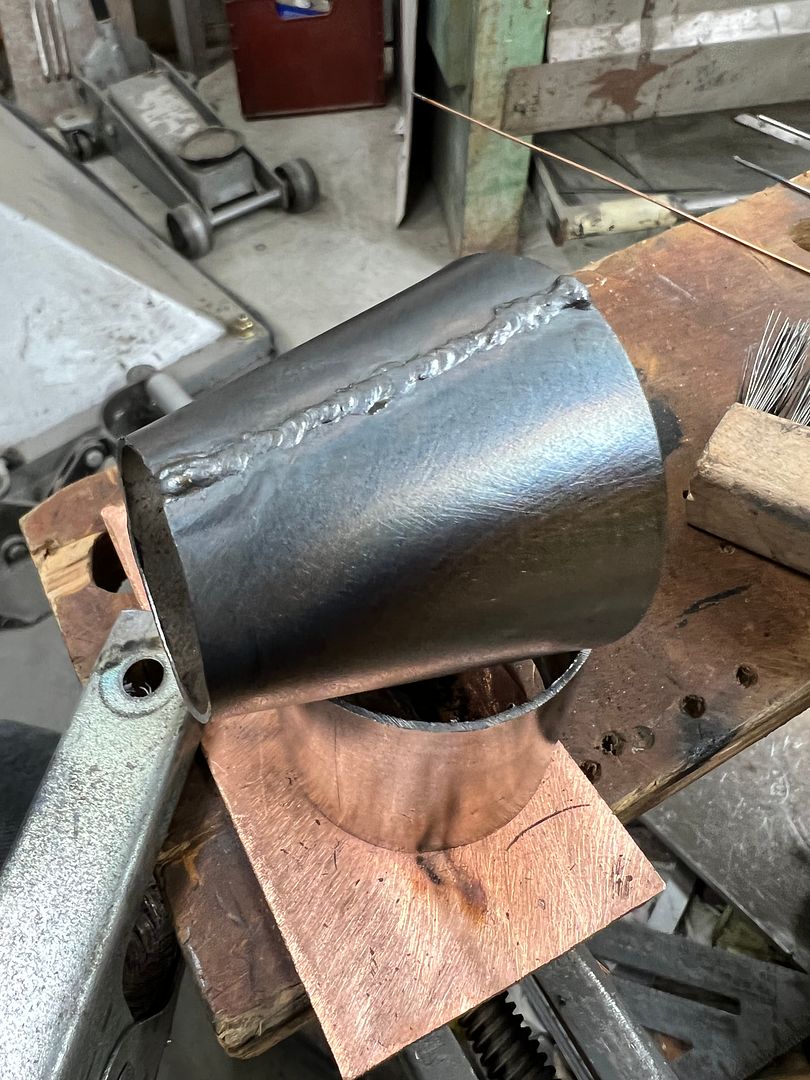
Another hurdle in the way of running our wiring under the dash, we need to address the defrost vents for the Vintage Air unit. What they send is cheesy at best, and given they only send two vents where Chevy installed 4, we're going to go another route..
The factory piece does take up quite a bit of real estate, and now interferes with the raingear wiper system and the VA heater box.
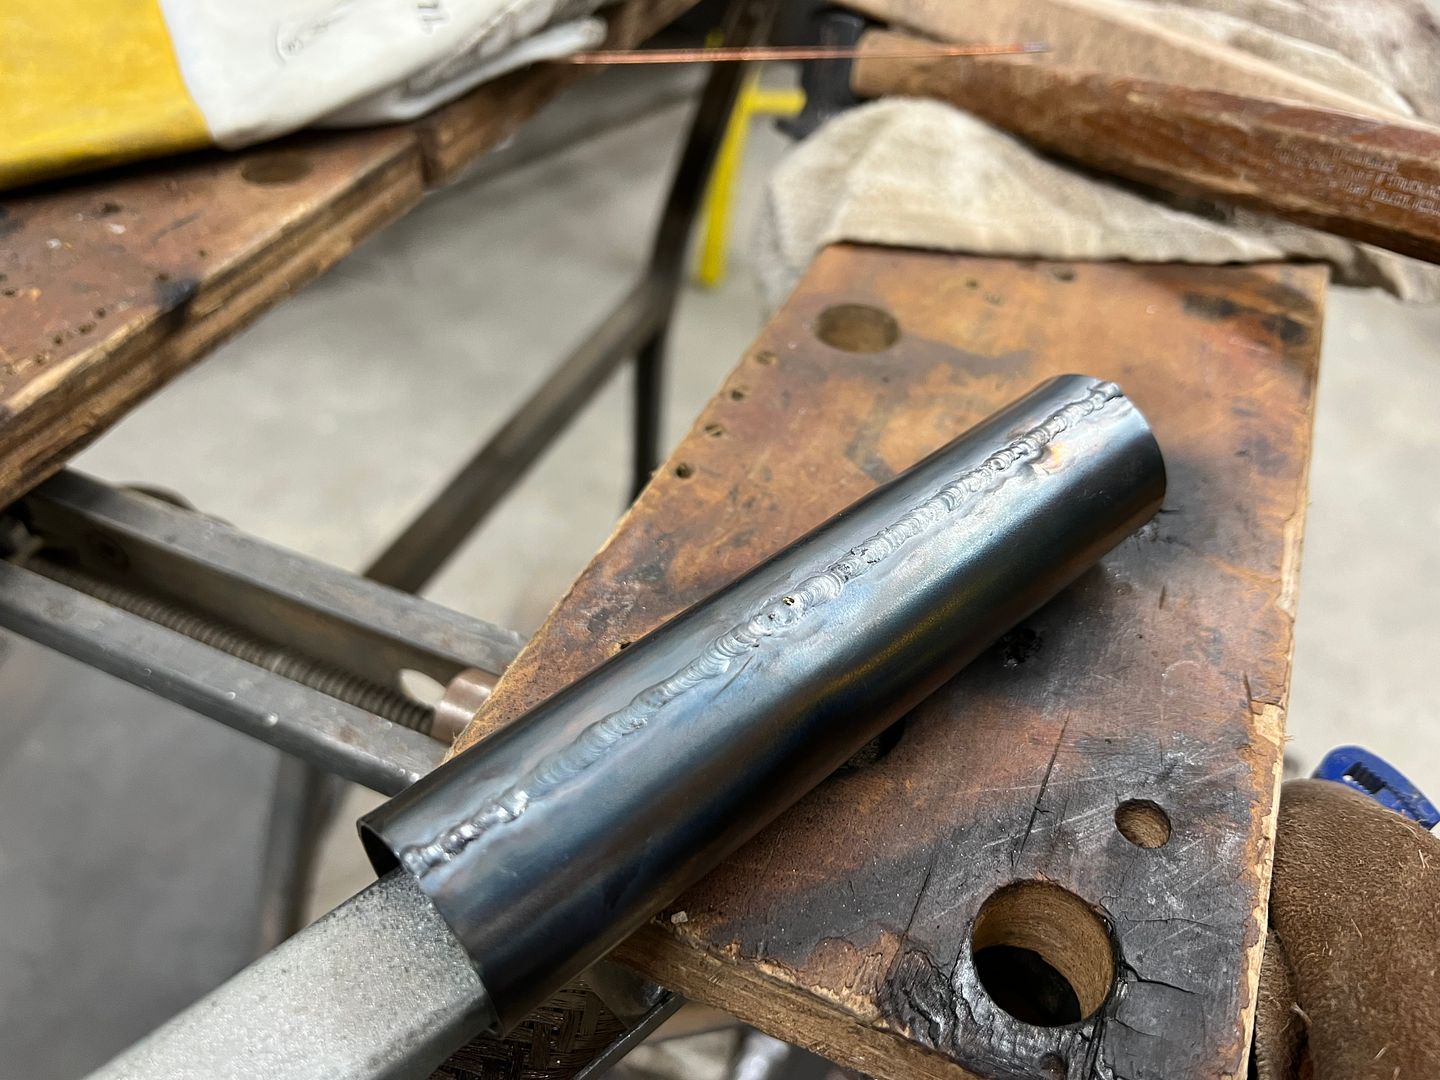
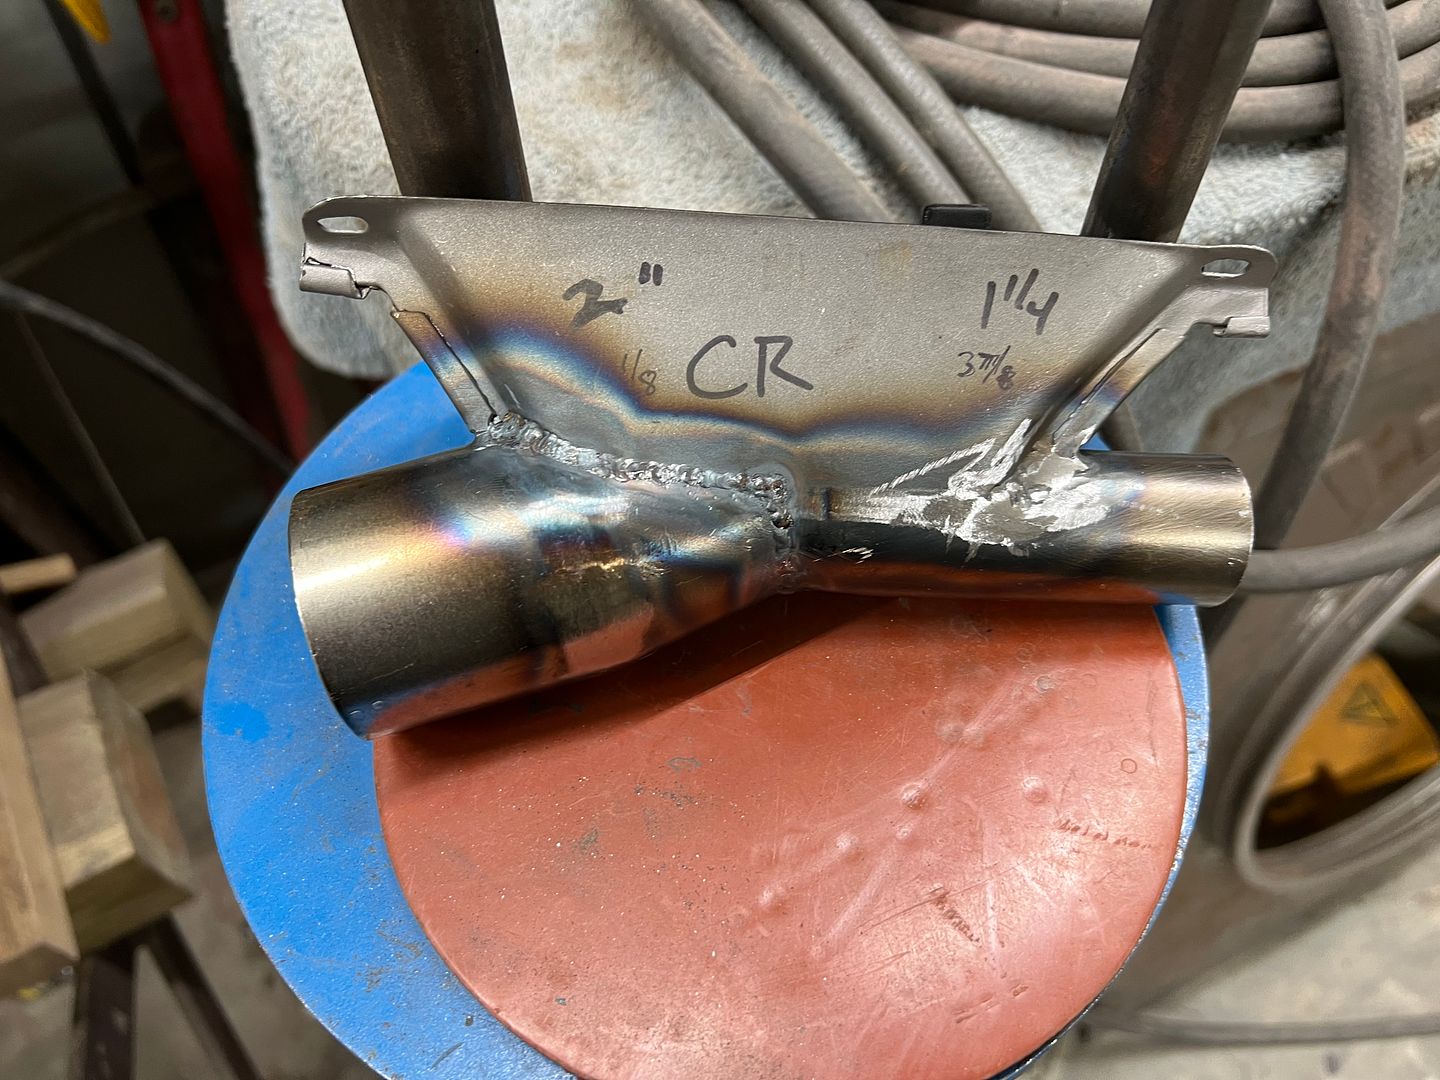
So all things considered, we plan on using the original vent top portion and adapt tubing in the equation to make use of a more flexible hose arrangement. The VA has two 2" outlets at the top for defrost, so we will use a 2" tube to feed the center two vents, and 1-1/4" tubes to feed to the outer vents.
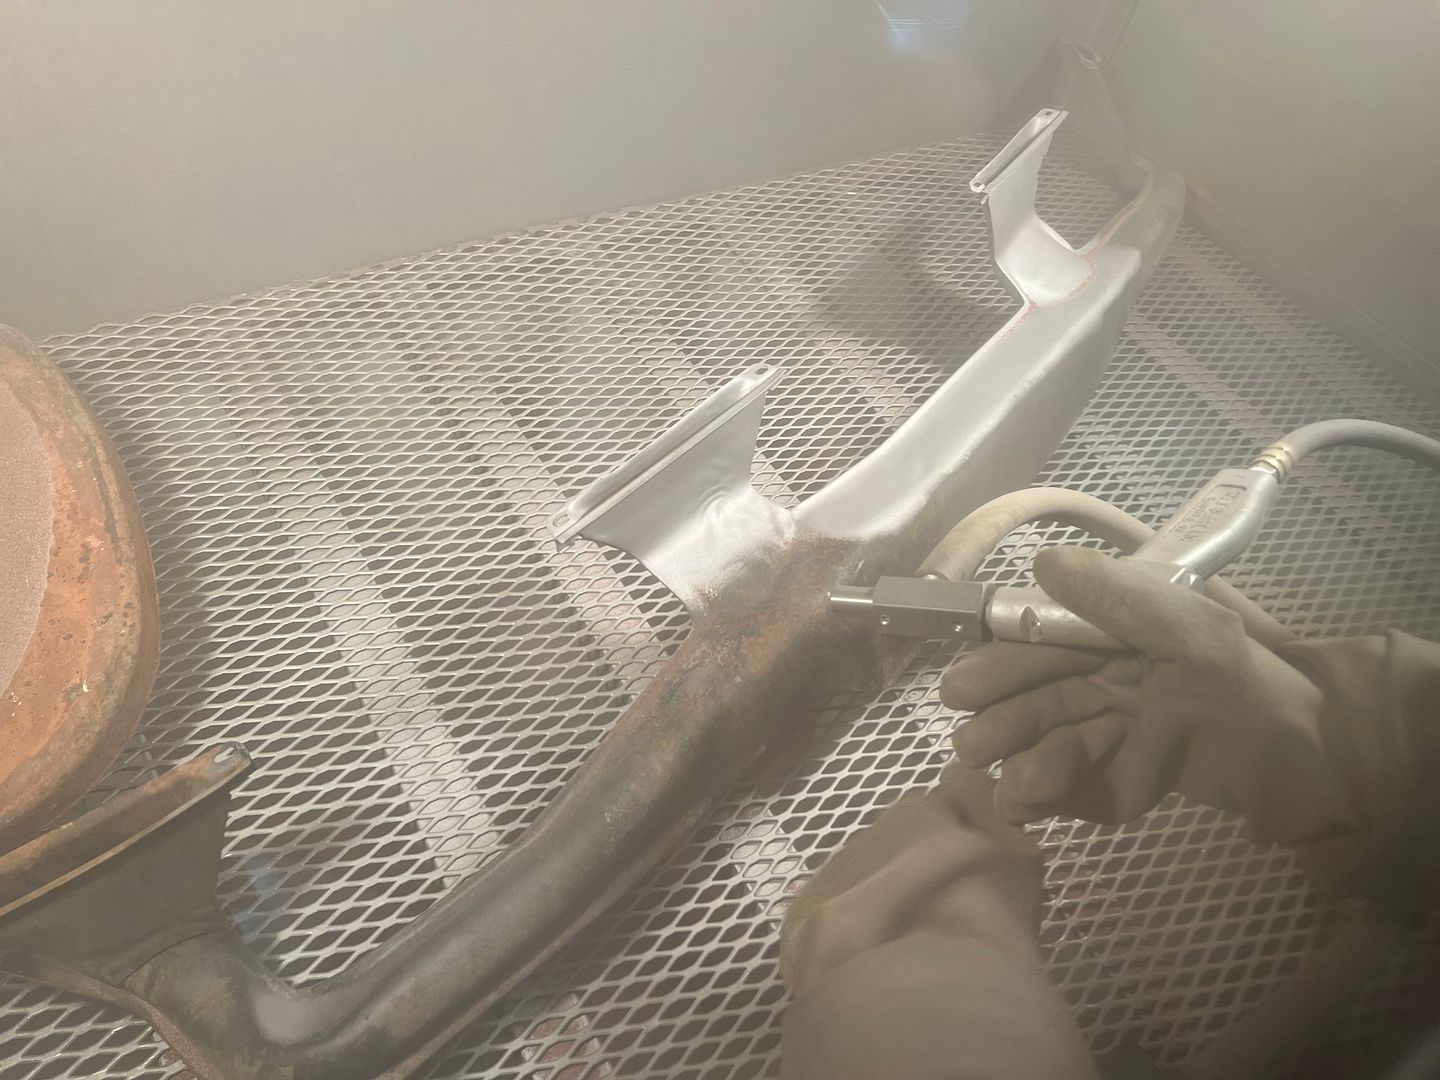
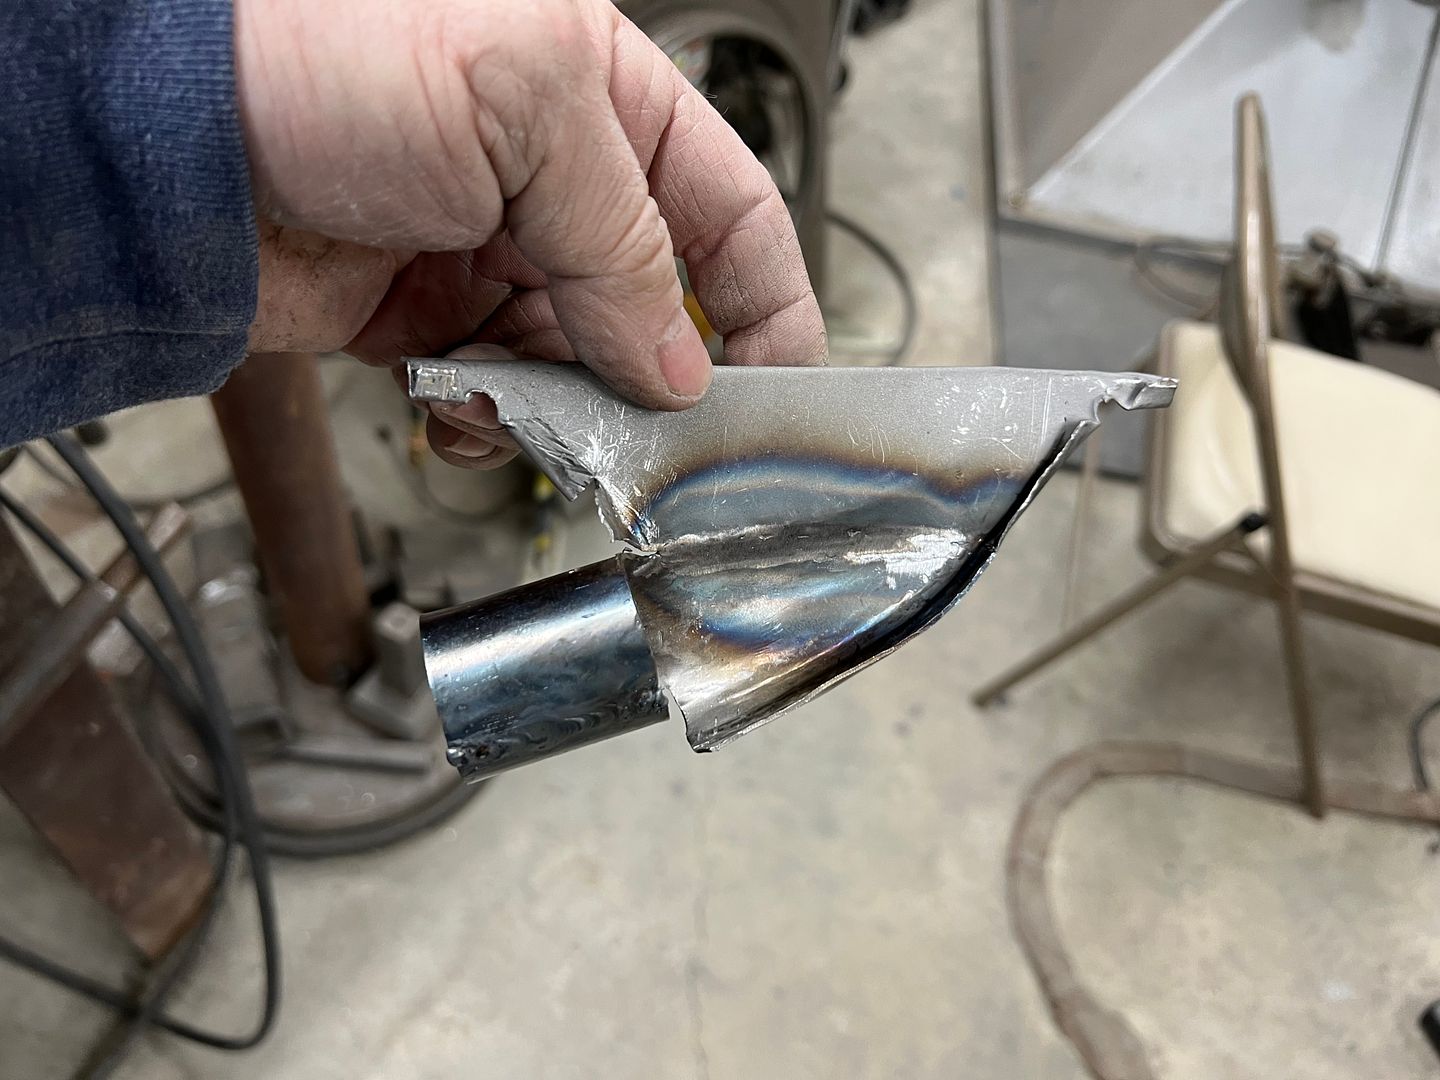
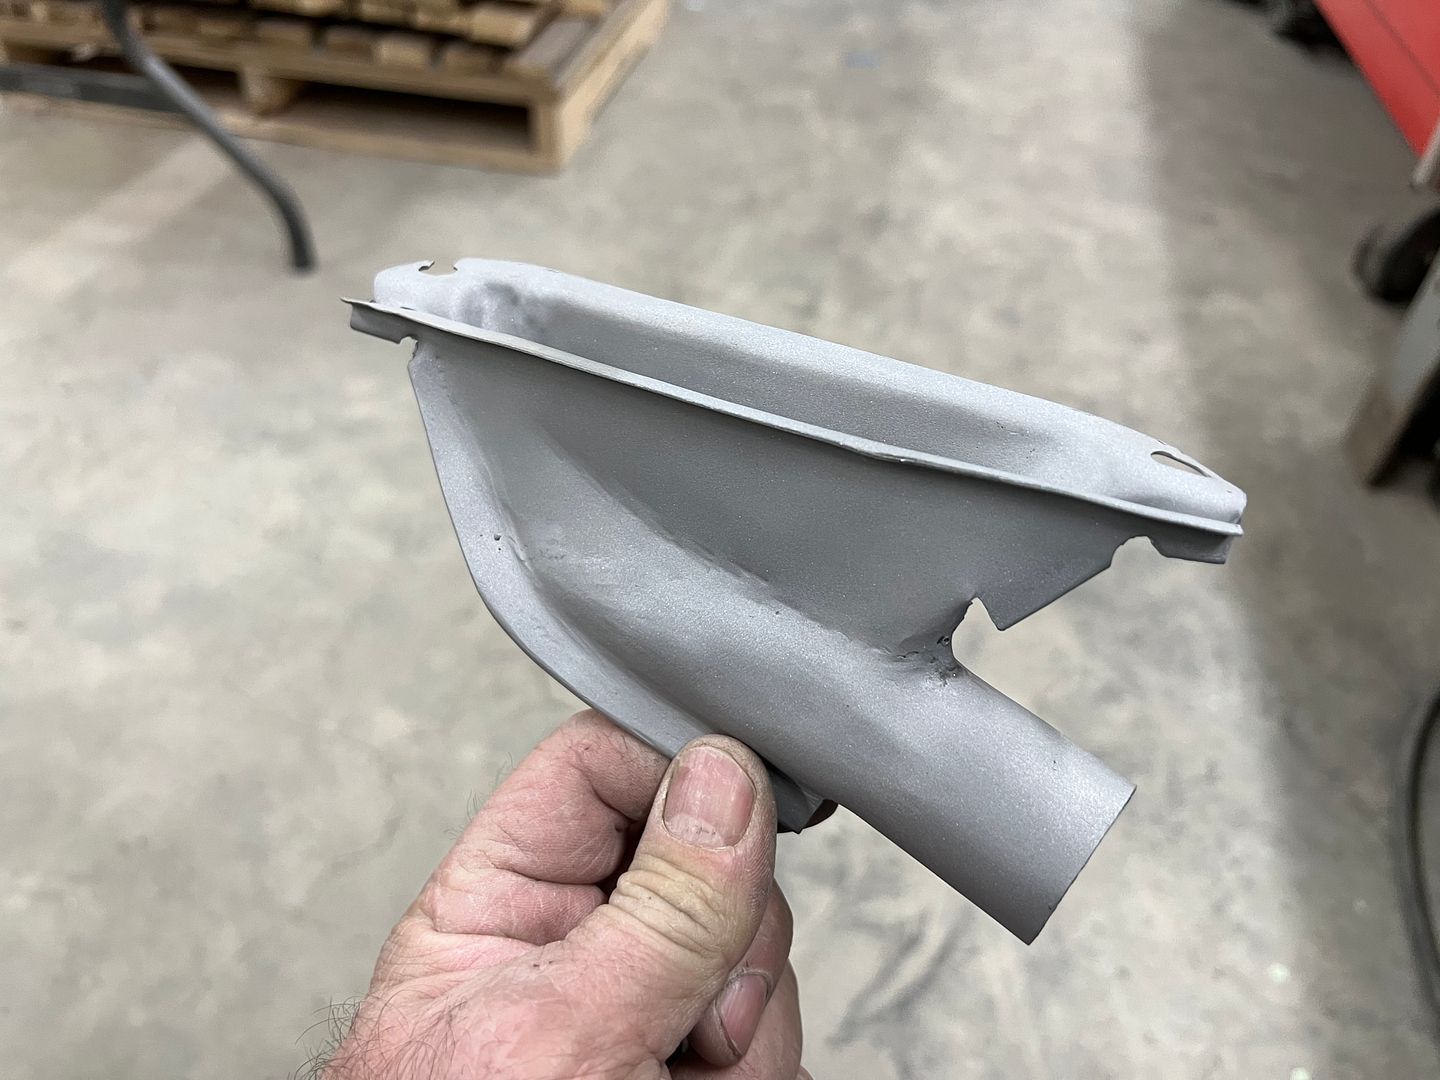
Missed some of the details with that one, a bit more for the center vent..
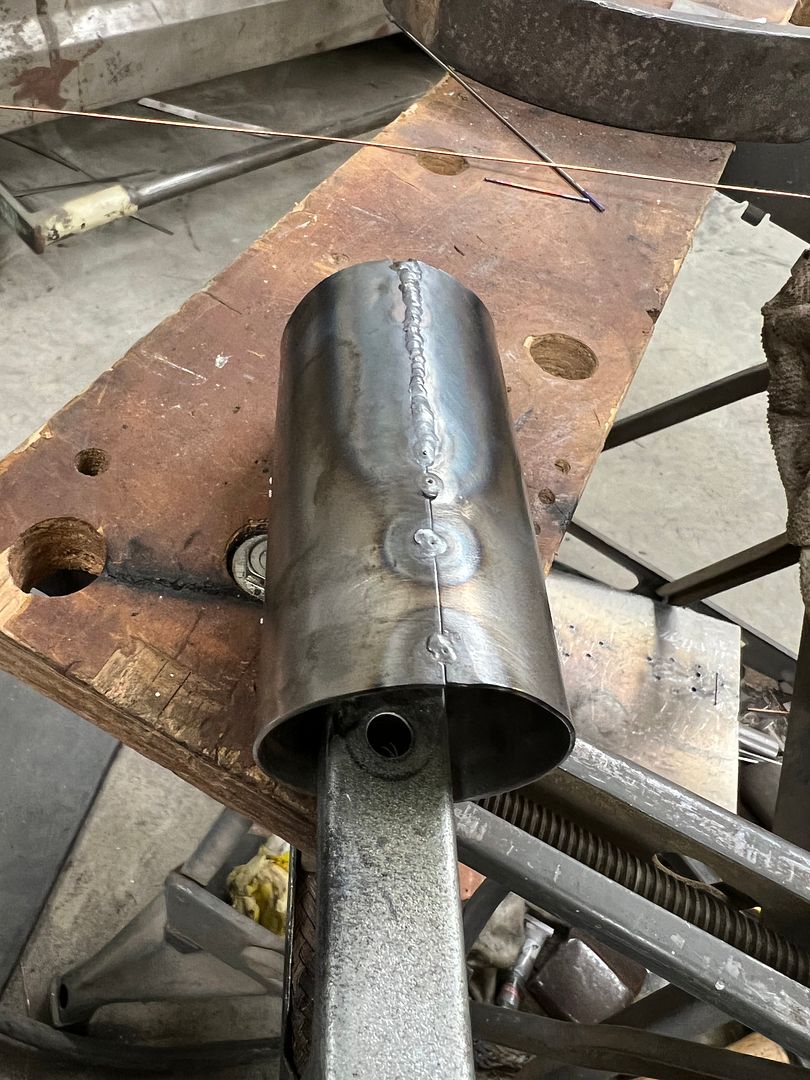
Forming our transition from 2" to 1-1/4".....
As the ports from the VA point almost straight up, the 2" tubes were welded at a slight incline to remove any sharp bends in the supply hose.
.....as a follow-up, our local artist has been working on the other side of the Lennox..
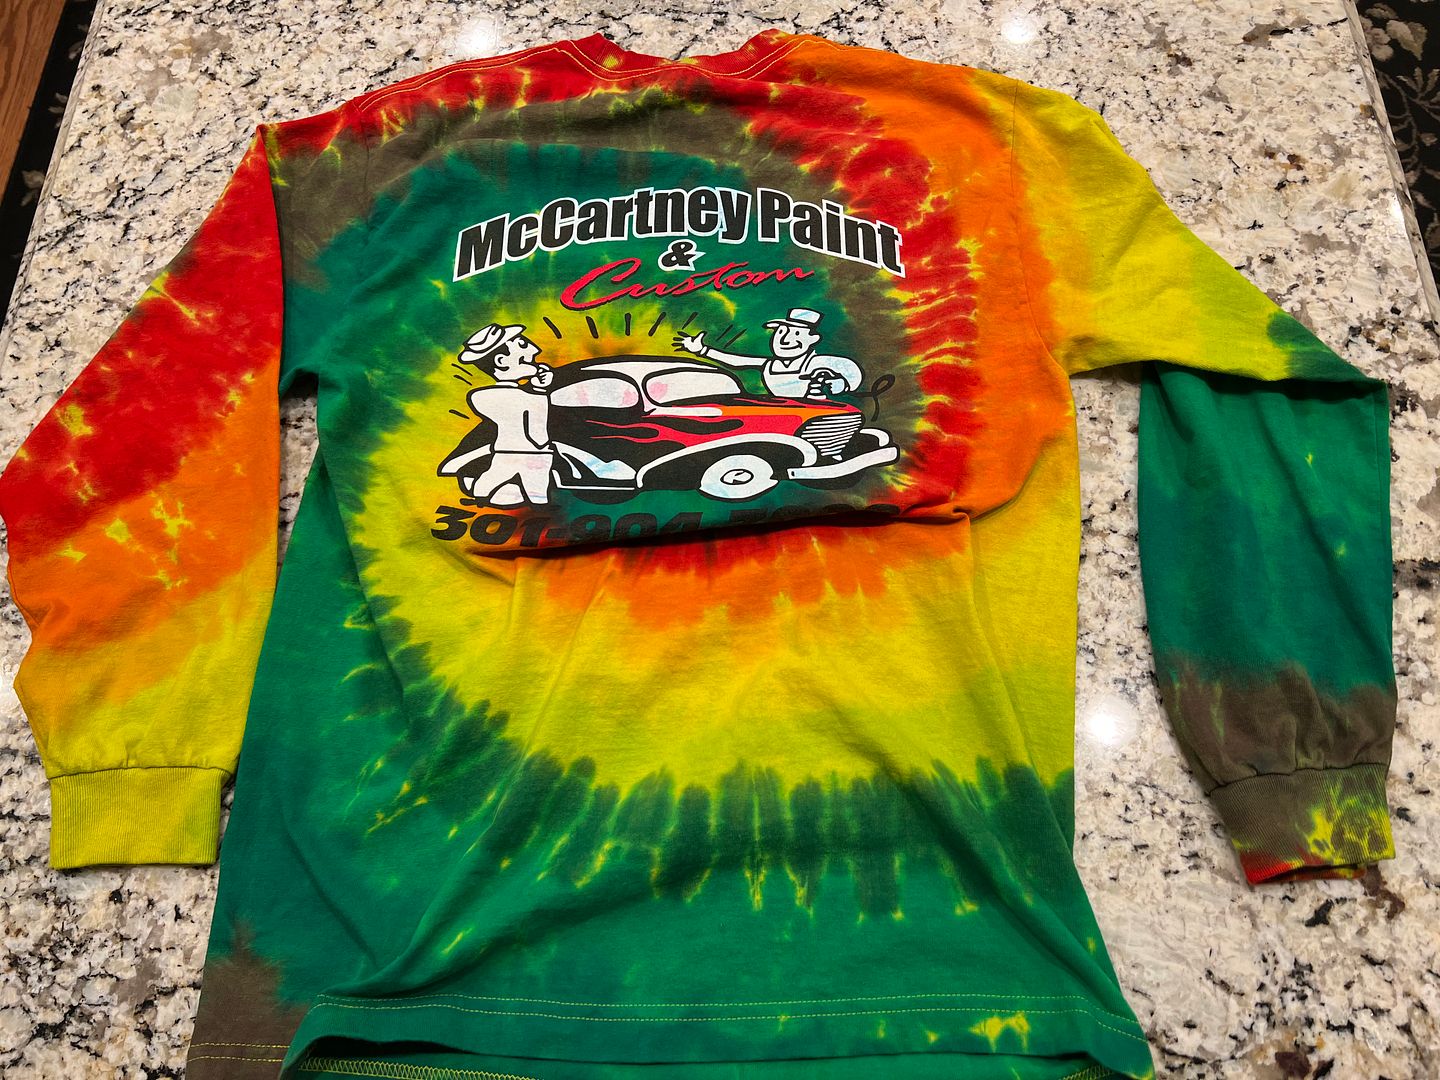
and we have been working with some local hippies to explore other shop shirt options.. This was done on the yellow shop shirt so naturally that base color limits what results you will get...

Nice work as always Robert!!
Brian
I'm at a lost for words, my hat is off to you and your talent as always.
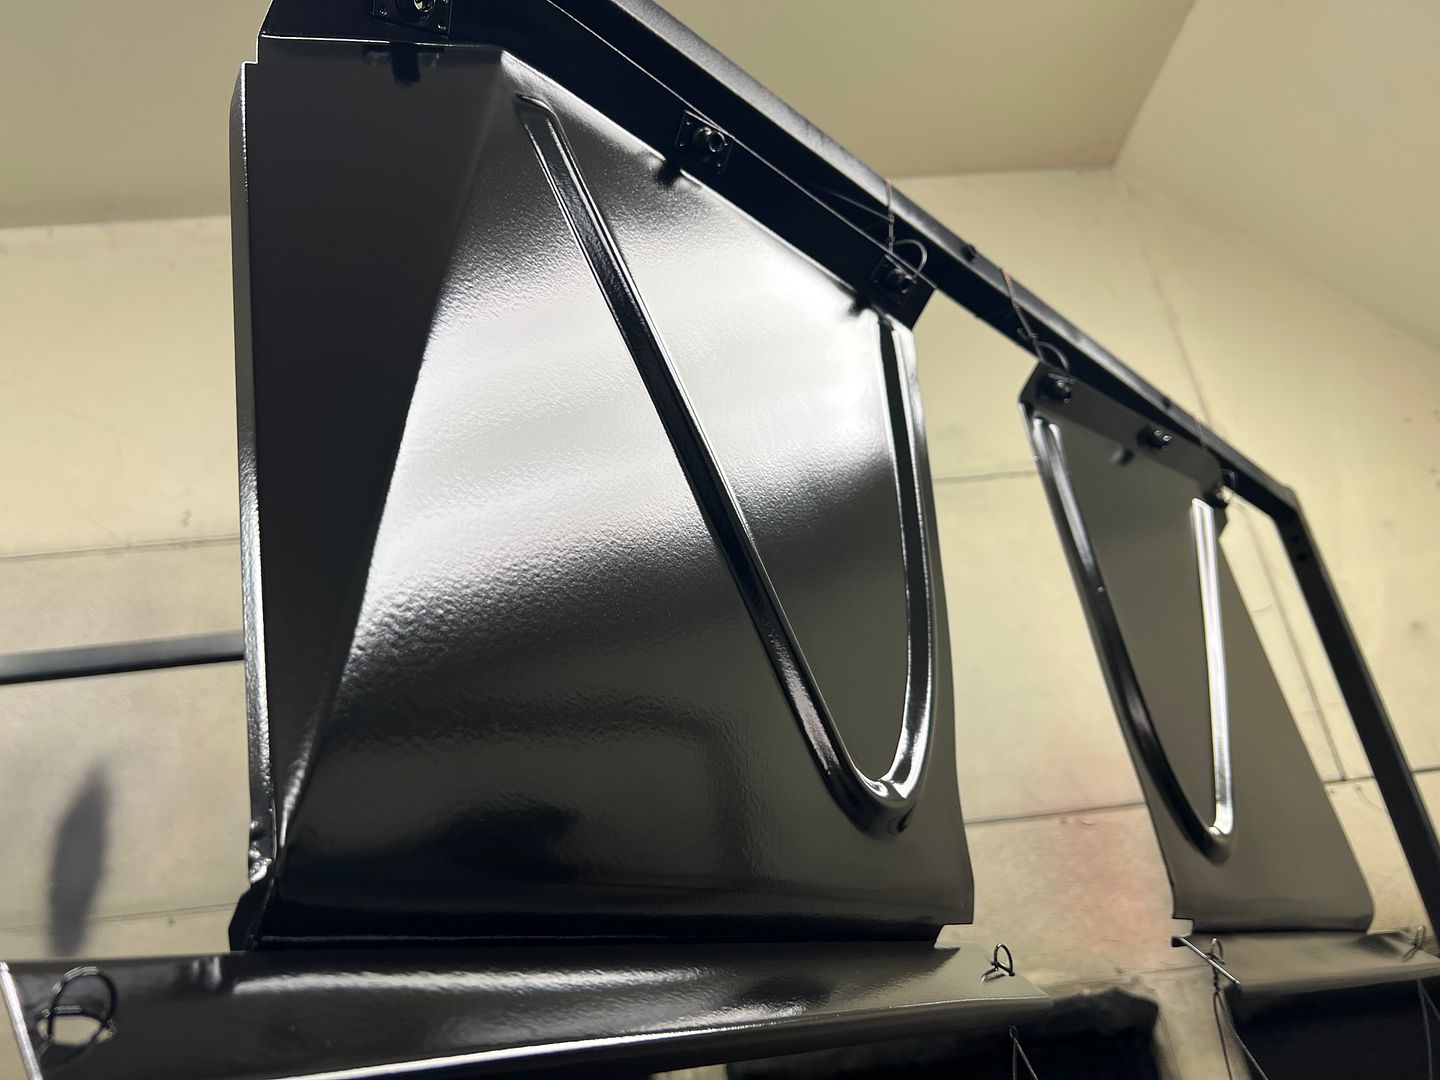
I would love to have a shroud like that on my 56.
Thanks for the comments!!
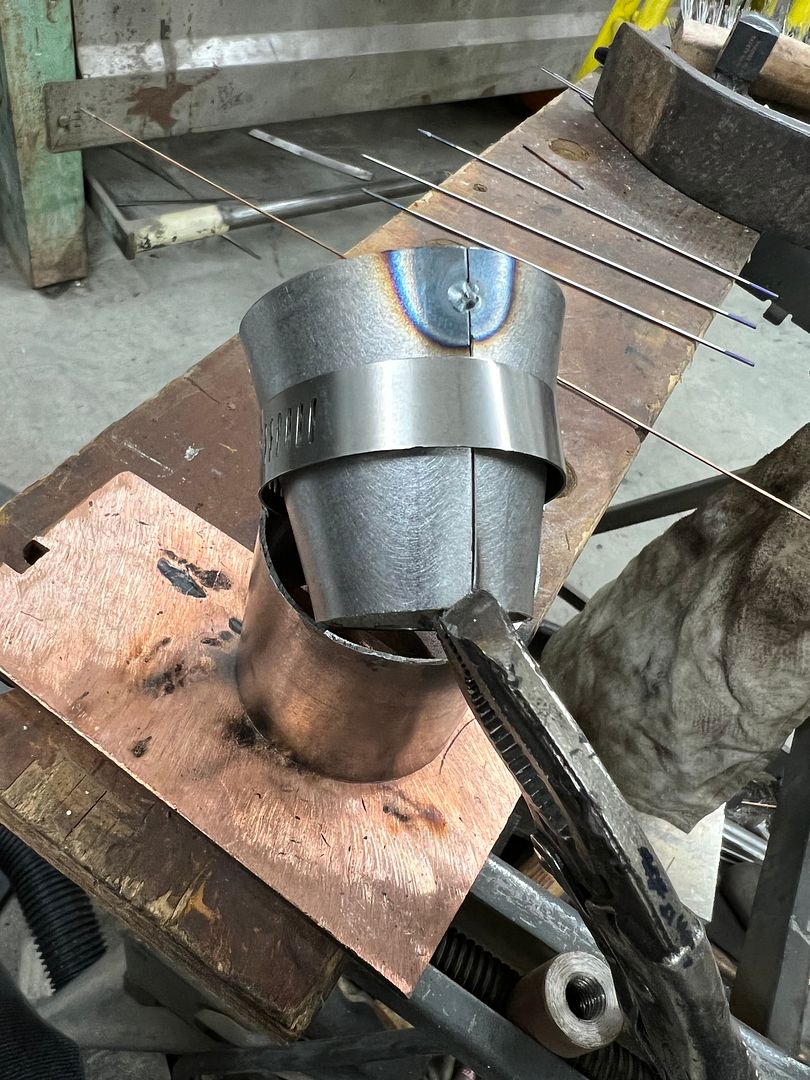
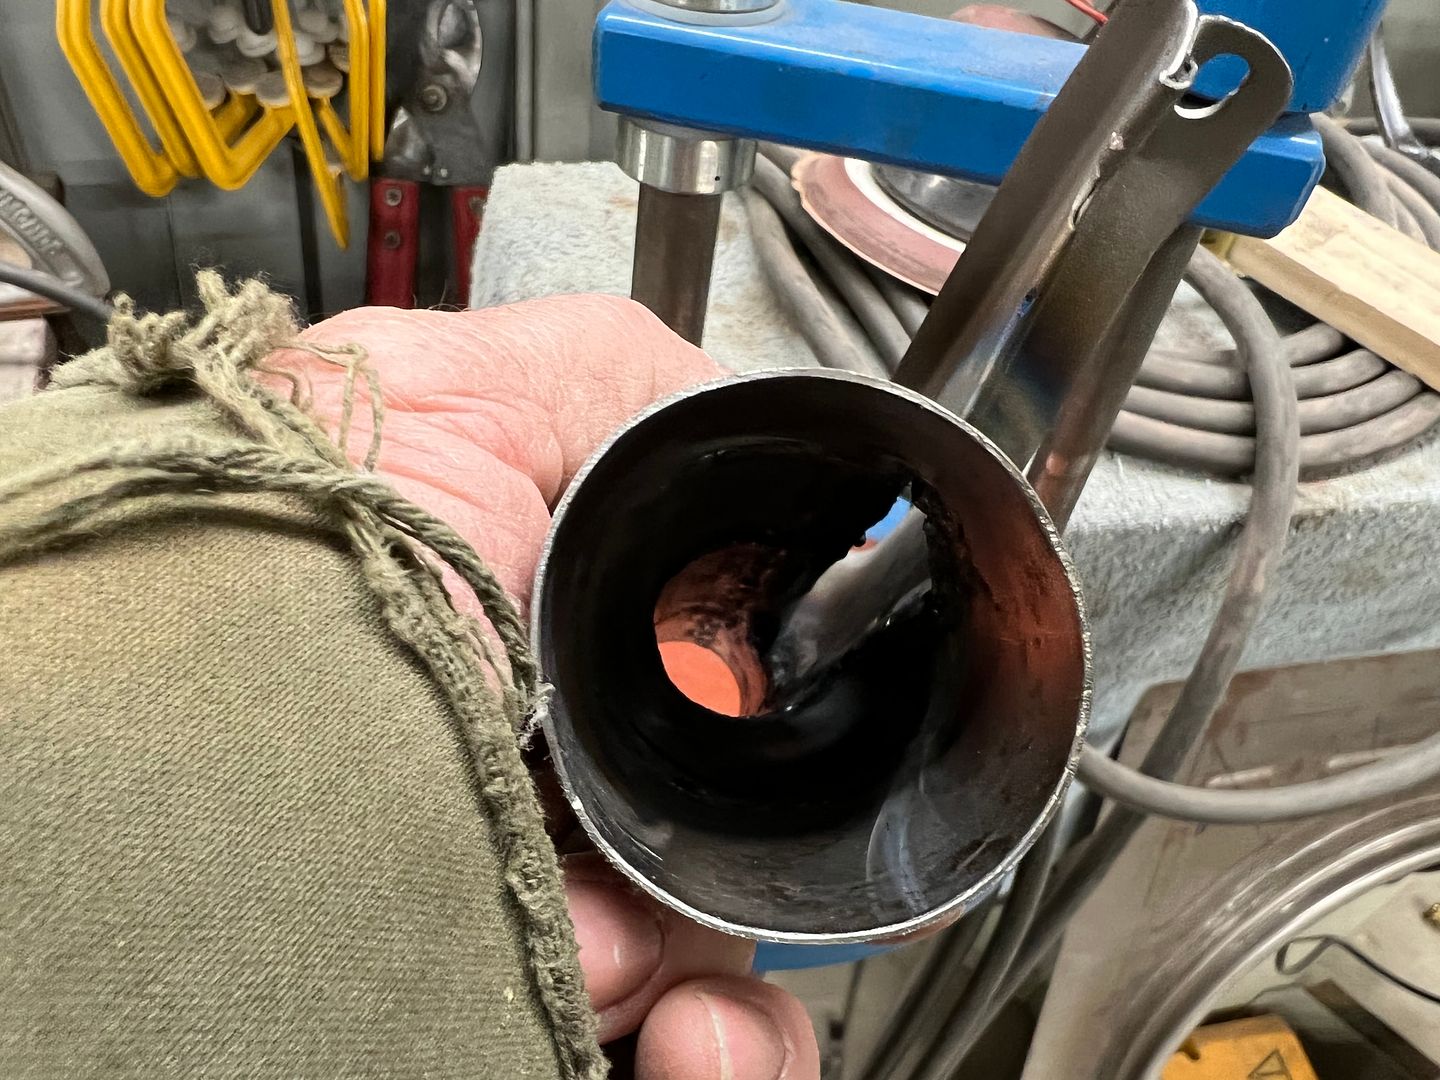
In adapting our defroster vents for the wagon, we needed to add a bead in the tubing to better retain the hose attached. The beading die we made for this purpose on the bead roller was too large to fit the 1-1/4" tube, so another tool is in order.. Our worn out Southbend was used to make the round profiles, with a step in the bottom die to act as a backstop for better consistency in bead placement.
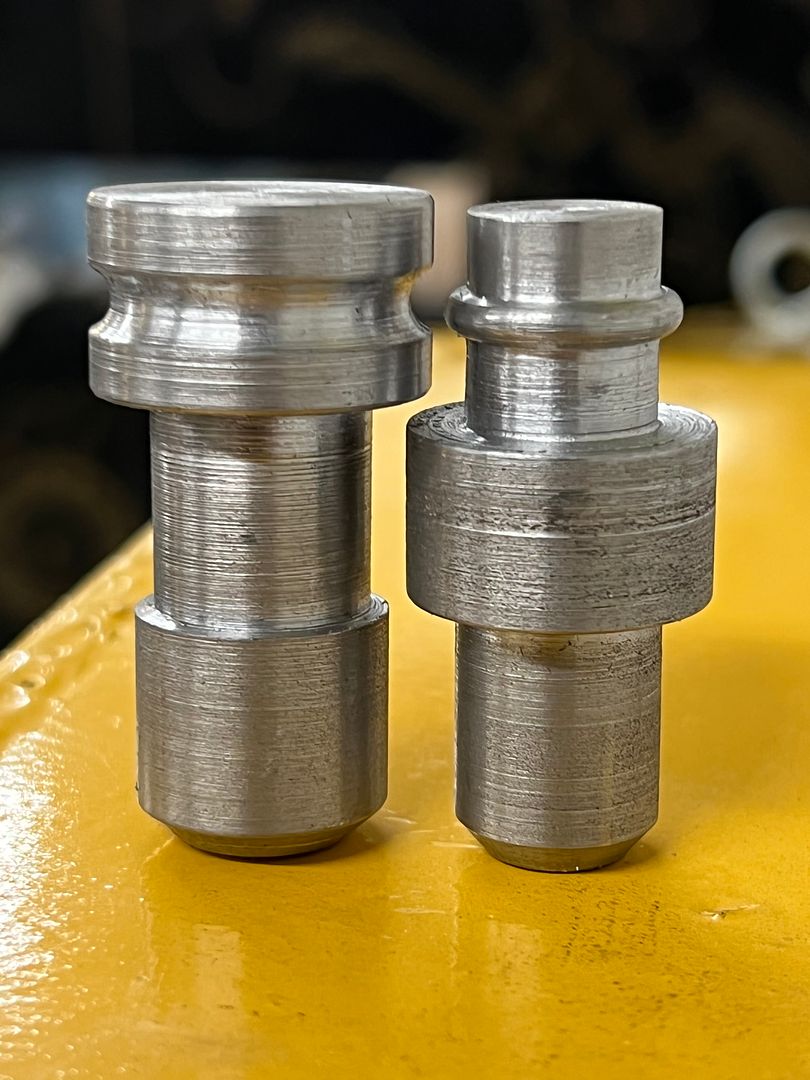
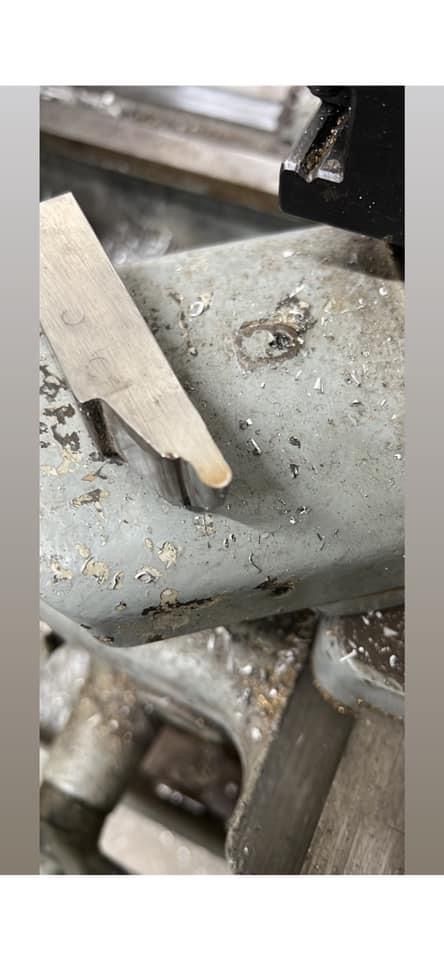
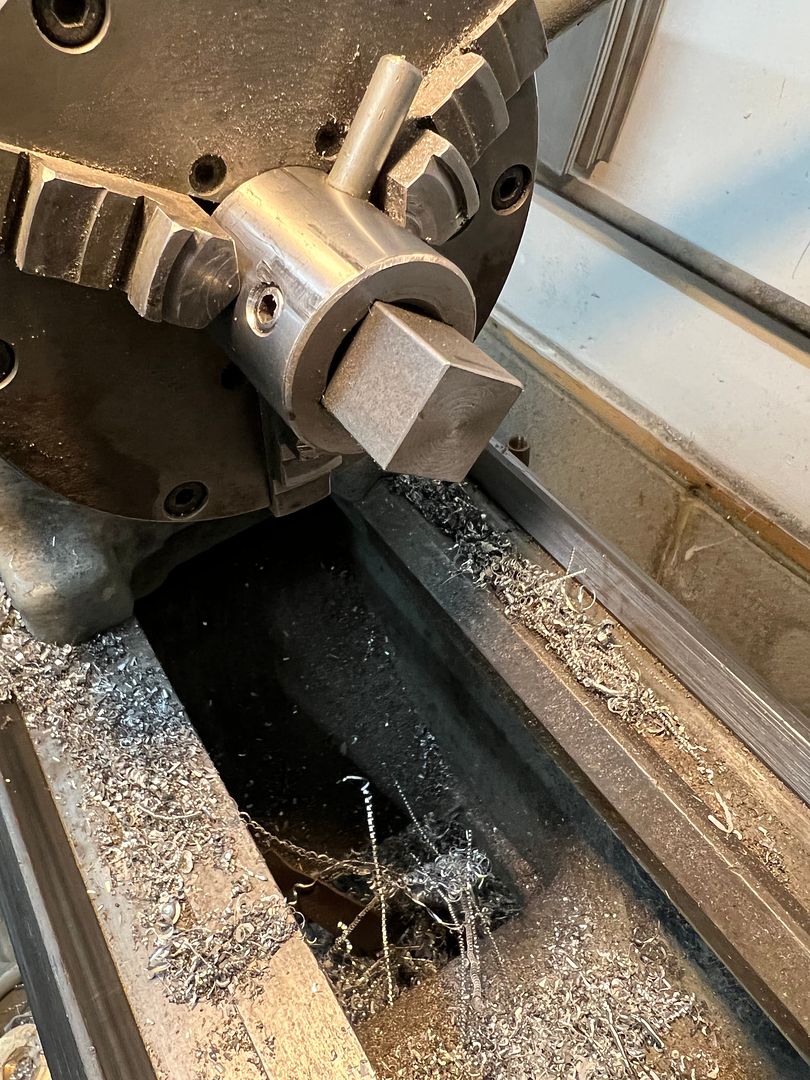
I don't have much in the form of hardened tool steel for making specialized cutters for the lathe, so I used a 3/4" square cutter from the Lennox to form the following for making the concave shape.. the male counterpart was done on the fly...
The 4140 square stock was squared on both ends, then a relief added for our round profile to rest in.
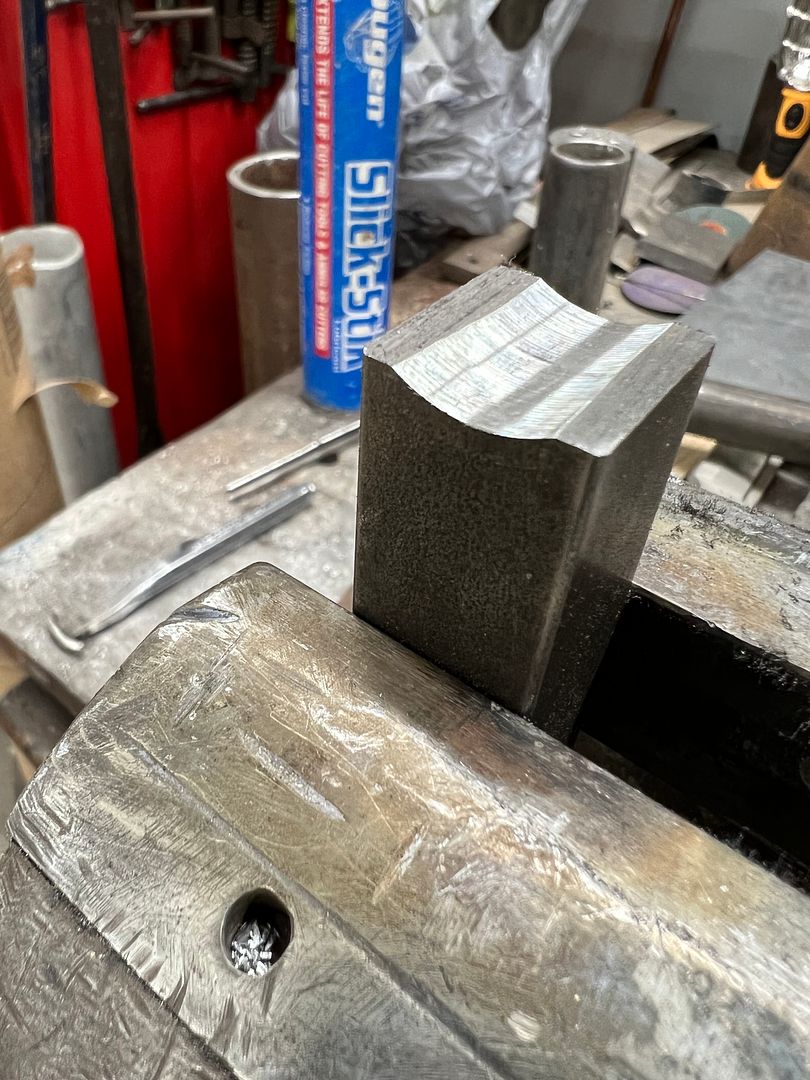
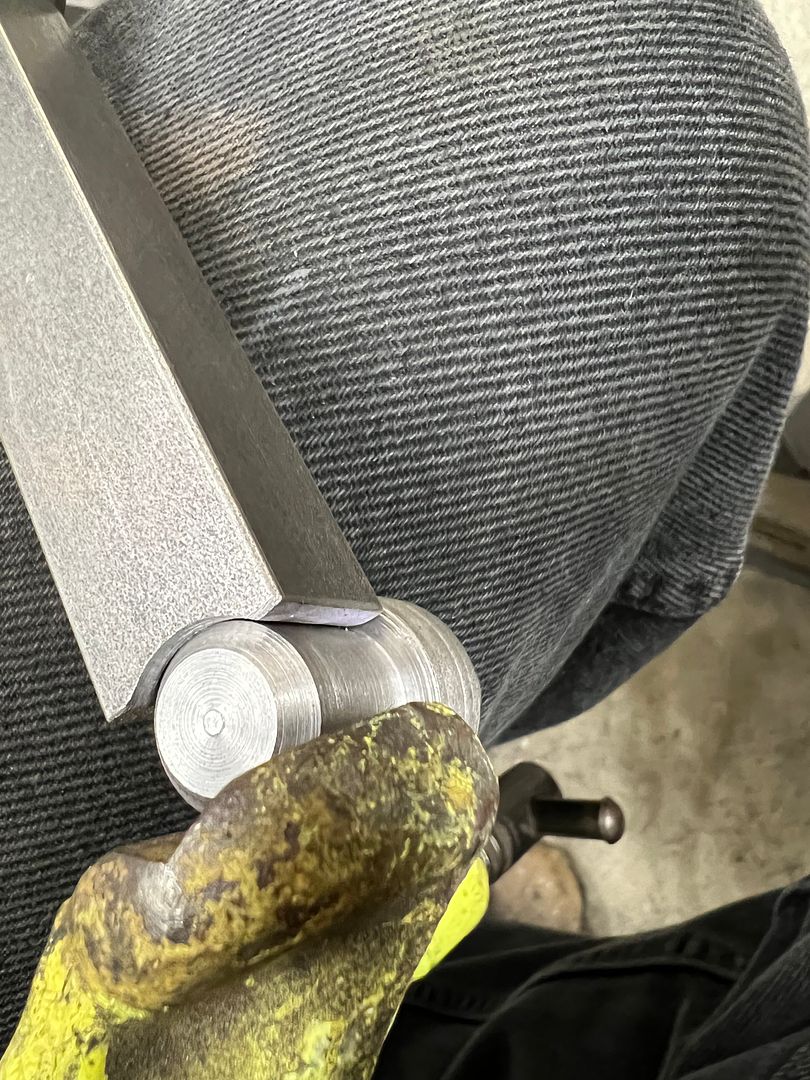
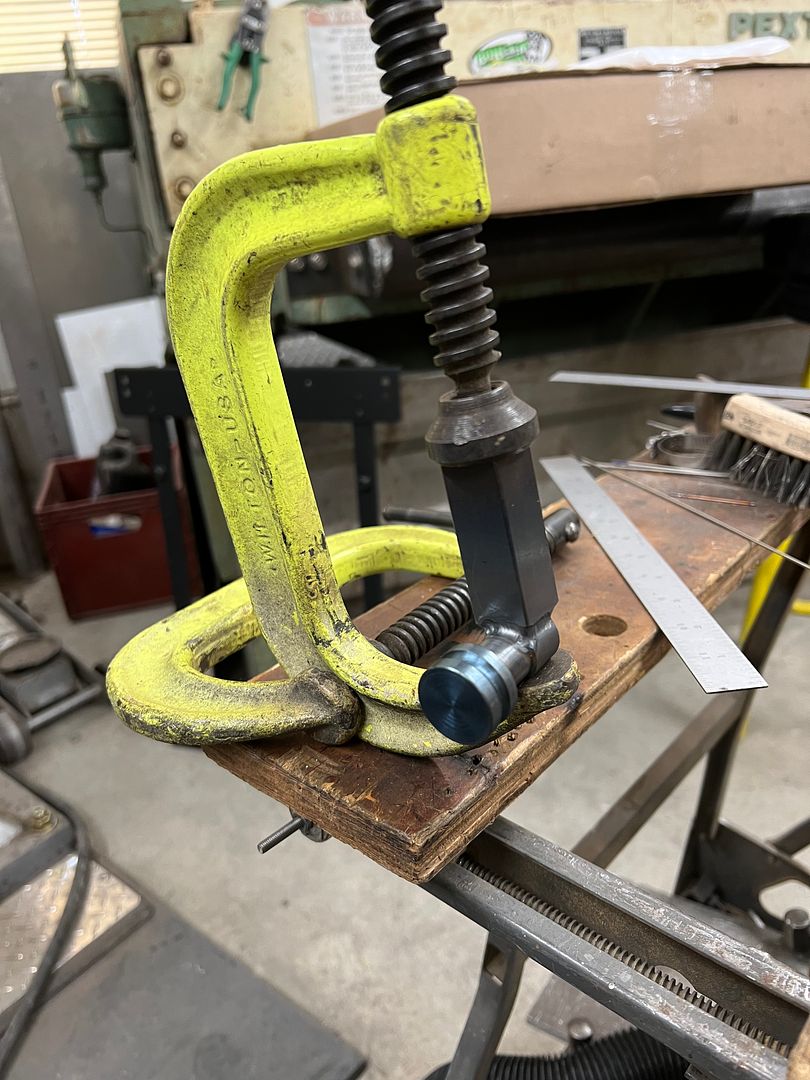
Our c-clamps had a VEE notch that would assist in keeping the round bits from moving, so that was used in lieu of a vise..
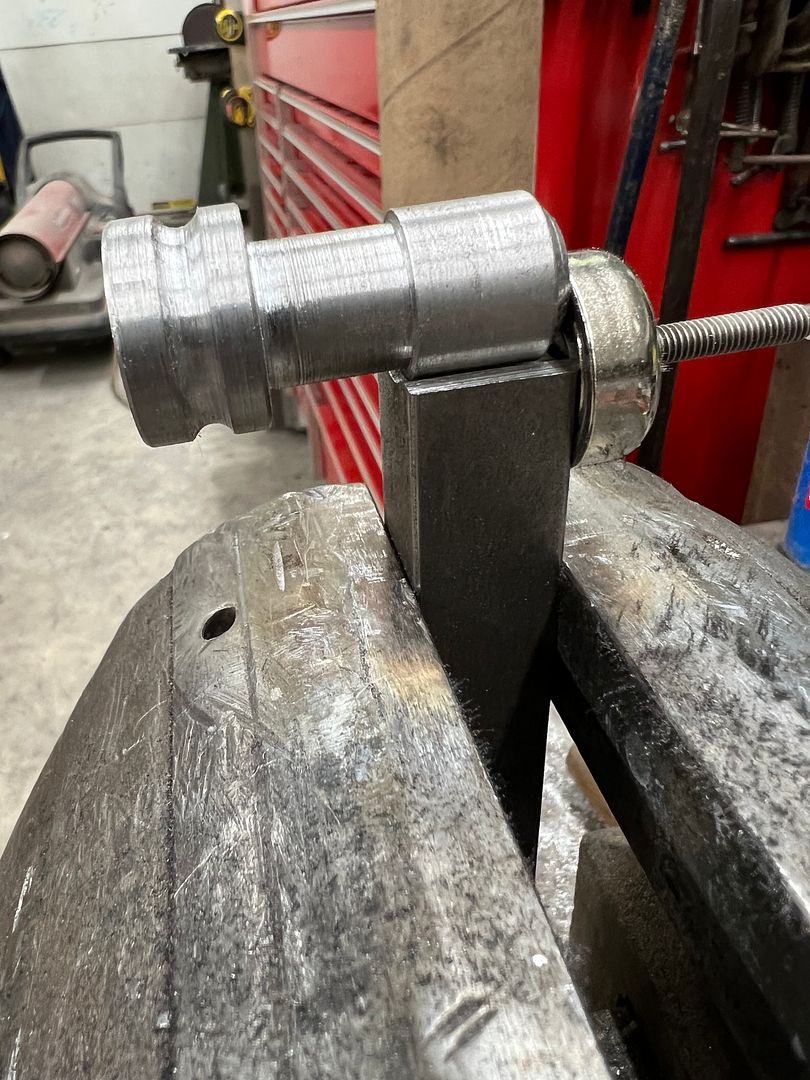
The infinitely adjustable clamps worked well, the TIG was used to add a fusion weld around the perimeter (no filler rod)
After welding, the assembly is heated to a straw color (pre-blue) and dipped in our official Mickey Thompson fluid container (transmission fluid) to harden things up a bit.
Here are the dies in use, take note of what happens when you don't keep pressure against the backstop.... No harm no foul, a couple more passes cleans it right up...
That should help to keep the hose in place...
Last edited by MP&C; 02-06-2022 at 10:25 AM.
 Posting Permissions

 Reply With Quote

.JPG)
.JPG)