wagon progress

Collapse
This is a sticky topic.
X
X
 
  • Time
  • Show
Clear All
new posts
  • MP&C
    Registered Member
    • Dec 2013
    • 1302

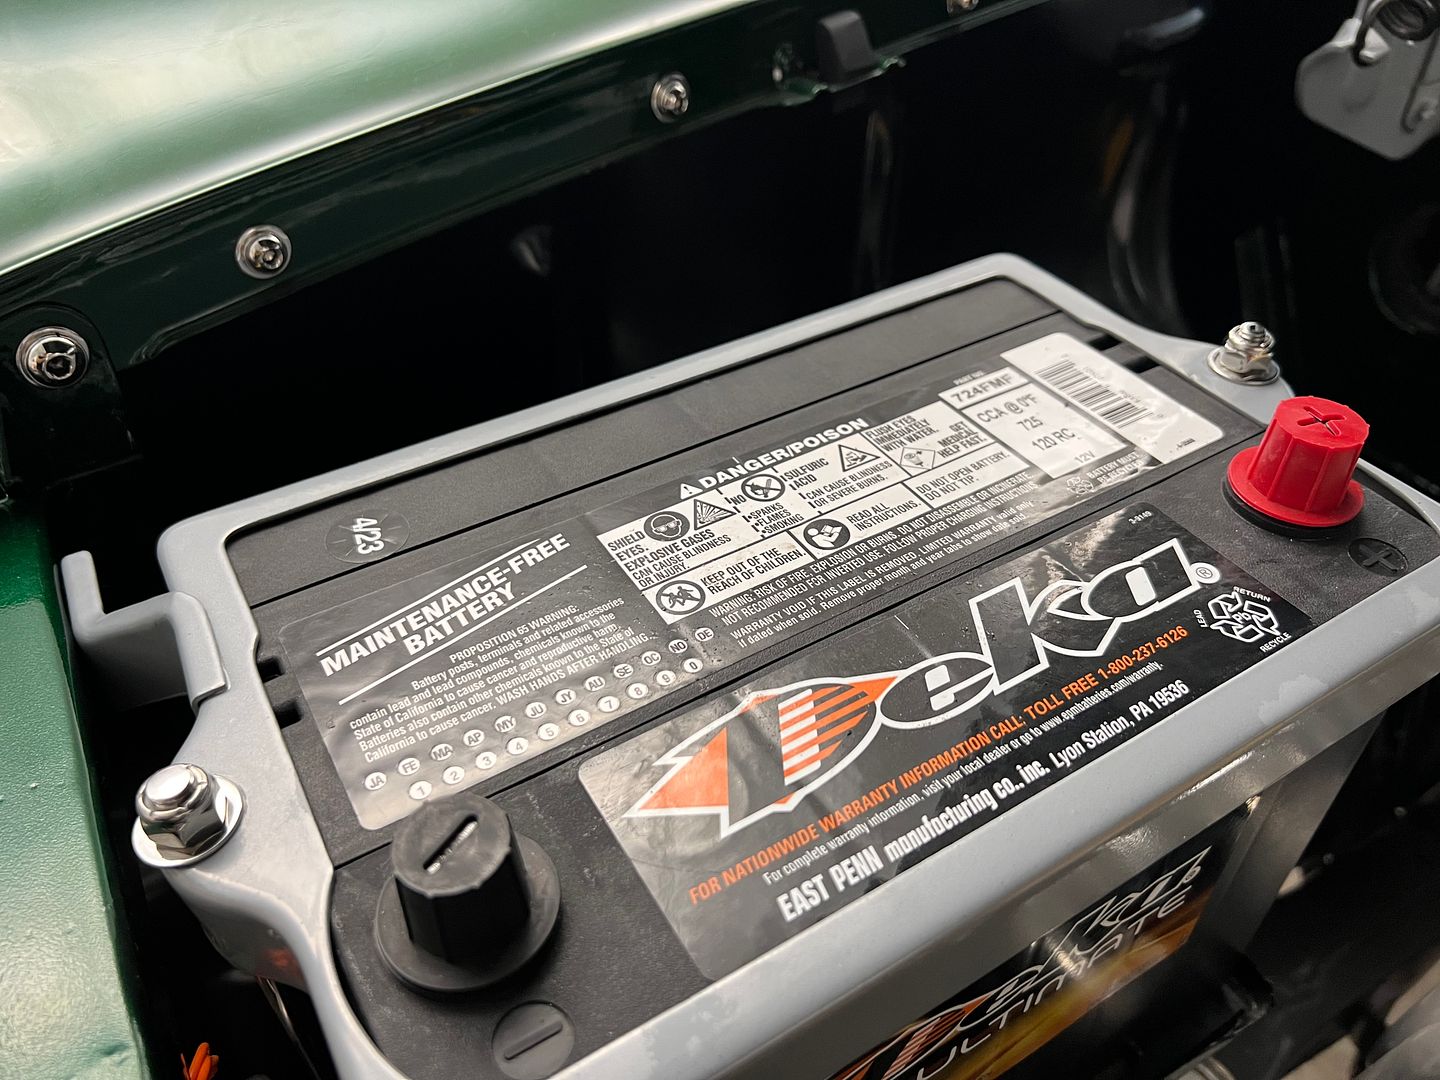
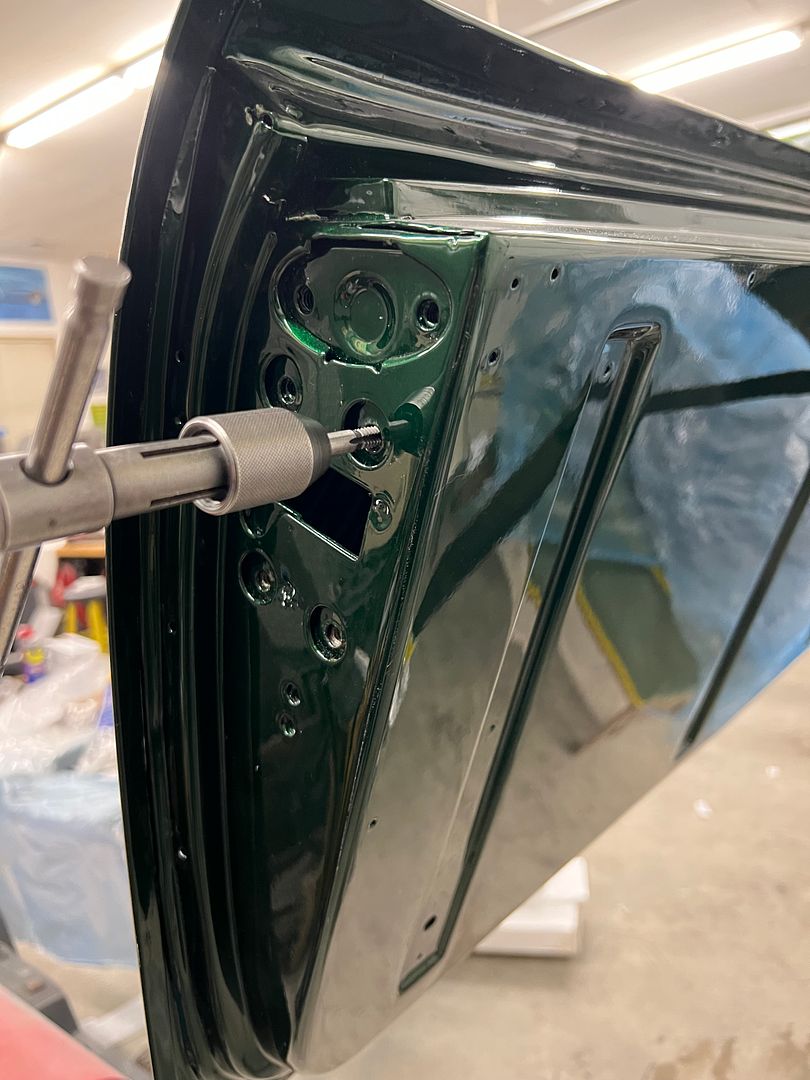
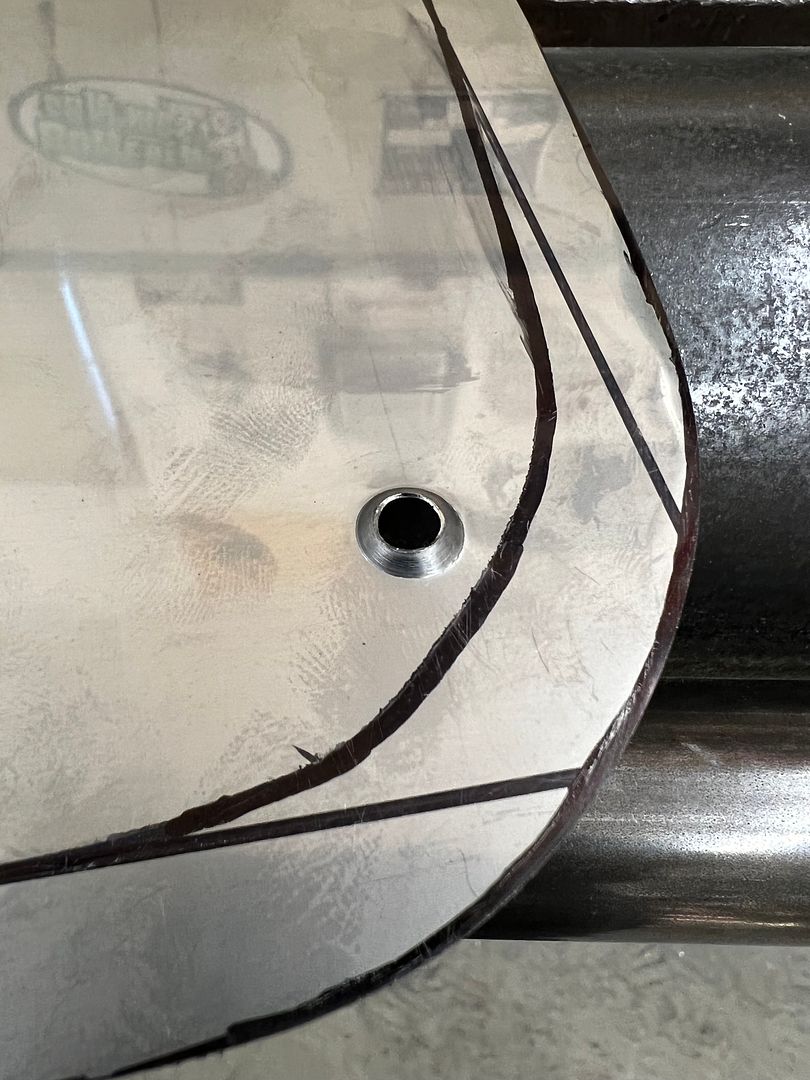
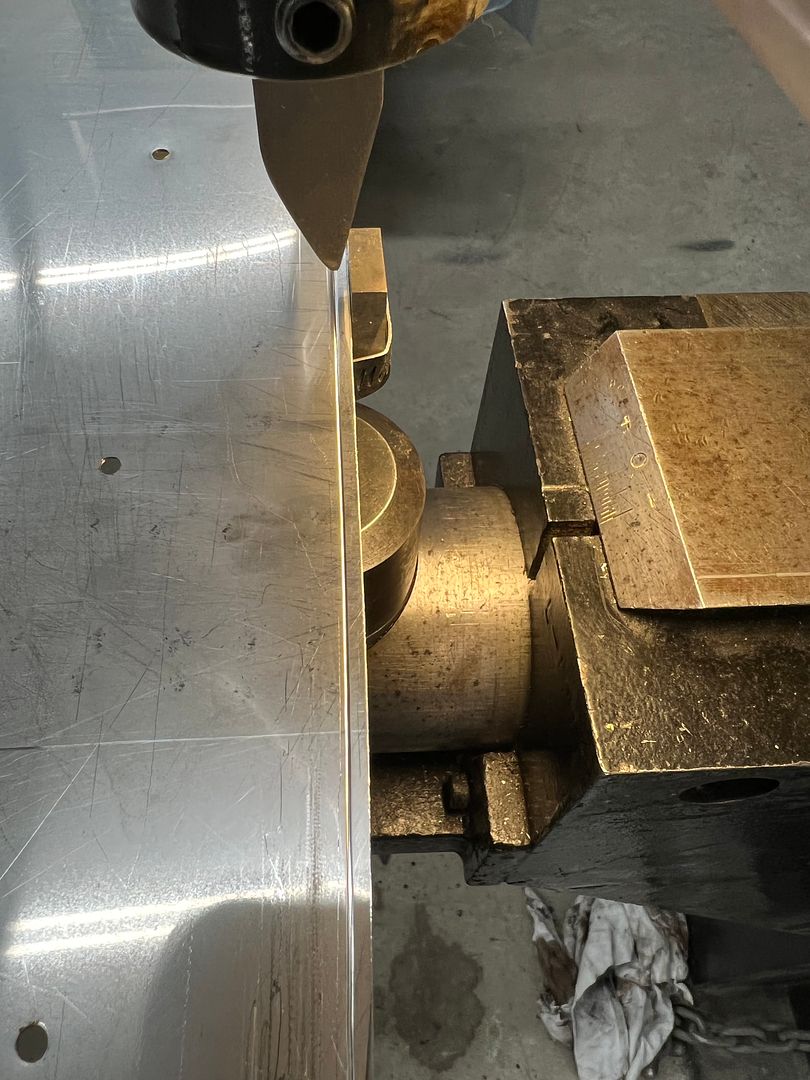
    Well in our typical back up and punt fashion, the original battery hold downs that we had already powder coated did not fit the battery, too short. So we ordered some round stock in stainless to fabricate some new ones.


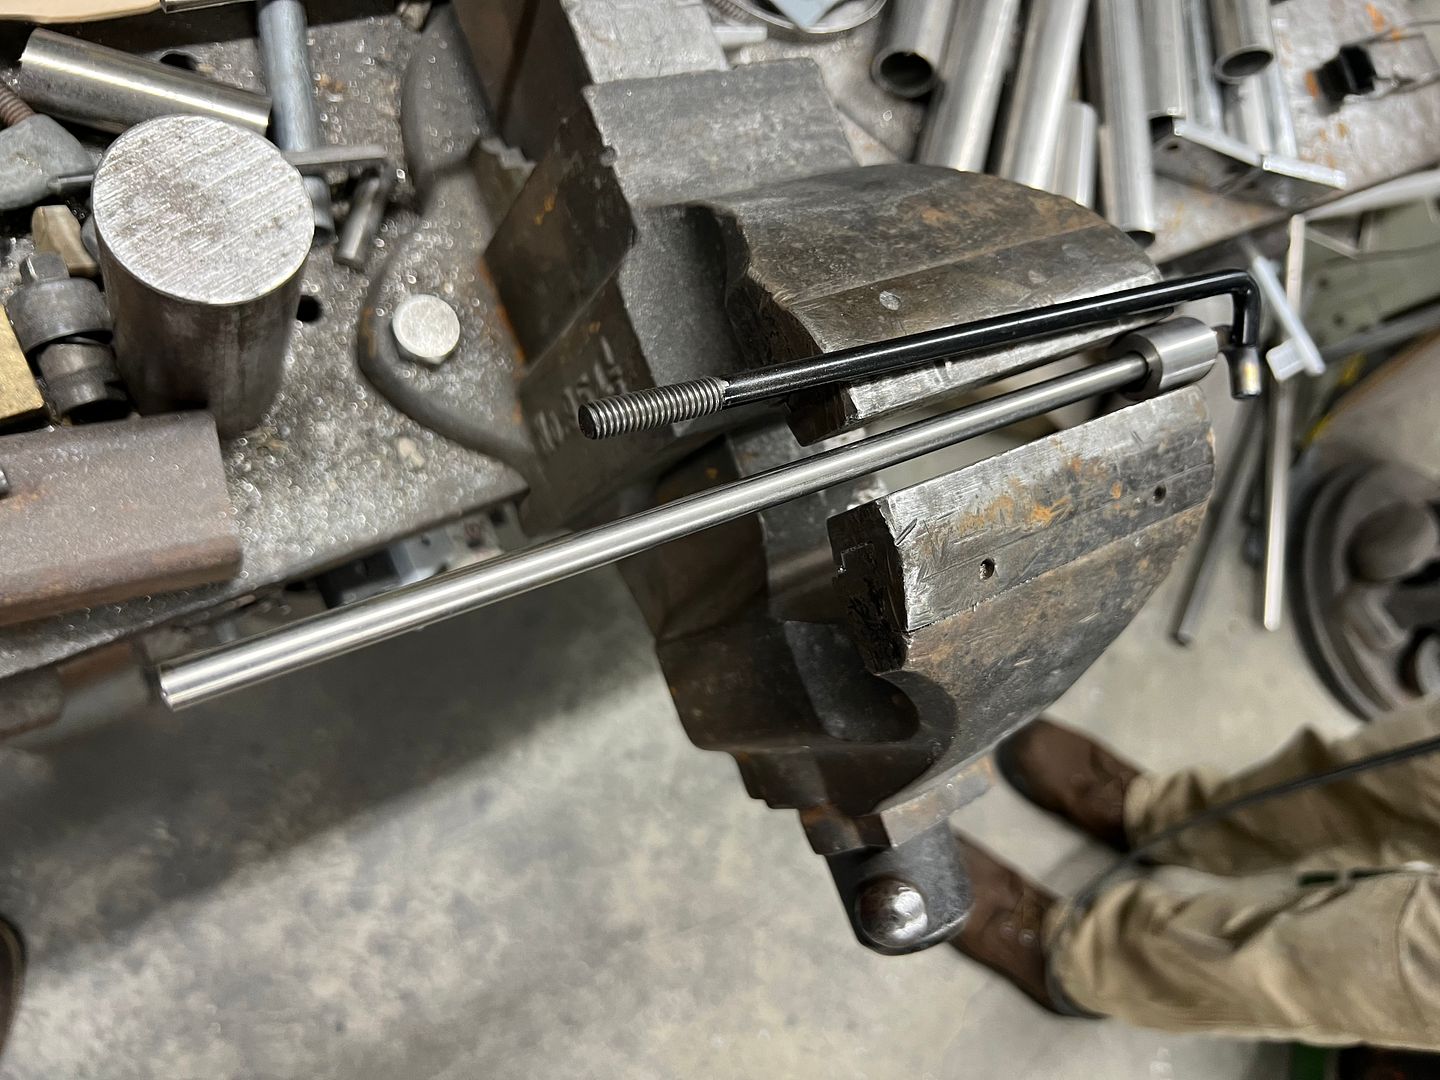
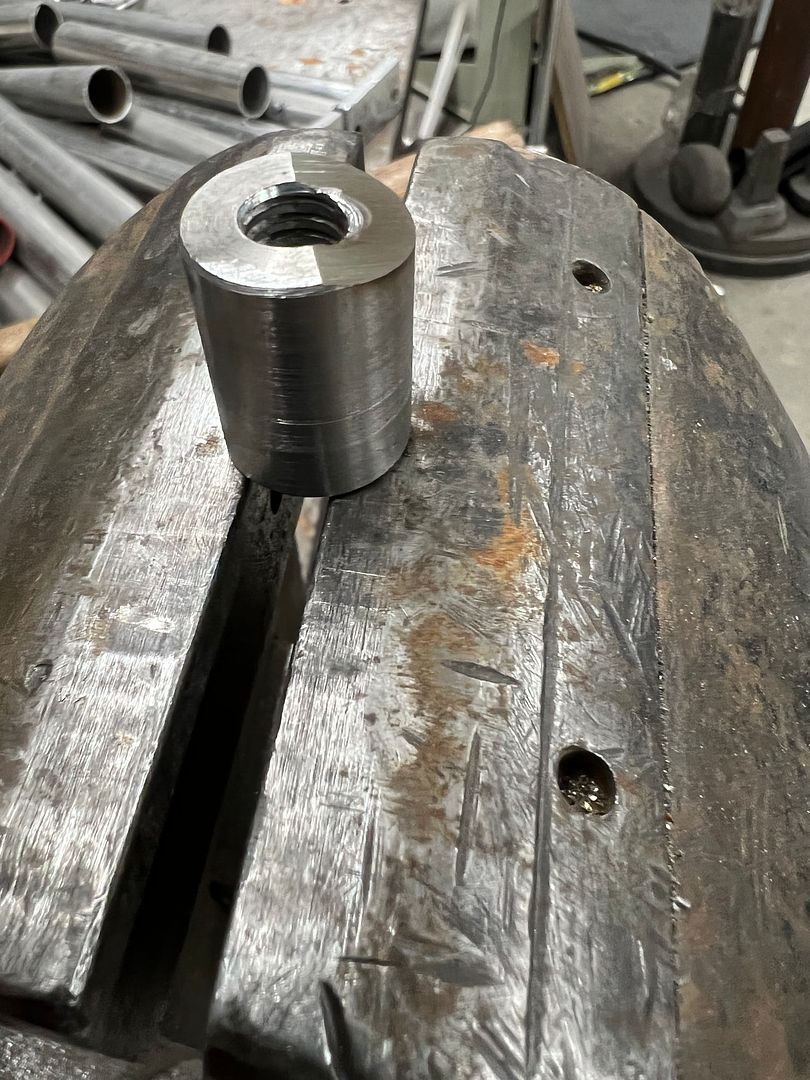
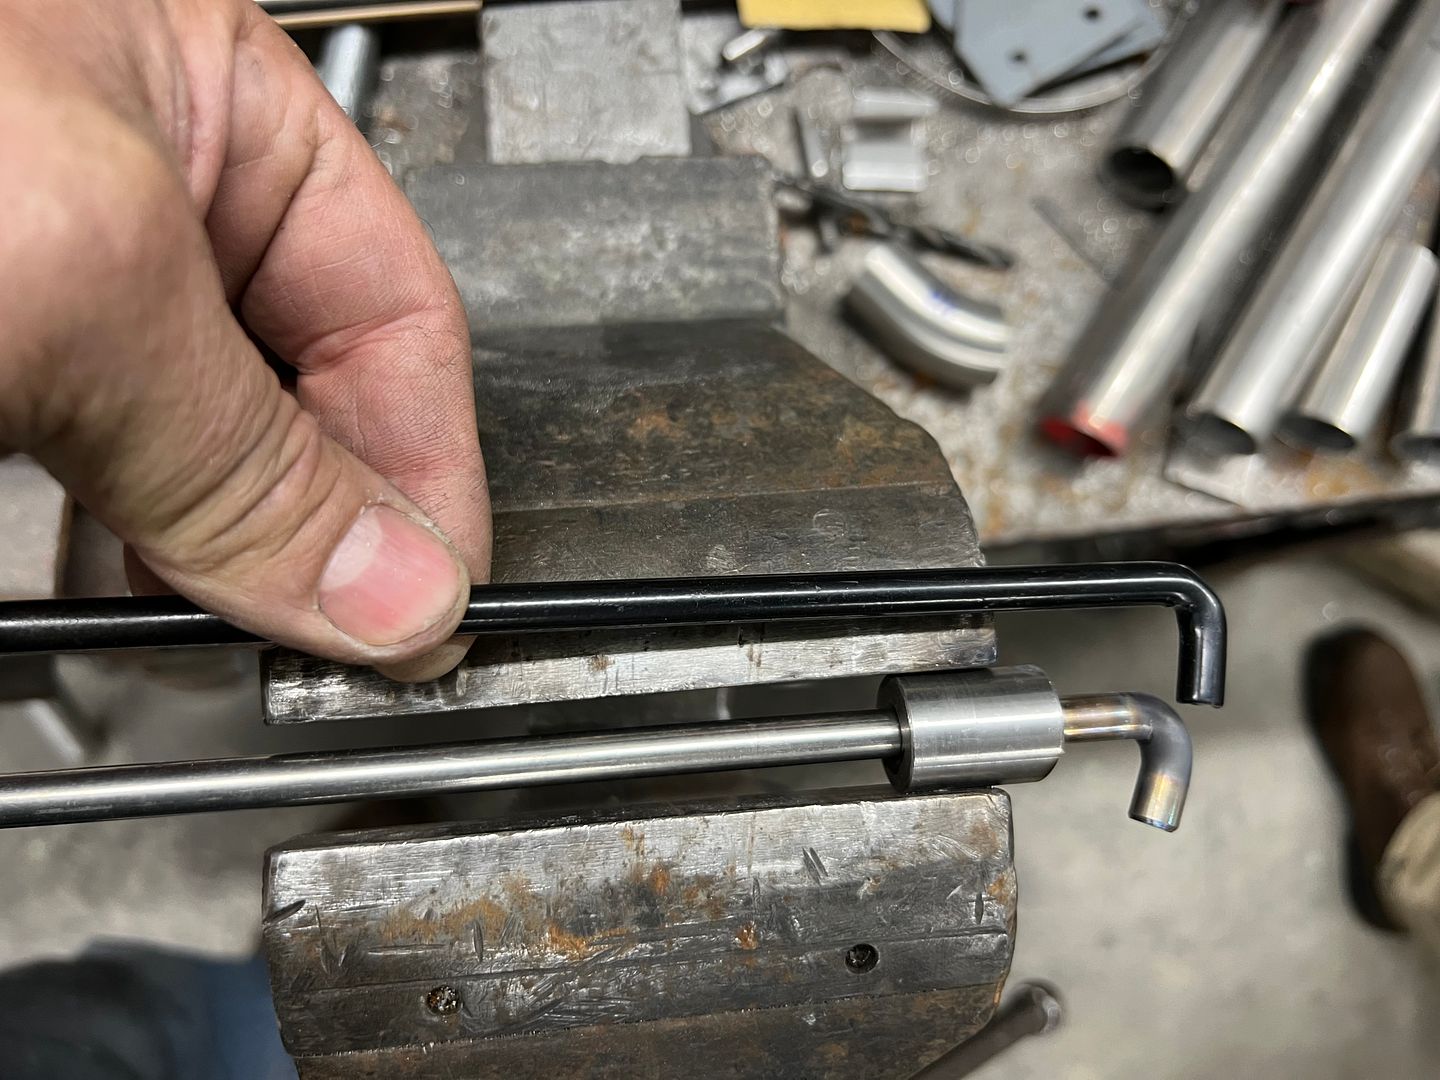
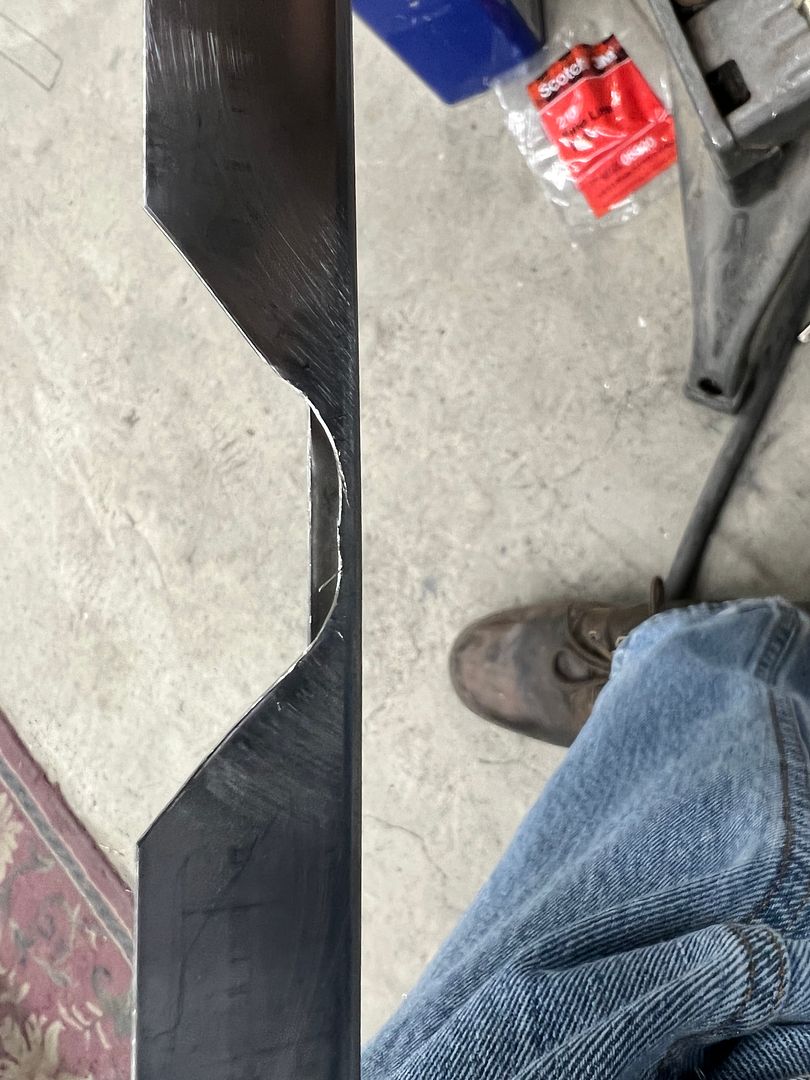
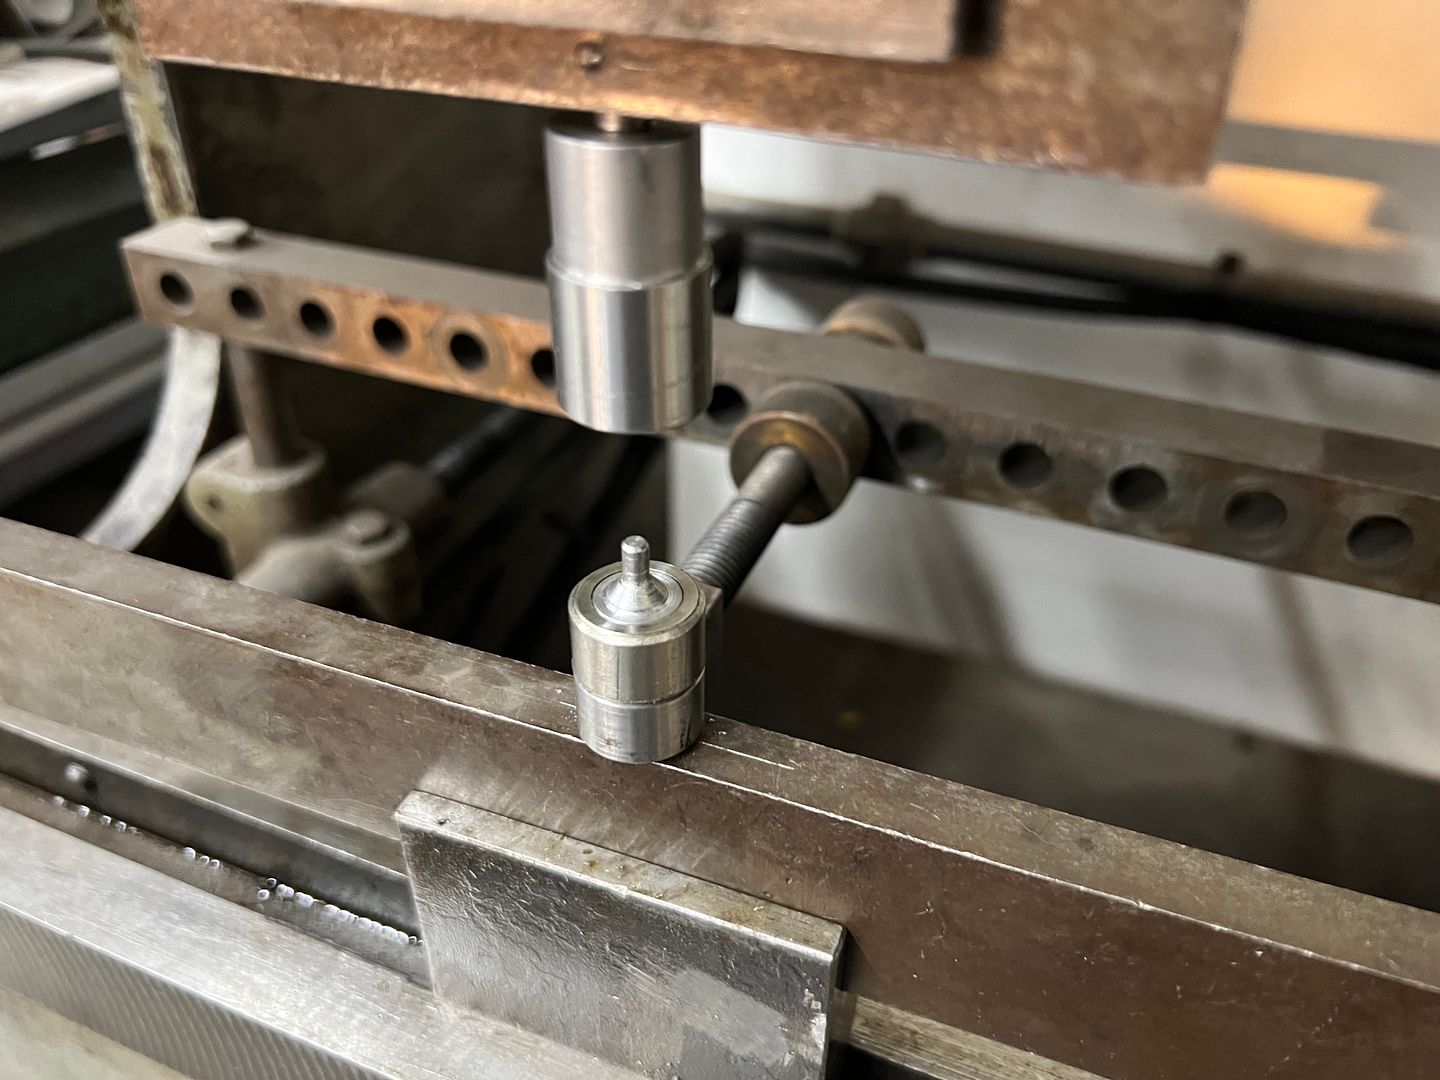
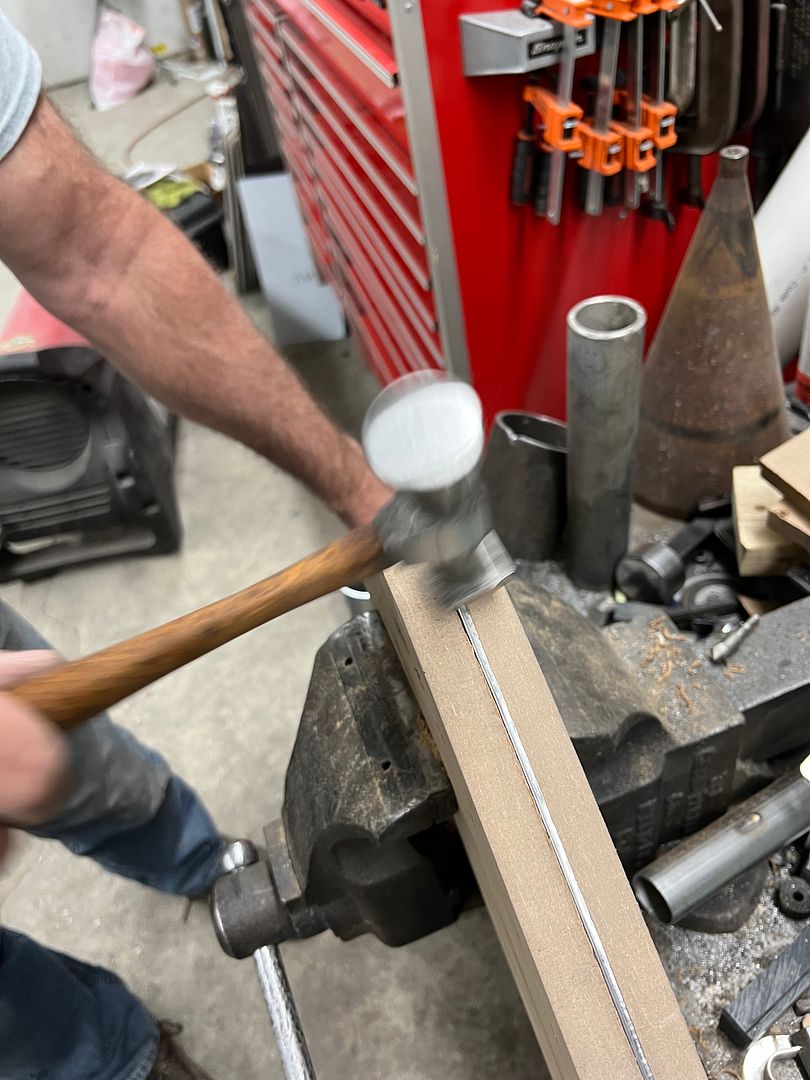
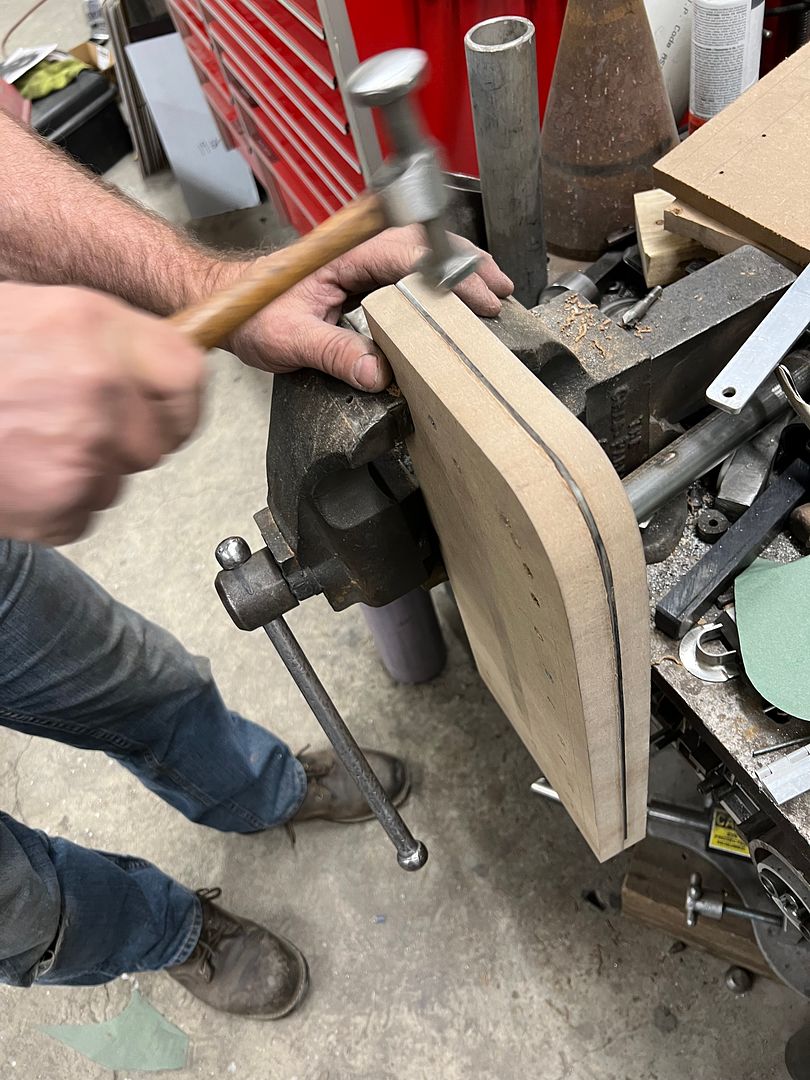
    A threaded standoff was modified to provide an angled surface for using as a hammer form to get the bottom "hooks" consistent...
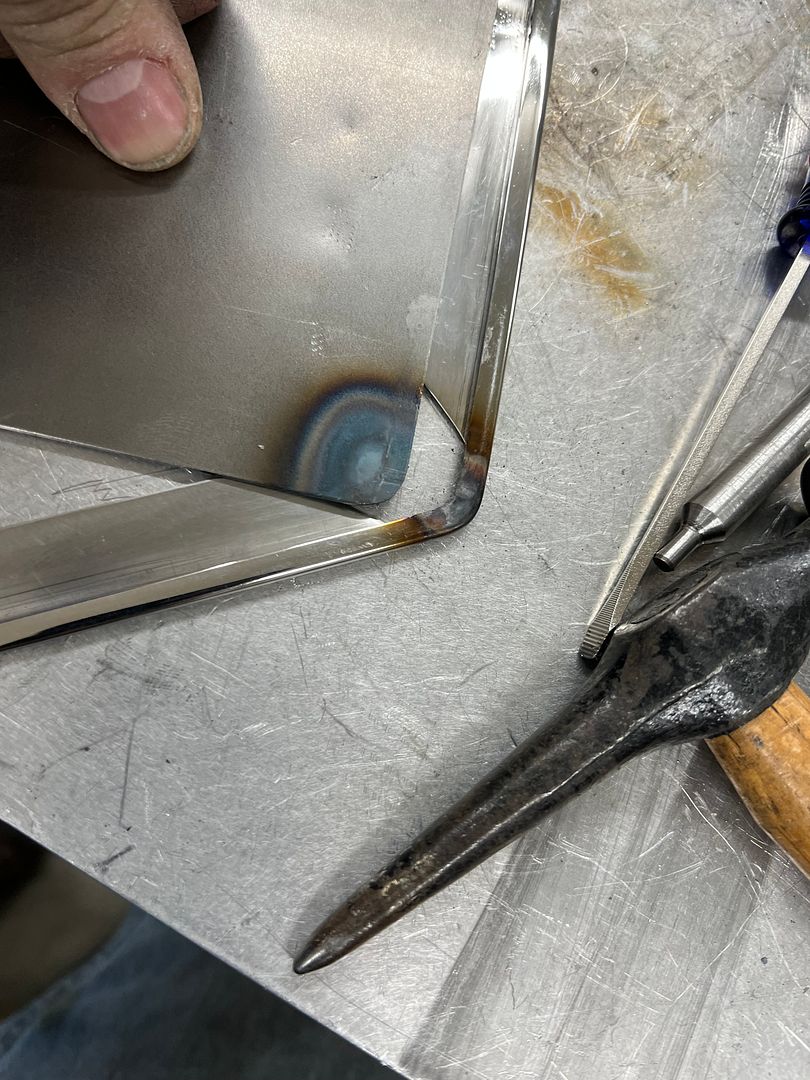
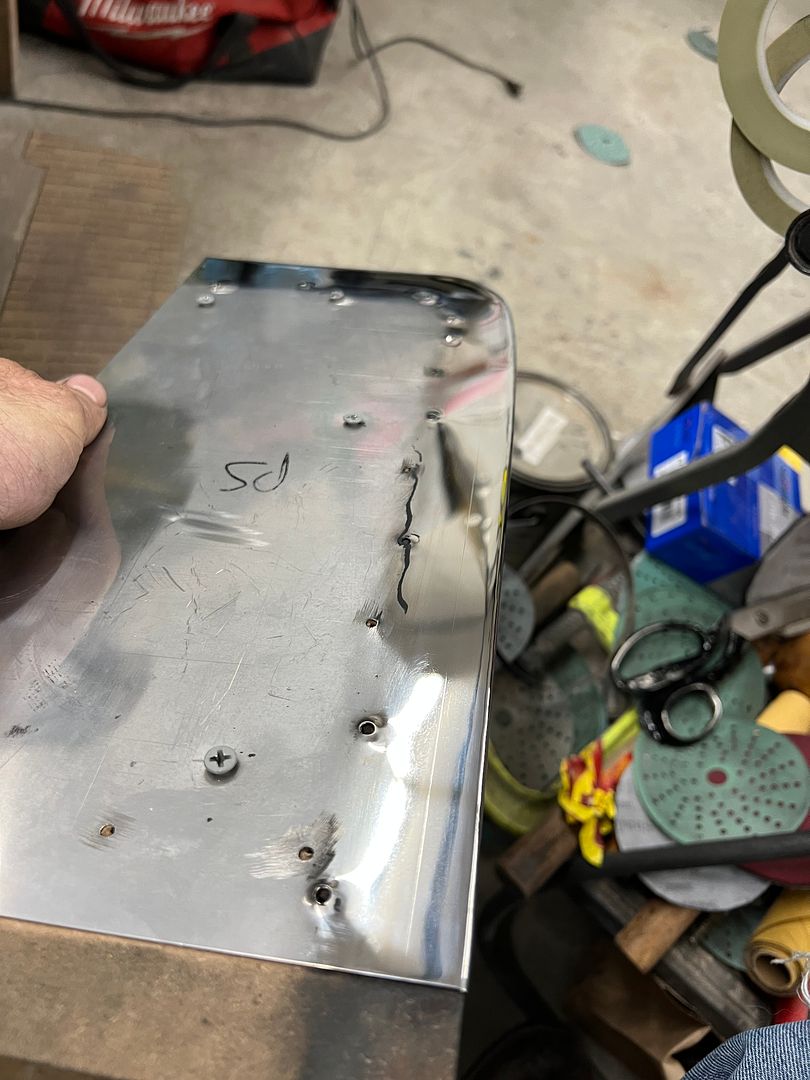


    All polished up...


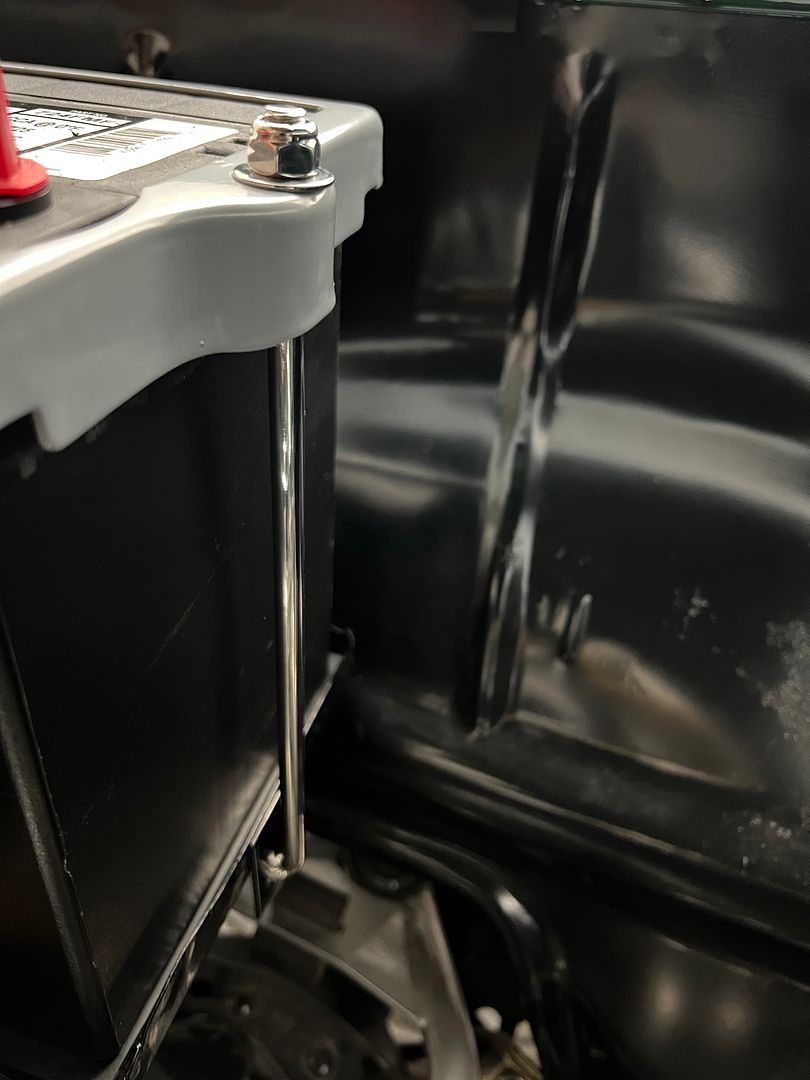
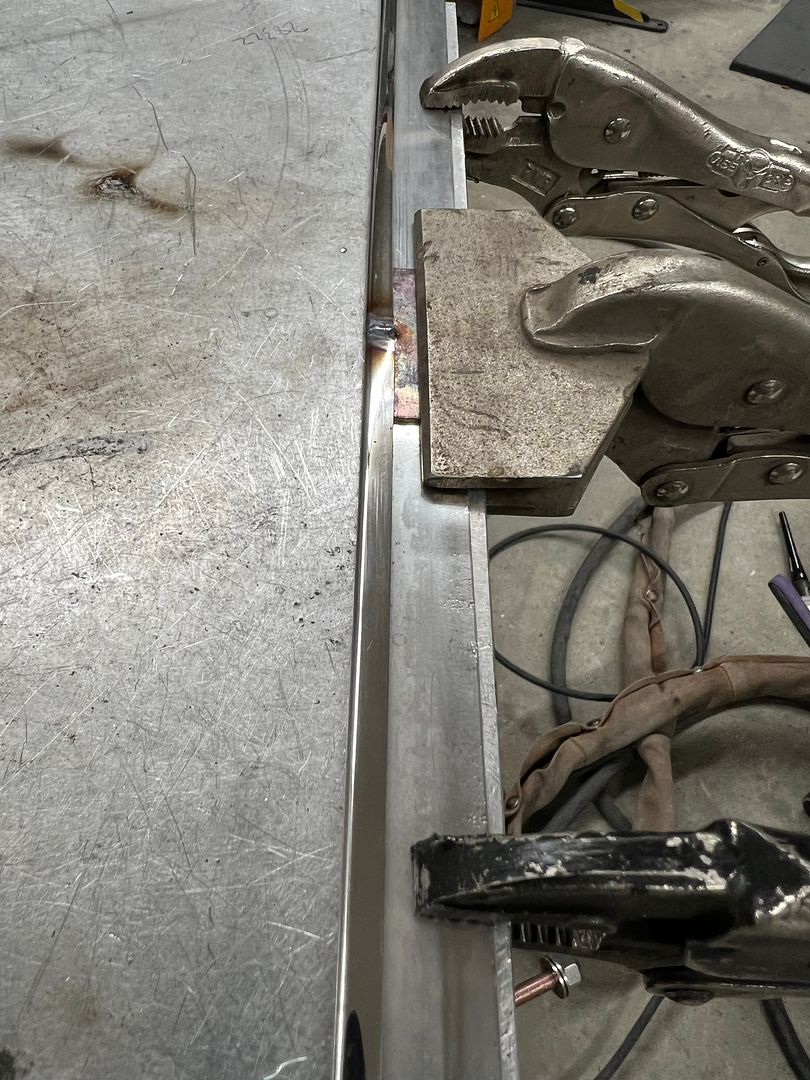
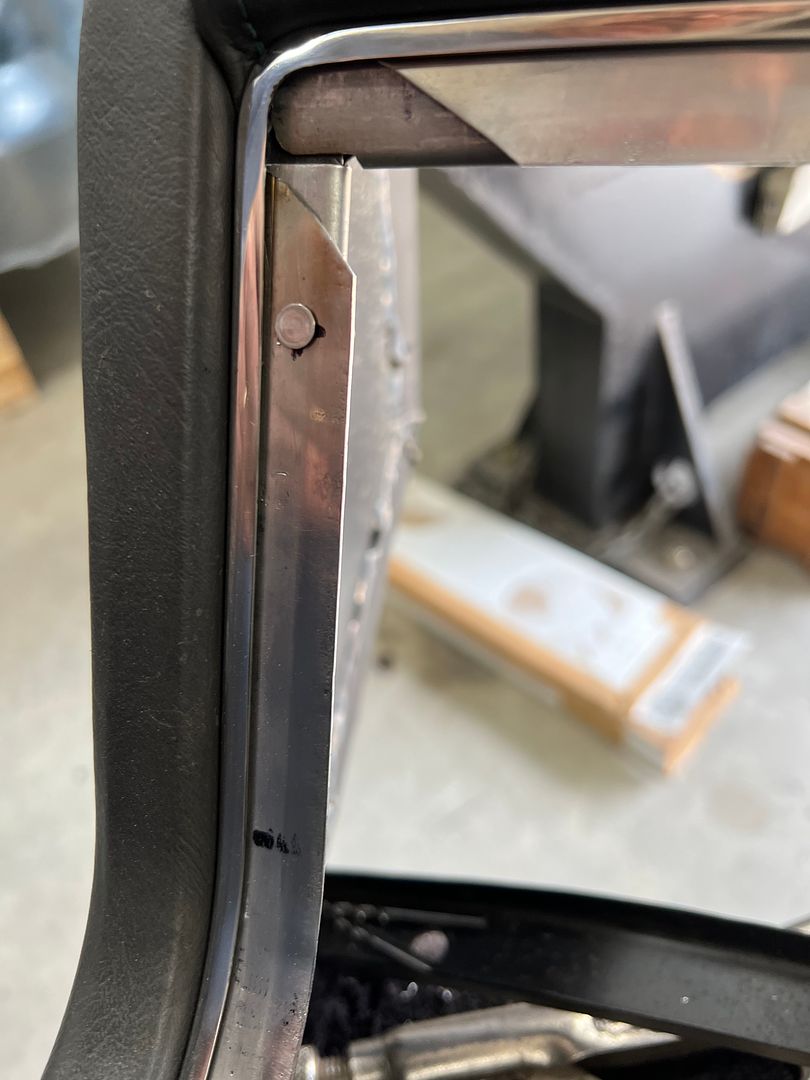
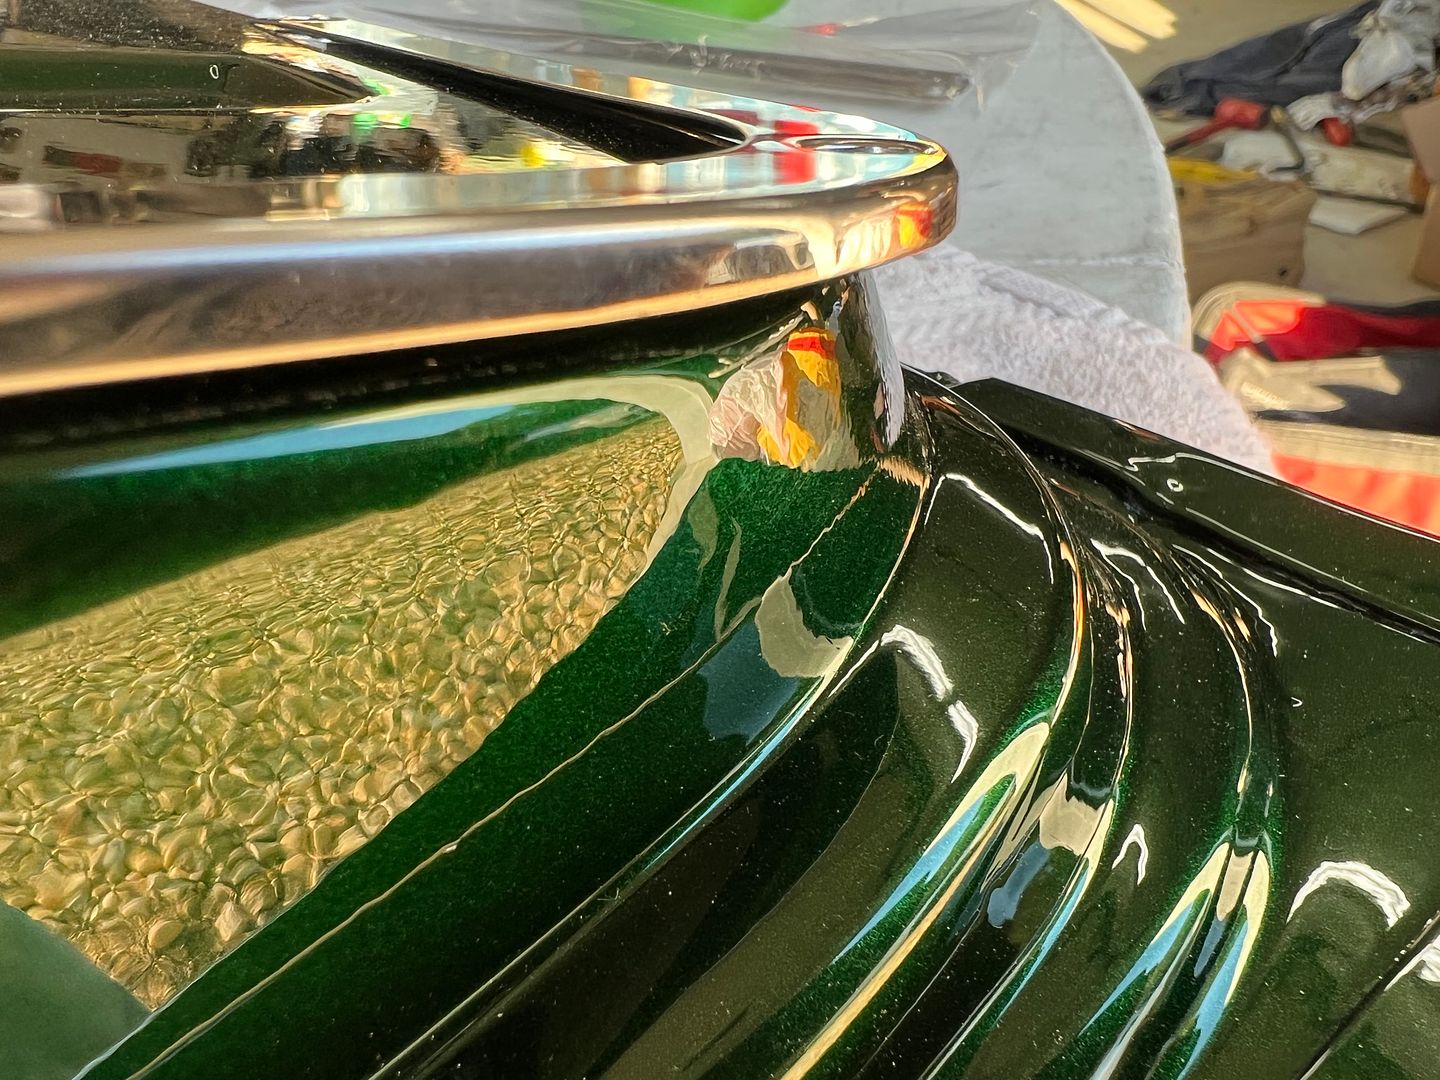
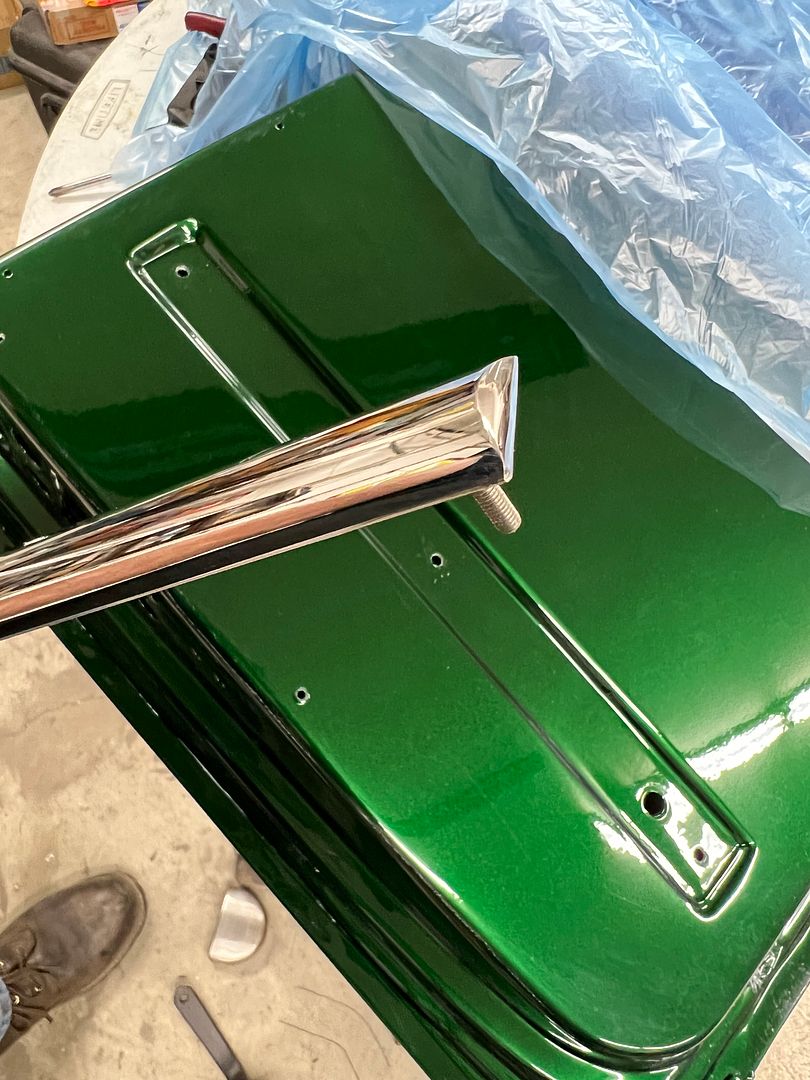
    Installed, and no polish job is complete without addressing the ends of the rods..


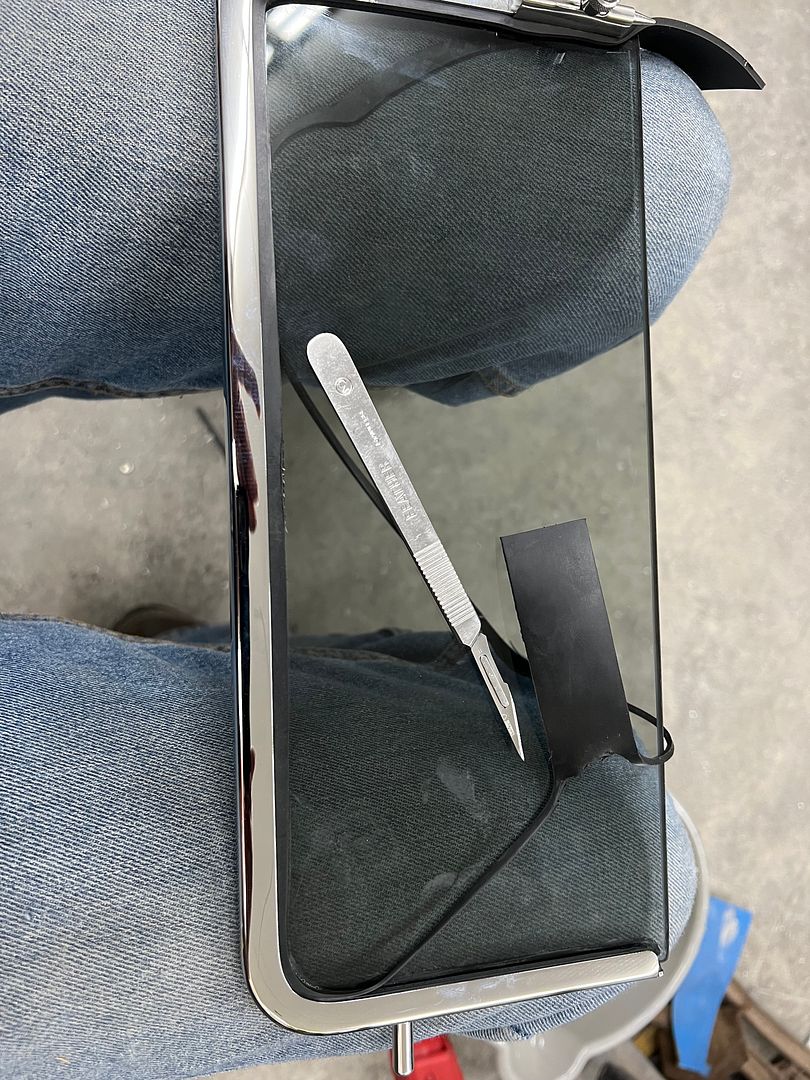
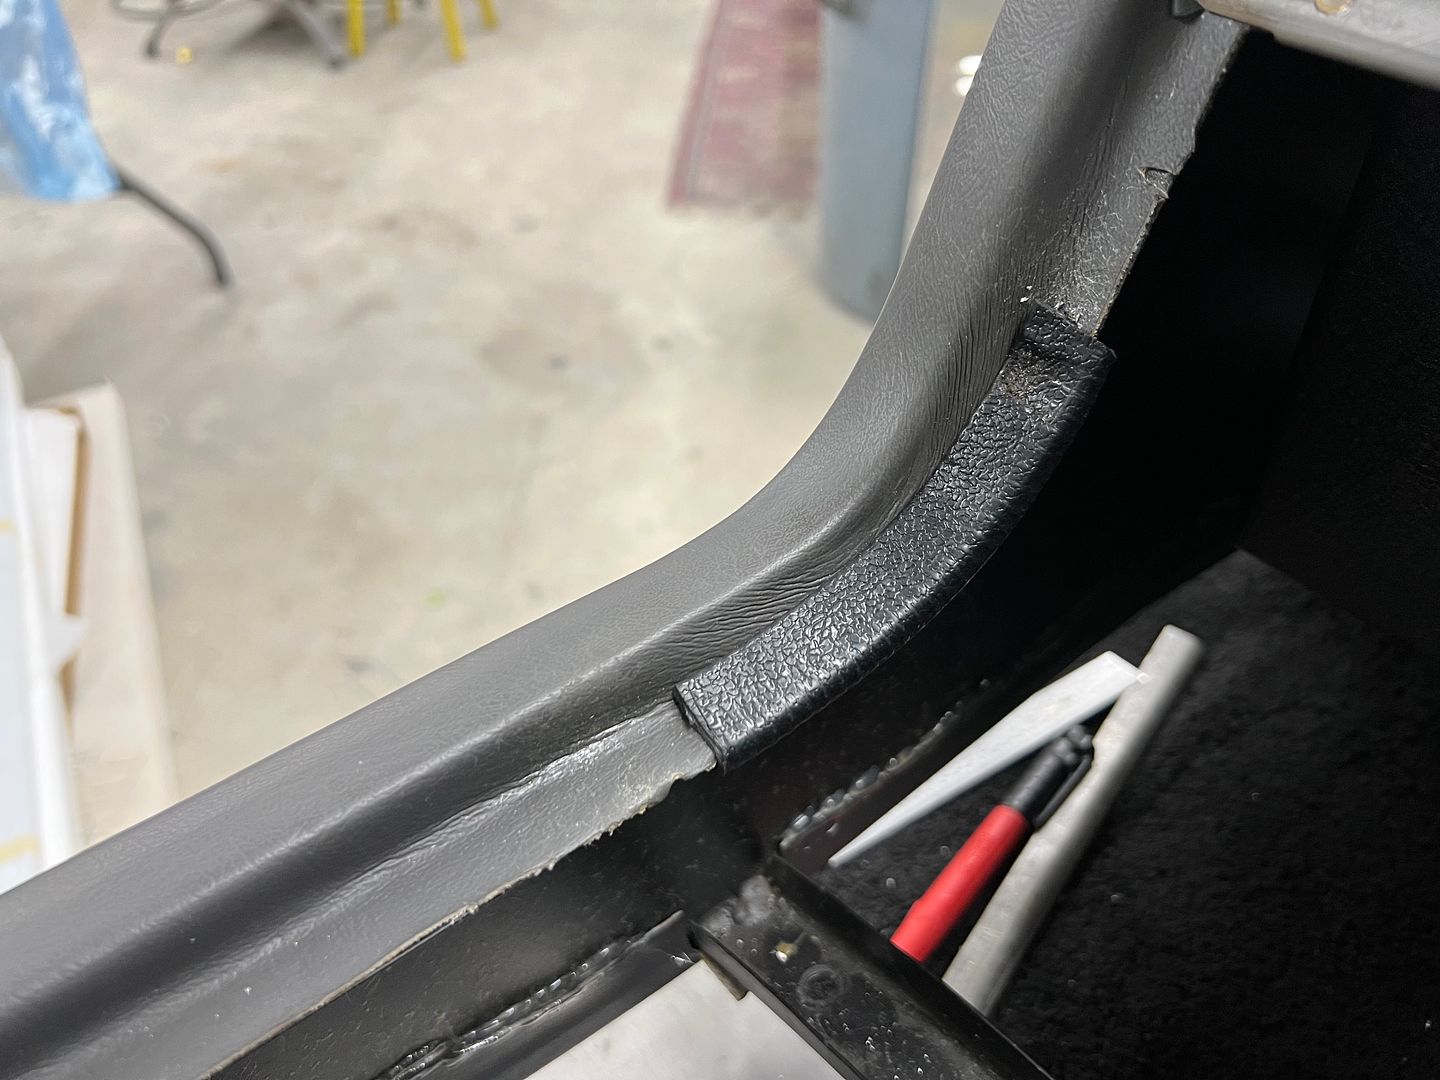
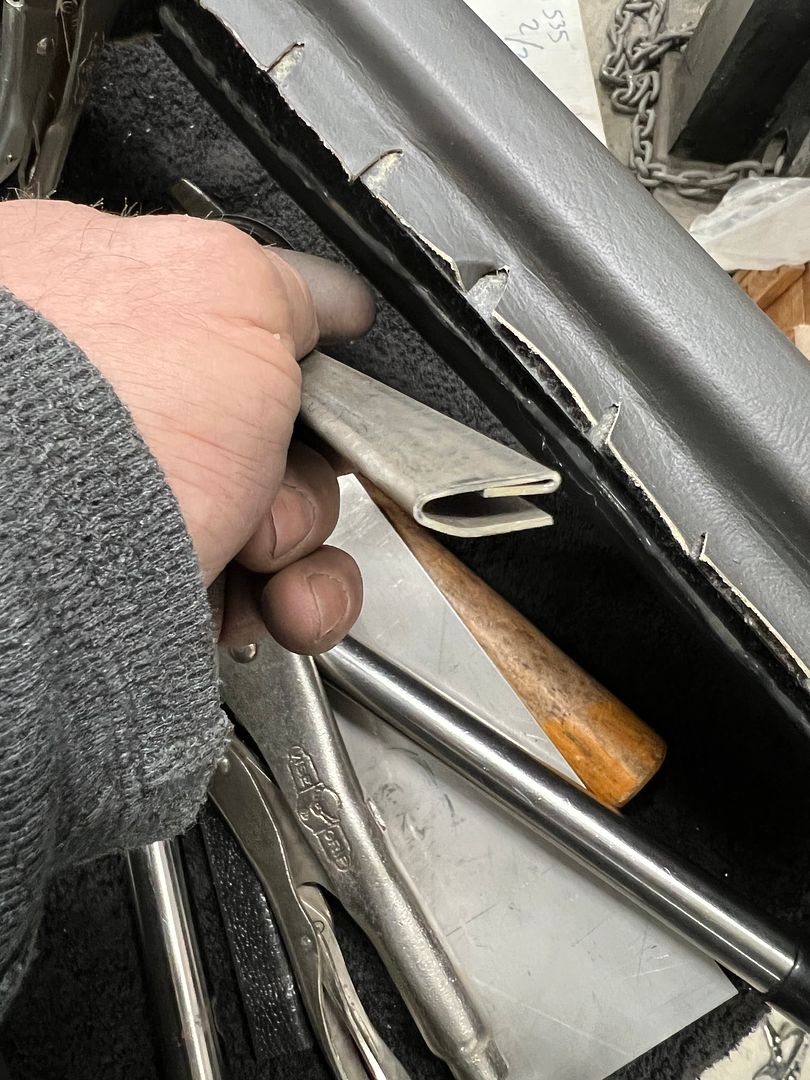
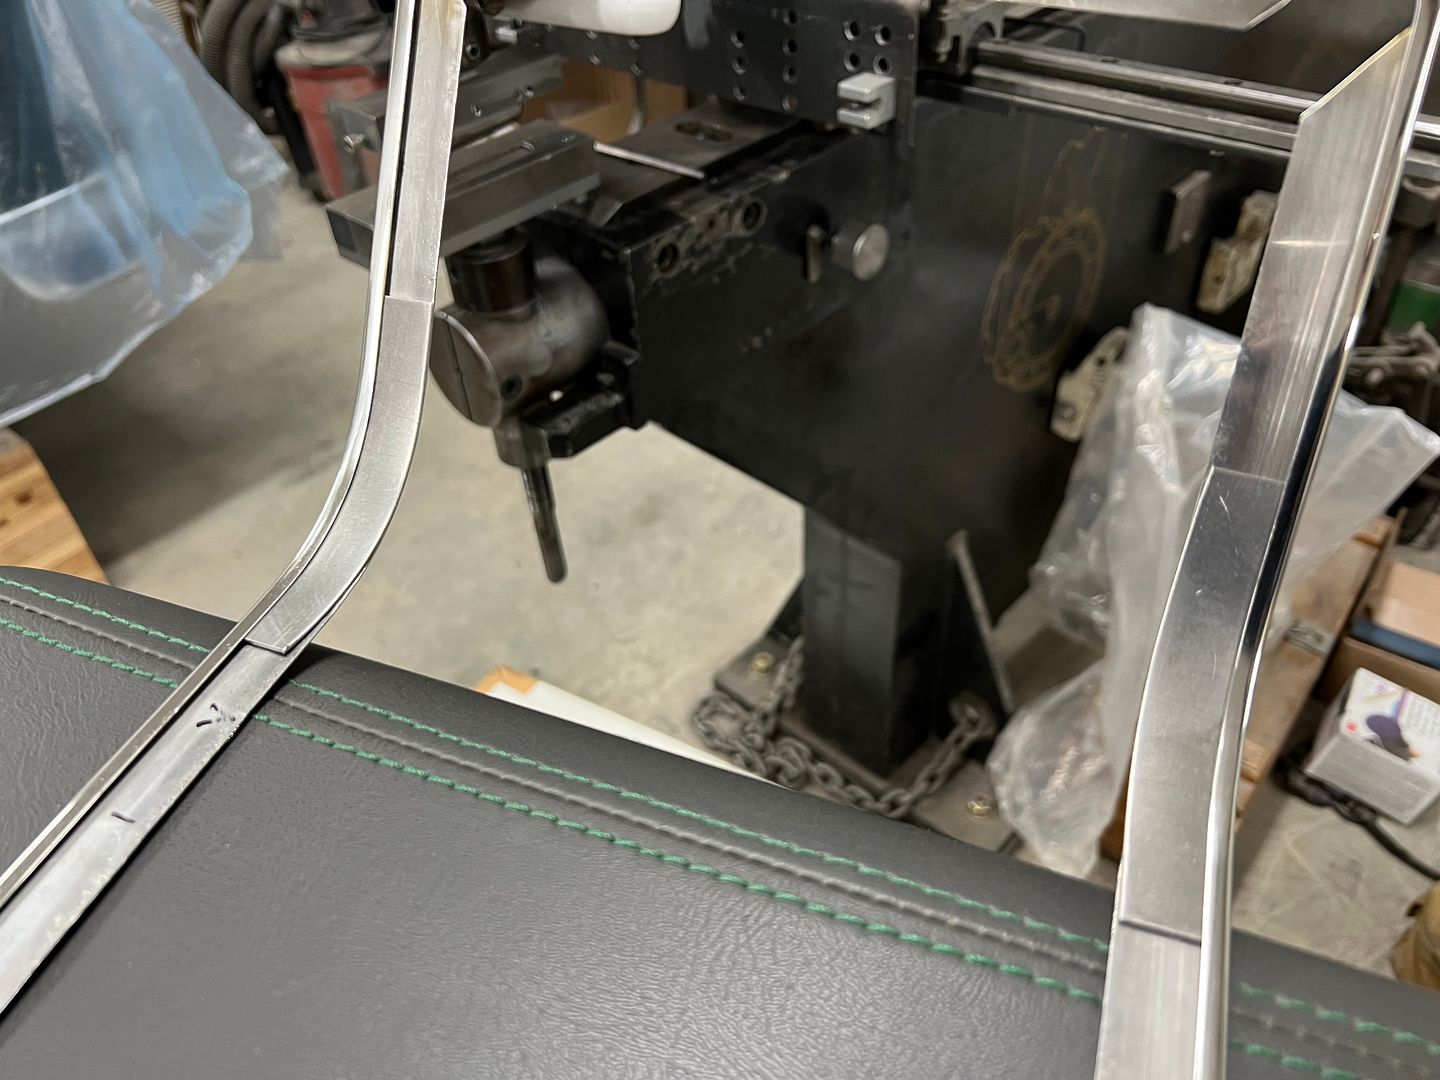
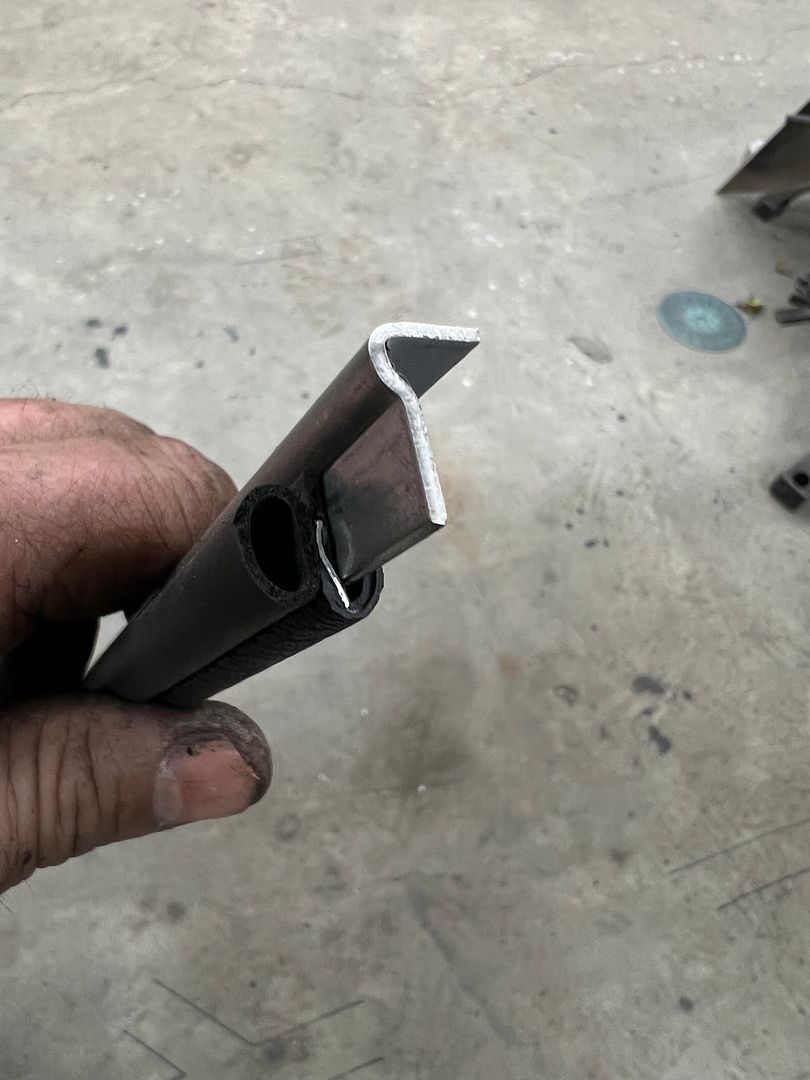
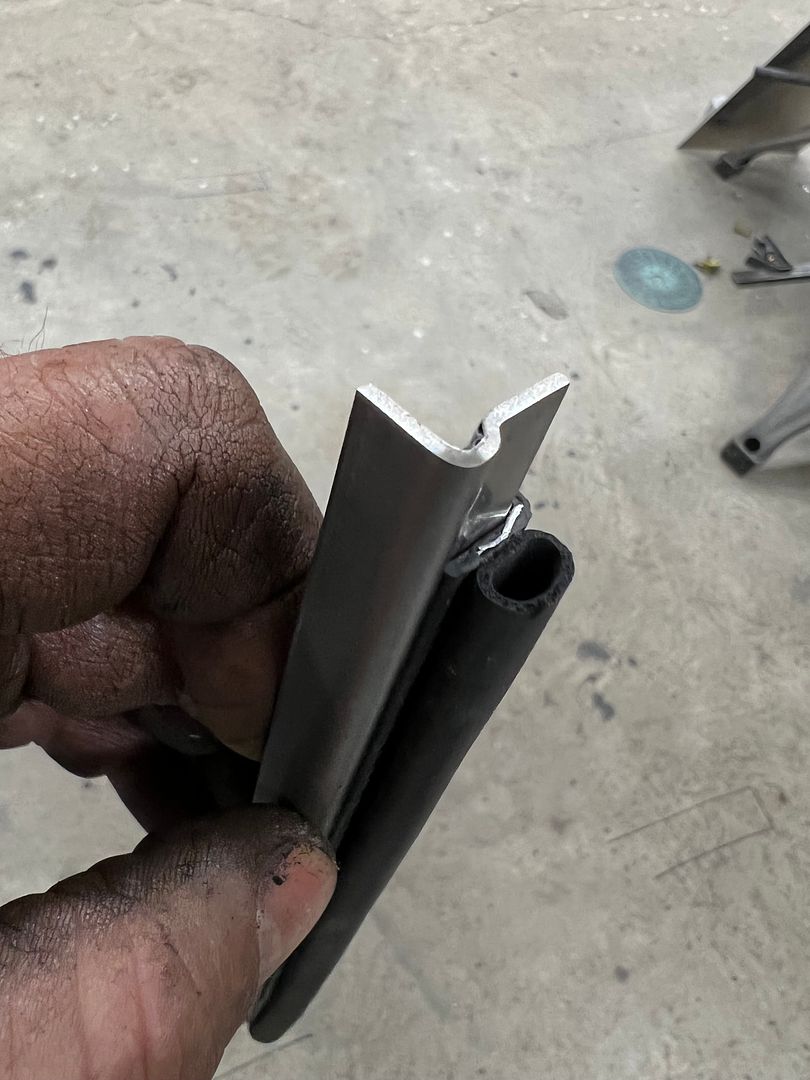
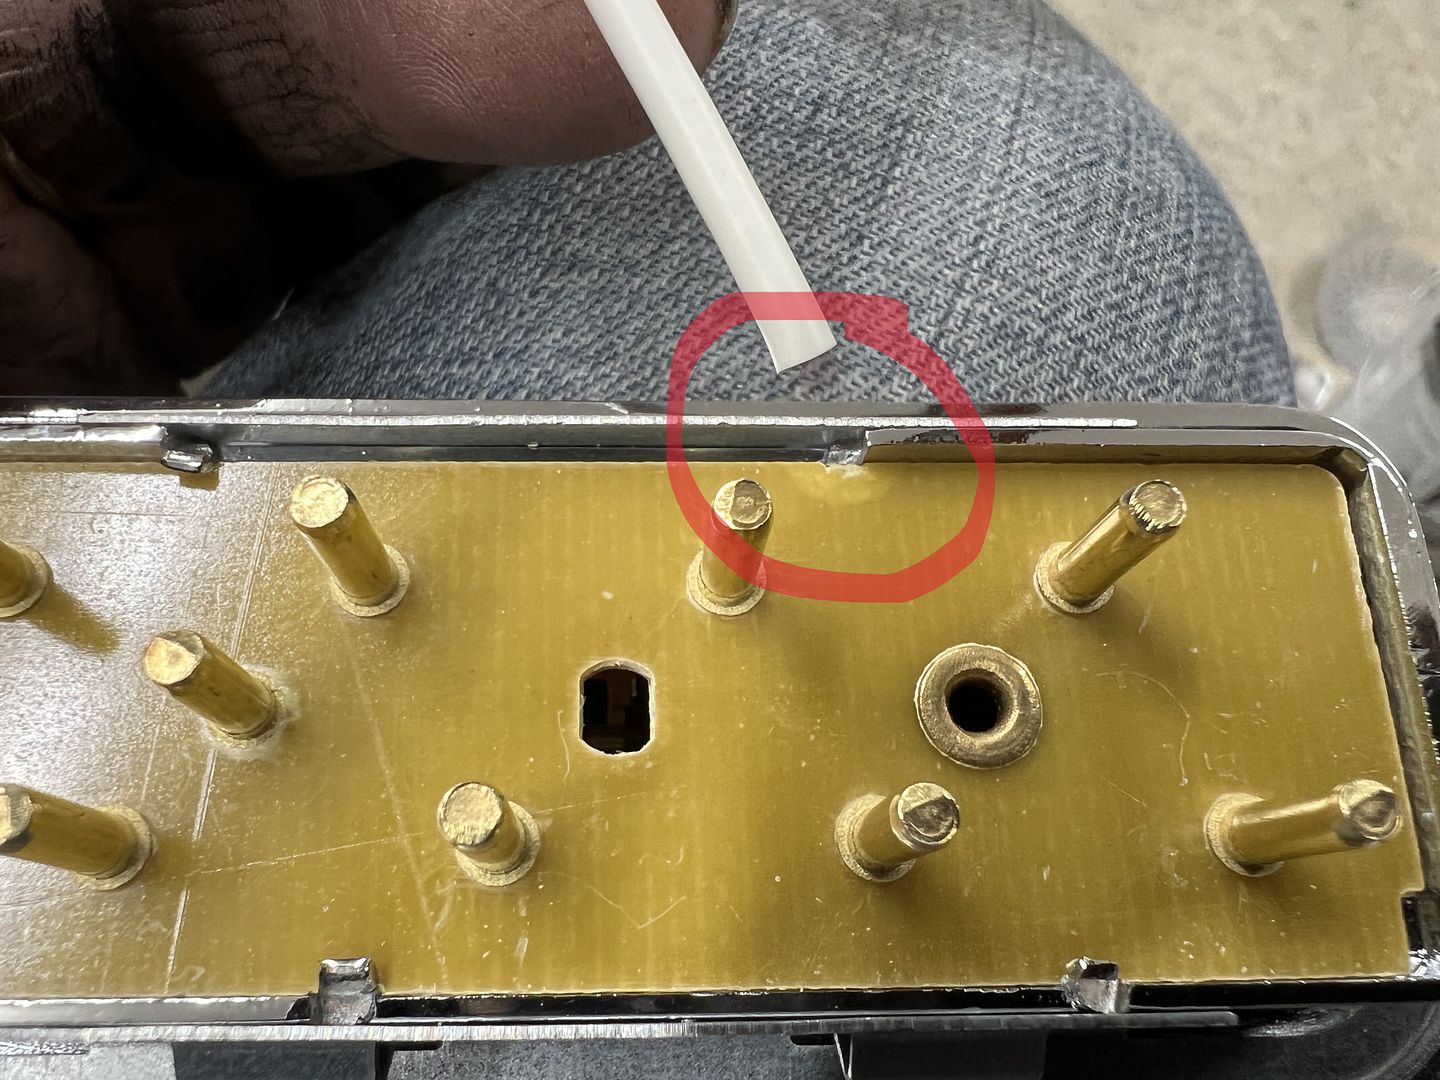
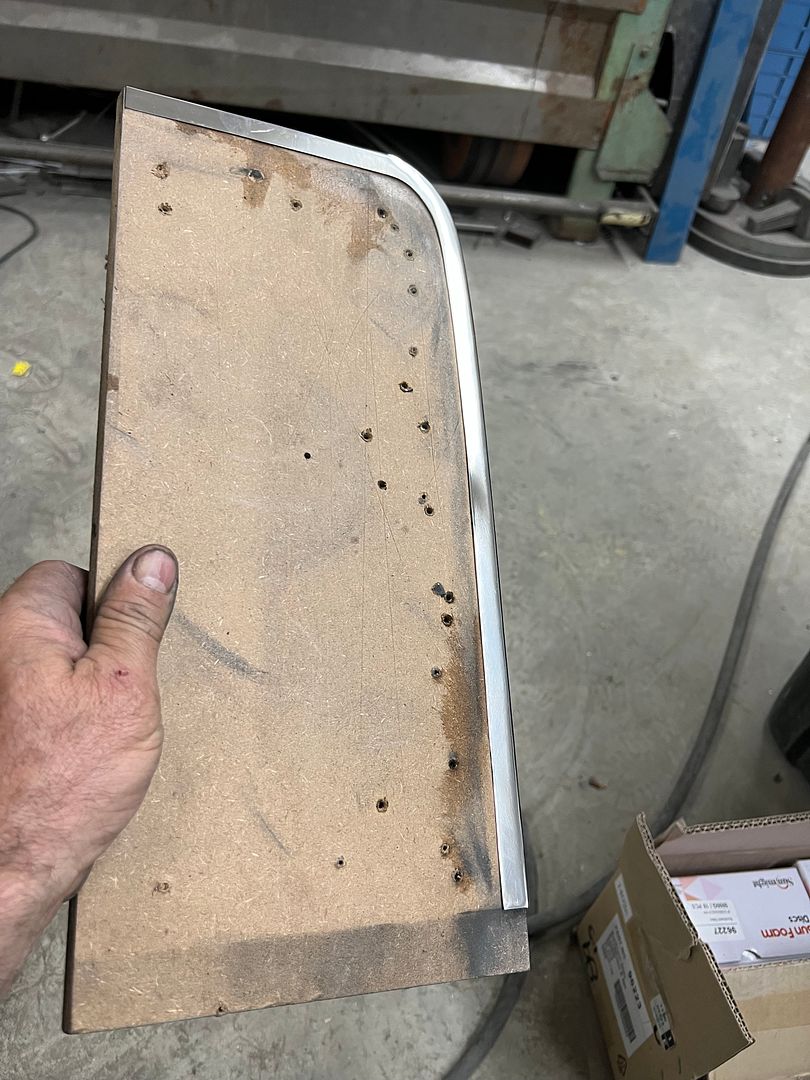
    Assembling our vent windows, the excess rubber is trimmed using a No. 11 scalpel blade for a nice and tidy fit


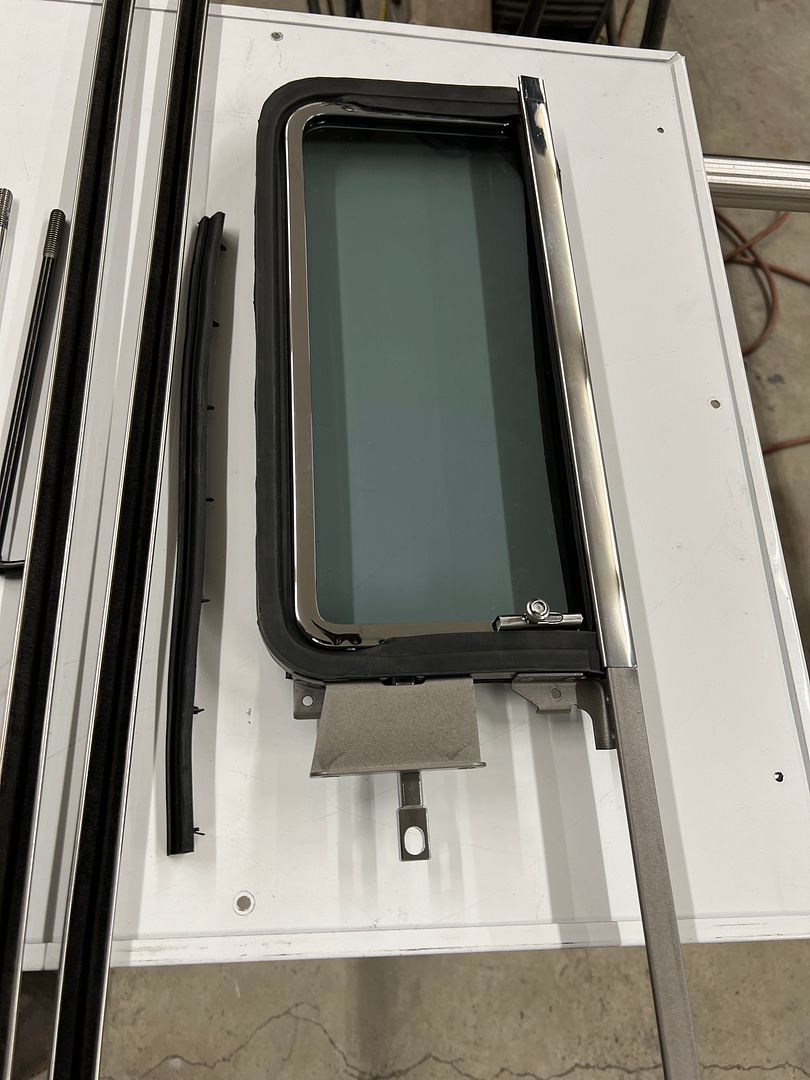
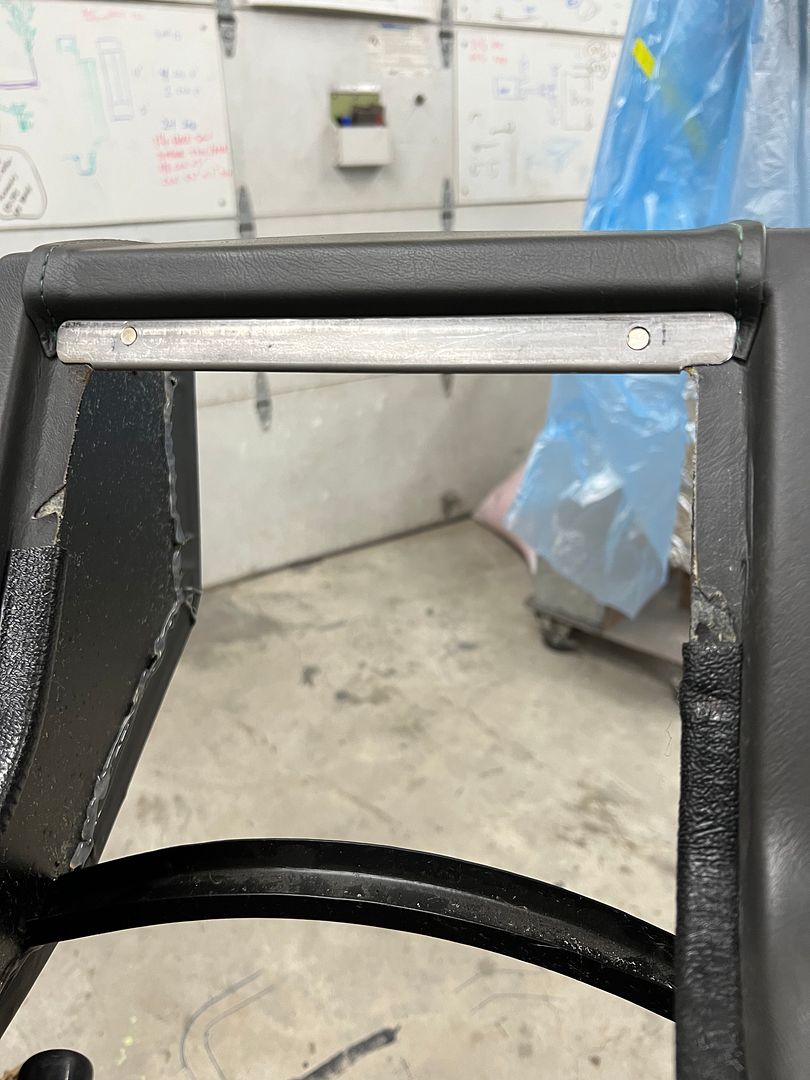
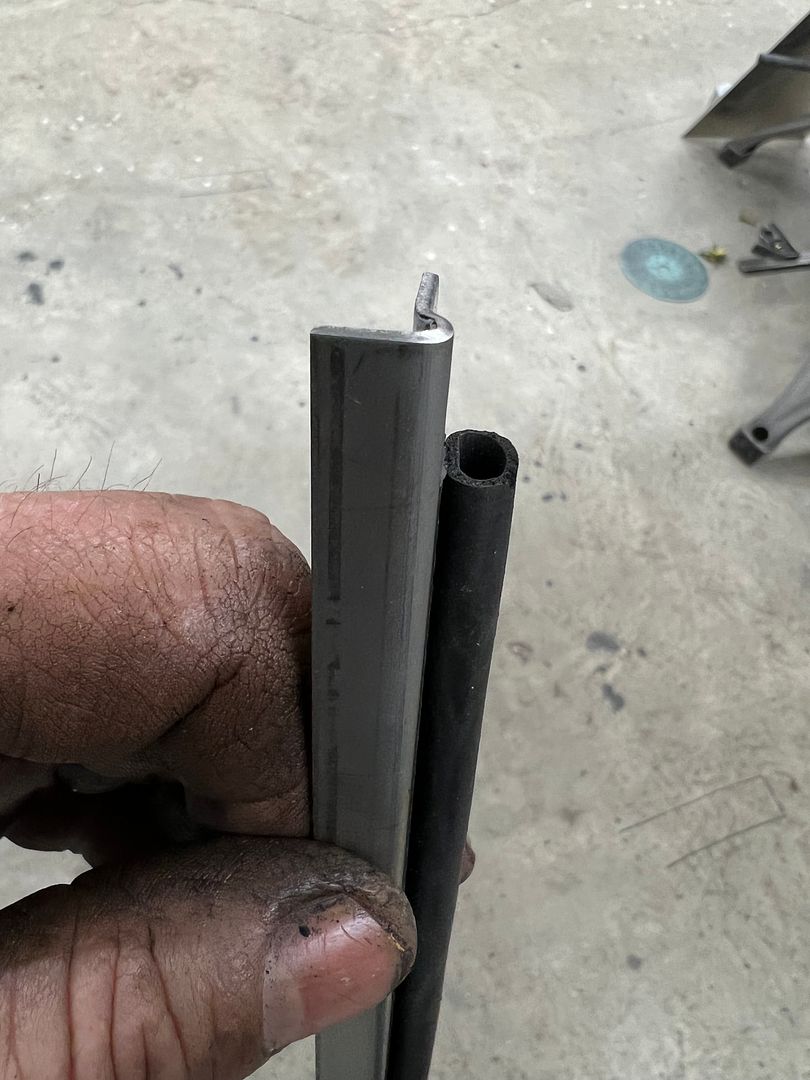
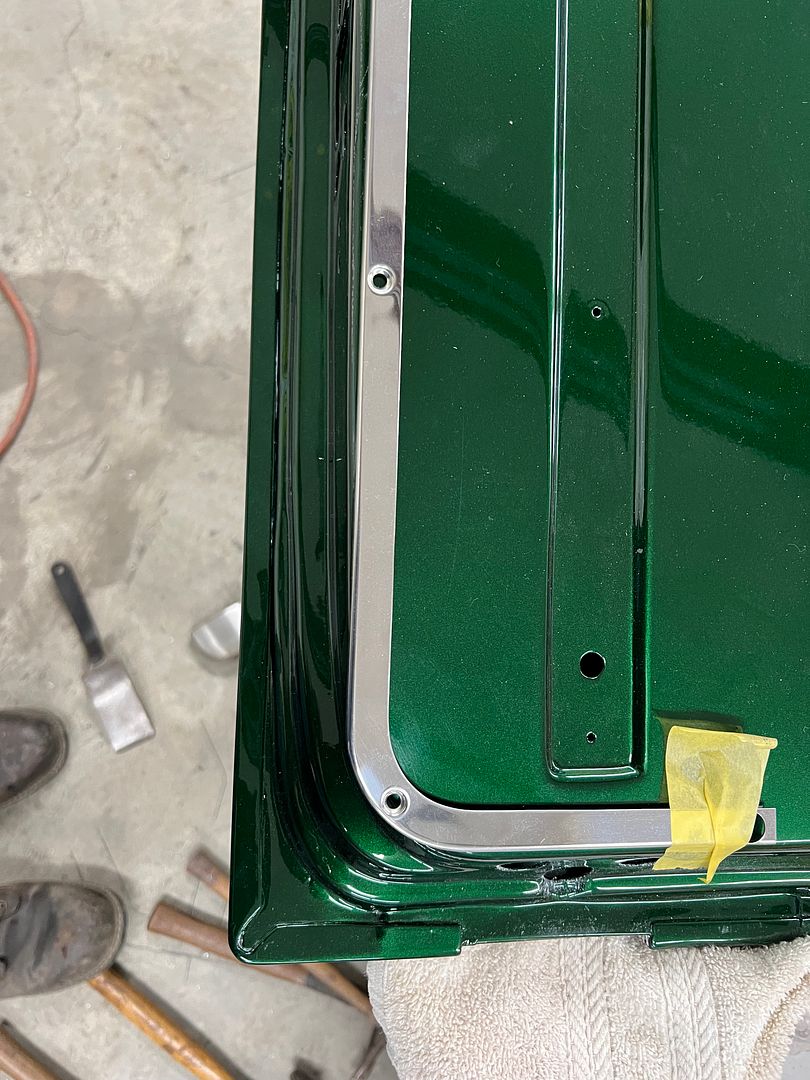
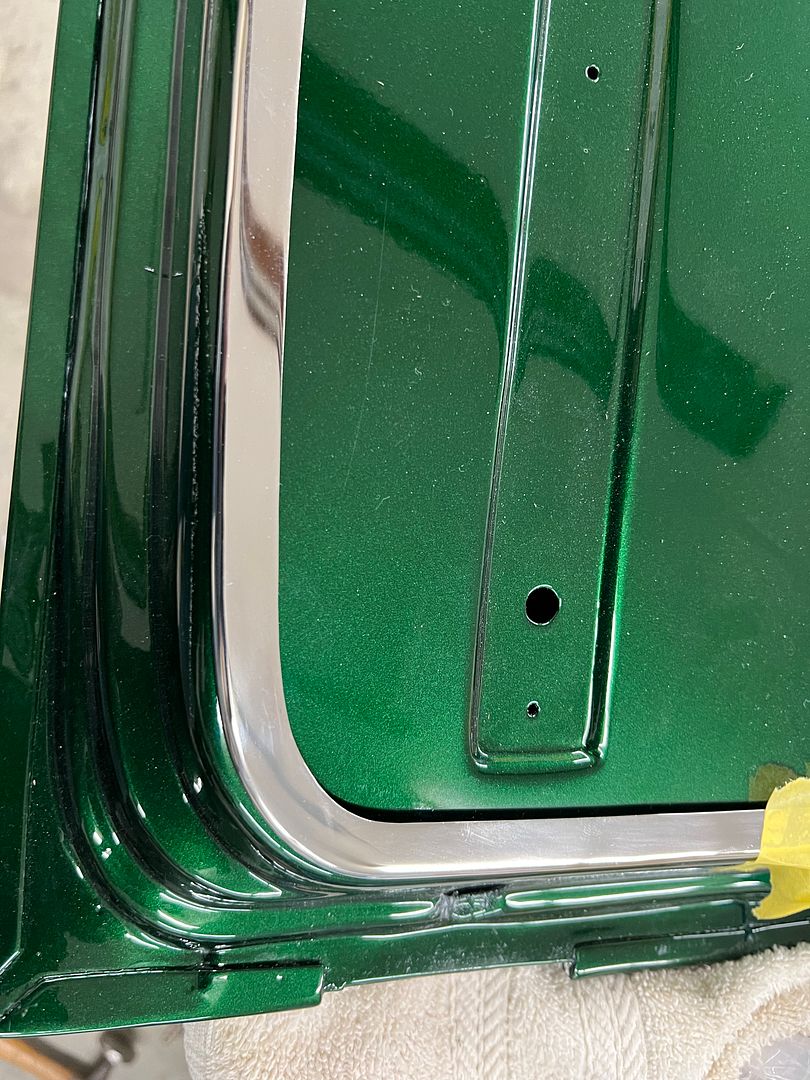
    All the bits assembled
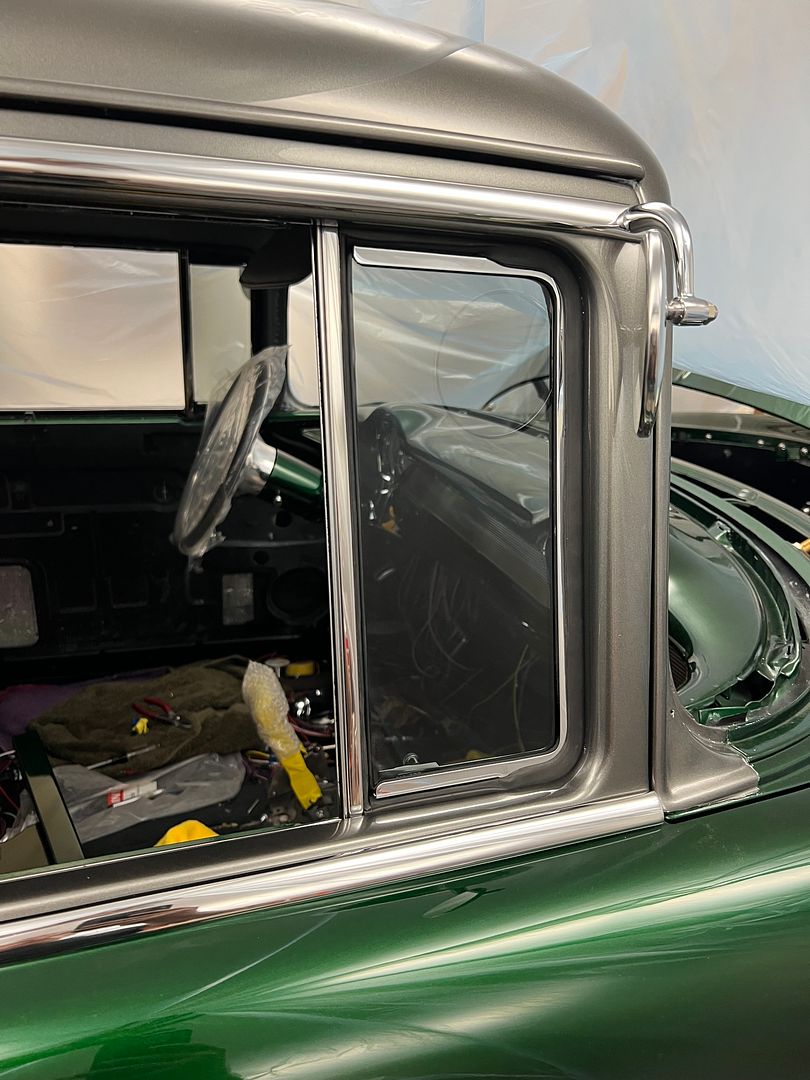
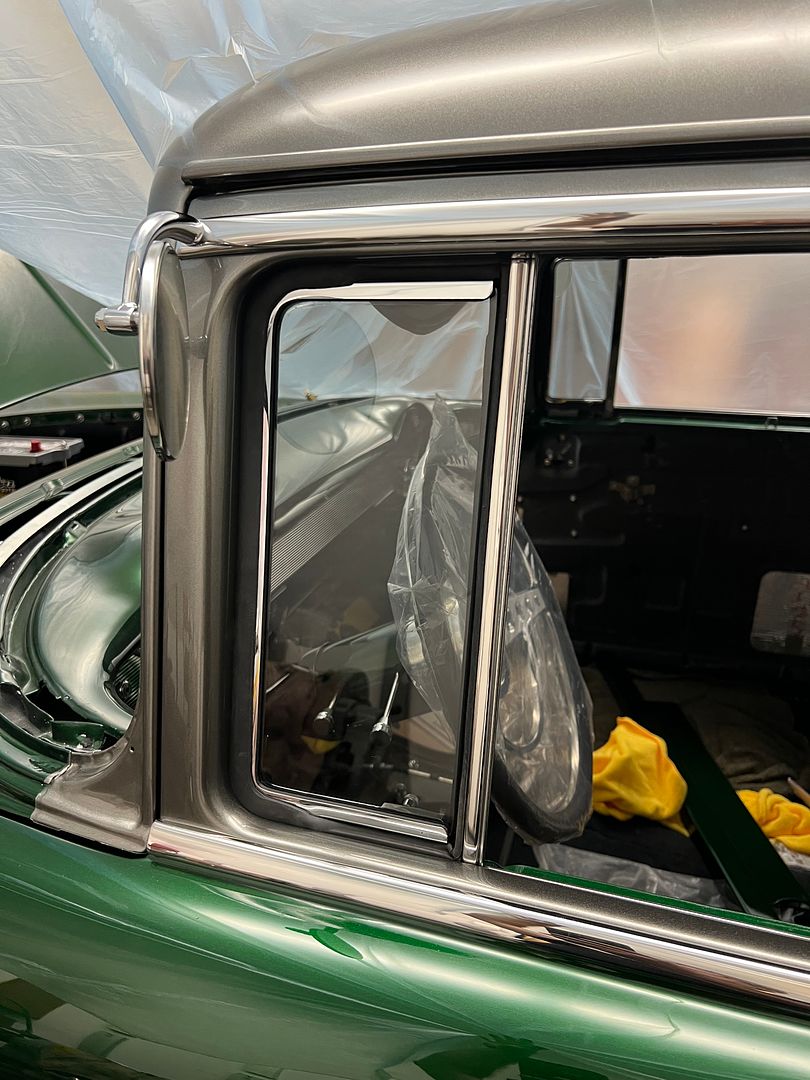
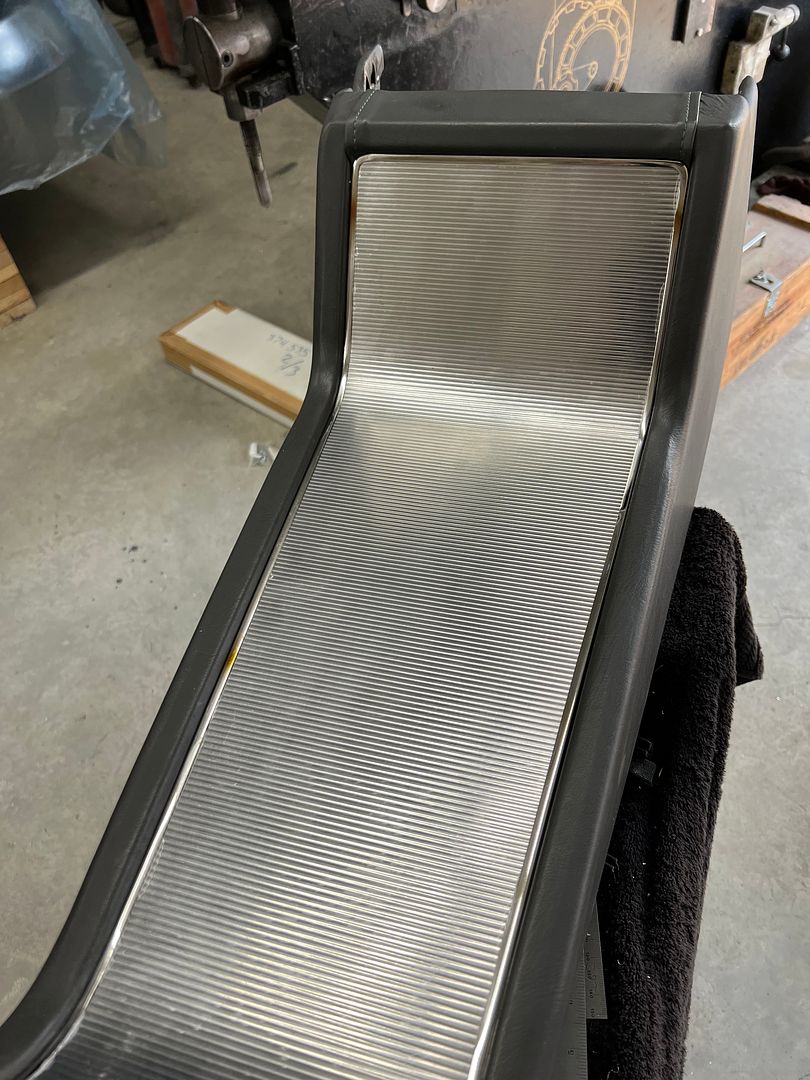
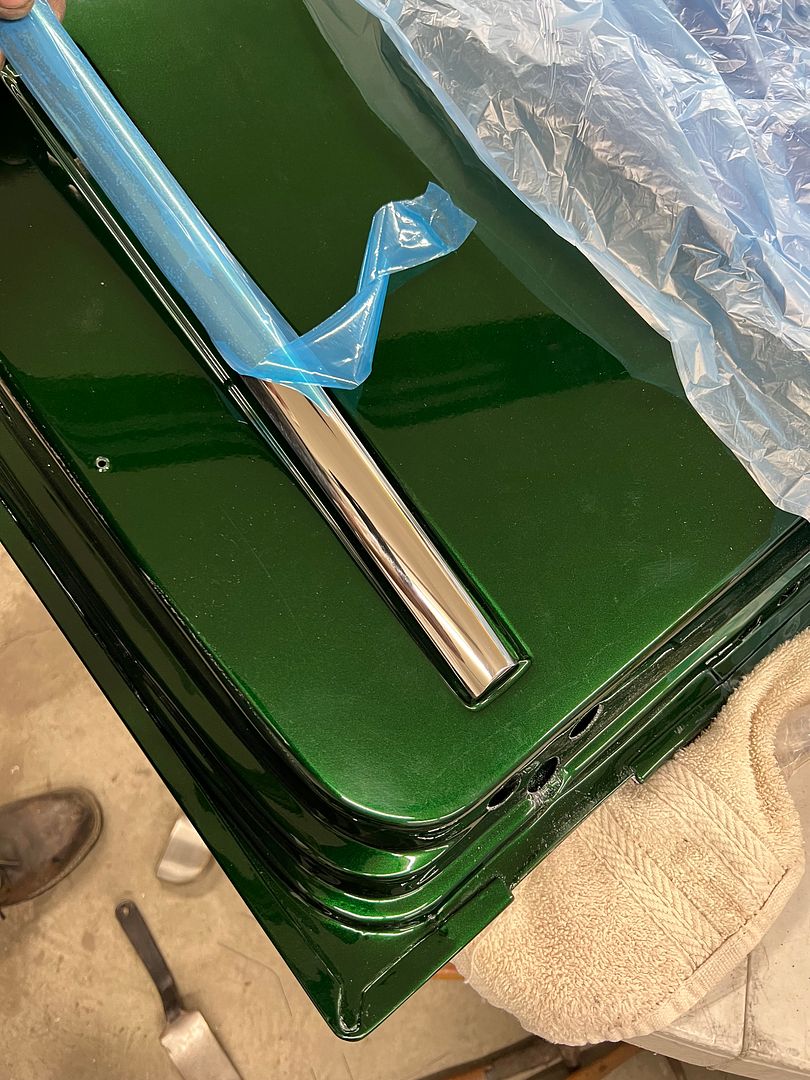
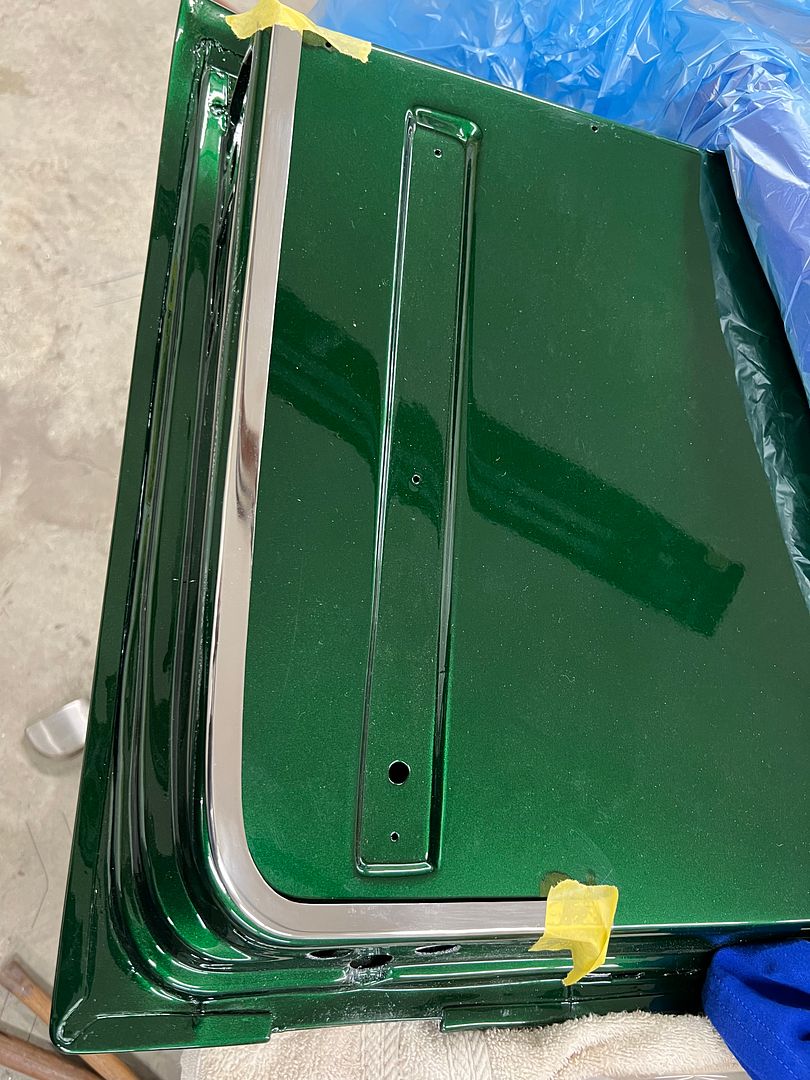


    installed...


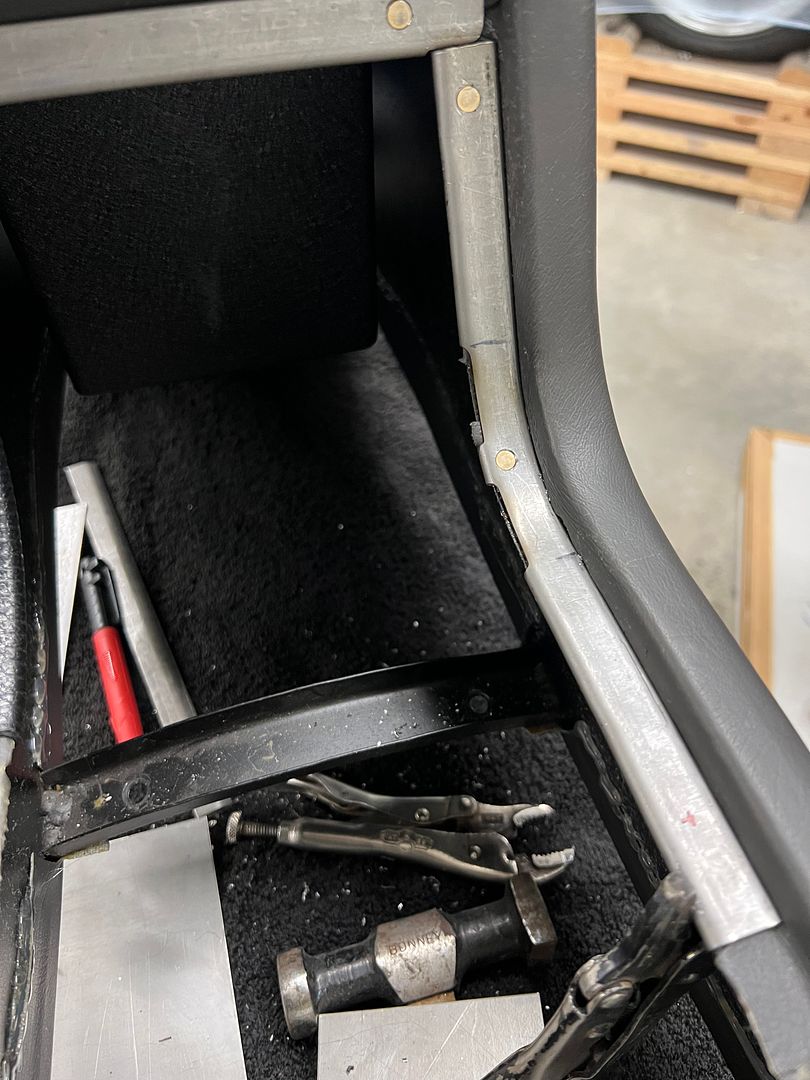
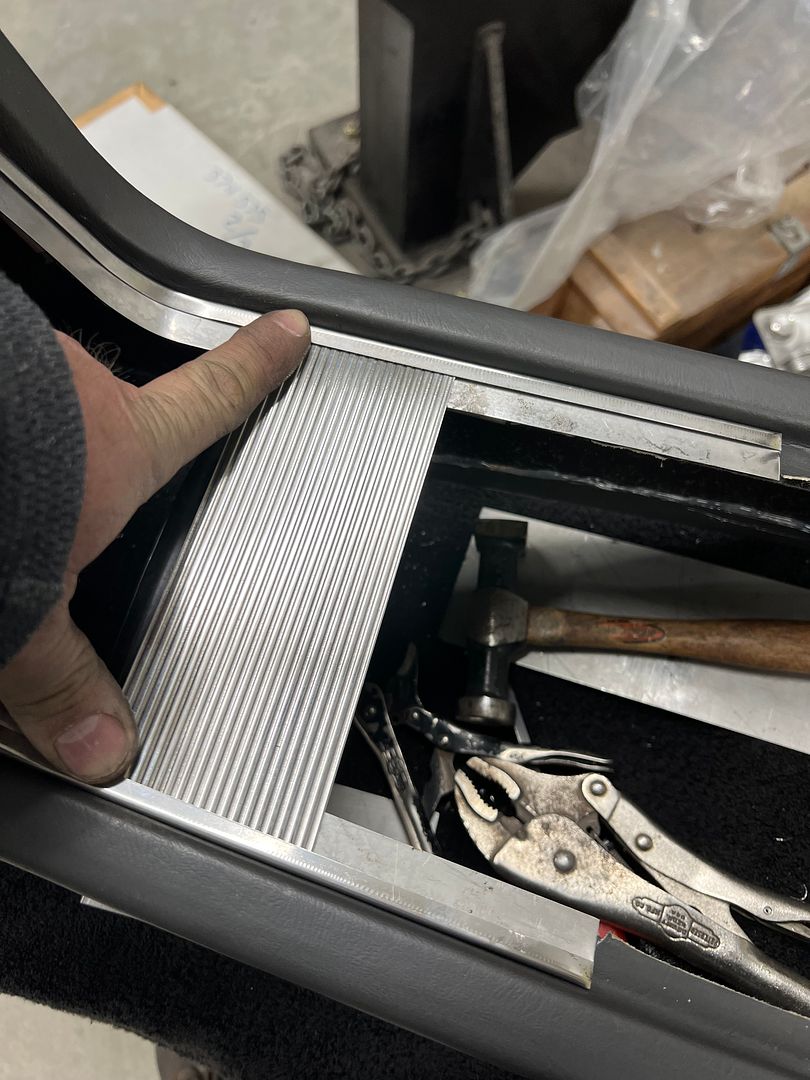
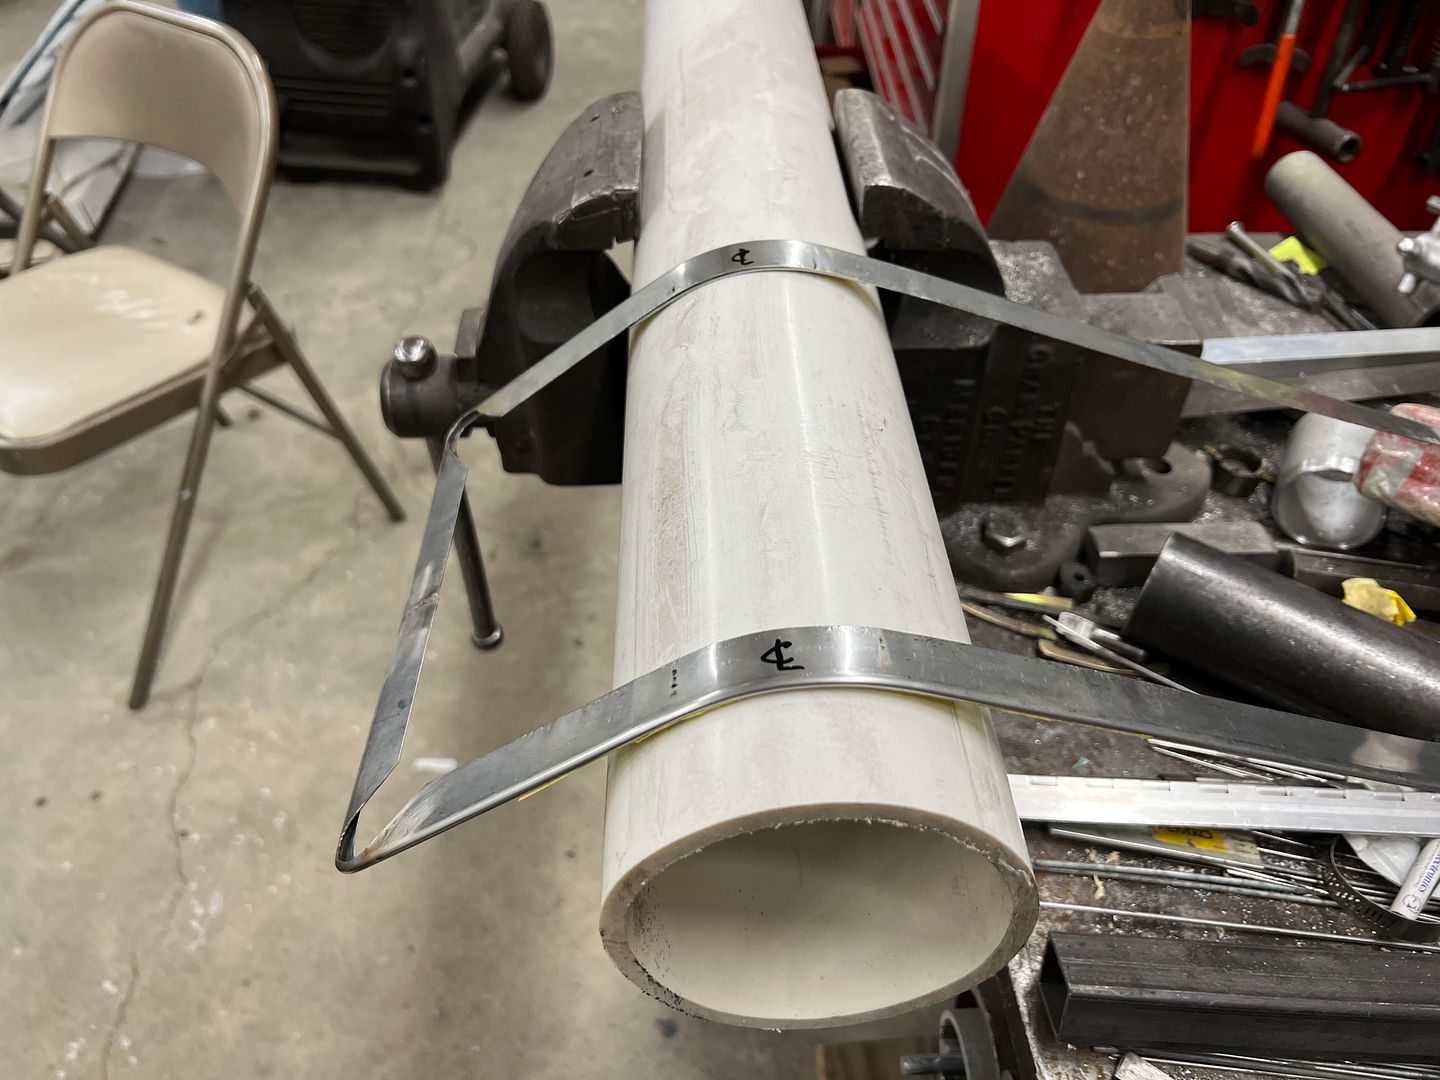
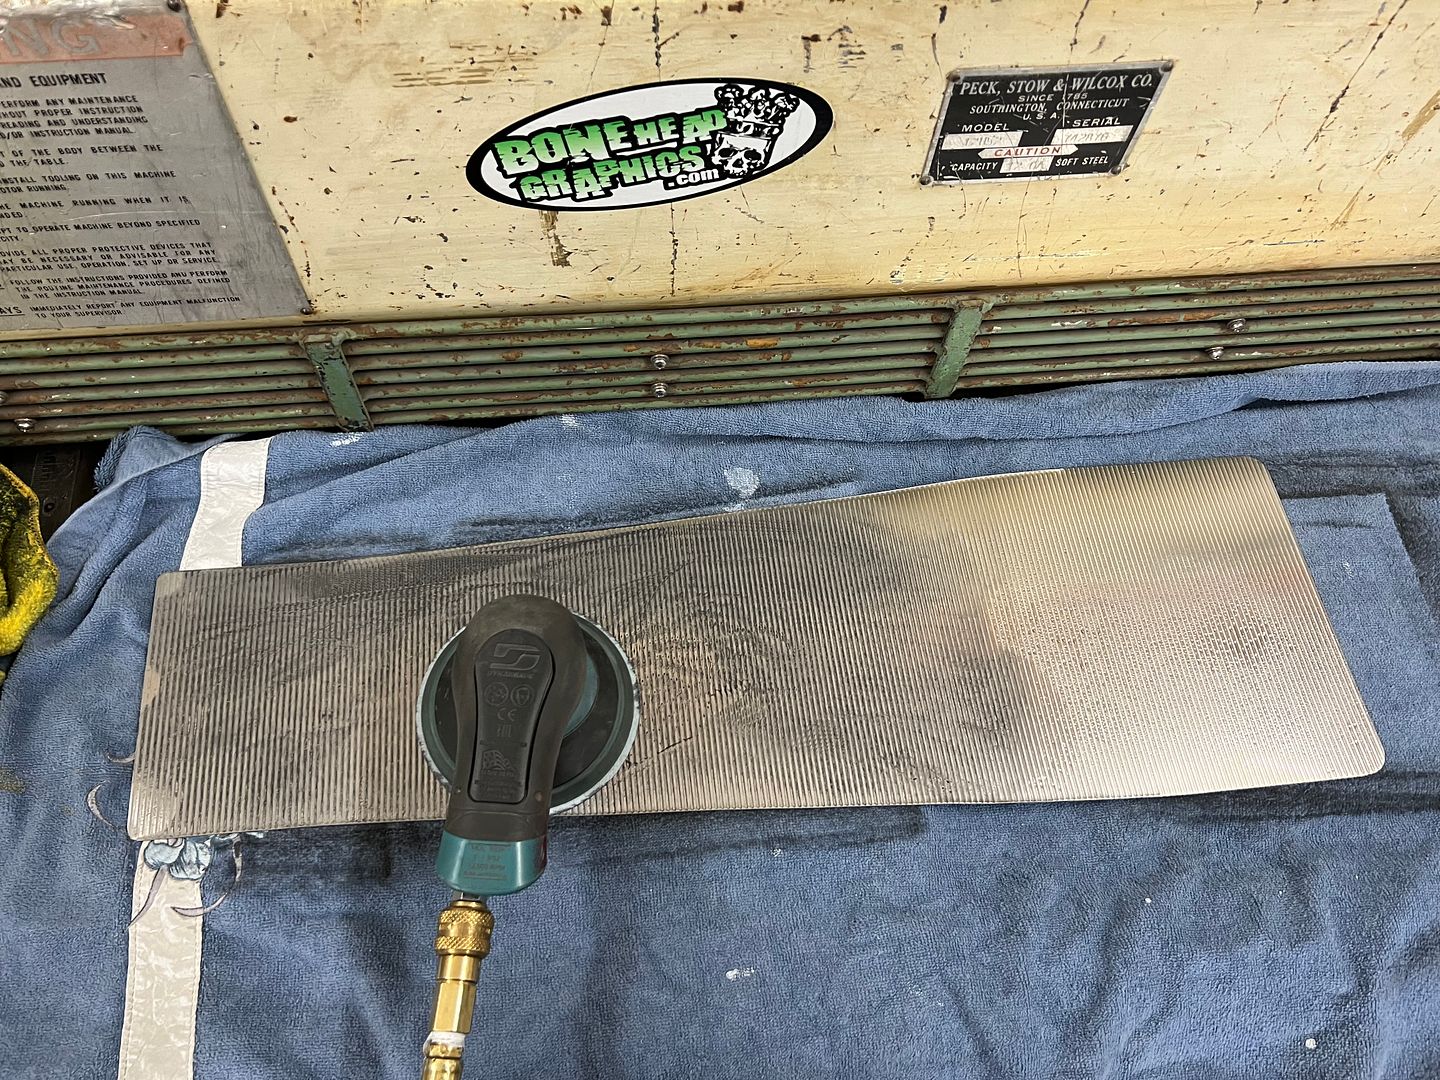
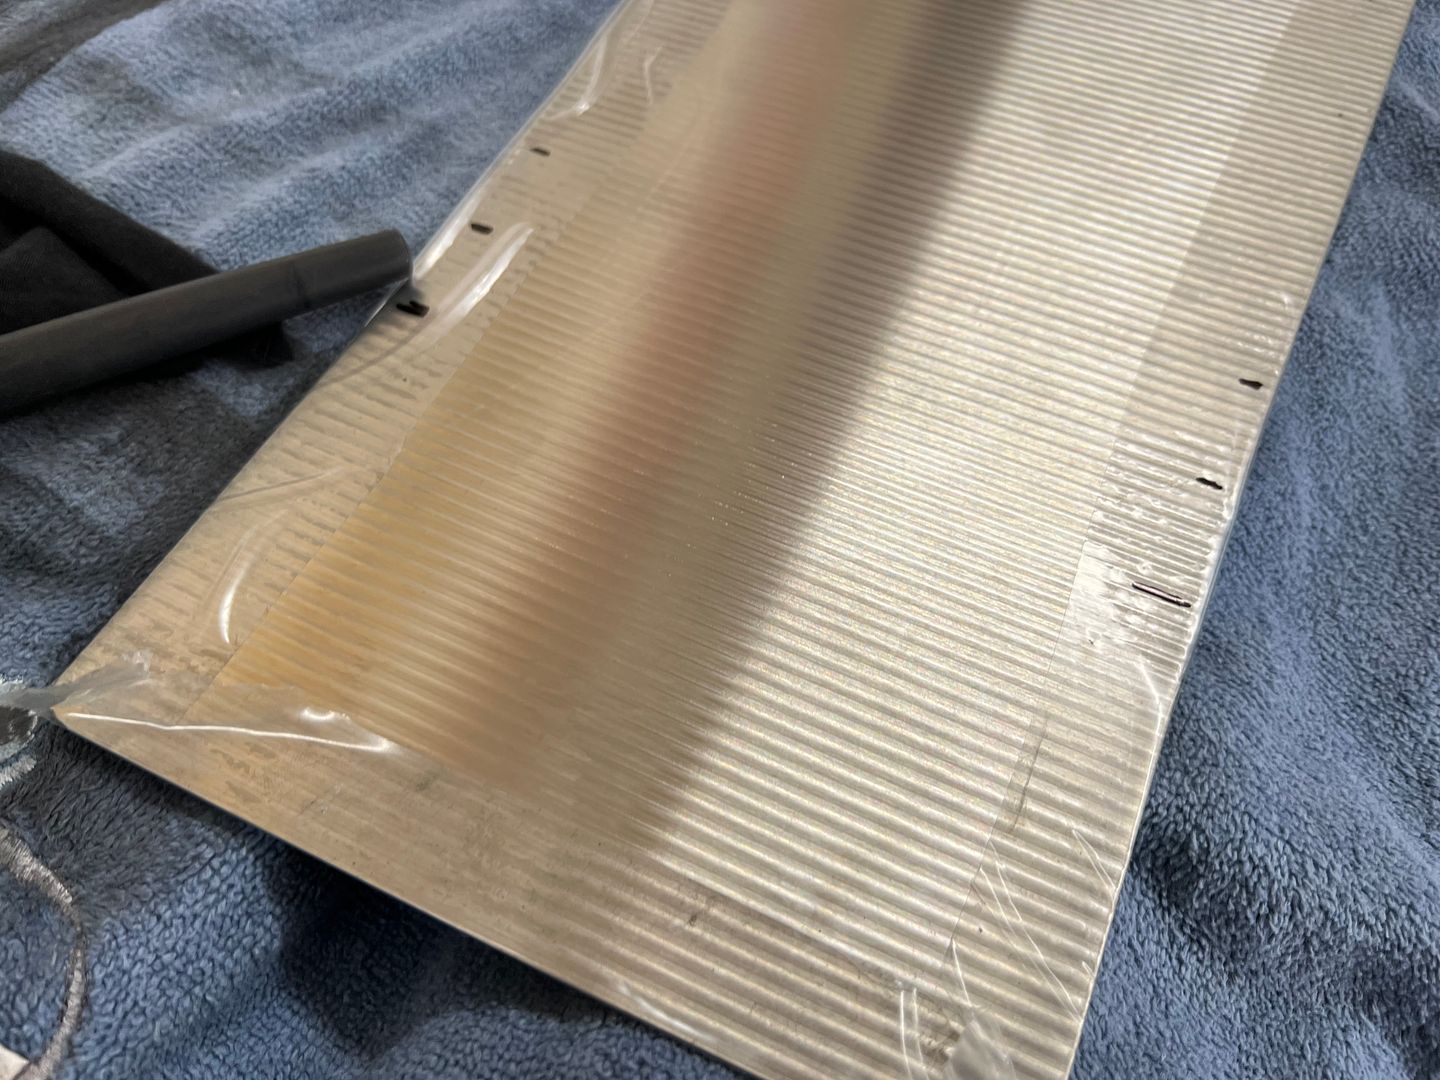
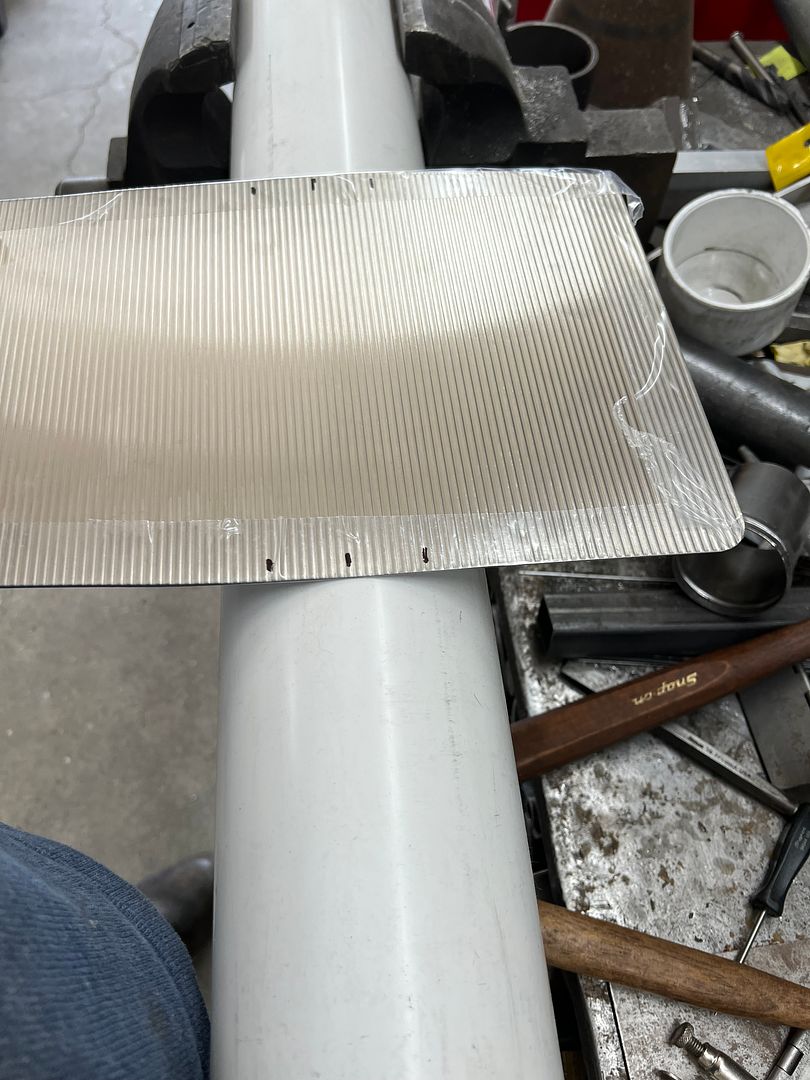
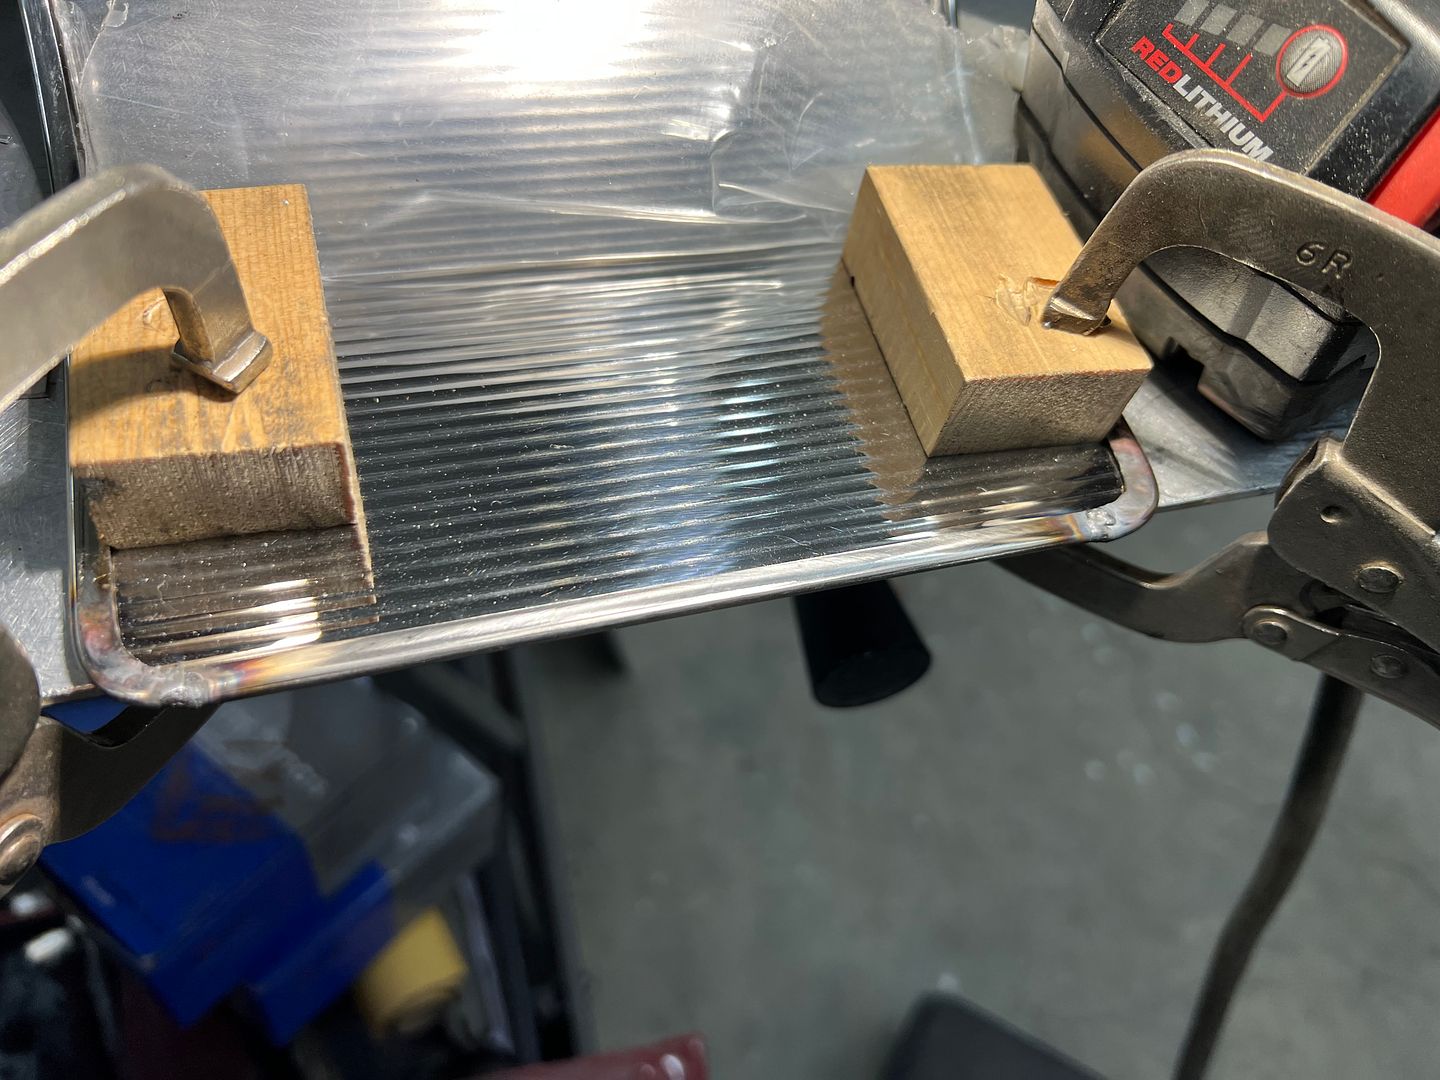
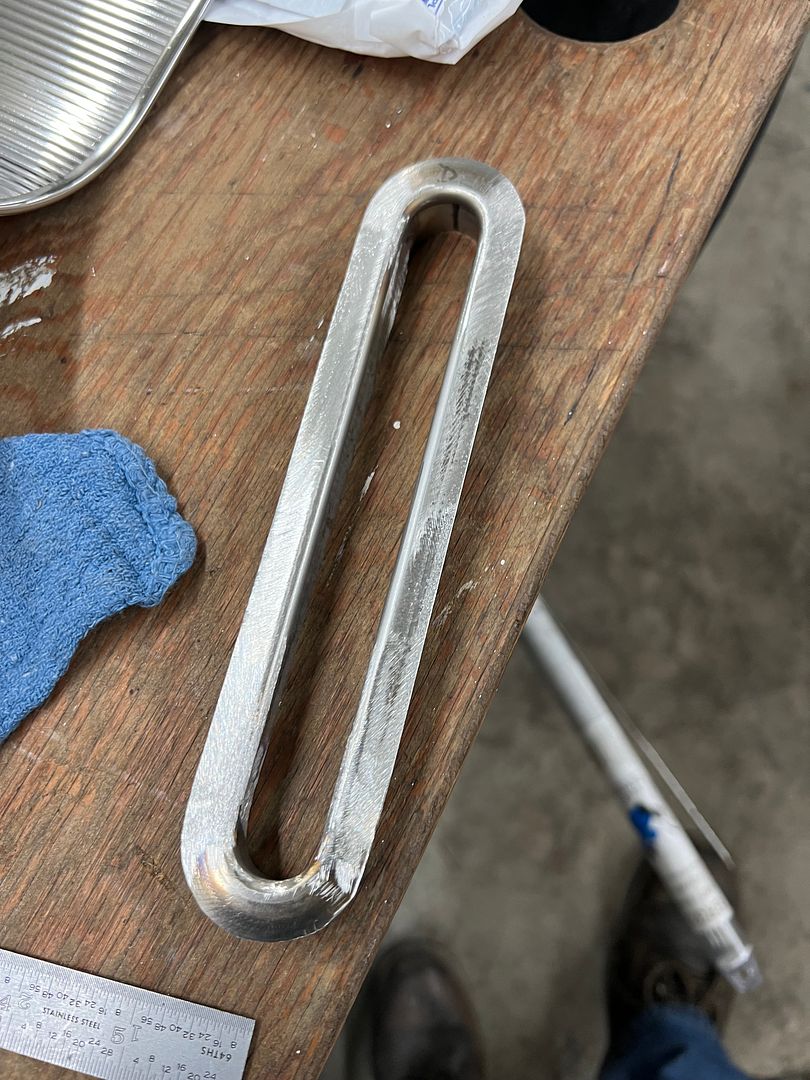
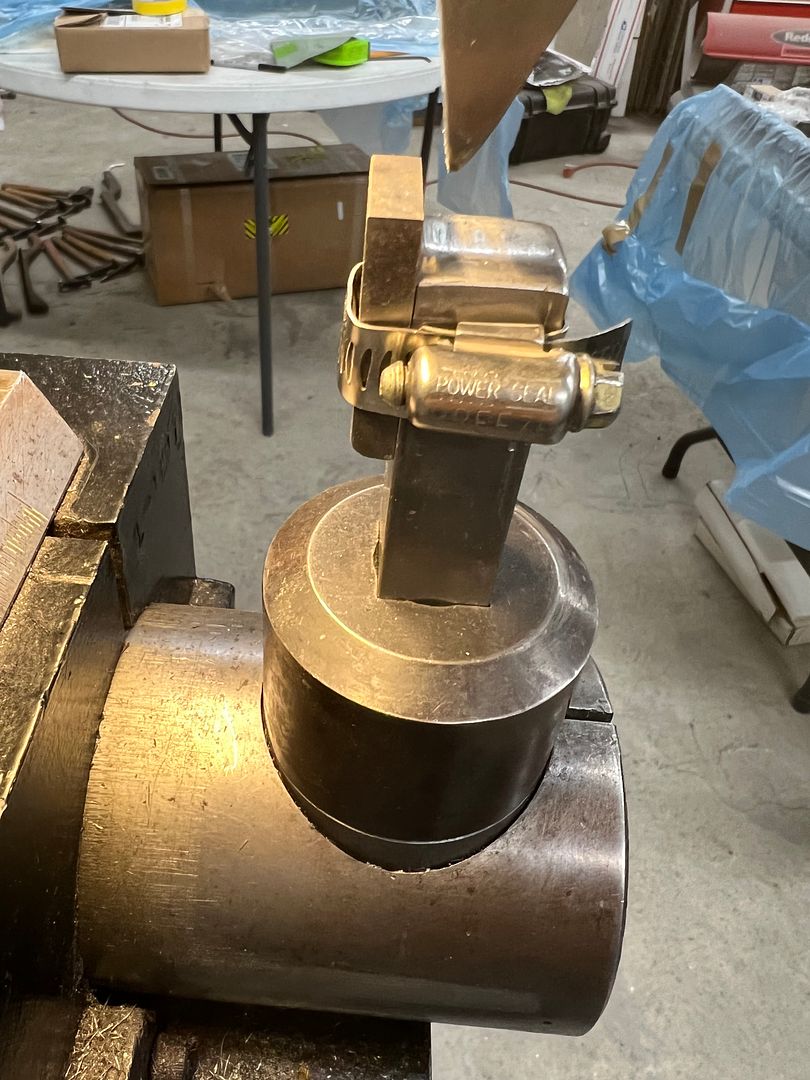
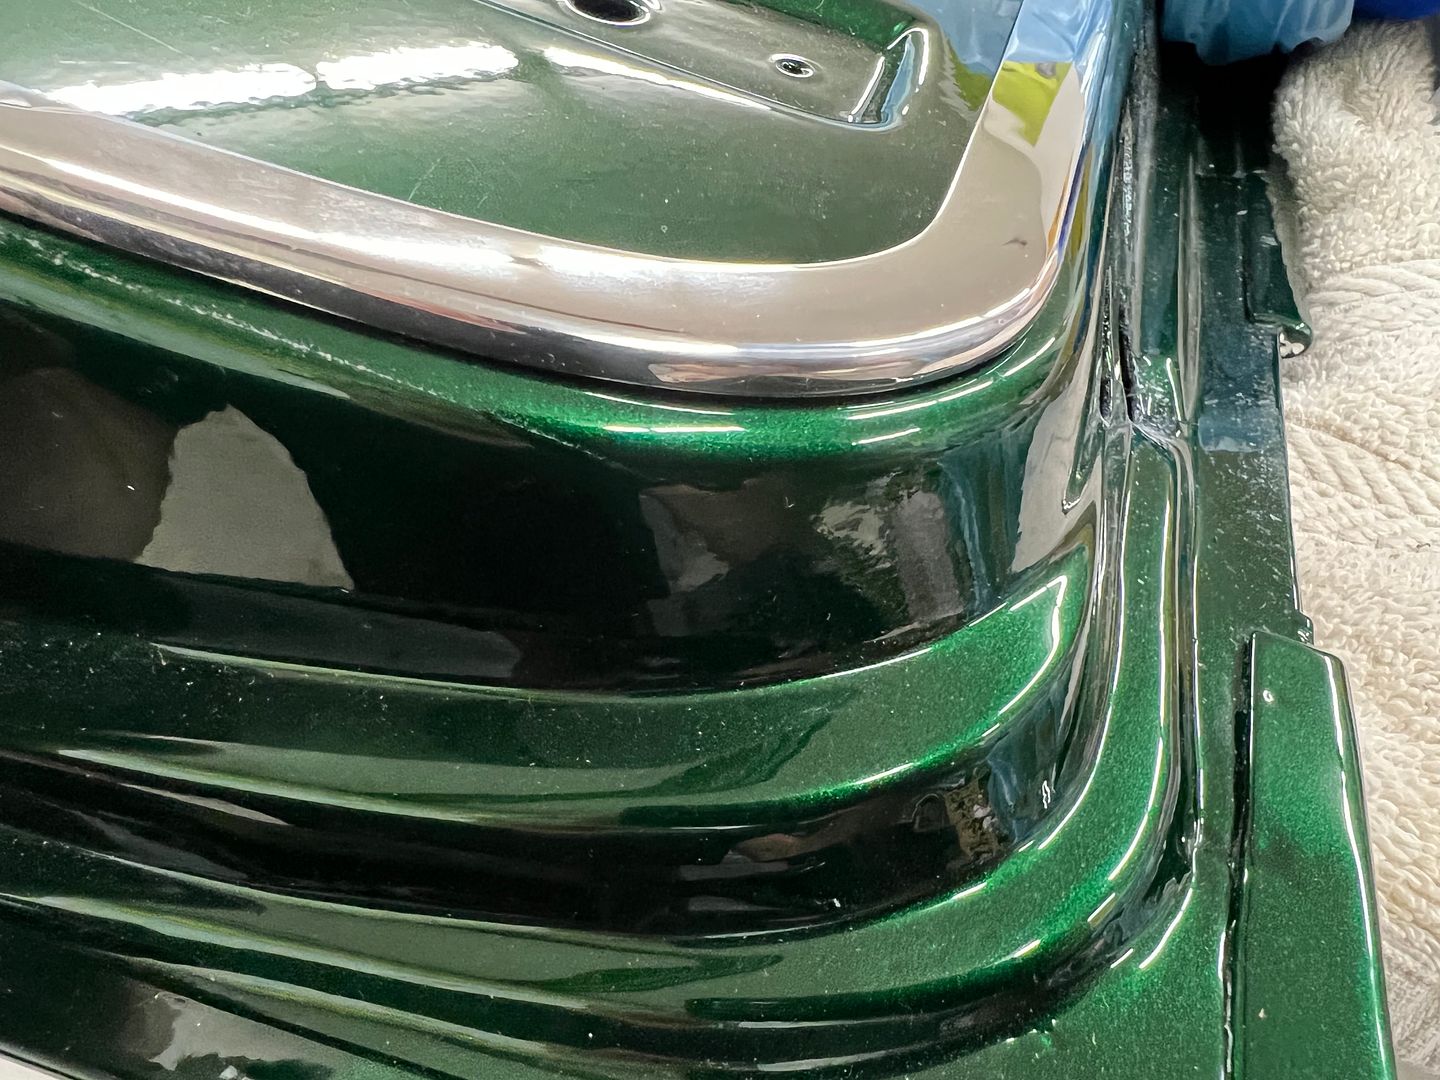
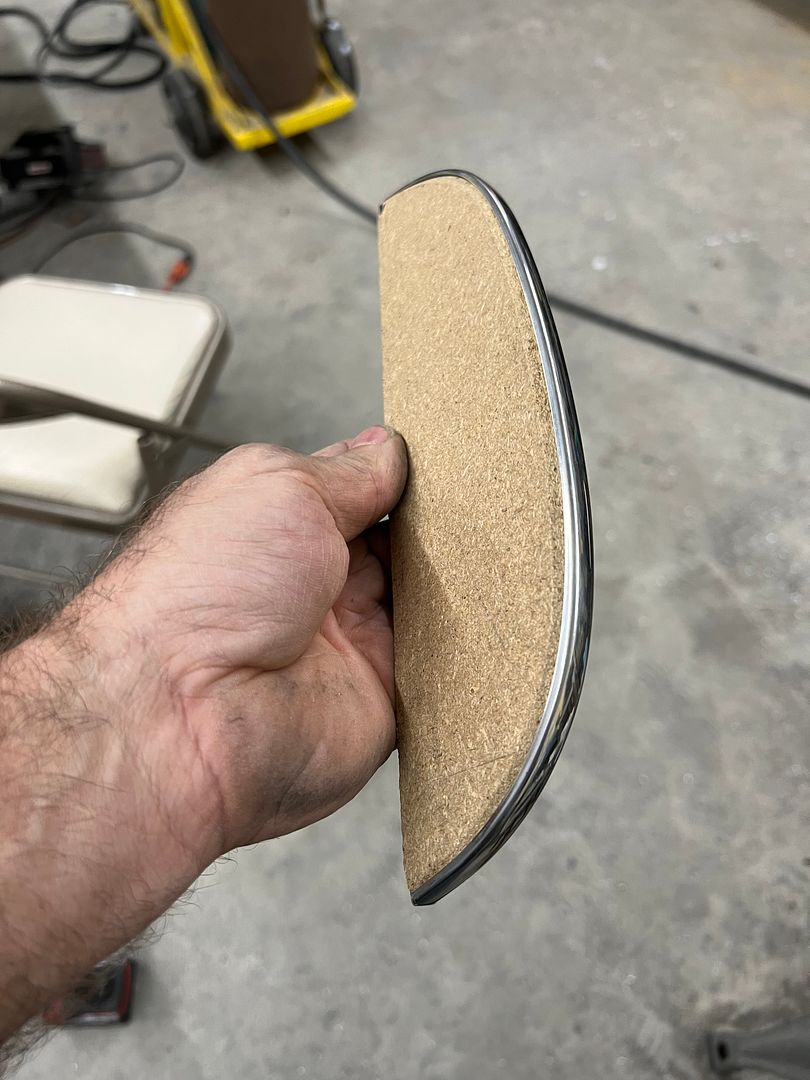
    And more stainless we missed, the parting bands for the front arm rests, complete with a form-fitted sanding/polishing fixture


    Robert


    MP&C Shop Projects-Metalshaping Tutorials


    Instagram @ mccartney_paint_and_custom


    .

    Comment

    • MP&C
      Registered Member
      • Dec 2013
      • 1302

      Trying to assemble the tailgate so we can put it on, but our latch actuator is absolutely worn out in the square hole, the handle just about rotates inside of it. They don't make repop's (that I'm aware of) and someone just offered a rebuilding service at over $300. So I reached out to my go to used parts outlet and a good used one is on the way, mailed the same day.. Reference photo:


      So while we're waiting on parts to load up the rest of the bits on the tailgate, lets chase the threaded holes....


      The console just got dropped off, we had some material in the corners that was pulling due to all the stretching that had taken place. In order to keep things more permanent, I came up with some 19 gauge stainless "trim lock". A hemmed edge helps keep from cutting into the upholstery. It gets clipped in place, shoved into the corner snugly, and through drilled for installing solid rivets.


      In order to match our dash insert, the console insert will also be oriented horizontally (lines left to right)


      We also got some of the stainless added to the front end. What an alignment pita. Still have some tweaks to do..


      Robert


      MP&C Shop Projects-Metalshaping Tutorials


      Instagram @ mccartney_paint_and_custom


      .

      Comment

      • chevynut
        Registered Member
        • Nov 2011
        • 11003

        Looking great Robert! That's one helluva nice paint job on the tailgate!
        56 Nomad, Ramjet 502, Viper 6-speed T56, C4 Corvette front and rear suspension


        Other vehicles:

        56 Chevy 2-door BelAir sedan
        56 Chevy 210 4-door sedan
        57 Chevy 210 4-door sedan
        1962 327/340HP Corvette
        1961 Willys CJ3B Jeep
        2001 Porsche Boxster S
        2003 Chevy Silverado 2500 HD Duramax
        2019 GMC Sierra Denali Duramax

        Comment

        • BamaNomad
          Registered Member
          • Nov 2016
          • 3878

          I agree with CN... the paint job looks terrific... and I love the color too.... emerald green??

          Comment

          • busterwivell
            Registered Member
            • Dec 2016
            • 797

            Looks great!

            Comment

            • MP&C
              Registered Member
              • Dec 2013
              • 1302

              Originally posted by BamaNomad
              I agree with CN... the paint job looks terrific... and I love the color too.... emerald green??

              House of Kolor Organic Green Kandy basecoat
              Robert


              MP&C Shop Projects-Metalshaping Tutorials


              Instagram @ mccartney_paint_and_custom


              .

              Comment

              • Belair-o
                Registered Member
                • Jun 2013
                • 643

                Looking great!
                Also, the last pic before these latest progress pics showed the fixture you built for polishing the thin trim. I missed it when you first posted - great idea you had to keep the trim from becoming a mangled mess during polishing - thanks for sharing!
                Thanks, Doug

                Comment

                • markm
                  Registered Member
                  • May 2012
                  • 3471

                  I love the color and I normally don't like green, anxious to see finished car.

                  Comment

                  • 567chevys
                    Administrator
                    • Oct 2010
                    • 2478

                    Hey Robert , I love that Green .

                    thanks for taking the time to post your work on this site .

                    Thanks Sid
                    sigpic
                    1955 2 DR Post
                    1937 Chevy Coupe
                    2023 Ford Super Duty F350 TREMOR
                    2019 Corvette Z06
                    1955 Chevy Nomad
                    1935 Ford 2dr Slant back I have 4

                    Comment

                    • MP&C
                      Registered Member
                      • Dec 2013
                      • 1302

                      Thanks for the comments guys!


                      More console work, time to fabricate the hemmed surround for the insert. In order for the surround to be seamless, we need to do some welding.


                      For our corners we relieve the flange and trim the back side to about half the hem width. This gives us less material in the tucks for shrinking in the corners.


                      We cut a fake insert out of 18 gauge CRS with rounded corners to use as a hammer form, gives us something to hammer against when we heat up the corners.


                      Everything's a tool, and when the PVC pipe is the only thing in the shop that matches our needed radius, it's what we use for a radius bender.


                      To prevent our hem from closing during the radius forming, some 18 gauge strips were placed in the hem.


                      Press studs used to attach to the console and will be hidden underneath the center panel.


                      Insert cut out to match our poster board sample, then it gets 800 grit, then 1000 through 5000 foam pads, then buffed..


                      Then we cover it with frisk film to protect our buffed surface.


                      Test fit...


                      Installing the surround to the filler panel


                      Still have to touch up some areas with the buffer (heat from tacking the press studs) but here's the test fit.


                      Robert


                      MP&C Shop Projects-Metalshaping Tutorials


                      Instagram @ mccartney_paint_and_custom


                      .

                      Comment

                      • MP&C
                        Registered Member
                        • Dec 2013
                        • 1302

                        Next step for the console, we need to cut some holes for the shifter. Using the Chevelle style horseshoe shifter, we don't have the factory style brush seals or trim bezel for the center plexi indicator. So lets see what we can come up with first to seal the shifters side arms. I didn't have any brush stock left over from the splice trailer, and window felt wasn't thick enough. But I did have some bulb seal that looked promising. To make a surround to hold the bulb seal, we used a folded piece of 16 gauge stainless, and put an offset to hide as much of the edge trim that holds the seal as possible.


                        To close off the ends, we used the linear stretch dies in the Lennox...


                        After welding the one end in place, the console was mocked up to get the overall length needed on the shifter seal.


                        The top flanges will be trimmed to the same width as our polished stainless edge trim surround on the console insert. This one will be used for the passenger side arm, the drivers side will have a wider flange toward the driver to accommodate the shift selector position marking.
                        Robert


                        MP&C Shop Projects-Metalshaping Tutorials


                        Instagram @ mccartney_paint_and_custom


                        .

                        Comment

                        • markm
                          Registered Member
                          • May 2012
                          • 3471

                          Cant wait to see this one finished looking good like the old truck did.

                          Comment

                          • Belair-o
                            Registered Member
                            • Jun 2013
                            • 643

                            Wow! Nicely formed - that is looking great!
                            Regards, Doug

                            Comment

                            • MP&C
                              Registered Member
                              • Dec 2013
                              • 1302

                              Thanks guys! The stretching on the ends took the 16 gauge (.059) down to .031 thick.
                              Robert


                              MP&C Shop Projects-Metalshaping Tutorials


                              Instagram @ mccartney_paint_and_custom


                              .

                              Comment

                              • MP&C
                                Registered Member
                                • Dec 2013
                                • 1302

                                We had ordered a 4 position switch for the power windows in the wagon, with plans to install in the console. Not knowing the origin of the part when it showed up, I thought some due diligence was in order and broke out the multimeter to test all the switch positions for connectivity. Wouldn't you know, one of the end switches had no contact in one position. Further investigation showed that the spring contact board was held in place with four tabs from the factory, except we only had three, which allowed the board/switch to lose contact. I sent the next picture of the damaged part (pointing to the damage with a white wire) in a message to the eBay seller who immediately questioned my abilities with a multimeter and assured me it functioned exactly as it should.


                                So for a more direct approach, I assured them I knew how to operate a multimeter, and perhaps they should look at the attached picture this time. To help eliminate any interpretation errors, I had doctored the original rear view picture to make things more obvious since they missed the visual cues the first time....


                                Oh, that. We'll send out a new switch. Thank you..


                                So with the console on hold to make sure we didn't have to use a different style switch (in case their whole batch was bad) we turned our attention to the tailgate, and started the fit up of the Mad Mooks polished stainless border trim. https://madmooks.com/ To preface, I will say the Mad Mooks parts are some of the nicest fit and finish parts you'll find ANYWHERE to trim out your Tri-five Chevy, as well as parts for other GM vehicles. Only the corner pieces didn't fit our tailgate. It appears that when yours truly did the rust repairs of the tailgate (before repop's were available) the replacement patches weren't exactly spot on. So yes, this is my F-up..


                                We had also ordered some stainless strips for the voids in the tailgate from McMillan Rod and Custom and wanted to retain the stainless border to use with these parts.


                                We had some 19 gauge stainless in stock, so let's give this a go. First order is to make sure we can duplicate the dimpled hole for the countersunk screws...


                                Next, the folded (side) flange on the trim piece is a consistent width and will need to be real accurate. So we opted for a hammer form to match the shape, used a tipping die to thin the bend location (to tell the metal where to bend) and a backstop on the Lennox to set the flange height. A paper pattern was used to capture the tailgate outline.


                                After the flange had been folded, the top part of the hammer form is set aside and the bottom section used to hold the part for polishing. We'll get it polished, trim the width and punch dimple holes, and then do a final polish.


                                Test fit looks much better to match our one-off tailgate.


                                Robert


                                MP&C Shop Projects-Metalshaping Tutorials


                                Instagram @ mccartney_paint_and_custom


                                .

                                Comment

                                Working...