Just joined? Please introduce yourself.
Page 41 of 61 FirstFirst ... 31394041424351 ... LastLast
Results 401 to 410 of 609

Thread: Nomad final assembly

  1. #401
    Registered Member chevynut's Avatar
    Join Date
    Nov 2011

    Member #:115
    Location
    Fort Collins, CO
    Posts
    10,846
    Quote Originally Posted by Tabasco View Post
    I made a copy of the picture of the fuse panel from AAW instructions. I blew it up to full page size, printed it and put it in the glove compartment. No if I need to replace a fuse I don't have to try to read the writing on the fuse panel. I can read on the picture I printed a lot easier. Then I can remove the fuse from the panel location that matches the location on my picture.
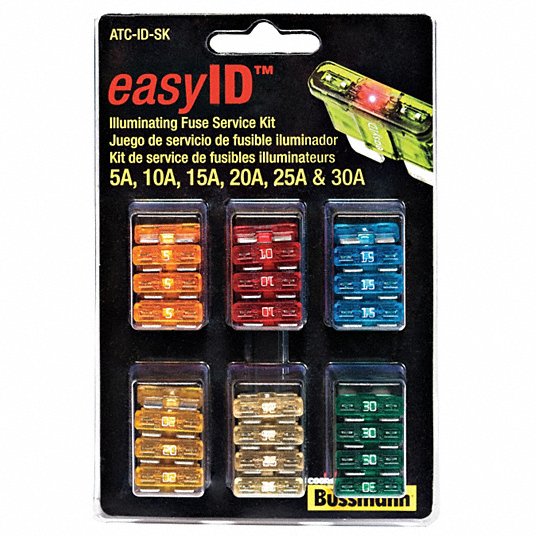
    I plan to put one on the underside of the cover or in the glove box. They now make fuses that have an LED in them so if they blow the LED turns on. It doesn't help if you just want to disable a circuit, though.

    https://www.zoro.com/eaton-bussmann-...specifications

    56 Nomad, Ramjet 502, Viper 6-speed T56, C4 Corvette front and rear suspension


    Other vehicles:

    56 Chevy 2-door BelAir sedan
    56 Chevy 210 4-door sedan
    57 Chevy 210 4-door sedan
    1962 327/340HP Corvette
    1961 Willys CJ3B Jeep
    2001 Porsche Boxster S
    2003 Chevy Silverado 2500 HD Duramax
    2019 GMC Sierra Denali Duramax

  2. #402
    Registered Member chevynut's Avatar
    Join Date
    Nov 2011

    Member #:115
    Location
    Fort Collins, CO
    Posts
    10,846
    Quote Originally Posted by BamaNomad View Post
    (It's a SORRY PART of the AAW design, to go with their half-ass explanation of what they did re changes from original...)
    I thought about trying to start with an AAW kit but the wires weren't long enough to put it in the console. I did buy another "Kwik Wire" kit that was garbage and was made with inferior wire. So i just bought the stackable fuse blocks and dozens of rolls of wire and built my own harness. There's about 80 wires going from the dash to the console and around 30 going from the console to the to the engine. I have 8 relays under the dash and 12 in the console. There's also 3 Dakota Digital modules (fan controller, door lock controller, auto headlight and dome light controller), 4 one-touch power window controllers (2 are for electric cutouts), a GM spark control module, Holley Wideband O2 module, stereo/backup camera wiring, and a keyless entry/alarm module. I also have a Dakota Digital cruise control, power vent windows, an electric power brake pump, electric fuel pump, backup lights, Halo headlights, Vintage Air A/C, reverse lock-out, power antenna, electric hood release, and auto-dimming mirror that all needed to be wired. It's all pretty well documented in a notebook and so far, everything works but I'm far from testing it all. No "kit" would have made sense.
    56 Nomad, Ramjet 502, Viper 6-speed T56, C4 Corvette front and rear suspension


    Other vehicles:

    56 Chevy 2-door BelAir sedan
    56 Chevy 210 4-door sedan
    57 Chevy 210 4-door sedan
    1962 327/340HP Corvette
    1961 Willys CJ3B Jeep
    2001 Porsche Boxster S
    2003 Chevy Silverado 2500 HD Duramax
    2019 GMC Sierra Denali Duramax

  3. #403
    Registered Member chevynut's Avatar
    Join Date
    Nov 2011

    Member #:115
    Location
    Fort Collins, CO
    Posts
    10,846
    As I mentioned before, I am using "one touch" window controllers for my electric cutouts. The nice thing about this setup is that you don't have to hold the switch until full open or close, all you have to do it tap the switch like you do an "auto-down" window. I'm using this footwell light switch from a Porsche and I thought the logo on it was pretty cool plus it matches my door lock and window switches.


    I had connected both cutouts to one controller, but found that as one cutout started "dragging" it drew more current. As a result, the window controller would stop with one of the cutouts partially open or closed. I had to hit the button again to get the other one to close or open all the way. To address this I decided to use two controllers, one for each cutout. The controllers now only have to deliver half the current as before, and current rise from one closing doesn't stop the other from opening or closing all the way.
    Last edited by chevynut; 12-08-2022 at 10:42 AM.
    56 Nomad, Ramjet 502, Viper 6-speed T56, C4 Corvette front and rear suspension


    Other vehicles:

    56 Chevy 2-door BelAir sedan
    56 Chevy 210 4-door sedan
    57 Chevy 210 4-door sedan
    1962 327/340HP Corvette
    1961 Willys CJ3B Jeep
    2001 Porsche Boxster S
    2003 Chevy Silverado 2500 HD Duramax
    2019 GMC Sierra Denali Duramax

  4. #404
    Registered Member chevynut's Avatar
    Join Date
    Nov 2011

    Member #:115
    Location
    Fort Collins, CO
    Posts
    10,846
    Recently I've been working on installing my Nomad roof rail weatherstrips and headliner tack strips. I have all the new tack strips in except the one at the windshield and the front of the b-pillar. Hope to get those in soon.

    The roof rail weatherstrips are a pain in the ass. Mine are Danchuk, and only they and I think Soff Seal make them. The Danchuk ones are the only ones that have metal in them like the originals, and are shaped properly. However, they're not made exactly like the originals for some stupid reason. My originals have a rubber "flap" that the window seals against but the repops don't. Also, when you install the screws they look like crap because you can see them unlike the original roof rail where the screws are kind of hidden behind that flap. I'm trying to figure out a better solution to this and have a couple of ideas. Anyone have any ideas of their own?
    56 Nomad, Ramjet 502, Viper 6-speed T56, C4 Corvette front and rear suspension


    Other vehicles:

    56 Chevy 2-door BelAir sedan
    56 Chevy 210 4-door sedan
    57 Chevy 210 4-door sedan
    1962 327/340HP Corvette
    1961 Willys CJ3B Jeep
    2001 Porsche Boxster S
    2003 Chevy Silverado 2500 HD Duramax
    2019 GMC Sierra Denali Duramax

  5. #405
    Registered Member WagonCrazy's Avatar
    Join Date
    Mar 2012

    Member #:530
    Location
    Santa Clarita, CA
    Posts
    1,797
    I will take a picture of mine and (probably) concur with you that they were a PITA to install, left the screwheads exposed, and the window in the door doesn't even fit the contour. I'll get to that later today.
    1957 Nomad- LS1/T56 on C4 chassis
    1959 Fleetside Apache 1/2 ton, shortbed, big window, 327ci.

  6. #406
    Registered Member chevynut's Avatar
    Join Date
    Nov 2011

    Member #:115
    Location
    Fort Collins, CO
    Posts
    10,846
    Have a question about the headliner tack strip at the windshield. The tack strip in my kit is about 5/8" wide and 1/8" thick. I put it up against the top of the windshield opening but I'm concerned that when I go to install the windshield, the windshield rubber is going to interfere with the tack strip. It would be difficult to fix this after the headliner is in so I want to make sure there's not a problem. Has anyone here done this?
    56 Nomad, Ramjet 502, Viper 6-speed T56, C4 Corvette front and rear suspension


    Other vehicles:

    56 Chevy 2-door BelAir sedan
    56 Chevy 210 4-door sedan
    57 Chevy 210 4-door sedan
    1962 327/340HP Corvette
    1961 Willys CJ3B Jeep
    2001 Porsche Boxster S
    2003 Chevy Silverado 2500 HD Duramax
    2019 GMC Sierra Denali Duramax

  7. #407
    Registered Member WagonCrazy's Avatar
    Join Date
    Mar 2012

    Member #:530
    Location
    Santa Clarita, CA
    Posts
    1,797
    Sorry bout that. I got sidetracked yesterday.

    Here's a pic of the door window seal. notice exposed screwheads. Tacky...
    IMG_8225.jpg

    And I thought i had the headliner tack strips installed in mine already, but I must have pulled them out before I put the windshield in.
    Looks like a 5/16 wide piece will fit up in there OK with the windshield rubber in place.

    But I would suggest you mount the strips in there first, as i don't know how I'll secure them to the sheetmetal due to the close proximity of the glass at the top of windshield...

    IMG_8226.jpg

    IMG_8227.jpg
    1957 Nomad- LS1/T56 on C4 chassis
    1959 Fleetside Apache 1/2 ton, shortbed, big window, 327ci.

  8. #408
    Registered Member BamaNomad's Avatar
    Join Date
    Nov 2016

    Member #:3217
    Location
    Rocket City, USA (Huntsville, AL area)
    Posts
    3,777
    CN: I installed all my tack strips before any of the glass install. I don't recall having any difficulty installing my windshield after having the WS tack strip in place. The 'over windshield' tack strip is only 1/8" thick x 50" long per my installation instructions... I used contact adhesive along with the bendover tabs...

    11778 tack strip instructions.jpg
    Last edited by BamaNomad; 12-12-2022 at 07:41 AM.

  9. #409
    Registered Member BamaNomad's Avatar
    Join Date
    Nov 2016

    Member #:3217
    Location
    Rocket City, USA (Huntsville, AL area)
    Posts
    3,777
    CN: I went out to my '57 Nomad this morning and checked my windshield tack strip; it was installed well before the windshield was in place, and didn't cause any issues during windshield install - it didn't even occur to me to worry about that at the time! Although, now that I look at both they are VERY close once both are installed. I would NOT want to try to install the tack strip AFTER the windshield was installed as it might be possible to accidentally break/crack your windshield doing so! I'm pretty sure I was warned about that before hand and before I decided to install the tack strip first!

    On my '57 there are three 'bendover' tabs at each end of that 50" strip to hold it in place, and I used adhesive under the tack strip all across the strip. I took a couple of photos this morning attempting to show there is no interference and I will post them here, but the photos are probably not going to do you much good as it's difficult to see both the tack strip and the windshield rubber, as they are nearly perpendicular to one another.

    They end up ~ 1/16" to 1/8" apart after both are installed as you might be able to tell from the photos.

    IMG_1206.jpgIMG_1207.jpg
    Last edited by BamaNomad; 12-12-2022 at 07:45 AM.

  10. #410
    Registered Member chevynut's Avatar
    Join Date
    Nov 2011

    Member #:115
    Location
    Fort Collins, CO
    Posts
    10,846
    Thanks guys, that's what I wanted to hear about the windshield tackstrip. I installed mine with the tabs at each end and #4 flat head sheetmetal screws about 6" apart between them. I can easily pull the screws so I may use some adhesive between the screws too. The original windshield tack strip was apparently held on with staples, but I sure don't understand how they bent them over on the ends. Same thing at the front of the b-pillars. I made new stainless staples for the tack strips above the liftgate and it worked out well.
    56 Nomad, Ramjet 502, Viper 6-speed T56, C4 Corvette front and rear suspension


    Other vehicles:

    56 Chevy 2-door BelAir sedan
    56 Chevy 210 4-door sedan
    57 Chevy 210 4-door sedan
    1962 327/340HP Corvette
    1961 Willys CJ3B Jeep
    2001 Porsche Boxster S
    2003 Chevy Silverado 2500 HD Duramax
    2019 GMC Sierra Denali Duramax

Page 41 of 61 FirstFirst ... 31394041424351 ... LastLast

Posting Permissions

  • You may not post new threads
  • You may not post replies
  • You may not post attachments
  • You may not edit your posts
  •