-
Brian,
-
That’s going to be one nice, solid body when you’re done, Brian. Nice work!Comment
-
Progress update
This week I continued working on the rearmost part of the trunk floor. I started by making a narrow sample piece to get the bends figured out for the center part.
Here I have it clamped in place on the drivers side. When I checked it on the passenger side I found a problem that needed to be fixed. The passenger side lower area of the quarter panel that I had repaired a while back didn't have quite the same shape as the drivers side which is still the original shape.
I made a cardboard pattern of the drivers side and used it to reshape the passenger side. I used combination of heat with the cutting torch and a tucking tool to shrink the flanges to get the correct shape. The black line on the pattern is what the shape was before fixing it.
So with that done I started on the center piece using my sample piece to layout the bends and then bead roll the panels similar to the rest of the trunk floor. Before doing the bead rolled panels I used my air hammer and planishing bit to pre-stretch the areas. It worked good to eliminate the distortion but I have to play around with air pressures and the air hammer adjustments as it was a bit to aggressive on a couple of the panels.
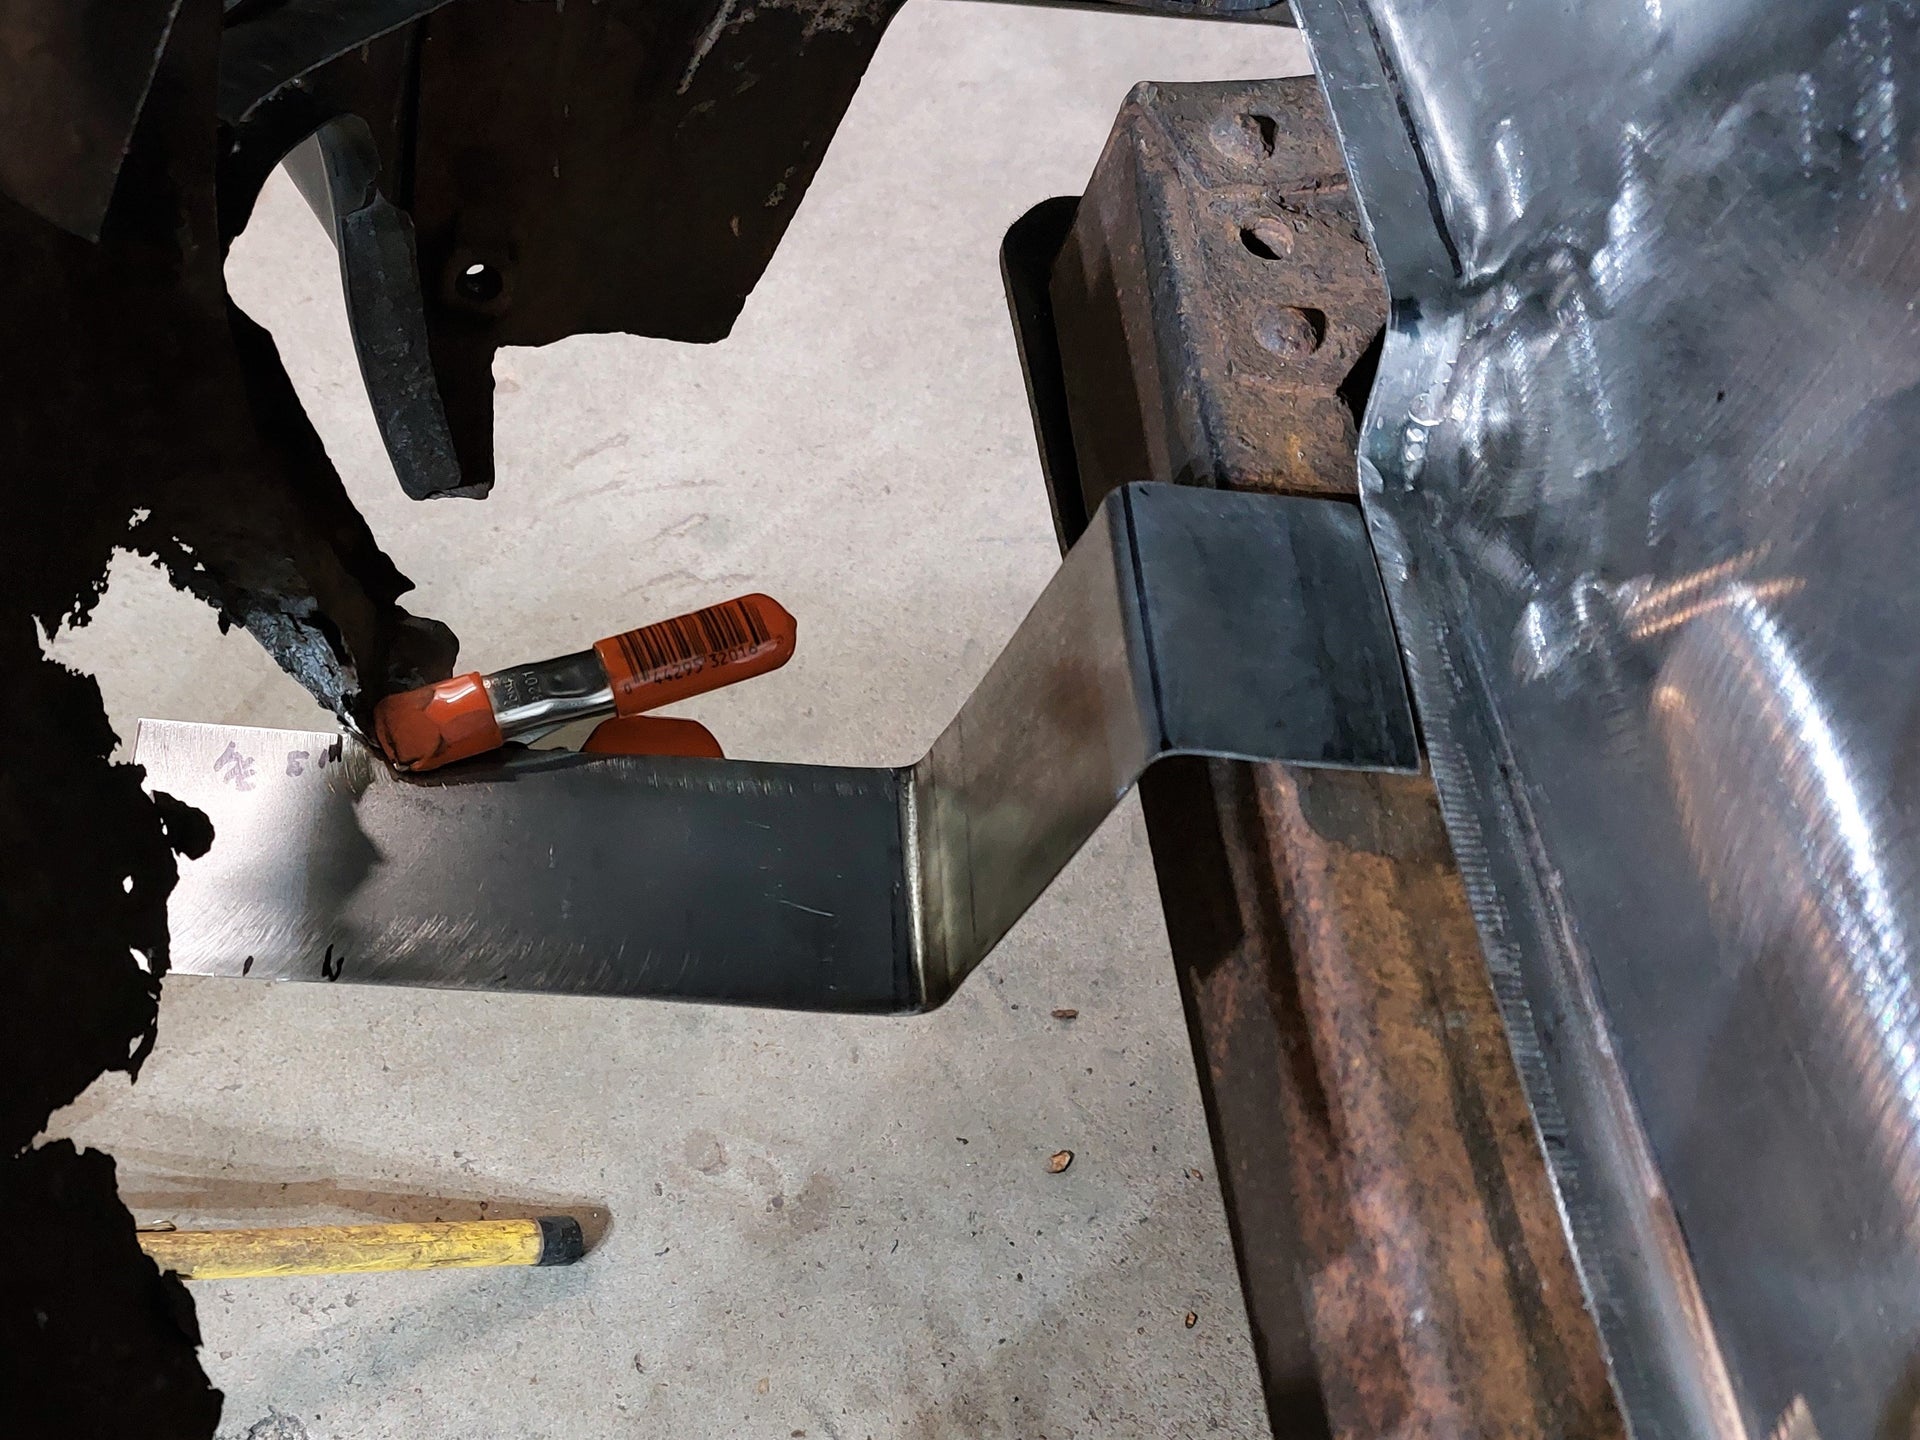
And with the bends made ready to fit up to the end pieces and the gas tank area panel. This one I had to bend over some square tubing as it was a couple of inches to wide for my bending brake.
All fit up with tabs welded to screw it in place I tack welded it to the end pieces hoping that I could remove and install the three pieces as a unit. Must have been my lucky day as I was able to get it out to finish the welding and small transition piece on the welding table. This made the job much easier!!
Here I have the transition piece tack welded in the place on the passenger side, which turned out to be much smaller than what I was thinking it would be. If I was to do this again I would just have made the end piece slightly bigger in that area.
And here is the drivers side after shaping the end and center pieces. The filler piece needed on this side was even smaller. Should have planned this out better.
All welded up and finished out. I actually used a copper backer to just weld up the gap on this side instead of making such a small filler piece.
All welded up and ready to do the final fitting.
Fitted up, screwed in place ready to final weld in place. Once everything is all welded up I think I am going to work on the trunk as that needs some tweaking to get the fit better. Then I can start on the tail pan after that is done.
Brian Brian,
Comment
-
It’s looking great ,Brian. Nice work!Comment
-
Shazaam! Great work, great results!Comment
-
Progress update
This past week I continued on welding all the trunk panels in place and finished it all up today.
All the welding done at this point and the weld seams ground out on the rearmost area. I bought some 3M cubitron 36 grit discs locally to try them out as I have heard they work well and last much longer than the cheap swap meet dics. They are not cheap but they do work nice so I ordered a box of 60 grit 2" discs online as the local auto parts store only had the 36 grit.
And the front part of the trunk floor all welded up and ready to grind out the welds. Now I remember why I put off welding up this area. It was not fun working around the braces behind the rear seat or over the the gas tank area to get in a decent position to see what I was doing. Glad that is done now!
When sanding everything out I had a slight oil can issue when I would put my weight on the highest panel over the gas tank, and a low spot at the weld seam below that. I took care of both of those issues with some torch shrinking on the weld seam between the 2 panels, and then using my shrinking disc to smooth things out a bit better. The oil can is gone now and the low spot will need less than 1/16" of filler to get it flat now, although I may not worry about it as it will be hidden behind the brace I cut out that the trunk latch will bolt to.
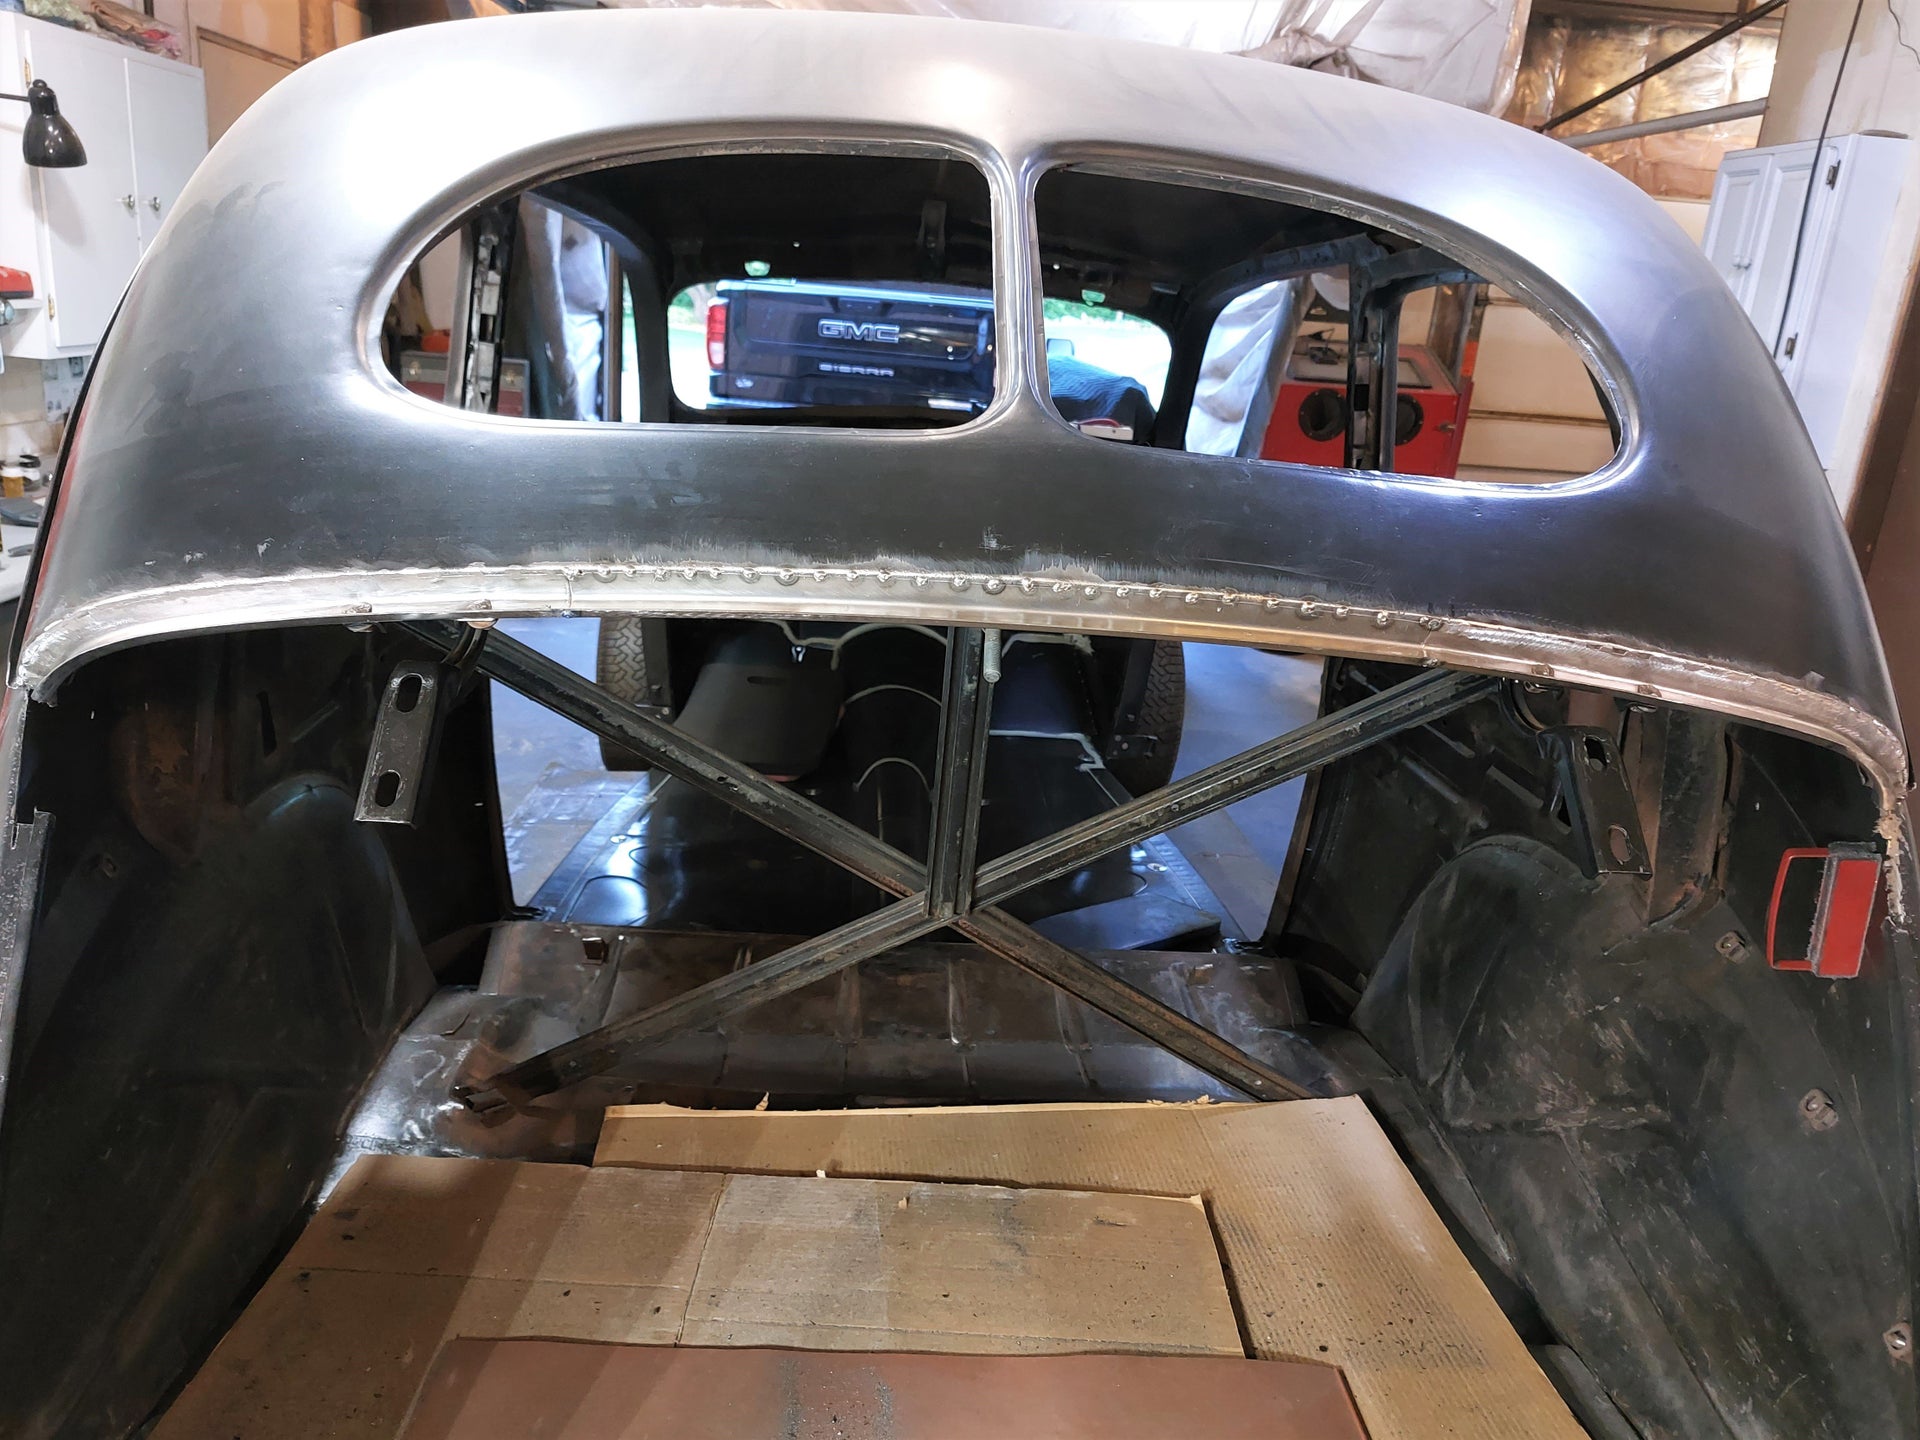
So with that done the next project will be getting the trunk to fit better and repairing the rain gutter/weather strip gutter around the trunk opening. In this picture you can see how the trunk is low to the body in the corner and high compared to the body in the middle below the rear window.
Another view of the fit. Probably doesn't look as bad in the pictures as it does in person.
And here is the rust damage in the rain gutter area that will need to be repaired. I have an idea how to make replacement pieces for this area. Hopefully it will work.
Another view of the damage. This was a very bad design by Ford in this area as the weather stripping sits in this channel which basically traps any water that gets in. Not a good plan.
With the trunk removed I started on making a template of the trunk opening shape. Using a piece of 20 gauge bent into a 90 and using the stretcher / shrinker to get the correct shape. Once done this will serve 2 purposes, number one being making sure the shape of the body doesn't change when repairing the gutter area, and number two being a guide to make the trunk fit the body opening.
And a view of the template from the top side. Very tedious piece to make as it's very easy to over stretch or over shrink. It's getting there though and I think it will be worth the effort in the end to make sure everything fits right in the end.
Brian
Brian,Comment
-
Hi Brian,
WOW! That trunk looks fabulous!
Thanks for posting all the advances you are making!
Regards, DougComment
-
That is alot of work, but we're enjoying you explaining your rationale on how you're going about it. Good for me to soak this in as I contemplate some more metal work on my Nomad.1957 Nomad- LS1/T56 on C4 chassis
1959 Fleetside Apache 1/2 ton, shortbed, big window, 327ci.Comment
-
Progress update
This week I worked on the trunk gutter in the hinge area. I wanted this to be solidly repaired before trying to get the trunk lid to fit better.
I had intended to make the template to go from one side of the trunk opening to the other but decided to just make it to the middle for now since I would be repairing the gutter area in 3 pieces anyway.
To start with I cut a piece of 18 gauge to width and then bent it to match the dimensions of the original gutters.
Then using my stretcher and shrinker I formed it to fit the shape of the left side trunk opening. I left the piece a little big on the top edge to make it easier to tell when the shape was correct. I also used the trunk hinges to help hold the new gutter piece in the correct position.
With the shape pretty good I trimmed about and 1/8" off the top of the replacement piece and clamped it in place on the trunk hinge and then scribed a line on the trunk opening to trim back to so I would have a nice tight fit for welding it in place.
And tack welded in place. After checking with my template nothing had moved at all so I decided to do the other side without making the template for the passenger side.
Passenger side formed and fitted up to weld in place.
Center piece formed up and clamped in place ready to tack weld in place. This was by far the easiest of the 3 to make as it just has a slight curve to it.
All tack welded in place.
And finally with all the tack welds ground flat and the joints between the 3 pieces fully welded and ground out. Also at this point I have the original trunk hinge bolts back in the new gutter to hold everything solidly in place to fit up the trunk lid. I still need to finish the weld seam at the body to gutter. The plan is to do this after the gutters have been replaced on the sides and at the bottom trunk opening. Hopefully there will be less chance of distortion with everything tack welded in place every half inch or so before fully welding any of the seams.
Brian
Brian,Comment
-
*Adding "Metal Master" to the list of Brian's accomplishments!!
Comment
-
Amen
Comment


Comment