Just joined? Please introduce yourself.
Page 31 of 41 FirstFirst ... 212930313233 ... LastLast
Results 301 to 310 of 405

Thread: 39 Ford Project

  1. #301
    Registered Member Custer55's Avatar
    Join Date
    Feb 2015

    Member #:2442
    Location
    Custer, WI
    Posts
    648
    So with the top gutter of the trunk opening securely tack welded in place my next project was to get the trunk lid to fit the opening as best I could.


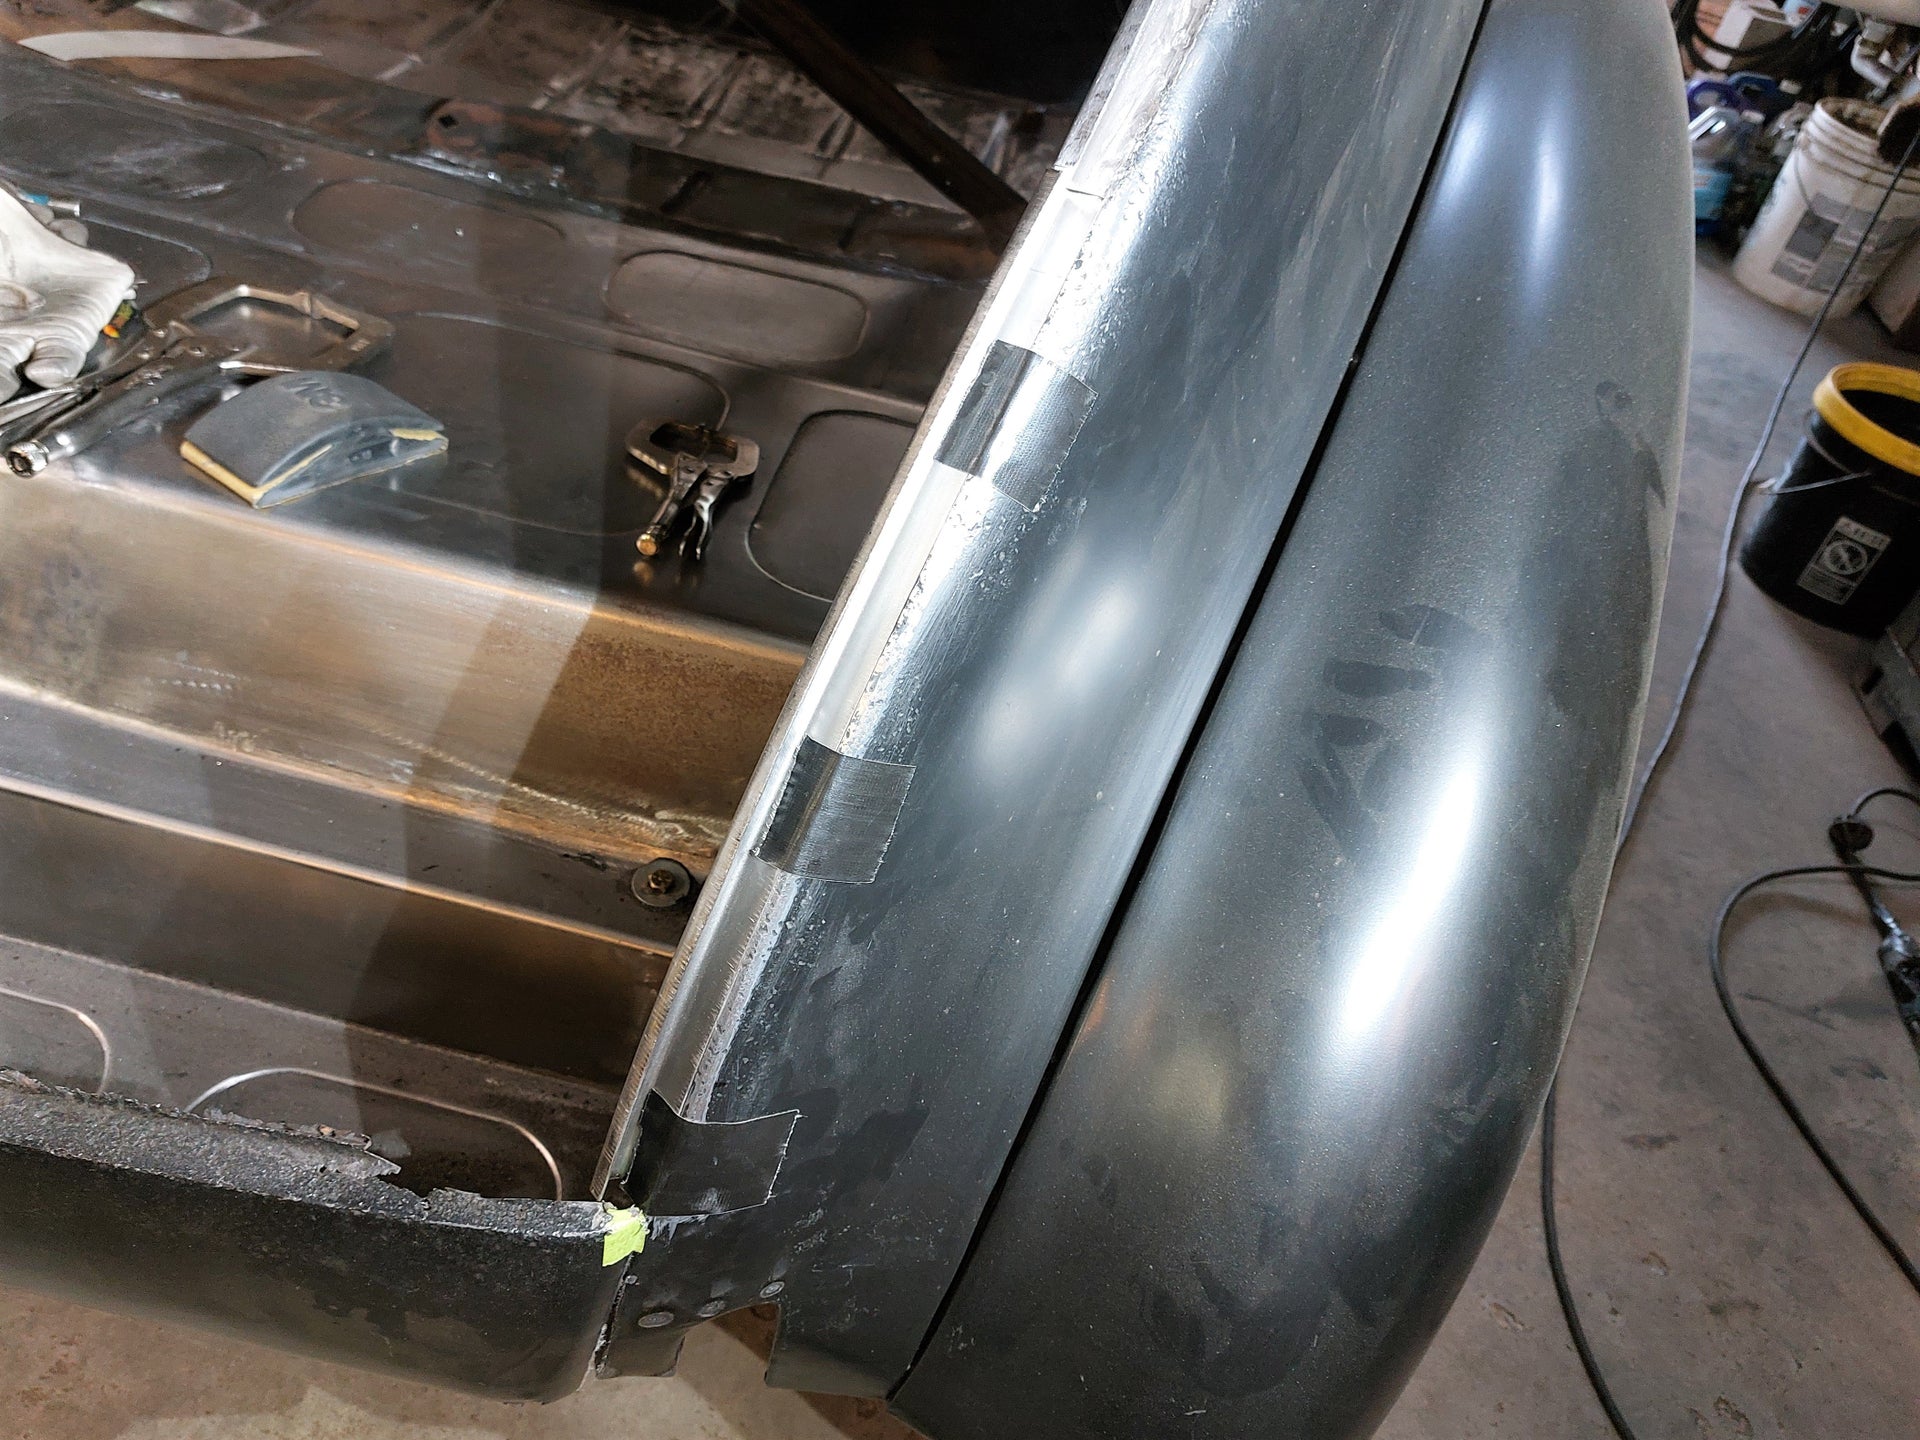
    With the trunk lid back on a shimmed and adjusted I marked up where it needed adjustments to get the fit better.
    It was low on the drivers side corner and high in the middle between the tape marks which is where the hinges fall. The right hand corner was pretty good other than the gaps being too tight, which will be easy enough to adjust later by grinding the edges of the trunk, and then welding the edges up and re-grinding.


    I then made a new profile gauge for the trunk opening as the one half I had made before was hard to get the fit just right. On this one I made a flat piece to fit the opening pretty close then welded another flat piece on top of that to form a T shape. I was then able to get it to fit a lot better by shrinking, stretching and filing and grinding the edge.


    Then with the aid of the profile gauge I got the shape better by slicing the trunk lid inner structure and welding it back together to reshape it to match the trunk opening. A couple of spots on the drivers side outside of the hinge pad I sliced and added a thin piece of metal. I also welded the shims needed on the upper bolt holes in place to make installation easier.


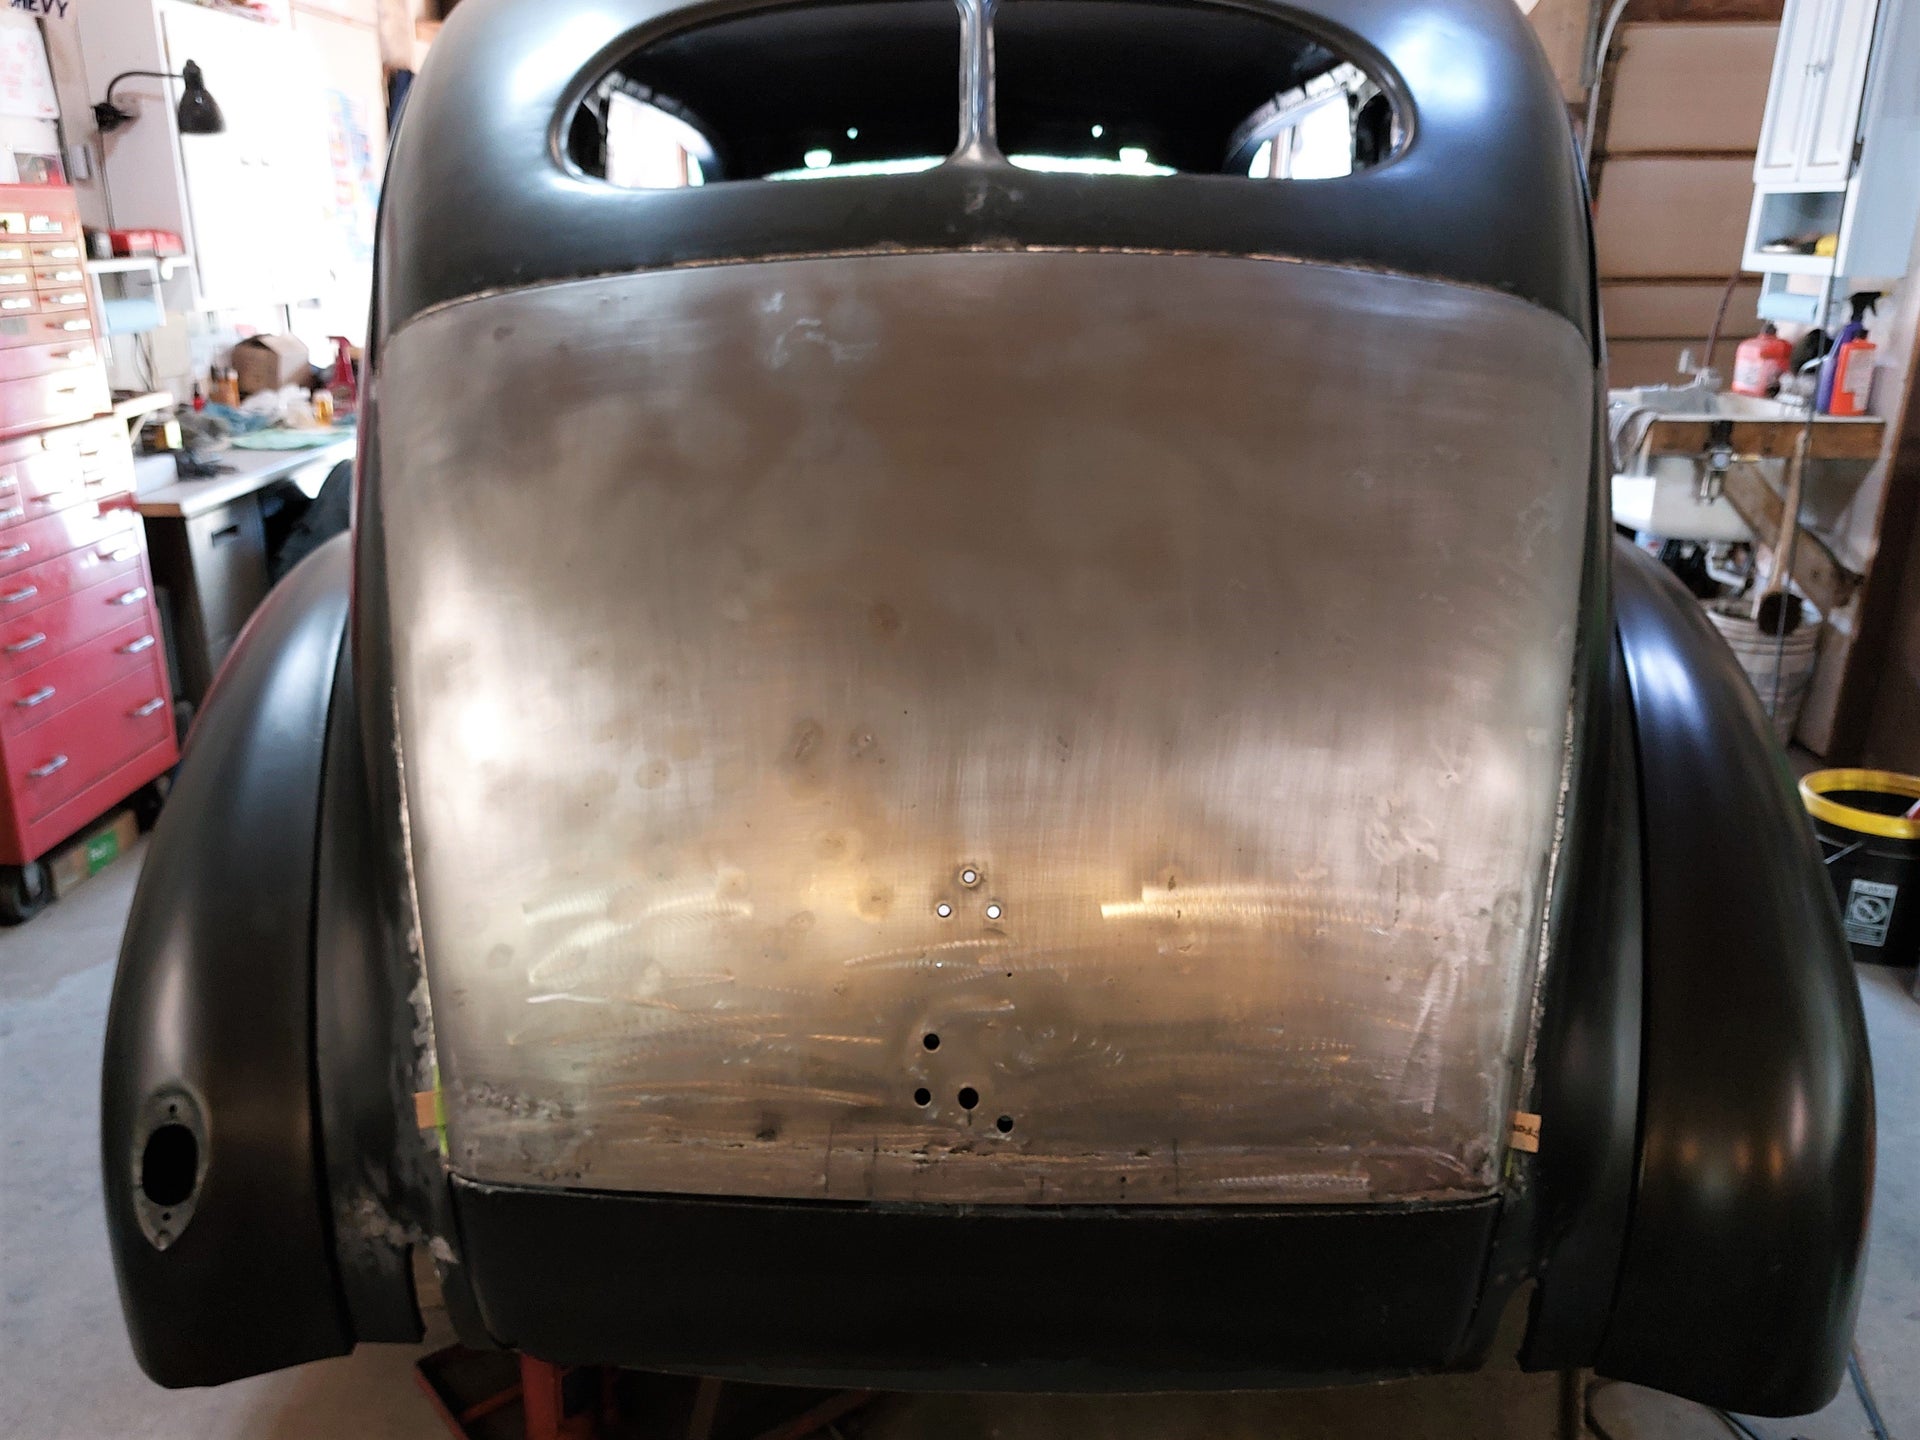
    With the trunk lid back in place the fit is pretty good now. May still just need a bit of an adjustment on the drivers side upper corner.


    So next was to make the new gutters for the sides of the trunk opening. This shot is before stretching and shrinking to fit the curve of the opening.


    After forming to shape but still needing to make the final bend.


    I made this tool for making the final bend. Just a piece of round bar with a slot cut in it to the depth of the final bend (5/16" in this case). I ended up clamping the tool in a vise and then made the bend by putting the piece in the slot and used a combination of bending by hand and tapping it down with a dead blow rubber mallet a bit at a time.


    A shot of a finished piece, the tool and a piece needing forming and the final bend.


    Here is the passenger side top piece fitted up and tack welded in place.


    And the drivers side formed up ready for final fitting and tack welding in place which I did get done today but I didn't get a picture of yet. So the next task will be getting the lower pieces of each trunk side formed, fitted and tack welded in place before starting on the tail pan.
    Brian

  2. #302
    Registered Member BamaNomad's Avatar
    Join Date
    Nov 2016

    Member #:3217
    Location
    Rocket City, USA (Huntsville, AL area)
    Posts
    3,784
    You're doing fantastic Brian... much better than some who DO call themselves metal masters..

  3. #303
    Registered Member
    Join Date
    Feb 2018

    Member #:3682
    Location
    Huntsville, AL
    Posts
    407
    That’s looking really nice, Brian. Great job!

  4. #304
    Registered Member Custer55's Avatar
    Join Date
    Feb 2015

    Member #:2442
    Location
    Custer, WI
    Posts
    648
    Quote Originally Posted by BamaNomad View Post
    You're doing fantastic Brian... much better than some who DO call themselves metal masters..
    Thanks Gary

    Quote Originally Posted by TrifiveRichard View Post
    That’s looking really nice, Brian. Great job!
    Thanks Richard

  5. #305
    Registered Member WagonCrazy's Avatar
    Join Date
    Mar 2012

    Member #:530
    Location
    Santa Clarita, CA
    Posts
    1,800
    Its great to watch your progress. I have limited metal shaping skills, and limited tools for it, but I see you doing this old jalopy a great service bringing it back from the dead! Gonna be great when you finally get to drive it around. Your sweat equity will be appreciated by many, most importantly YOU.
    Carry on!
    1957 Nomad- LS1/T56 on C4 chassis
    1959 Fleetside Apache 1/2 ton, shortbed, big window, 327ci.

  6. #306
    Registered Member Custer55's Avatar
    Join Date
    Feb 2015

    Member #:2442
    Location
    Custer, WI
    Posts
    648
    Quote Originally Posted by WagonCrazy View Post
    Its great to watch your progress. I have limited metal shaping skills, and limited tools for it, but I see you doing this old jalopy a great service bringing it back from the dead! Gonna be great when you finally get to drive it around. Your sweat equity will be appreciated by many, most importantly YOU.
    Carry on!
    Thanks Paul, it's getting there slow but sure.

  7. #307
    Registered Member Custer55's Avatar
    Join Date
    Feb 2015

    Member #:2442
    Location
    Custer, WI
    Posts
    648
    No progress to report on the 39 yet as I have been pretty busy on other things since the middle of June. I went to the Indy car race at Road America on fathers day with my son and my brother. The week after that was our annual trip to Minnesota for "Back to the 50's" car show. Great show as always even with the really hot weather on Friday and a few rain showers on Friday, Saturday and the ride home on Sunday. Not gonna complain about a bit of rain though as it was super dry out there. I have never seen it that dry in the 25 plus years we have been going out there.
    Then the week after getting back home my wife and I were volunteering at the US Senior Open at Sentry World all of the following week. Overall it was a pretty cool experience having a major event like that in our small town. Stevens Point has a population of about 26,000, The Point, Whiting, and Plover area is about 40,000.
    Then just a few days after that was the Iola Car Show & Swap Meet this past weekend. The weather for Iola was about as perfect as you could ask for with highs in the Mid to upper 70's and partly cloudy all weekend.


    Early Thursday morning at Iola I bought this at the swap meet. Pretty good deal as it is in nice shape and cost me less than half of what they are new. Should come in handy for making panels once I get the hang of using it.


    The dies it came with aren't the greatest but after some filing and sanding with 80 grit and working up to 400 grit they look much better. The one on the right (2" radius die) is the way they all looked before sanding and polishing.


    Here is all of the lower dies (1", 2" and 3" radius) sanded and polished out. The 2" radius die actually almost had a bit of a point in the middle but I have the shape much better now.


    Here is a couple of test pieces I did with it. I will have to play around with air pressures and the regulator settings (it has a small regulator at the air hammer) but it seems to work pretty well for what it is.


    Since the included dies will be good for tight curves but not so much for low crown areas I decided to try to make a die with a bigger radius. I found some pieces on my scrap pile that will work good enough to give it a try.
    These will be welded together and then shaped, sanded and polished out.


    Welded together and ready for sanding and polishing. Shooting for a 6" to 8" radius based on what I will need to make the new rear tail pan.


    Well my first attempt was a failure. It worked good for about a minute before it broke apart. Obviously not welded together very well. I had only ground a V on the top of the inner post and not the outer ring so there was not near enough weld and I didn't weld the bottom of the outer ring to the post at all.


    So this time I made sure to grind out the outer ring at the top and bottom so there should be a good strong weld to hold the outer ring to the post. If this doesn't work I will see if I can find a machine shop to make me some blanks out of a single piece of steel. A small lathe would make this a pretty simple project. Not in the budget at this time but someday I will have to get one.


    And finally with a 6" radius template on top of the blank it won't take much grinding to get it to a 6" radius. Just from grinding out the welds trying to keep it flat it's already close to a 10" or so radius.
    Brian

  8. #308
    Registered Member BamaNomad's Avatar
    Join Date
    Nov 2016

    Member #:3217
    Location
    Rocket City, USA (Huntsville, AL area)
    Posts
    3,784
    Brian, with that new tool at your disposal your outstanding work of the past will be even better!

  9. #309
    Registered Member Custer55's Avatar
    Join Date
    Feb 2015

    Member #:2442
    Location
    Custer, WI
    Posts
    648
    So after sanding and polishing the 6" radius die and trying it out I can finally start getting some work done on the 39 again.


    Still not welded as well as I would like but at least this time it didn't break and it worked decent too.
    When I need dies with a different radius I will most likely find someone to make a blank on a lathe though.


    Taking up where I left off a while back, making the bottom portion of the side trunk gutter pieces. Bent to a 90 and then formed to fit the curvature of the trunk, this one is ready to make the last bend. This one I fit to the trunk lid as well as the quarter panel since the quarter panel had some damage at the lower end.


    With the 2nd bend made and fitted up for tack welding in place. The duct tape (T-Rex tape in this case) works well to hold pieces like this in place for tack welding as there is no good place to clamp it once it is fit up. I start tack welding at the joint to the upper piece and work my way down to the bottom with tacks about a half inch apart.
    With a few tack welds in place I can remove the tape as I go along then.


    All tack welded in place and tack welds ground flat.


    With the trunk closed to check the fit. Looks good enough for me. I did check the fit before tack welding it in place as well.


    Another view of the gap to the quarter panel. It's a little bit wider towards the top but not too bad.


    Passenger side piece formed and fitted up for tack welding in place.


    Tack welded in place with the seam between the upper and lower pieces fully welded and ground out.


    With everything but the tail pan tacked in place the fit all the way around the trunk to the body is pretty good. I have a couple of spots on the trunk lid that I need to grind and re-weld the edges to get the gaps a little better yet, but overall it looks good. Much better than it was for sure. So the next project will be cutting out the tail pan to build a new one. We shall see how well that goes!!
    Brian

  10. #310
    Registered Member BamaNomad's Avatar
    Join Date
    Nov 2016

    Member #:3217
    Location
    Rocket City, USA (Huntsville, AL area)
    Posts
    3,784
    It's looking better and better Brian!

Page 31 of 41 FirstFirst ... 212930313233 ... LastLast

Posting Permissions

  • You may not post new threads
  • You may not post replies
  • You may not post attachments
  • You may not edit your posts
  •