Just joined? Please introduce yourself.
Page 37 of 41 FirstFirst ... 273536373839 ... LastLast
Results 361 to 370 of 405

Thread: 39 Ford Project

  1. #361
    Registered Member Custer55's Avatar
    Join Date
    Feb 2015

    Member #:2442
    Location
    Custer, WI
    Posts
    648
    Quote Originally Posted by Belair-o View Post
    Hi Brian,
    Really liked the tip about the wooden forming blocks. I will have to stuff that one in my brain, not that I will likely know where to access it there!
    Thanks! Doug
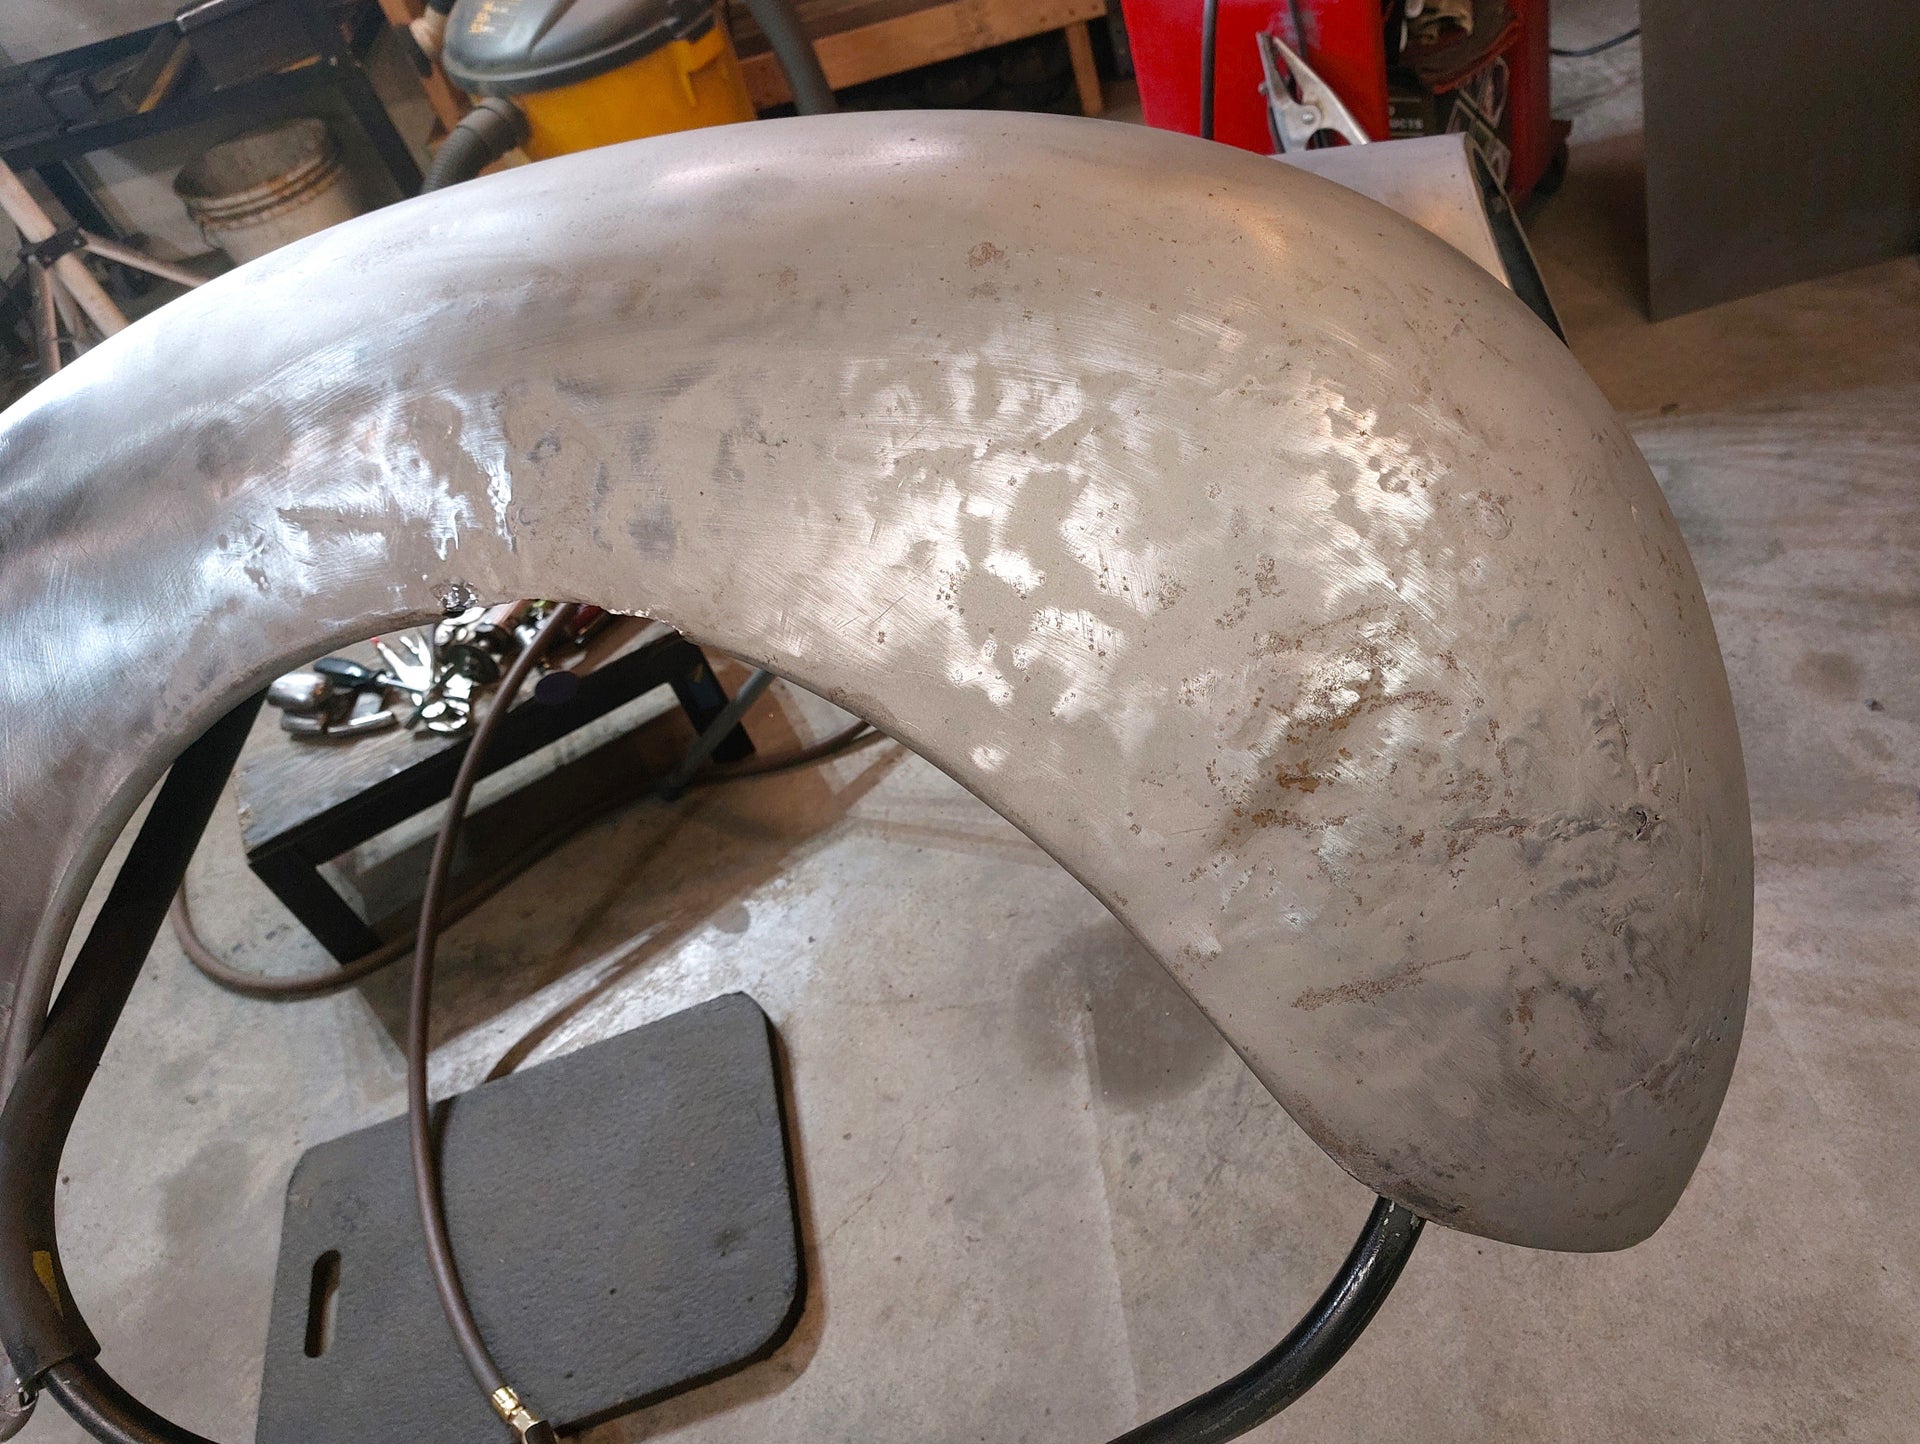
    Thanks, There are a lot of ways to from metal, making the wood blocks seemed like the best way in this case as I will most likely need to make one for the passenger side front fender as well.

    Quote Originally Posted by WagonCrazy View Post
    Great progress! and great updates here. Thanks for sharing your techniques. it helps all of us.
    Thanks, I hope it does help others on their projects. I have been learning as well by watching videos on you tube. My favorites to watch are Karl Fischer (Make it Kustom) and Carter Auto Restyling, They are both out of Western Canada.

  2. #362
    Registered Member Custer55's Avatar
    Join Date
    Feb 2015

    Member #:2442
    Location
    Custer, WI
    Posts
    648
    The past week I finished up on all the fender repairs and have it ready for epoxy primer.


    This was my attempt at making the patch in one piece. It became obvious pretty quickly that while I was making progress it was taking way to much time to get it to where it would fit properly.


    So time for plan B which will require more weld seam but will end up fitting much better and take less time in the end. The first thing I did was bend a half inch flange and then use my shrinker to shape the piece to fit the shape of the fender and where it will meet the running board.


    Then I made a second piece to fit the lower part of the fender. This was still a challenge to make as it has a reverse curve to it similar to a 55 Chevy fender below the parking lights.


    Then before welding either of those in place I replaced the rotted out section of the inner bracing where the fender meets the running board. Just tacked in place here but I did fully weld it up before proceeding.


    Here is the 1st piece fitted, tack welded, and plug welded in place. I did check the fit to the running board while it was just tack welded before doing the plug welds.
    Also I only cut away as much of the rusted area of the fender as needed at this point so I could tweak the 2nd patch section to fit while the original shape of the fender was still there.


    Here the upper part of the patch is fit up pretty close ready to start welding it in place.
    I didn't cut out any more of the original fender than I had to to make fitting the patch a bit easier.


    All tack welded in place. Just need to grind all the tack welds flush before fully welding up the seams.


    And fully welded and finished out. Far from perfect but way better than having all the rust holes. I was able to get the fit a little better with some hammer and dolly work at this point as well. It will just need a thin coat of body filler at this point.


    And the last repair on this fender was to fix a couple of spots where the bolt holes were really close to the edge and good candidates for future cracks. I just added a bit of metal right at the holes. One finished repair and one in progress in this shot.


    After some time with a wire wheel and 80 grit I got the inside and outside of the fender ready for primer. I was going to attempt putting it on with a brush but after trying that on a few smaller part I wasn't happy with the results. Our weather has been in the mid 50's for highs with lows in the mid 30's recently and should stay that way through most of next week so I decided to turn on the heat in the shop to get a few more things in primer.
    I don't like to have the heat on with an open flame (gas heater) as I need to have the garage door open at least a crack when spraying the epoxy primer. It has been staying close to 60 in the shop though so I won't need to run it much to get it up to the 65 I need it to be for the epoxy to cure properly. The passenger fender will most likely have to wait until spring for primer though as the 10 day forecast for the following week shows high temps only in the mid 30's. Winter is on the way!!
    Brian

  3. #363
    Registered Member Custer55's Avatar
    Join Date
    Feb 2015

    Member #:2442
    Location
    Custer, WI
    Posts
    648
    This week I was able to get a few more things in epoxy primer as the weather has been cooperating for the most part.


    Drivers side front fender all done. I had a little primer left over so I ended up getting a couple grill parts which had already been sand blasted that didn't need much prep work in primer as well. By hanging the fender up I was able to paint the inside and outside at the same time, although the outside wasn't in the ideal position.


    View from the inside of the fender with one of the grill parts in the foreground. The grill on this car is made of 5 pieces that all bolt together, which made it possible to sand blast in my cabinet with it all apart.


    Here is a better shot of the fender after it was cured enough to take it down. Looks much better than what I started with.


    Next up was the outer grill halves. The drivers side had a few rust pin holes on the lower end which were too much to just weld up so I ended up making a small patch in this area. The passenger side was in better shape and just needed a couple of small cracks around some bolt holes welded up after getting it sand blasted.


    Here I have the patch formed up and clamped in place to scribe the grill for the area to cut out.


    All fitted up and ready to tack weld in place. Compared to the patch for the fender I just did this one was a lot easier to make.


    All tacked in place and ready for final welding.


    All welded up and finished out. I am pretty happy with how this one turned out.


    All five pieces of the grill now in primer and ready to re-assemble once the paint cures better.
    With the shop between 60 and 65 degrees the epoxy primer takes a while longer to cure so I will give it a week or two.
    So the next project will be the passenger side fender which will just about wrap up all the metal work on the body. The last thing will be the running boards and then the dash and the windshield inside trim in the lower right hand corner. No hurry on any of this though as the high is only supposed to be 40 degrees on Saturday and the foreseeable future so all of those will be a while before they can get epoxy primer anyway.
    And my shop needs a good cleaning and I have a bunch of projects in the shop and around the house to get done that I have been putting off as well.
    Hopefully I will be back on the passenger fender soon though.
    Brian

  4. #364
    Registered Member chevynut's Avatar
    Join Date
    Nov 2011

    Member #:115
    Location
    Fort Collins, CO
    Posts
    10,854
    That's looking GREAT Brian! You've come a long way. To tell the truth I'm kinda missing the metalwork.
    56 Nomad, Ramjet 502, Viper 6-speed T56, C4 Corvette front and rear suspension


    Other vehicles:

    56 Chevy 2-door BelAir sedan
    56 Chevy 210 4-door sedan
    57 Chevy 210 4-door sedan
    1962 327/340HP Corvette
    1961 Willys CJ3B Jeep
    2001 Porsche Boxster S
    2003 Chevy Silverado 2500 HD Duramax
    2019 GMC Sierra Denali Duramax

  5. #365
    Registered Member Custer55's Avatar
    Join Date
    Feb 2015

    Member #:2442
    Location
    Custer, WI
    Posts
    648
    Quote Originally Posted by chevynut View Post
    That's looking GREAT Brian! You've come a long way. To tell the truth I'm kinda missing the metalwork.
    Thanks Lazlo!
    I enjoy the challenges of metal working, very satisfying when stuff turns out halfway decent.

  6. #366
    Registered Member
    Join Date
    Mar 2017

    Member #:3360
    Location
    Canton,Ohio
    Posts
    263
    Looking great I love the detail that you show us, I hope mine will be half as good as yours.

  7. #367
    Registered Member busterwivell's Avatar
    Join Date
    Dec 2016

    Member #:3249
    Location
    Sahuarita (Tucson), AZ
    Posts
    770
    Like the others have said, you do amazing work, Brian. You should be very proud. It's been fun watching your progress.
    Bill

  8. #368
    Registered Member Custer55's Avatar
    Join Date
    Feb 2015

    Member #:2442
    Location
    Custer, WI
    Posts
    648
    Quote Originally Posted by bigblock View Post
    Looking great I love the detail that you show us, I hope mine will be half as good as yours.
    Quote Originally Posted by busterwivell View Post
    Like the others have said, you do amazing work, Brian. You should be very proud. It's been fun watching your progress.
    Bill
    Thanks guys! Glad you are following the progress. This has been a good car to learn on. Still worth saving but not so nice to worry about messing it up.

  9. #369
    Registered Member Custer55's Avatar
    Join Date
    Feb 2015

    Member #:2442
    Location
    Custer, WI
    Posts
    648
    It's been a couple of months since my last update. After getting epoxy primer on the grille pieces I have been working on a bunch of other projects. First off was getting all the leaves cleaned up as they fell from the trees around the yard. We have woods around most of the yard so that takes a while!! Then spent a couple of weeks cutting and splitting firewood for the winter season. Haven't used any of it yet though as December and early January have been way warmer than normal so far. After changing oil in my 55 and 95 Trans AM I ended up building a taller and wider set of car ramps than what I had. The old ones I have been using for years were only 6 inches high and wide so I finally decided it was time for some better ones. I have not used them yet but should make that job much easier.
    Next up was cleaning up the corner of the shop where I stash all the metal scraps that are still big enough to save. That had become a big mess as I save too much of it. I ended up filling a bunch of 5 gallon buckets with metal to go the recycling yard.
    Then I built stands for my sheet metal shear and bending brake instead of having to bolt them to my welding table when I needed to use them.

    Here are the two stands. I built both of them mostly with material from the scrap metal pile. Both have wheels to make them easy to move around. On the bending brake I added a brace to the clamp bar and tack welded c-clamps to the clamp bar and underneath on the base so that should make it easier to use as well. In the background to the right are all the 5 gallon buckets filled up with scrap metal.


    So finally last week I got back to working on the passenger side fender. A little less rust than the drivers side where it meets the running board, so that should be a little easier to repair. The lower corner of the wheel opening will need a similar repair to the drivers side as well. The rest of the back half is not to bad, just a few smaller dents to smooth out.


    The outer front corner is another story. This area was damaged at some point and the previous attempt at repairs were not done very well. Luckily the damage is only on the outer part of the fender. The headlight area and where the grille bolts in place are in good shape yet.


    In this shot from the inside of the fender shows how poorly the repair was done. They must have just ground off the high spots creating holes in the metal. So once I get the fender smoothed out and back close to the right shape a patch will have to made to replace this area. Way to many holes and way to much thin metal to even consider welding up the holes.


    Then there is these areas they tried to weld up cracks in the fender lip on the lower front corner. Not sure what kind of welder they used but it didn't work very well.


    And this mess in the middle of the wheel opening.


    I tried grinding out the old welds on the fender lip to see if I could save any of it but decided to just cut them out and just plan on making new pieces to weld in place to repair the fender lip.


    The good news on this fender is that the inside edge is in good shape. Just a few minor spots to weld up and the front fits the shape of the grille pretty good.


    So before making and welding in any patches I want to get all the damage smoothed out and the correct fender shape as good as I can get it. The back half still need some work but it's close enough to move on at this point.


    On to the front half. This will be a challenge as it is pretty rough and will most likely need some heat shrinking as well. Nothing to lose here though as it would be hard to make it any worse. I think the general shape is close so mostly I just need to smooth out the damage, shrink any metal that needs it and then start with the repairs to the wheel opening.
    Should be a fun project!!
    Brian

  10. #370
    Registered Member
    Join Date
    Mar 2017

    Member #:3360
    Location
    Canton,Ohio
    Posts
    263
    Thanks on all your updates

Page 37 of 41 FirstFirst ... 273536373839 ... LastLast

Posting Permissions

  • You may not post new threads
  • You may not post replies
  • You may not post attachments
  • You may not edit your posts
  •